Jotform makes it easy to collect e-signatures by offering built-in signature fields right within your forms. First introduced in 2013, the E-signature widget allowed users to capture handwritten signatures before submission. Since then, more signature options have been added, and Signature has become a core element in the Form Builder.
With Jotform Sign, you can take things further by creating signable documents and collecting legally binding e-signatures in just a few clicks. Every document created in Jotform Sign is UETA and ESIGN compliant, and seamlessly integrates into an automated workflow, making it easy to track, manage, and complete signing processes.
Adding an E-Signature to Your Form
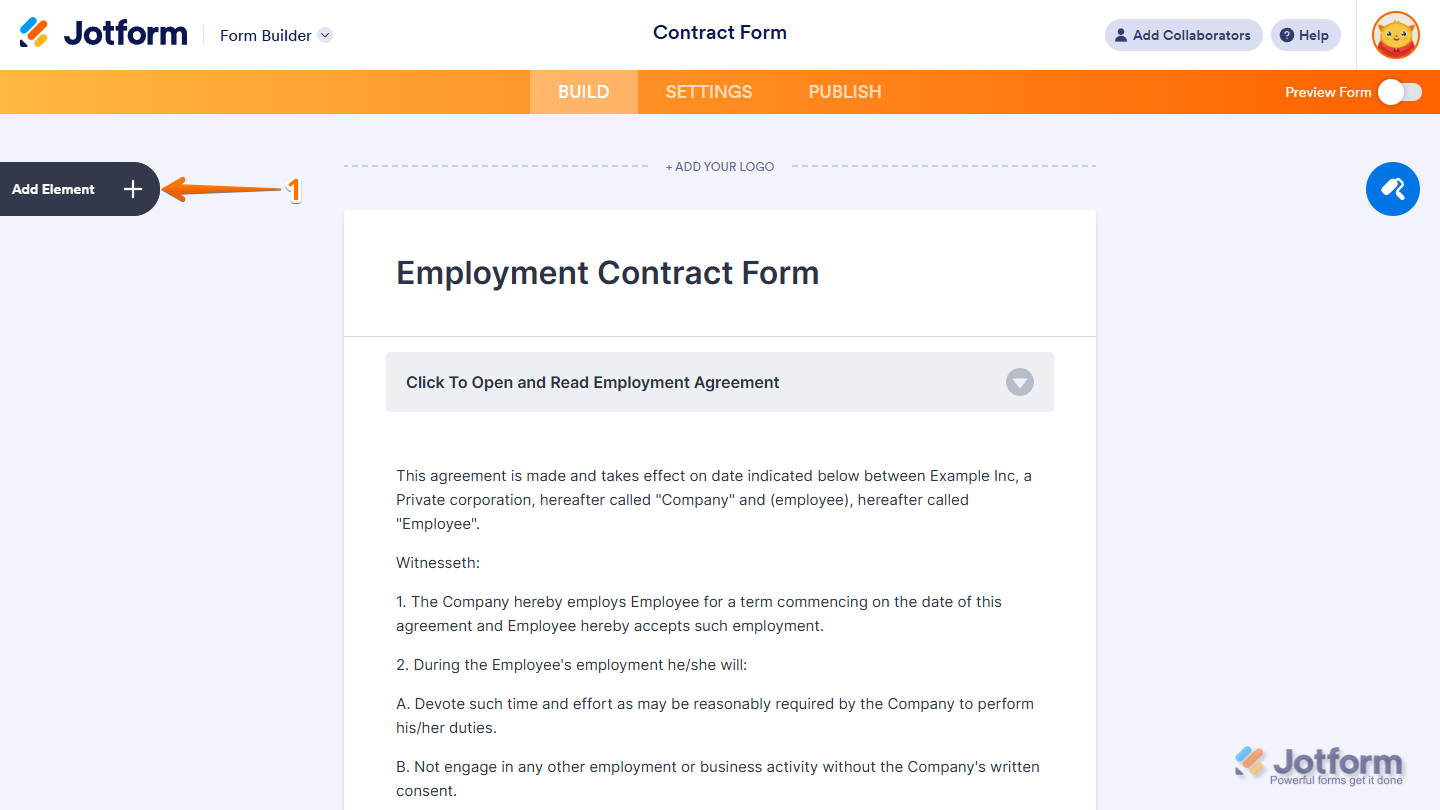
Whether you’re creating a new form or updating an existing one, you can add and set up the E-Signature widget on your form in a few easy steps. Here’s how to do it:
- In Form Builder, click on Add Element on the left side of the page.
- Now, in the Form Elements menu, under the Basic tab, click on Signature to add it to your Form, and you’re all set.
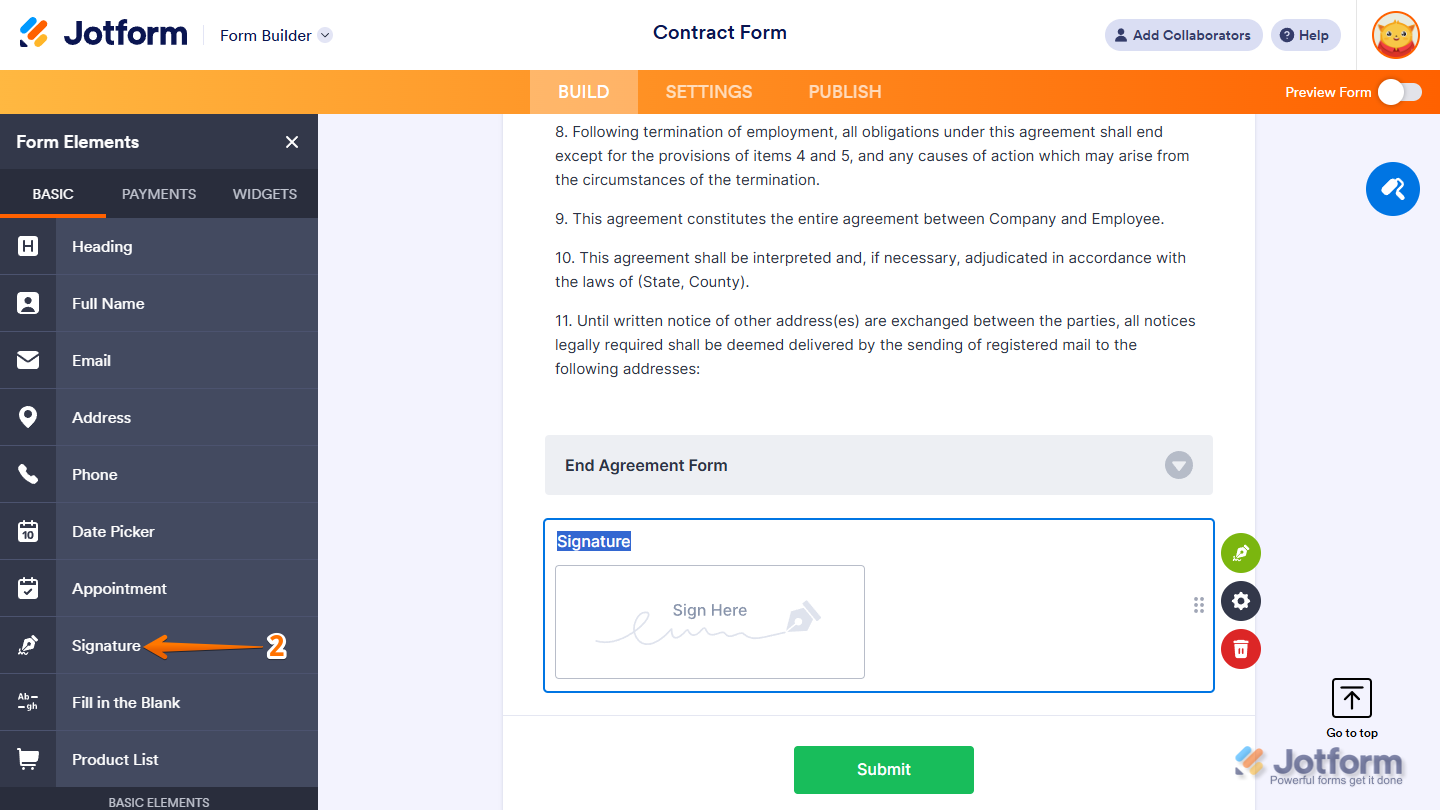
And that’s it! Your form is now ready to collect e-signatures. Check out this demo form to see it in action.
Pro Tip
The Smooth Signature widget functions similarly to the regular Signature element — both let users draw and submit their e-signature. The key difference is that Smooth Signature is located under the Widgets tab.
Enabling Jotform Sign
It only takes a minute to enable Jotform Sign so you can collect legally binding signatures. Here’s how:
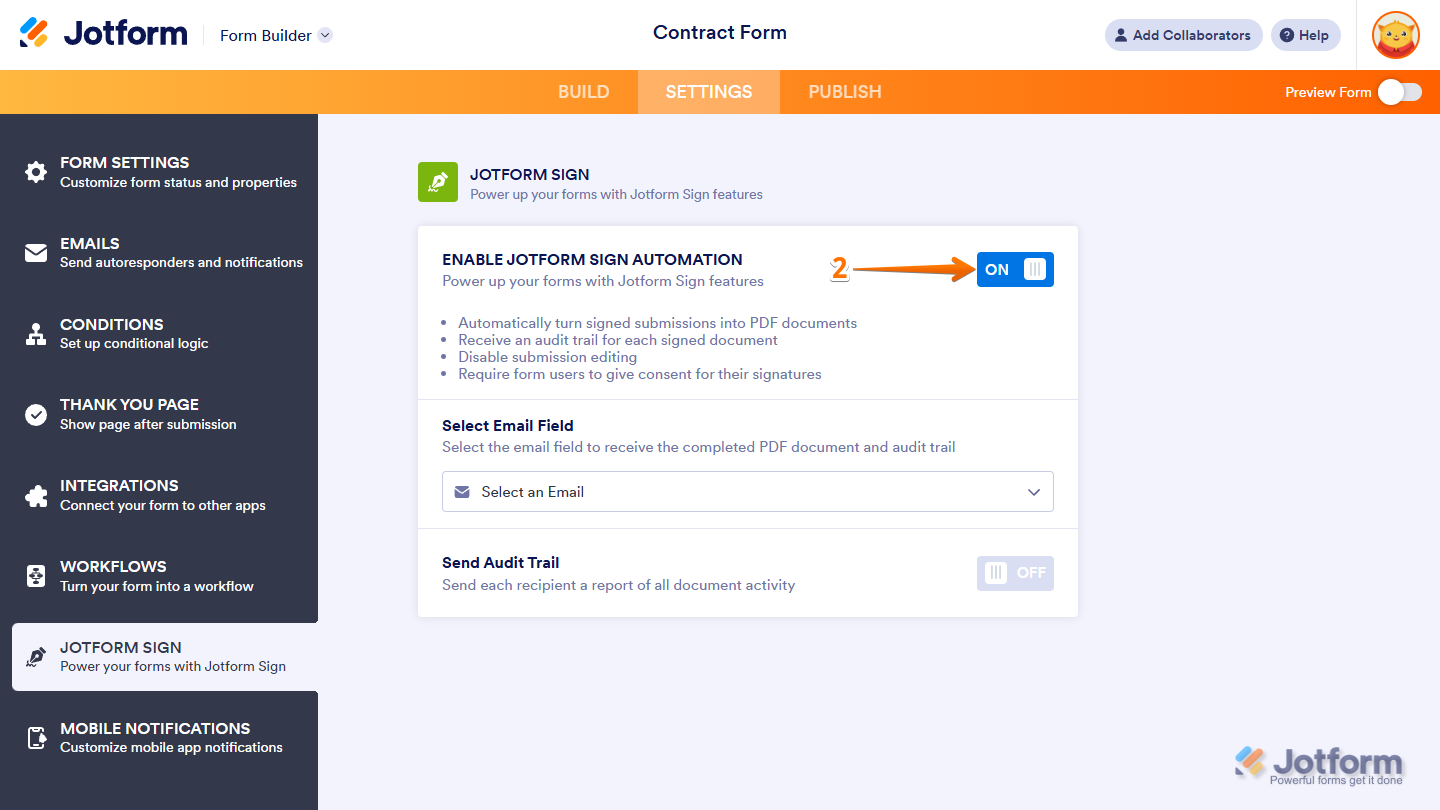
- In Form Builder, click on the Signature field, and then click on the Signature Pen icon on the right.
- Then, toggle Enable Jotform Sign Automation to On, and you’re all set.
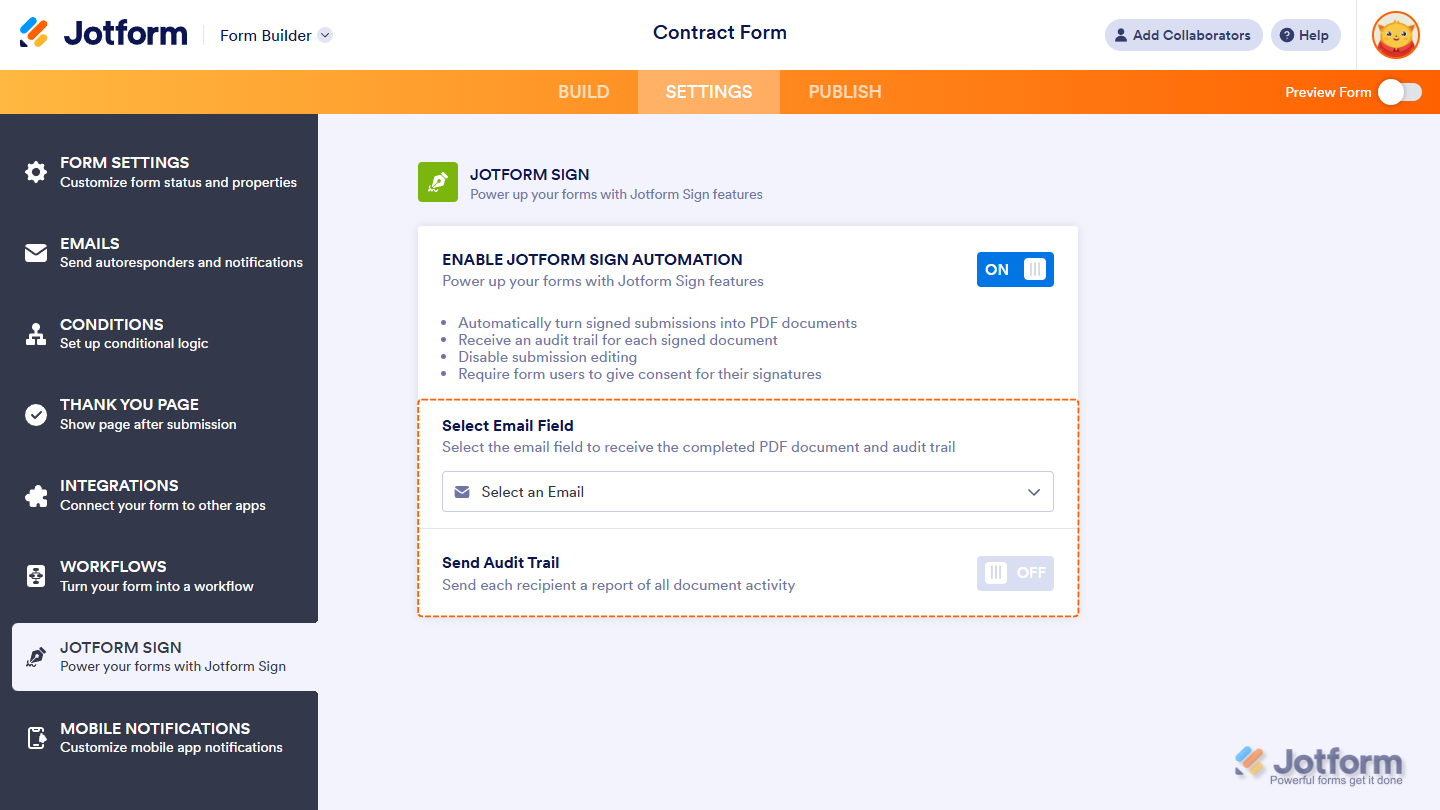
After enabling Jotform Sign, you can also configure the other Jotform Sign settings as needed:
- Select Email Field — Select this to get the completed PDF document and audit trail.
- Sent Audit Trail — Toggle this to On to send each recipient a report of all document activity.
And that’s it! Our guide about How to Use Jotform Sign for more details about it. Curious how it works on a live form? This demo form shows it in action.
You can also check out the most commonly used Jotform’s Signature Widgets below:

Send Comment:
17 Comments:
272 days ago
Does Sign Automation need to be turned on for Signatures within a form to be legally binding?
More than a year ago
So, on a lease agreement where there are multiple tenant signatures, including MY signature as the landlord, how am I supposed to work that exactly??
It just seems like there is a huge lack of explanation how to implement this. Is there only 1 signature line, and then I got 4 different copies of the same lease for the tenants vs all 4 signatures on 1 page? how do I do the landlord signature?
More than a year ago
Hello everyone, I use the basic signature widget, unfortunately I don't have the option to delete the signature. Can someone help me there ?
Thank you
More than a year ago
Is there a way to receive an email notice when your document has been signed and sent to your inbox. Otherwise, you must check back in periodically just to see if it has been signed.
More than a year ago
Hi, we have 2 signatures, however, when we select 2 different emails for each signature, only 1 of the emails made it to receive the attached pdf document of the submission.
More than a year ago
When I sign the document it didn't work.
More than a year ago
What DocuSign plans are compatible with Jotform for adding a digital signature to my form?
More than a year ago
Is the e-sig UETA, ESIGN or GDPR compliant?
More than a year ago
I was able to upload my form using your Smart PDF Forms. However, I am trying to collect signatures. It works great on the desktop, but when I try to sign on my phone, the form moves and I'm unable to sign. Am I doing something wrong?
More than a year ago
Hi there! I was able to create a form that requires a signature (yay for your amazing guides and video tutorials)....but I was wondering if after someone signs the form there's a way for it to auto send a signed copy to the person that signed it? Thank you.
More than a year ago
Can you help me
More than a year ago
Wondering if there is a way to put a Signature box and have it also use type to signature. I know you can make a short text box and css code it to look signature like- but when you preview the PDF at the end the CSS formatting doesn't carry through. Wondering if there is a way to implement a type to write signature function.
More than a year ago
I tested a form to myself before I start using my created form. I signed it and emailed to me but the email I get back is a summary and looks to be okay. However, the two signature spaces appeared only with a blue "?" in the field. I cannot open them. I have tried right-clicking, etc. NOTHING. Pleaser advise. I am working on a Mac and using Safari.
More than a year ago
I added a signature field to my form, works well. I added this form to the Jotform app, and now the signature field cannot be filled out by user. Did i miss a setting???
More than a year ago
I utilize the signature options, yet when I get the PDF, the signature is gone. How can I get that to stay?
More than a year ago
The latest signature field is great, but it would be even greater if there was an option to upload a signature graphic at runtime. I've seen other forms do this. I have a saved PNG file with my signature in it, which would be far more useful than trying to sign with my mouse on a desktop computer. Just a thought...
More than a year ago
We currently use HelloSign to collect e-signatures. Can that be used with Jotform? It's not on your list under widgets.