As a Jotform Teams admin, you have full control over managing your team members. You can update their roles or remove them as needed to keep your team organized. You can manage team members through your My Workspace page, Team Workspace page, and Team Settings.
Managing Team Members From Your Team’s Workspace Page
You can easily view and manage your team members through your Team’s Workspace page. Here’s how to do that:
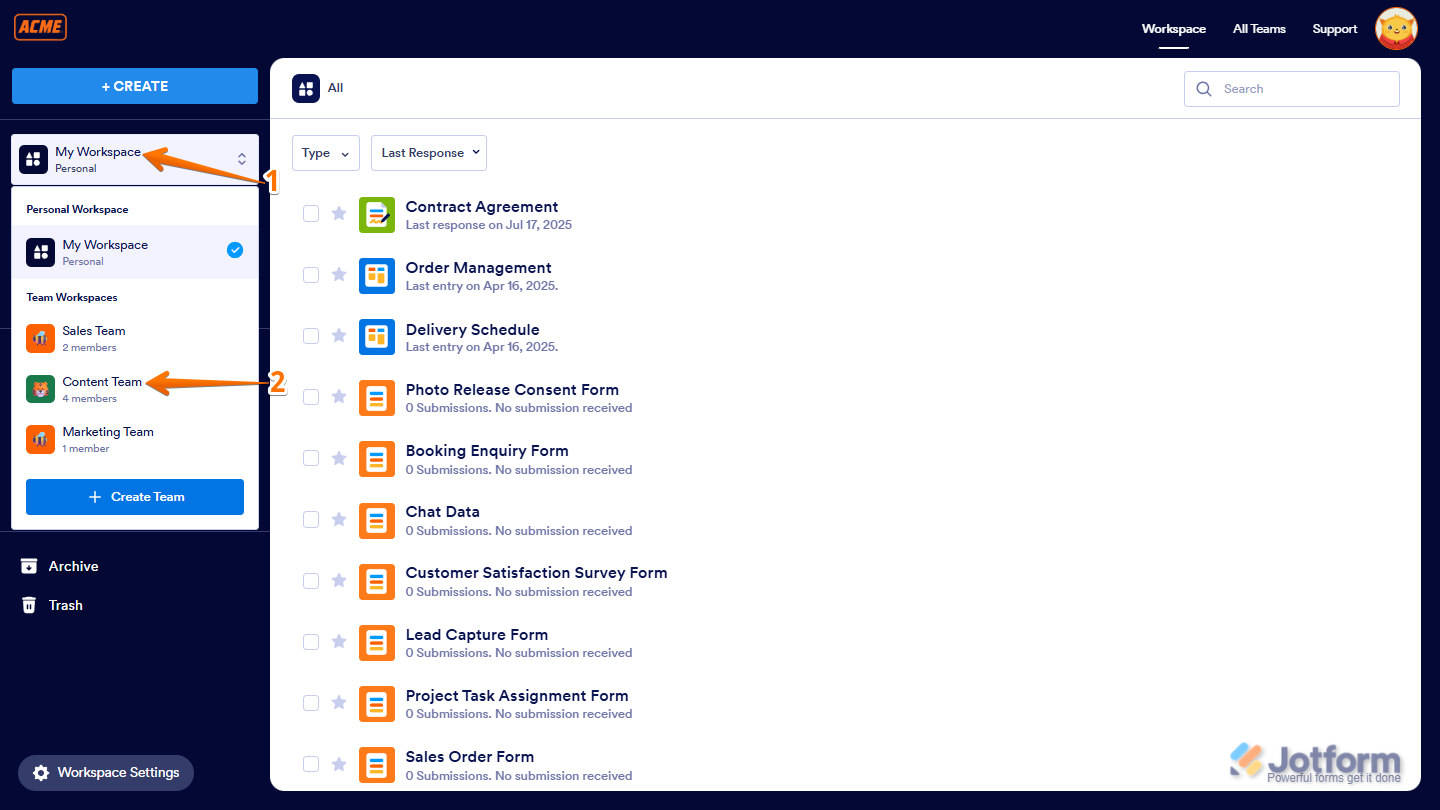
- On the left side of your Workspace page, click on My Workspace.
- Then, in the menu that comes up, under Team Workspaces, select the team you want to manage. For example, the Content Team.

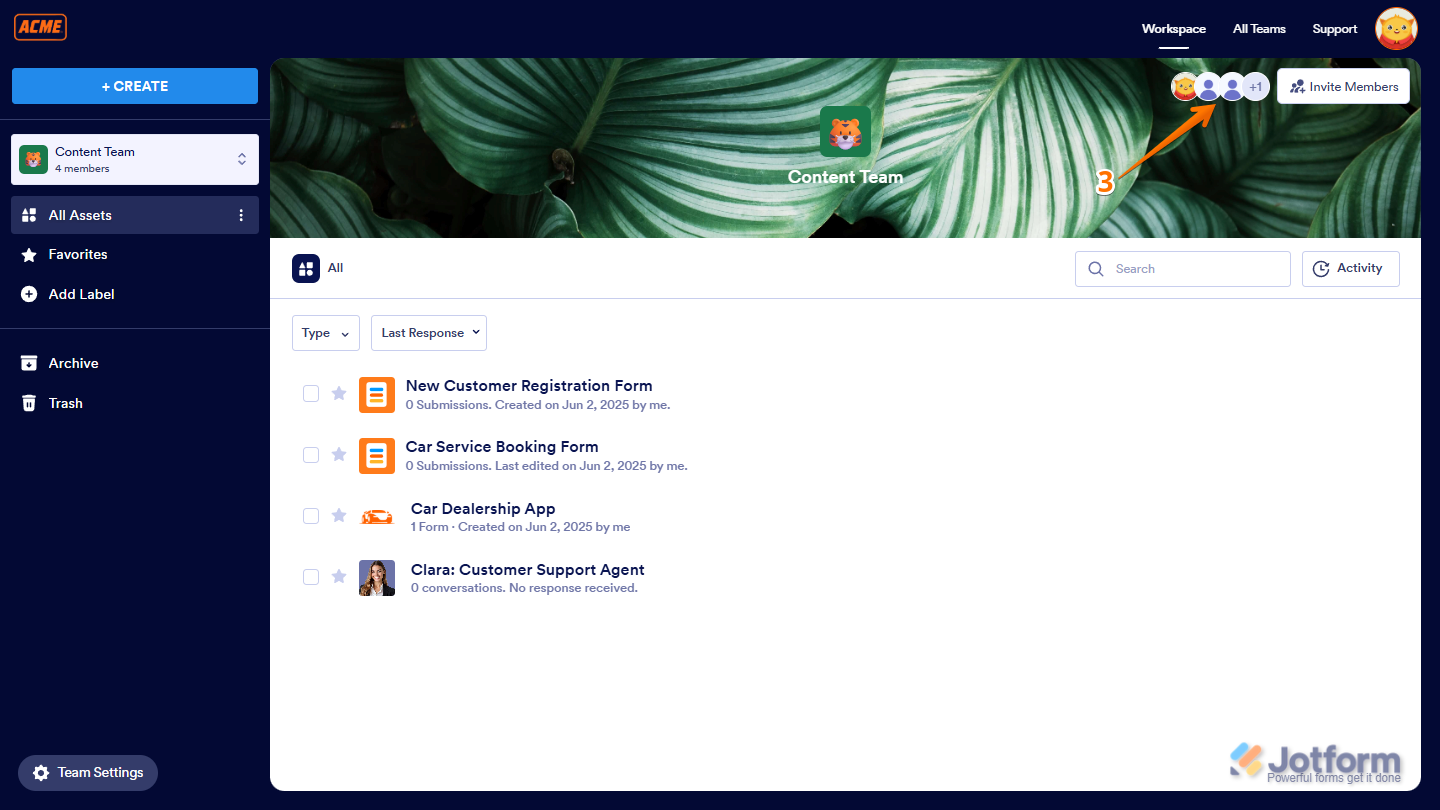
- Now, on the Team Workspace page for the team you selected, click on the Members icon in the top-right corner of the page.
And you can also do it this way:
- On the left side of your Workspace page, click on My Workspace.
- Then, in the menu that comes up, under Team Workspaces, select the team you want to manage. For example, the Content Team.
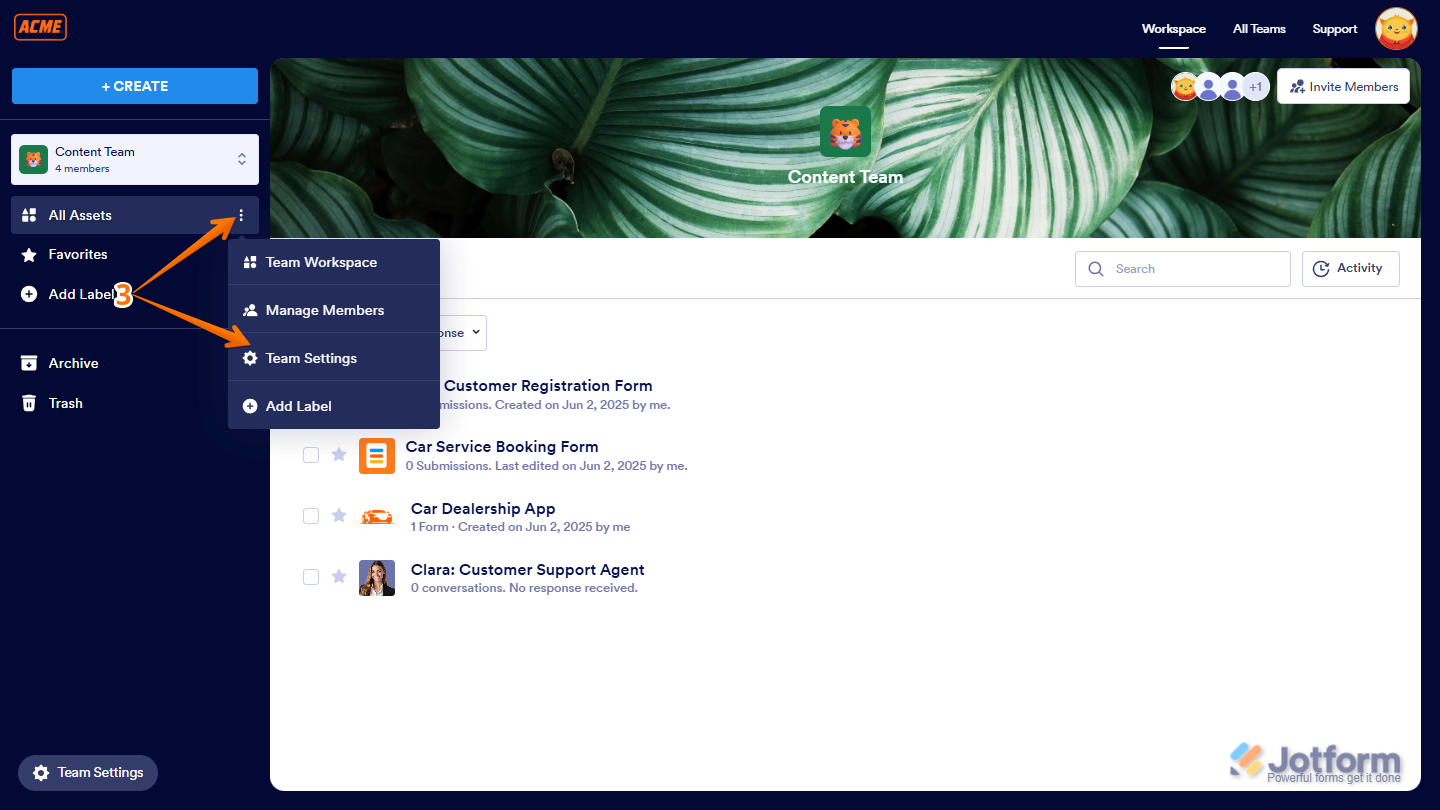
- Next, on the left side of the page of your Team Workspace, click on the Three Dots icon next to All Assets, and then select Manage Members.

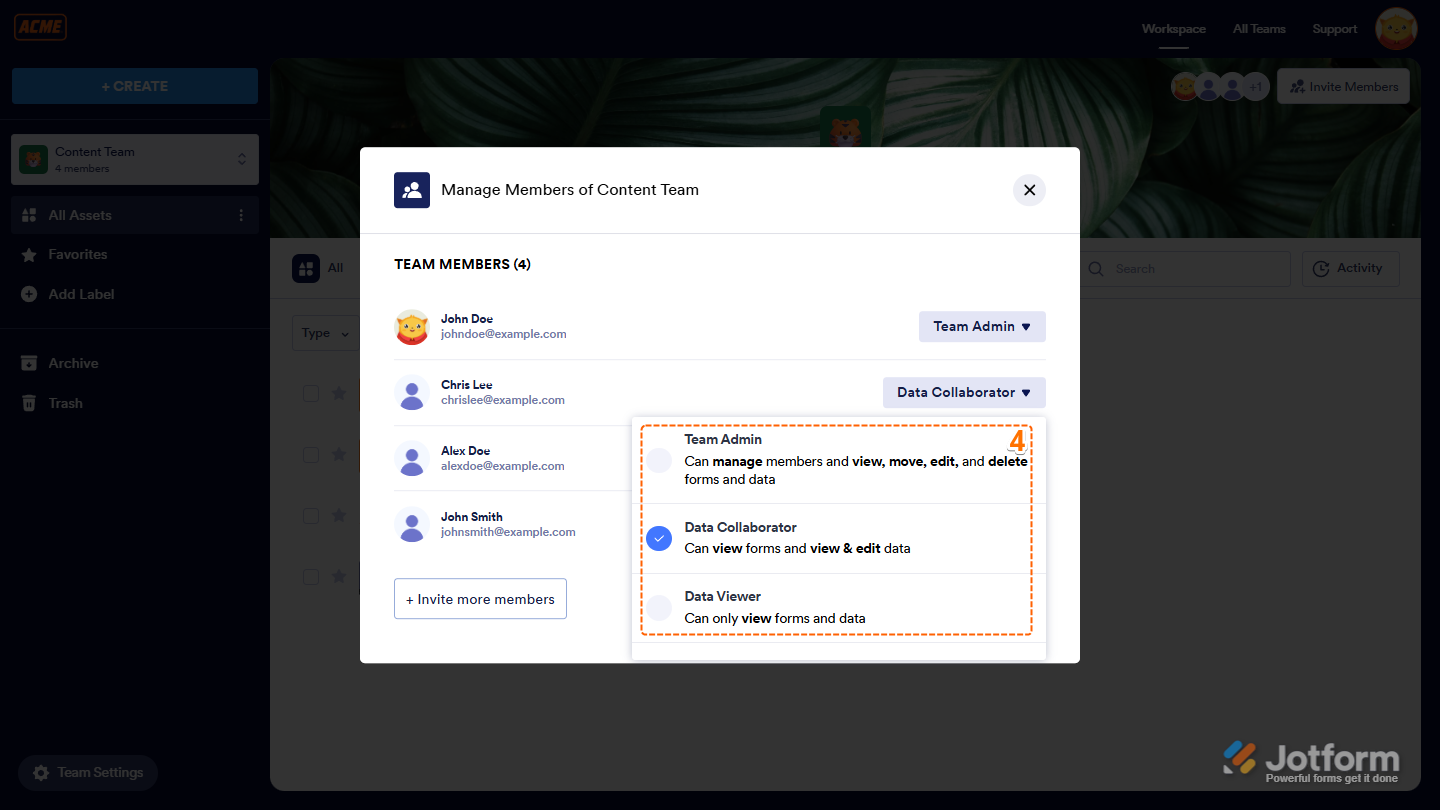
- Now, in the Manage Members window that opens, click on the Downward Arrow icon on the right side of your team member and select one of the following role options:
- Team Admin — Can manage members and view, move, edit, and delete assets and data.
- Data Collaborator — Can view assets and edit data.
- Data Viewer — Can only view assets and data.
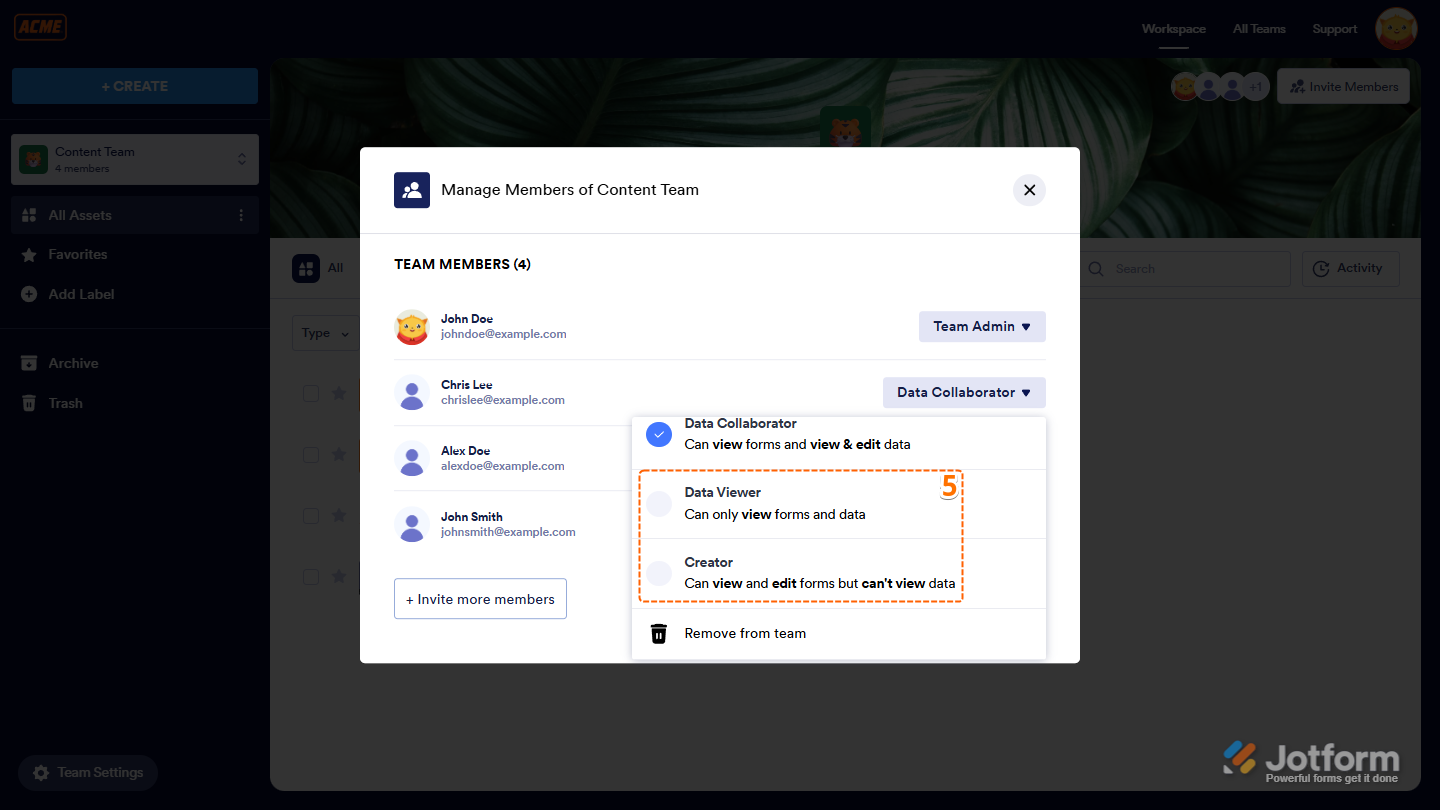
- Then, scroll down to the bottom of the Dropdown menu to see the rest of the role options:
- Creator — Can view and edit assets, but can’t view data.
- Remove from Team — Can revoke a member’s access and remove them from the team.
That’s it! You’ve successfully updated your team member’s role from your Team Workspace page.
Managing Team Members From the Team Settings
If you’re viewing your Team Settings, you can also manage your members from there. Here’s how to do it:
- On the left side of your Workspace page, click on My Workspace.
- Then, in the menu that comes up, under Team Workspaces, select the team you want to manage. For example, the Content Team.
- Now, on the left side of your Team Workspace page, click on the Three Dots icon next to All Assets, and then select Team Settings.
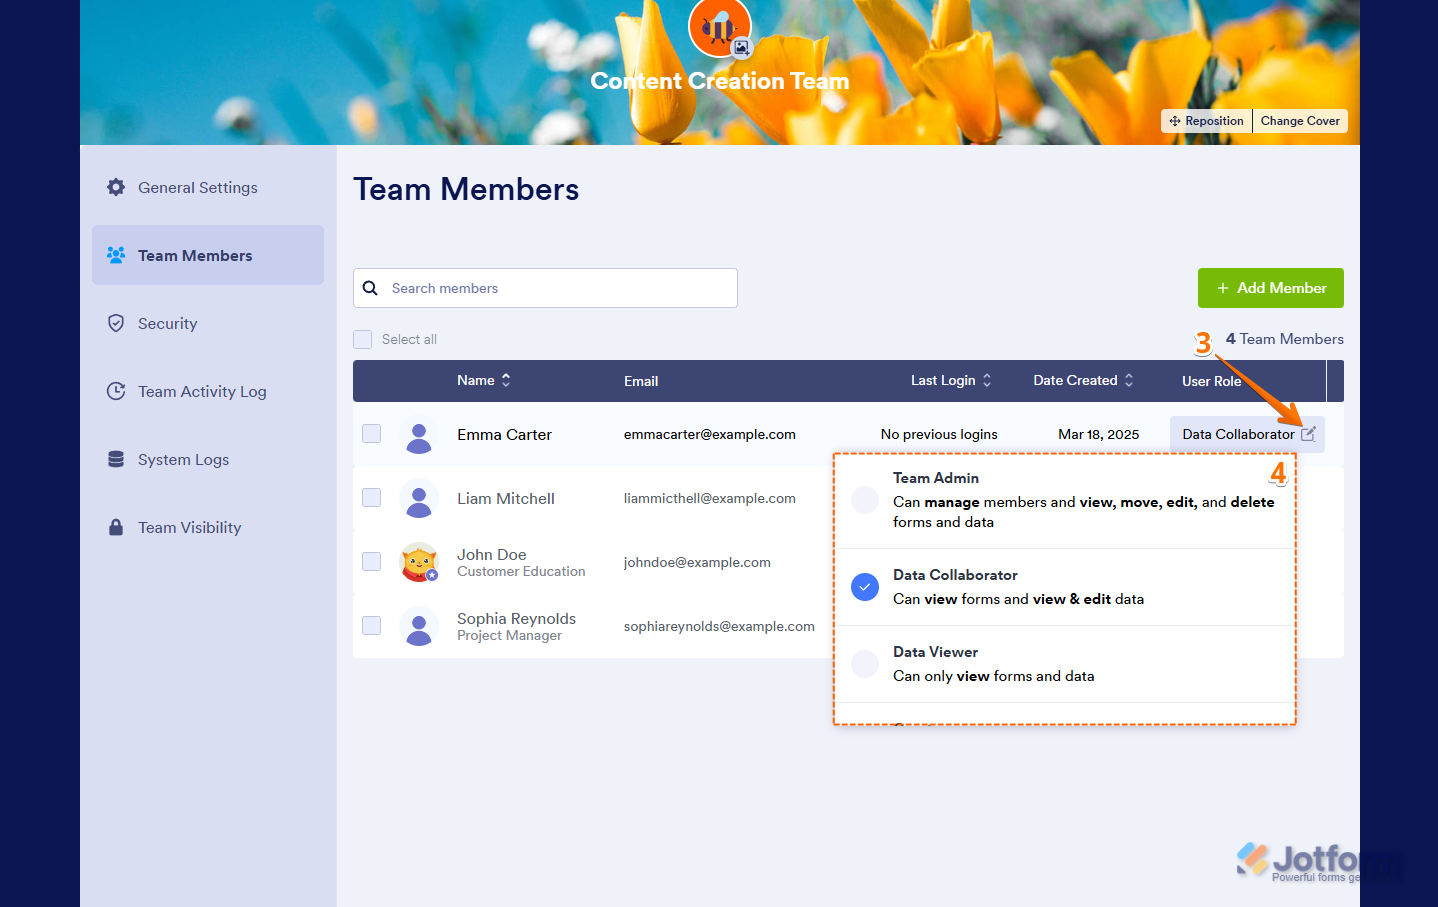
- Next, in the menu on the left, click on Team Members.
- Then, hover your mouse over the team member whose role you want to update, and click on the Pencil icon.
- Now, select one of the following role options:
- Team Admin — Can manage members and view, move, edit, and delete assets and data.
- Data Collaborator — Can view assets and edit data.
- Data Viewer — Can only view assets and data.
- Creator — Can view and edit assets, but can’t view data.
And you’re done! You’ve successfully updated your team member’s role from the Team Settings.
Removing Team Members Through Team Settings
If you want to remove a team member when you’re managing your team within the Team Settings, it’s easy to do. Here’s how:
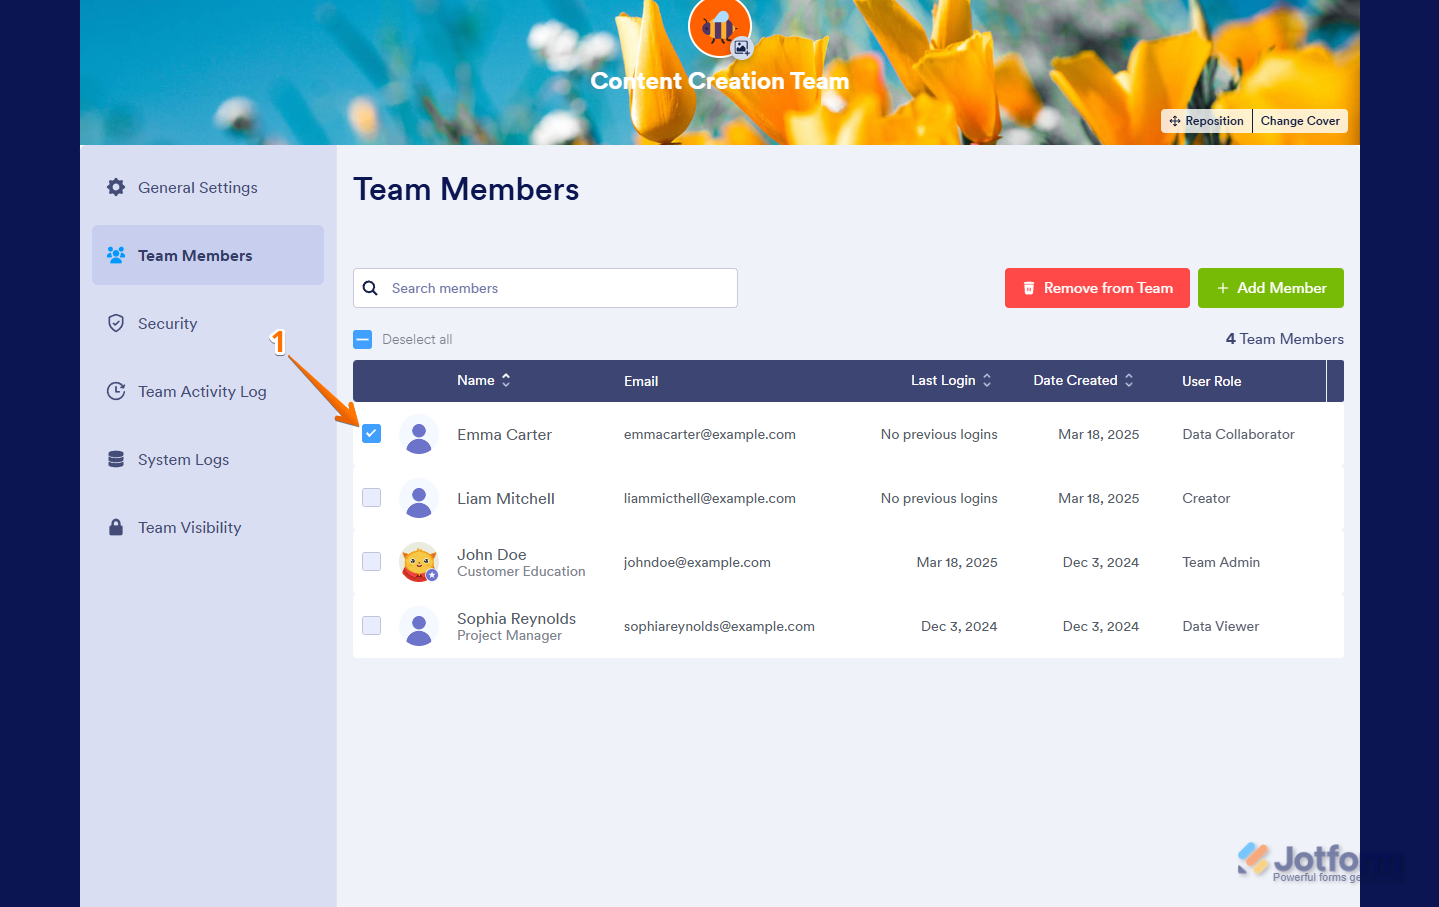
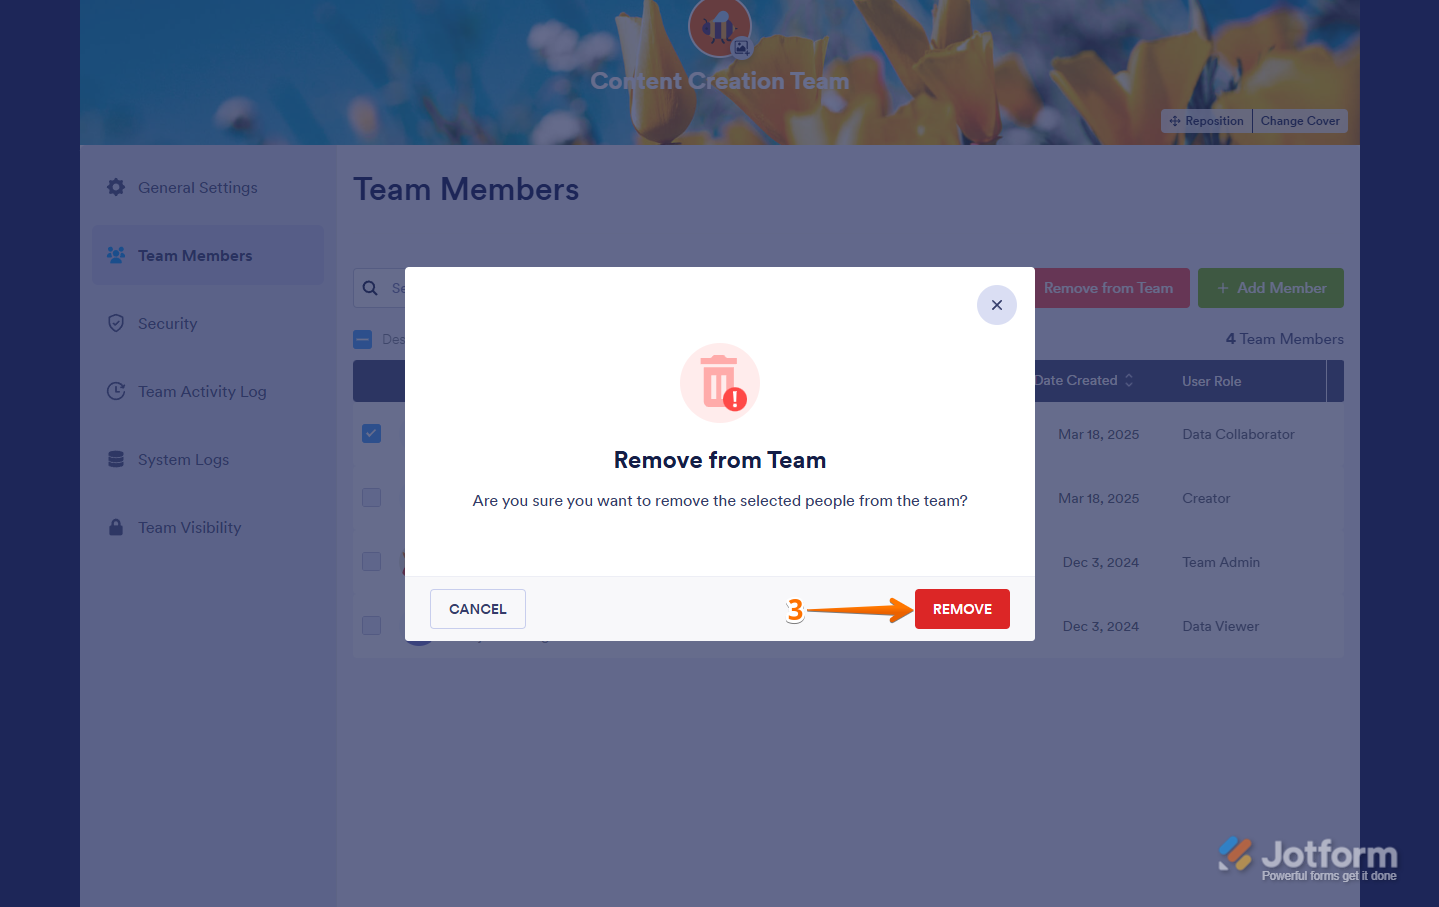
- In the Team Members section, click on the team member you want to remove.
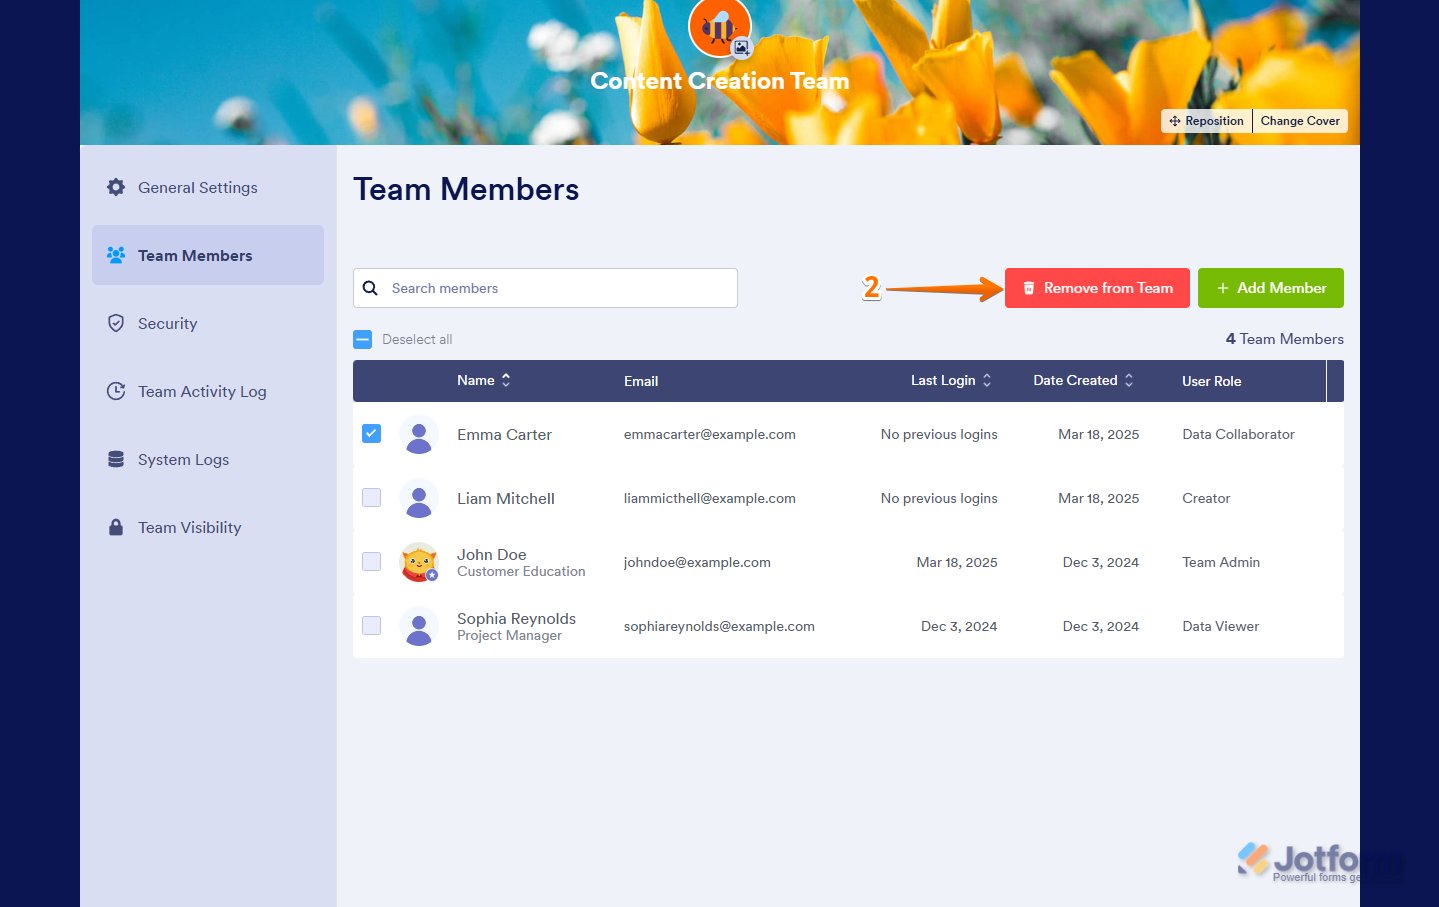
- Then, click on Remove From Team on the top-right side of the screen.
- Now, in the Confirmation window that comes up, click on Remove.
That’s it! You’ve successfully removed your team member from your Jotform Team.

Send Comment:
1 Comments:
More than a year ago
is this function only for enterprise accounts?