Jotform lets you easily delete submission data right from your Submission Tables. After downloading your submissions, you might want to remove old or test entries and keep only the recent ones. Whether you’re managing outdated responses, clearing test entries, or staying compliant with data privacy regulations, knowing how to safely delete submissions is essential.
Notes
- Deleted entries are moved to the Trash and kept there for 30 days.
- Deleting submissions won’t free up your account’s monthly submissions limit. You can check the guide about Understanding Your Account Usage and Limits for detailed information.
Accessing the Form Submission Table
To view and manage the responses you’ve collected, you’ll need to open your form’s Submission Table. Here’s how to do it:
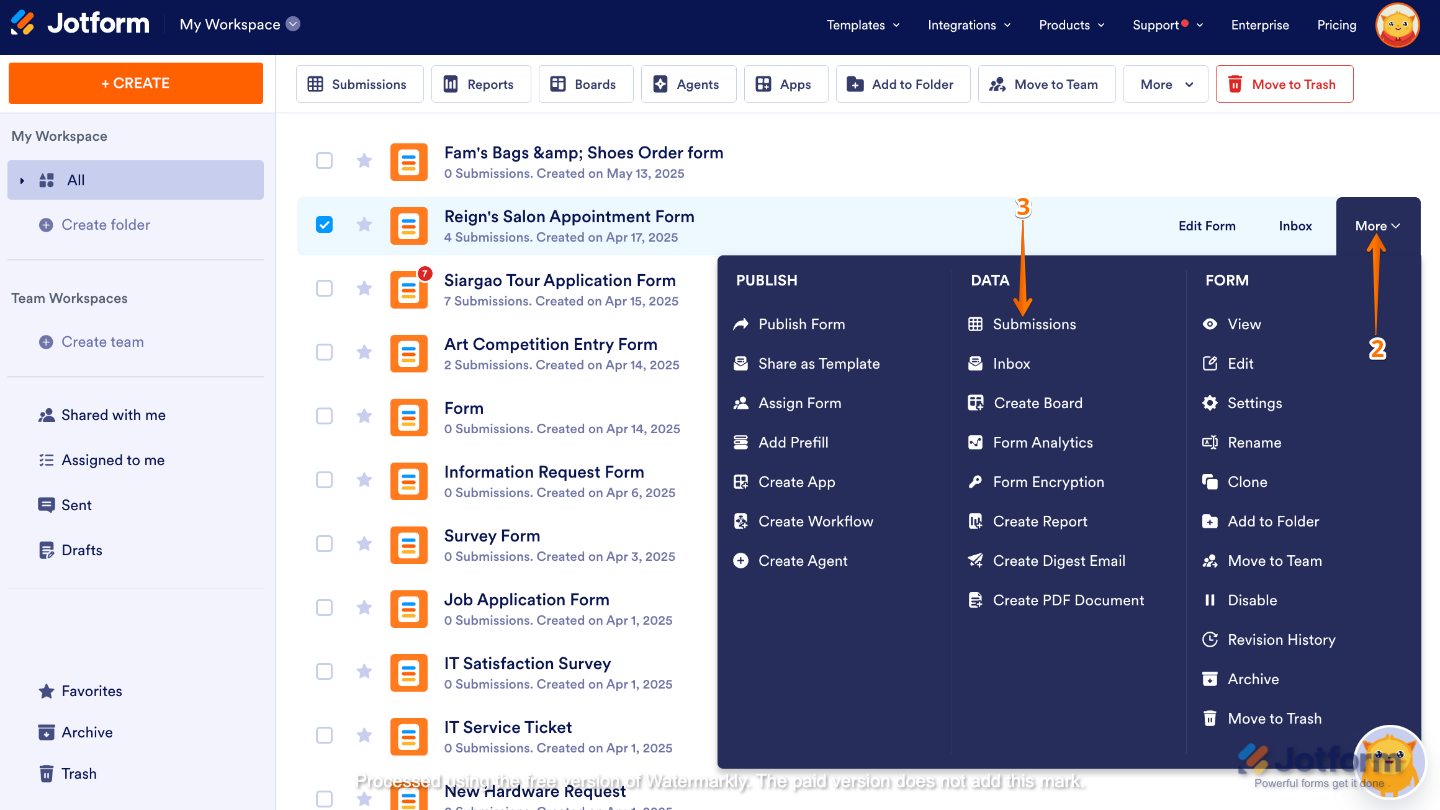
- On your My Workspace page, click on Type at the top and in the Dropdown menu that opens, uncheck the boxes next to all the assets except Forms, so only they’ll be shown on the page.
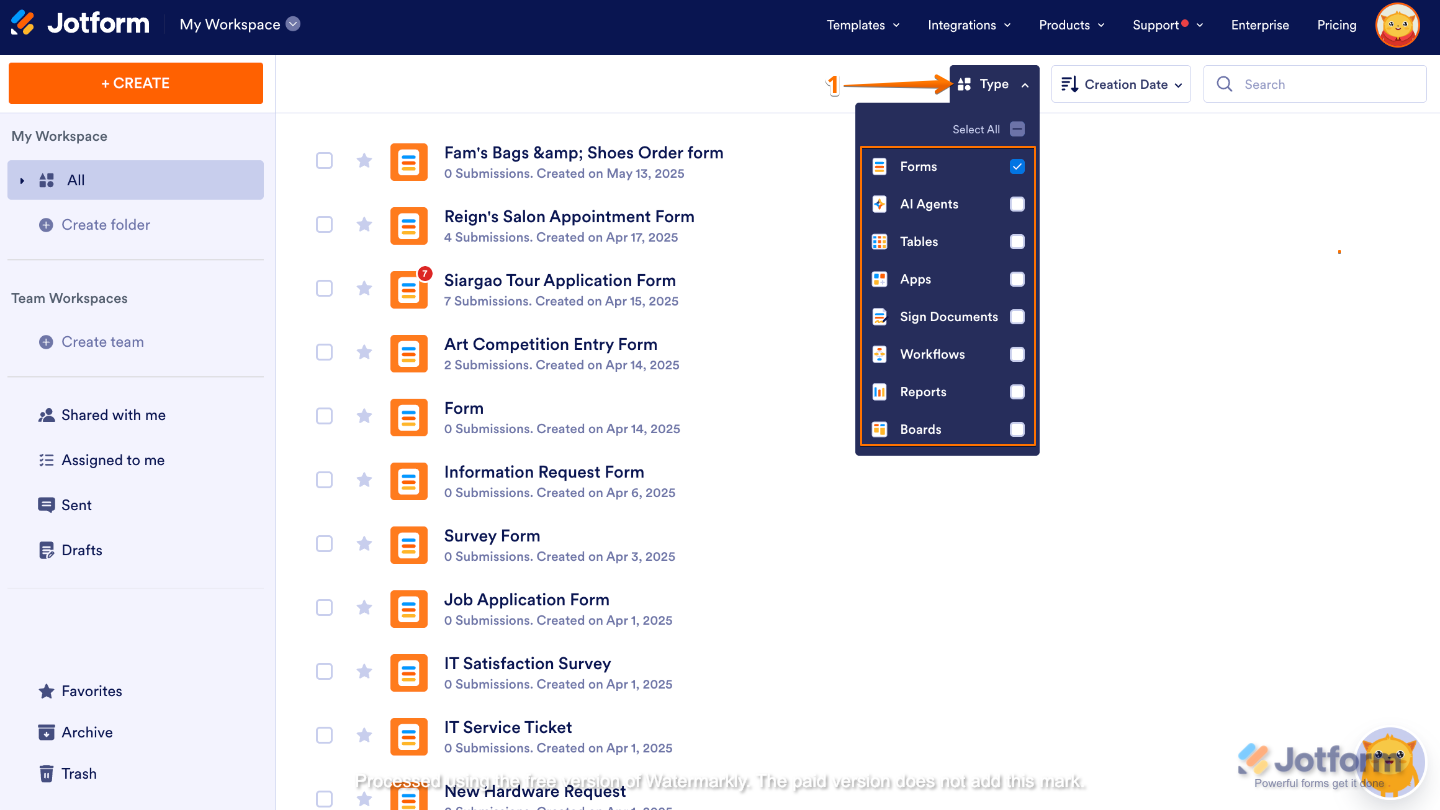
- Now, hover your mouse over the form you want to manage, and click on More on the right side of the page.
- Next, in the Dropdown menu, under the Data column, click on Submissions.
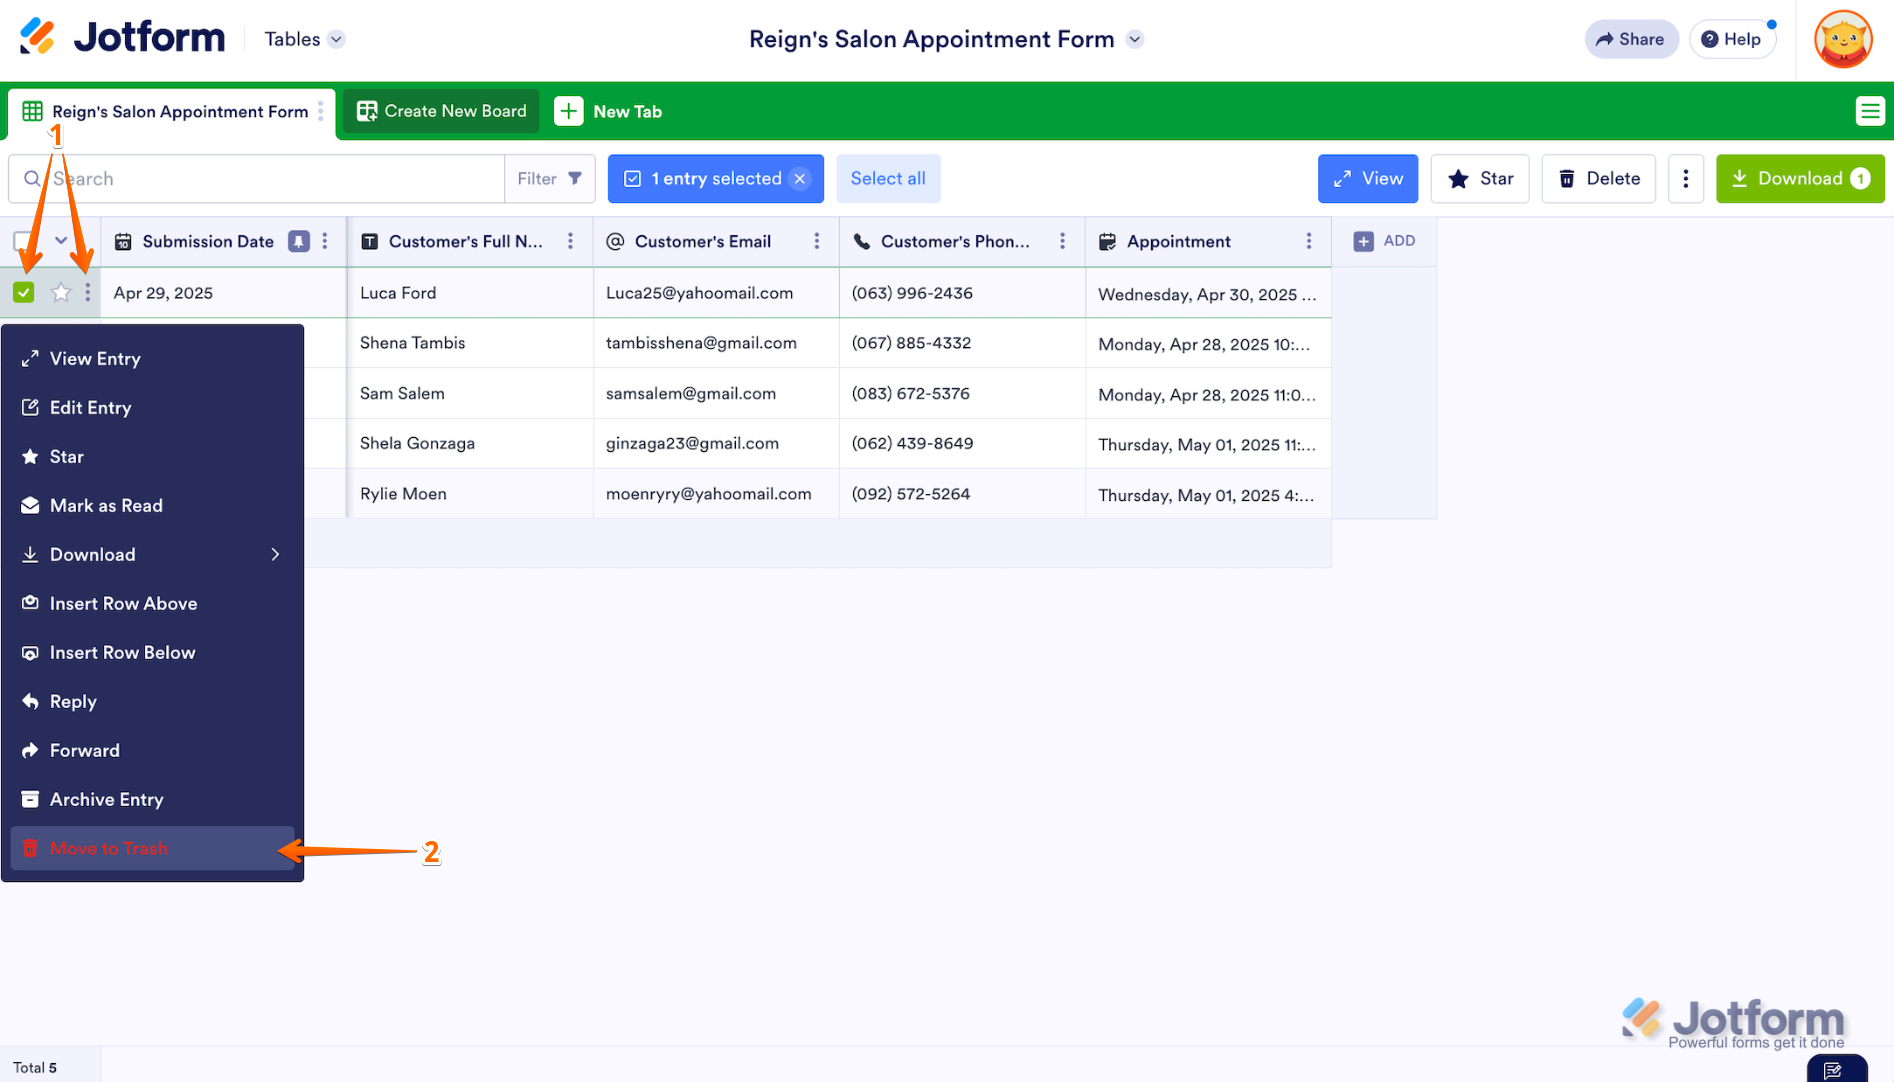
Deleting a Specific Entry
You can delete individual submissions directly from the Submission Table to free up space or remove unwanted entries. Here’s how to do it:
- On your Jotform Submission Table, tick the Checkbox next to a submission on the left side of the page and then click on the Three Dots icon next to it.
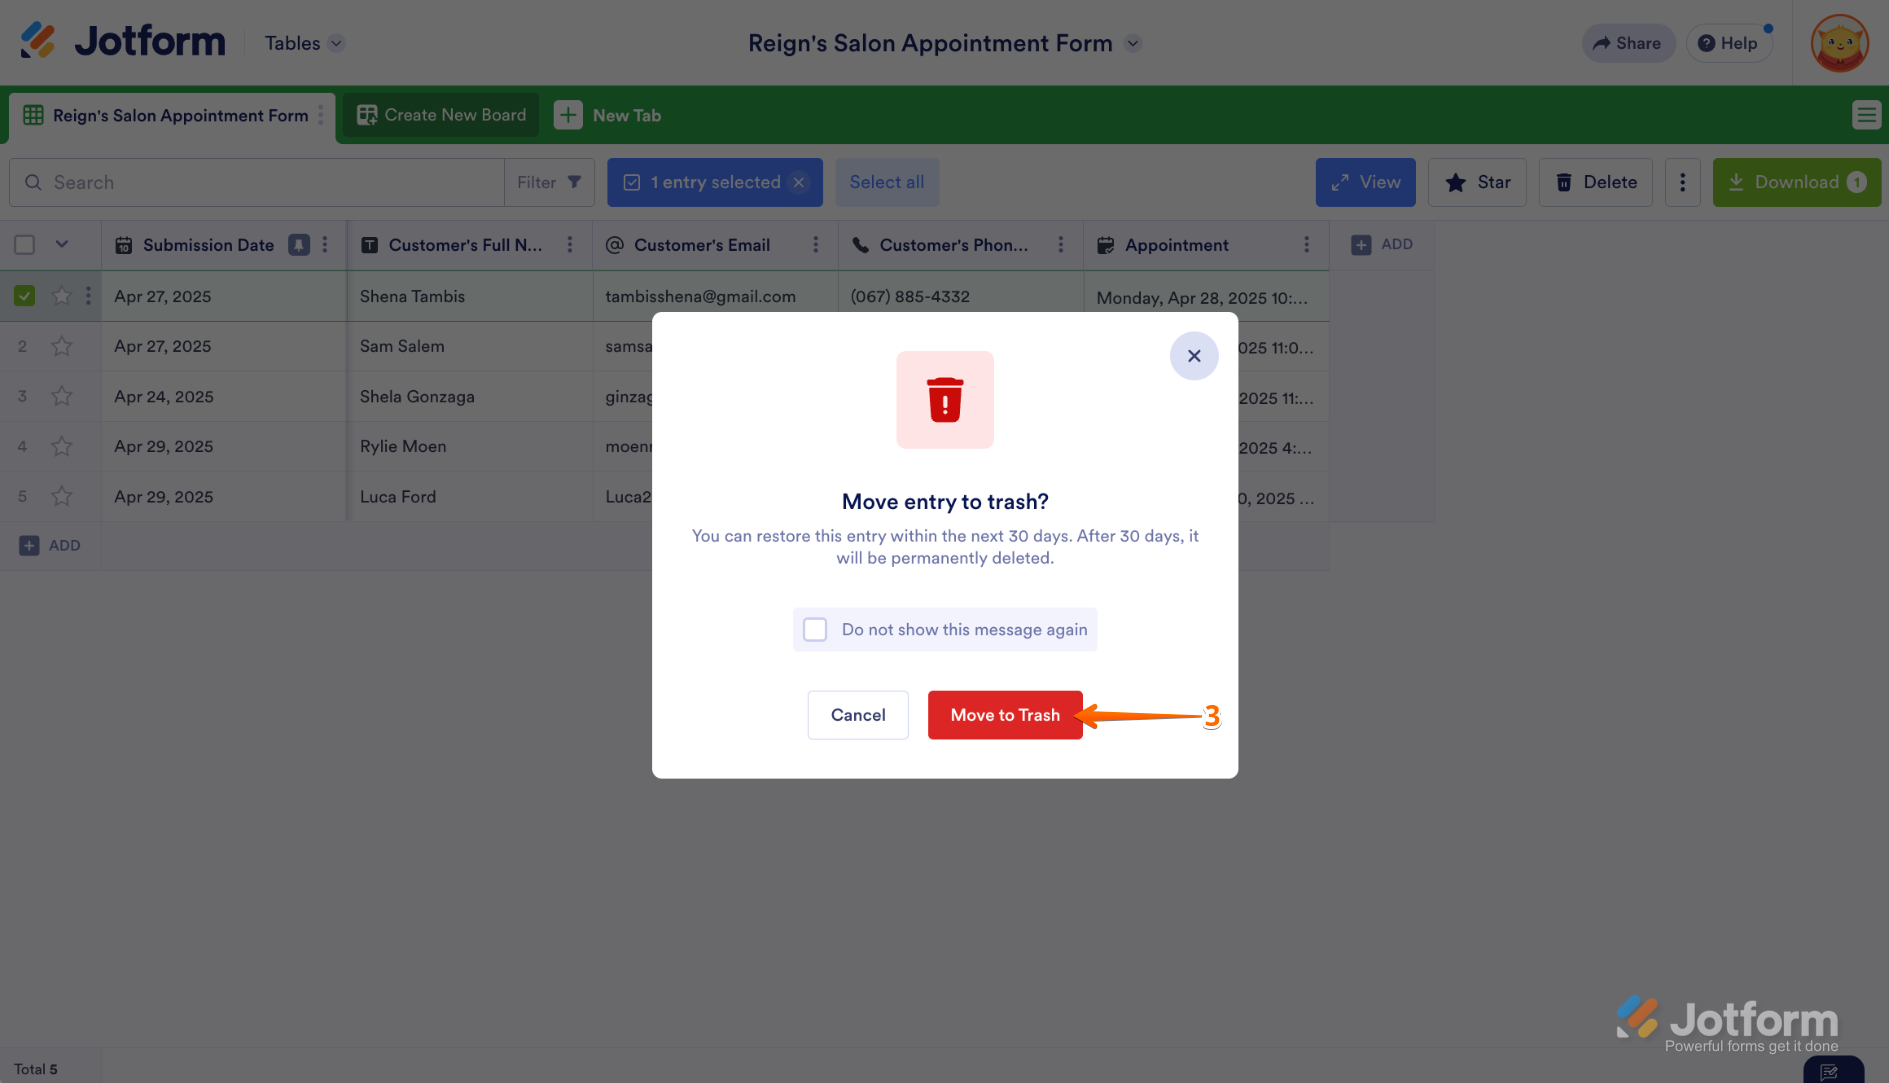
- In the Dropdown menu that opens, click on Move to Trash.
- In the Confirmation window that pops up, click on Move to Trash.
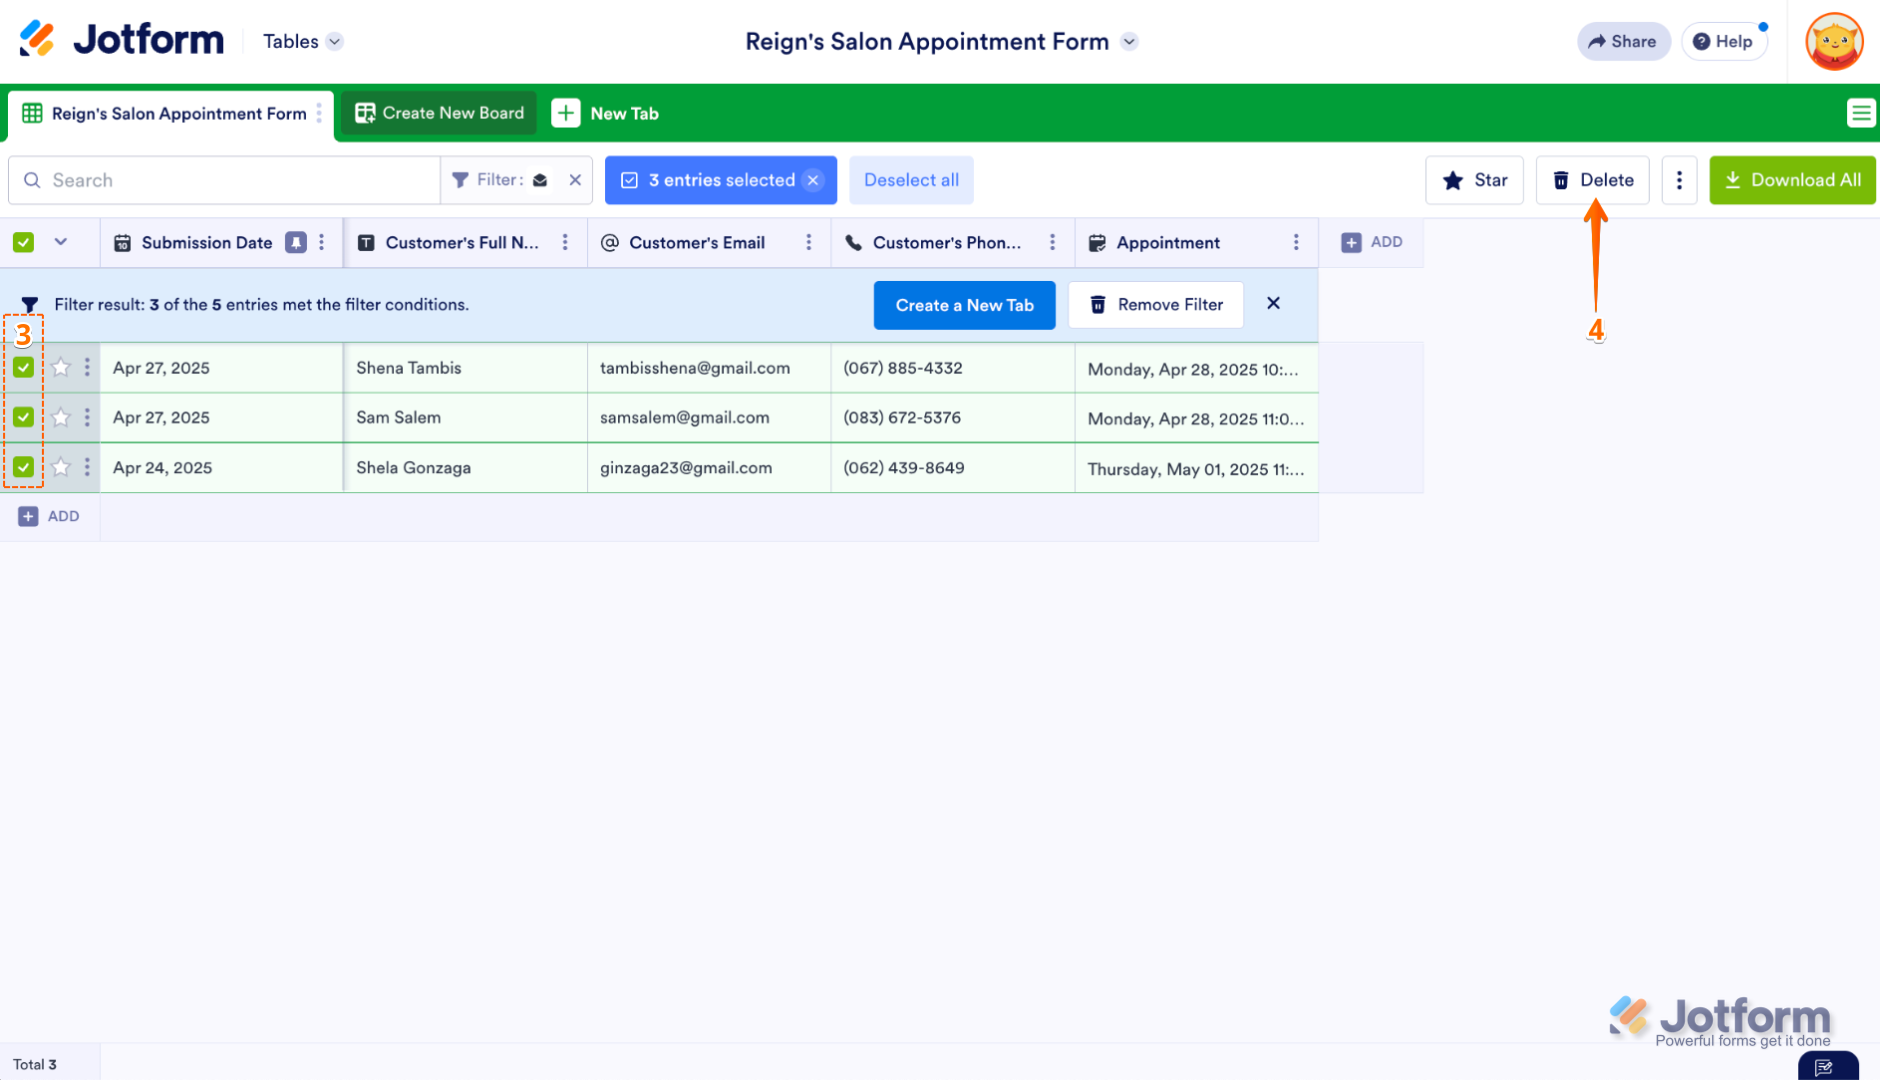
Deleting Multiple Entries
If you need to remove multiple entries from your Submission Table, you can delete them all at once. It’s easy, here’s how:
- On the left side of your Jotform Submission Table, tick the Checkboxes next to submissions you want to delete.
- Then, on the upper-right side of the page, click on Delete.
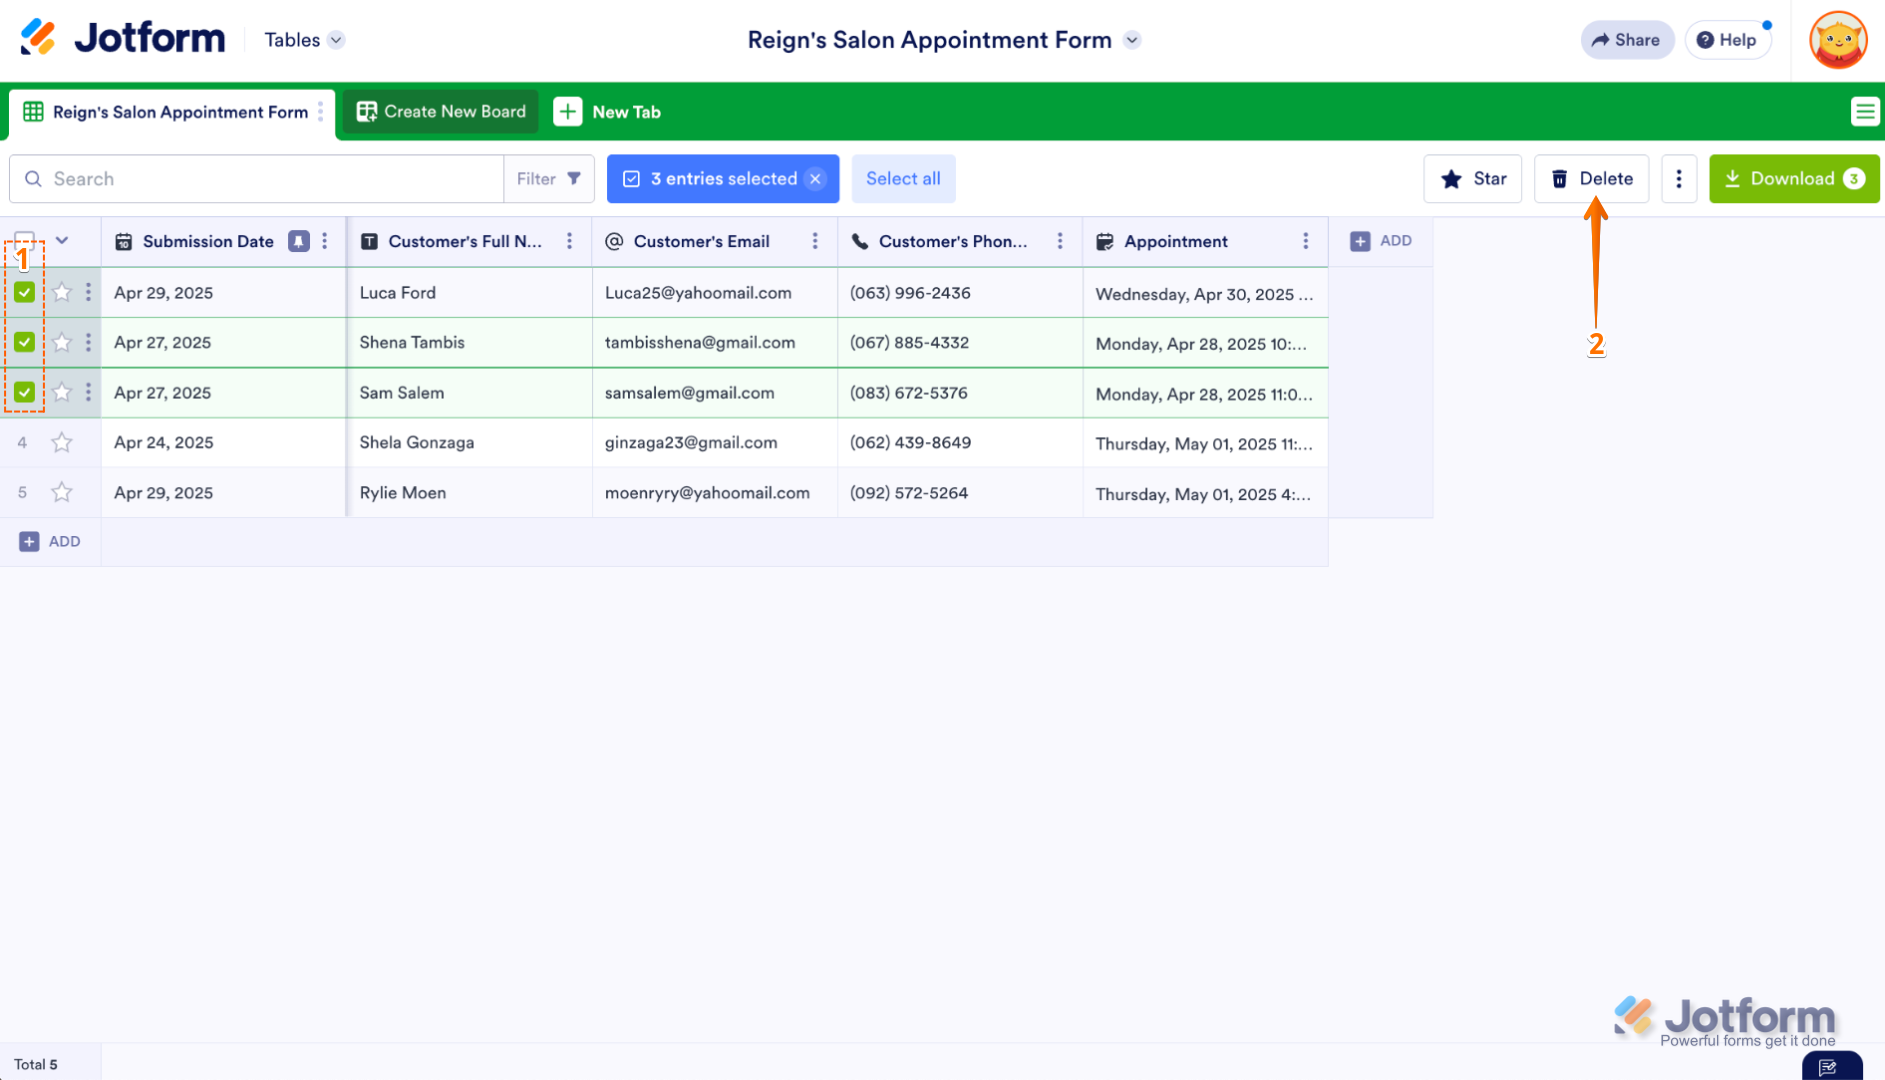
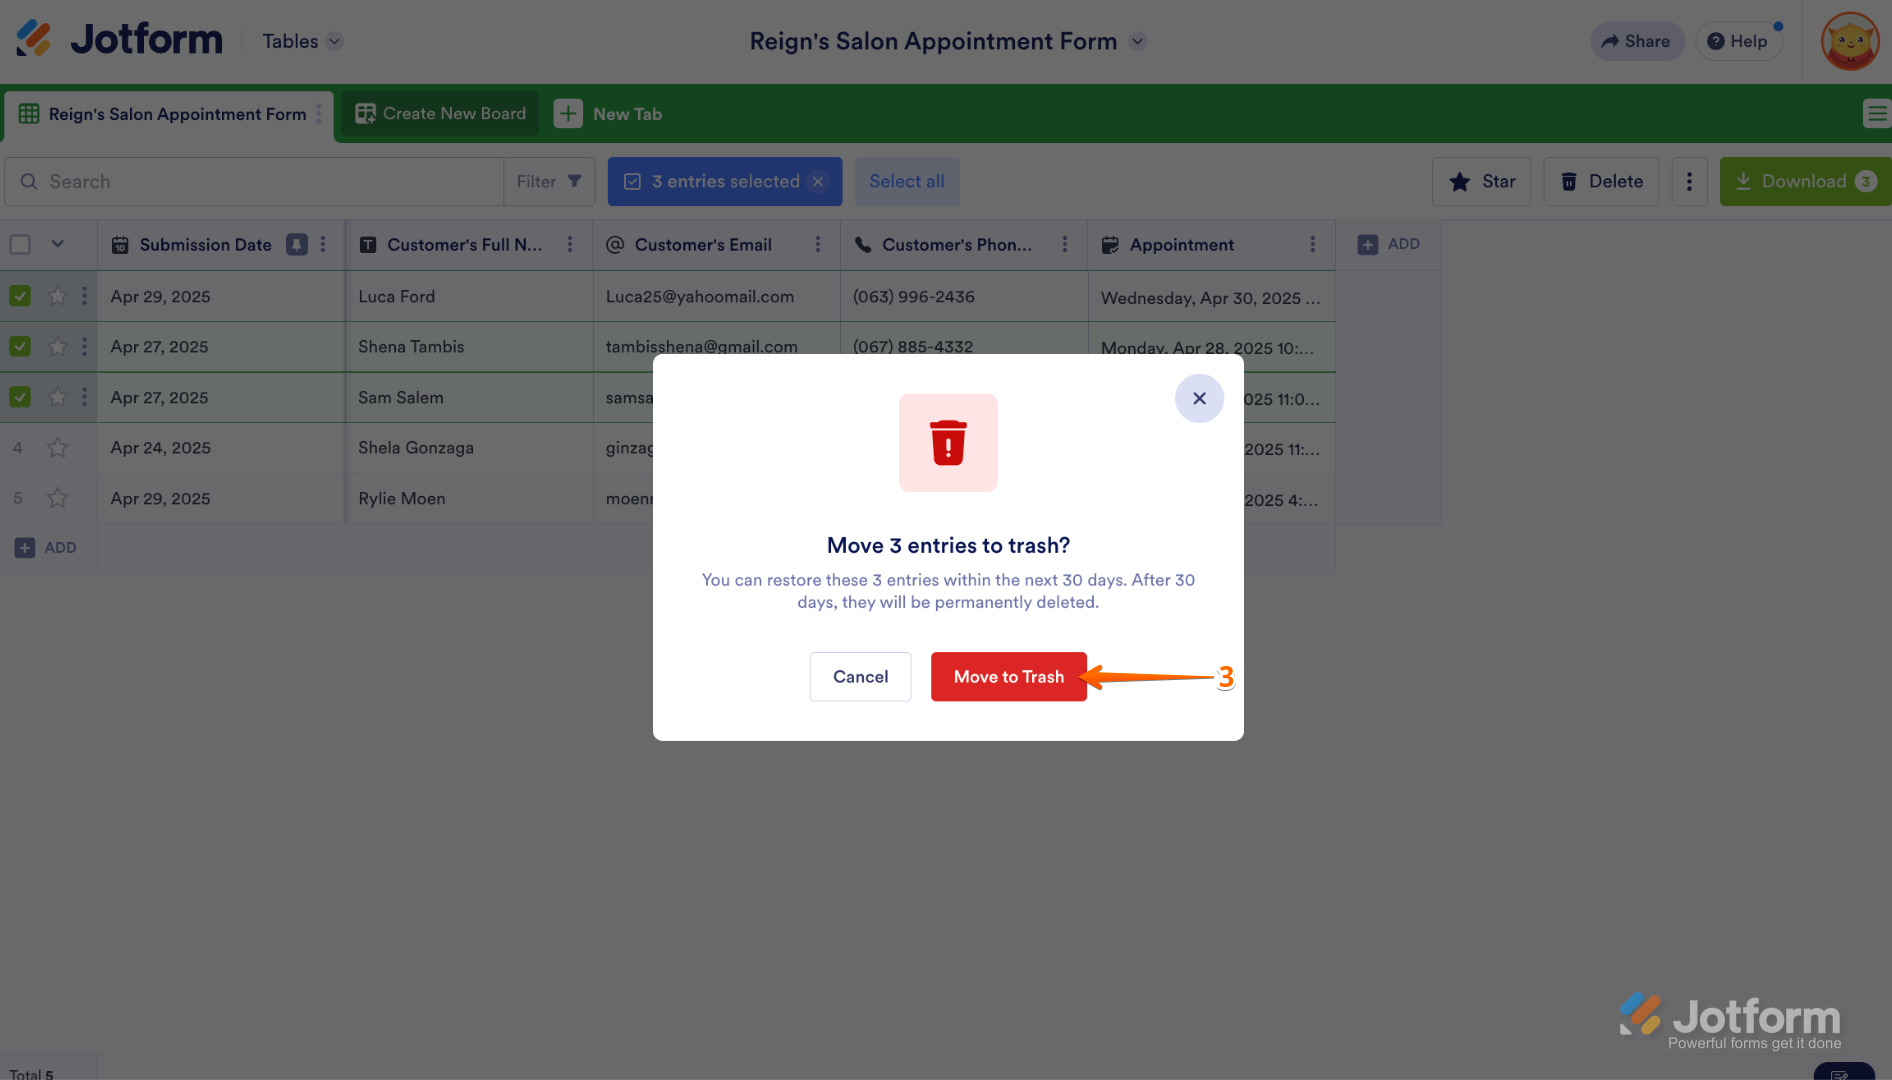
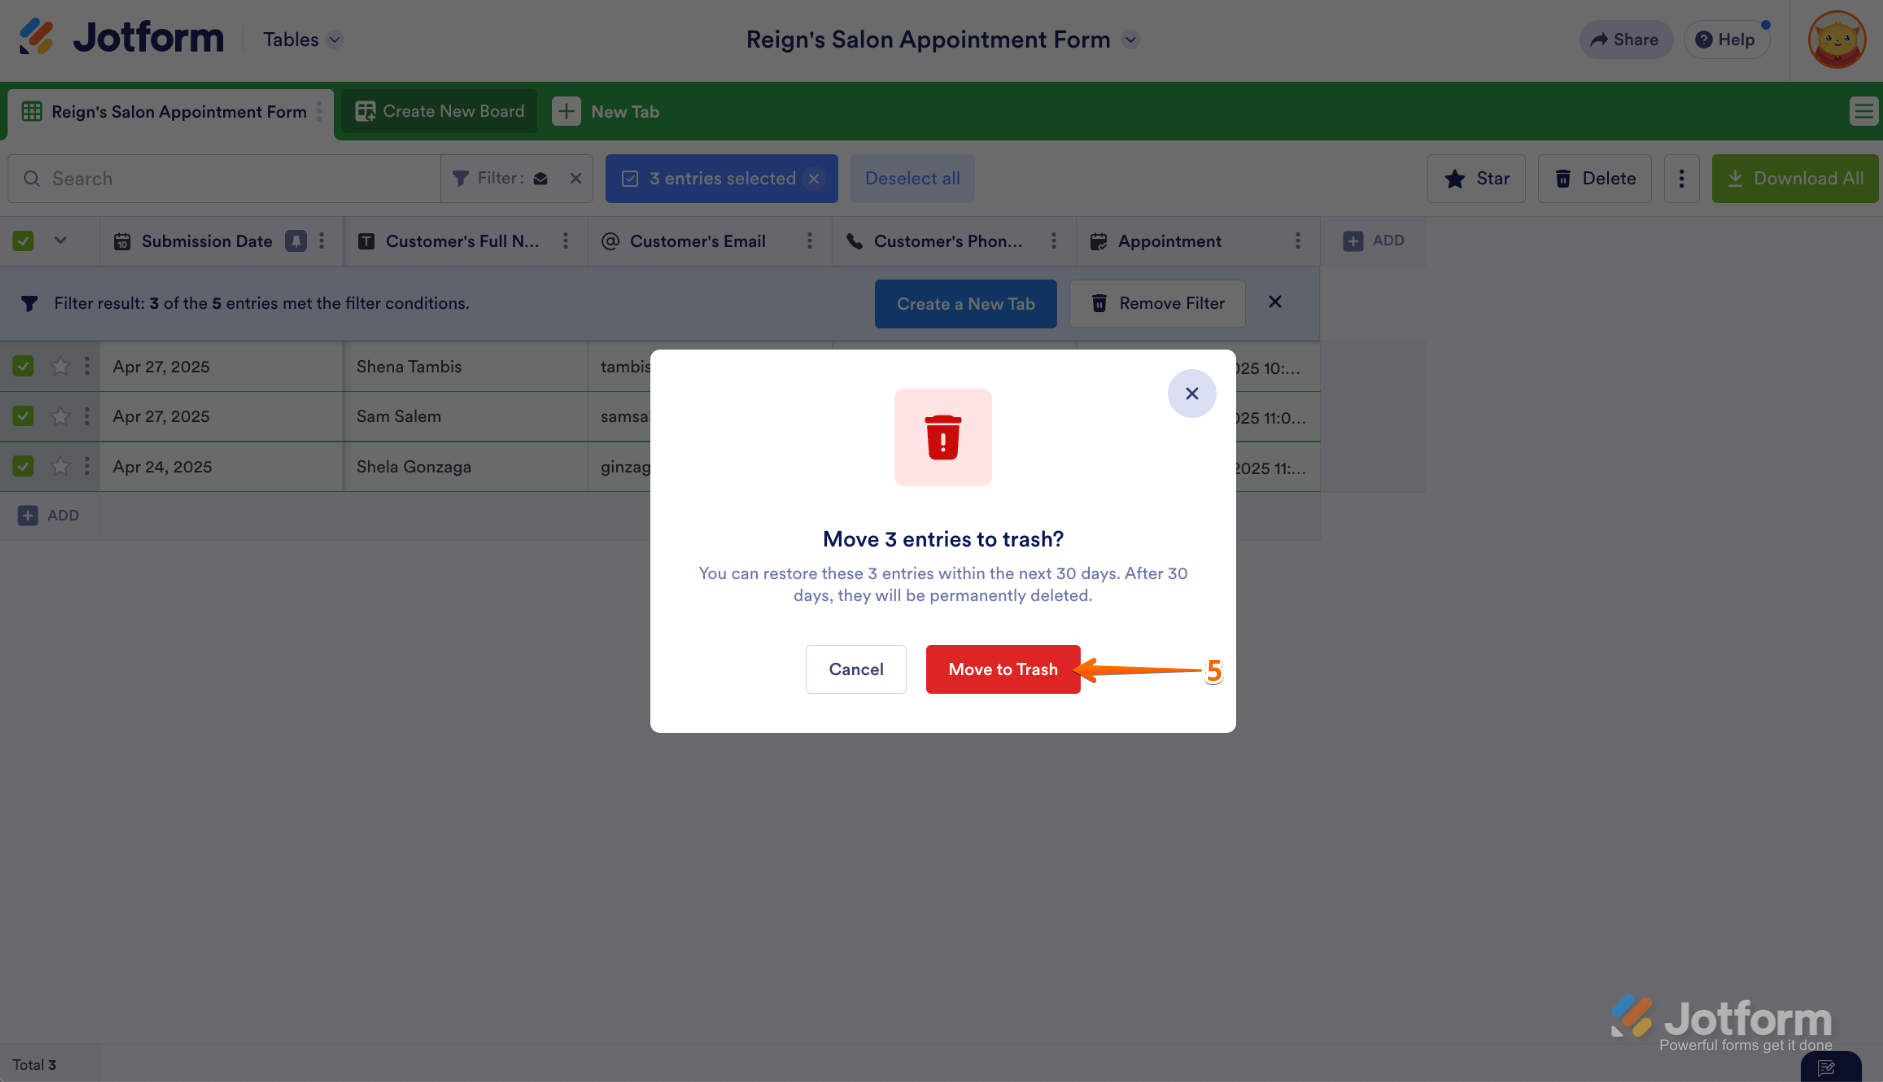
- In the Confirmation window that pops up, click on Move to Trash.
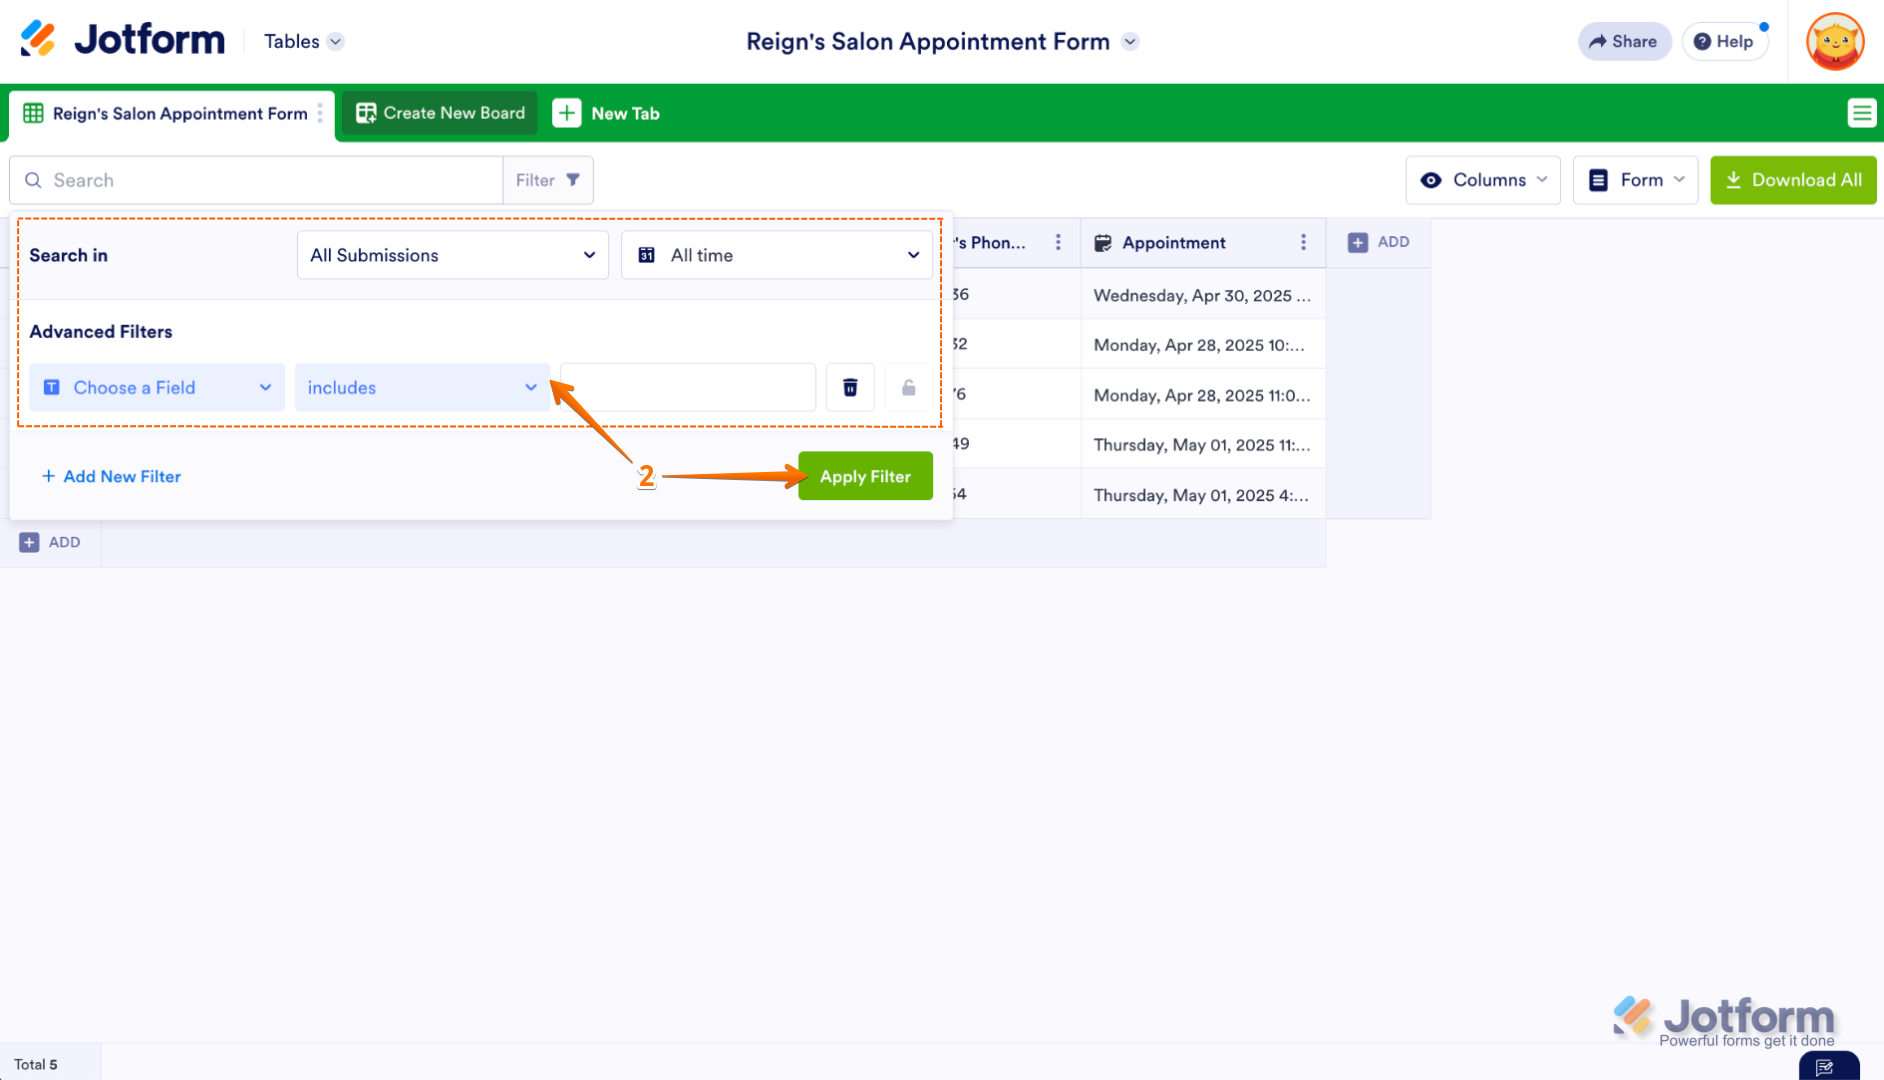
Deleting Submissions Based on a Filter
You can also filter your submissions first to quickly find and delete only the ones you no longer need. Here’s how to do it:
- On your Jotform Submission Table, click on Filter on the right side of the Search bar.
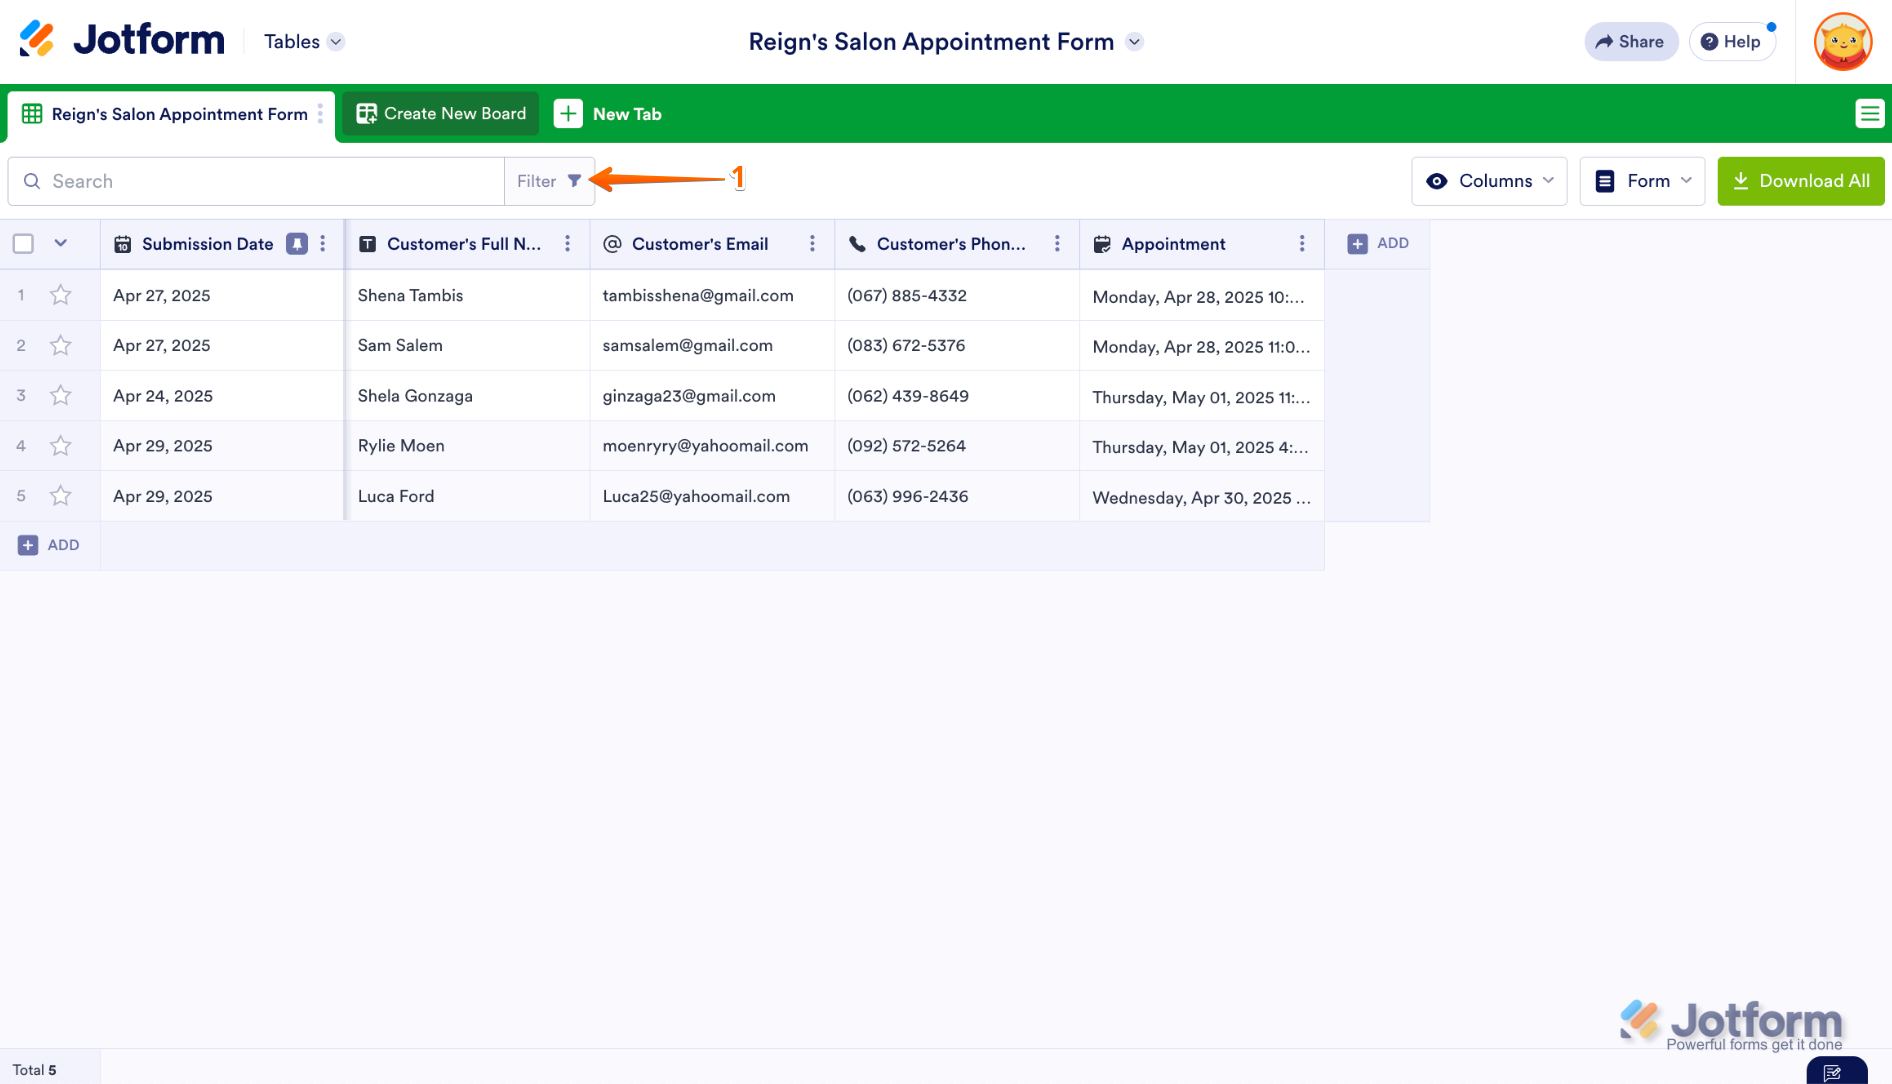
- In the menu that comes up, adjust the search filters—like where to search (All Submissions or specific ones), a specific date range or All Time, or use Advanced Filters to narrow things down. Once you’re done, click on Apply Filter.
- Then, tick the Checkboxes next to each submission.
- On the upper-right side of the page, click on Delete.
- In the Confirmation window that pops up, click on Move to Trash.
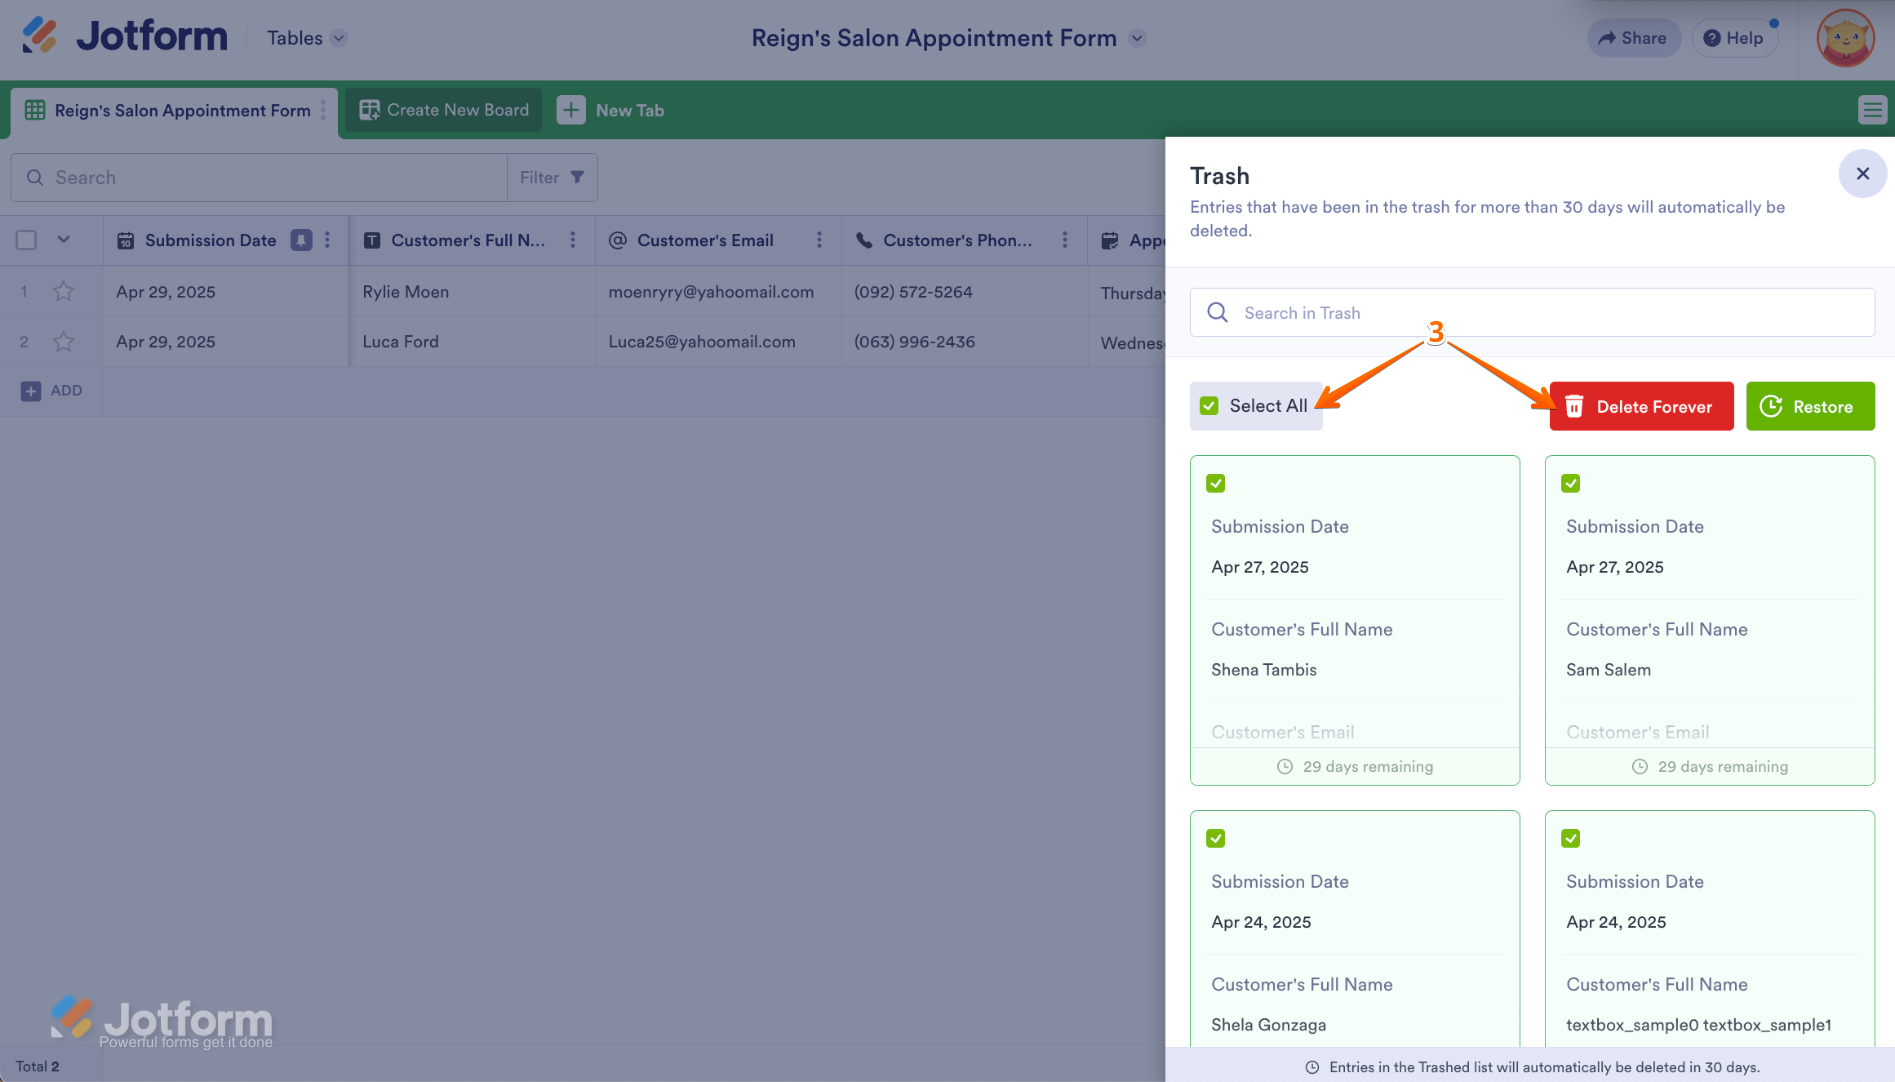
Deleting Trashed Entries
Trashed submissions aren’t deleted right away. To free up space and stay organized, you can permanently delete them from your Submission Table. It’s easy, here’s how:
- Click on the Three Dots icon on the right side of the main tab in your Submission Table.
- Then, in the Dropdown menu, select Trashed Entries.
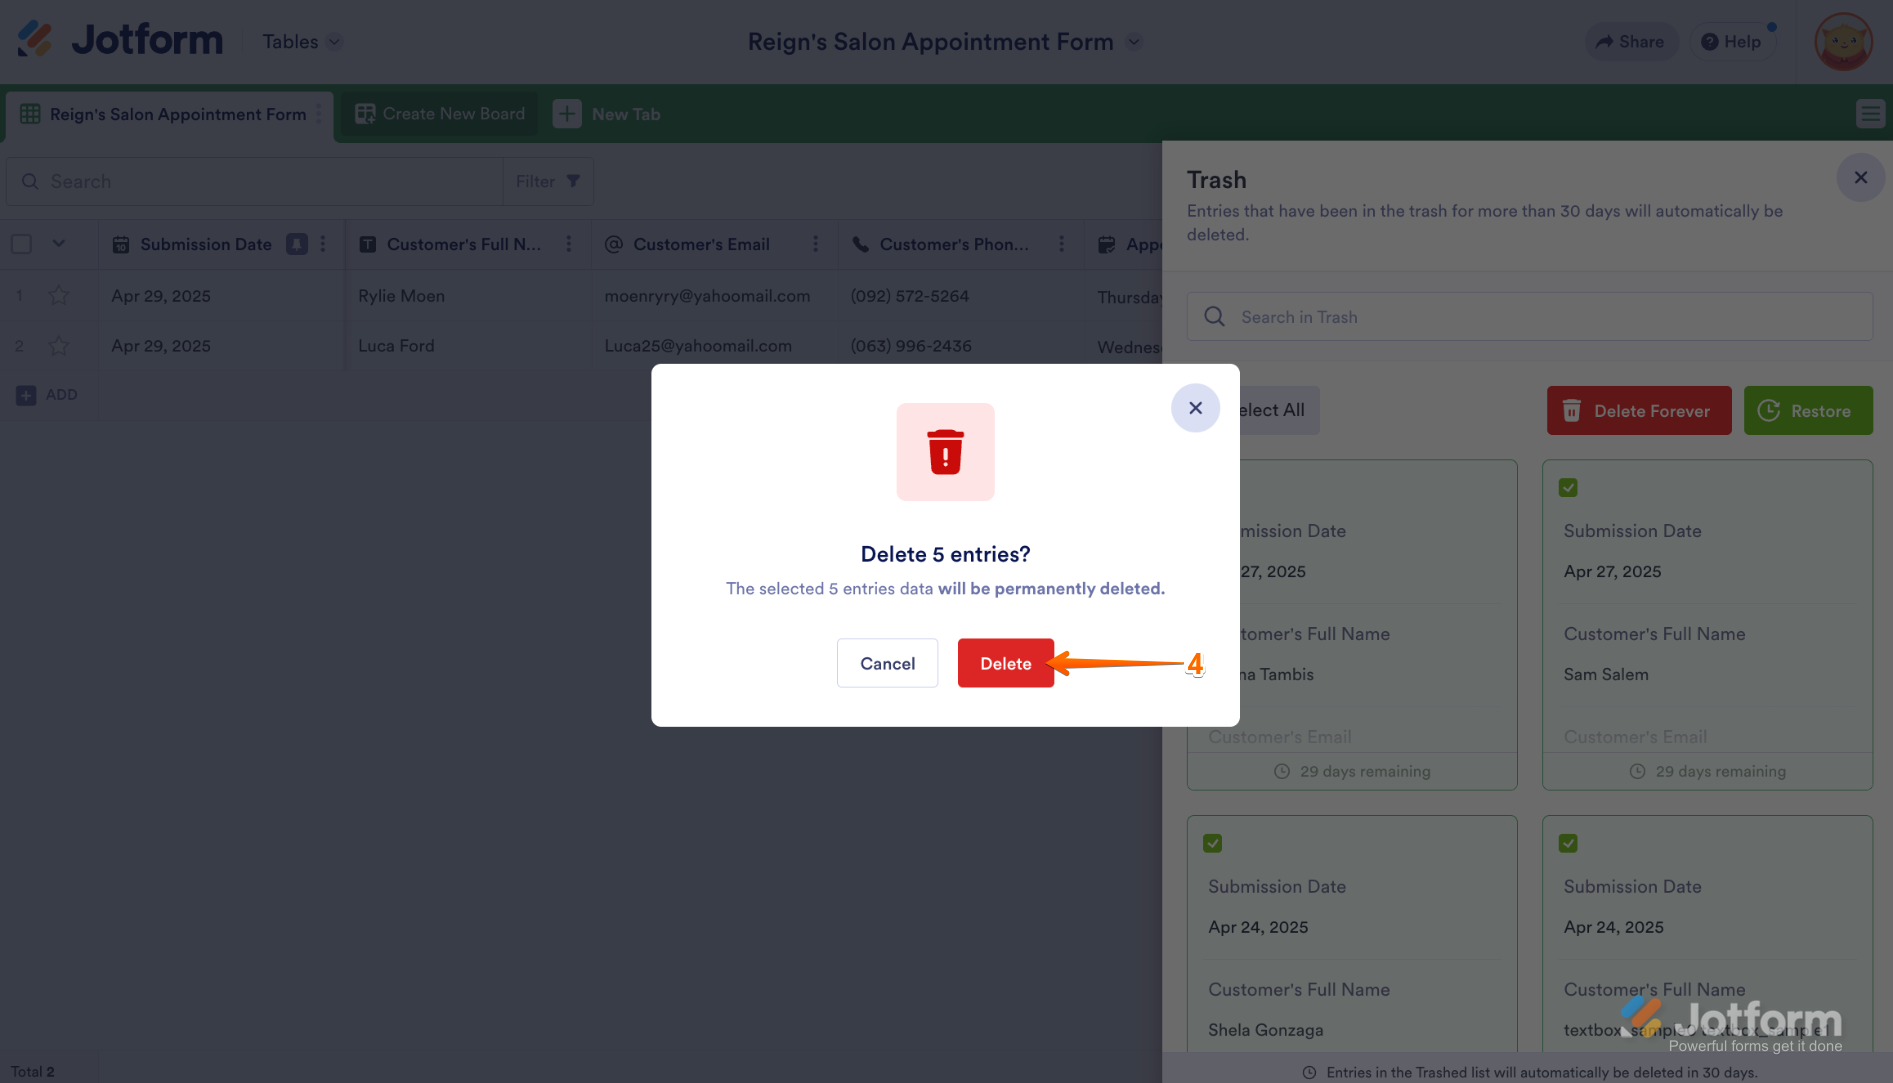
- In the Trash menu on the right side of the page, click on Select All or select a deleted submission and then click on Delete Forever.
- Finally, in the Confirmation window that pops up, click on Delete.
Pro Tips
- If you want submissions to delete themselves after a set time, Jotform’s auto-delete feature makes it easy. Just set it up once, and your form will handle it for you. Check out our guide about Deleting Form Submissions Automatically to learn more about it.
- If you want to delete your submissions because you’ve reached your upload limit, you should purge the submission that contains uploaded file. Check out our guide about How to Free Up Space in Your Account’s Upload Limit.

Send Comment:
84 Comments:
100 days ago
I tried but the trash menu is empty and nothing to check to delete forever, can you help me please
190 days ago
this didnt work, still have upload space issues. also the use of delete and trash on home page, and in the form table are useless if they dont do anything, confusing UI, at first glance the user would assume thats where to look
232 days ago
Hi, I have deleted and purged historical submissions but our upload space is not updating, and is therefore preventing submission of forms. How can I get this updated?
270 days ago
Good Morning,
I need help clearing space in my upload file - I have deleted all uploaded submissions, yet the account is still saying no upload space available.
276 days ago
This doesn't clear form submission limits based on IP or cookies for forms that can accept a single submission. Even after deleting a submission, that submitter still gets a message saying they can only submit once. How does the form get reset completely??
311 days ago
I completed a submission following all directions about pixels, image size, etc., but when I pressed the submit button got back a jot form image informing me that --> "Form over quota. This form has exceeded its allocated quota." Underneath it reads "Create beautiful & free forms with Jotform" followed by "Try Now". I cannot get rid of this notification and re-submit. I tried to log in to jot form and delete any existing forms but I don't have any forms and am new to jotform. The submission deadline is Dec 31
341 days ago
Please confirm if the data is deleted from the server it is wiped forever?
More than a year ago
I'm having the same issues as everyone else
More than a year ago
Hi, having the same issue as everyone else. I have no submissions in my account. Nothing in my archives or trash. But it says I have over 1.1GB of upload space being used, somehow. Tried purging the cache. Logged out and back in. Followed every step here. What can I do?
More than a year ago
I have deleted all submissions I had come in, but I'm still getting a message saying I'm over the 100 limit? Is there something else I'm missing?
More than a year ago
Hello, well from what I see I have the same problem as everyone in this place. How can I clear my shipping count? I have already done all the steps about five times, so what can I do?
More than a year ago
There has been a mistake. I received notice that my account has reached its submission limit. This is not possible. Could someone please help?
More than a year ago
I just deleted most of the submissions I have made and I also deleted them from the trash; however, neither my monthly submission or total submissions totals decreased. I was expecting both to decrease especially since I deleted dummy test data and don't want them to count against my plan. Please explain. Thanks ahead!
More than a year ago
I have deleted submissions and then deleted forever from the trash.
Why hasn't the place become available yet?
More than a year ago
hello jotform i have already delete half of my submission, but its still full :(
can you check my account?
thank you
More than a year ago
This is not helpful. I have deleted all submissions and then deleted forever from the trash. It still says I’ve reached my quota.
Please help.
More than a year ago
Please reset my account as well. I deleted all of my submissions but it is not reflected on your server
More than a year ago
Please I have deleted all Submissions, All Trash and everything but the upload space is still showing 64%. Please i have submitted my email. Help me to reset from your side so it can reduce to zero.
Thanks for your kind works.
More than a year ago
Hello JOTFORM, I have already delete ALL my submissions in the trash. But my upload limit is still the same with the before I delete the submissions (75.09 MB). Can you check my account and fix it? I need it hurry, please, I need help urgently!
More than a year ago
I am also having issues all of a sudden with space limitations! I have deleted, purged, forever deleted...no space! My customers cannot connect with us! Help! It looks like SO many of us are having this issue!!! I cannot wait another 24 hours!!!
More than a year ago
Had fill an jotform but may be a scam please contact me asap to fix it through you first
More than a year ago
I did this and even logged out and back in, but my usage limits are still the same even though all but 3 of my submissions have been deleted. I haven't had to worry about this for years and then out of the blue I get an email stating my limit is close to reaching. The last form submitted was with two pics that were less than 1MB each and that was almost 2 weeks ago. Why now?
More than a year ago
Hello, we're having the same problem as everyone else - the deleted space not being reopened. Please help.
More than a year ago
This is not helpful, I deleted all the submissions and emptied the trash but my upload space isn't restored. please help
More than a year ago
I've followed the instructions for deleting submissions, and my total submission numbers haven't changed. I've double checked the trash on each form submission page, and there is no longer anything there (in trash). Does it take awhile for the total submission numbers to get refreshed? Seems like lots of people are having this issue....