Jotform’s Geolocation widget helps you collect a user’s location directly in your form, either as an address or as latitude and longitude coordinates. With user consent, this makes it easier to gather accurate location data for reports, deliveries, or surveys.
Here are a few ways to use it:
- Collect location data for incident or inspection reports.
- Capture addresses for deliveries or service requests.
- Gather geographic data for surveys or research.
- Record precise coordinates when needed.
Note
You’ll need your Google Maps API Key to set up the Geolocation widget. If you’re not sure where to find it, check out our guide on How to Get Google Maps API Key to learn more.
Whether you’re building a new form or editing an existing one, you can add and configure the Geolocation widget in just a few steps. This is how it’s done:
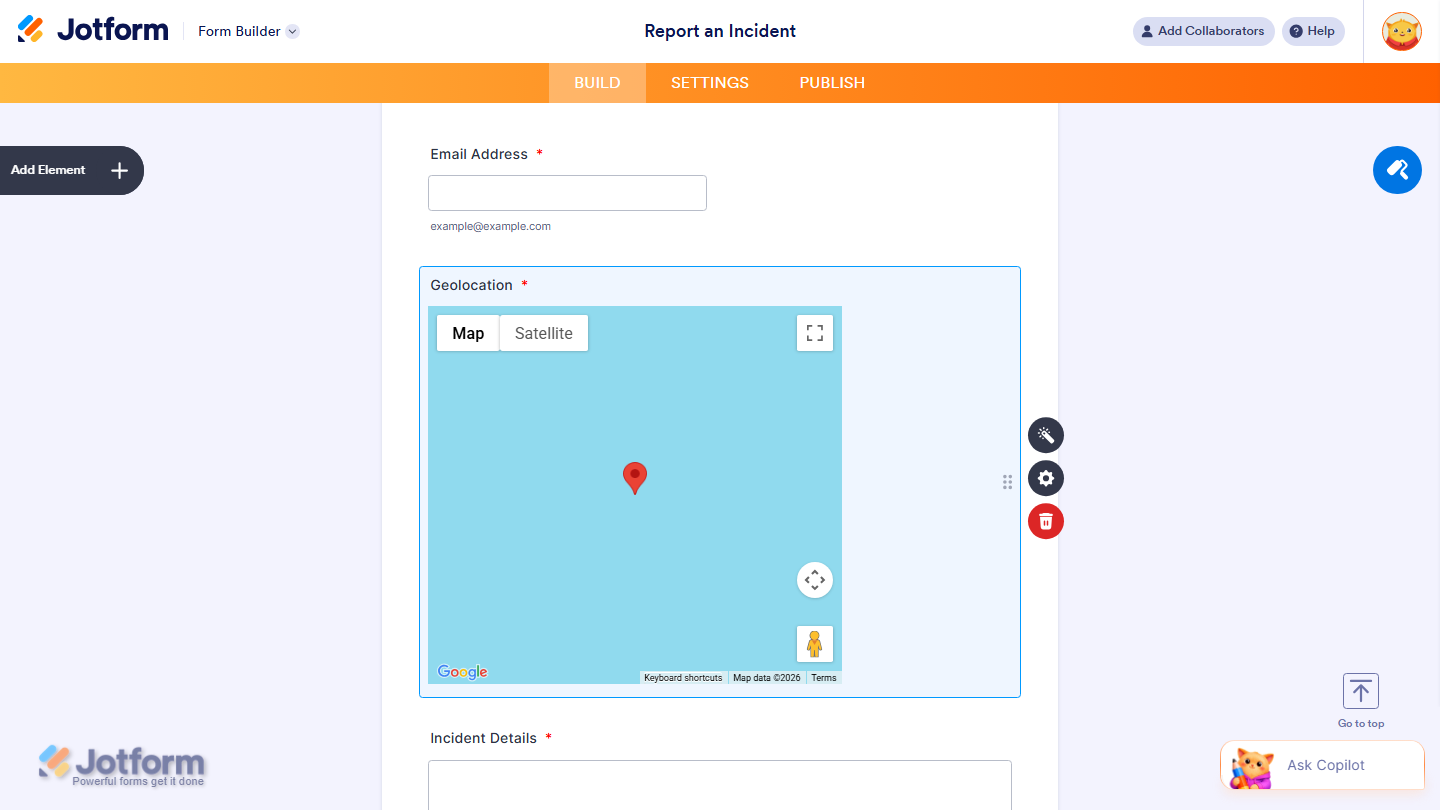
- In Form Builder, click on Add Element on the left side of the page.

- Now, in the Form Elements menu, under the Widgets tab, search for Geolocation and click on it. Or, just drag and drop it to where you want it to be on your form.

- Next, in the Widget Settings menu that opens on the right side of the page, under the General tab, you’ll see this list of settings you can configure:
- Output Format — Select how the location data is submitted: as a full address, latitude and longitude coordinates, or both.
- Coordinates Precision — Set the number of decimal places for latitude and longitude values. A precision of 5 to 7 digits is recommended for optimal accuracy.
- Default Location — Set the map’s default position using Longitude and Latitude. However, entering coordinates disables automatic location detection. Leave blank to keep auto-detection enabled.

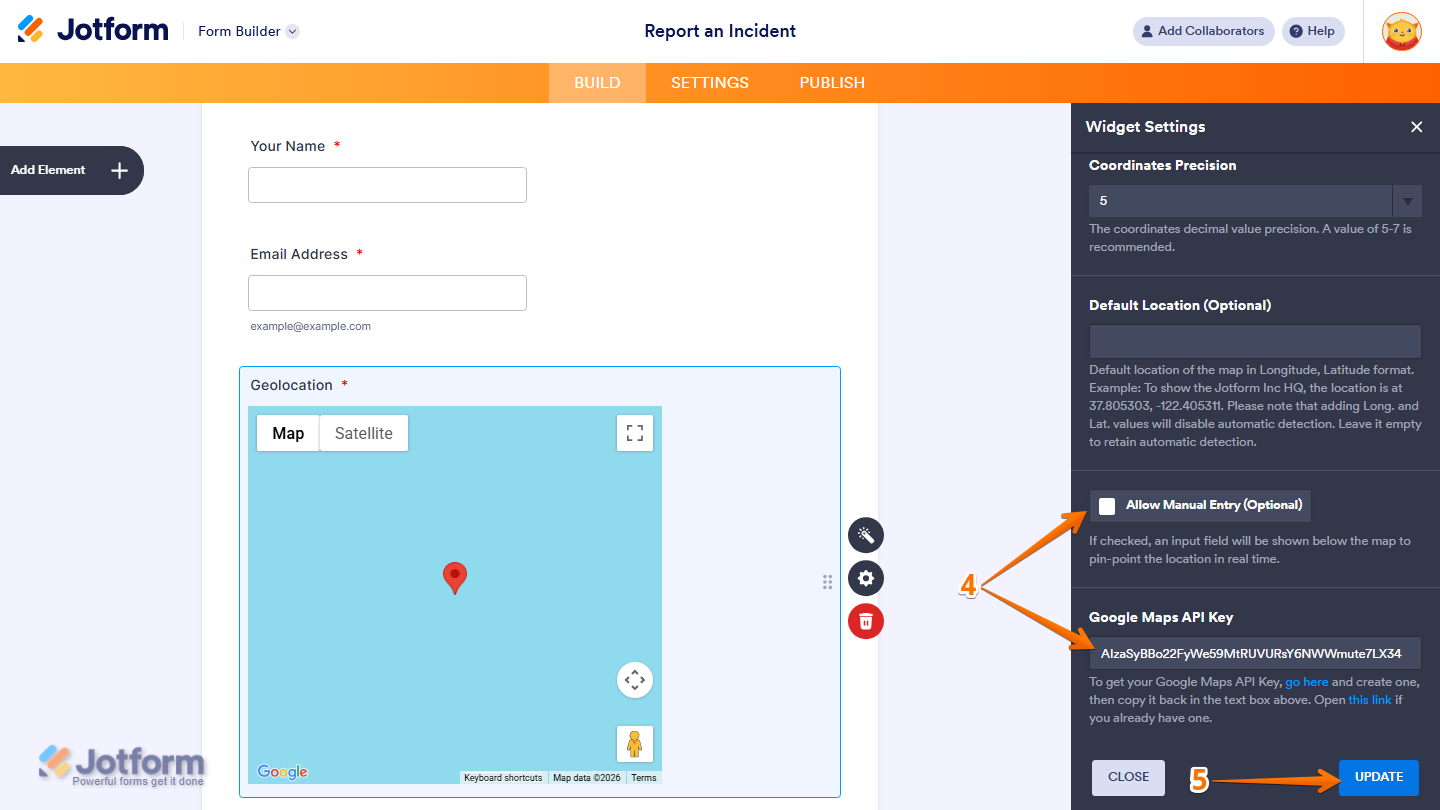
- Then, scroll down to the bottom and continue to configure this thing:
- Allow Manual Entry — When checked, an input field appears below the map, allowing users to manually enter and update the location in real time.
- Google Map API Key — This API key is required for the widget to function properly. Without it, the map will not load or display on the form.
- Once your changes are complete, click on Update.
That’s it. You’ve successfully added and set up the Geolocation widget on your form.
You can explore how it looks with this demo form.
Note
- You can use a Google Map URL(https://maps.google.com/maps?q={tag}) to add the location link to your notification email — replace {tag} with your Geolocation’s Unique Name. You can copy the Unique Name through your widget’s properties panel. You’ll find more info in our guide on How to Find Field IDs and Unique Names.
- For advanced styling of the Geolocation widget, you can add your own custom CSS code under the Custom CSS tab in the Widget Settings. Our guide on How to Inject CSS Codes to Widgets walks you through everything.
- You can also configure the widget properties, like alignment, labels, size, visibility, and more, to control how it looks and behaves on your form. Check out our guide on How to Access and Configure the Question Properties of a Widget to learn more

Send Comment:
3 Comments:
February 19, 2025
Hello,
I am trying to setup geolocation mapping but I continue to get an error, and with geolocation the latitude and longitude is not pin pointing the adress correctly.
February 16, 2024
Hello, on my form ( I am trying to add the widget 'Toon Kaart Locatie' on Jotform but I get the message:
Google Maps is niet correct geladen op deze pagina. Zie de JavaScript-console voor technische details
Any idea?
February 10, 2022
You can also try Clappia for collecting GPS