Just received an email asking you to sign an attached PDF document? If you’re on a Mac, there are multiple ways to sign the document using Apple’s Preview app — all without printing, scanning, or downloading third-party software.
This article covers four native methods to sign a PDF in Mac Preview, steps to flatten and secure your signature after signing, and when it makes more sense to use a dedicated e-signature app like Jotform Sign to add an electronic signature to a PDF.
Pro Tip
Read our more detailed guide on how to add a signature to a PDF online, with desktop or mobile devices.
How to sign a PDF on Mac using Preview
Preview is Mac’s built-in app for viewing and editing PDF documents (if you’re new to the document format, here’s what a PDF is). Preview comes installed on every MacBook by default and includes a signature tool that lets you create and save signatures directly within the app — no downloads or accounts needed.
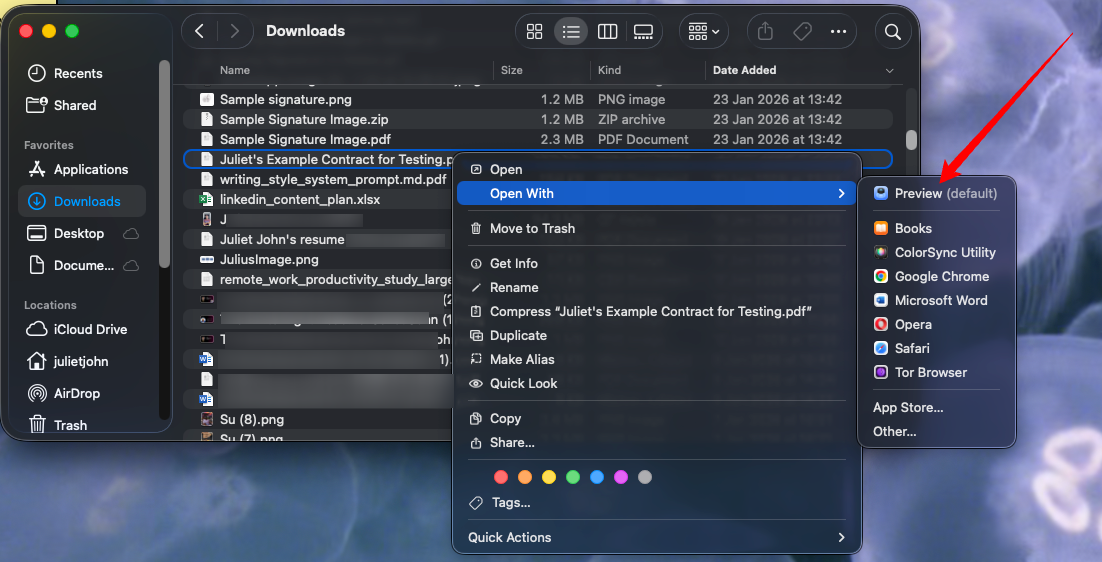
To start signing documents using Preview, first download and save the file you want to sign. We recommend saving to Desktop, where it’ll be easy to find. On your Desktop or in the Finder App (if it’s saved to Downloads), right-click on the document and select Open With > Preview.
Sign a PDF on Mac using your trackpad
- Click the Show Markup Toolbar icon (pencil) in the top right corner of the document window.
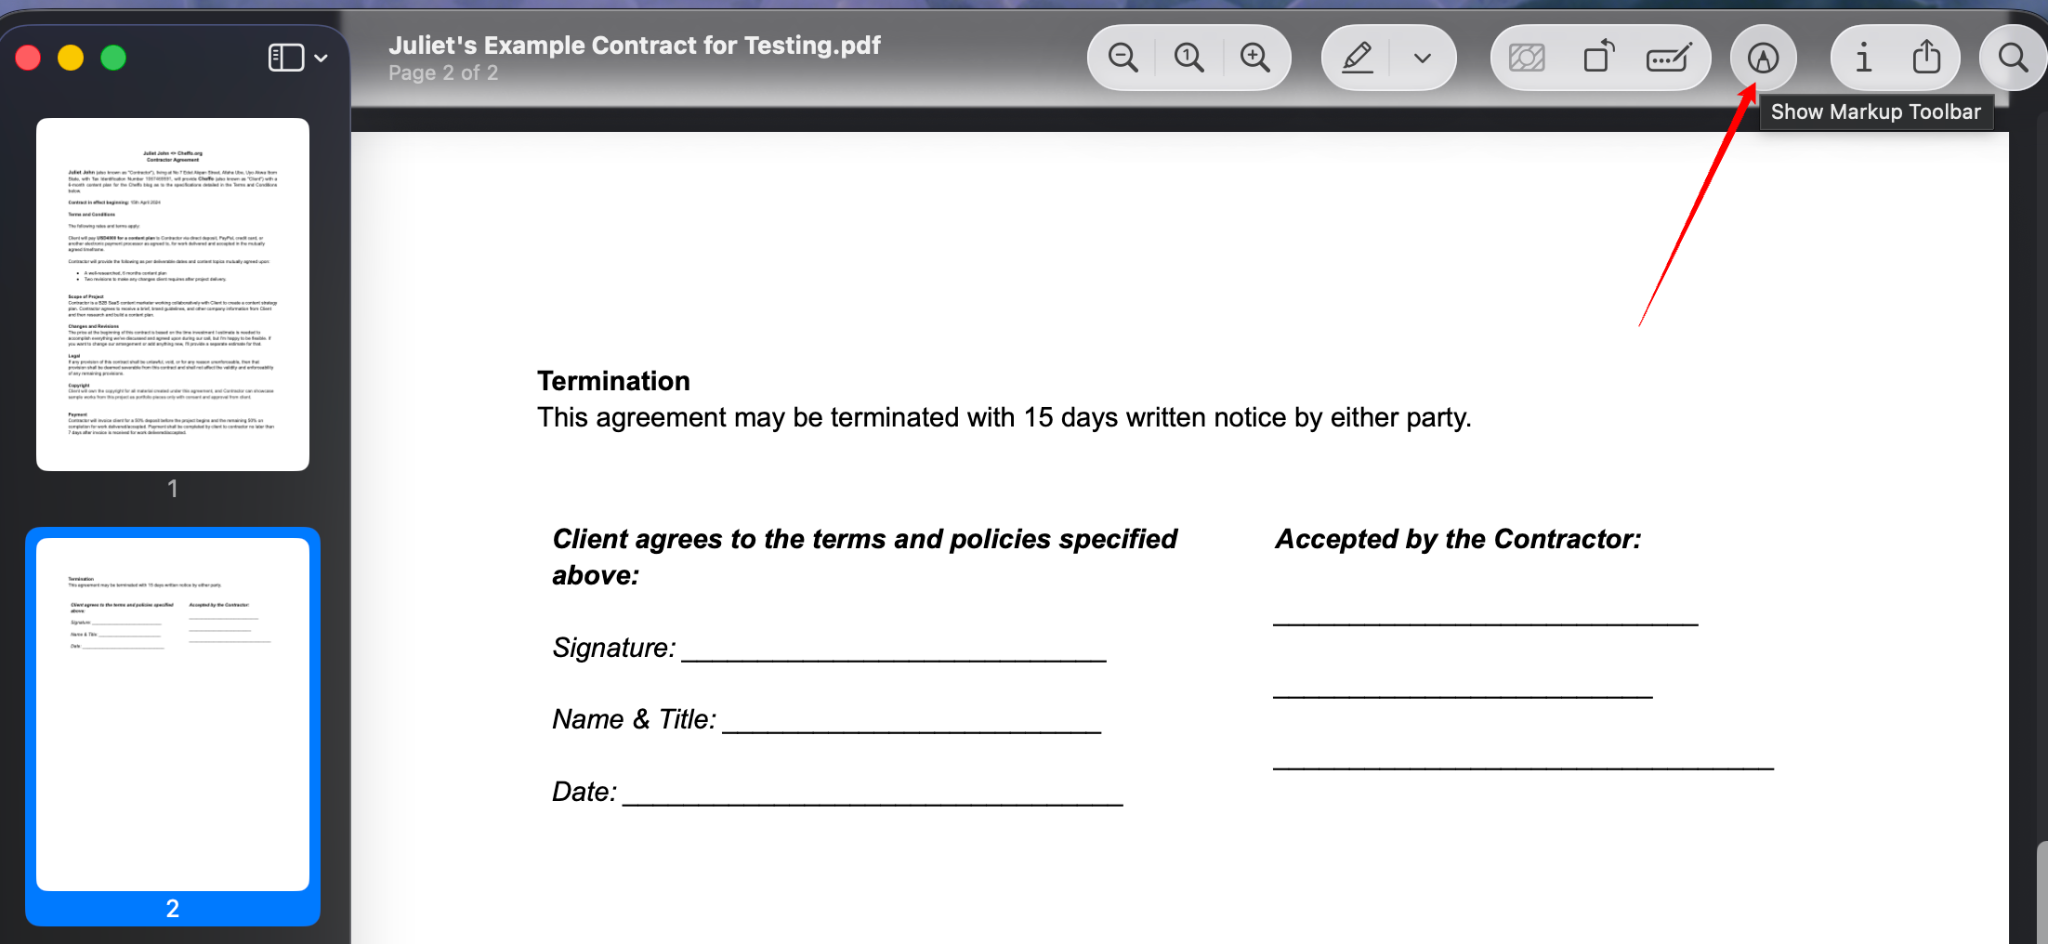
- Select the Sign icon in the toolbar that appears.
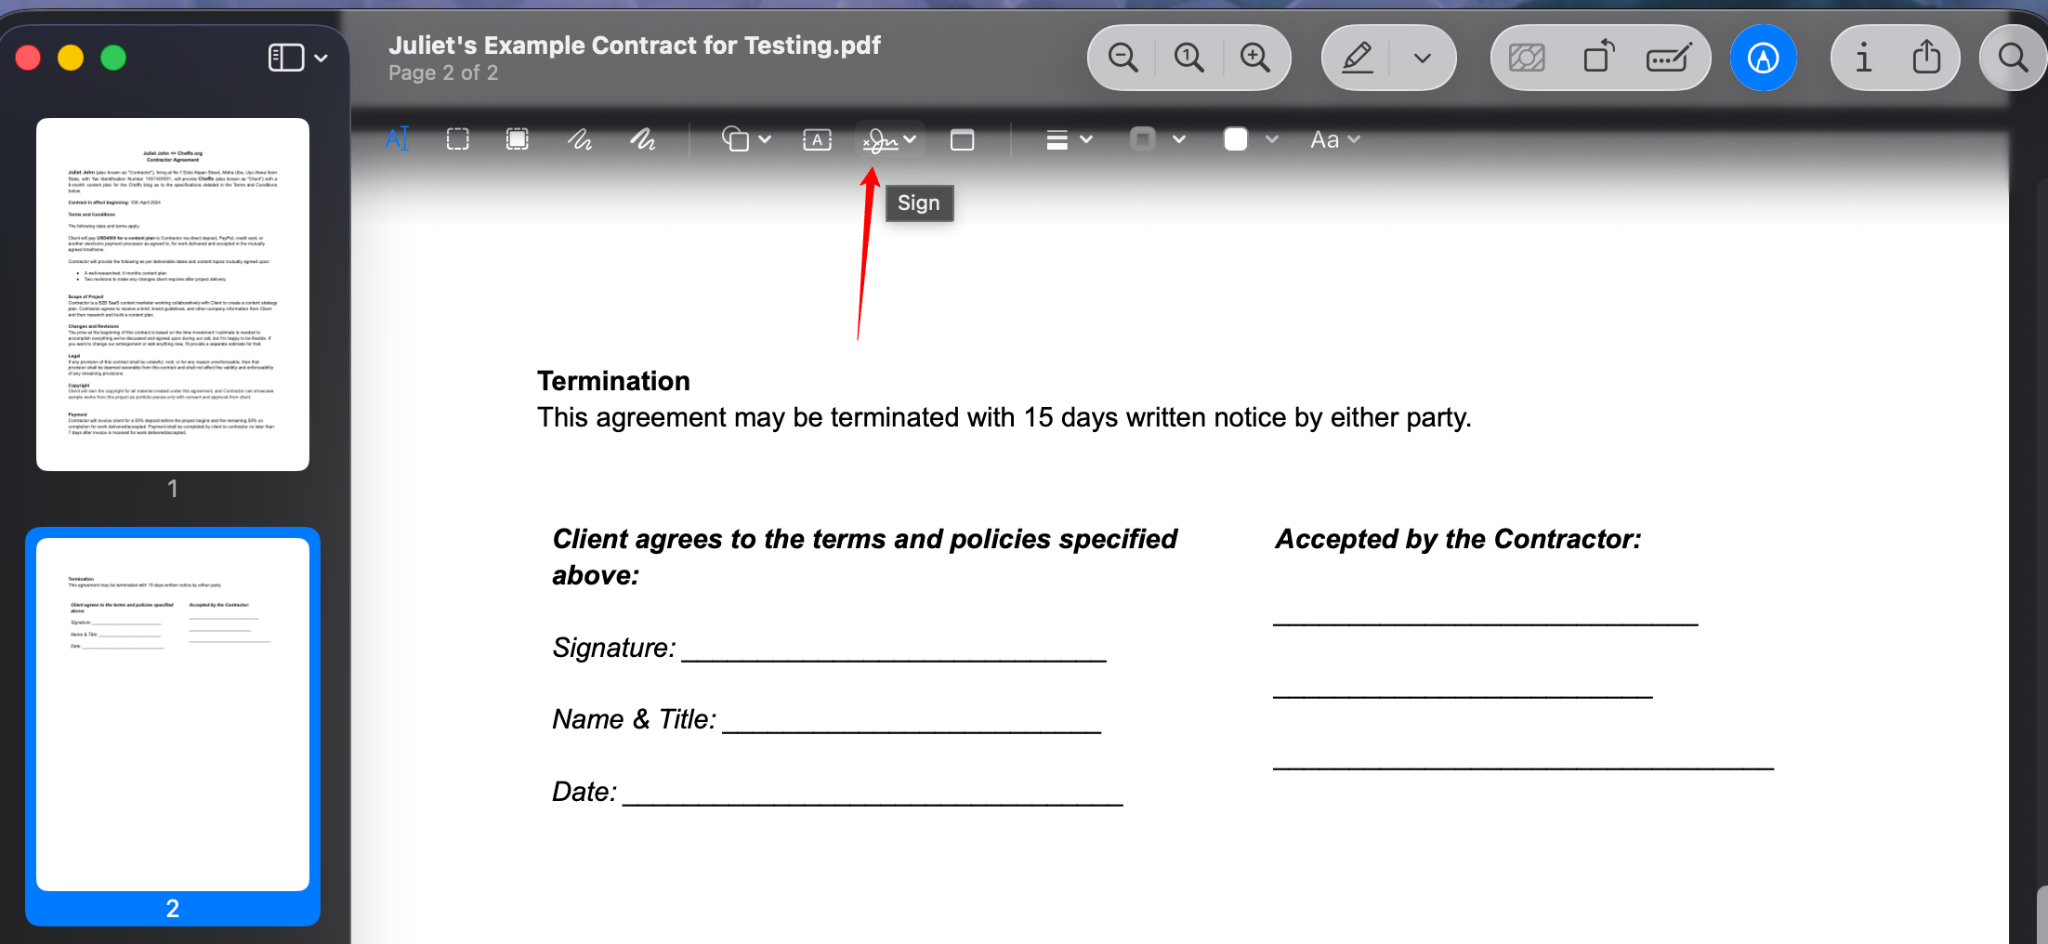
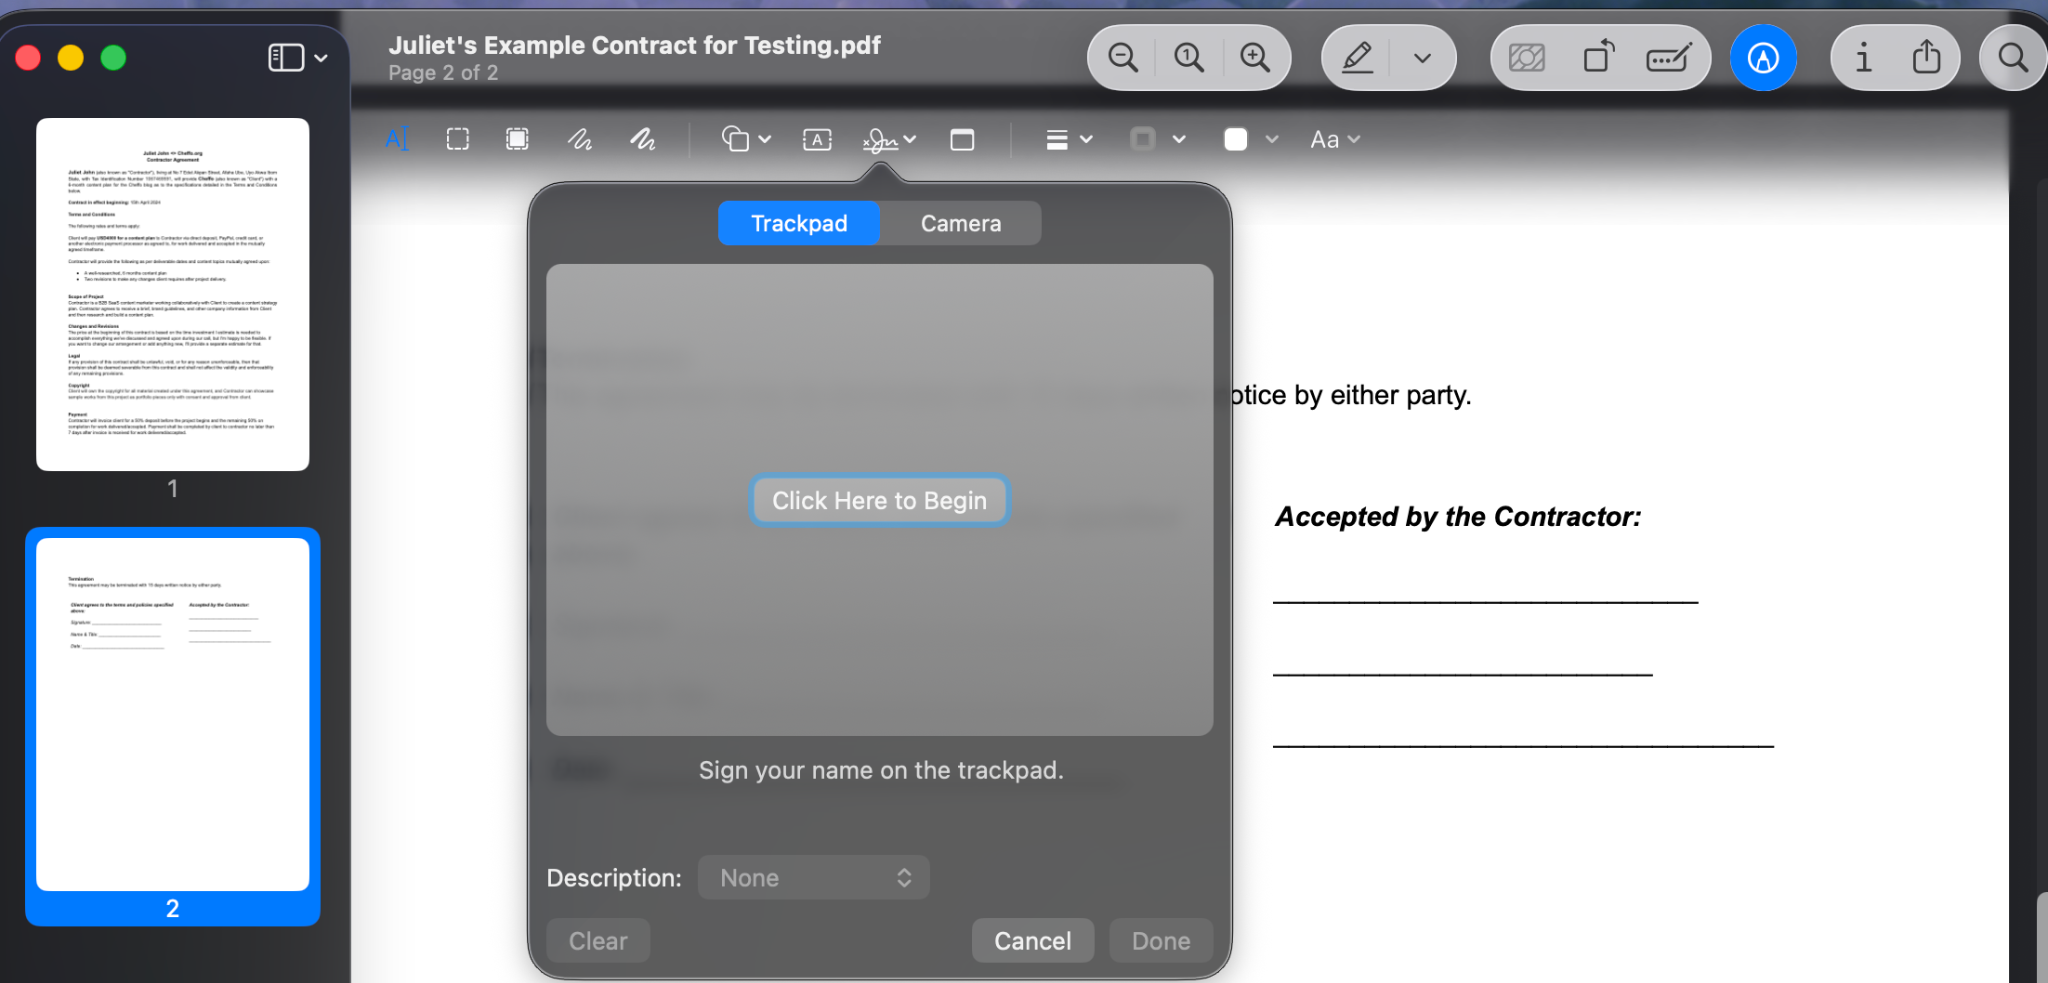
- It’ll open a modal window with two options: Trackpad and Camera. Click Trackpad and select Click Here to Begin.
- Use your trackpad to sign your name.
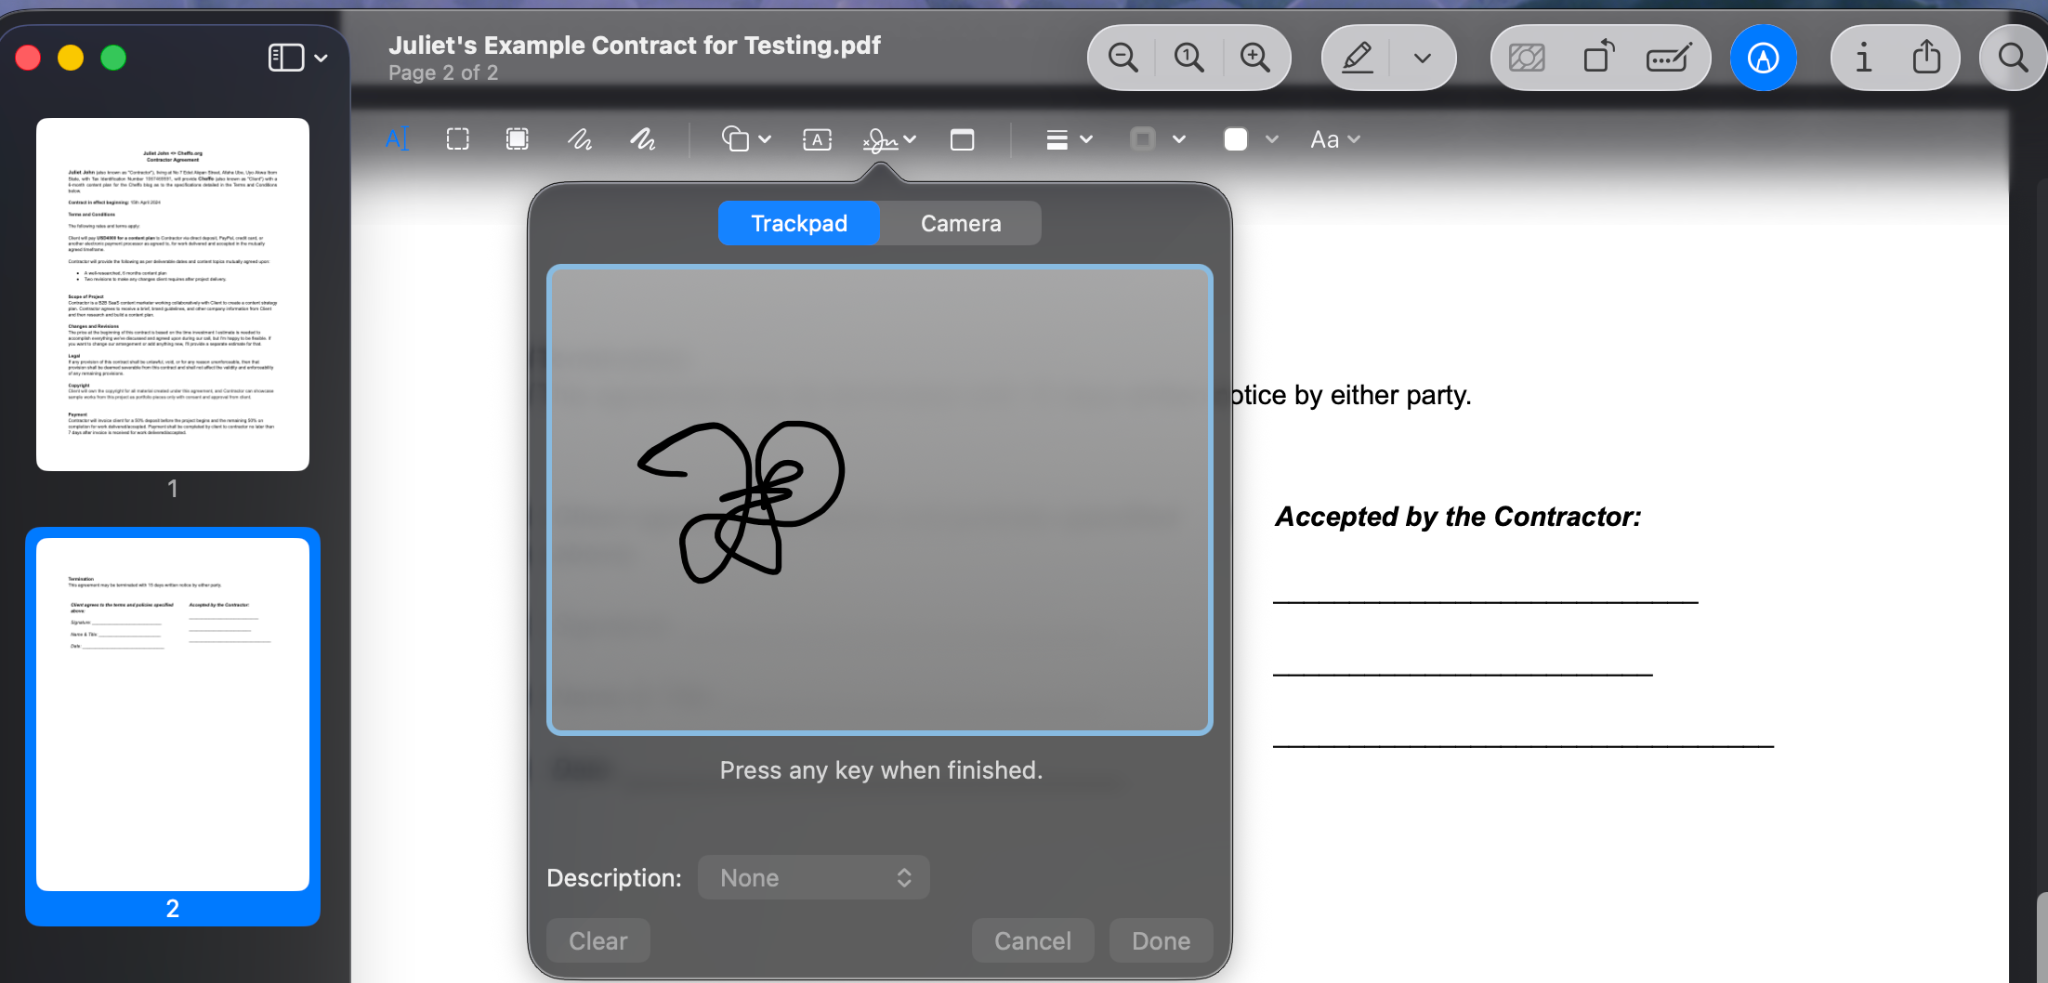
- Press any key when you’re finished, and then click Done.
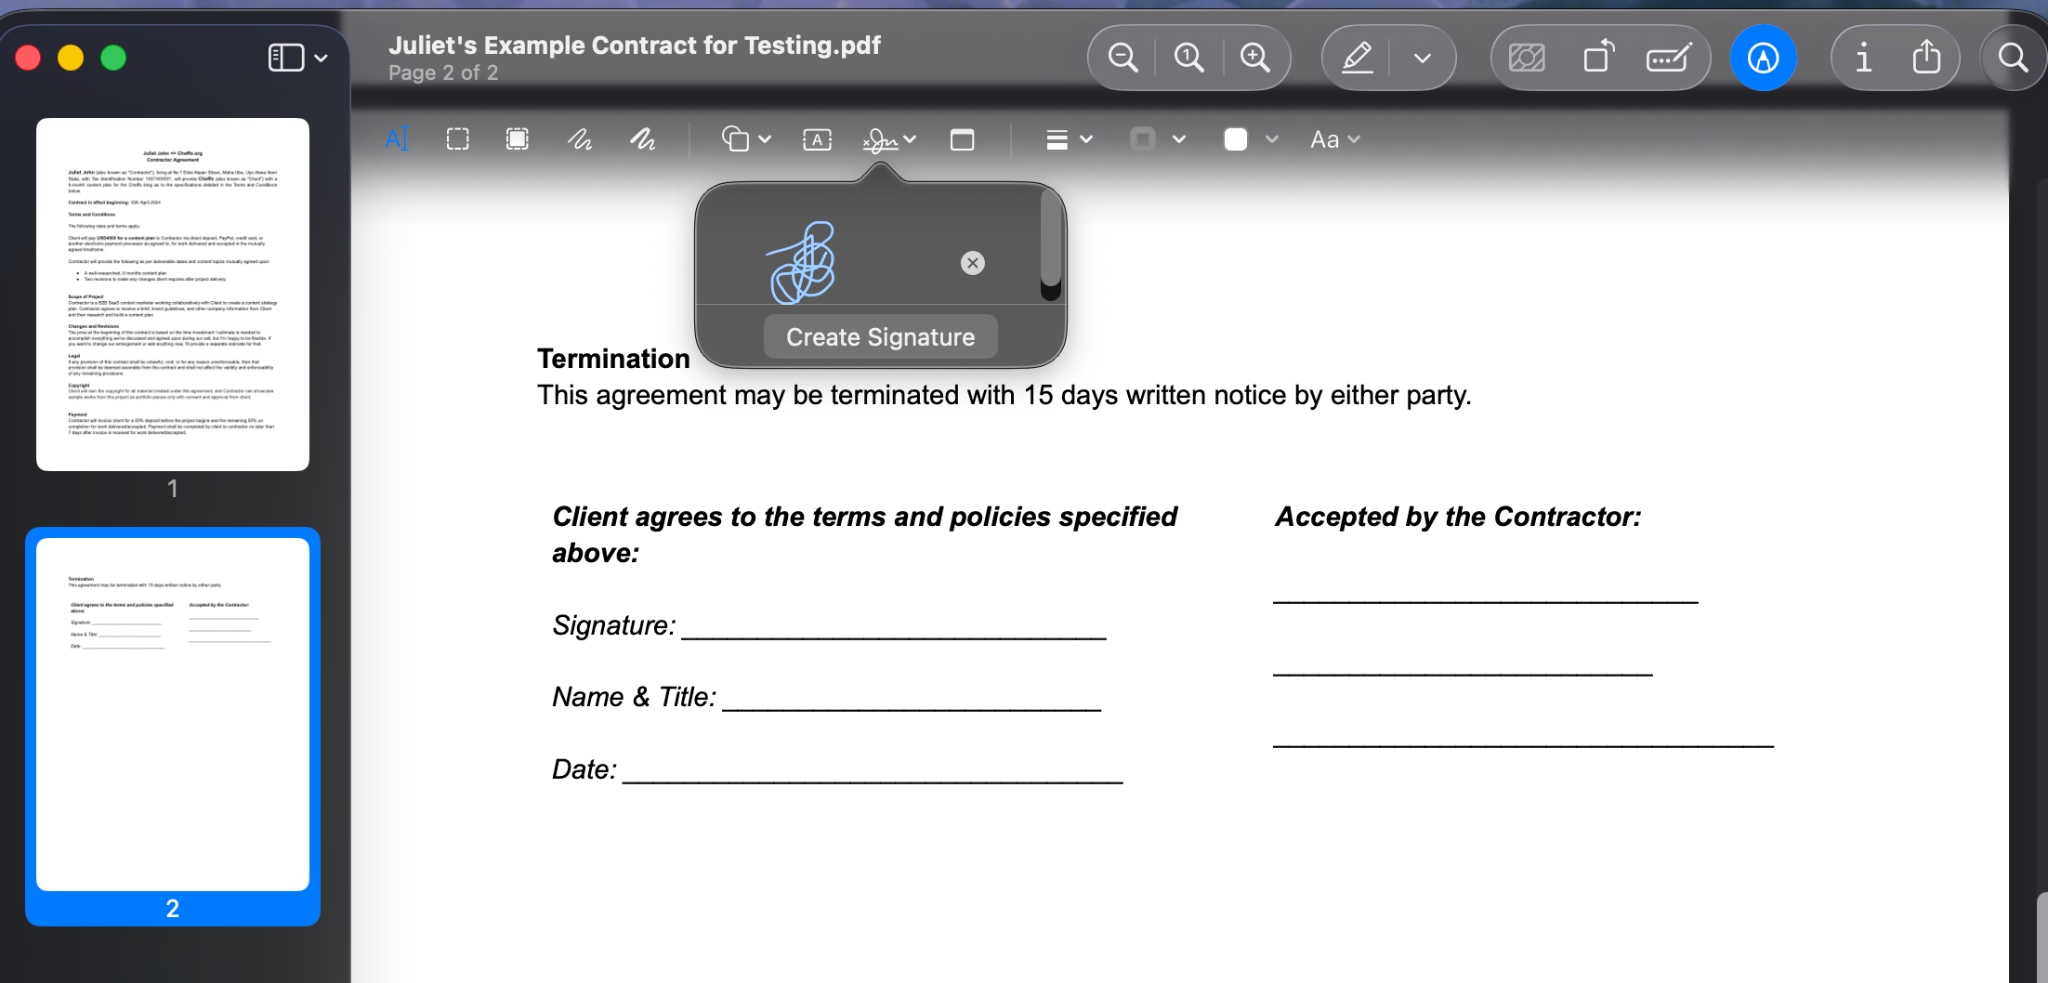
- Your signature will be immediately saved under the Sign icon on your screen.
- Click the signature and drag it to the desired position on the document, then resize it as needed.
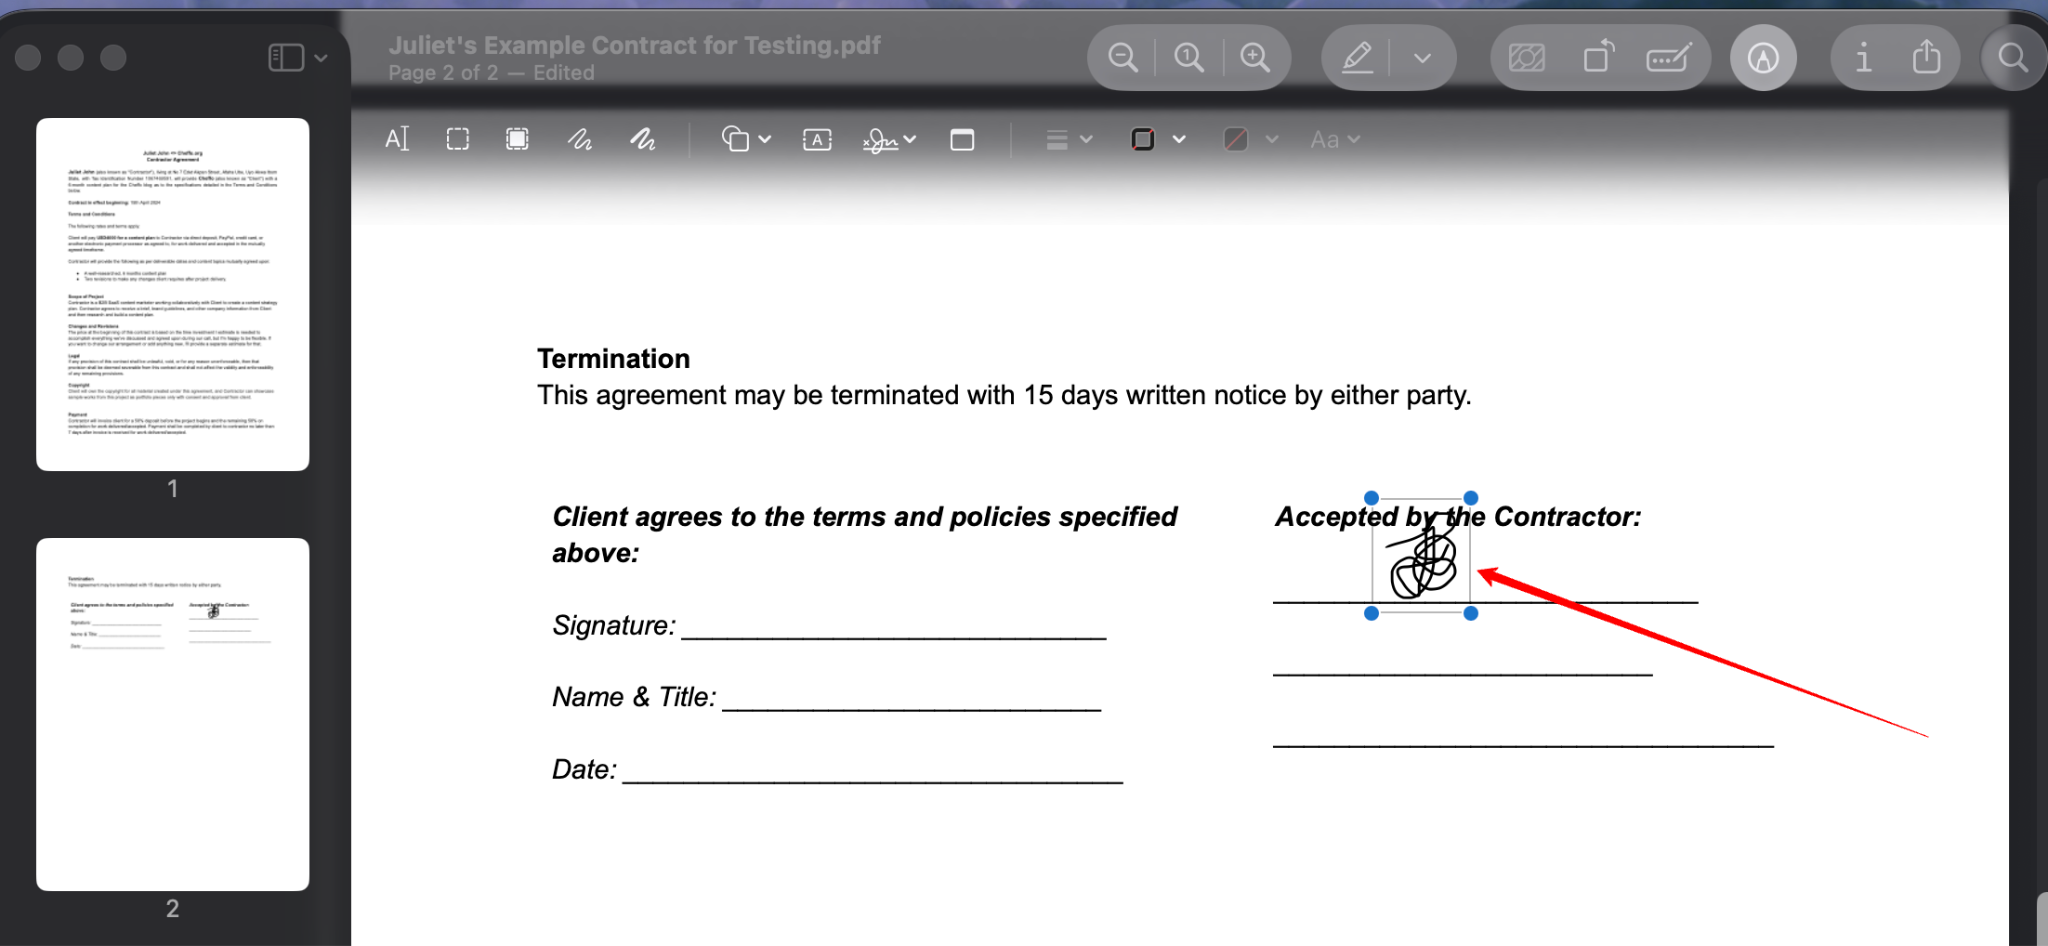
- Press Command + S to save the signed document.
Sign a PDF on Mac using your camera
- Click the Sign icon in the Markup toolbar

- In the signature window that appears, select Camera.
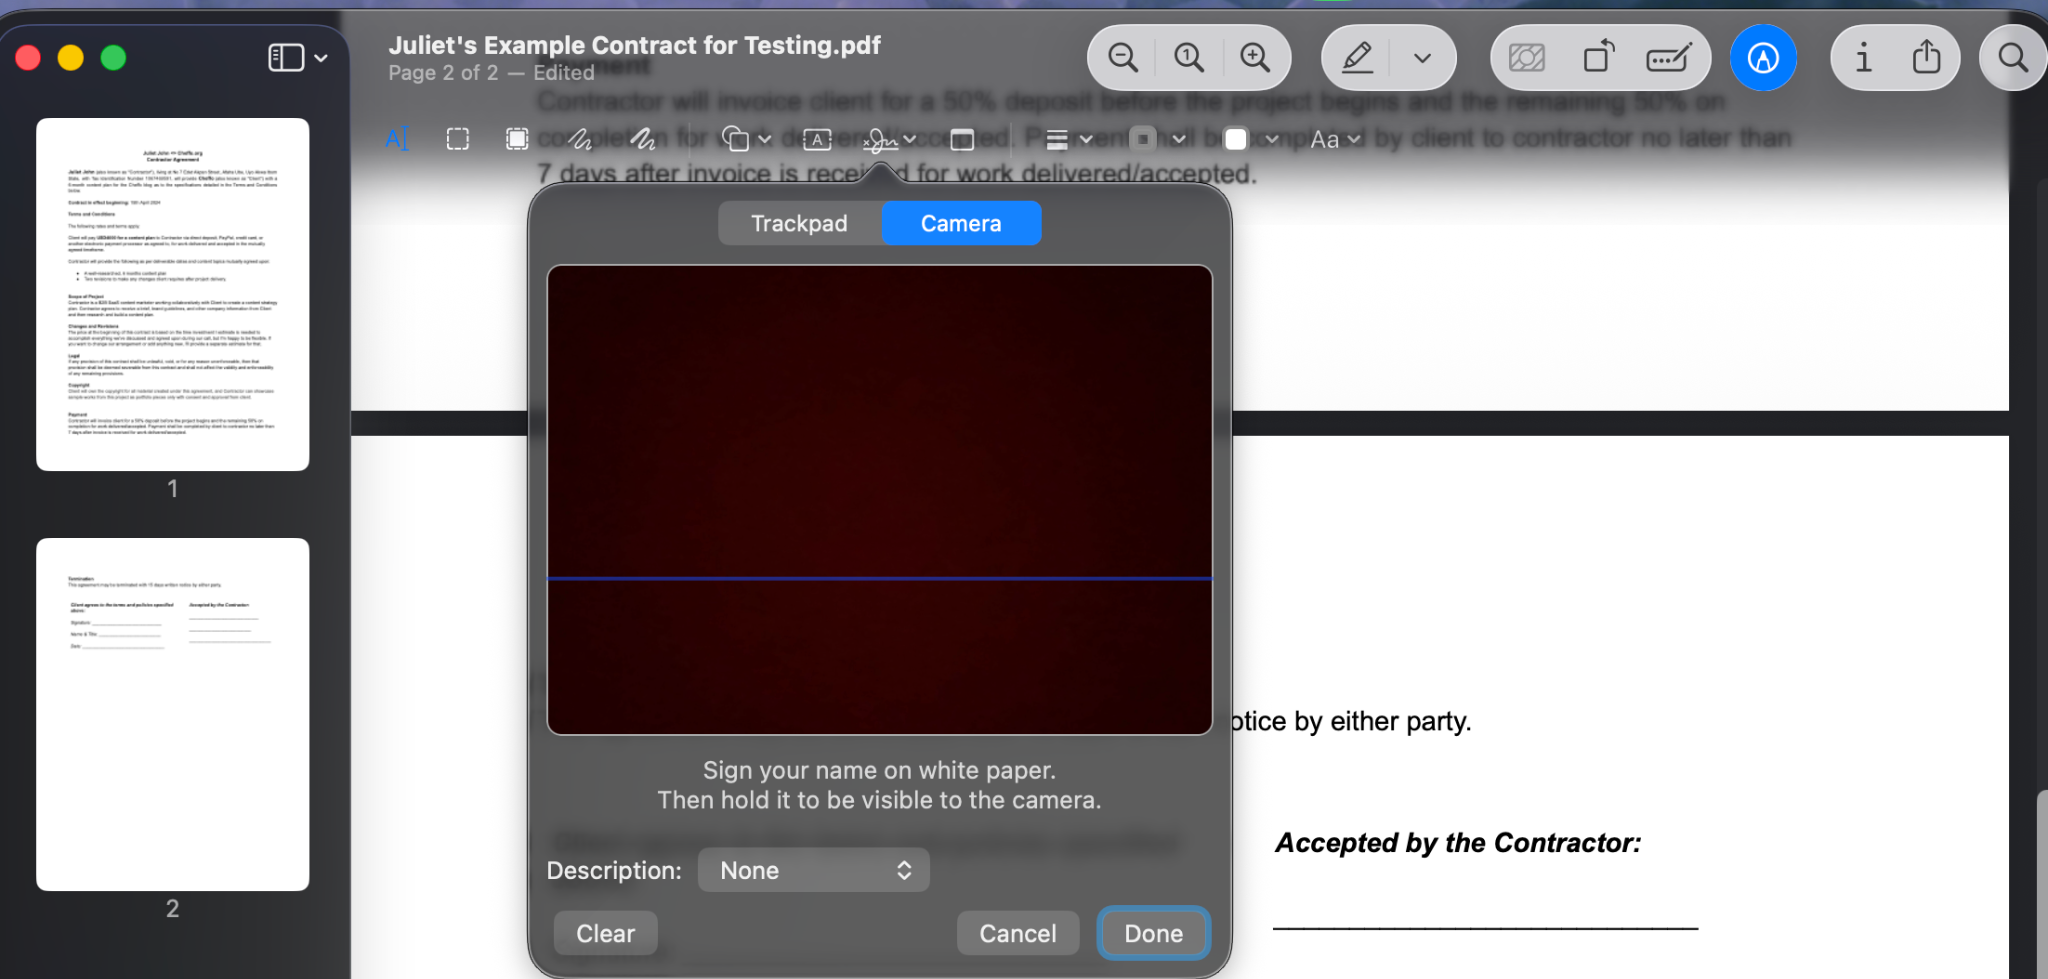
- Sign your signature in blue or black ink on a plain white piece of paper.
- Hold the paper up to your Mac’s camera, and make sure the image is level with the blue line in the window.
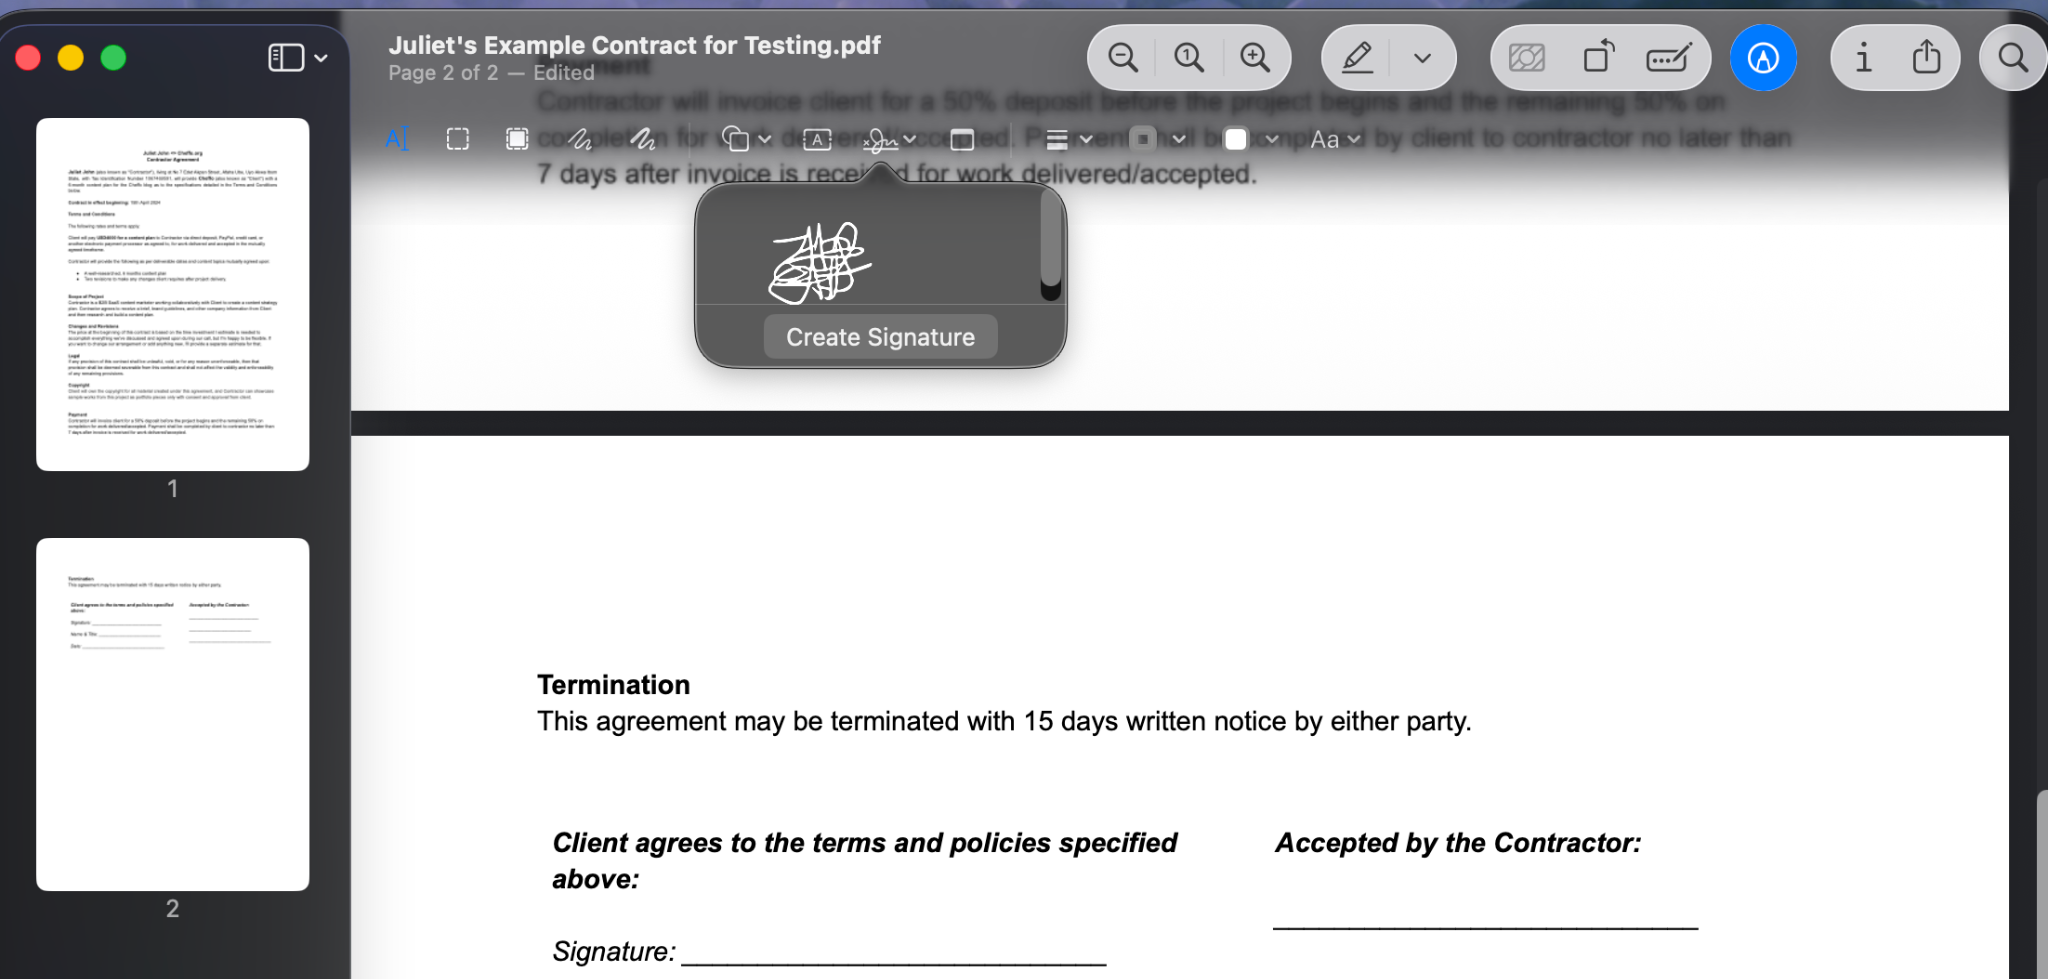
- Once Preview captures a clean image of the signature, click Done.
- Again, the signature will be saved immediately under the Sign icon. Click to insert it into the PDF.
- Drag the signature to the correct position and resize as needed.
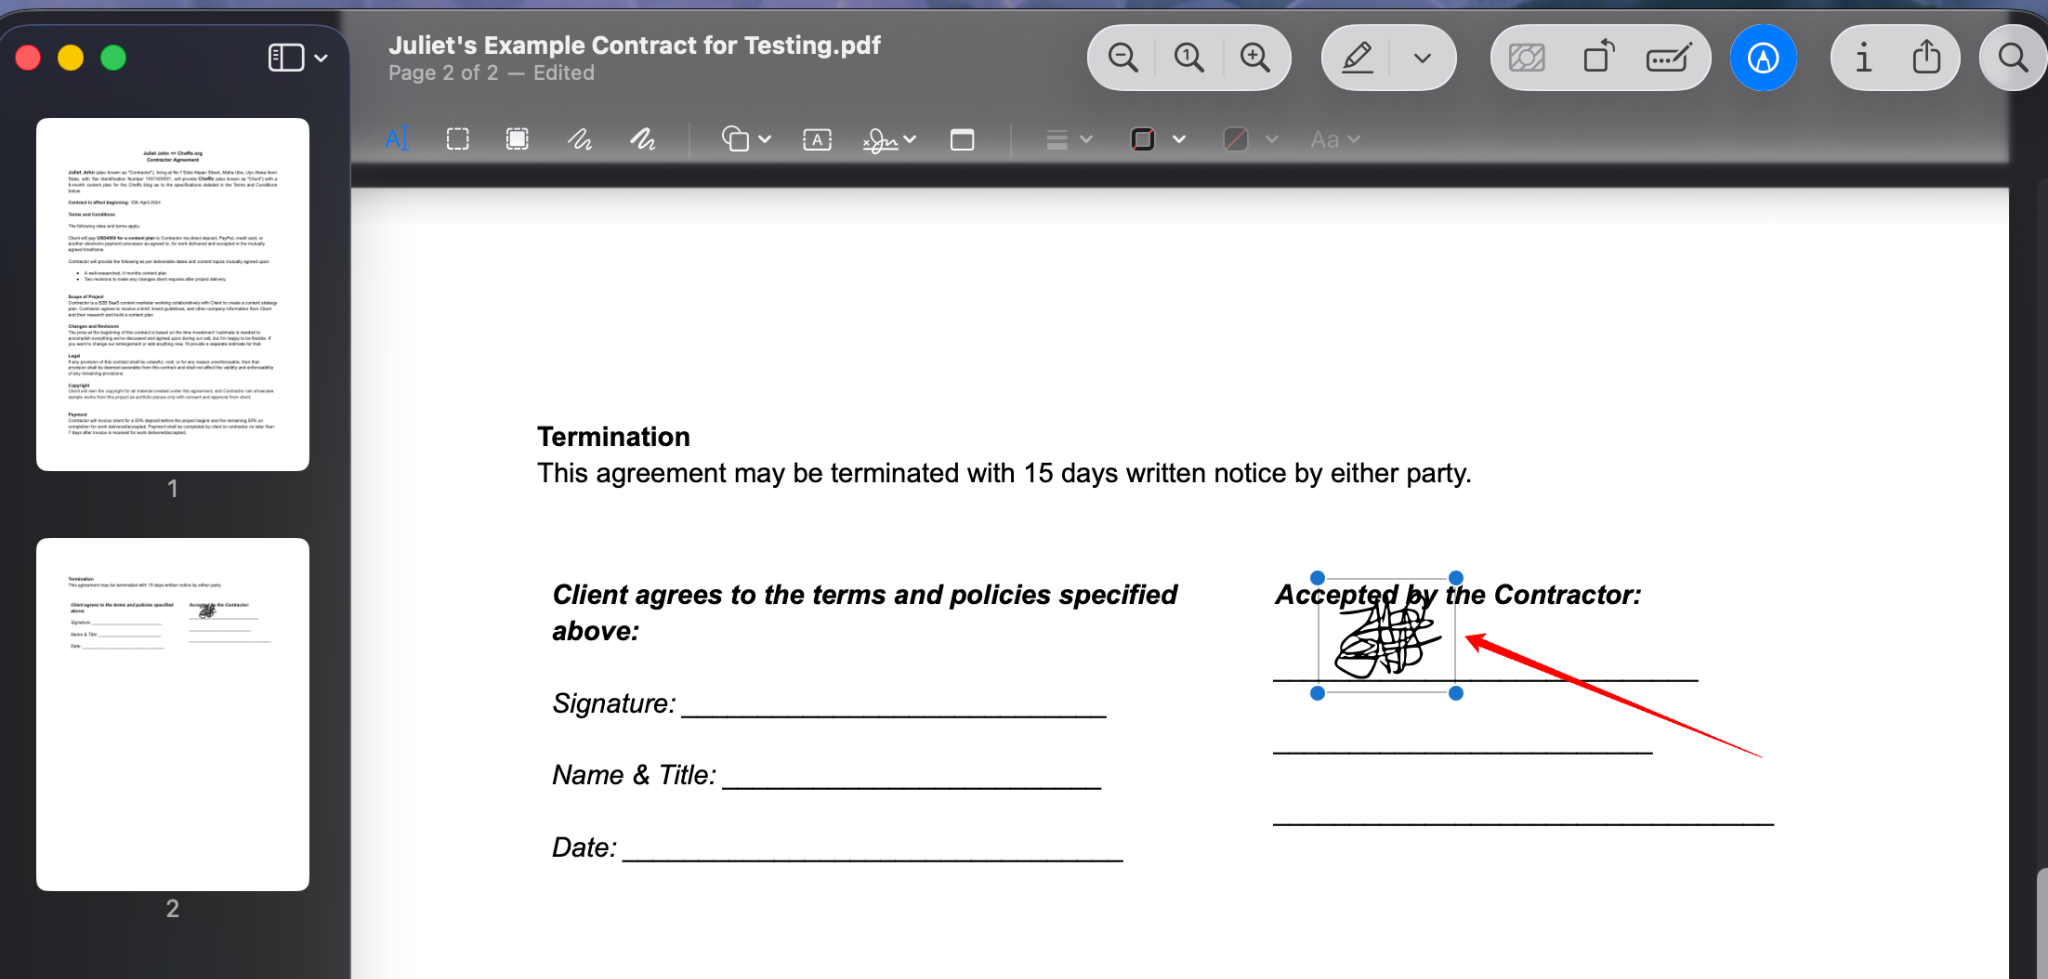
- Press Command + S to save the signed document.
Sign a PDF on Mac using your iPhone or iPad
For this method, you need to have your iPhone or iPad close to your MacBook.
- Click the Sign icon in the Markup toolbar.

- Click iPhone or iPad in the signature window.
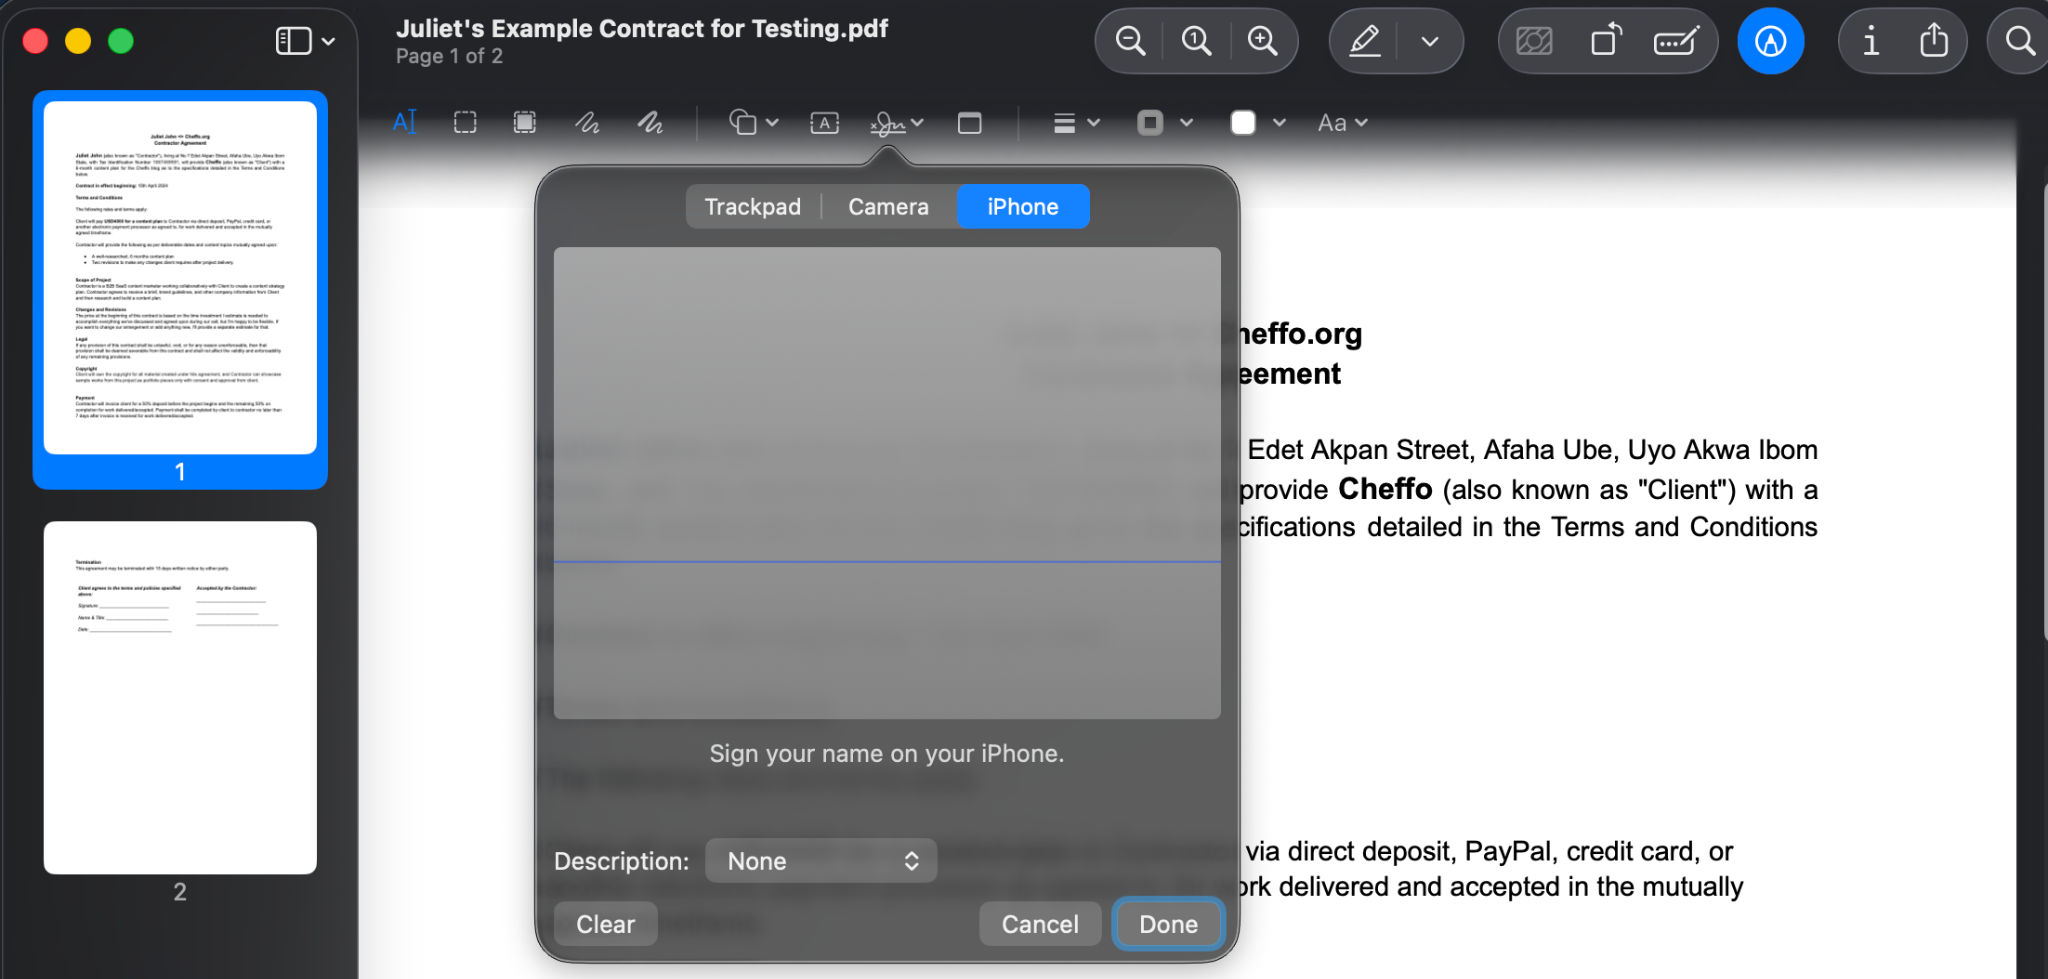
- It’ll instantly open a signing modal on your iPhone or iPad.
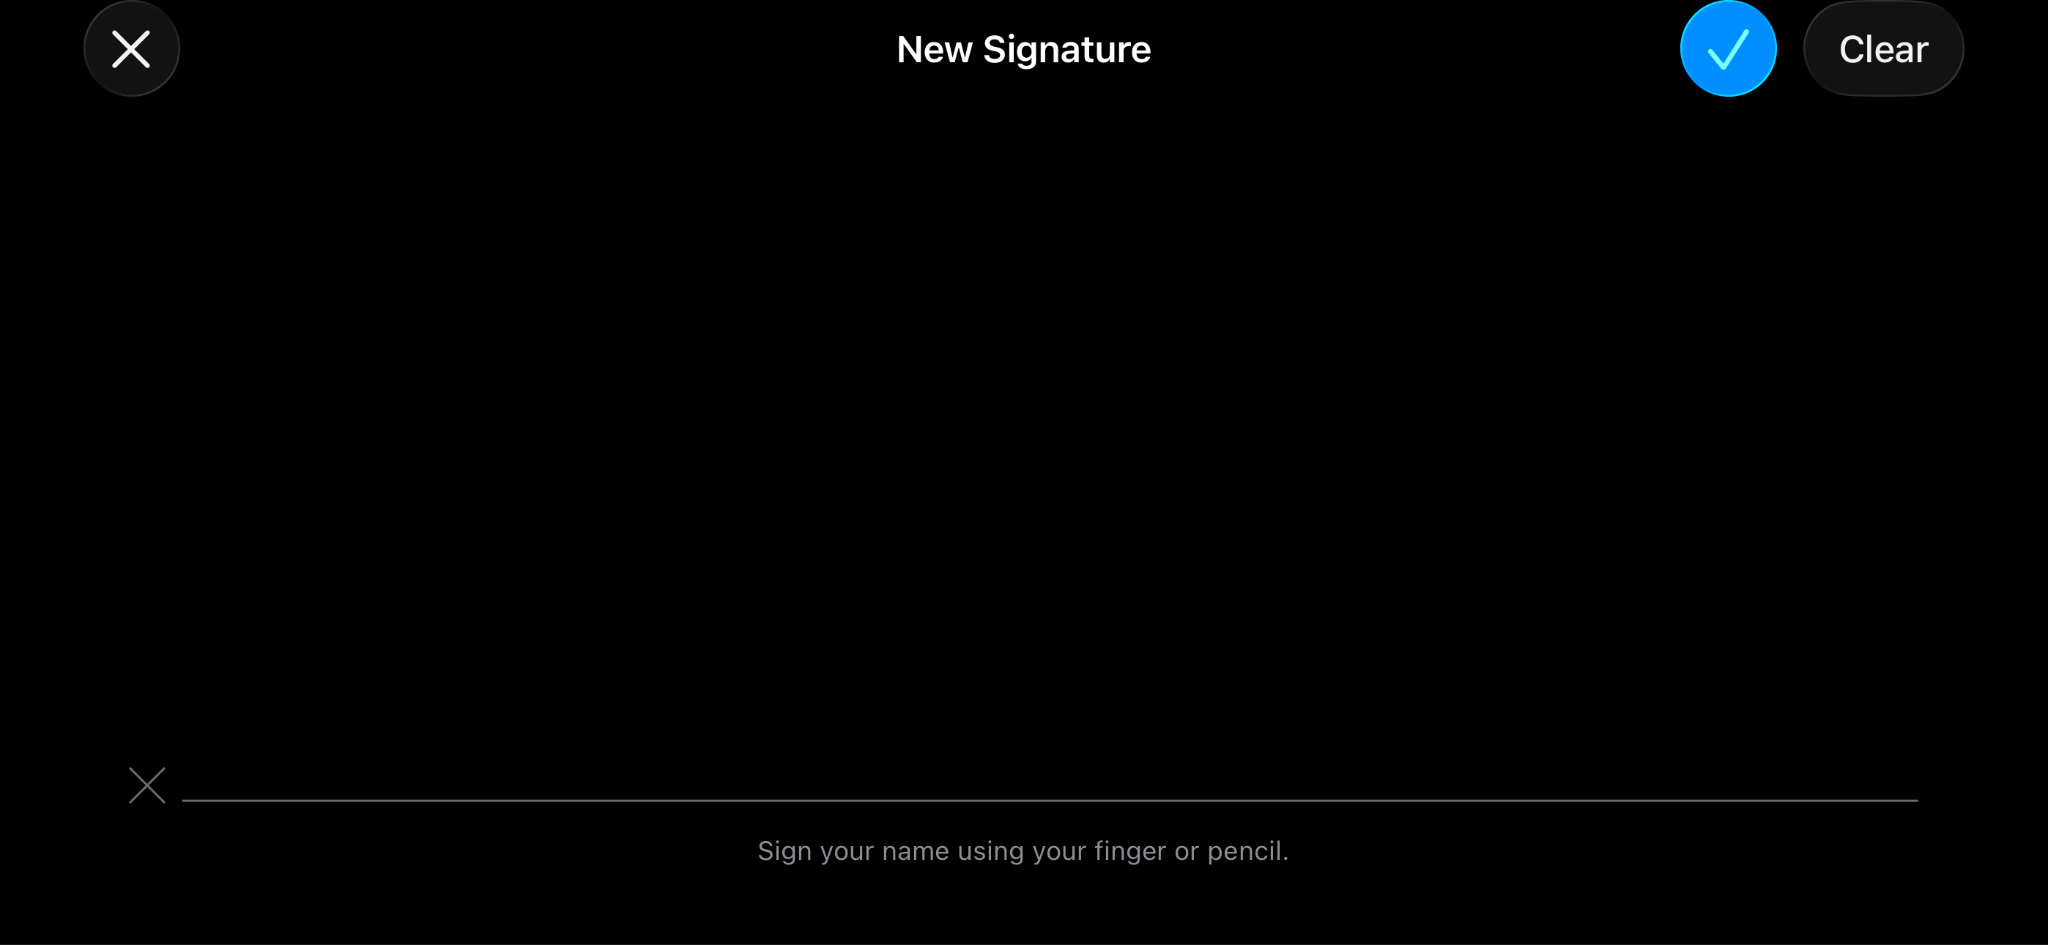
- Sign your name on the screen using your finger or Apple Pencil, then tap the blue checkmark when you’re done.
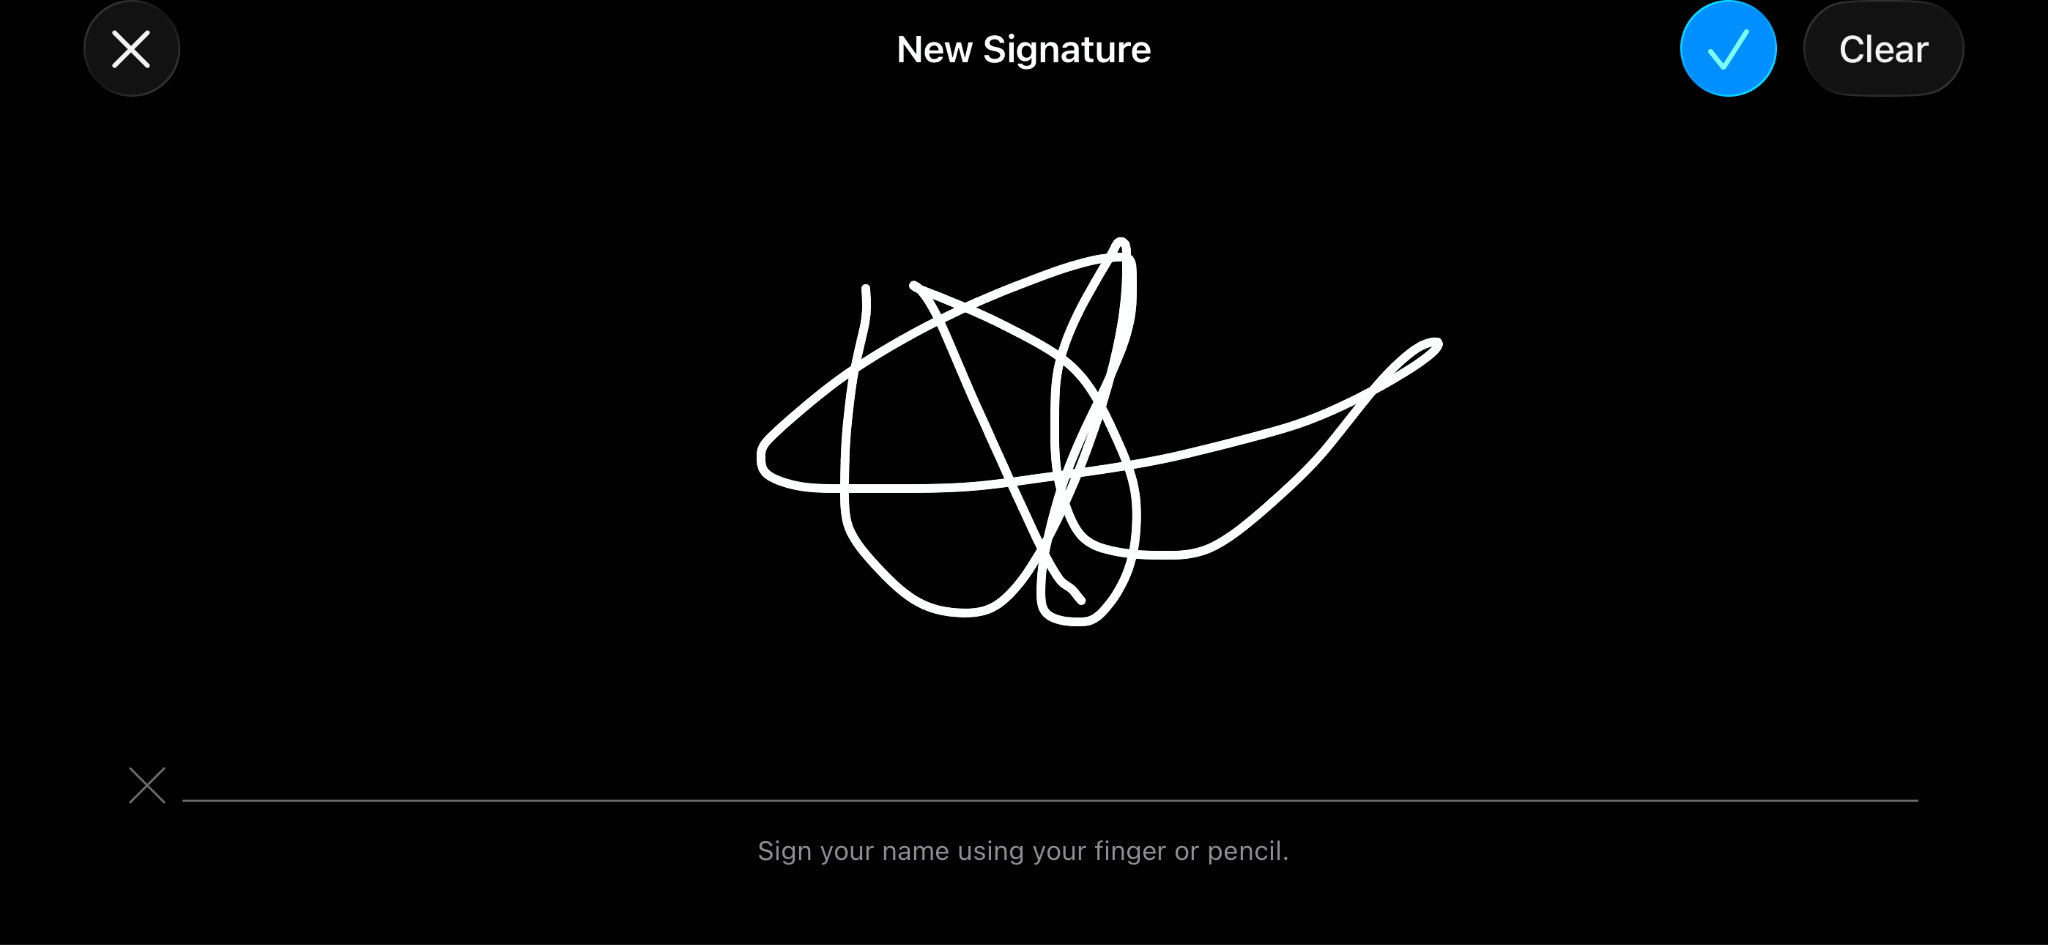
- The signature will be saved instantly and appear automatically under the Sign icon on your Mac.
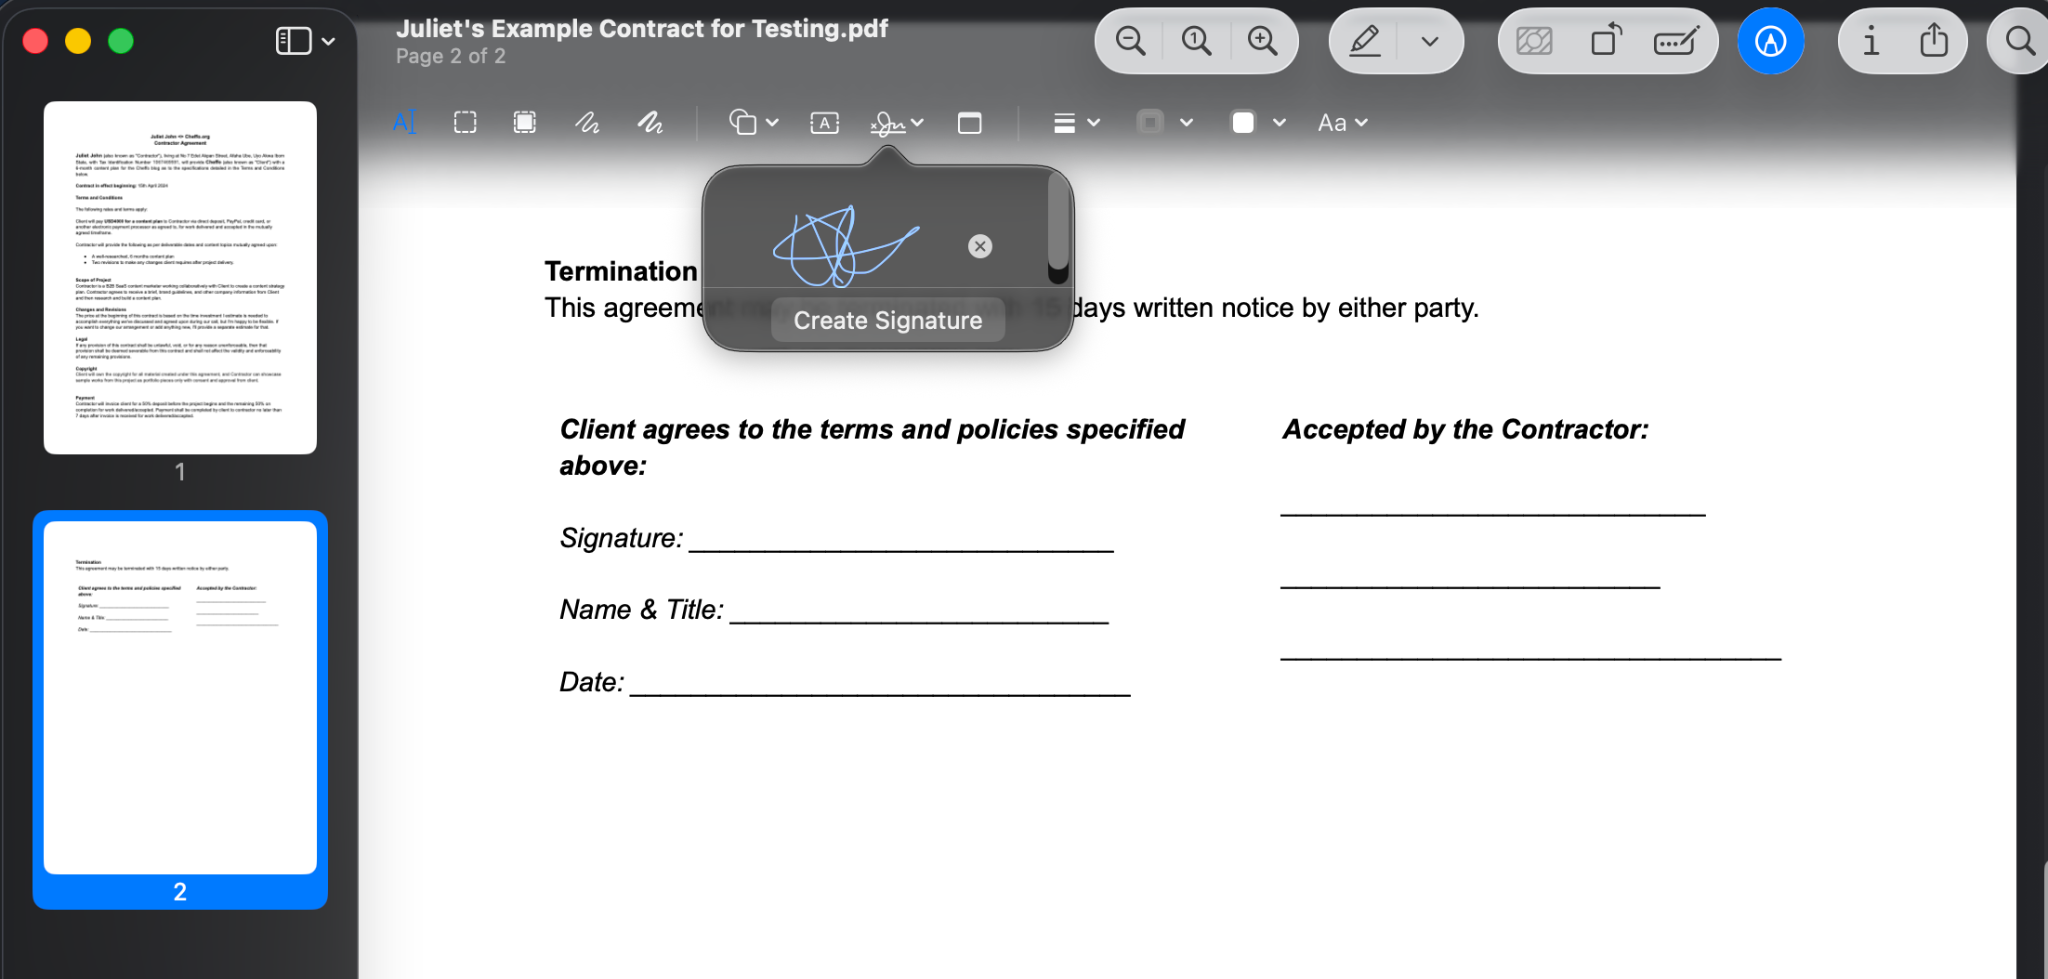
- Click the signature to insert it into the PDF. Then drag to the correct position and resize as needed.
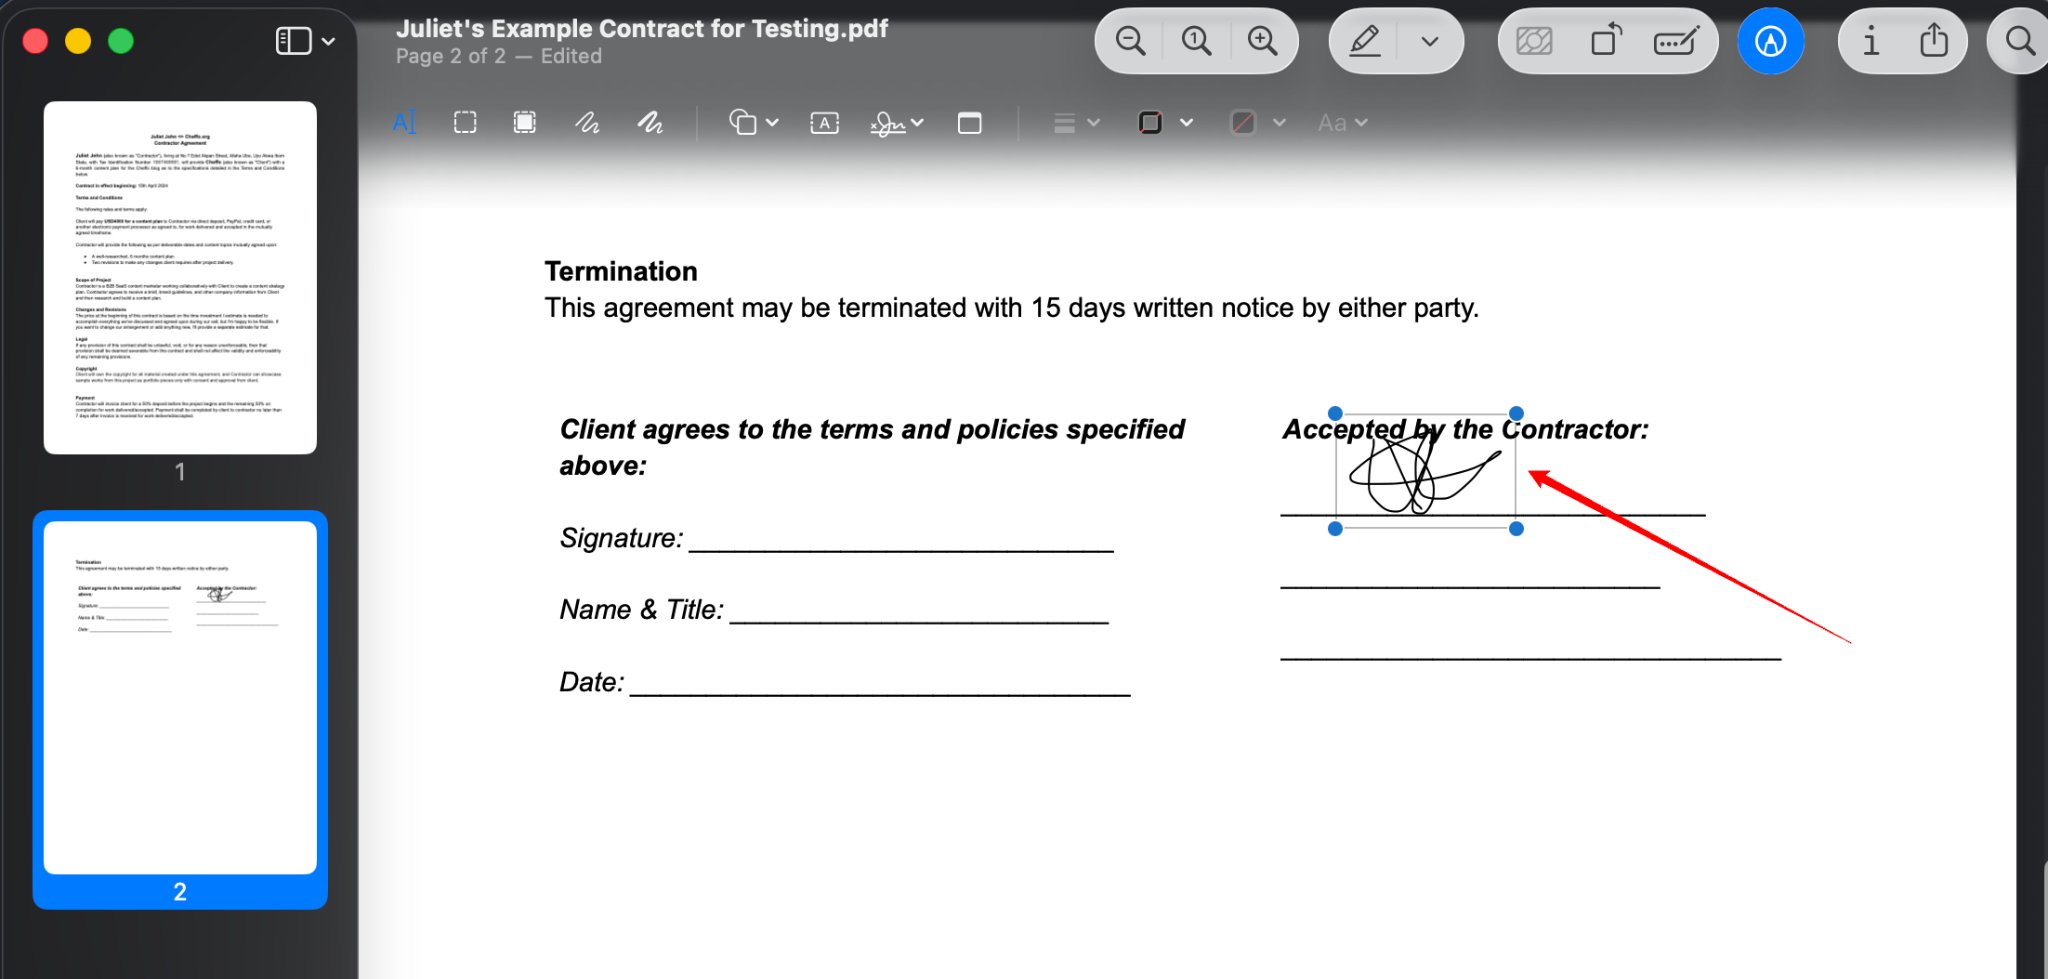
- Press Command + S to save the signed document.
How to sign a PDF on MacBook using the Mail app
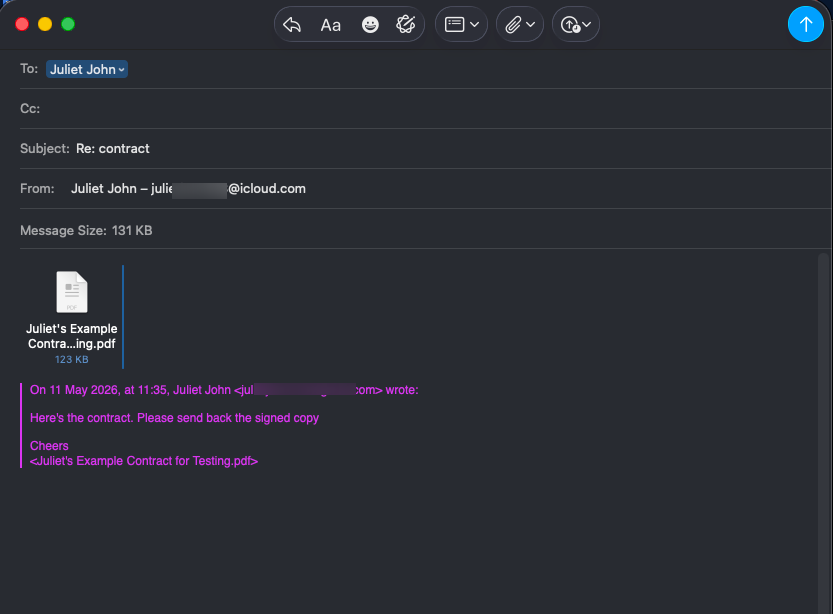
If the document requiring your signature is in your Mail app, you can conveniently sign it and return it without saving it to your MacBook first. Follow the steps below to sign PDF attachments from Apple Mail.
- Go to the Mail app on your Mac, then open the email with the PDF attachment.

- Double-click on the PDF to open it in the Preview app.
- Next, follow the steps covered above to sign the PDF using your Trackpad, Camera, or iPhone/iPad.
- When done, click File > Save in the top menu bar, then select Reply to [Sender] or New Mail Message.
![PDF document showing the Save options, such as "Reply to [Sender]" or "New Mail Message"](https://jotform.pro-bark.biz/blog/wp-content/uploads/2026/06/image-12.png)
- The signed PDF will automatically attach to a reply email. You can add your message and hit Send.
How to flatten a PDF signature on Mac
After you sign a PDF in Preview and save it, the signature is stored as an editable annotation on the document. This means that anyone who opens the file in Preview can move, resize, or delete the signature.
Flattening prevents this by permanently merging the PDF and other annotations, such as your name and date, into the document — making them uneditable and indistinguishable from the rest of the document.
If you’re signing important documents that need to remain final, such as an NDA, rental agreement, or official form, flattening ensures they cannot be tampered with after you sign.
Here’s how to flatten your signed PDF on Mac:
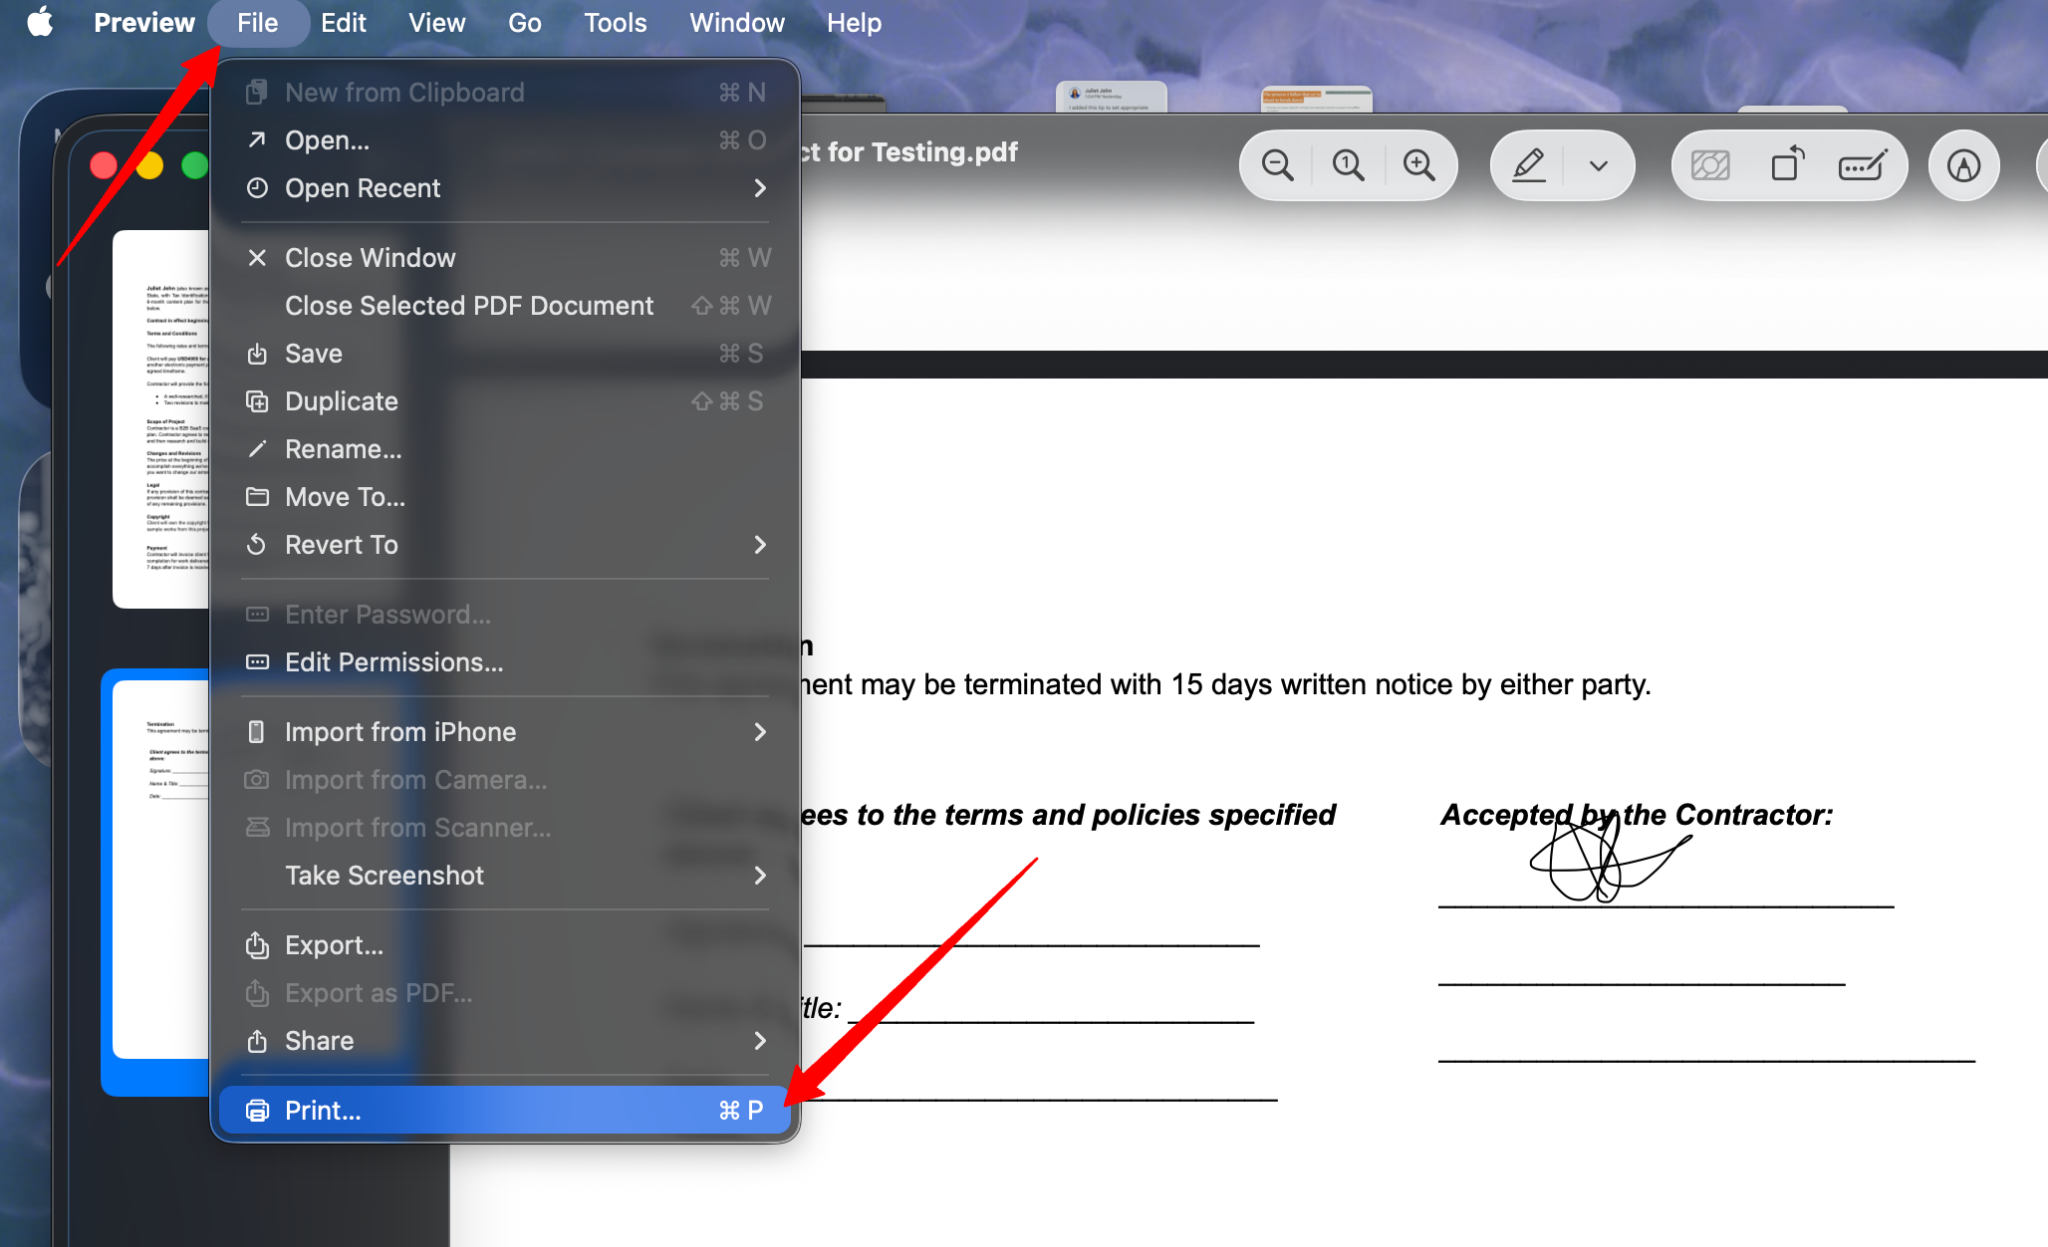
- With the signed PDF open, click File in the top menu bar and select Print from the list of options.
- In the Print window, find the PDF dropdown menu at the bottom of the screen and select Save as PDF to create a new, non-editable version of the document.
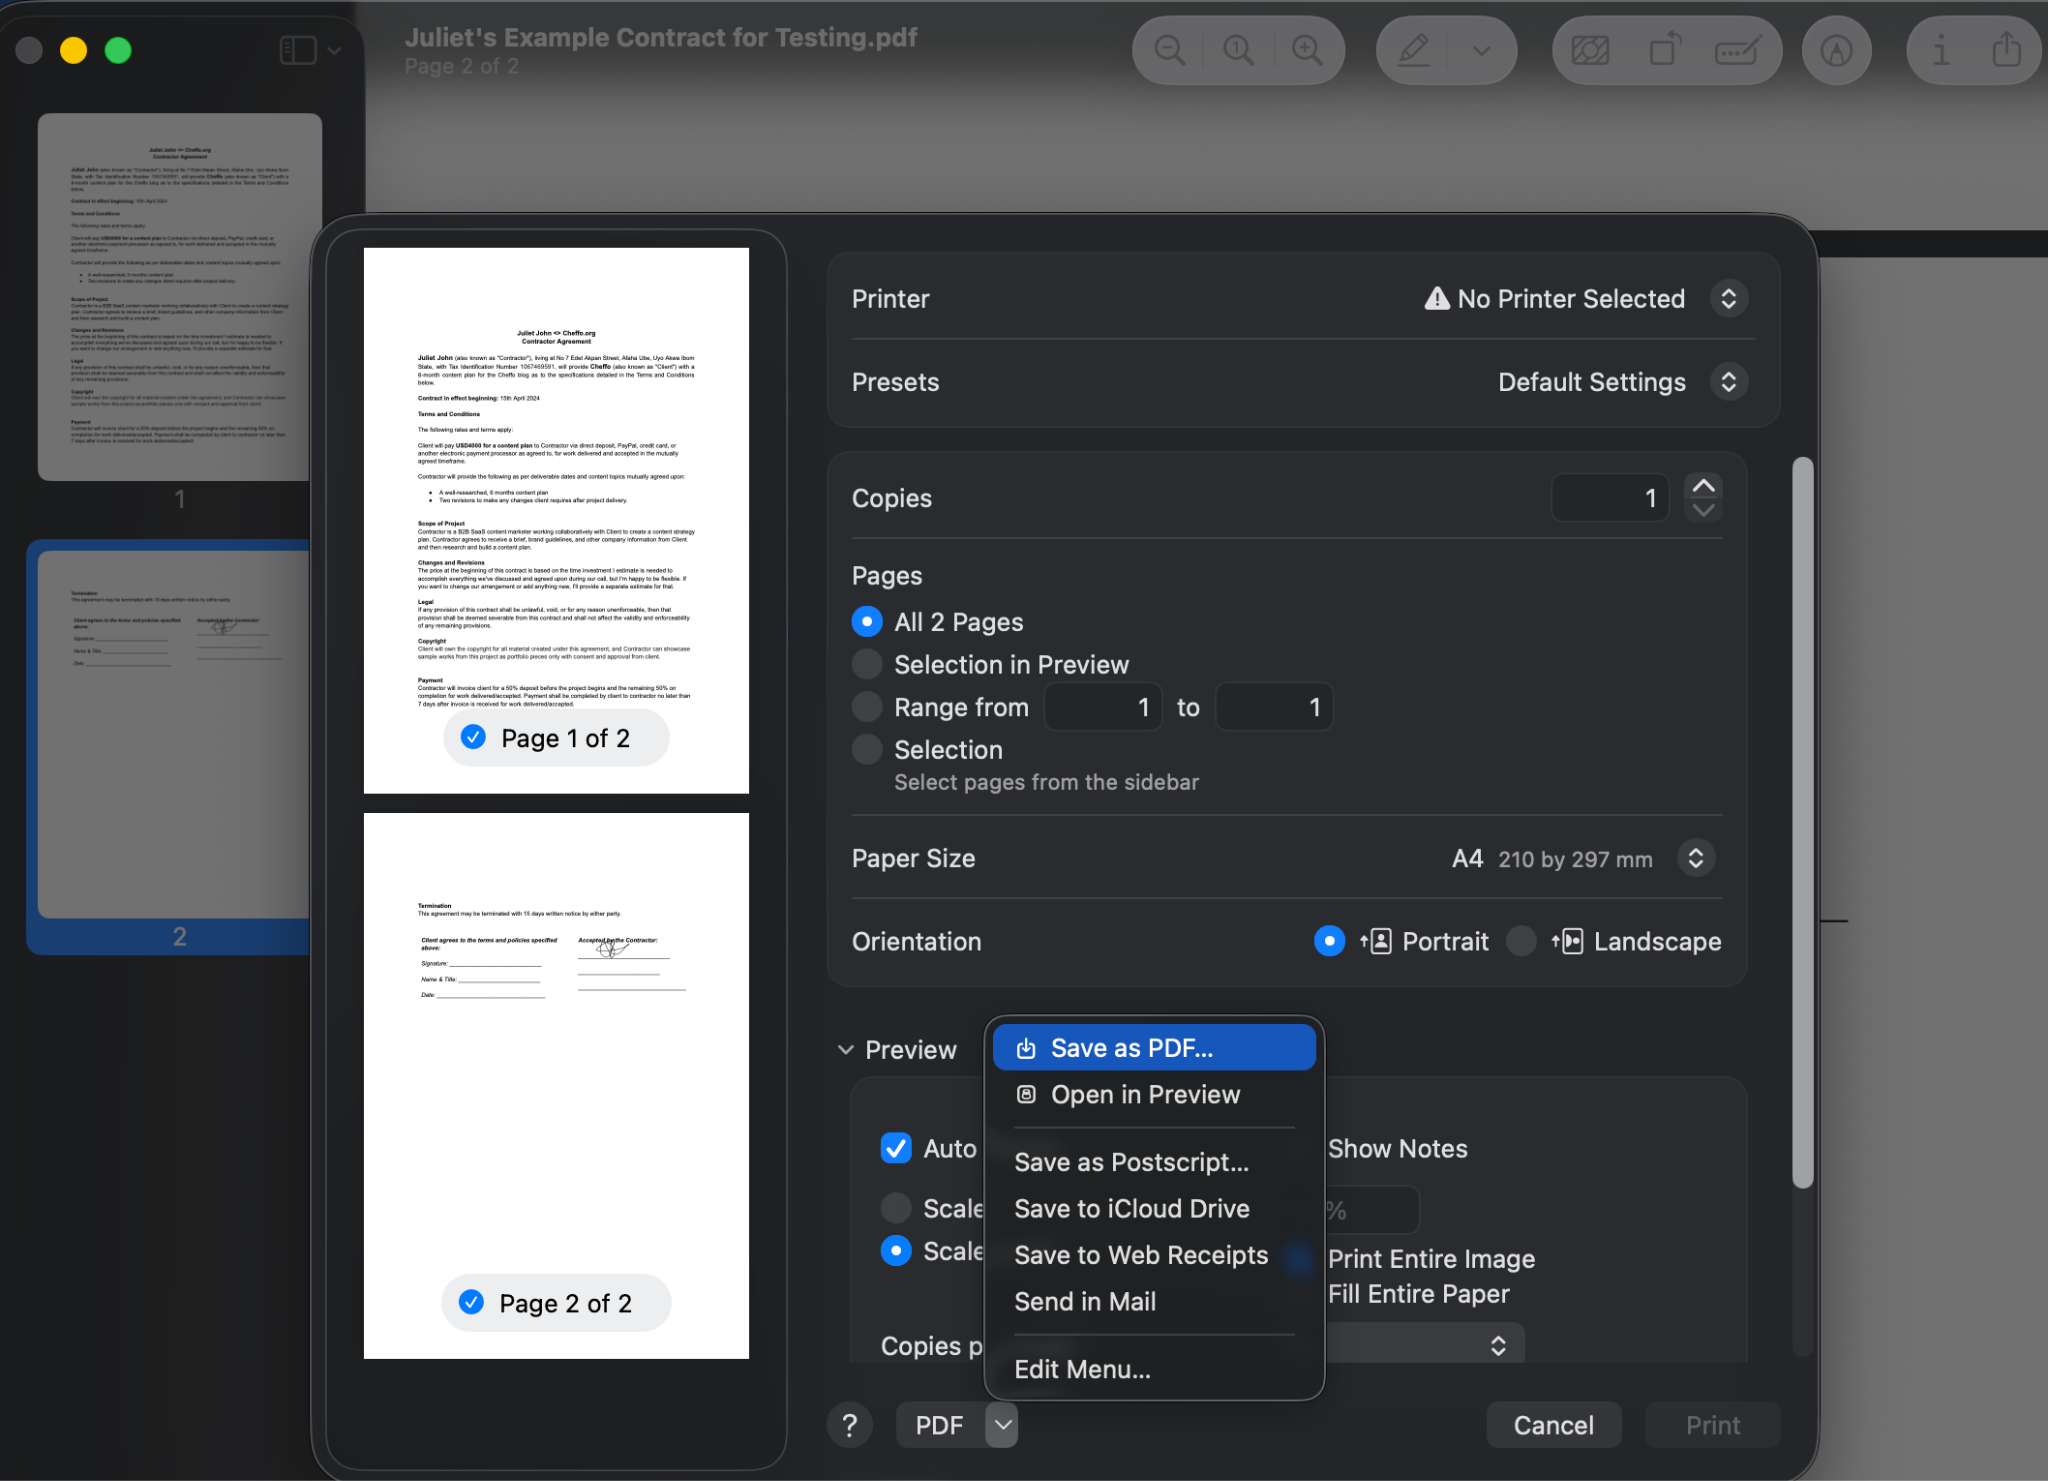
- Name the file, choose a save location, and click Save.
This process will save the new PDF as a different file, so make sure to delete or archive the original file with editable annotations to avoid sending the wrong version.
If you need to flatten a PDF without opening Preview, you can use Jotform’s free PDF flattening tool. It lets you upload and flatten any document in seconds — no software or account required.
Pro Tip
As well as Flatten PDF, Jotform offers other PDF tools to simplify your PDF management process, including
Preview signature tips for better results
As you can see, adding a signature to a PDF on a MacBook is easy. But the following tips will help you save even more time and get cleaner, more consistent results.
- Once you create a signature in Preview, it’s automatically saved and available every time you open a PDF. You don’t need to recreate it for each document.
- Preview lets you save more than one signature, which is useful if you need both a full name signature and initials, depending on the document.
- If you use iCloud, you can sign a PDF on iPhone, iPad, and Mac with the same saved signatures — automatically synced across all your devices. There’s no need to recreate them on each device.
- When creating a signature, the camera method produces a cleaner result than the trackpad for most people. Make sure to sign with a dark pen on plain white paper in good lighting, hold it steady, and level the signature with the blue line in the window.
- When using the iPhone or iPad method, use an Apple Pencil for a more natural and precise result. This is particularly important when signing formal documents where consistency matters.
- To delete a saved signature under the Sign icon, just hover over it and click the X that appears.
Need to gather signatures fast? Try Jotform Sign
Mac’s Preview app is suitable for quick, no-frills, single-use signing. But the moment another party is involved in the signing process, you’ll notice how limiting the tool is. Preview doesn’t allow you to send documents for signing, collect signatures from multiple signers in a sequence, or track the status of documents sent via the Mail app. And even when a document is signed and returned, there’s no record of who signed, when, or from where — all of which matter when you need to prove a signature is valid.
And that’s where Jotform Sign comes in. Jotform Sign is a free e-signature tool that lets you sign and collect signatures securely in minutes.
With it, you can create reusable signature templates for documents you send repeatedly — such as contracts, NDAs, onboarding forms, and lease agreements — and send them to multiple signers via email or a shareable link. Your signers can sign securely on their MacBook, iPhone, iPad, or Android devices without downloading any software or creating a Jotform account. You can then track the status of each document in real time and receive a complete electronic signature audit trail, with signer identity, timestamp, and IP address automatically attached to the completed document.
Jotform Sign also integrates with the broader Jotform ecosystem. So, if you’re already using Jotform for data collection, you can trigger signature requests from form submissions, add approval steps, and automate your entire document signing workflow from start to finish. Try Jotform Sign for free today.
FAQs about signing PDFs on Mac
An electronic signature is a digital mark, such as a drawn or typed signature, used to indicate agreement on a document. A digital signature is a more secure, encrypted form of electronic signature that verifies the signer’s identity using a certificate authority. The two terms are often used interchangeably, but they aren’t the same. For a more in-depth distinction, see digital signature vs e-signature.
You can add a PDF signature on Mac without Adobe or Preview using Jotform Sign. Simply upload the PDF, add your signature fields, and send for signature via email or a shareable link. You’ll get a secure, valid signature in minutes. Get started with Jotform Sign for free now.
This article is for Mac users (students, professionals, freelancers, and small business owners) who need to sign a PDF quickly without printing. Likely triggered by receiving a contract, form, or agreement via email.


Send Comment:
3 Comments:
December 20, 2024
Wow thanks, this was so helpful!! Can't believe I almost went to an Internet cafe to print, sign and scan...
Thanks!
January 19, 2021
I am trying to place a signature onto an official state form. It looks like a PDF but I don't think it is. I have filled out information on it except for the signature. So, the blog says open the PDF in Mac Preview. What the hell is Mac Preview? Do you mean open the document and pull down from Preview? There is nothing there that corresponds to a signature icon!
June 11, 2020
Many thanks for providing the information Darin - most useful.
I had been using a fully functioning App: PDFPen Pro - but SMILE wanted £43 to upgrade. However, It was far too big a tool for me as I really only wanted to add signatures to documents. Your solution was very handy and easy.
Kind regards