You don’t need expensive software or years of training to become a web designer. Graphic design solutions like Canva make it easy to unleash your creative potential, helping you improve your website and create stunning visuals in minutes.
But if you truly want to get the most out of this popular solution, it helps to know your way around its features. Here are 40 Canva tips and tricks to level up your design skills, whether you’re a pro or creating just for fun.
Best Canva hacks for designers
Ready to change the way you use Canva for the better? Once you’ve mastered the following design hacks, you’ll not only create better visuals but work faster too.
1. Filter, don’t scroll
Rather than scrolling past every design element Canva has to offer, use the search bar in the Elements panel to look up what you want. Then, add filters like color and file format to narrow your search.
2. Take advantage of smart templates
Canva offers a full library of design templates, along with AI-powered tools like Magic Design. Accelerate your design process by letting Canva’s AI generate template suggestions for you.
3. Draw on Canva
Let your imagination run wild with Canva’s Draw tool, which lets you create custom design elements using digital pens and pencils.
4. Customize colors with gradients
You don’t have to settle for solid colors with Canva. Adding gradients to your design can boost visual appeal. Simply search for “gradient” in the Elements panel, choose the style you like best, and make adjustments to customize.
5. Resize instantly
Canva’s Magic Resize feature makes it easy to turn a single design into a full set of perfectly sized images. Instantly convert content into Instagram posts or LinkedIn banners without reinventing the wheel each time.
6. Add charts and graphs
Present your data using infographics and charts from the Elements panel. Whether you need a line graph or a doughnut chart, Canva has plenty of options that make data visualization easy and fully customizable.
7. Create a brand kit
Under the Canva Pro plan, you can create and manage all your custom brand assets — your brand colors, fonts, and logos — with the Brand Kit tool. It’s a simple way to ensure visual consistency across all of your designs, no matter the project or designer.
8. Group your elements
Instead of repositioning elements one by one, use Canva’s group function to move them all as a single unit. This may be useful if you’ve created a logo or icon using individual elements that you now consider to be one cohesive graphic.
9. Lock it down
The lock function is one Canva hack that will minimize the potential for errors or redos in your work. Simply click on the element you want to stay the same, then select the lock icon from the top menu to prevent any changes.
10. Brainstorm with Whiteboard
The Canva Whiteboard feature provides a blank creative space where you can gather visual inspiration and generate new Canva design ideas. Save ideas for later, generate new concepts, and brainstorm edits without constantly having to remake or update your designs.
11. Use keyboard shortcuts
There are a variety of Canva shortcuts you can use to speed up your design process, including these handy keystrokes:
- T: Insert a text box
- L: Insert a line
- Ctrl + D: Duplicate an element
- Ctrl + Shift + K: Change text to uppercase
- Shift + arrow keys: Move an element in small increments
12. Create hyperlinks
Highlight the text you wish to hyperlink with your cursor, then click the link icon from the top menu. Paste or type the corresponding URL into the field and finalize by pressing Enter.
13. Ensure consistent spacing
Use Canva’s positioning tool to create equal spacing between core elements instantly. Simply select all the major elements of your design (we suggest grouping items you wish to keep together first), then click on the Position tool in the top menu and select Tidy Up.
14. Remove backgrounds
For Canva Pro users, removing the background from a photo or simple video can be done with a single click. Select the image you want to edit, then click on the Background Remover button in the top menu. Or, click on the video you want to edit, select the Edit Video option, and then click Remove Background.
15. Save time with templates
From social media posts to presentations, Canva offers an endless array of templates that can save you time and jump-start your designs. You can even make your own templates and share them with friends and colleagues.
16. Generate QR codes
QR codes add a layer of interactivity and utility that can be invaluable for marketing, business, and other purposes. Canva provides a range of integrations that will help you add a QR code to your designs.
17. Schedule social posts
If you’re building out a social media calendar, Canva’s built-in content planner allows you to schedule and publish directly to various social channels without the need for a third-party tool.
18. Optimize designs for print
Color accuracy and clarity are key for printed designs. To ensure your designs print as they appear onscreen, select PDF Print when downloading the file and choose the CMYK color profile, available to all Canva Pro users.
19. Add your own fonts
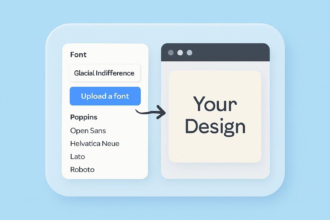
Not finding the font you’re looking for? Upload your own. Click on Menu > Brand > Brand Kit to access your brand assets and then select Fonts. Upload a custom font and make it the default for your brand kit. Please note, however, that Canva will ask you to confirm your right to use the font before uploading it.
20. Make the most of Magic Studio
Canva’s AI-driven Magic Studio feature takes the ease of the popular design suite to the next level. AI tools like Magic Grab, Magic Expand, and more can enhance your design possibilities and streamline the creation process.
21. Generate copy with Magic Write
Magic Write is an AI copywriting assistant that can provide instant copy for your designs. This time-saving feature helps content creators and marketers produce effective social posts and advertisements quickly.
22. Auto-add captions to videos
Save time and increase video accessibility with Canva’s AI-powered auto-caption feature. This tool automatically generates captions based on video audio, so you can skip the process of creating and uploading caption scripts while still enabling compliance with the Americans with Disabilities Act (ADA).
23. Add excitement with animations
Want to spice up your designs and increase engagement? Try incorporating one of the several animation options available in Canva’s design studio. From animated text to Magic Animate, you can add a touch of motion to any aspect of your design.
24. Apply instant color schemes
One of the most-loved Canva hacks among design pros is the Styles feature. Whether you’re using brand colors or exploring new palettes, this tool allows you to apply a cohesive color scheme to your designs instantly.
25. Organize your files
Not all Canva tips and tricks are design related — staying organized is just as important as the design process itself. Canva’s project folders offer an effective file management system, making sure your files are easily accessible at all times. With Canva Pro, users have access to unlimited folders.
26. Create a duplicate
Creating a design in Canva similar to one you already have doesn’t require you to start from scratch. Simply click the Make a Copy button in the design suite to copy an existing design, or click Duplicate Page to copy a single page from a larger project.
27. Frame your elements
Adding a frame to a picture, graphic, or video can improve visual appeal and tie your overall design together. Head to the Frames section in the Elements panel, choose a style you like, and adjust it to fit your image or media.
28. Copy your style
Canva’s Copy Style tool (represented by a paint roller icon in the top menu) lets you quickly apply the same fonts, colors, and effects from one element to another. It’s a simple way to maintain consistency without manually adjusting each object.
29. Record your presentation
Canva makes it easy to turn presentations into videos by allowing you to record yourself presenting in real time. Click Share, then select Present and Record to create either a video pop-out or a screen recording. Once you’re done, you can download the video and share it with others.
30. Edit existing PDFs
If you need to edit an existing PDF, Canva allows you to upload your files and make updates within the design suite. Once uploaded, you can move, change, or delete elements as needed.
31. Add notes to presentations
Canva lets you add speaker notes to a presentation that only you can see. Just add them to the Notes tab while creating your presentation, and you’ll have access to them while in presentation mode.
32. Use transparency and layers to add depth
Canva makes it easy to create depth in your designs with its Position tool, which lets you layer elements by moving them forward or backward. You can also adjust their transparency to create overlays, reduce object obtrusiveness, and add visual appeal.
33. Deliver designs in a variety of formats
No matter what visual format or compatibility you need for your final design files, Canva can likely save them accordingly. Canva can save files in a wide range of formats:
- JPEG
- PNG
- Web PDF
- Print PDF
- SVG
- MP4
- GIF
34. Change logo colors
Reformatting logos — whether it be a partner logo or your own — to match your website’s color scheme is easy with Canva’s duotone effect. This color filter lets you change the color of existing graphics after isolating them from their original background.
35. Comment to collaborate
Want direct feedback from teammates on your design? Share your project with collaborators so they can use Canva’s comment feature to add notes on everything from specific elements to the design as a whole.
36. Embed maps and videos
Using Canva’s third-party integration library, you can add features like maps and videos directly to your designs. Google Maps and YouTube integrations can level up your design instantly.
37. Edit videos with precision
Canva’s timeline editor tool gives you more control over the video editing process. This precise video editor allows you to effectively trim clips and sync audio with your video content without the need for expensive third-party video editing software.
38. Search for images
Canva AI makes finding the ideal image for your design easier than ever. Using design history and keywords, Canva AI can make image suggestions to best suit your needs.
39. Find the perfect font pairing
Fonts should coordinate with one another to create an aesthetic design. Canva makes it easier with a font pairing guide that shows which fonts work best together, along with visual examples.
40. Align team designs
Working on designs as a team requires a certain level of cohesion to ensure all designs fit the same style, scheme, and branding. Canva’s Brand Controls setting lets you set rules for color schemes, fonts, logos, and more across all team designs to help avoid mismatched visuals.
Integrating Jotform for streamlined design and form creation
Jotform’s integration with Canva is one of the best hacks around, letting you add a form to your Canva project in just a few clicks. This integration lets you create and embed forms directly in Canva. It also provides access to advanced features such as
- E-signatures
- Payment processing through popular options like Stripe, Square, and PayPal
- Automated approval workflows
- Conditional logic
Create and add advanced forms in minutes, either by building one from scratch or generating a pre-built form from one of over 10,000 free form templates. Integrating with Jotform adds a layer of utility to your Canva designs and streamlines the design process by unifying your forms with Canva tools.
Use the 40 tips we’ve shared here to take your Canva skills to the next level. The next time you come up with a fresh design, try implementing a few, and remember how third-party integrations like Jotform can enhance your design process even further.
This article is tailored for anyone who wants to design smarter, not harder — from small business owners and marketers to students, educators, and even seasoned designers looking to speed up their workflow










Send Comment: