Populating your form fields from an external Excel sheet is now easier than ever. With our Spreadsheet to Form Widget, you can upload a spreadsheet and use its data to automatically fill out form fields based on a unique code. This is ideal for pulling existing records and displaying them on your form, similar to querying a database using a unique key.
Pro Tip
Microsoft Excel integration is available in Jotform, so you no longer need to manually update your Excel file as the data source for your widget. By connecting your form, submissions are automatically added and kept up to date, allowing you to download the latest version at any time for use in your widget. Take a look at our guide on How to Integrate Your Form With Microsoft Excel for more details.
Widget Requirements and Limitations
Before you continue, here are some important limitations and key points to keep in mind when using the Spreadsheet to Form widget:
- The widget only accepts XLS or XLSX files. Other formats such as CSV or Google Sheets aren’t supported.
- You can place the unique code you use for searching anywhere in your sheet—just make sure to set the correct column index during configuration.
- The unique code is case-sensitive. So the code entered in the form has to match the exact format in your spreadsheet.
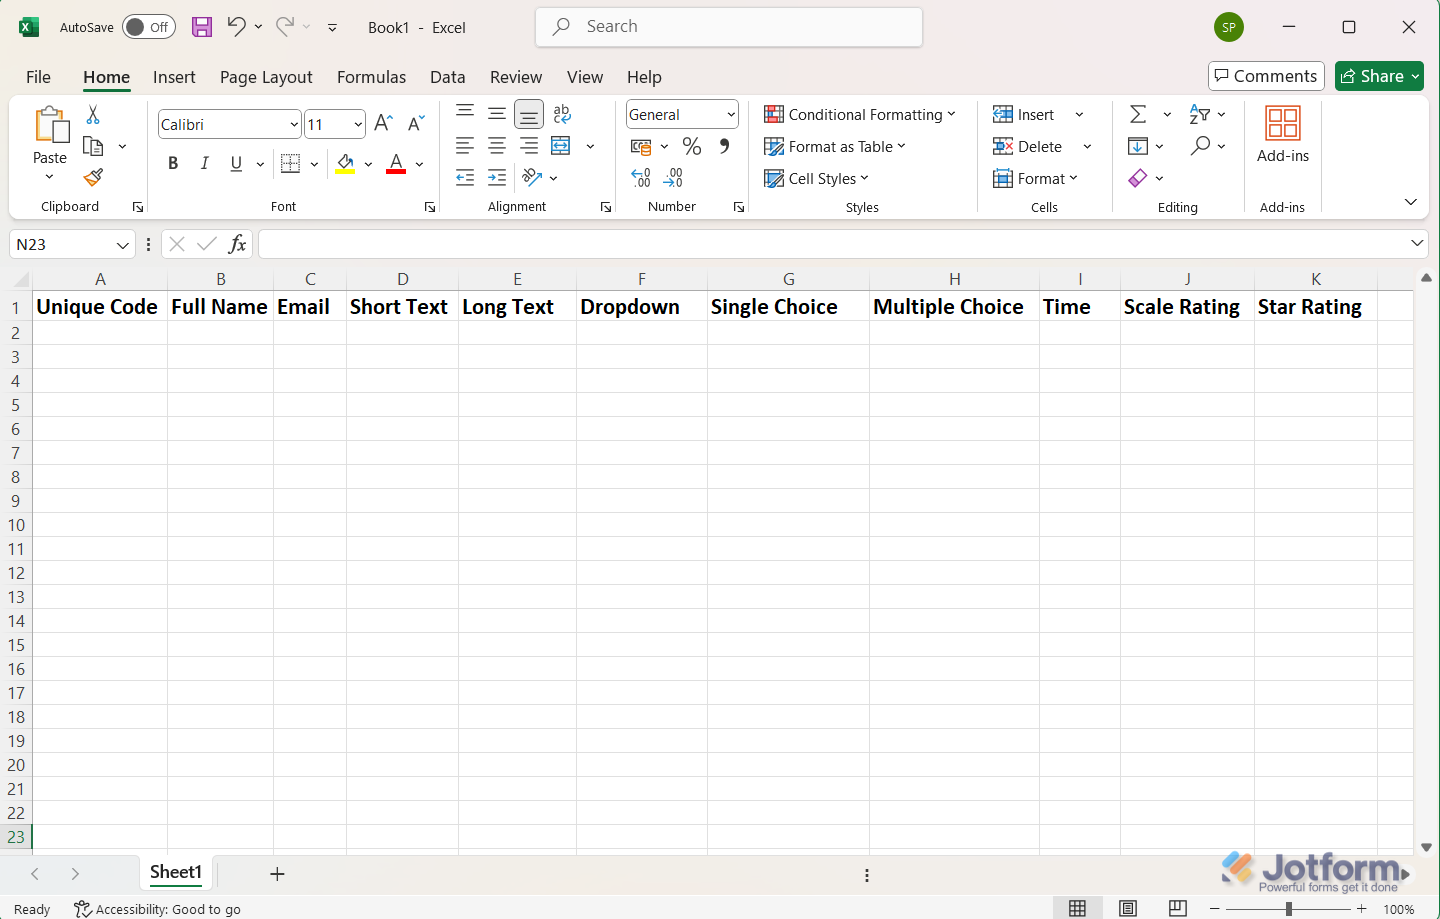
- The column names in your sheet need to match the field labels on your form for the data to populate correctly.
For instance, if your form fields are labeled as follows:

Then, the column names on your sheet should be labeled the same.
Here’s the demo form and sample spreadsheet used in the setup above. Use them to explore how the widget works and test pre-populating fields using unique codes.
The arrangement of fields on your form doesn’t matter, even if there are unrelated fields in between. What’s important is that the form field labels exactly match the column names in your spreadsheet.
The widget currently supports the following form elements:
- Full Name
- Time
- Short Text
- Long Text
- Dropdown
- Single Choice
- Multiple Choice
- Scale Rating
- Star Rating
When a valid unique code is entered, the form will automatically clear the existing values in supported fields and replace them with the corresponding values from your spreadsheet.
Setting Up the Spreadsheet to Form Widget
Now that your form and spreadsheet are ready, it’s time to set up the Spreadsheet to Form widget. Here’s how:
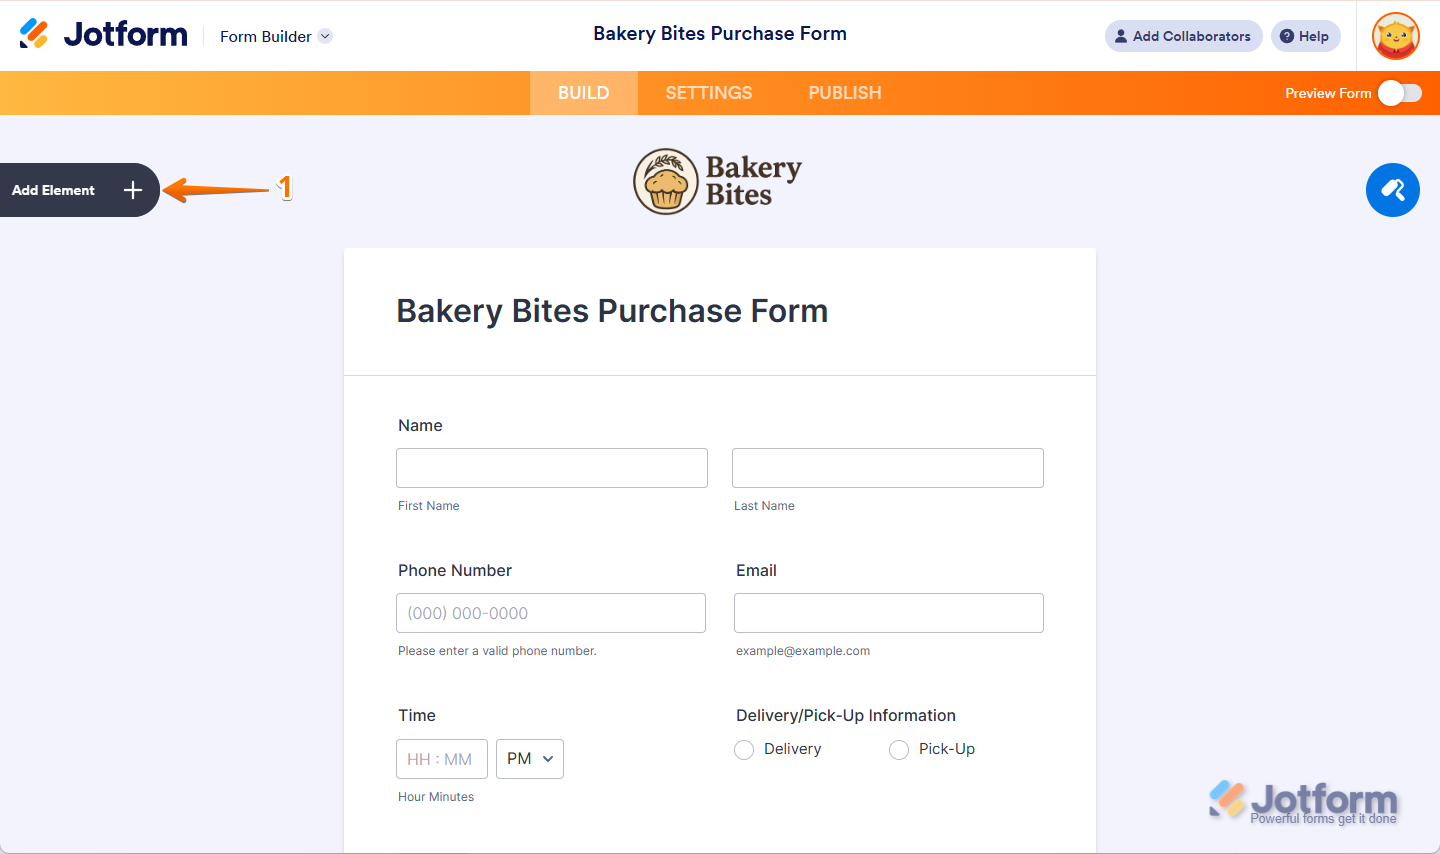
- In Form Builder, click on Add Element on the left side of the page.
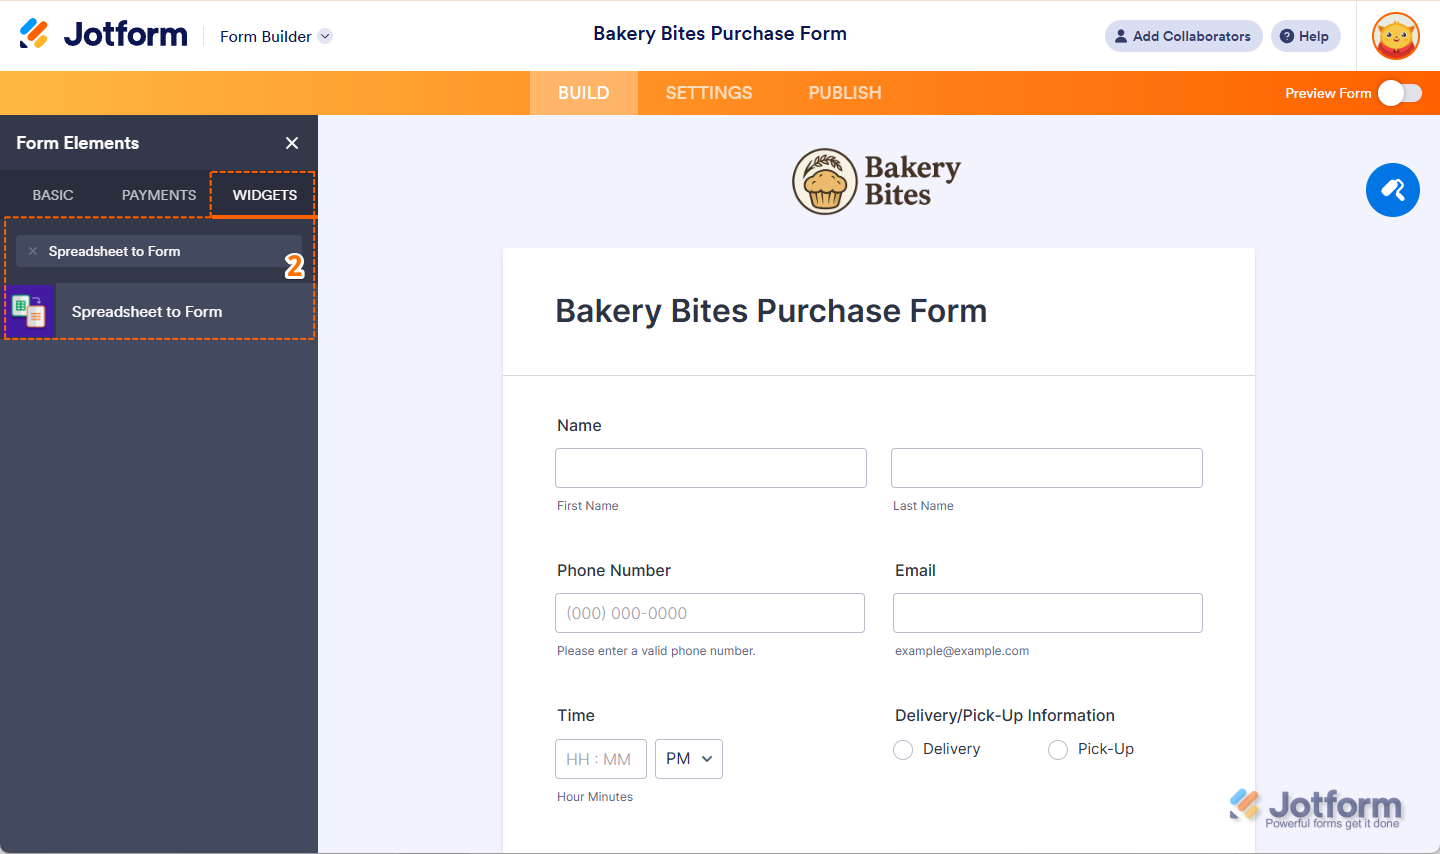
- Now, in the Form Elements menu, under the Widgets tab, search Spreadsheet to Form and click on it to add it to your form.
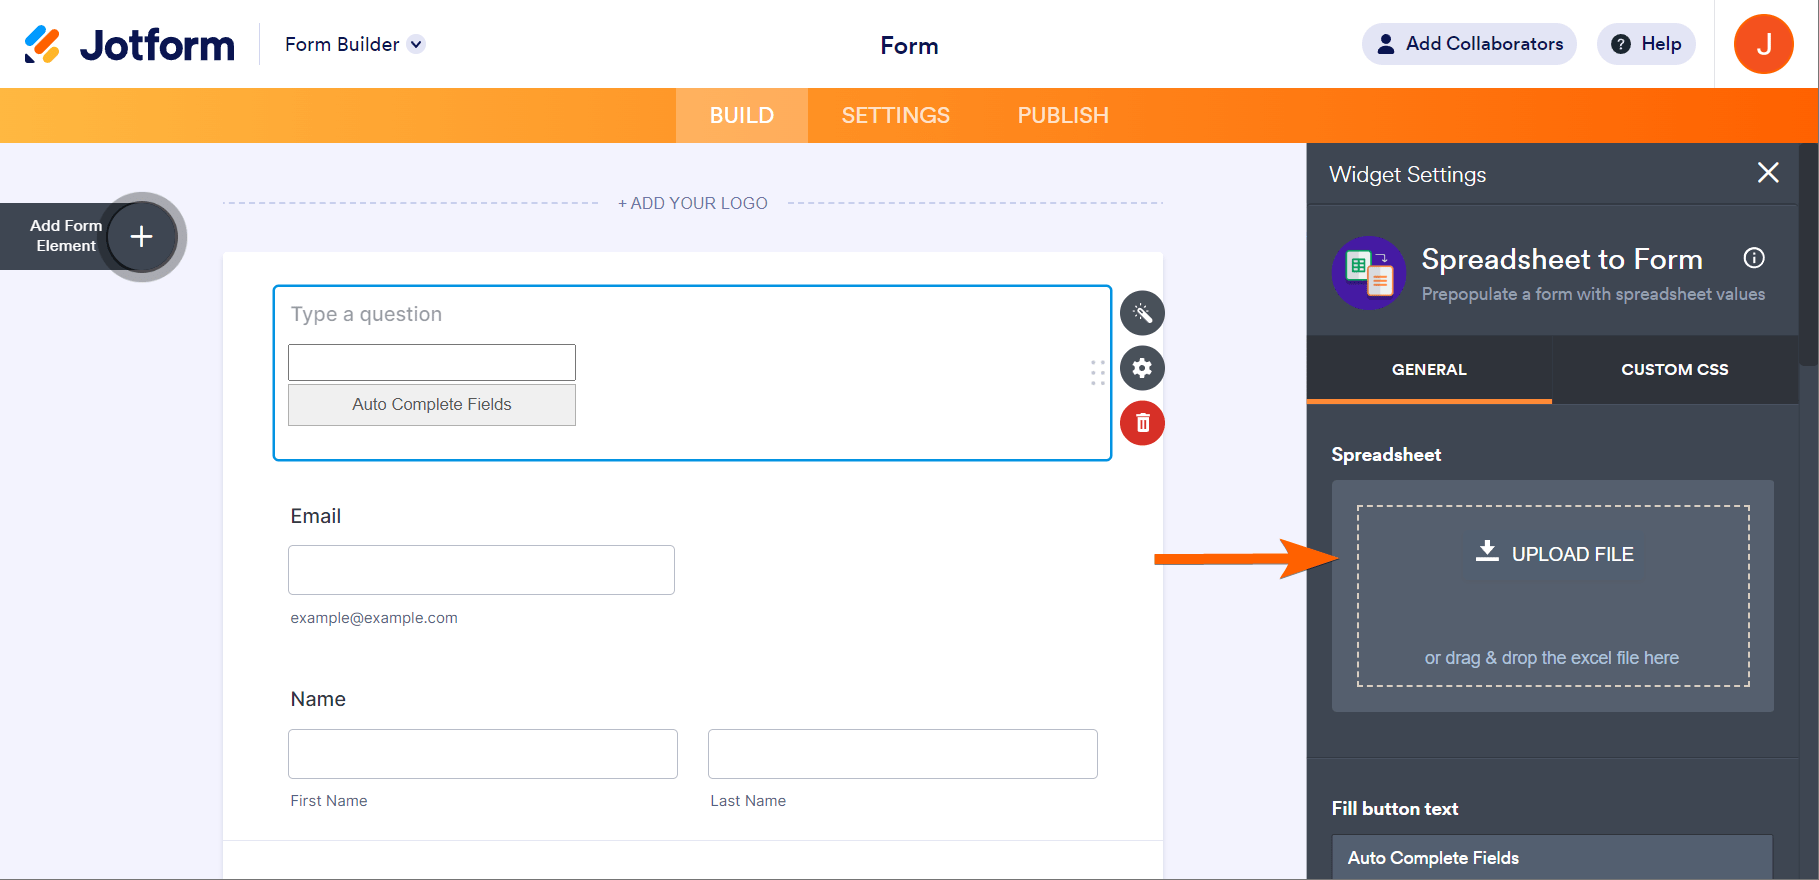
- Next, in the Widget Settings window that opens on the right side of the page, click on Upload File and upload your spreadsheet file.
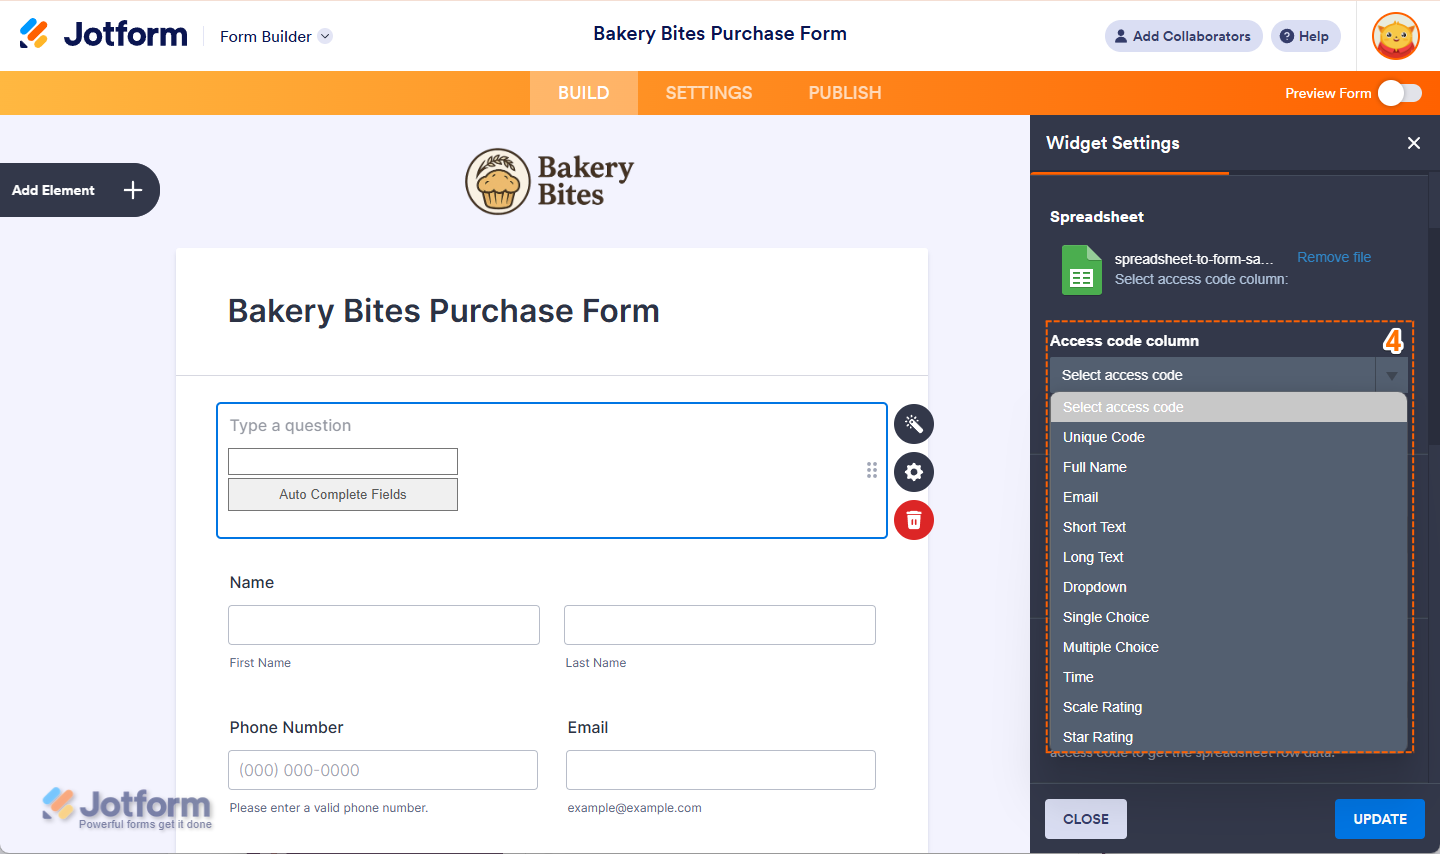
- After that, in the Access code column, choose the label from your spreadsheet file that you’d like to use as the Access Code.
- Then, set up the rest of your widget settings:
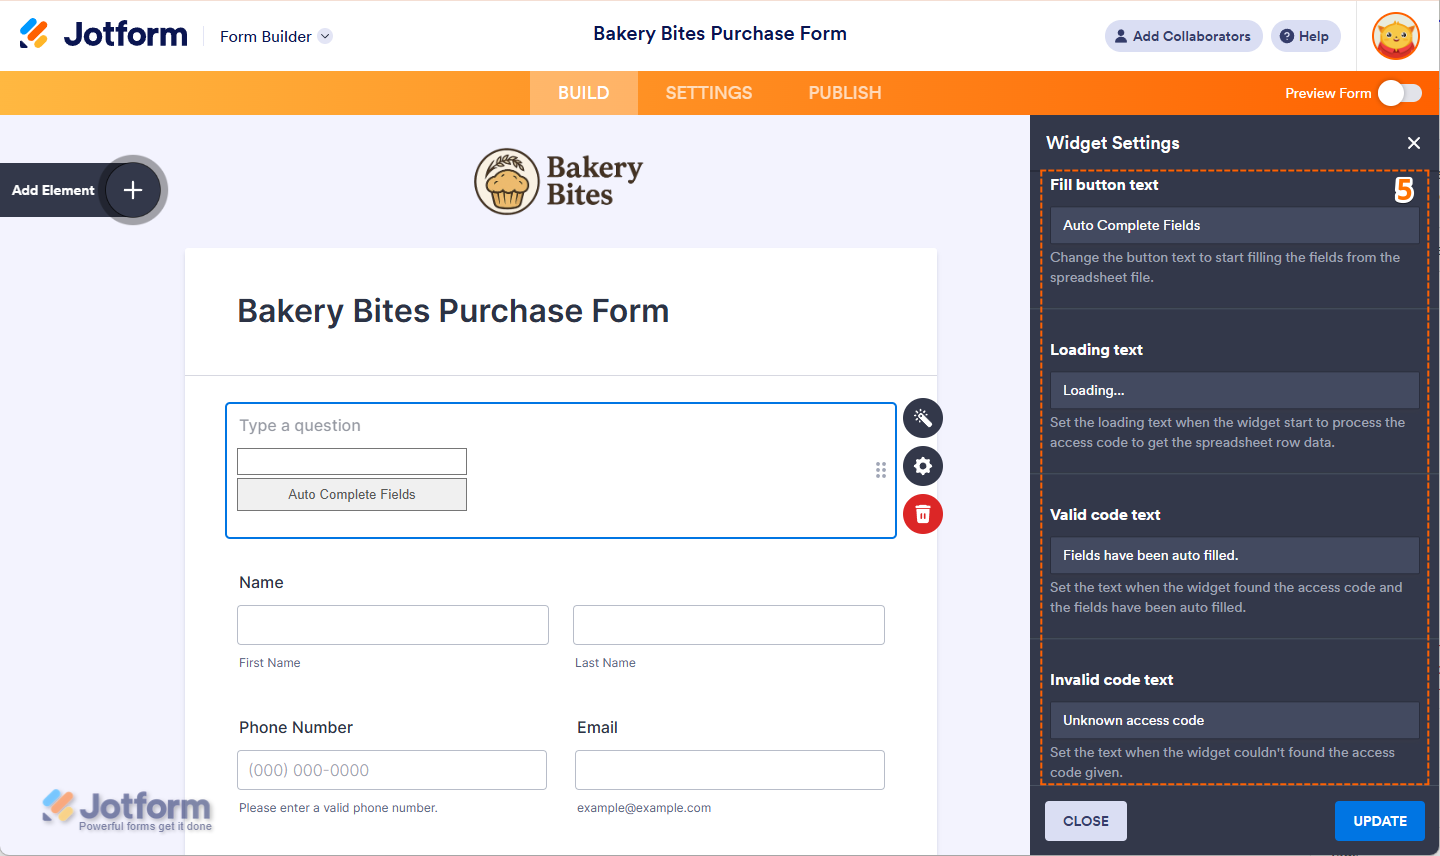
- Fill Button Text — Customize the button text to begin filling the fields with data from your spreadsheet.
- Loading Text — Choose the text that will appear while the widget processes the access code and fetches the spreadsheet row data.
- Valid Code Text — Set the message that’ll be displayed when fields are successfully autofilled.
- Invalid Code Text — Enter the text to show when the widget can’t find the access code provided.
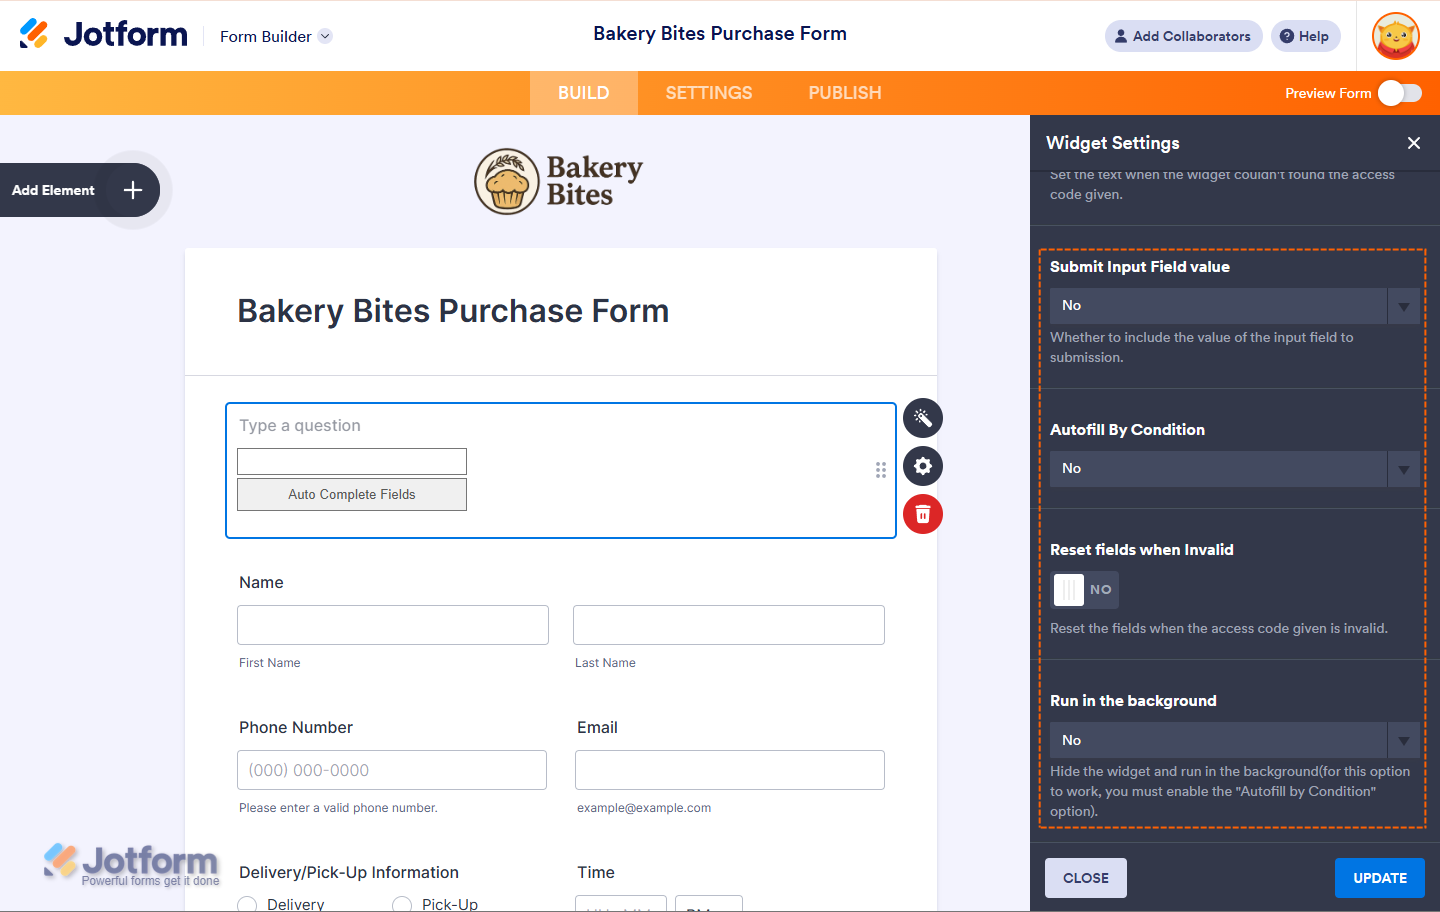
- Submit Input Field Value — Choose whether to include the input field value in the submission.
- Autofill By Condition — Automatically fill in fields based on a condition.
- Reset Fields When Invalid — Reset the fields if the access code provided is invalid.
- Run in the Background — Hide the widget and run it in the background (this option requires the Autofill by Condition feature to be enabled).
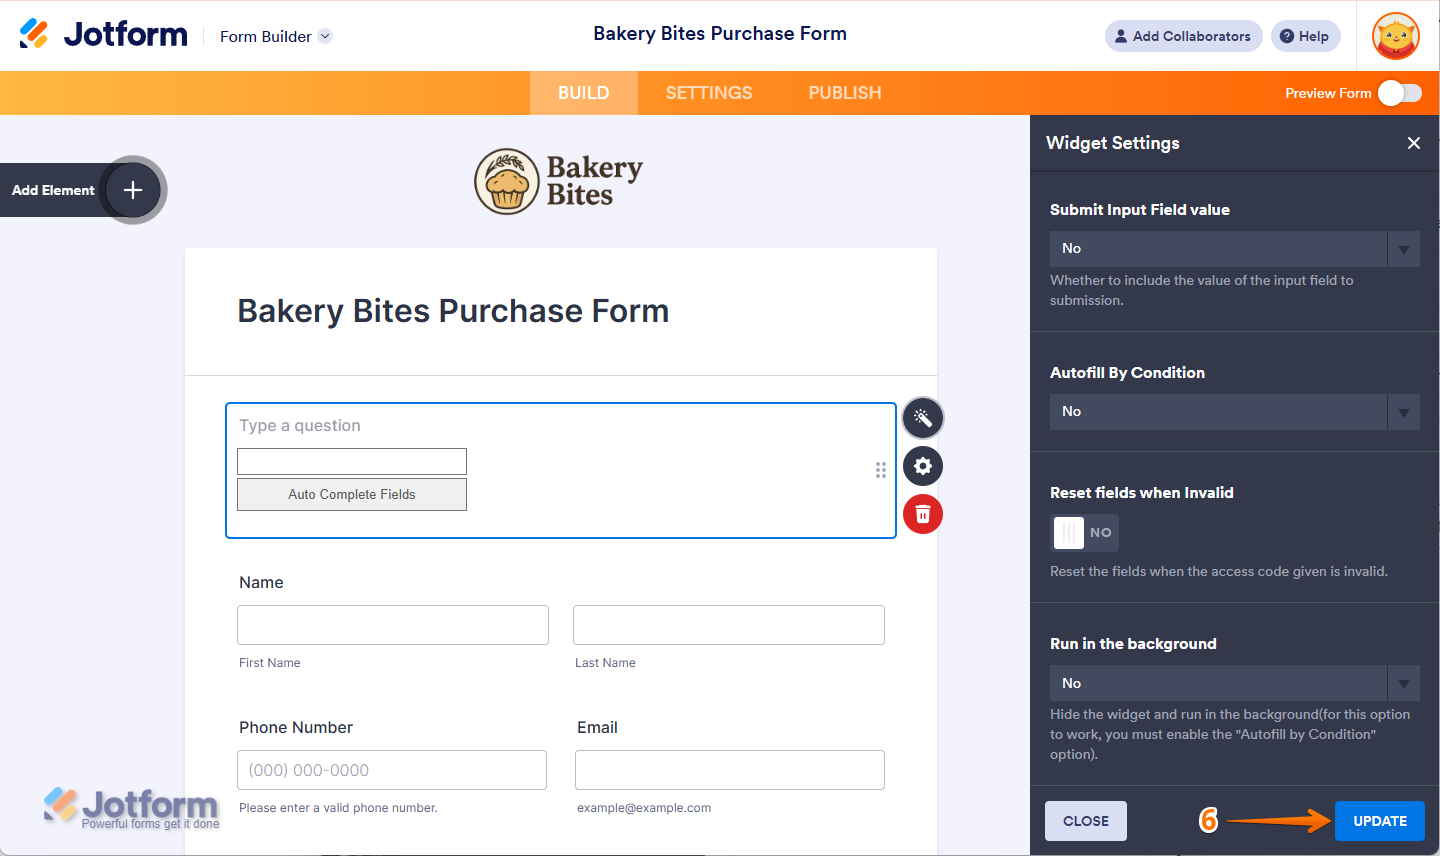
- Now, just click on Update and you’re all set.
That’s it! With your widget fully configured, your form is now ready to dynamically pull data from your spreadsheet, making form filling faster, smarter, and more personalized for your users.
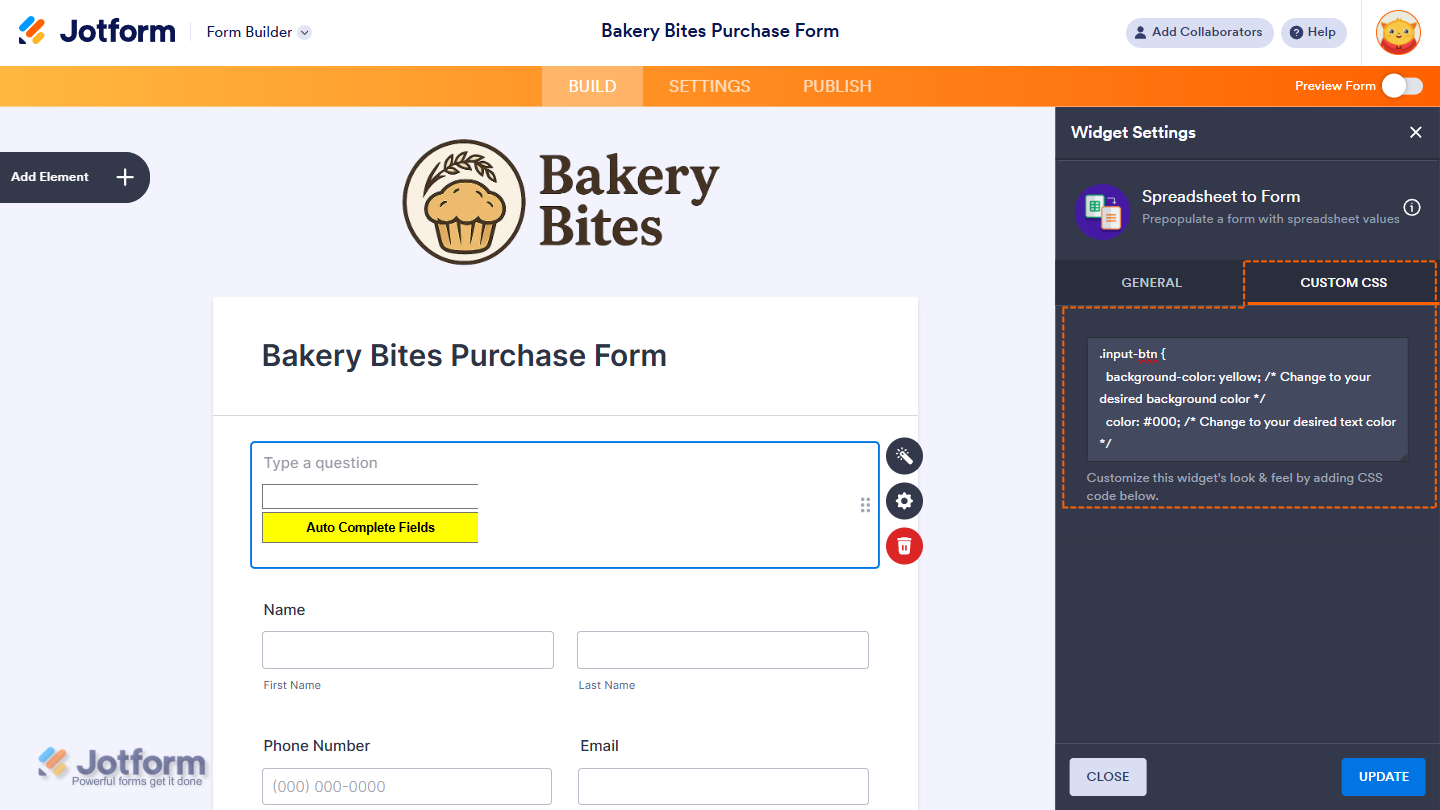
Customizing Your Widget using CSS
Under the Custom CSS tab, you can input or encode your custom CSS codes to further personalize your Spreadsheet to Form Widget, such as the button color or the content of the text color of your spreadsheet. Check out this guide about How to Inject CSS codes to Widgets for more details about it.

Send Comment:
78 Comments:
January 8, 2026
How can I refresh the spreadsheet frequently (e.g. every 30 minutes)?
Can I use the pre-populate URL style to call the unique code. i.e. /form?uniquecode={{contact.email}}
Unique code would be hidden, as these would be customer details that we'd want to be pulling out via the spreadsheet (currently 70K customers, though only 4 fields, name (first & last), email address and 1 other).
December 13, 2025
Gagawa Ako ng apps
December 2, 2025
Hola,
Estoy experimentando una falla crítica con el widget Spreadsheet to Form en mi formulario de cotización dinámica.
El problema es de mapeo interno: El widget encuentra la fila correcta en mi Excel basándose en la clave (CLAVE_BUSQUEDA), pero el campo de destino (P1_PRECIO_NOCHE) recibe un valor incorrecto (Ej: 22) en lugar del precio real (Ej: 350) de la tabla.
He confirmado los siguientes puntos, descartando errores comunes:
Sintaxis: La clave se genera con guiones bajos (_) para evitar fallos de resta.
Mapeo: La columna de precios y el campo de destino son idénticos (P1_PRECIO_NOCHE). El destino es un campo de Texto Corto (no un cálculo).
Datos: Los precios en el Excel son números limpios.
Ejecución: El widget está configurado para ejecutar la búsqueda en segundo plano con éxito, pero transfiere el valor equivocado.
Parece que hay un error de caché o una falla en la lectura de la columna dentro del widget. ¿Existe alguna solución para forzar el mapeo correcto del encabezado de la columna de precios?"
December 1, 2025
can you show an example of the result? I've done everything listed with no errors but I'm still not sure what the result that is supposed happen.
November 18, 2025
Il ne fonctionne plus depuis ce midi (18-11-2025) Que faire?
September 25, 2025
No funciona para trabajar offline.
Algun otro metodo de precarga que pueda usar offline??
September 22, 2025
How can I fill in date using spreadsheet to form?
August 27, 2025
Hello, I couldn't get the other form fields to fill out. What's wrong?
June 4, 2025
Can we track the status "not found" after the widget scans the spreadsheet? I need a condition where I will show a user message that the item is not found when the widget finishes scanning the spreadsheet and item is not found.
February 26, 2025
does this widget now also work in offline mode
February 26, 2025
Hi Team, I finally got it working :-) however, i was wondering why i dont get a "drop down" in the widget on the form. With the current setup I have to type in the full Unique code. (I am using your demo spreadsheet). When I am using your demo form there is a "drop down" and I can scroll and choose. Did I miss a setting during setup? Thank you
December 10, 2024
what if we have more than one "single choice" on our form, is spreadsheet to form still an option?
October 6, 2024
LIMITADO A MENOS DE 14500 FILAS.... NO ME SIRVE
September 30, 2024
I've been using this widget for months and love it. However today my entry fields just continue to spin with "loading...". Any idea if there's a known bug with this widget?
August 29, 2024
You have a great demo with regards to the autofill demo, can we get the innerworkings of that demo, the spreadsheet, the condition, just more detailed information in general.
July 10, 2024
I need to make updates the the spreadsheet the form is pulling from. I accidentally deleted the file off my computer, is there a way to download the file that I have already uploaded to ensure the updated one is formatted correctly?
July 5, 2024
Could you do a demo on how to use this function but taking information from another form, downloading its info in excel and then transferring some of those field values into another document. With the added difference that each question from form 1 has been numbered with a space after the number before the question.
June 21, 2024
This is actually pretty nice.
Curious, is there anything in the works where a USER can upload a spreadsheet, input the Access code, have that data populate into the form - and then submit the form with the data?
Trying to figure out how I can help my team from all the entry errors (mistyping numbers, entering numbers for one machine into a different machine, etc.). Would be nice if, at the end of their shift, they simply upload the spreadsheet - select the code from the worksheet, click the button - all done.
Thanks,
Craig
February 8, 2024
Is there a way that this form can be integrated with google sheets? My data is constantly changing and having an autosync would be so helpful. I have to keep removing my excel spreadsheet and then reattaching everytime something changes.
Thanks so much!
January 17, 2024
Is there any maximum limit of rows that the Spreadsheet to form widget? I have a spreadsheet that has 37,000 rows and it works great BUT when inputting the data it needs to find on line 30651 it gives and error and says access code not found.... Appreciate the help.
December 28, 2023
You said in point 7, "Set up the other options. Some of the options, such as the texts, are relatively straightforward"... can you please explain how this is done as there is no way to connect other fields to the spreadsheet?
December 14, 2023
Is there a way to have different fields display based on which code is entered from the spreadsheet? Ideally I would upload a spreadsheet with 2 sheets, each with one column of unique codes. If a code is entered from Sheet 1, certain fields display and different fields display if a code is entered from Sheet 2.
December 14, 2023
Two questions --
1) Can a single spreadsheet by used by multiple forms that need the same lookup fields?
2) is there an API to update/replace the spreadsheet, instead of manually uploading a new spreadsheet?
Thanks!
November 29, 2023
How many columns does this support or load? If I have roughly 1,000 columns worth of data, would it load it for all the columns?
November 17, 2023
Any idea how to change the notice "please add a code" when clicking the button without having a value into input box.
Thank you!