Jotform Workspace is a unified hub where you can access all your Forms, AI agents, Apps, E-sign Documents, Workflows, Tables and Reports. Instead of switching between different pages, everything’s now in one place, making it easier to find what you need. You can now:
- Simplified Navigation — No need to switch between multiple pages.
- Shared Workspaces — Easily share and manage assets
- Quick Access to Assigned Forms — You can see and manage forms assigned to you.
- Search & Labeling — Quickly find and categorize assets.
Users now can organize their work efficiently in one central hub. Let’s explore the Workspace Features in more detail below.
Mixed Listing
All your Jotform assets (Forms, AI agents, Apps, E-sign Documents, Apps, Tables, and Reports) are now listed together in one place. No need to switch tabs to find them. By default, all your assets will be visible. But, you can filter asset types and use sorting options to organize them as you’d like.
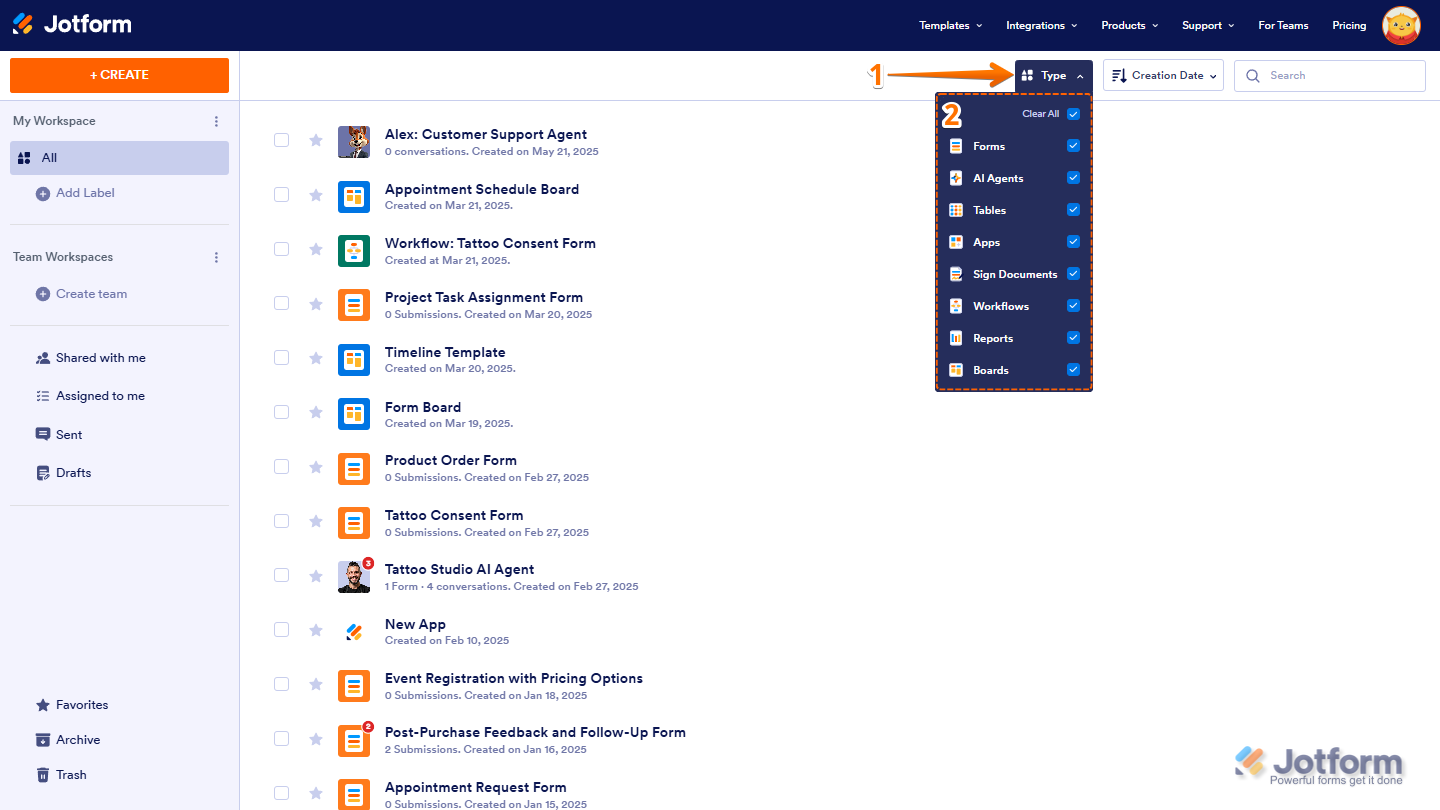
Filtering Assets Type
You can easily filter the display of your assets by type on your Workspace. You can do it in just a few steps:
- On your Workspace page, click on the Type tab on the top-right side of the screen.
- In the dropdown menu, you can view all your assets and customize your display by selecting or unselecting the Checkboxes for specific asset types.
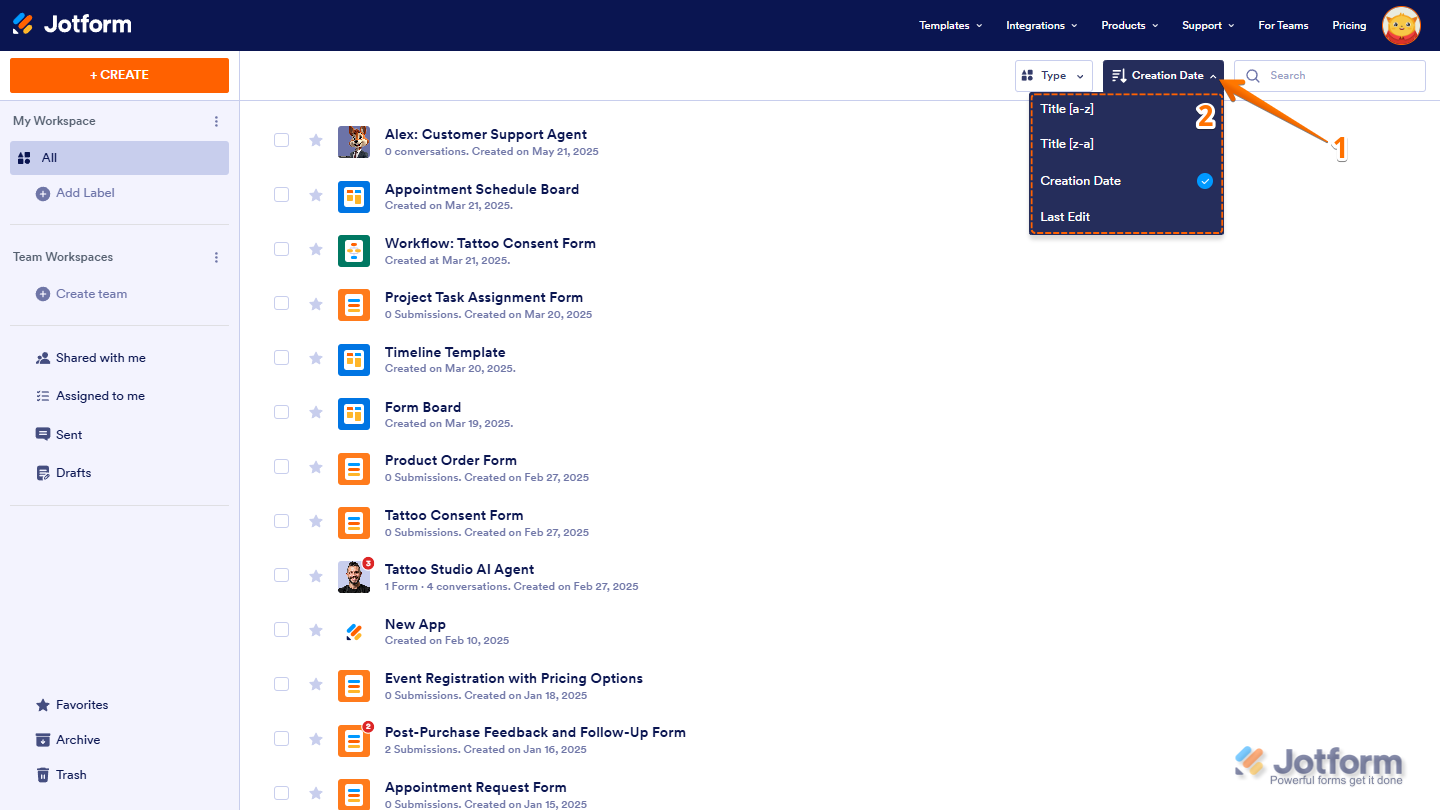
Sorting Assets
You can also sort your assets by setting up the sorting option. Here’s what to do:
- On your Workspace page, click on the Sorting tab on the right side of the Type tab.
- In the dropdown menu, you can sort your assets by selecting one of these choices:
- Title (A-Z) — Arranges assets in alphabetical order.
- Title (Z-A) — Lists assets in reverse alphabetical order.
- Creation Date — Shows the newest assets first.
- Last Edit — Displays the most recently updated assets at the top.
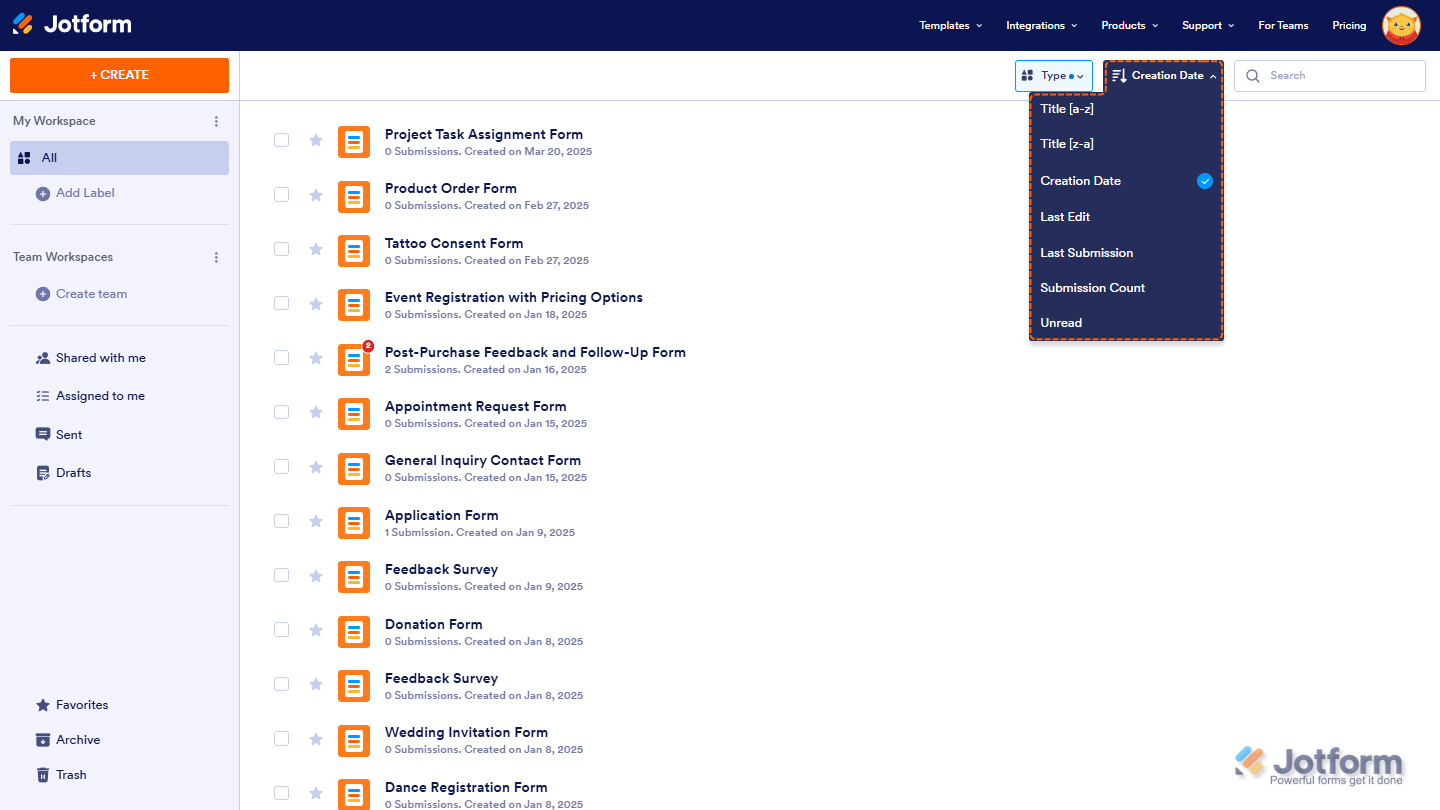
When filtering assets to display only forms, additional sorting options become available. You can organize your forms based on different criteria:
- Title [A-Z] — Sorts forms alphabetically from A to Z.
- Title [Z-A] — Sorts forms alphabetically from Z to A.
- Creation Date — Arranges forms by their creation date, from newest to oldest.
- Last Edit — Sorts forms based on the most recent modifications.
- Last Submission — Orders forms by the date of the most recent submission.
- Submission Count — Ranks forms by the total number of submissions received.
- Unread — Displays forms with unread submissions first.
Creating an Asset
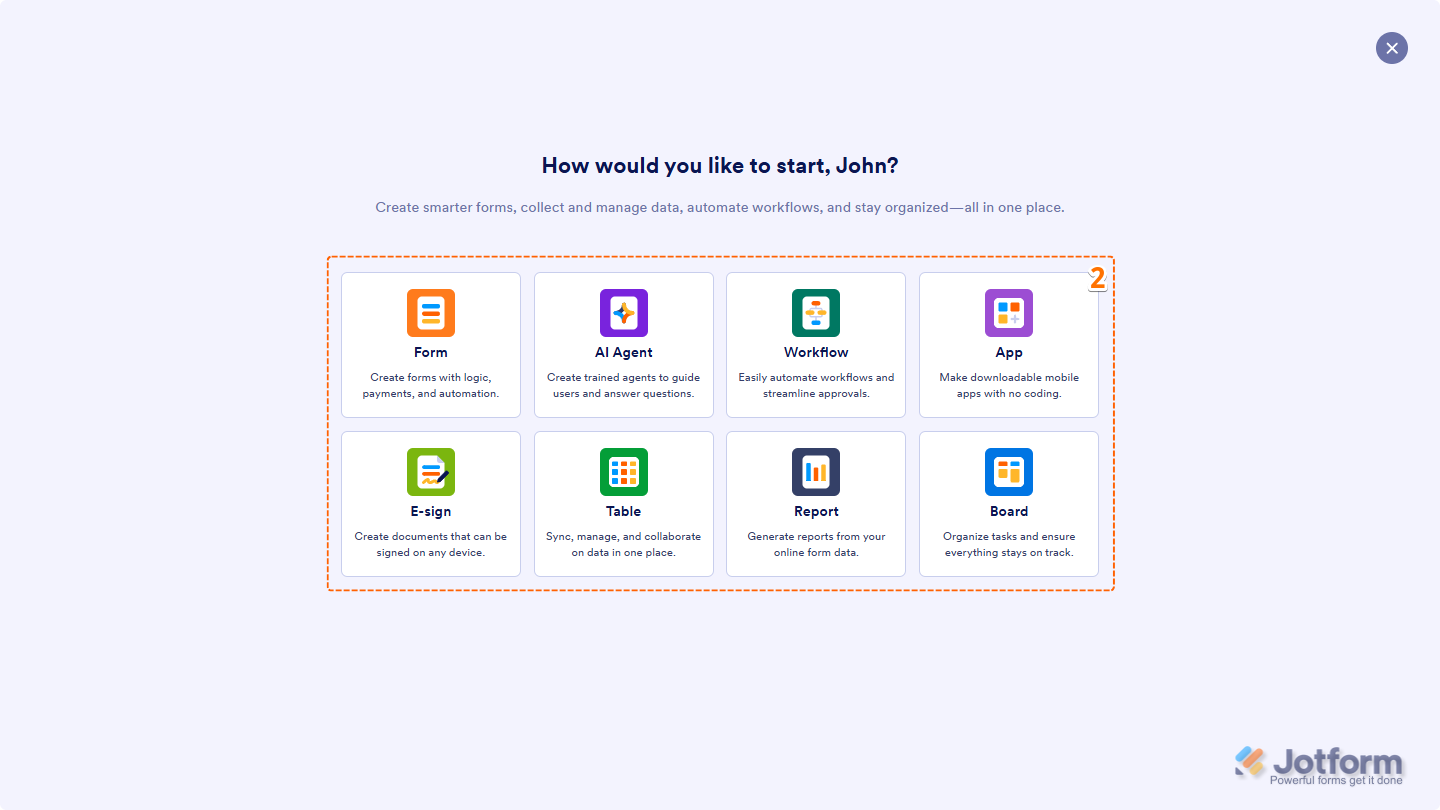
Creating an asset in Jotform Workspace is a simple and streamlined process. Whether you need a form, AI Agent, workflow, app, e-sign document, table, or report, you can start building in just a few clicks. Let’s do it:
- On your Workspace page, click on Create on the top-left side of the screen.
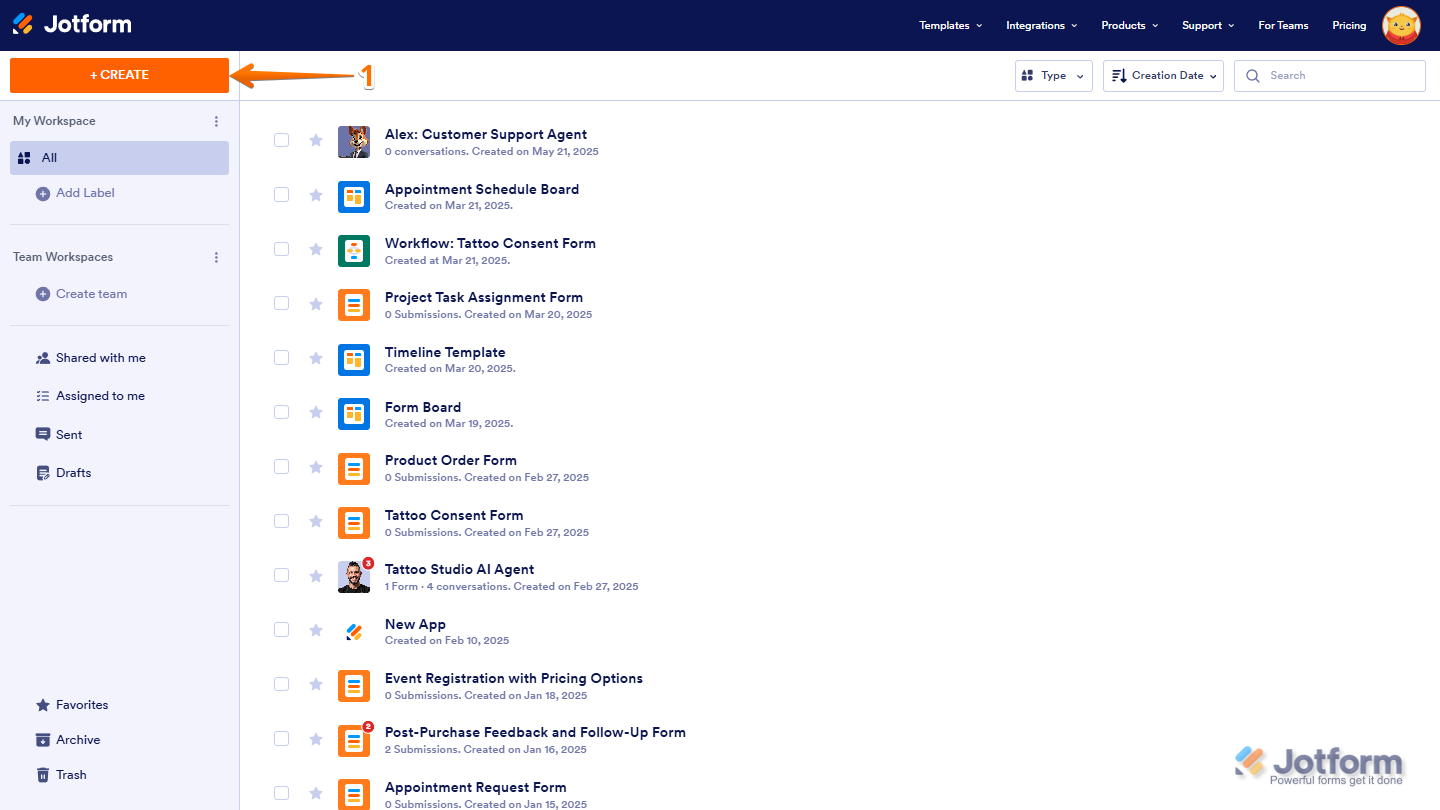
- Now, choose the Asset you want to create, and you’ll be redirected to its respective builder.
- Form — Create and customize forms to collect information easily.
- AI Agent — Create AI Agents to automate conversations and enhance customer interactions.
- Workflow — Automate processes and streamline approvals with workflows.
- App — Build and design custom apps without coding.
- E-Sign — Send documents for electronic signatures quickly and securely.
- Table — Organize and manage data in a spreadsheet-style table.
- Report — Generate visual reports to analyze and share collected data.
- Board — Manage tasks and projects visually with customizable boards.
Once created, your asset will be automatically saved and listed on your My Workspace page for easy access.
Adding and Using Labels
Labels help you organize and categorize your assets efficiently. You can assign multiple labels to a single asset, making it easier to filter and find what you need.
Adding Labels
Adding a Label is easy. Let’s do it:
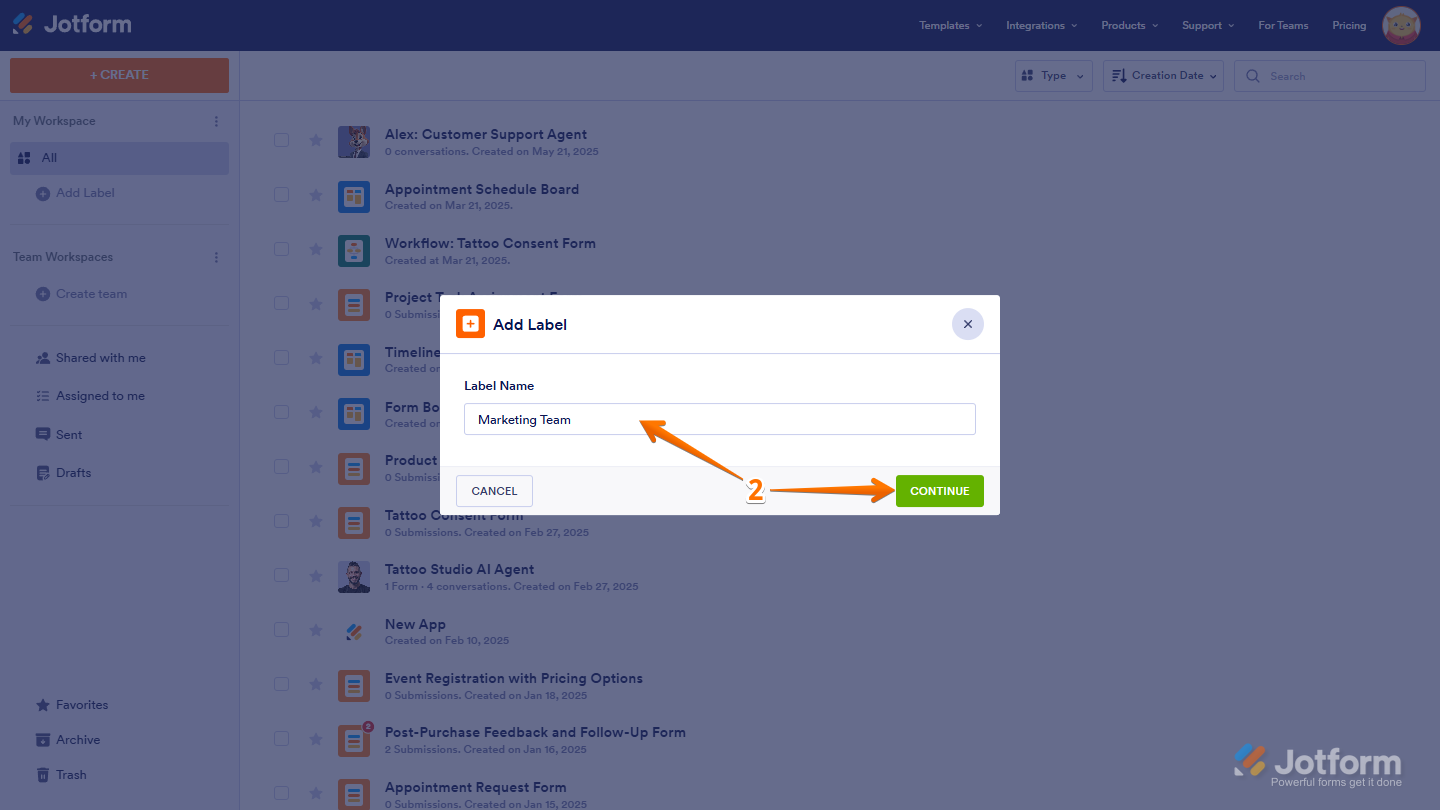
- On your Workspace page, click on Create Label on the left side of the page.
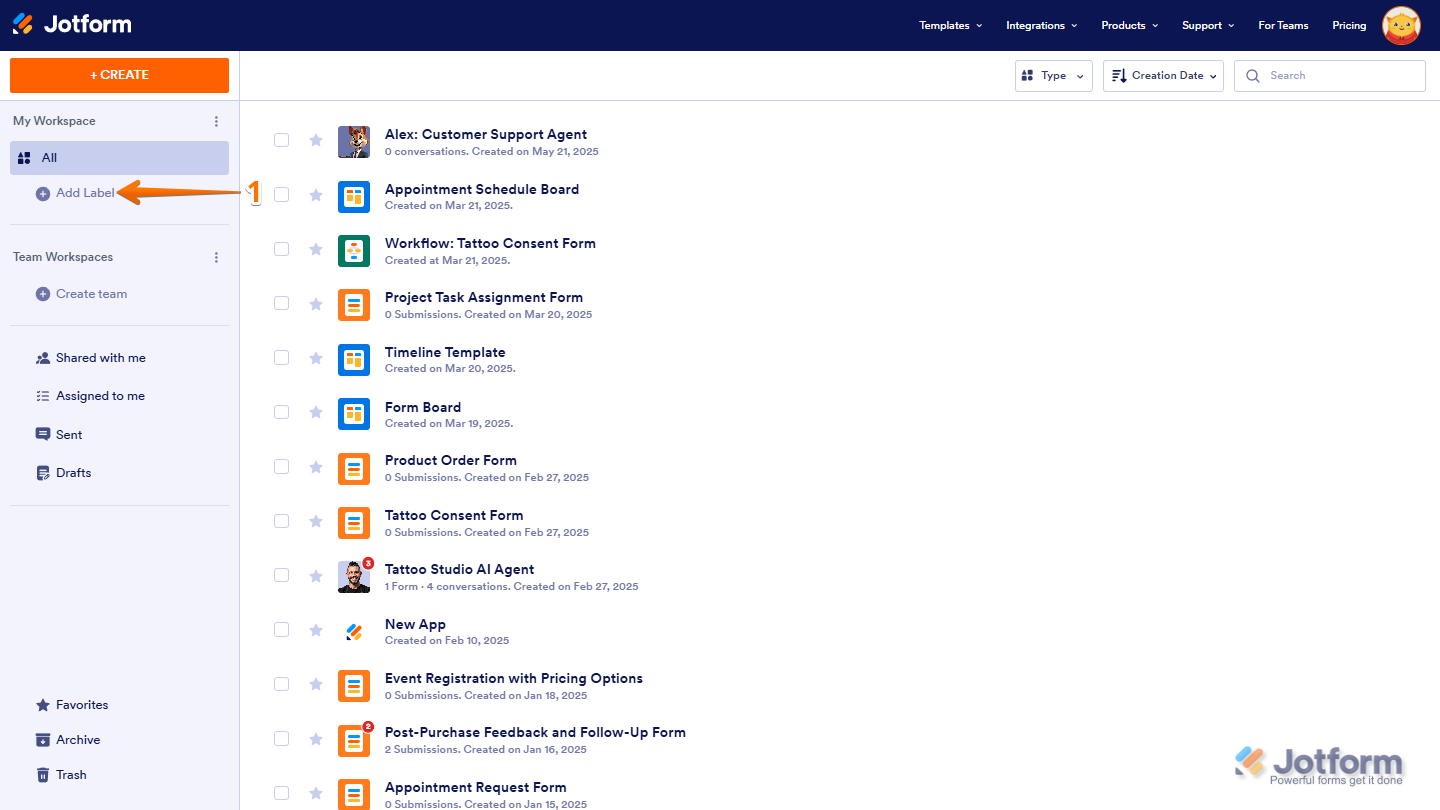
- In the window that opens, enter your Label Name and click on Continue . That’s it.
Using Labels
Once you’ve successfully added your Label, you can now label any type of asset in your workspace. It’s easier than you think::
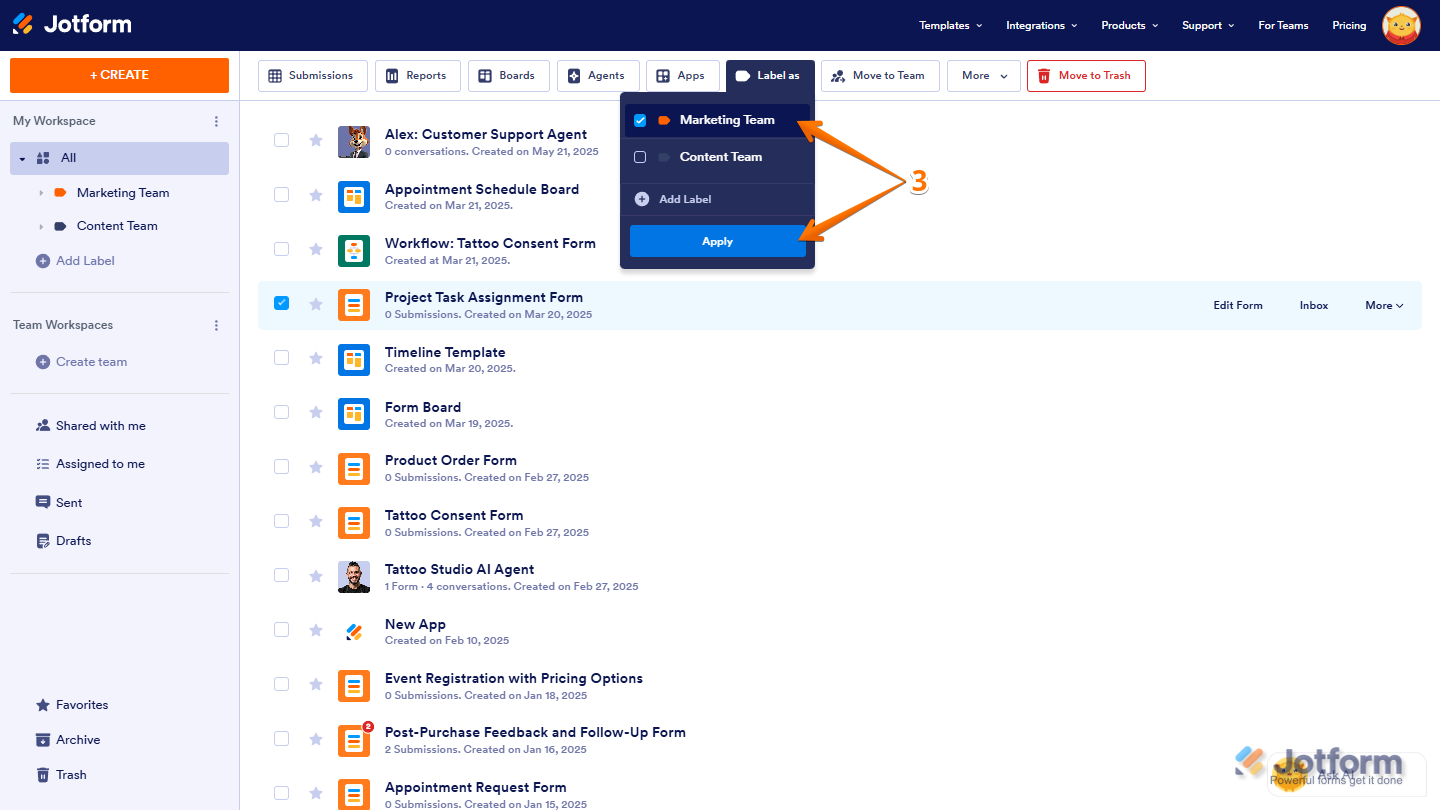
- On your Workspace page, select the asset that you want to label.
- Then, click on Label As in the menu that comes up at the top of the page. Or you can drag the asset and drop to the label.
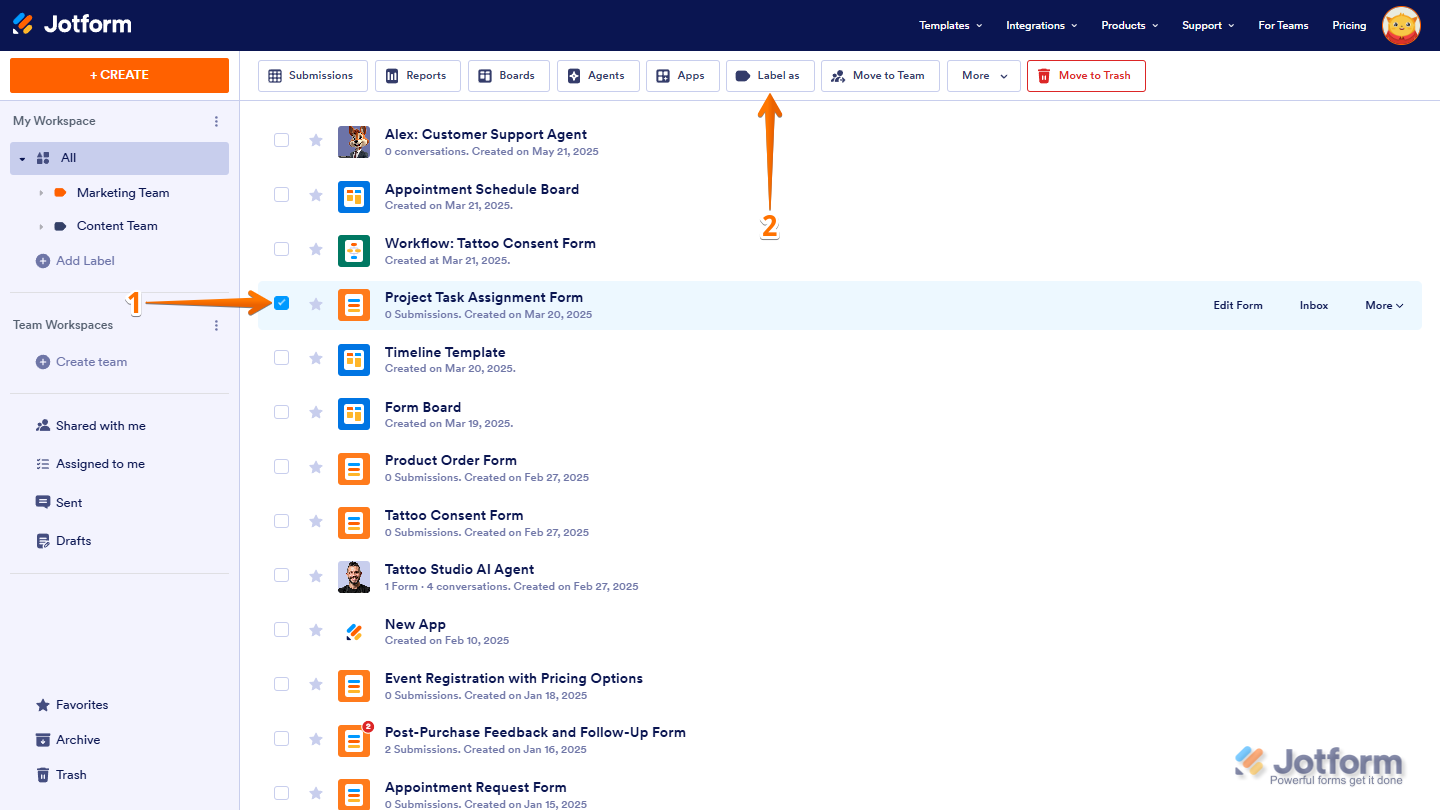
- Now, put checks in the Checkboxes next to the assets you’d like to apply labels to, for example Marketing Team, and click on Apply.
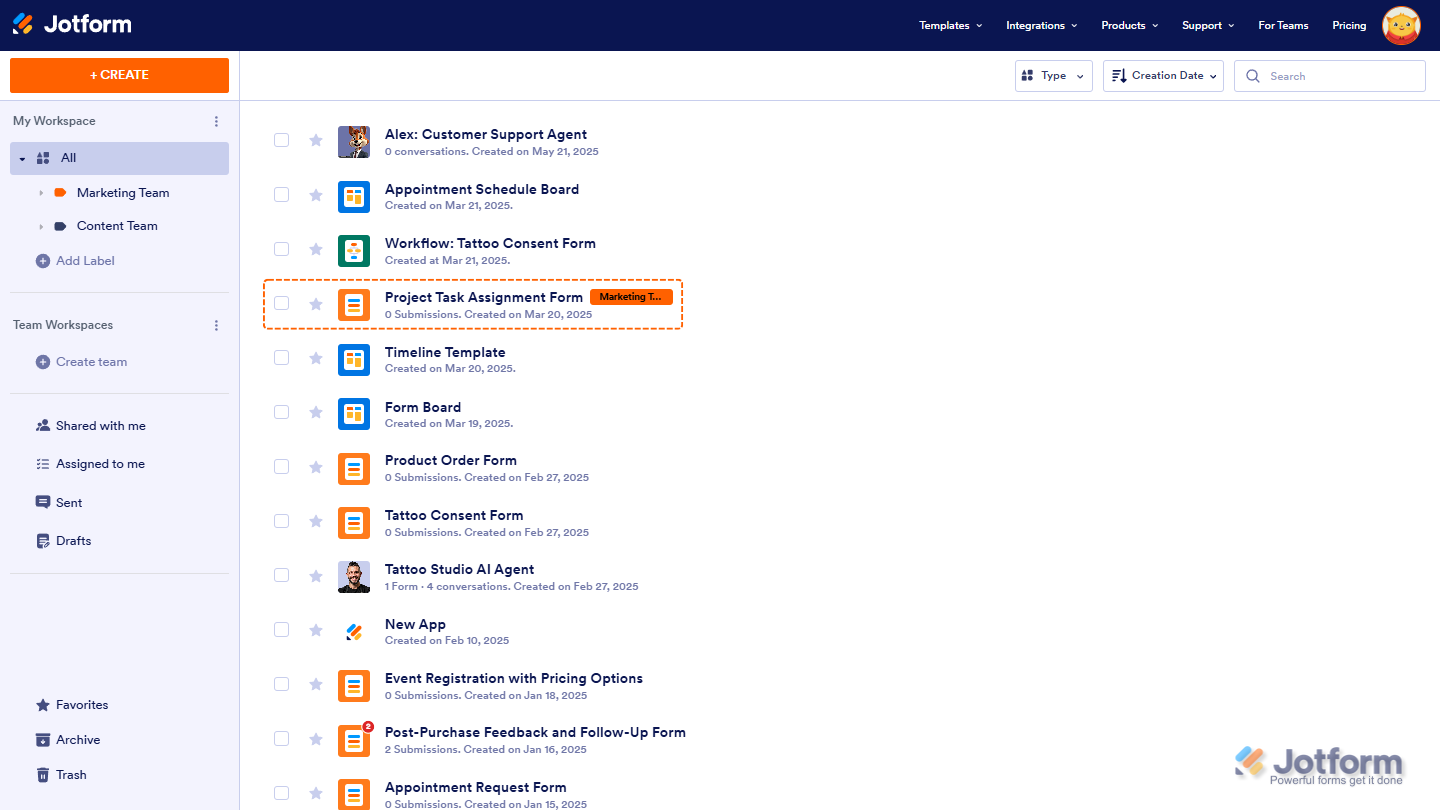
That’s it. You’ll see that the asset you selected is labelled now. Checkout the sample screenshot below:
Note
- All asset types can be labeled.
- You can assign multiple labels to each asset.
Accessing Shared Assets
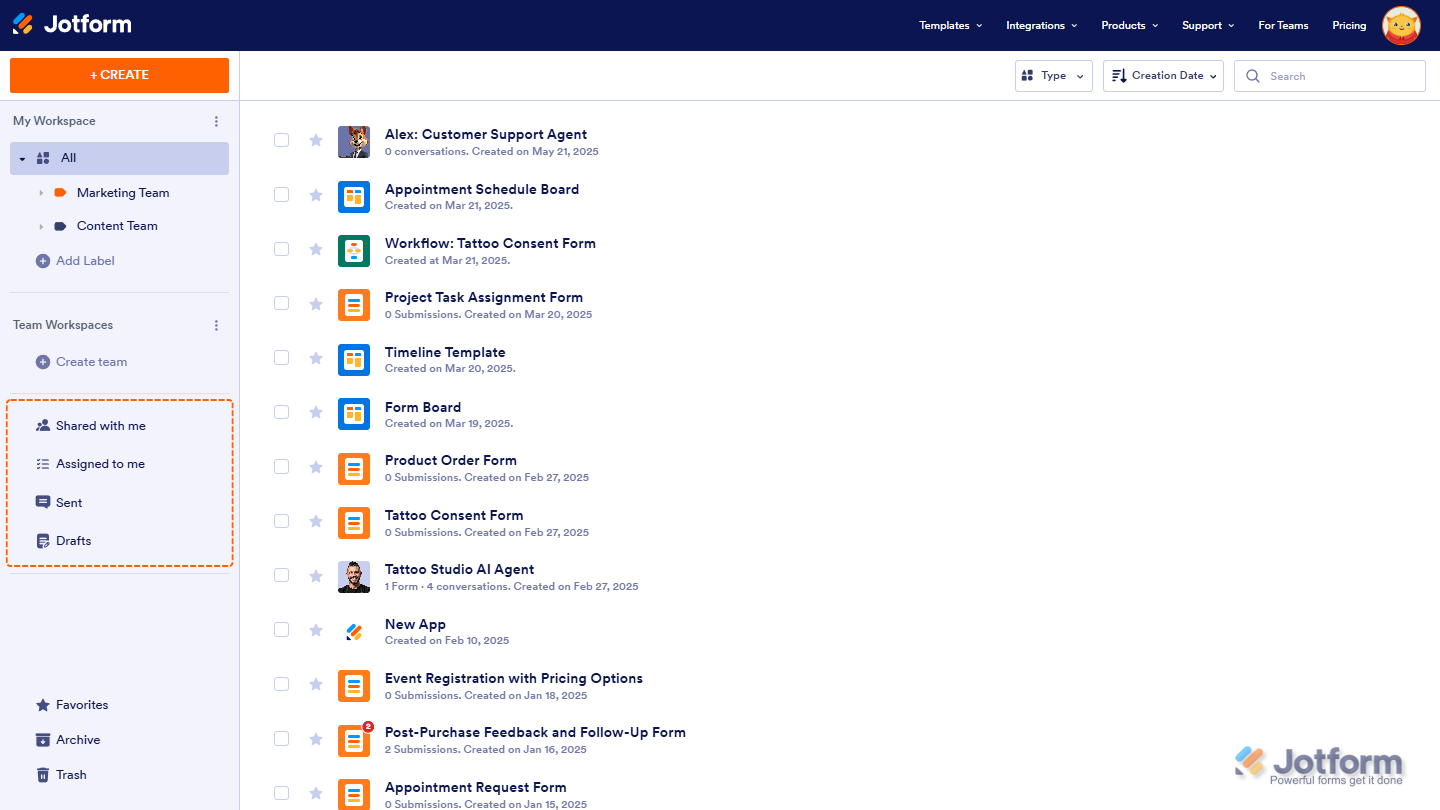
You can also access your shared assets in your Workspace page. In the menu on the left, you’ll see a section that includes:
- Shared with Me — Access Forms, Tables, Boards, Conversations and Reports that others have shared with you.
- Assigned to Me — Access forms and workflows that have been assigned to you.
- Sent — Track sent forms and agent conversations you engaged with.
- Draft — View and manage saved drafts of forms.

Send Comment:
2 Comments:
181 days ago
I love the walk through visuals. I look forward to making it through and seeing what you have to offer!
200 days ago
It's a fantastic way for beginners like me to understand Jotform. Thanks, Jotform team, for making it easier.