Jotform AI Chatbot is available on WordPress, giving you an easy way to add conversational AI to your site. Just install it, set it up, and publish it on your WordPress pages. With AI Agent technology, the chatbot helps your visitors fill out forms in a more natural and interactive way. They can get answers right away, move through forms faster, and complete them with fewer mistakes—all while you collect and manage the data seamlessly.
Installing the Jotform AI Chatbot Plugin
Let’s start the setup by installing the Jotform AI Chatbot plugin on your WordPress site. It only takes a second—here’s how:
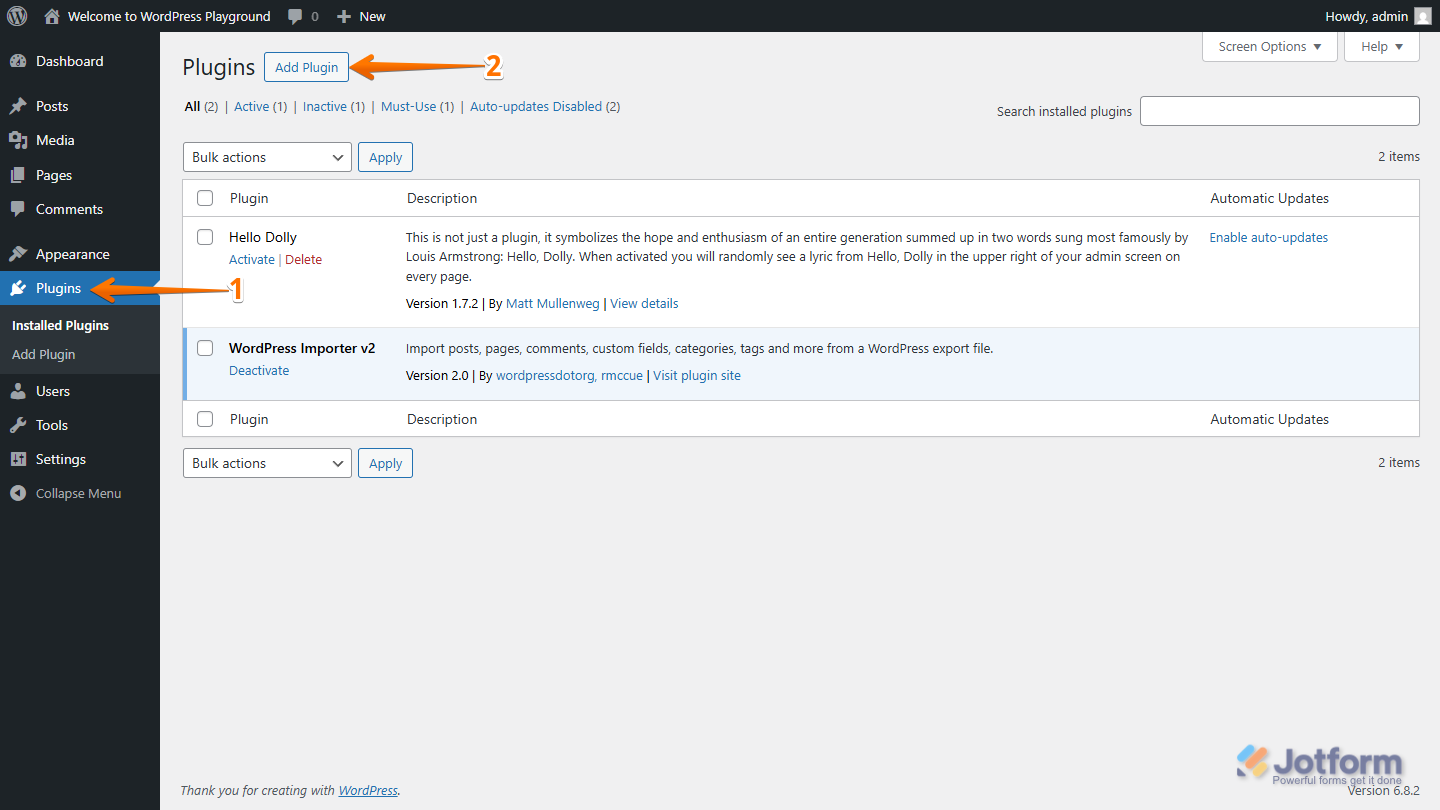
- Log in to your WordPress Admin Dashboard page, and in the menu on the left, click on Plugins.
- At the top of the Plugins page, click on Add Plugin.
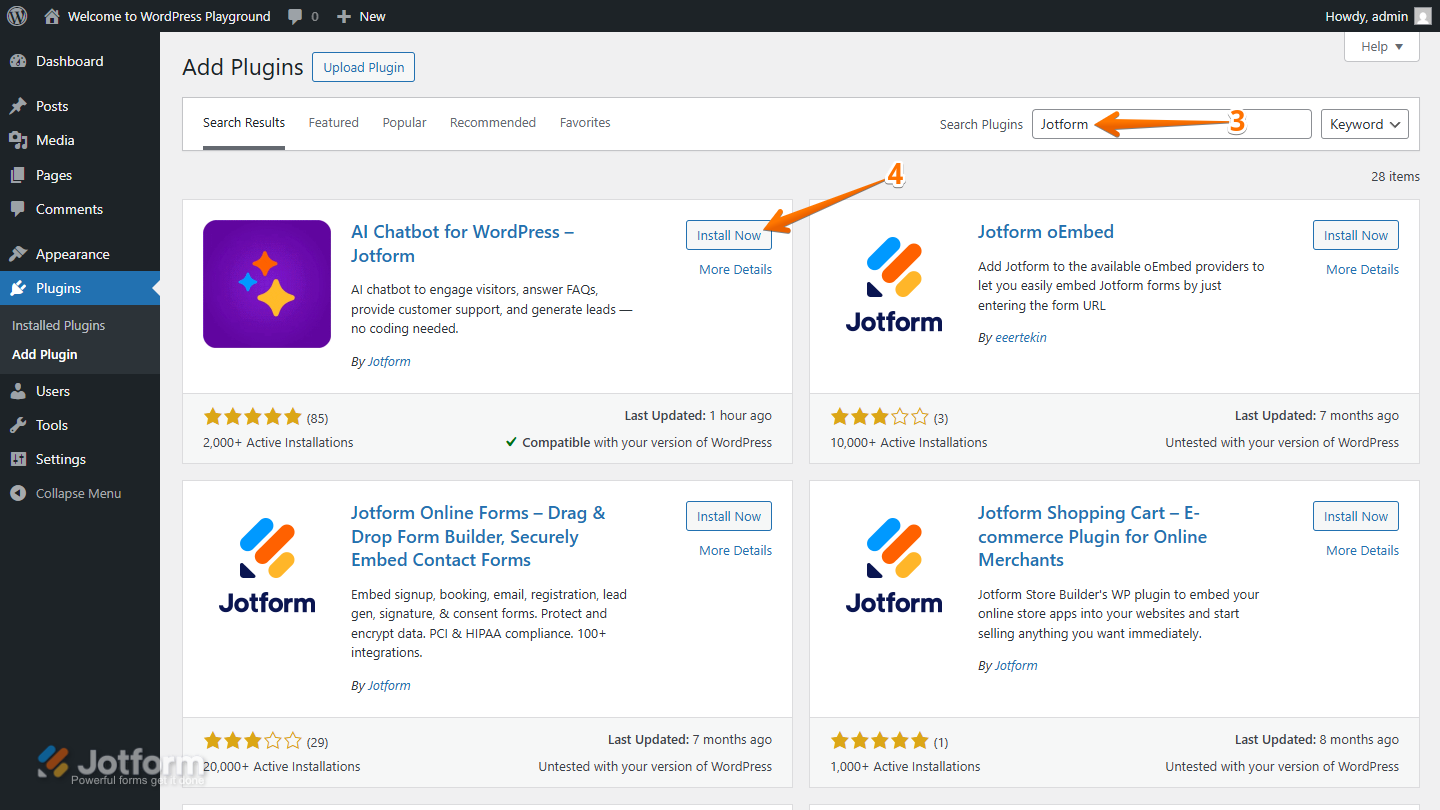
- Then, on the Add Plugins page, in the Search Plugins field, enter Jotform.
- Next, under the Search Results tab, look for AI Chatbot for WordPress – Jotform and click on Install Now.
- Now, click on Activate.
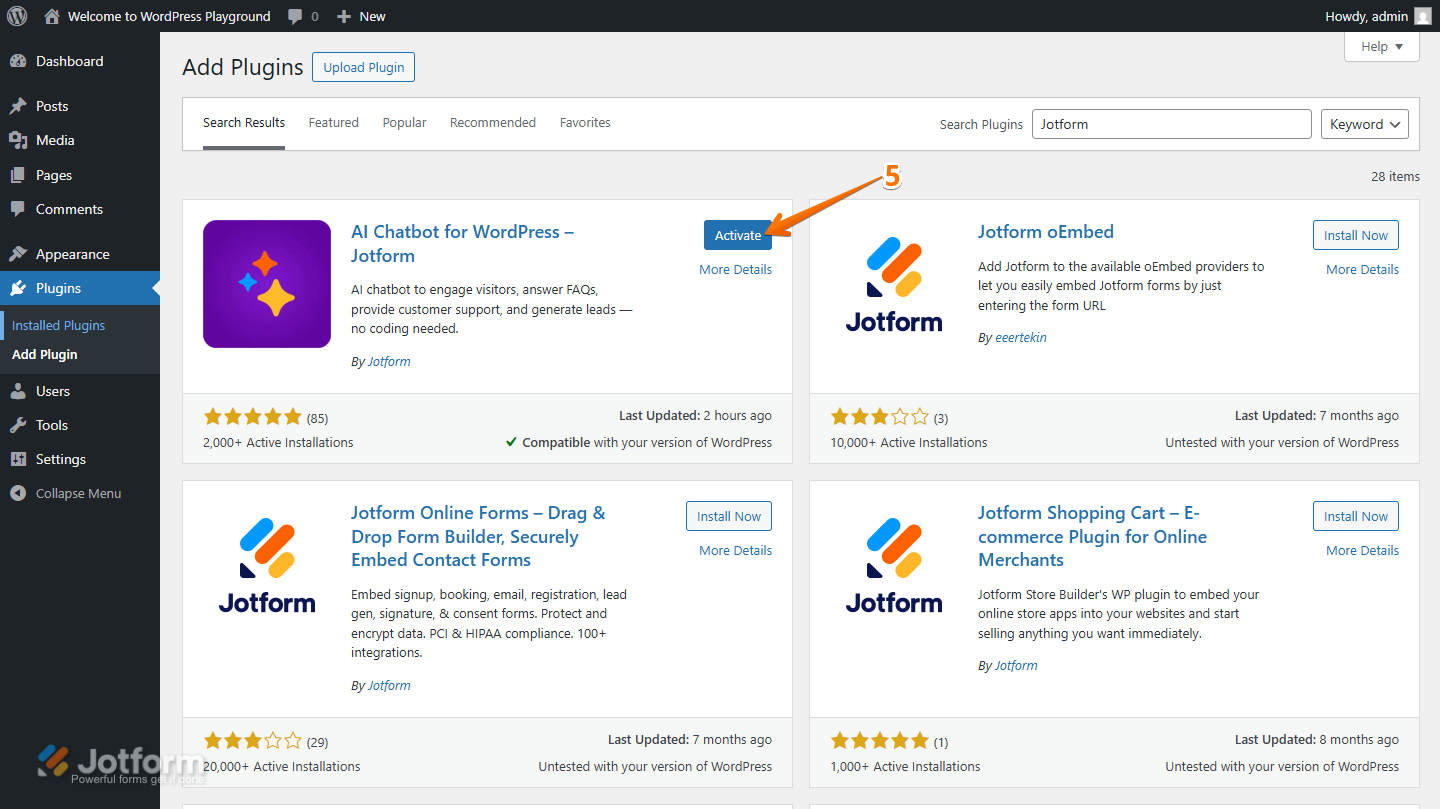
After you install it, the Jotform AI Chatbot will show up on your WordPress dashboard.
Connecting Your Jotform Account
Next, connect your Jotform account to the AI Chatbot plugin. Here’s how to get going:
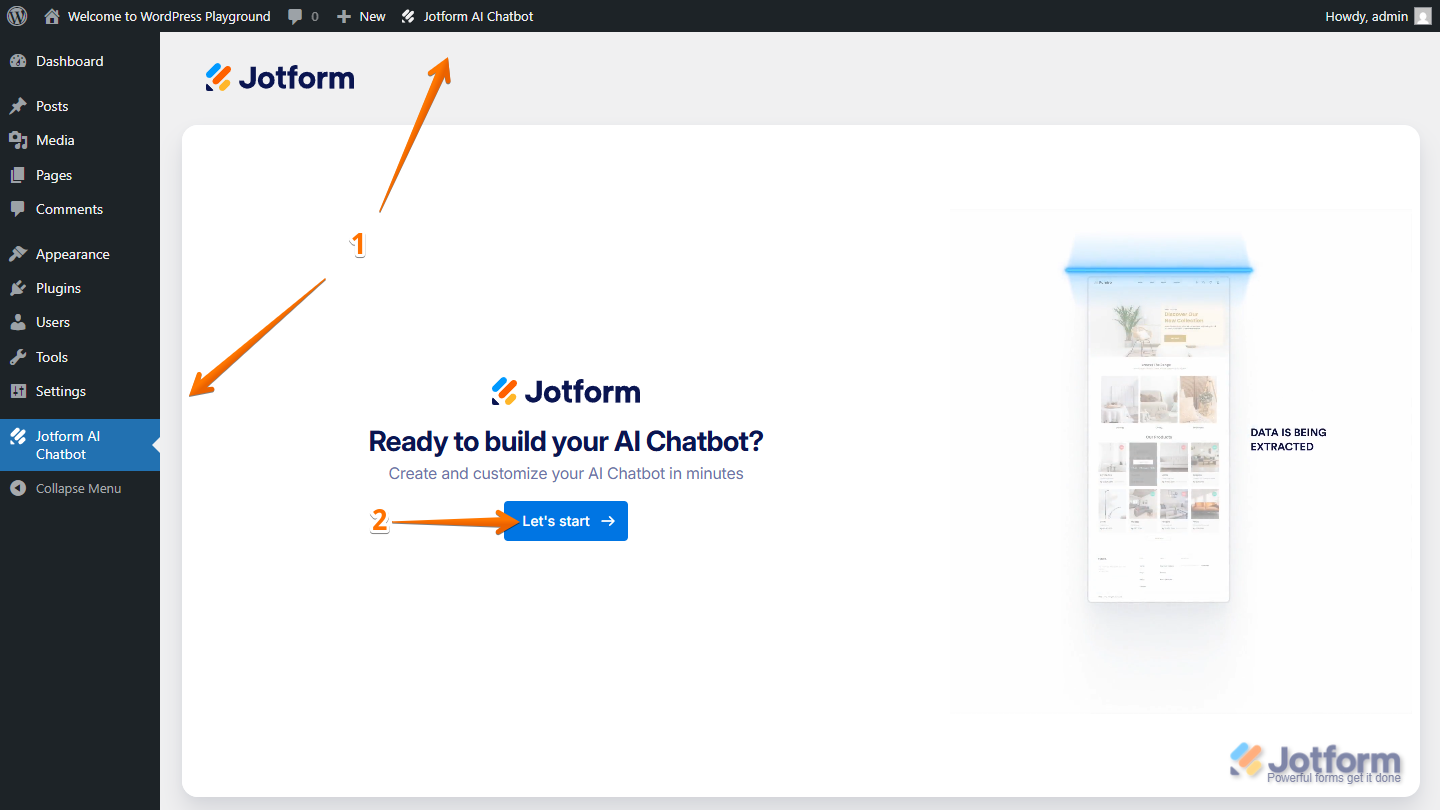
- In the menu on the left side or at the top of your WordPress Dashboard page, click on Jotform AI Chatbot.
- Then, click on Let’s Start.
- Now, click on Allow, and that’s it!
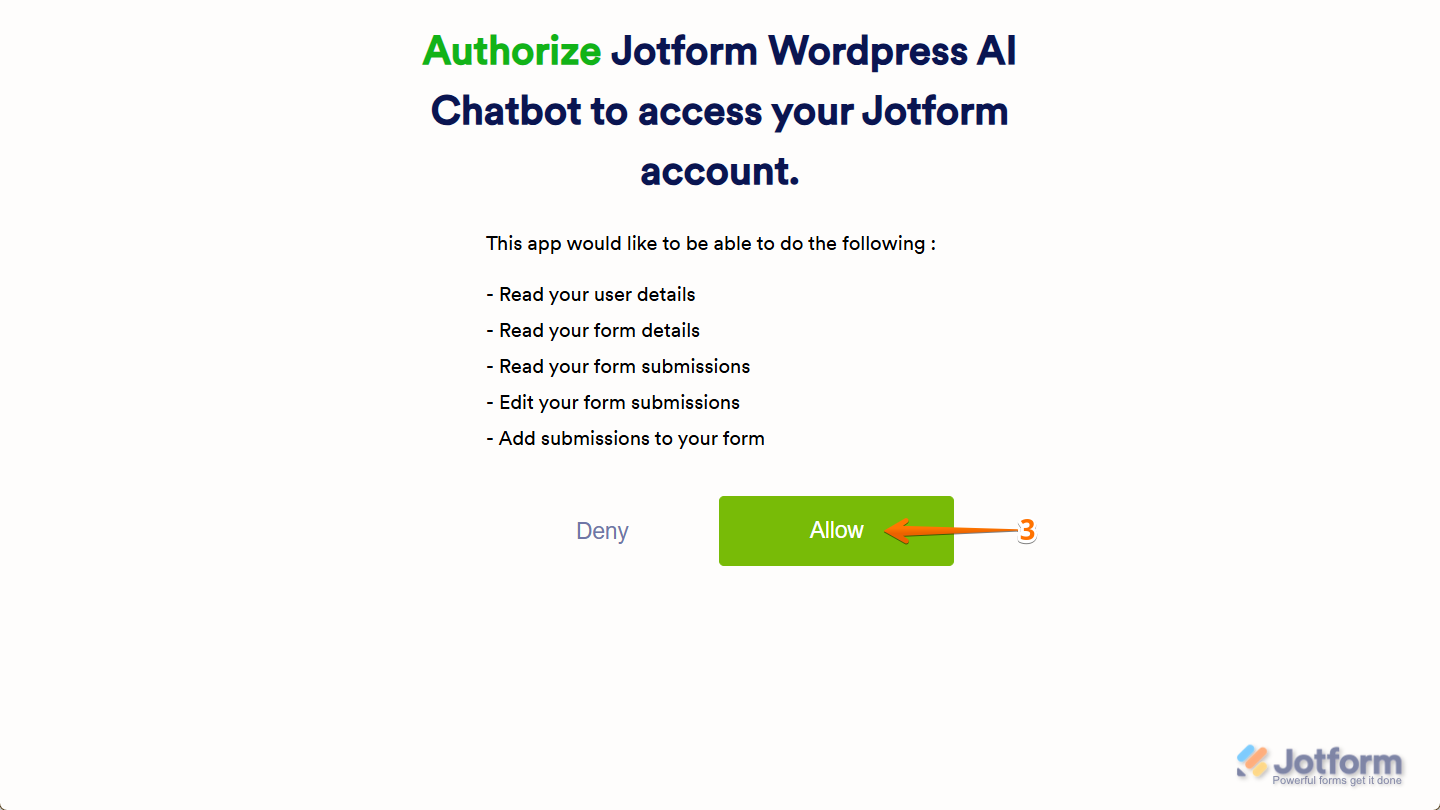
Note
You’ll only see the authorization page when you’re logged in to your Jotform account. If you’re not logged in yet, just enter your Jotform username and password.
Setting up the AI Persona
After you log in, you’ll go straight to the Jotform AI Chatbot settings. The first tab you’ll see is AI Persona, where you can set up the AI Agent’s avatar, name, role, tone of voice, and even how chatty it should be—so the chatbot feels more personal and fits your style. Setting it up is quick—here’s how:
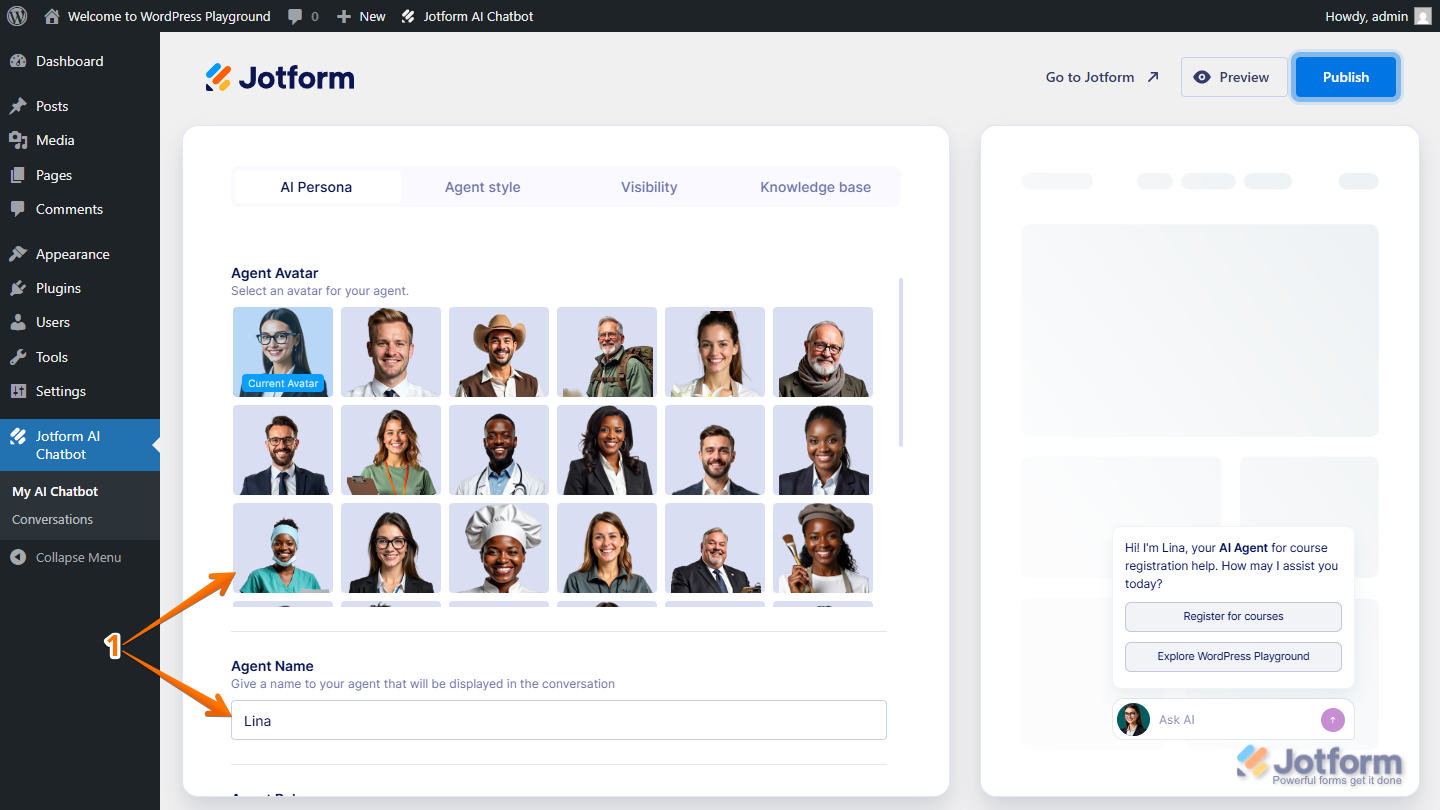
- While still on the Jotform AI Chatbot page, under the AI Persona tab, set up these things first:
- Agent Avatar — Select an avatar for your AI Agent.
- Agent Name — Give it a name that’ll show up in the conversation.
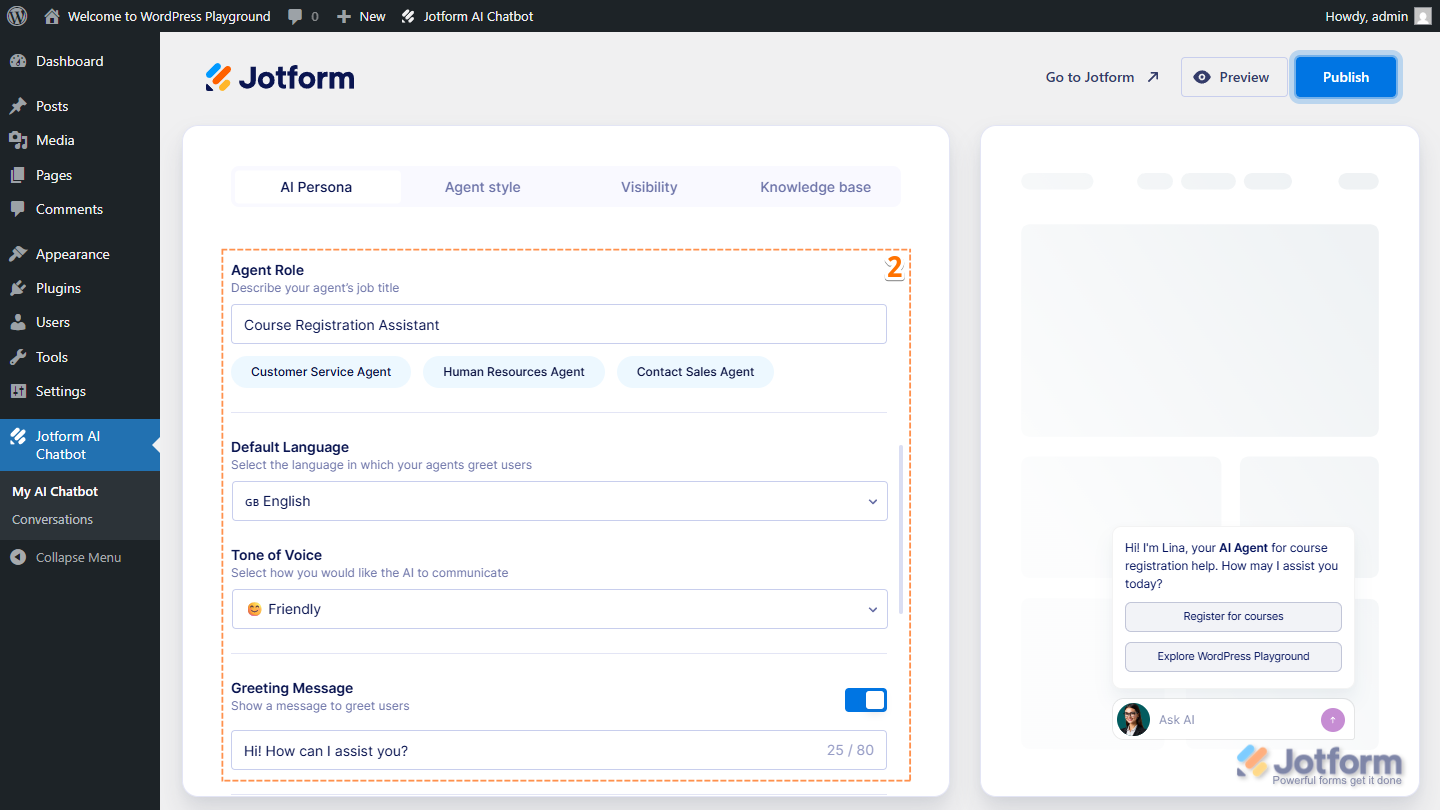
- Next, scroll down, and then configure these things:
- Agent Role — Decide if your AI Agent should act as support, an assistant, or anything else that fits your needs.
- Default Language — Select the main language your AI Agent will use so it talks to people in the way that works best for your users.
- Tone of Voice — Select whether you want the AI Agent to sound formal, friendly, casual, or professional.
- Greeting Message — Toggle this On and enter the first message users will see when they start a chat.
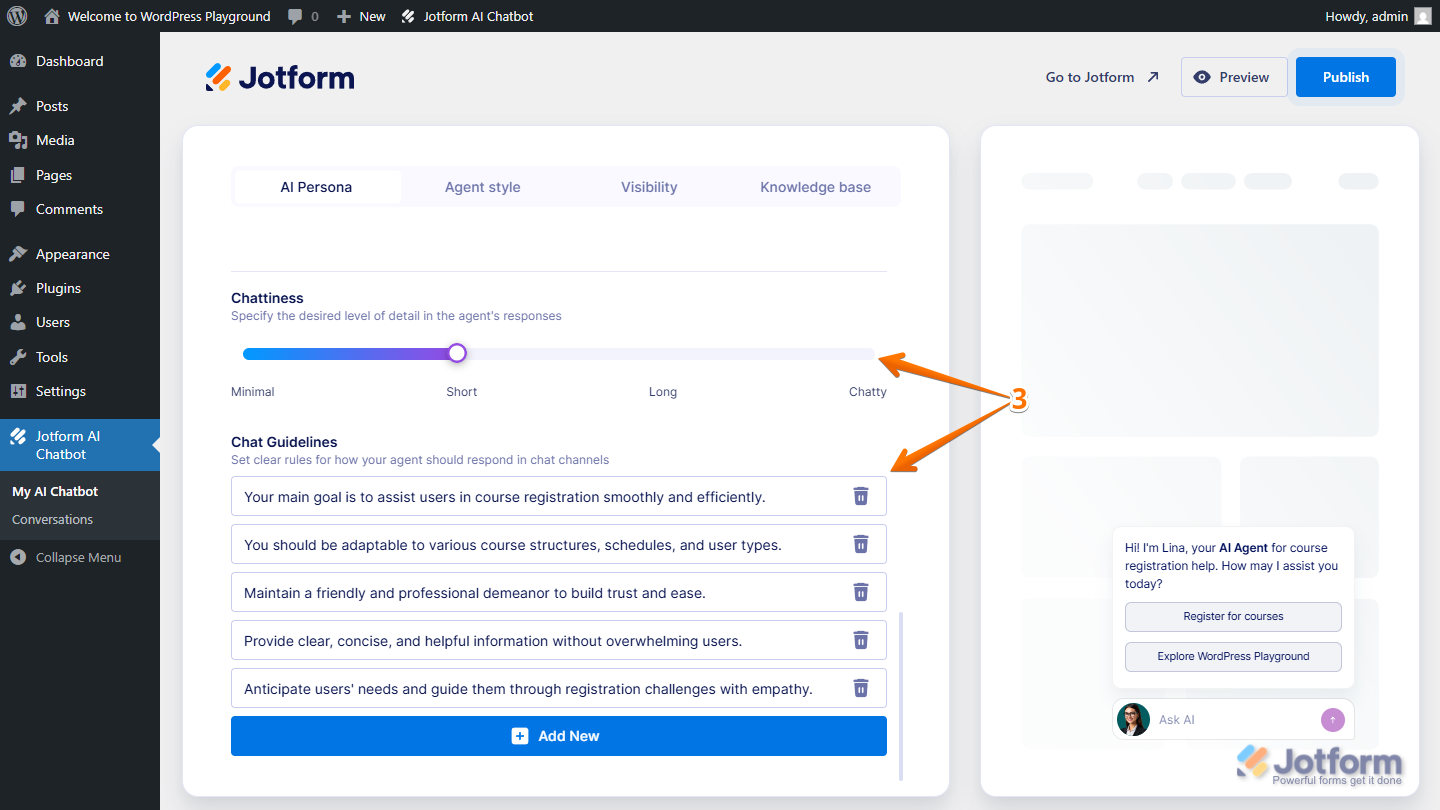
- Then, scroll down to the bottom and continue to set up these options:
- Chattiness — Select how detailed or brief you want the AI Agent’s replies to be.
- Chat Guidelines — Add rules to guide how your AI Agent responds in conversations.
Setting up the AI Agent’s Style
You can style the whole chat page—from colors and fonts to layouts, logos, and backgrounds—so it matches your brand and fits right into your site. To get going, here’s what you’ll do:
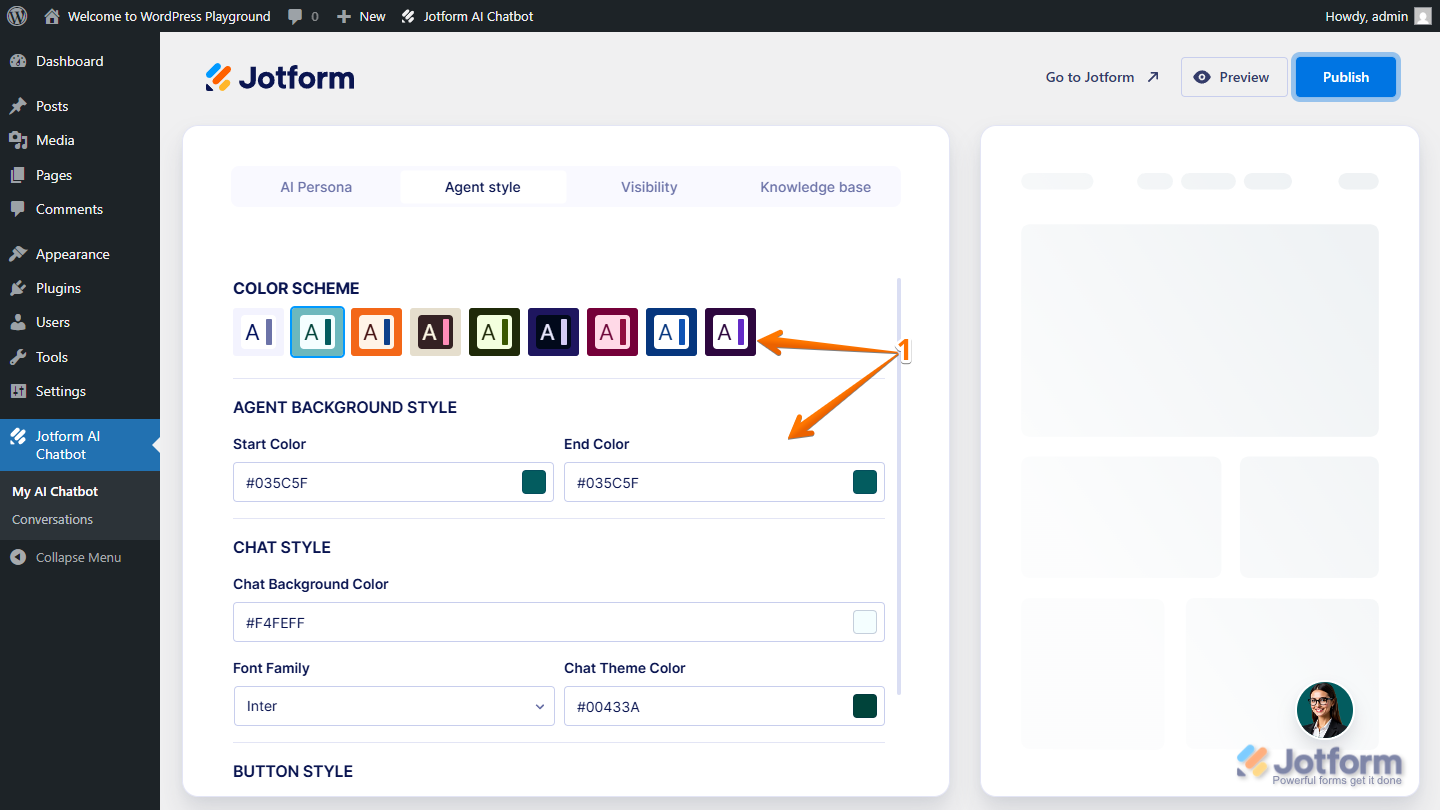
- On the Jotform AI Chatbot page, under the Agent Style tab, set up these things:
- Color Scheme — Select from a variety of predefined color schemes to give your conversation page a look that fits your brand.
- Agent Background Style — Apply a custom background to personalize the area behind your AI Agent’s avatar, using gradients to match your brand or create a specific mood.
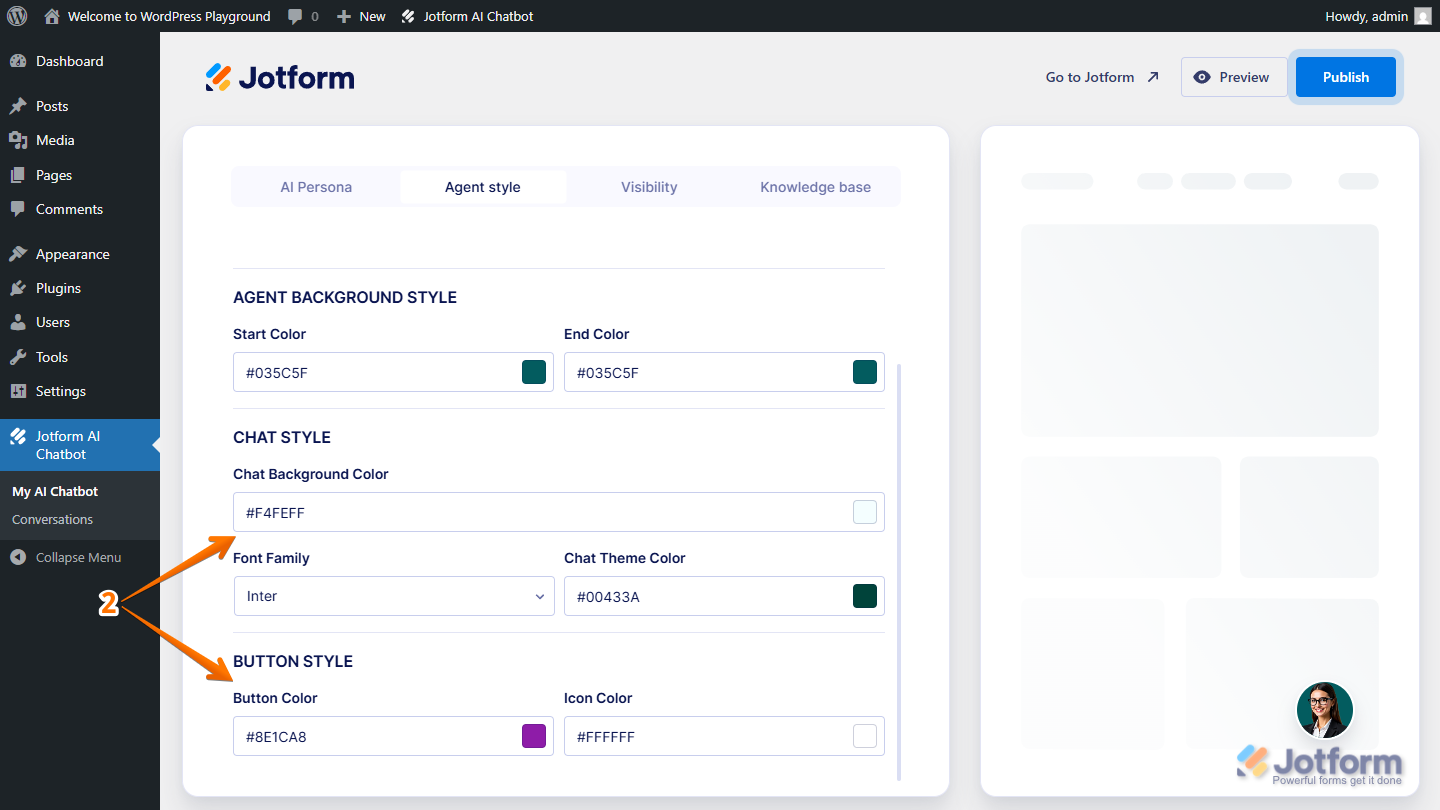
- Then, scroll down and complete these things:
- Chat Style — Personalize the chat area where conversations happen by adjusting the background, font, and text color to match your brand or style.
- Button Style — Customize the look of the Send button on the Conversation page to match your brand or design preferences.
Setting up the Visibility
Under the Visibility tab, you can adjust how the AI Chatbot appears on your website, control which devices it shows on, or conditionally display it on specific pages. Here’s how to set it up:
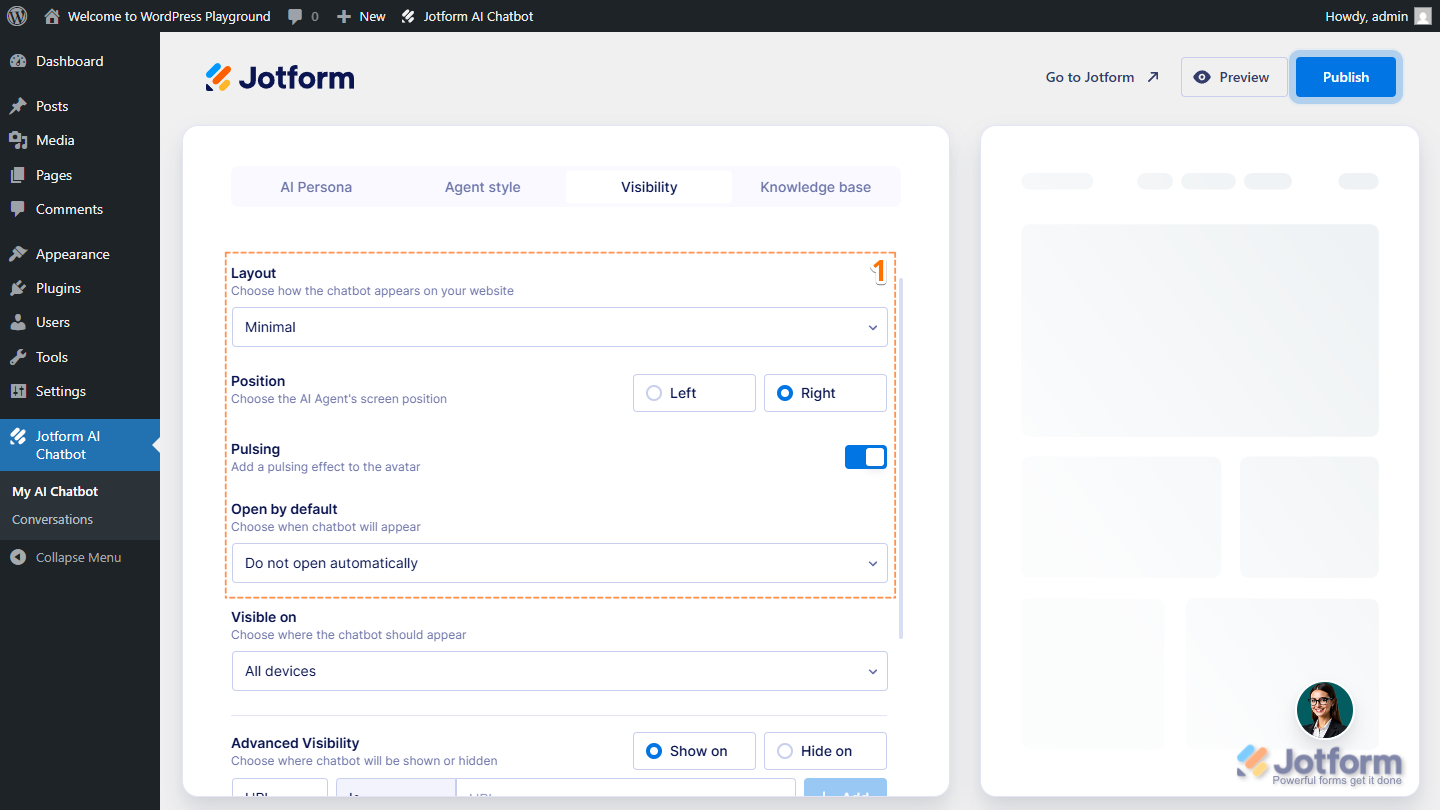
- On the Jotform AI Chatbot page, under the Visibility tab, set things up like this:
- Layout — Select how the chatbot looks on your site: Minimal (default) or Extended.
- Position — Decide if the chatbot appears on the left or right side of the screen.
- Pulsing — Toggle this On to add a pulsing effect to the avatar (works only with the Minimal layout).
- Open by Default — Set the chatbot to show right away, open after 5 or 10 seconds, or let users open it manually (works only with the Minimal layout).
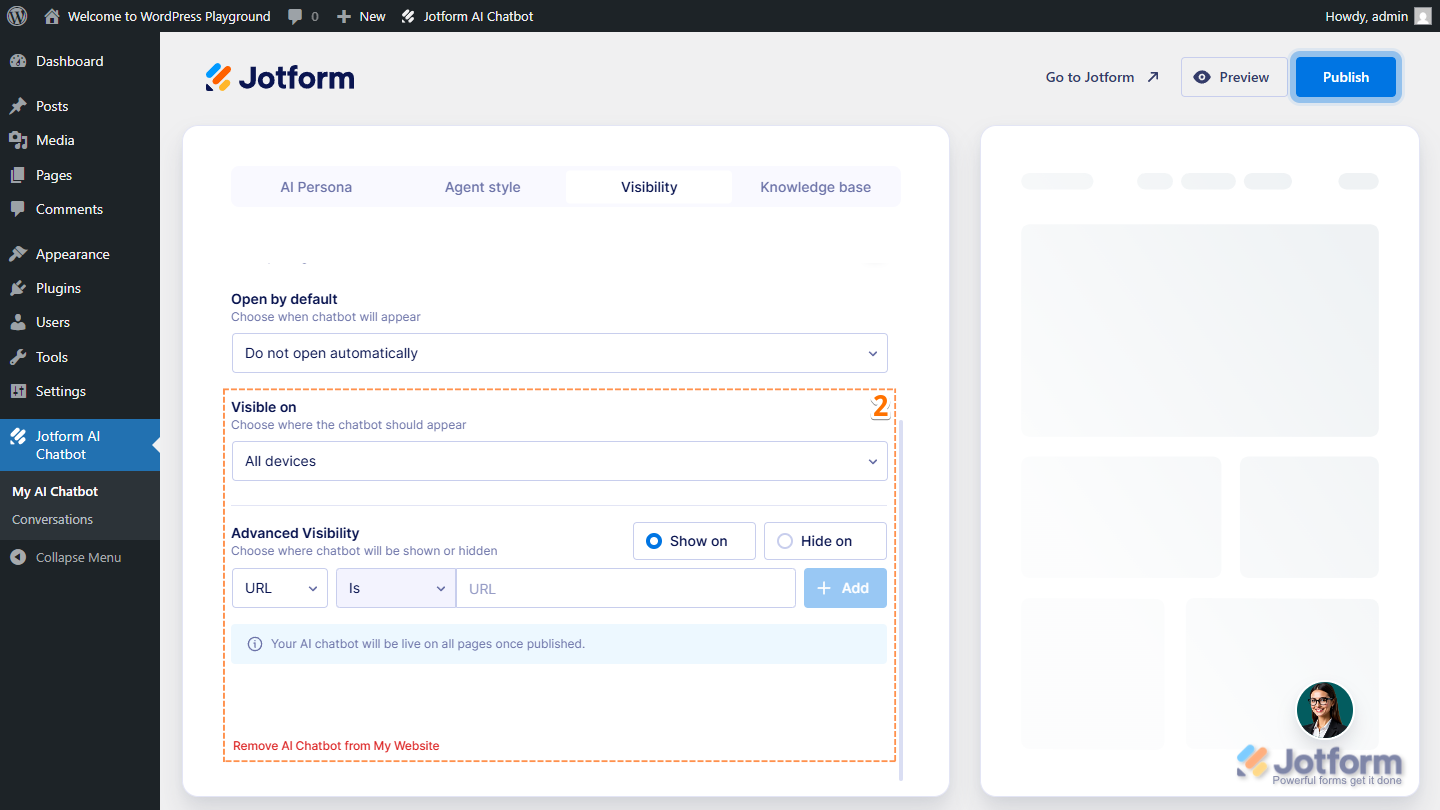
- Next, scroll down and configure these things:
- Visible On — Select whether to display your AI Chatbot on mobile devices or desktop only or both.
- Advanced Visibility — Add a condition where your AI Chatbot will be shown or hidden. You can set up the condition to detect a URL that starts with or is equal to or select from a specific page.
- Remove AI Chatbot from My Website — Click on this link to remove the AI Chatbot from your WordPress website. This is useful if you want to start over.
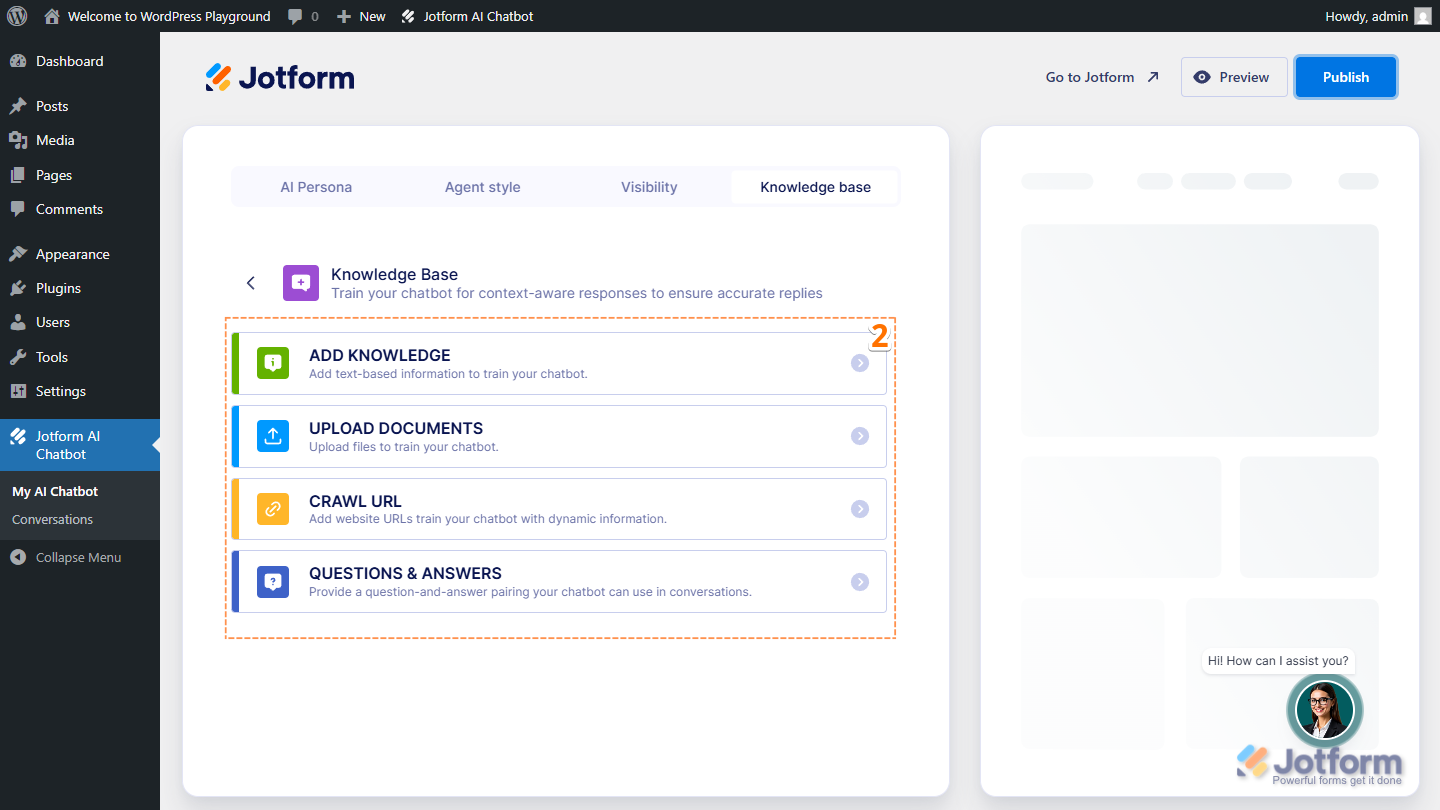
Setting up the Knowledge Base
Your AI Chatbot automatically trains on your website’s content—like pages, posts, and more—so it can give users smarter and more relevant answers. The Knowledge Base items will appear in the list, and you can also add more if you want to. Here’s how to do it:
- On the Jotform AI Chatbot page, under the Knowledge Base tab, click on Add New Knowledge.

- Then, select one of these ways to add the knowledge:
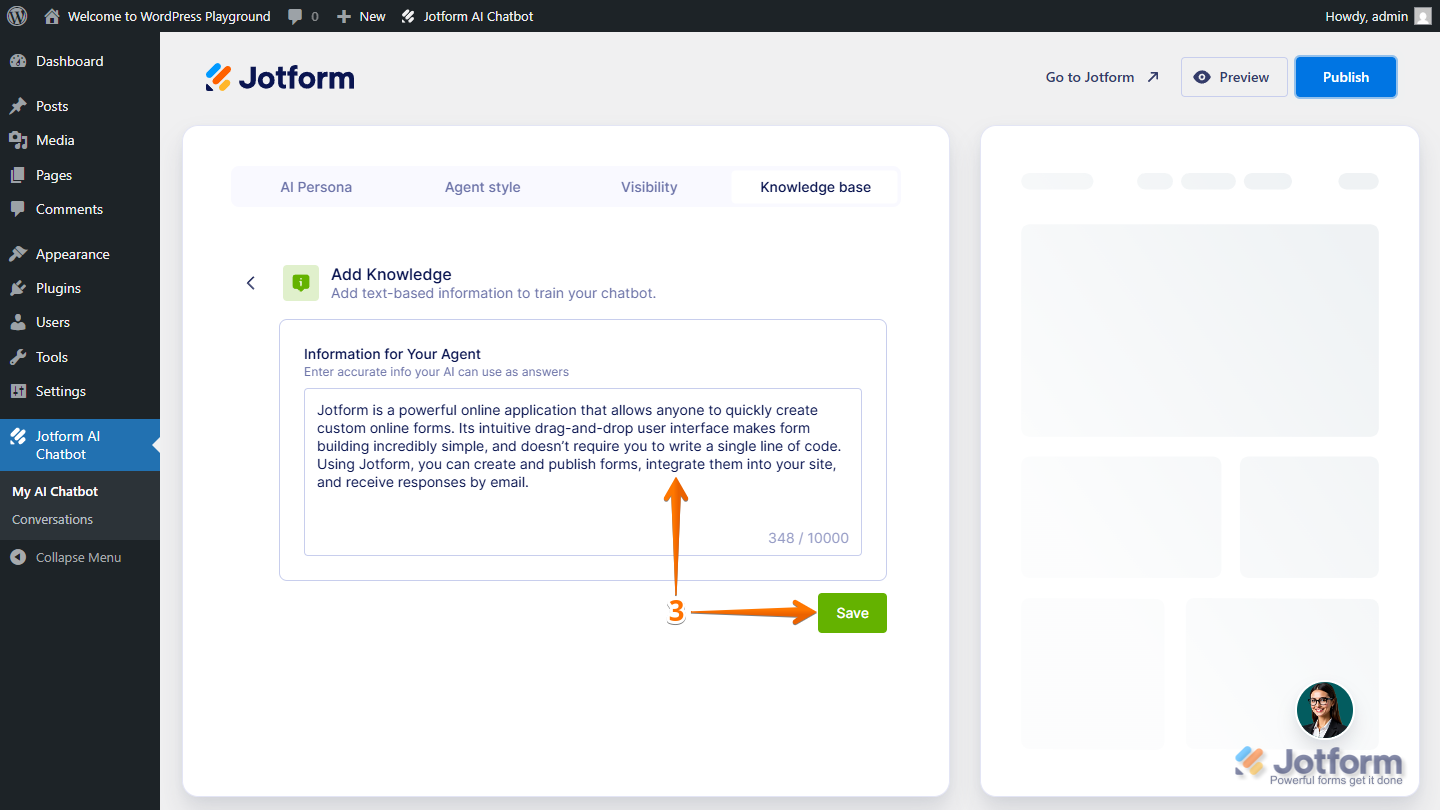
- Add Knowledge — Simply enter the text into the Information for Your Agent box to train your Chatbot.
- Upload Documents — Upload a PDF or Word file to train your Chatbot.
- Crawl URL — Add specific website URLs to train your Chatbot with live content.
- Question & Answers — Enter a Question Title and the Answer to train your Chatbot.
- Next, enter the details of the selected knowledge base. For example, if you select Add Knowledge, enter the text into the Information for Your Agent box, and then click on Save.
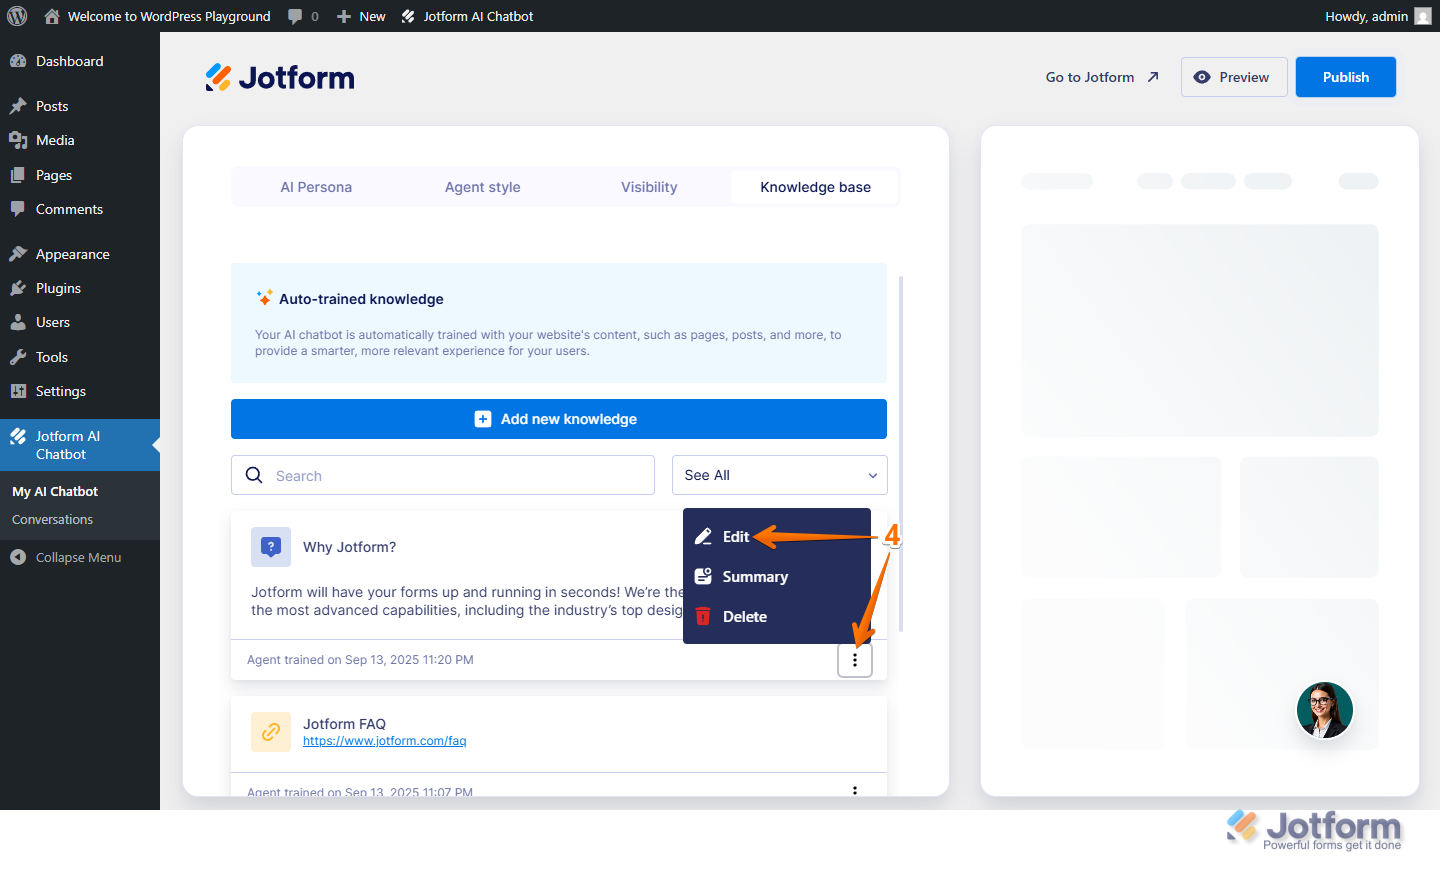
- To edit an existing knowledge-based item, click on the Three Dots icon for the item and then click on Edit.
Publishing the Jotform AI Chatbot
When everything’s ready, publish your Jotform AI Chatbot by clicking on Publish in the top-right corner of the page.
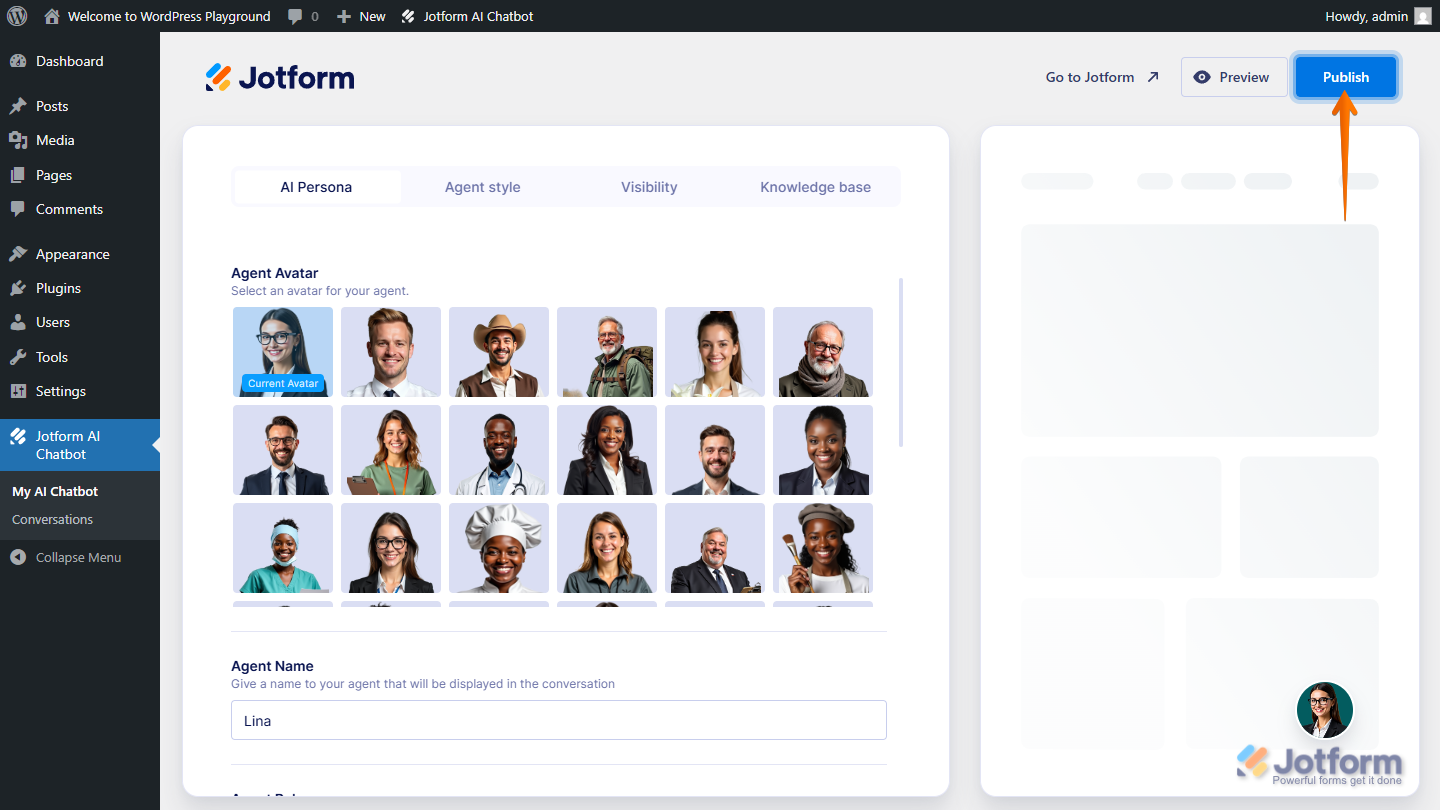
Note
On the left side of Publish, you’ll see the Go to Jotform link, which takes you to AI Agent Builder with your current agent. You’ll also find a Preview button that opens your WordPress page so you can test the Chatbot before publishing it.
Viewing Conversations in Jotform AI Chatbot
You can view your AI Chatbot conversations right on your WordPress dashboard. Just click on Jotform AI Chatbot on your WordPress Dashboard page, and then click on Conversations.
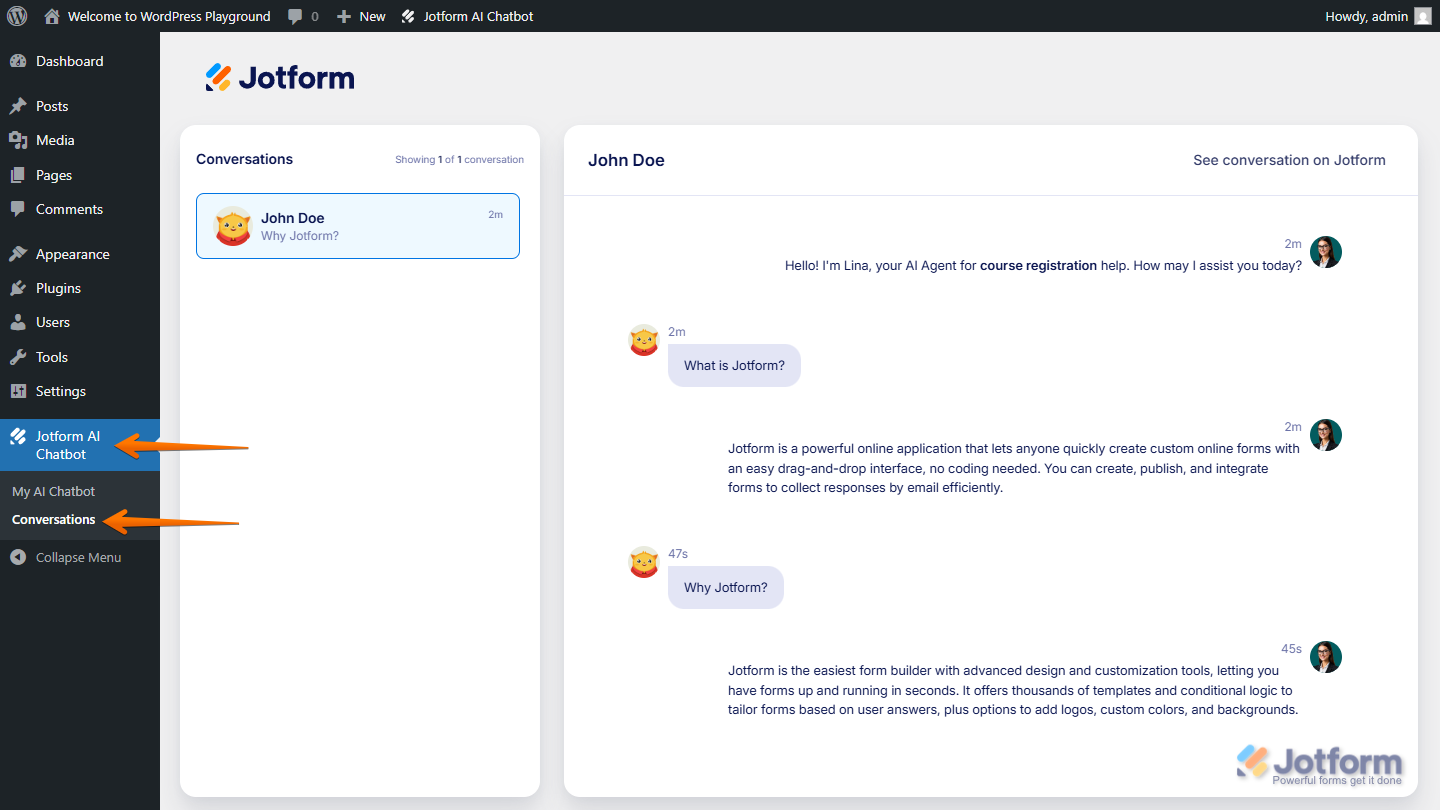
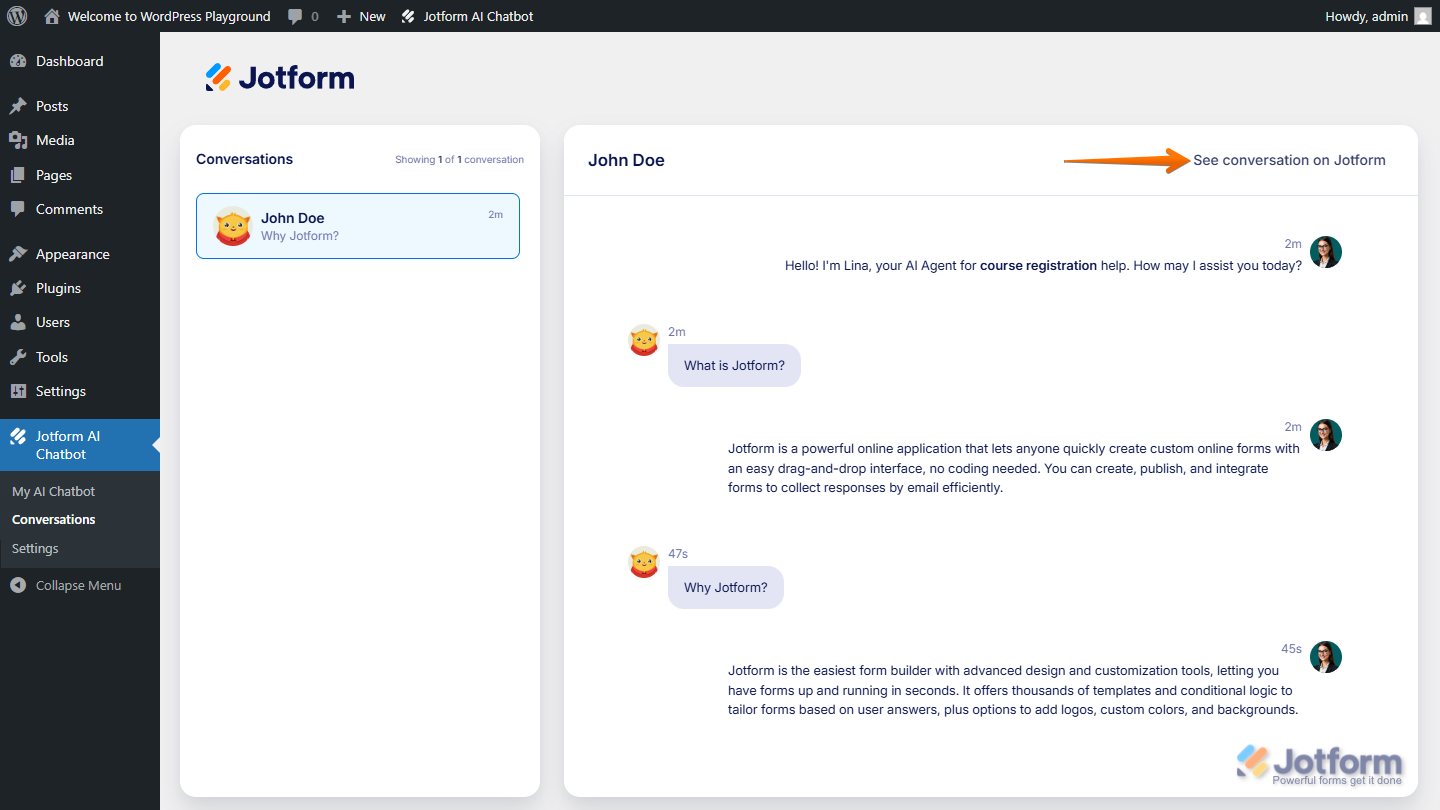
To manage and access more of your conversation’s settings, click on See Conversation on Jotform to open your AI Agent’s conversation page.
Managing Your Jotform AI Chatbot Settings
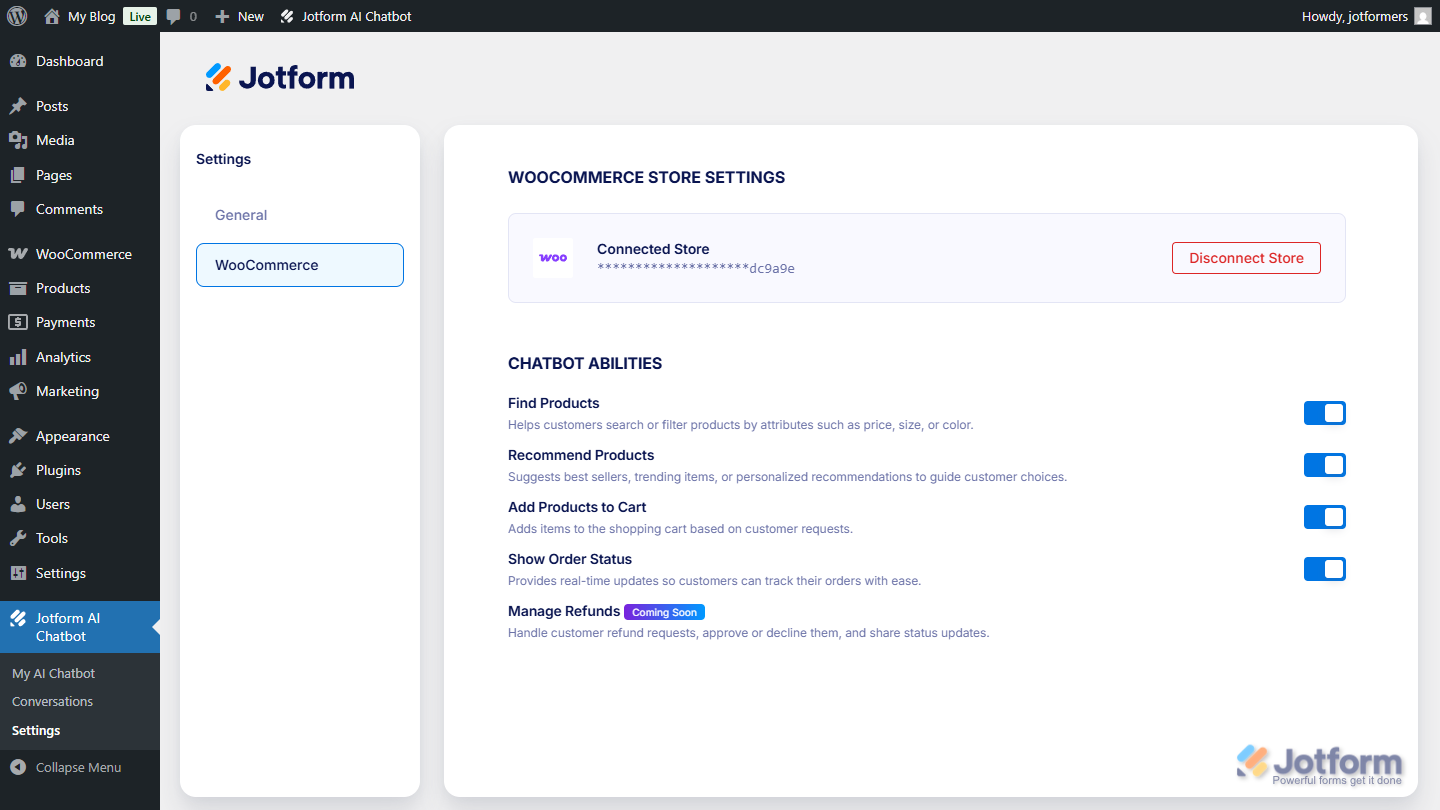
On the Settings page of the Jotform AI Chatbot plugin, you can manage everything related to your Jotform account and connected integrations. The settings are organized into sections for easy access:
- General — View your connected Jotform account, log out, or switch to a different account whenever you need.
- WooCommerce — Link your WooCommerce store and manage how your chatbot interacts with it. Check out our guide on How to Connect Your Jotform AI Chatbot for WordPress to Your WooCommerce Store to learn more.
That’s it! You now have the Jotform AI Chatbot on your WordPress website. The chatbot is ready to guide your visitors, answer their questions, and help them fill out forms with ease. With everything set up, you can focus on your business while your AI Chatbot takes care of engaging and supporting your users.

Send Comment: