This guide walks you through configuring SCIM and role provisioning between Okta and your organization to automate user management and streamline access control. Before setting up SCIM, make sure you have already configured SAML Single Sign-On (SSO) for your organization.
SETTING UP SCIM PROVISIONING
Activating SCIM Provisioning
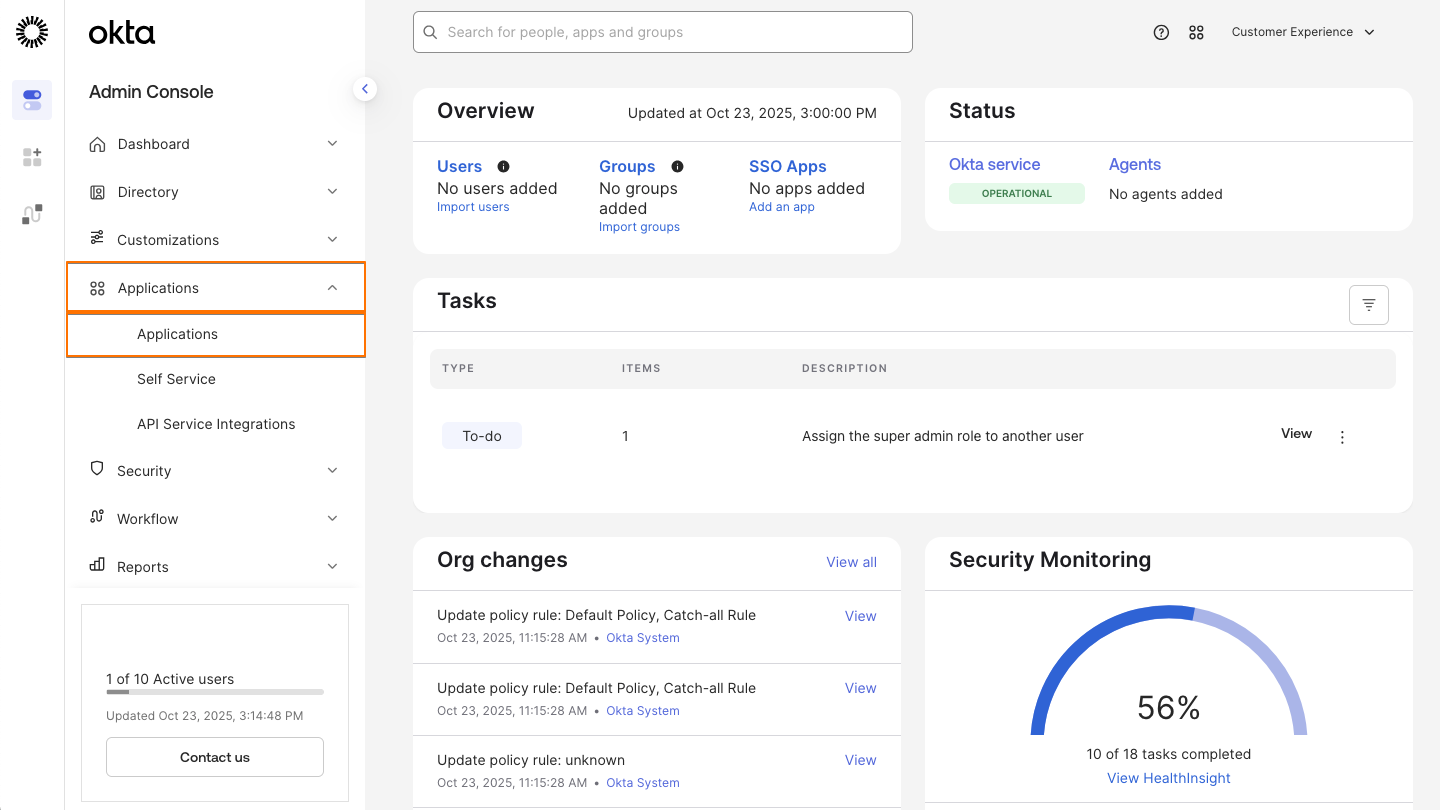
- In the Okta Admin Console, in the left menu click on Applications.
- In the Applications dropdown, select Applications.
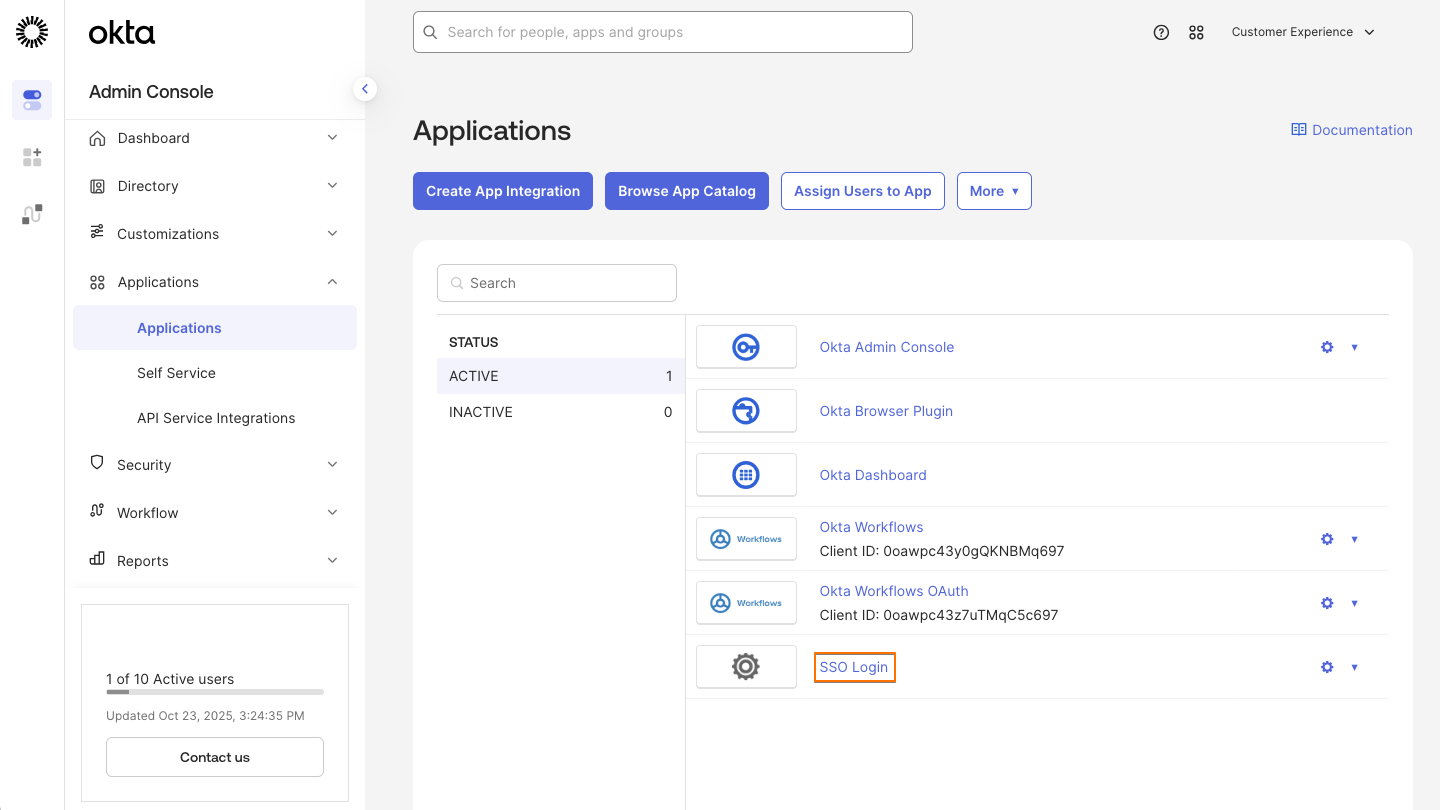
- Click on the SAML application you created for the SSO.
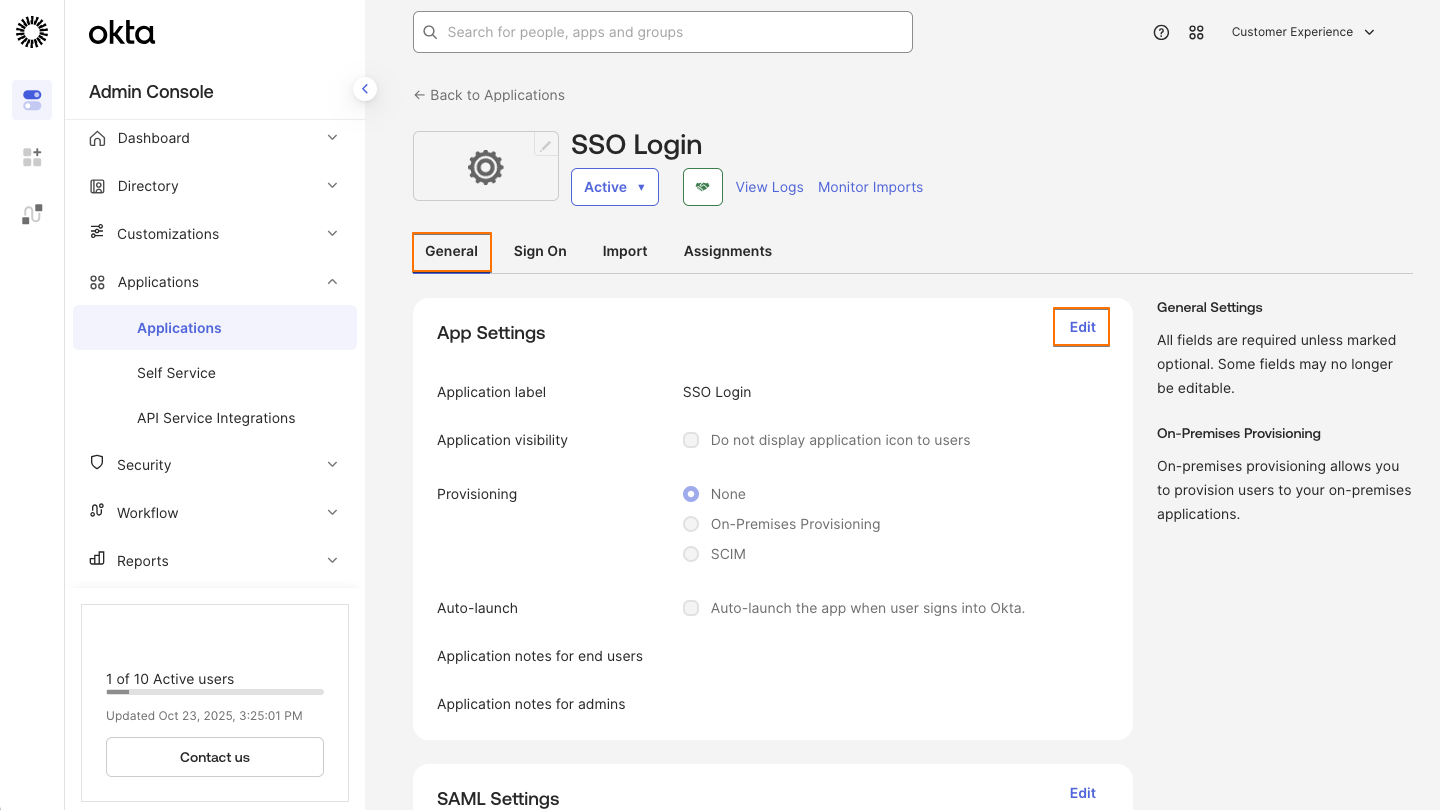
- Now, go to the General tab.
- In the top right of App Settings, click on Edit.
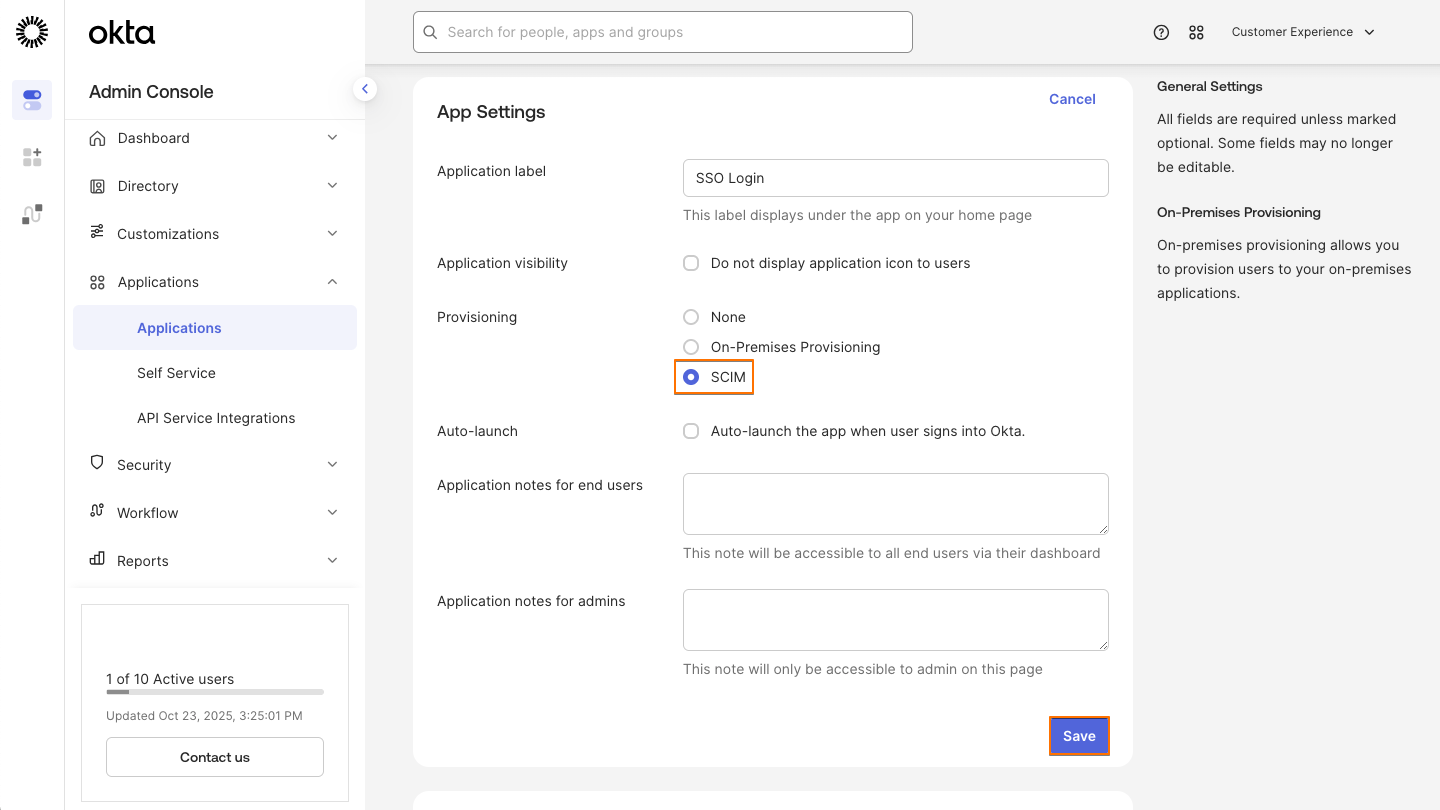
- Next, set provisioning as SCIM.
- Click on Save.
Configuring SCIM Provisioning
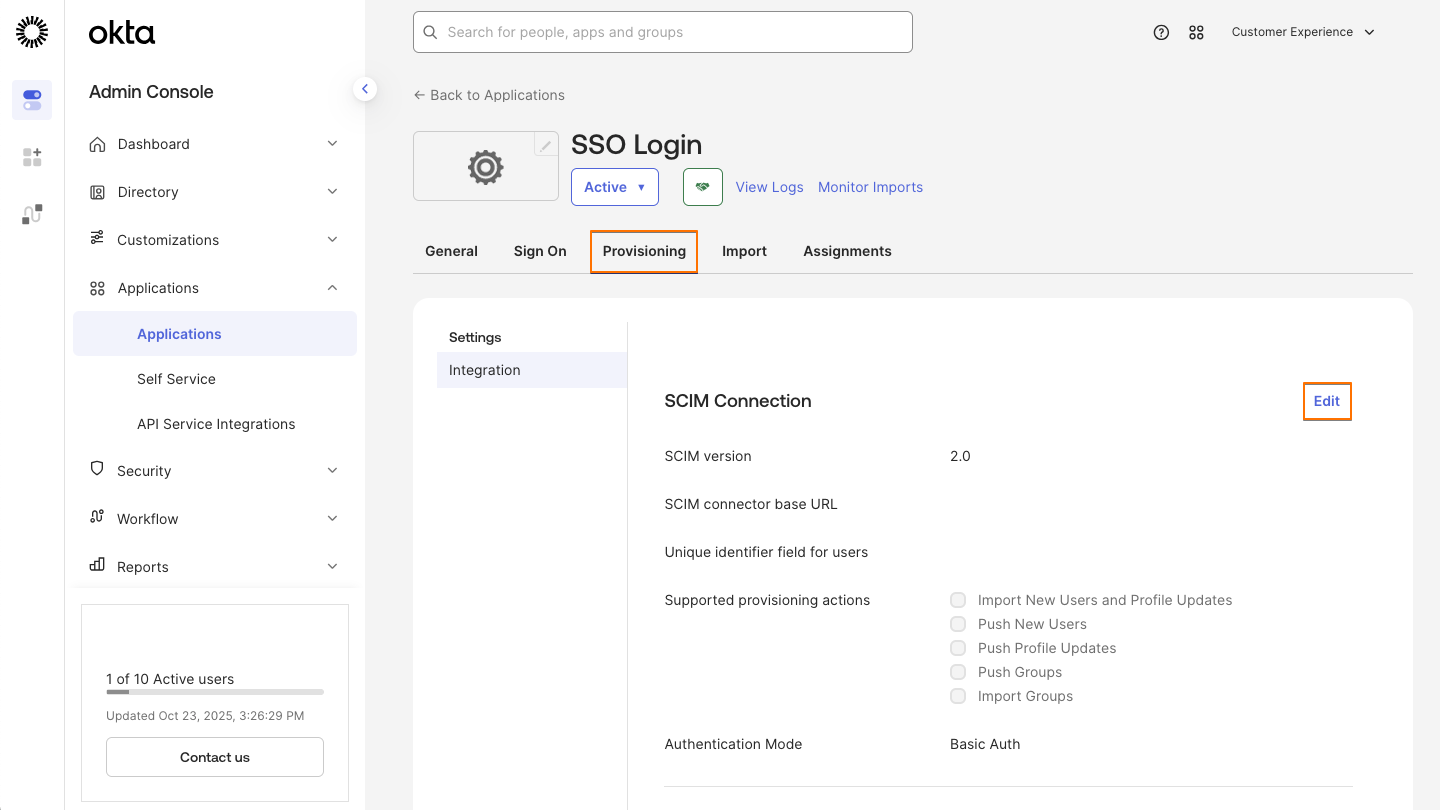
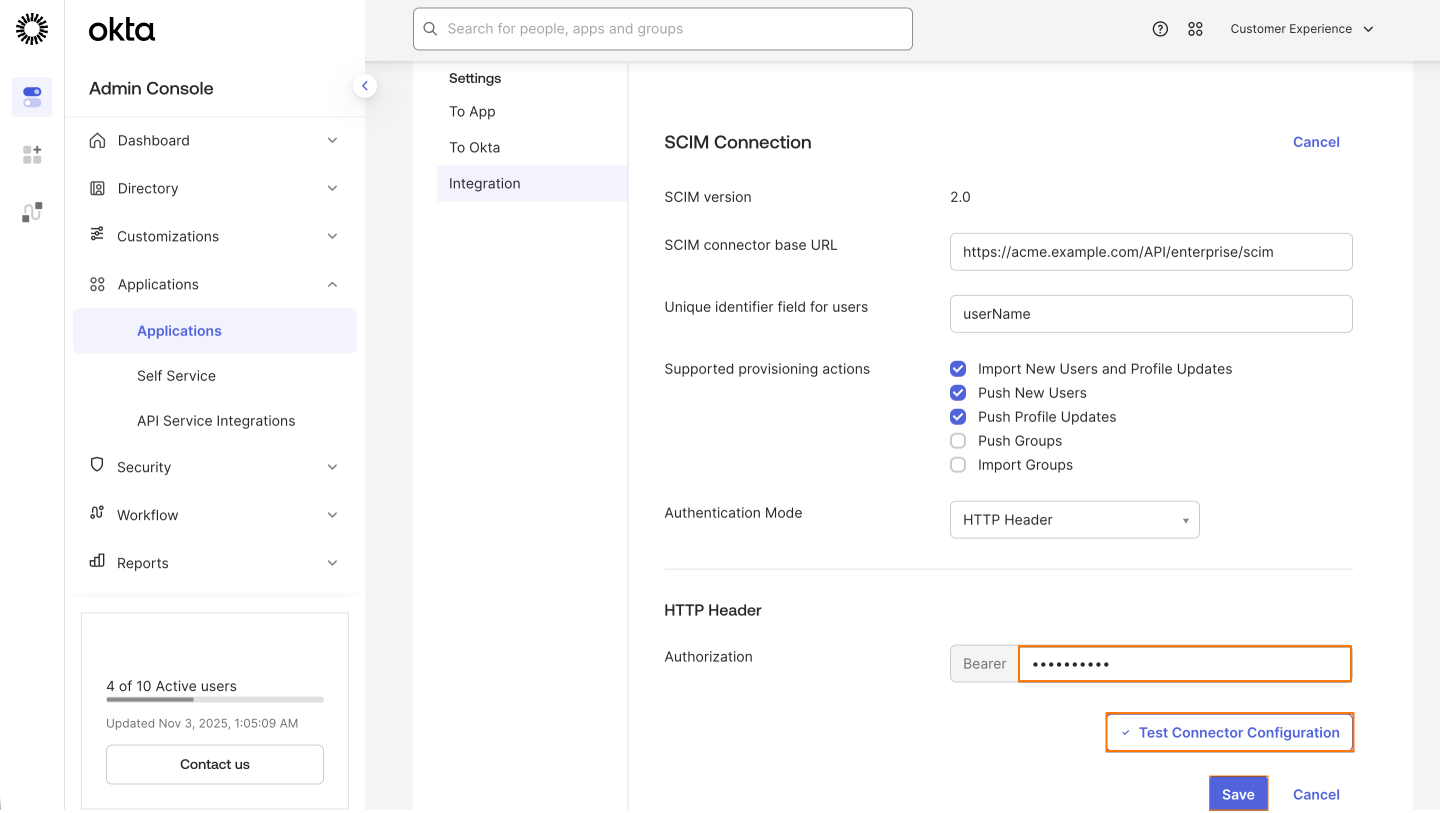
- Go to the Provisioning tab.
- In the top right of SCIM Connection, click on Edit.
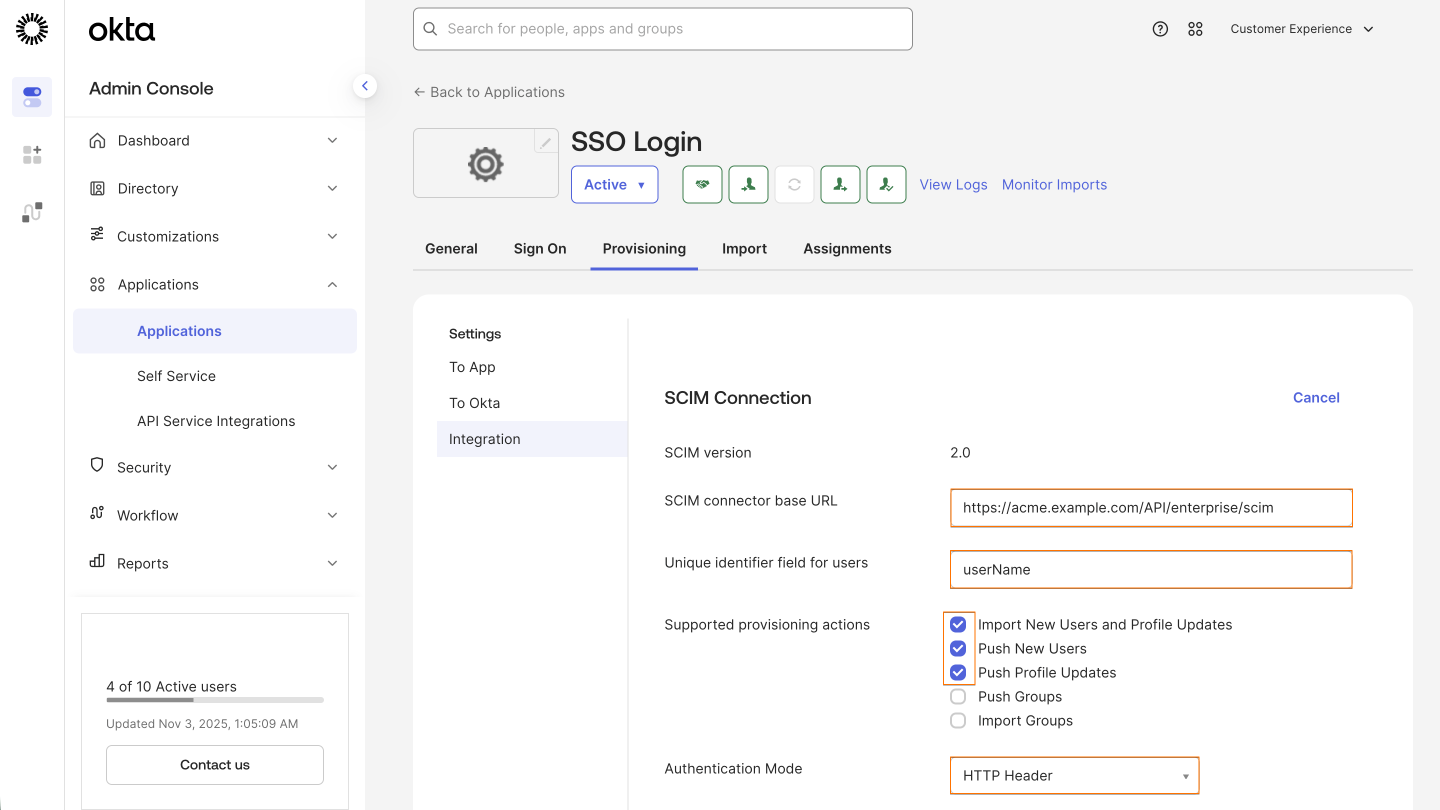
- For SCIM Connector base URL, enter https://{YOUR_COMPANY_SLUG}.example.com/API/enterprise/scim.
Note: The company slug is the unique subdomain for your organization. It appears at the start of your URL — for example, if your team signs in at https://acme.example.com, your company slug is acme.
- For the Unique Identifier field for users, enter userName.
- Select the supported provisioning actions.
Note: Currently, we do not support groups.
- Choose HTTP Header from the Authentication Mode dropdown.
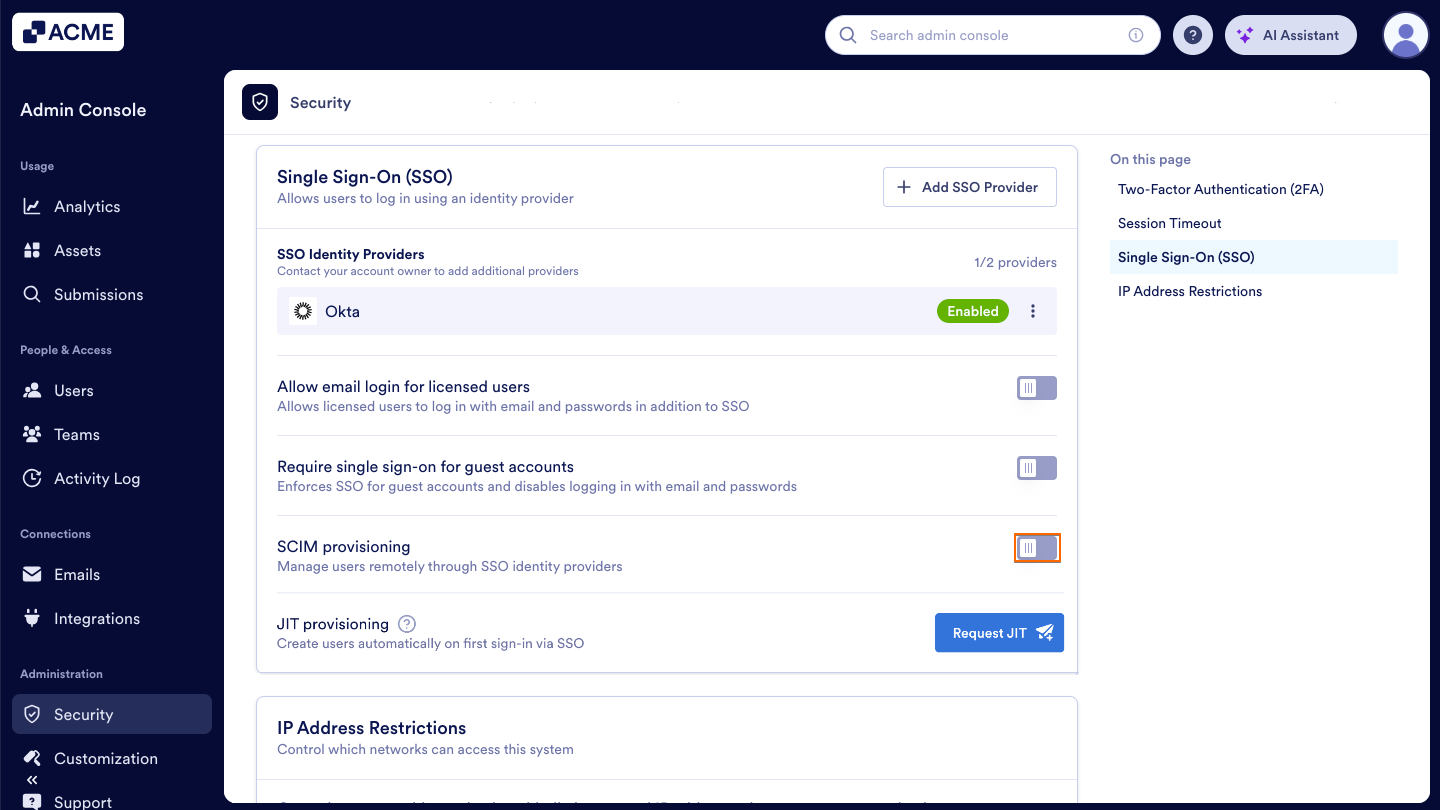
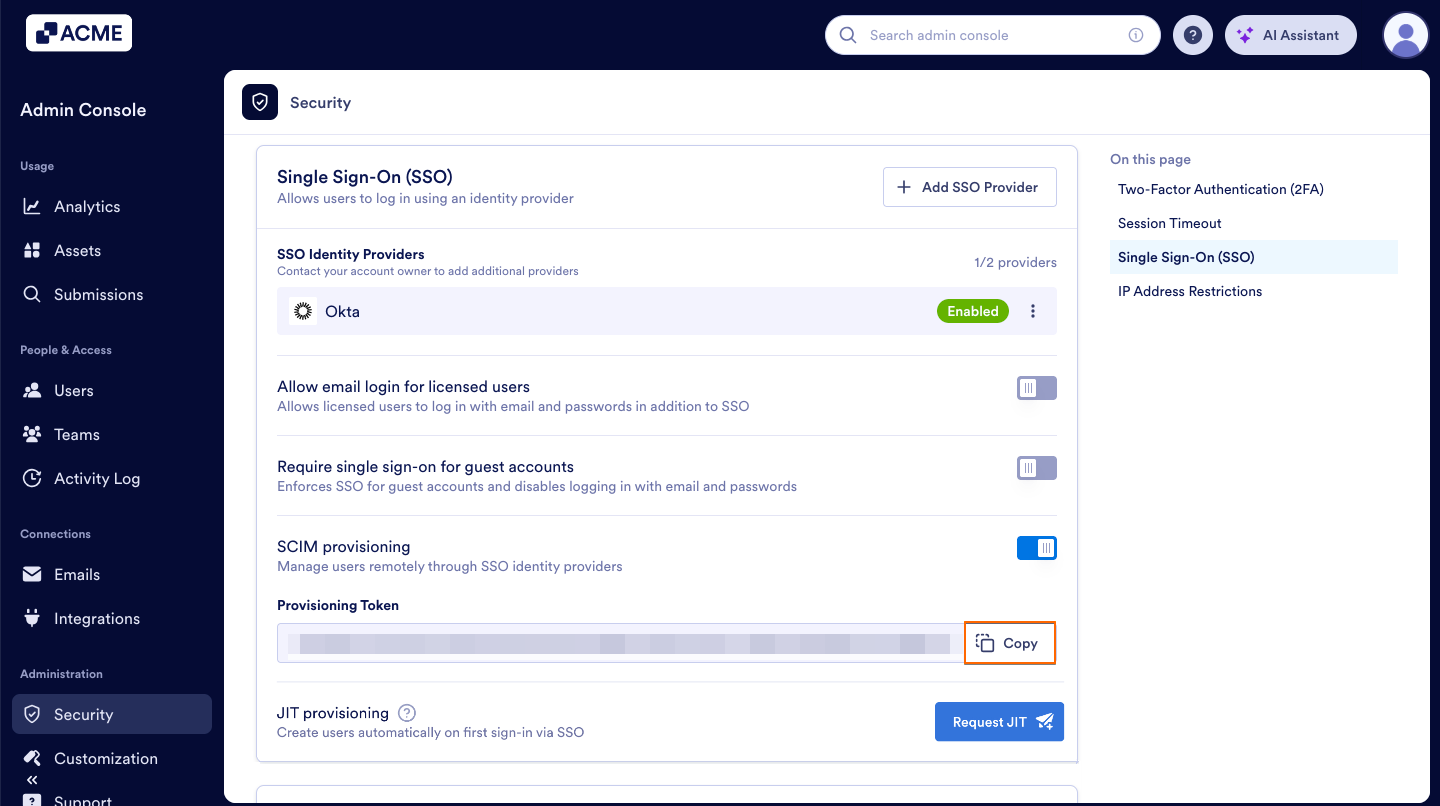
- In your Admin Console, in the left menu, click on Security.
- Under Single Sign-On (SSO), toggle on SCIM Provisioning if it is not already turned on.
- Select Yes, Generate Token.
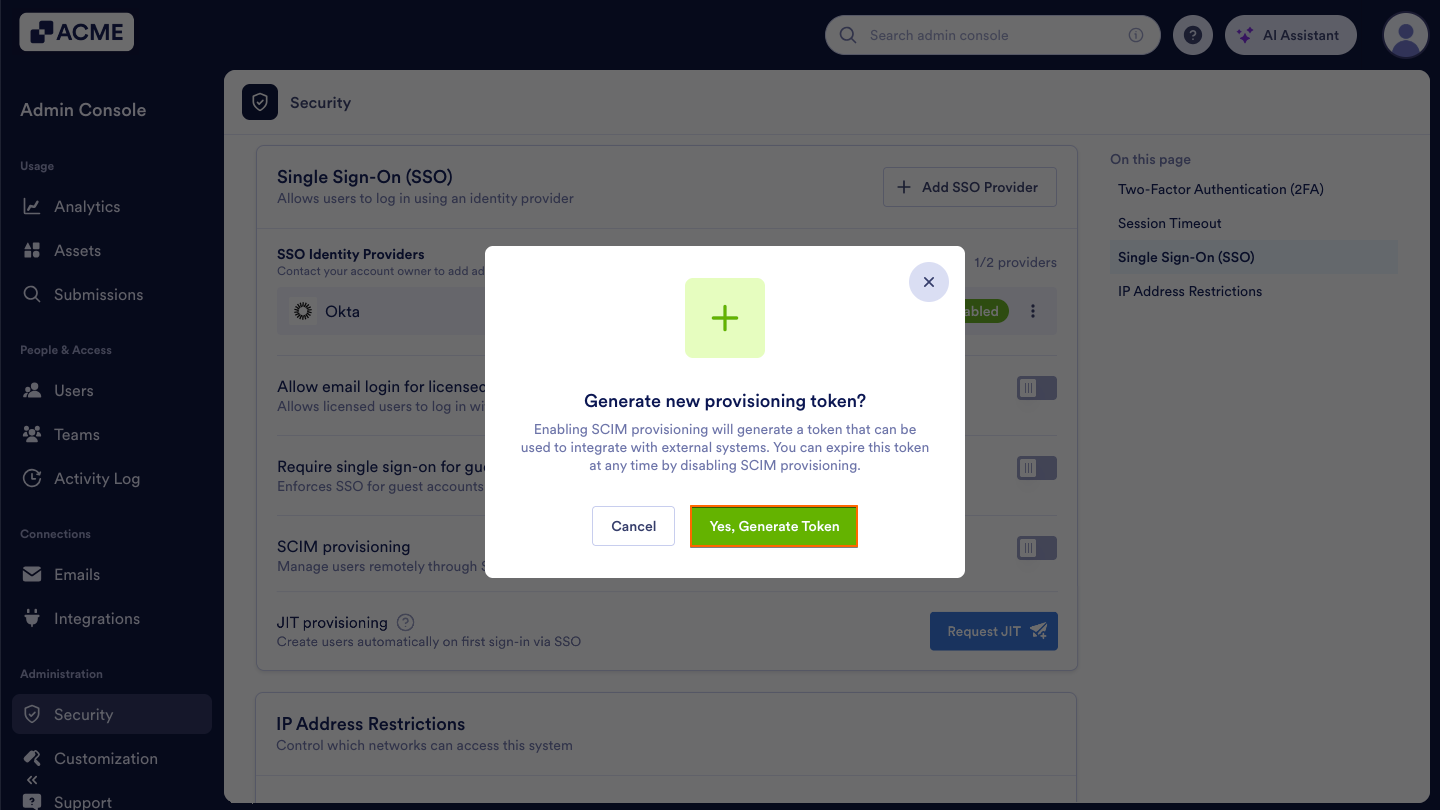
- Then, copy the token.
- In Okta, paste your token into Authorization.
- Click on Test Connector Configuration.
- Finally, click on Save.
Managing Provisioning Settings
After saving your SCIM connection, the Provisioning tab will open. On this page, you can configure how user accounts are created, updated, and removed in your organization.
- In the Provisioning to App, click on Edit.
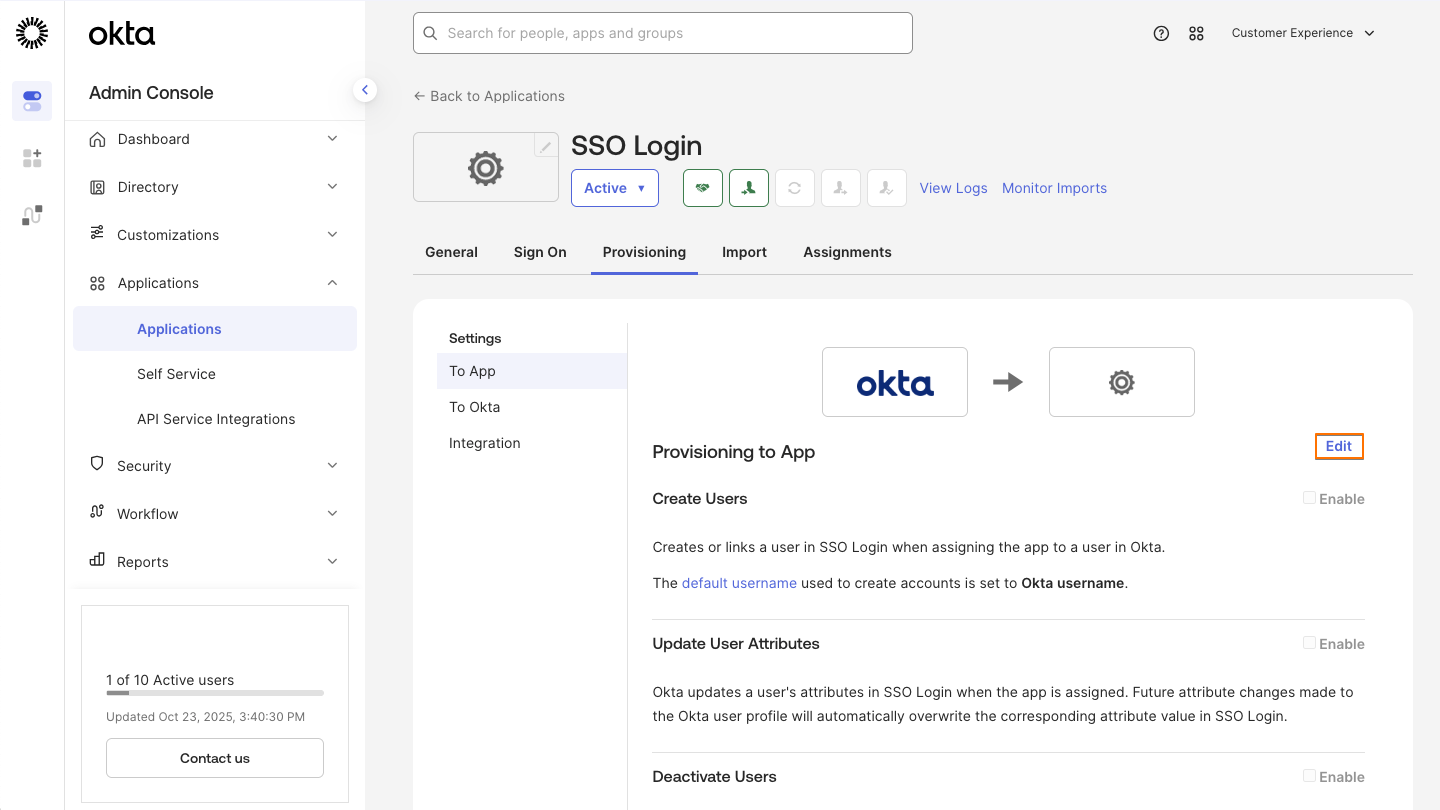
- Enable Create Users, Update User Attributes and Deactivate Users.
- Click on Save.

Assigning Users
You can assign either individual users (People) or entire Groups to your organization from the assignments tab.
Assigning People
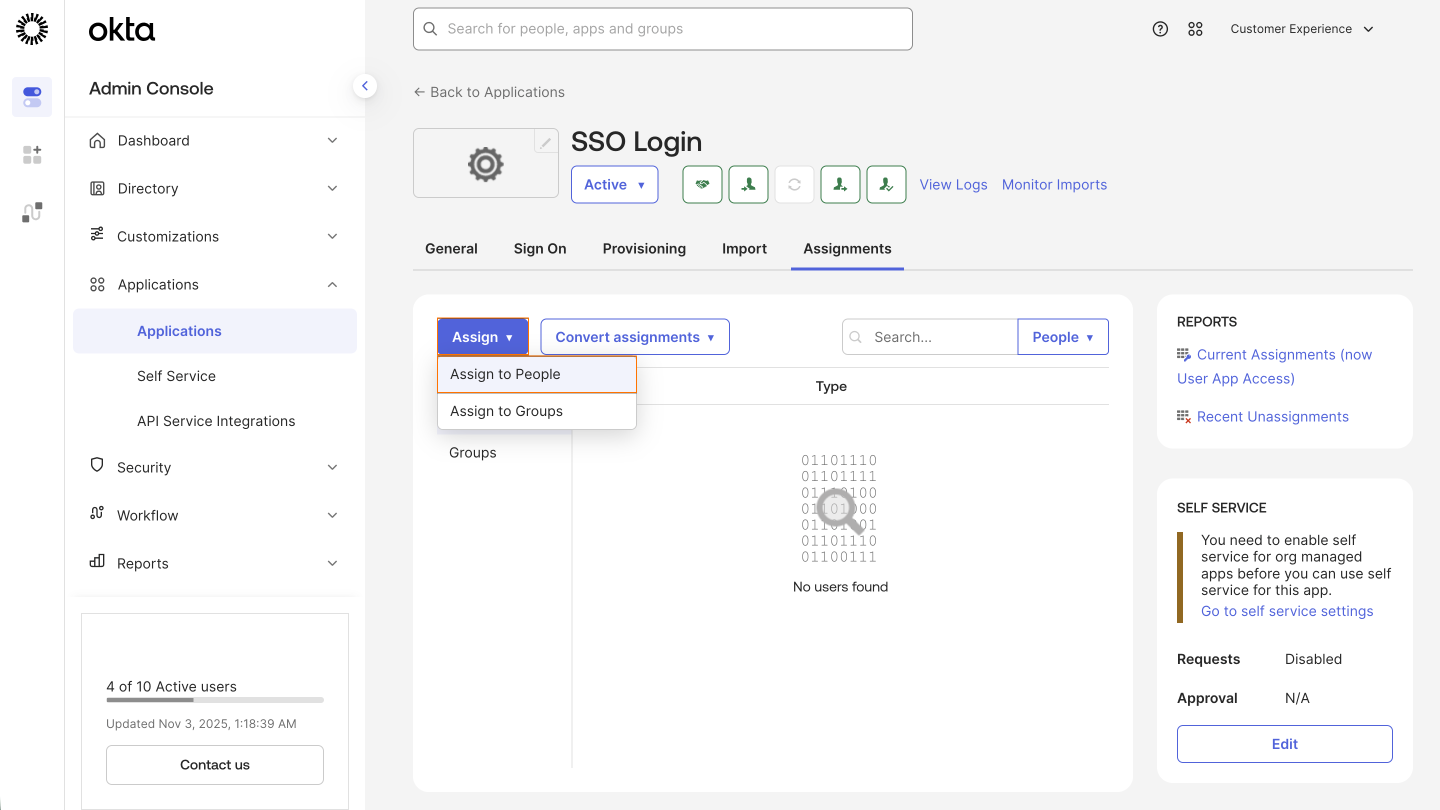
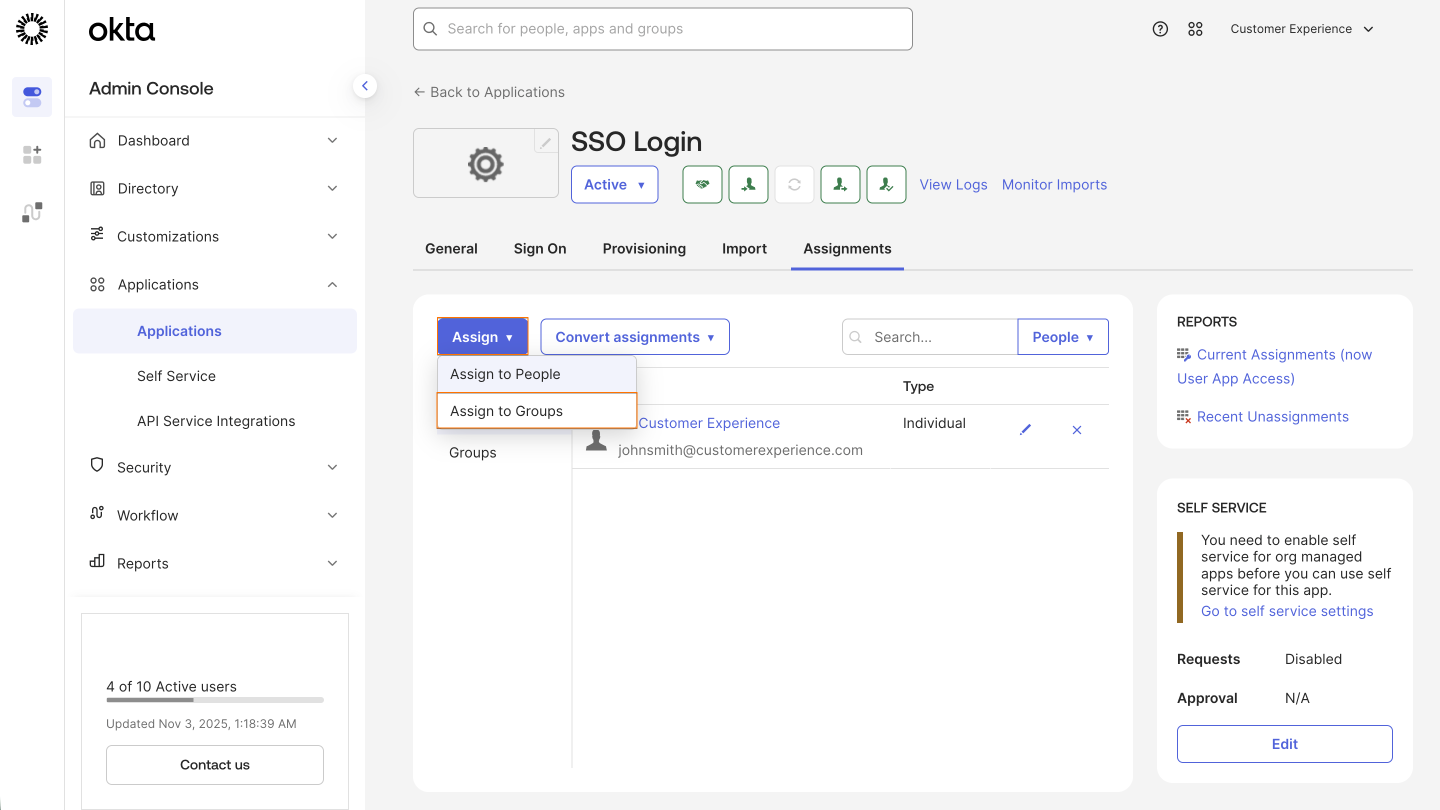
- In the Assignments tab, click on the Assign dropdown on the left.
- Select Assign to People.

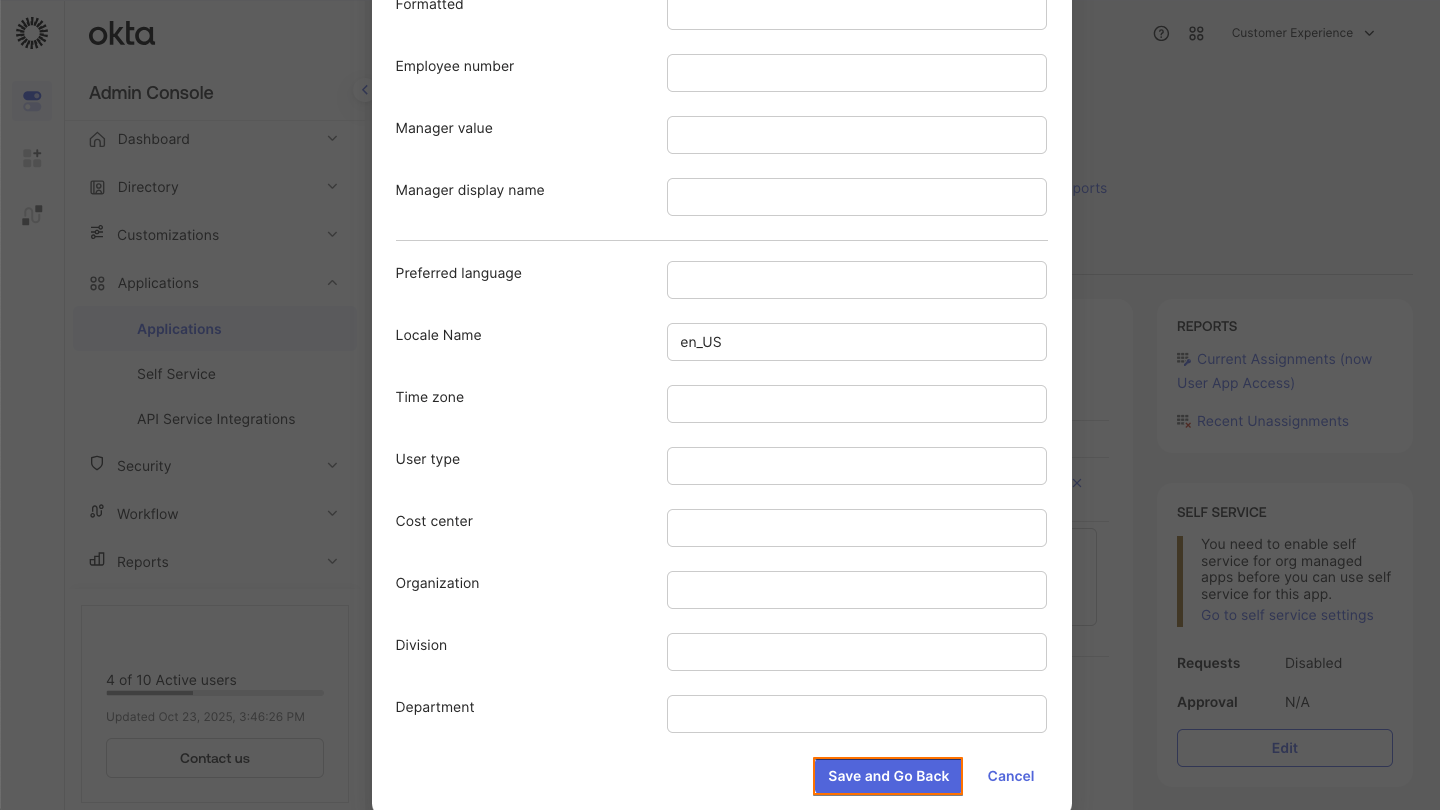
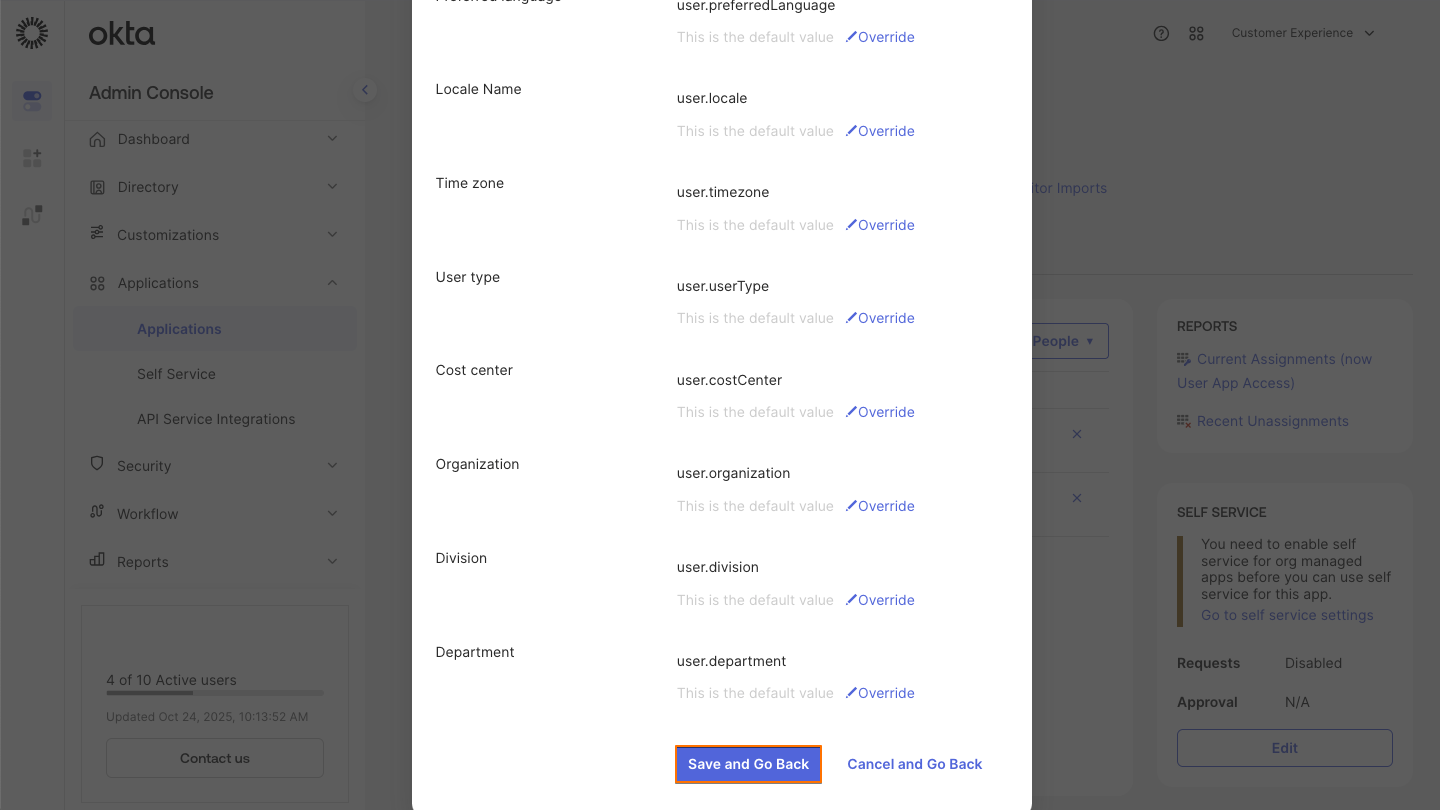
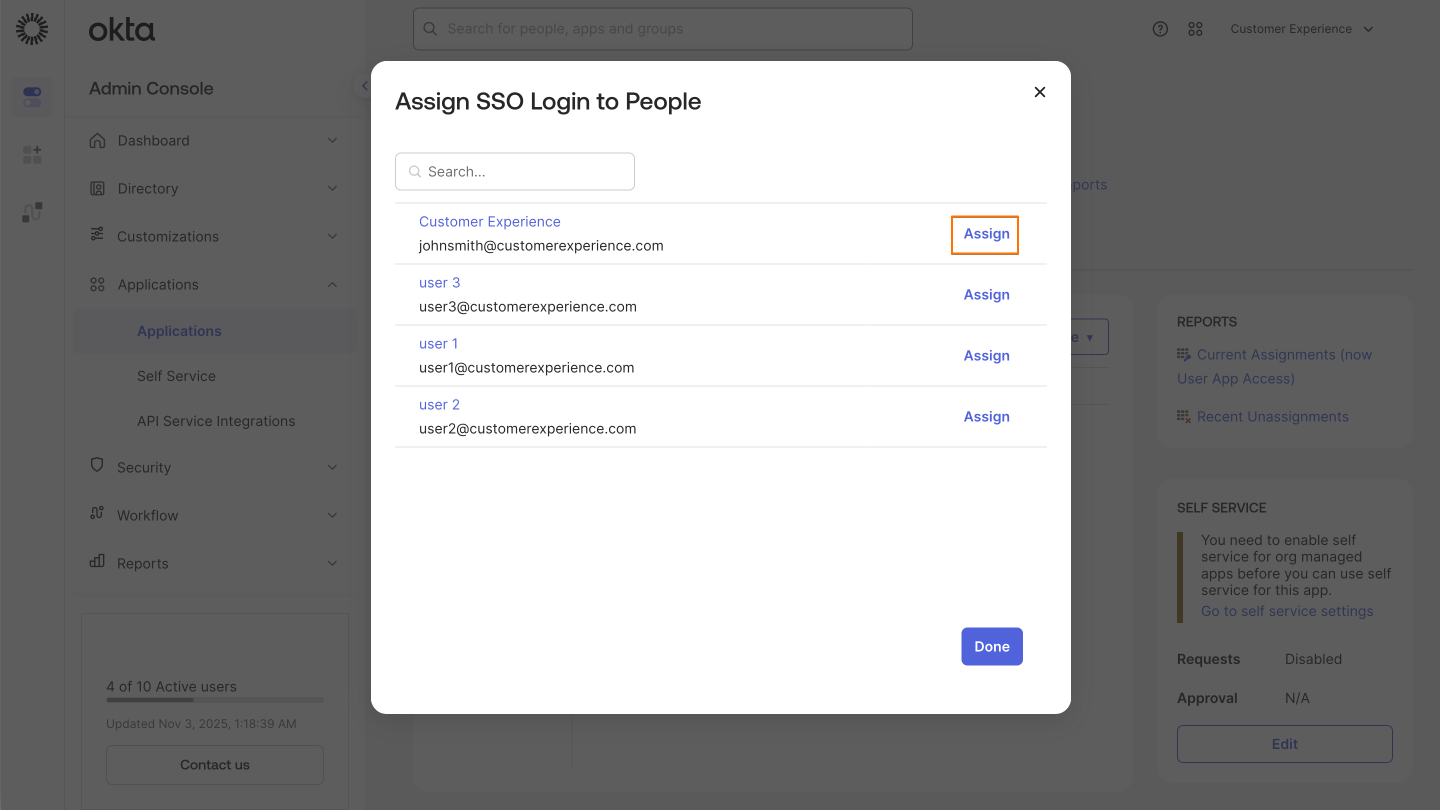
- Click on the Assign button on the right side of the person you want to assign.

- Finally, scroll down and click on Save and Go Back.
Assigning Groups
- In the Assignments tab, click on the Assign dropdown on the left.
- Select Assign to Groups.

- Click on the Assign button on the right side of the group you want to assign.
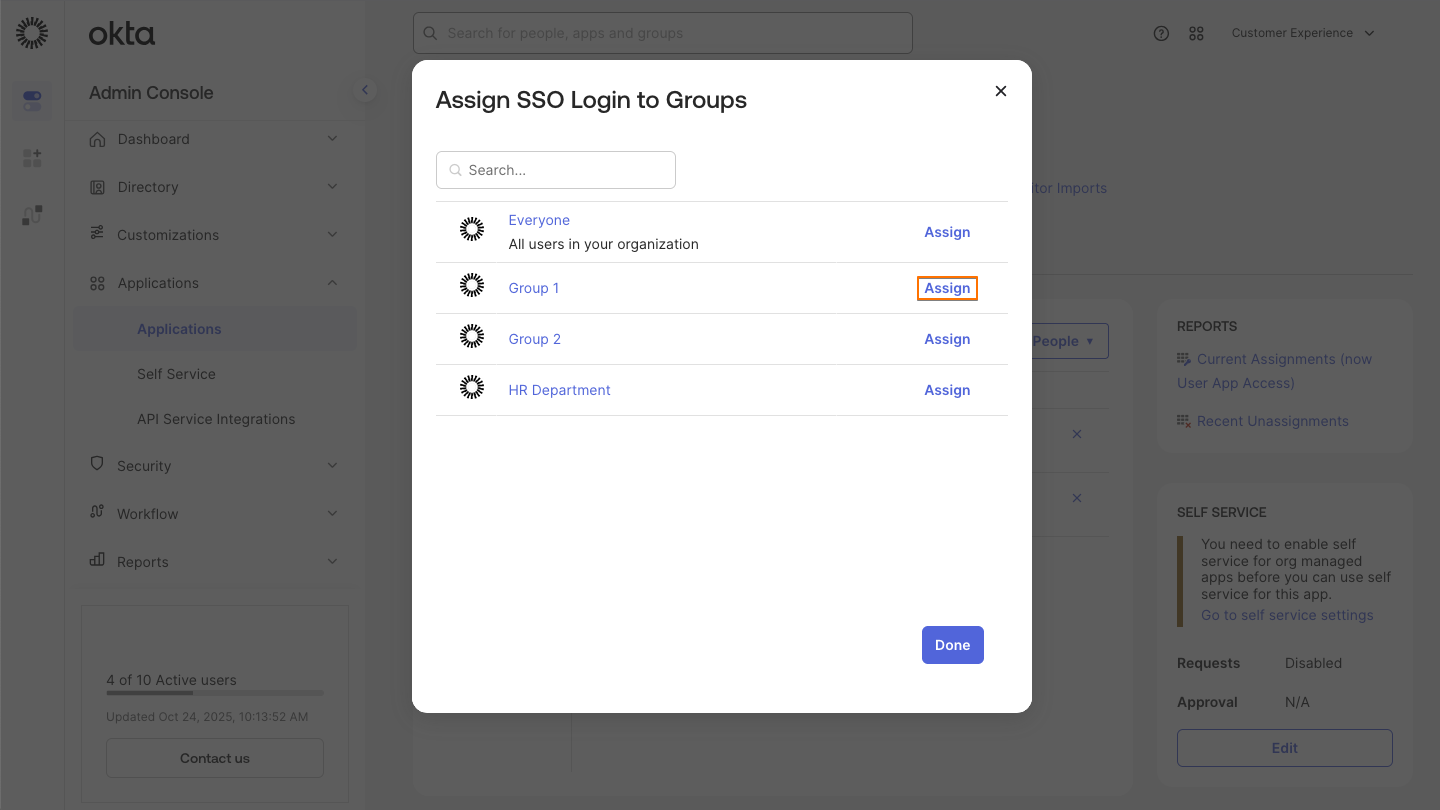
- Finally, scroll down and click on Save and Go Back.
Removing Users
You can also unassign people or groups to automatically deactivate or remove their accounts from your organization.
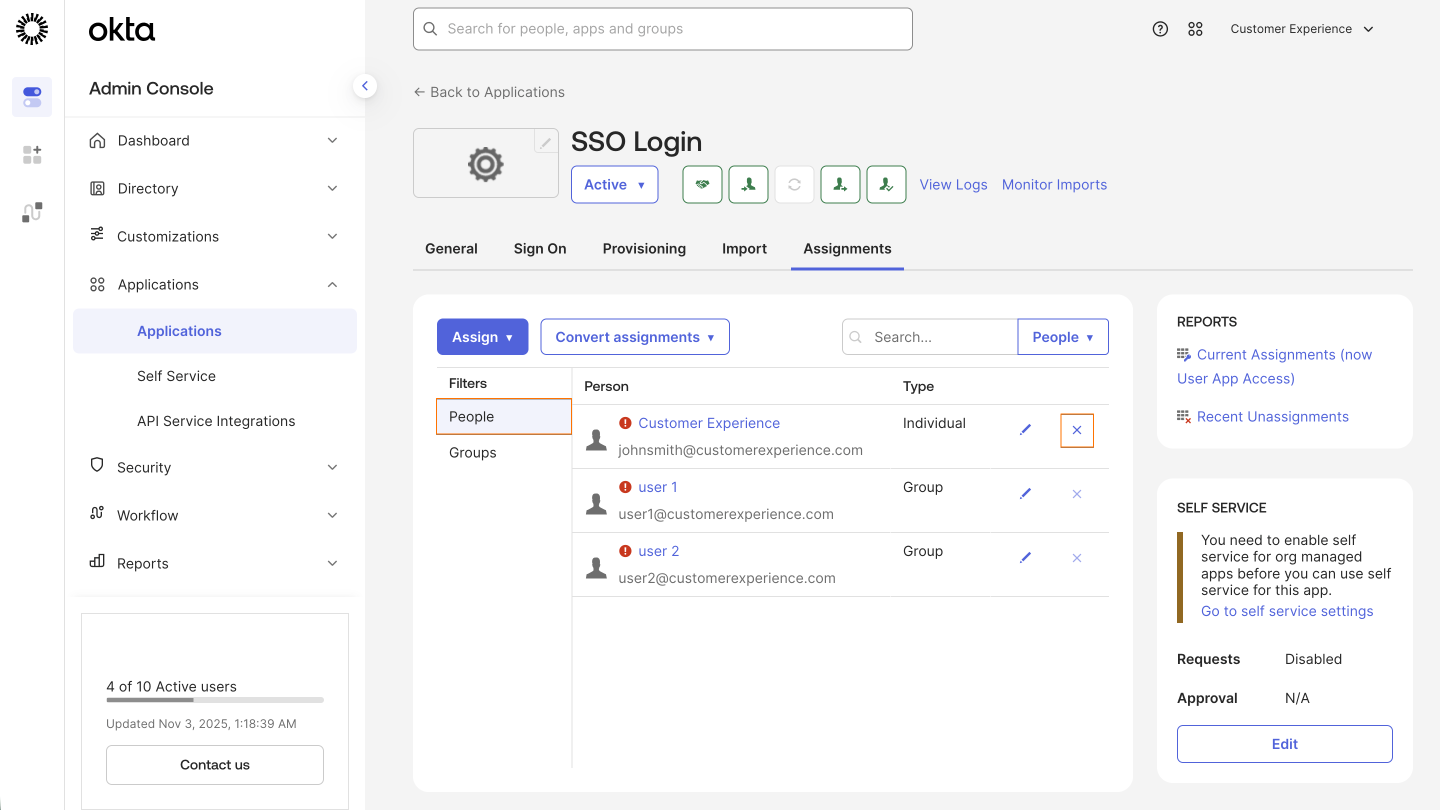
Removing People
- In the Assignments tab, under Filters, select People.
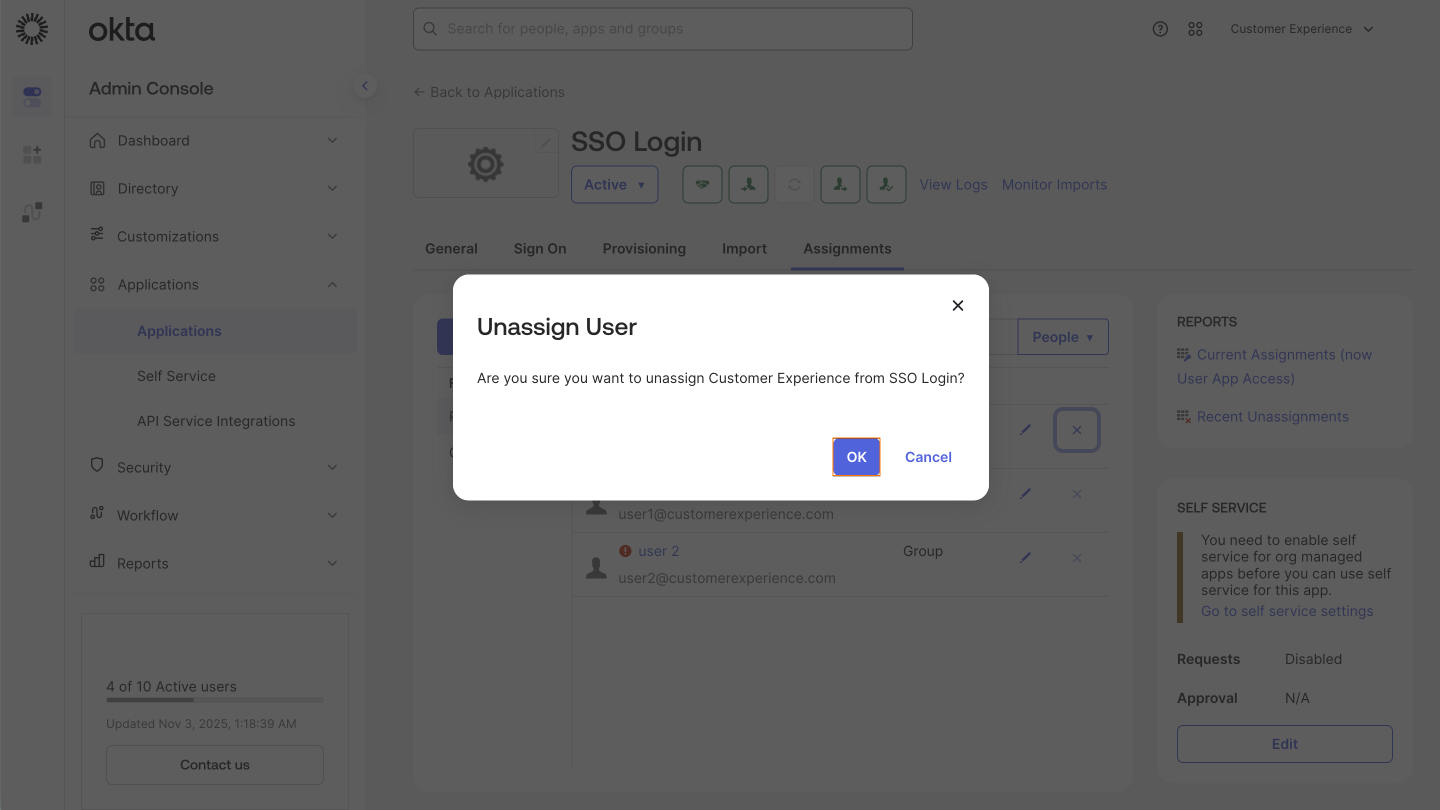
- Now, click on the X icon on the right side of the person you want to remove.
- Click on OK.
Removing Groups
- In the Assignments tab, under Filters, select Groups.
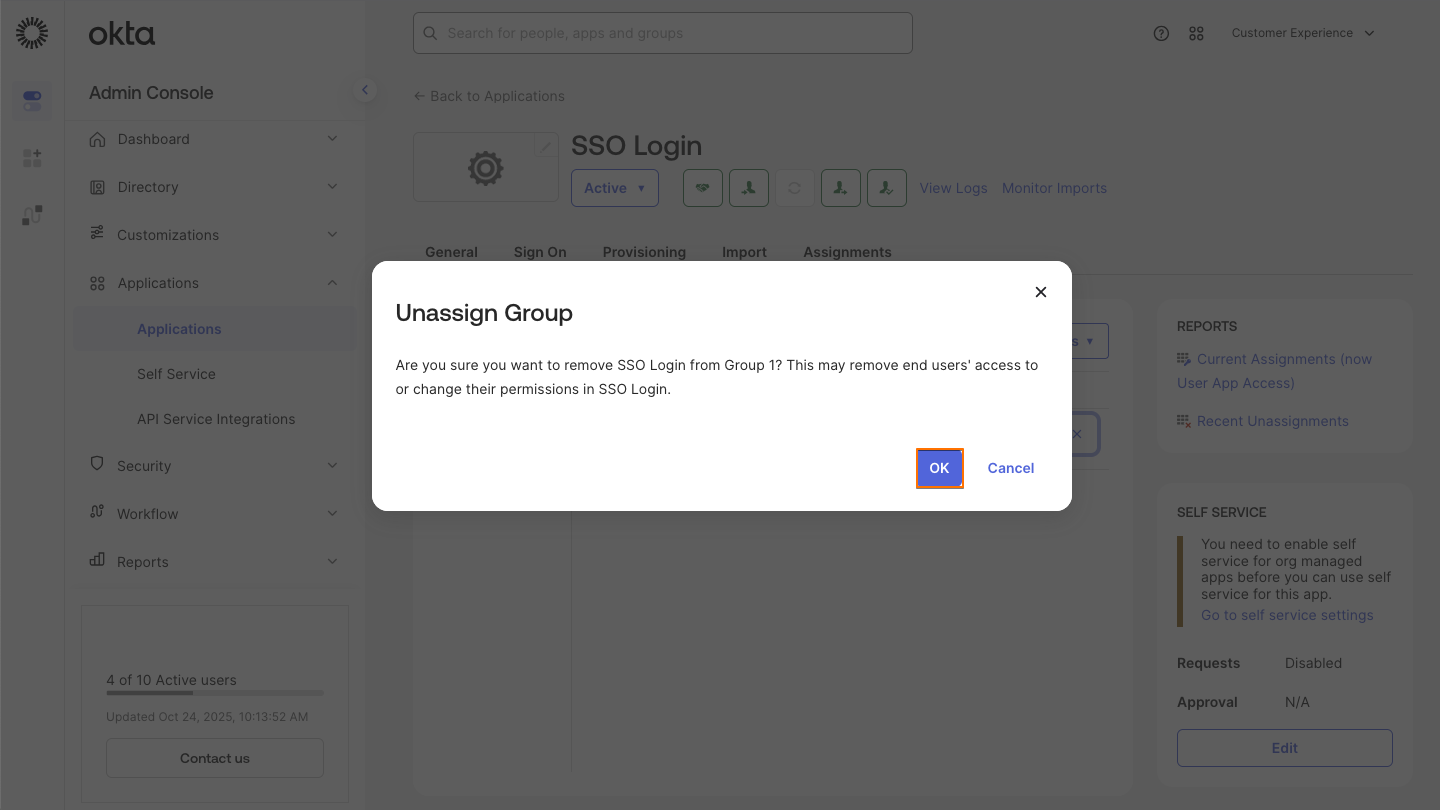
- Now, click on the X icon on the right side of the group you want to remove.
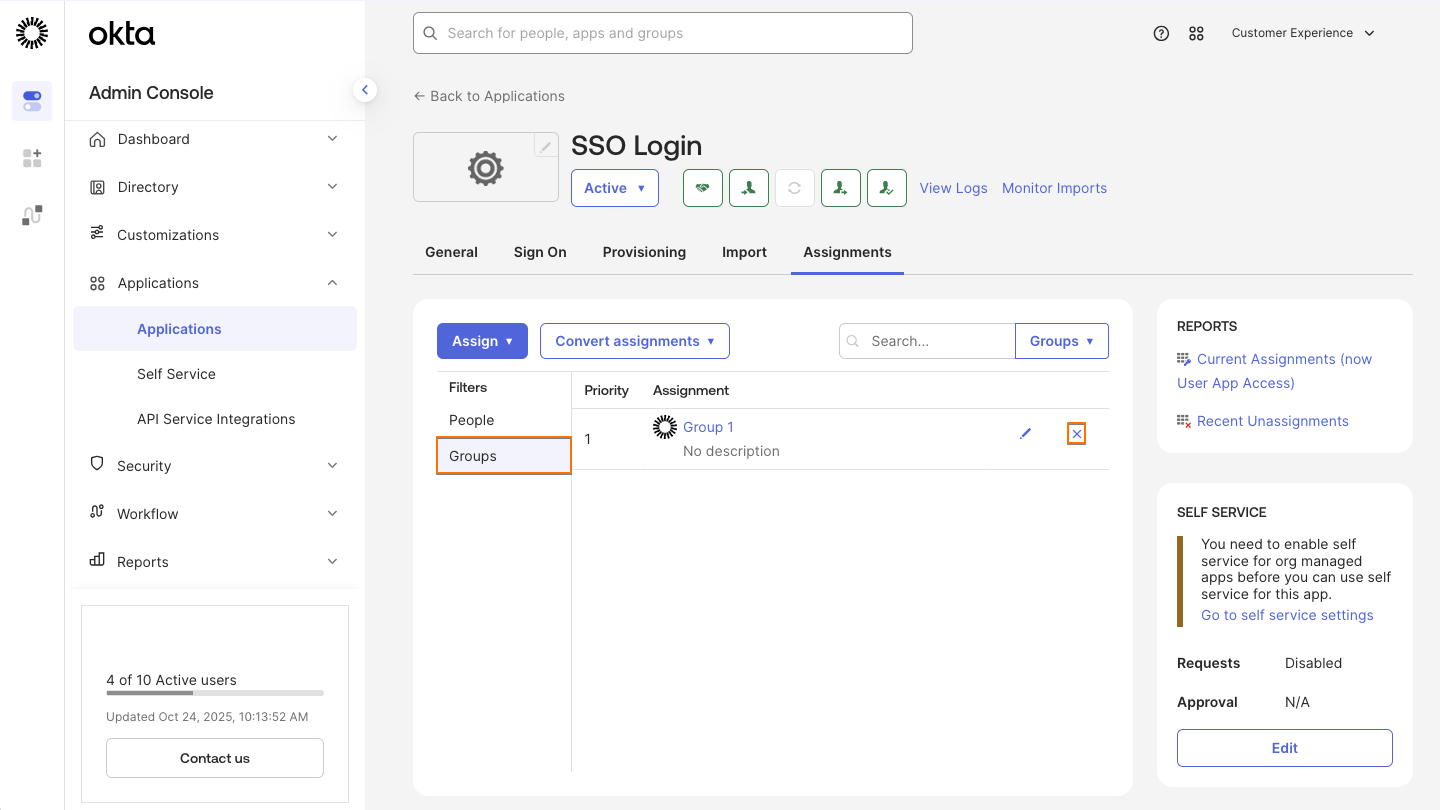
- Click on OK.
After provisioning, affected users will be created or deleted from your server.
SETTING UP SCIM ROLE PROVISIONING
To specify users’ roles in your organization, a new attribute needs to be added to your IDP.
Please follow the steps below to add the attribute and define user roles.
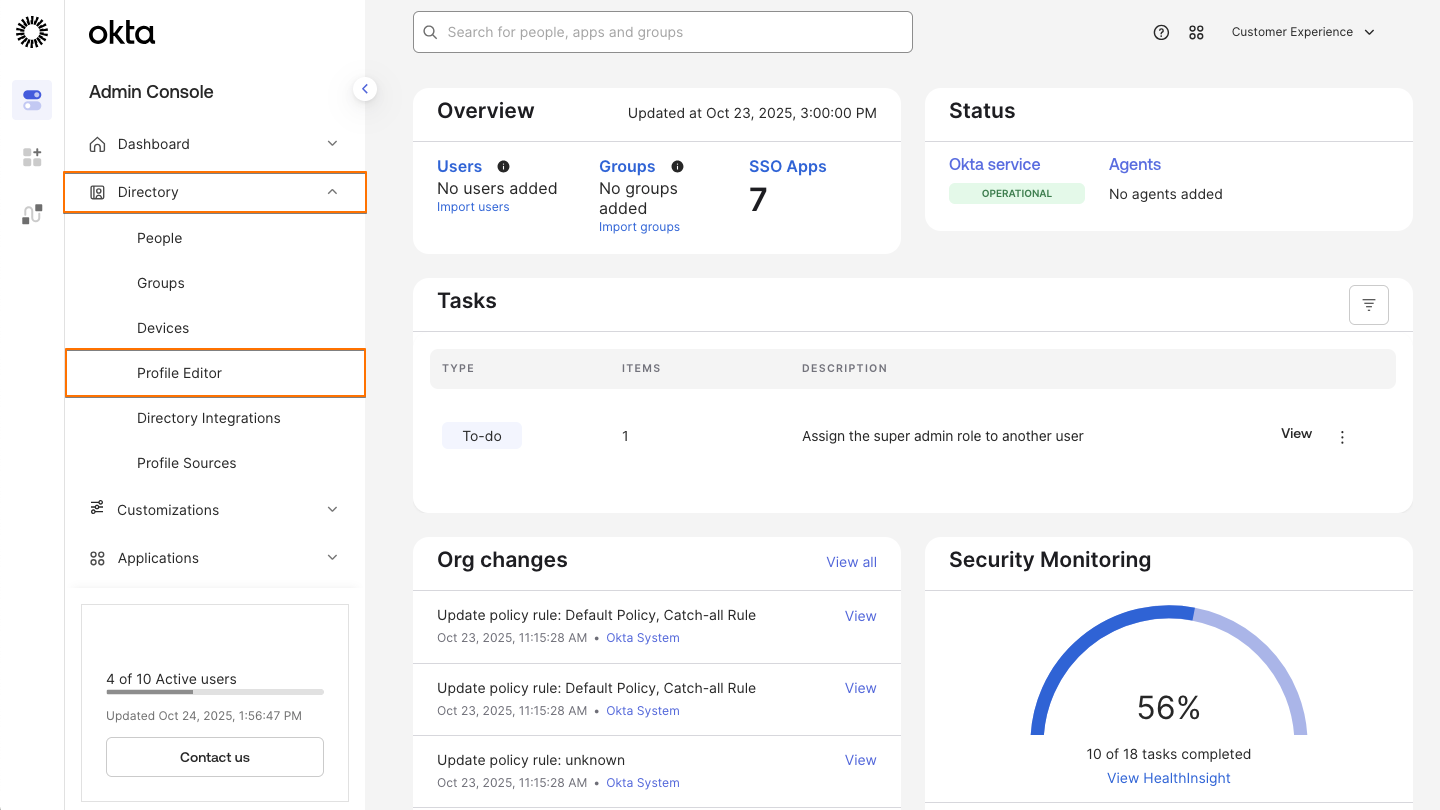
- In the Okta Admin Console, in the left menu click on Directory.
- In the Directory dropdown, select Profile Editor.
- Click on the corresponding profile.
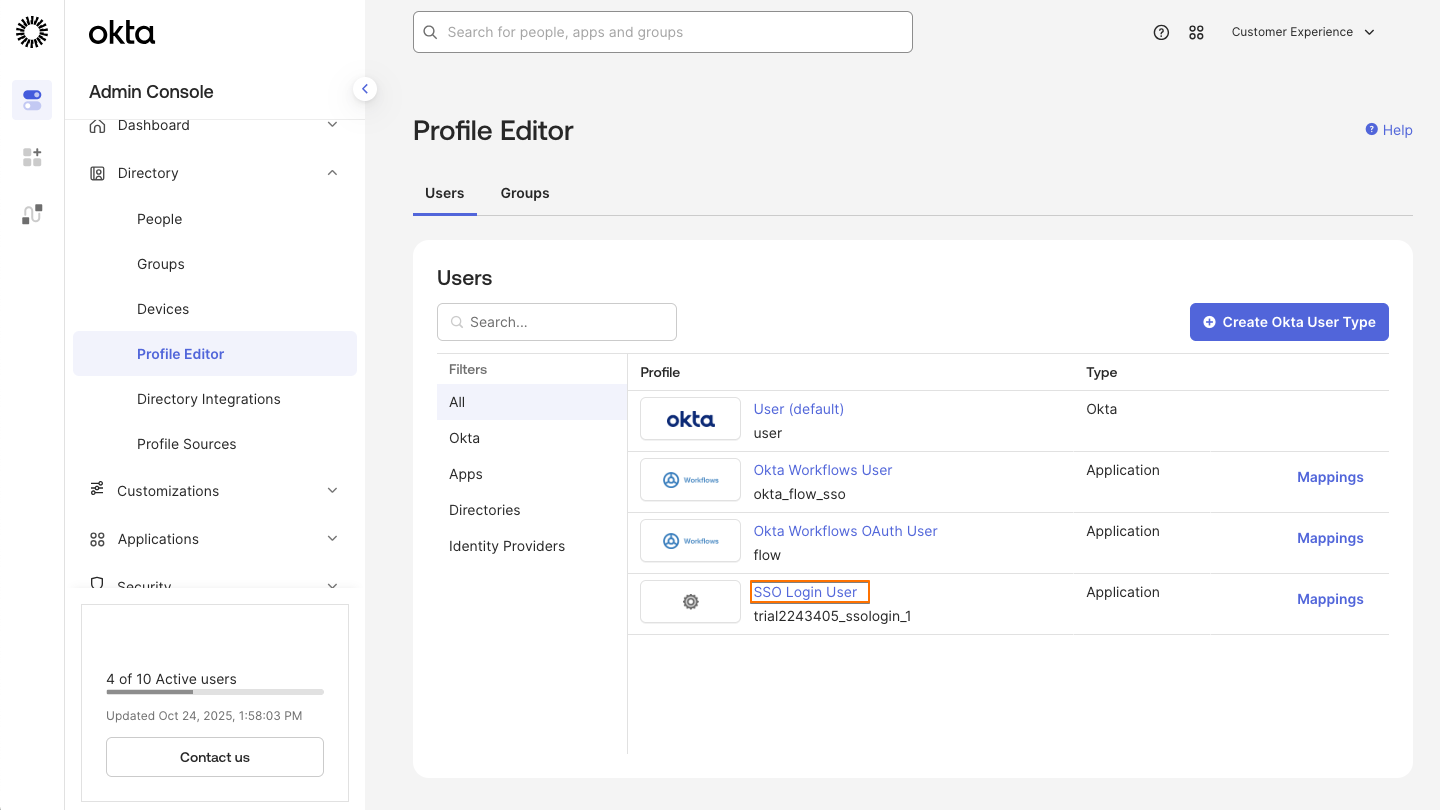
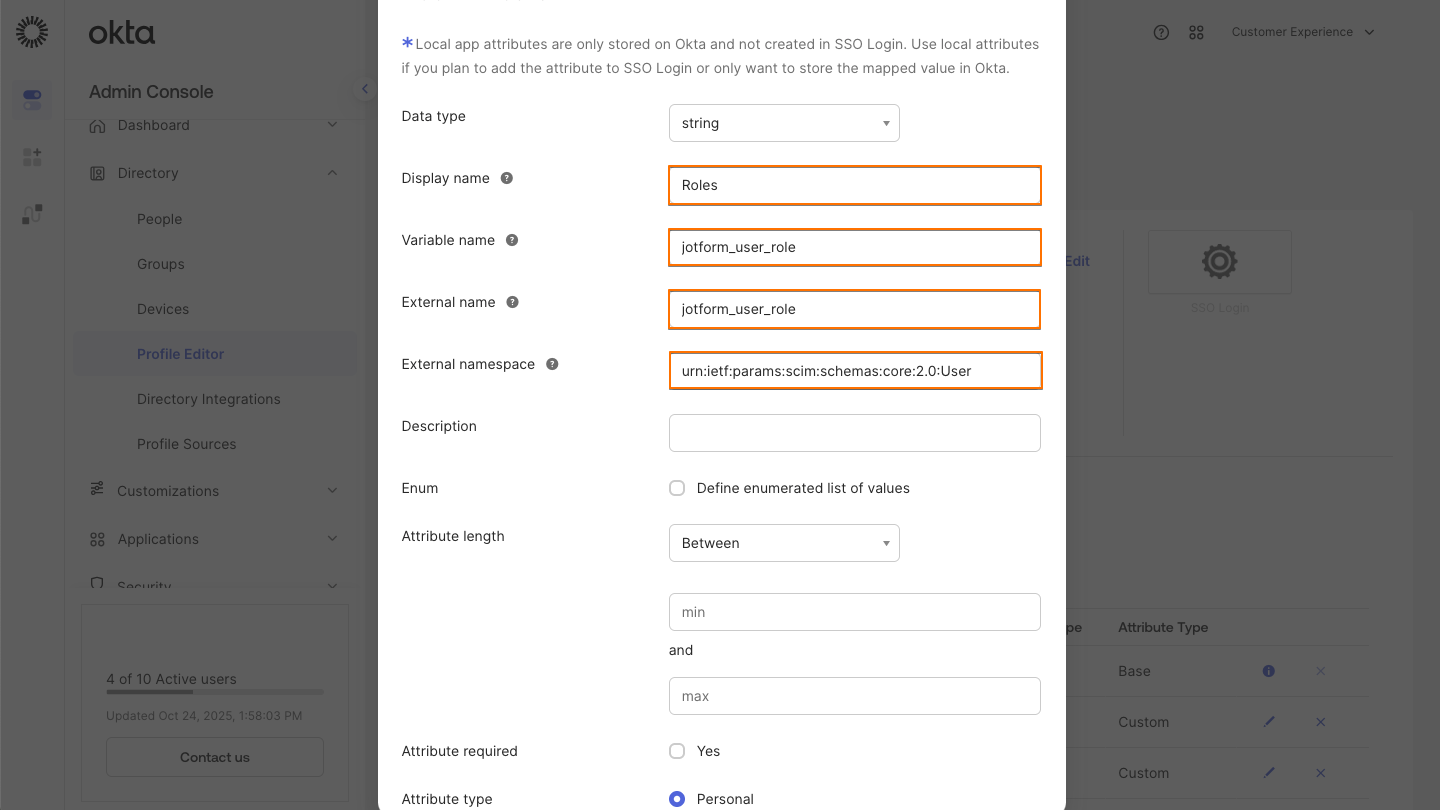
- In the next page, under Attributes, click on Add Attribute.

- Copy the below and paste it into the appropriate fields:
Display name: Roles
Variable name: jotform_user_role
External name: jotform_user_role
External namespace: urn:ietf:params:scim:schemas:core:2.0:User
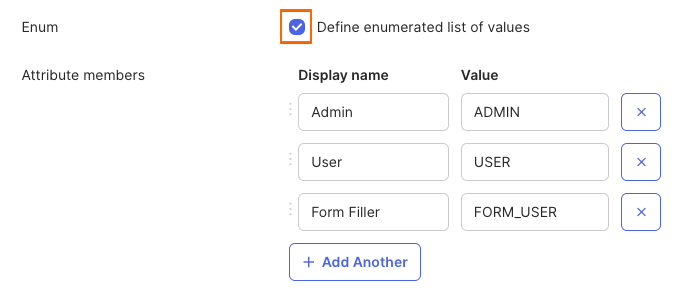
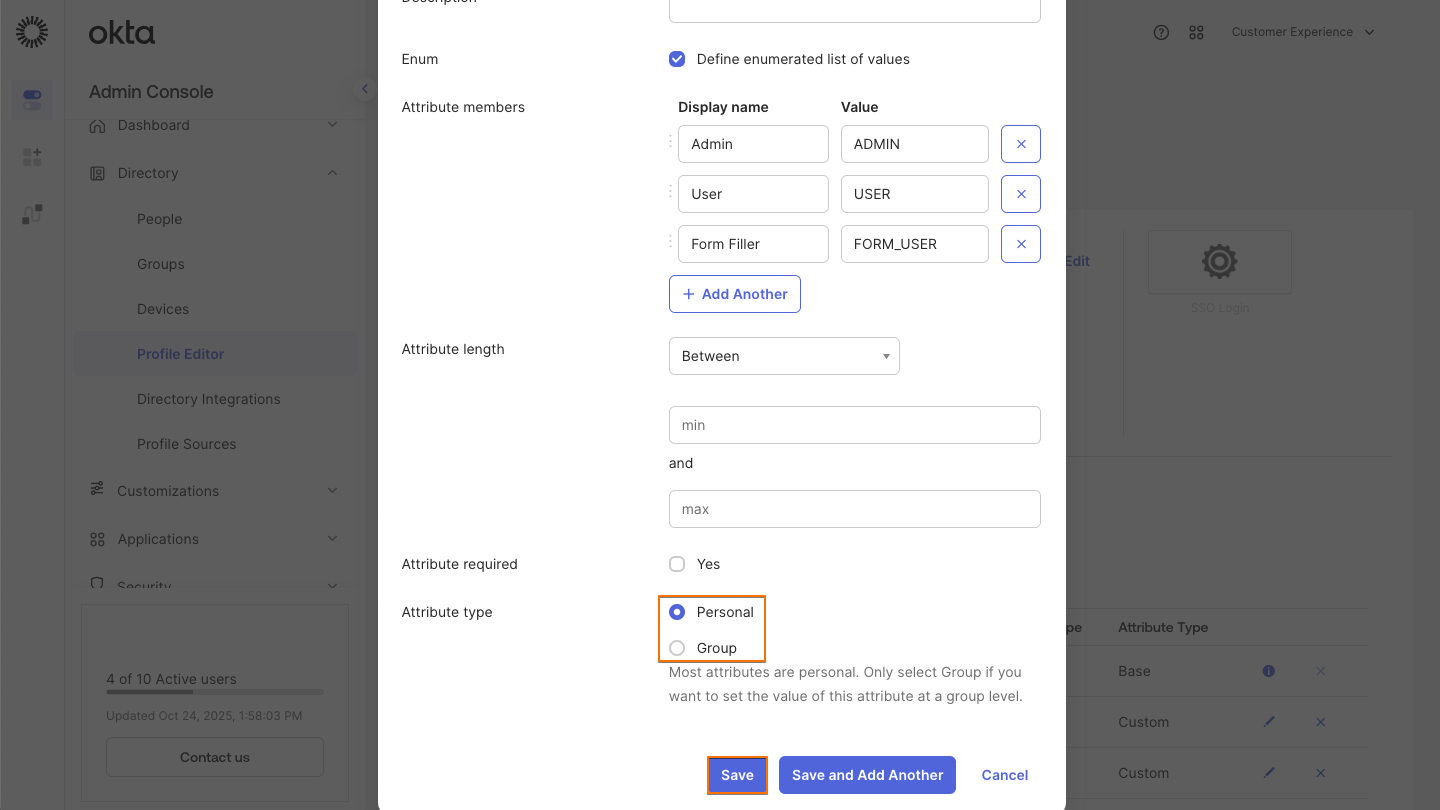
- Check the Define enumerated list of values checkbox and fill in the fields as below:
- Select the Attribute type.
Note: You can only assign roles that are defined as personal to individual users and as group roles to groups. Personal roles can be applied when assigning People, while group roles can only be applied when assigning Groups.
- Click on Save.
After adding and saving the attribute, you can now assign roles to users or groups directly from your SSO application in Okta. Please note that you should unassign the person first if you want to switch the role.
- In the Okta Admin Console, in the left menu click on Applications.
- In the Applications dropdown, select Applications.

- Click on the SAML application you created for the SSO.
Assigning People
- In the Assignments tab, click on the Assign dropdown on the left.
- Select Assign to People.
- Click on the Assign button on the right side of the person you want to assign.
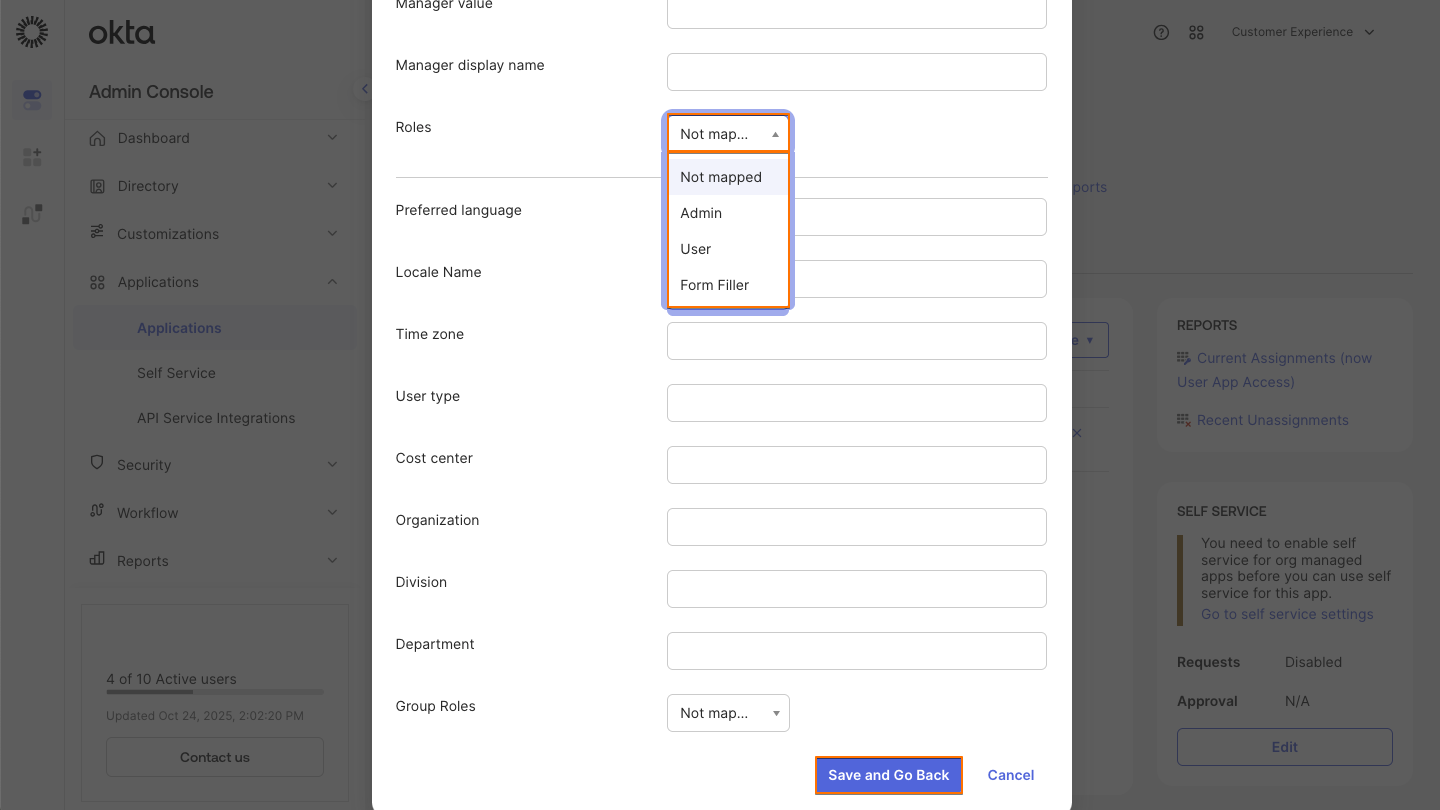
- Scroll down and in the Roles dropdown, select the role for the user.
- Finally, click on Save and Go Back.
Assigning Groups
- In the Assignments tab, click on the Assign dropdown on the left.
- Select Assign to Groups.
- Click on the Assign button on the right side of the group you want to assign.

- Scroll down and in the Group Roles dropdown, select the role for the group.
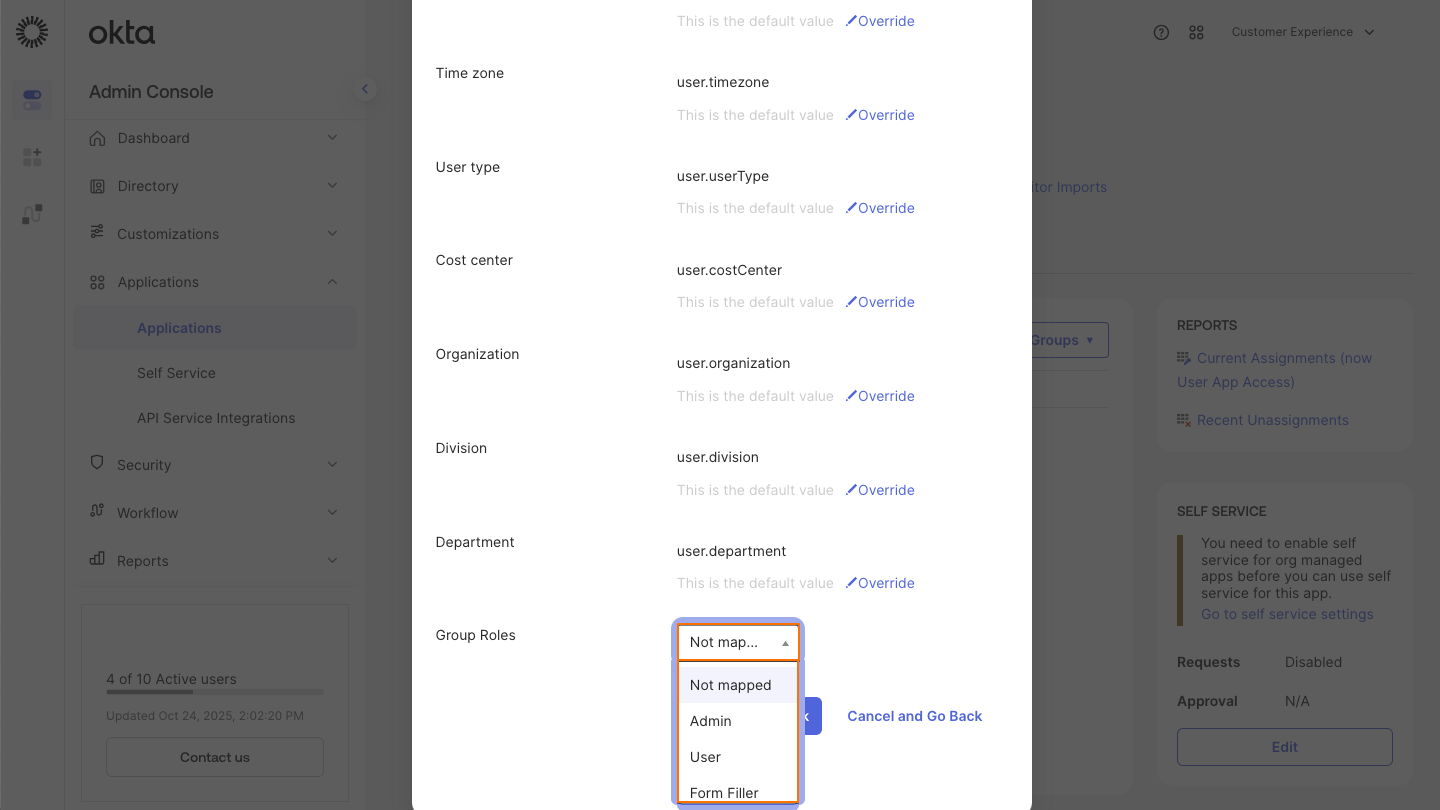
- Finally, click on Save and Go Back.


Send Comment: