As a Salesforce System Administrator, you could create a user with API-only access. The Minimum Access – API Only Integrations profile enables and restricts assigned users from operating via API. It’s helpful if you want to assign a user to integrations but without access to Salesforce UI.
In Jotform, you can configure the Salesforce integration using this license type. Like a standard user license, you can easily connect the account and set up the integration. Let’s start!
Creating Permission Set
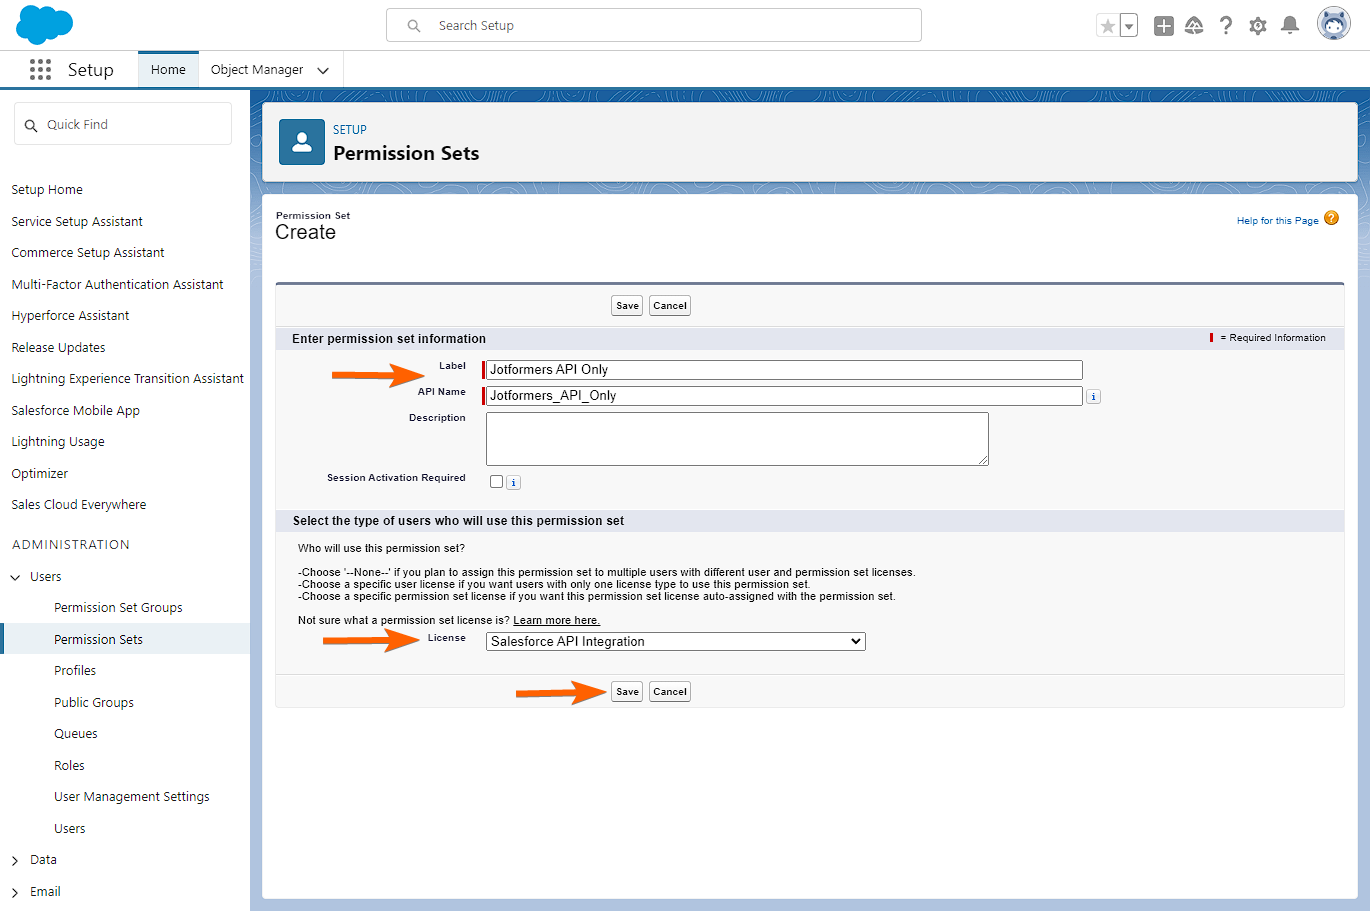
Creating the proper Permission Set is very important, so ensure you follow this part to avoid possible issues with the integration. To create a Permission Set:
- In your Salesforce dashboard, go to the Setup page.
- Select Permission Sets under the Users section of the Administration page.
- Click the New button to create a new Permission Set.

- Enter the Label as part of the permission set information. The API Name is filled out automatically based on the Label, but you can customize it to your preferred name.
- Now, under the License dropdown, select the Salesforce API Integration option.
- Finally, click the Save button on this part to save the new permission set.
Creating Integration User
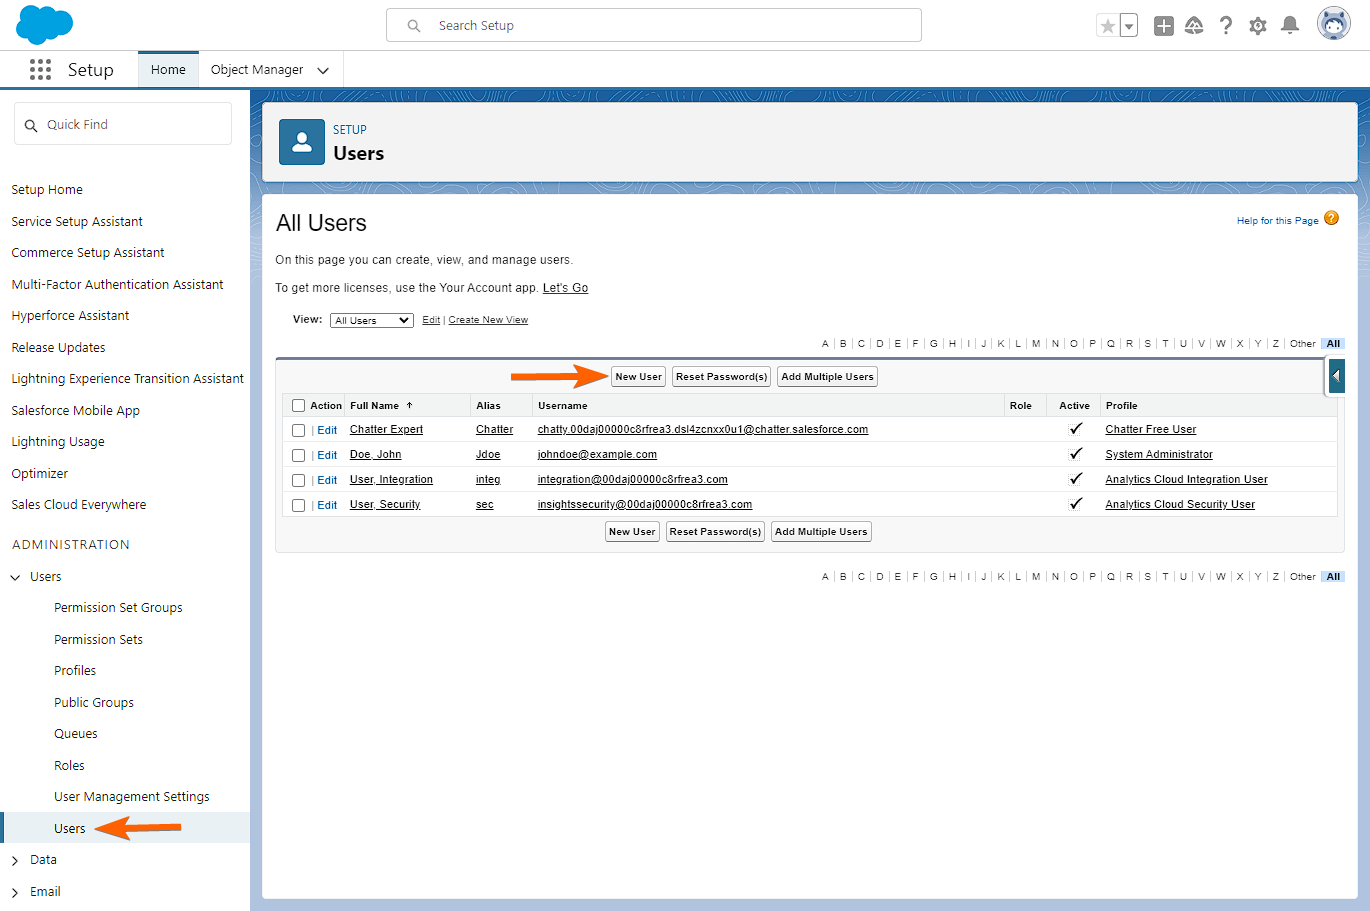
On this part, you must create the Integration User with the proper license type you’ve selected when creating the Permission Set. You must also remember to select the proper Profile, which is the Minimum Access – API Only Integrations. To create the Integration User:
- Select Users under the Users section of the Administration page.
- Click the New User button.
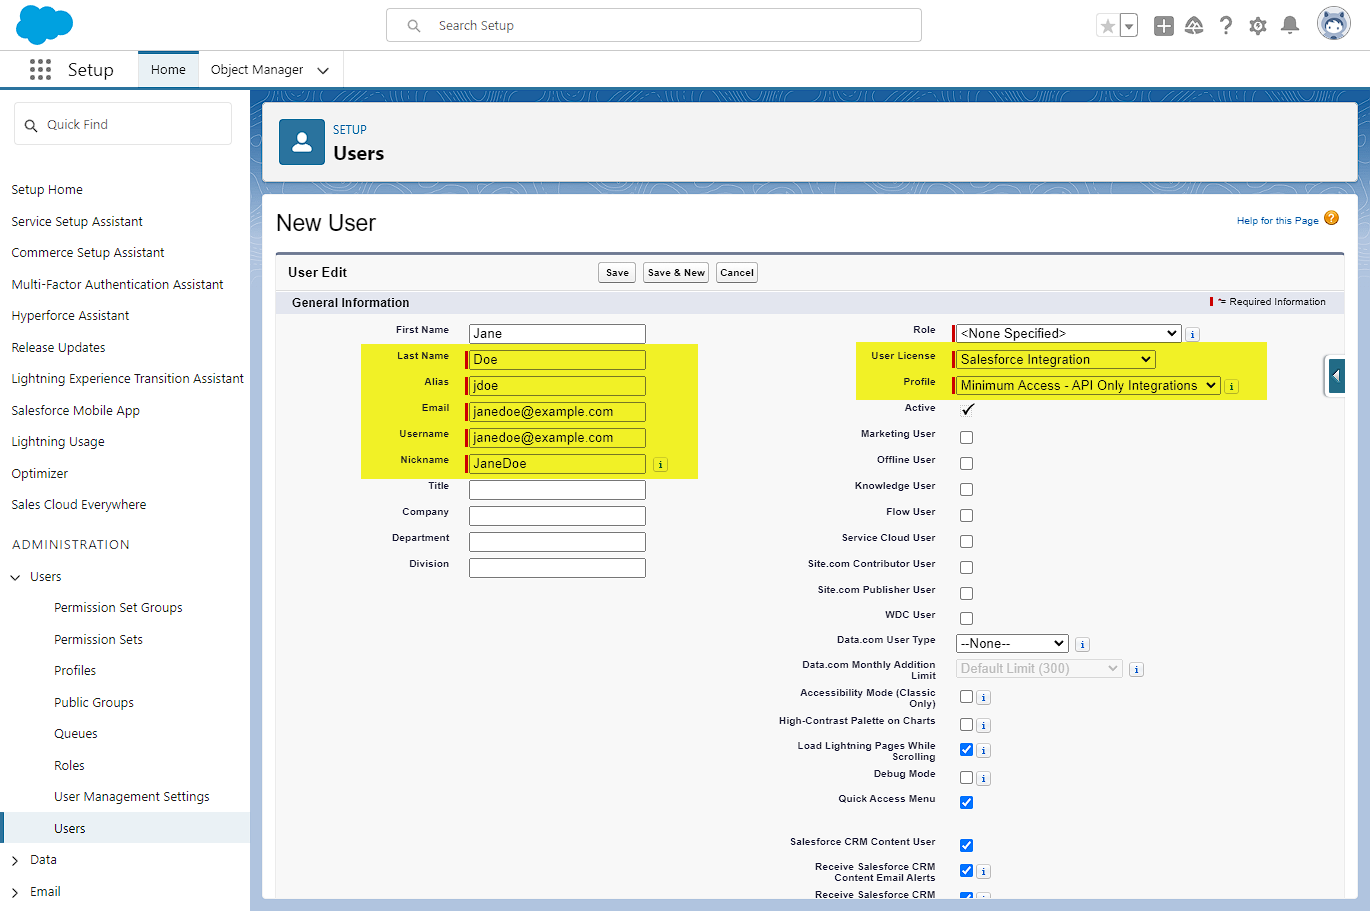
- Under the General Information, enter the following user details:
- First Name — Optional, but we recommend filling this out.
- Last Name — Enter the user’s last name.
- Alias — This detail is automatically filled out after you provide the first and last names. You can customize this to your liking.
- Email — Enter the user’s email address. Ensure this is an active email address because this will require verification.
- Username — The user’s email address is also the username. We recommend keeping it this way.
- Nickname — The page automatically fills in the nickname. Feel free to customize it.
- On the right side of the General Information, set the following very important options:
- User License — Select Salesforce Integration.
- Profile — Select Minimum Access – API Only Integrations.
- Scroll down and click the Save button to save the new user.
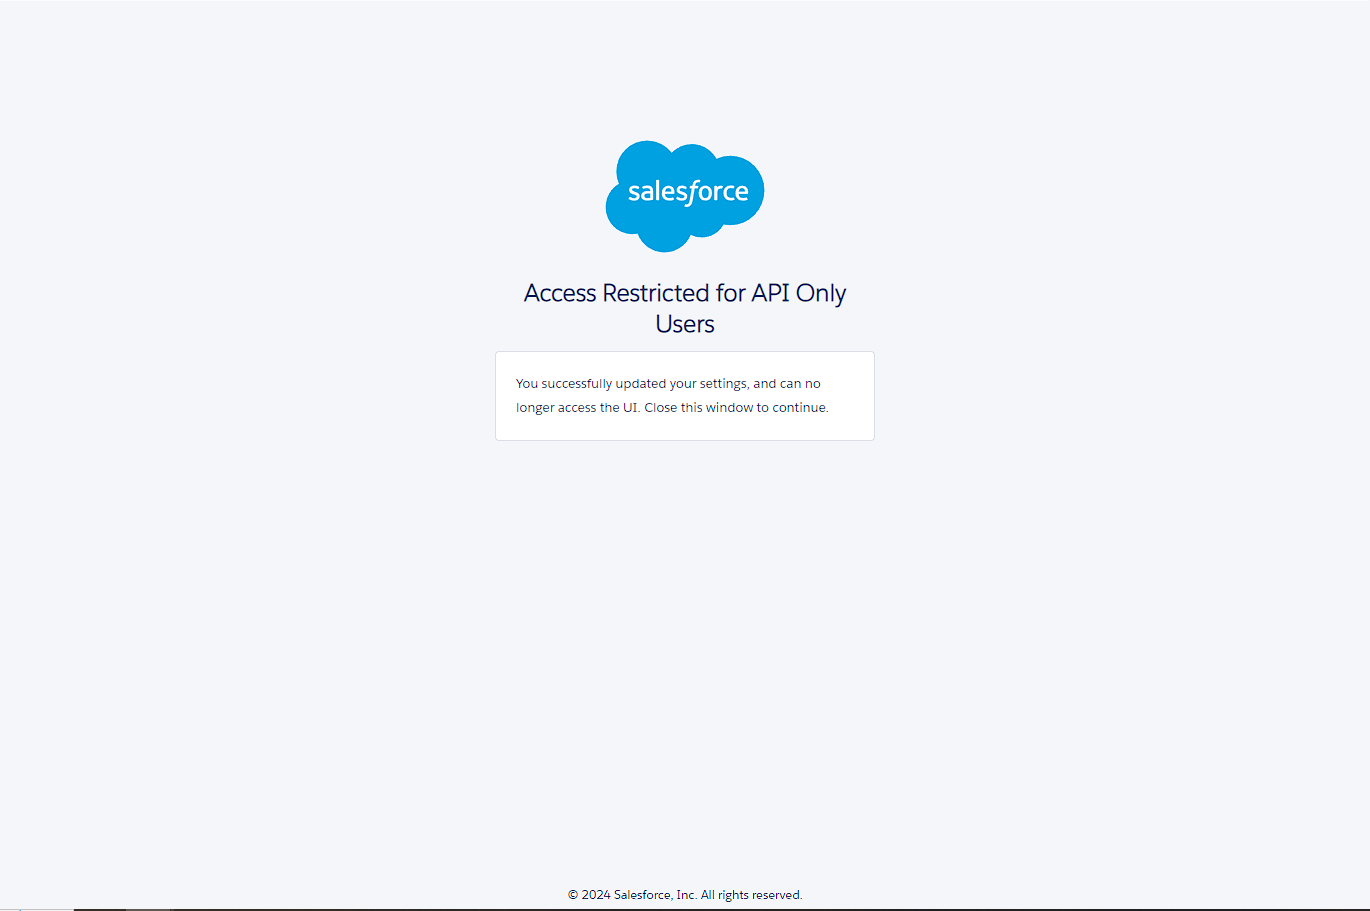
After saving, the new user should verify their account through the email that’s sent to their email address. The new user will also get the following screen after verifying their account, indicating that they’re API Only Users.
Assigning Permission to the User
After creating the user, don’t close the user’s page yet. Scroll to the Permission Set Assignments of the newly created user, and click the Edit Assignments button.
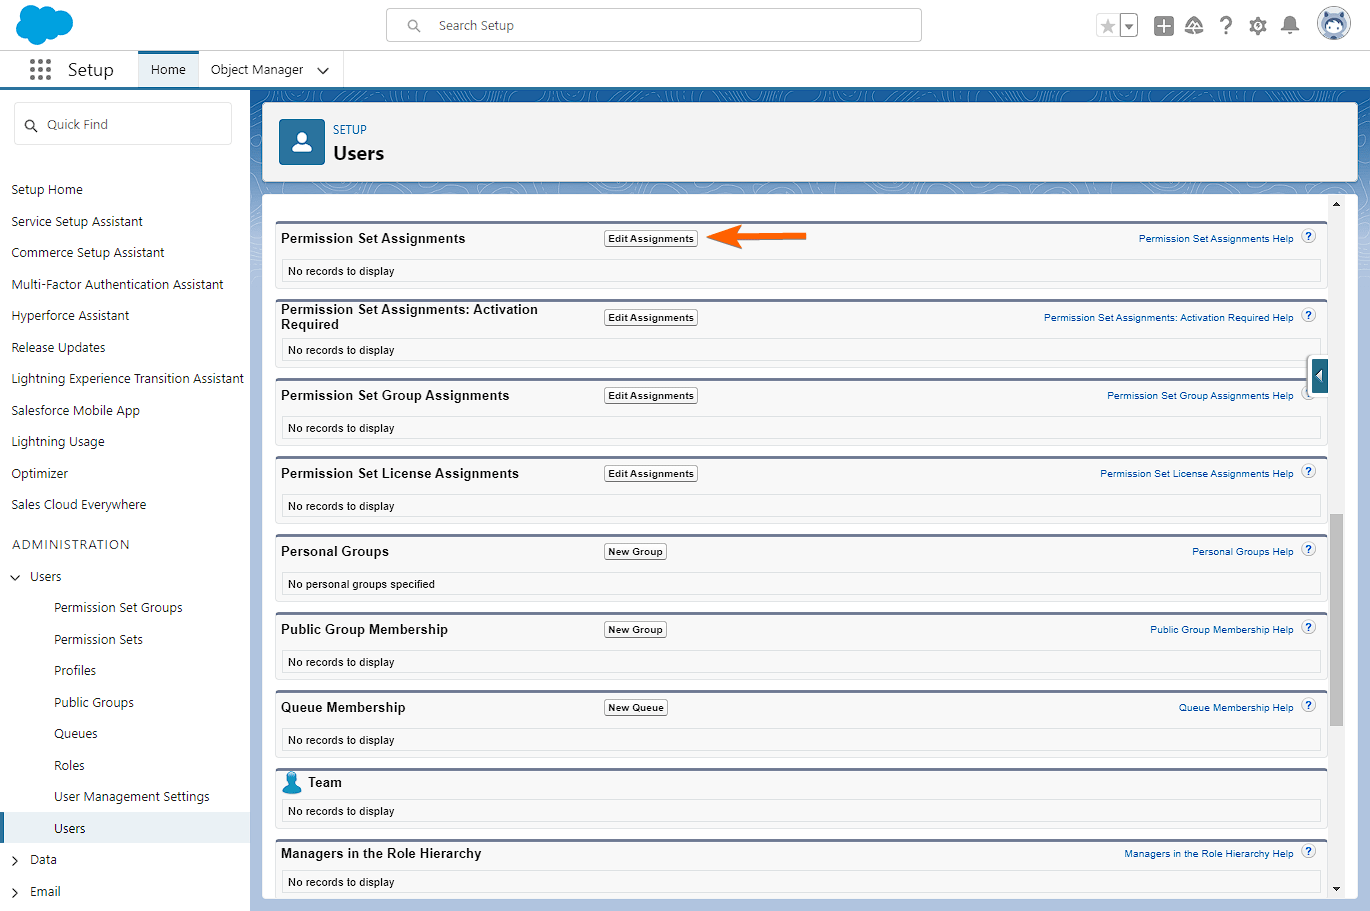
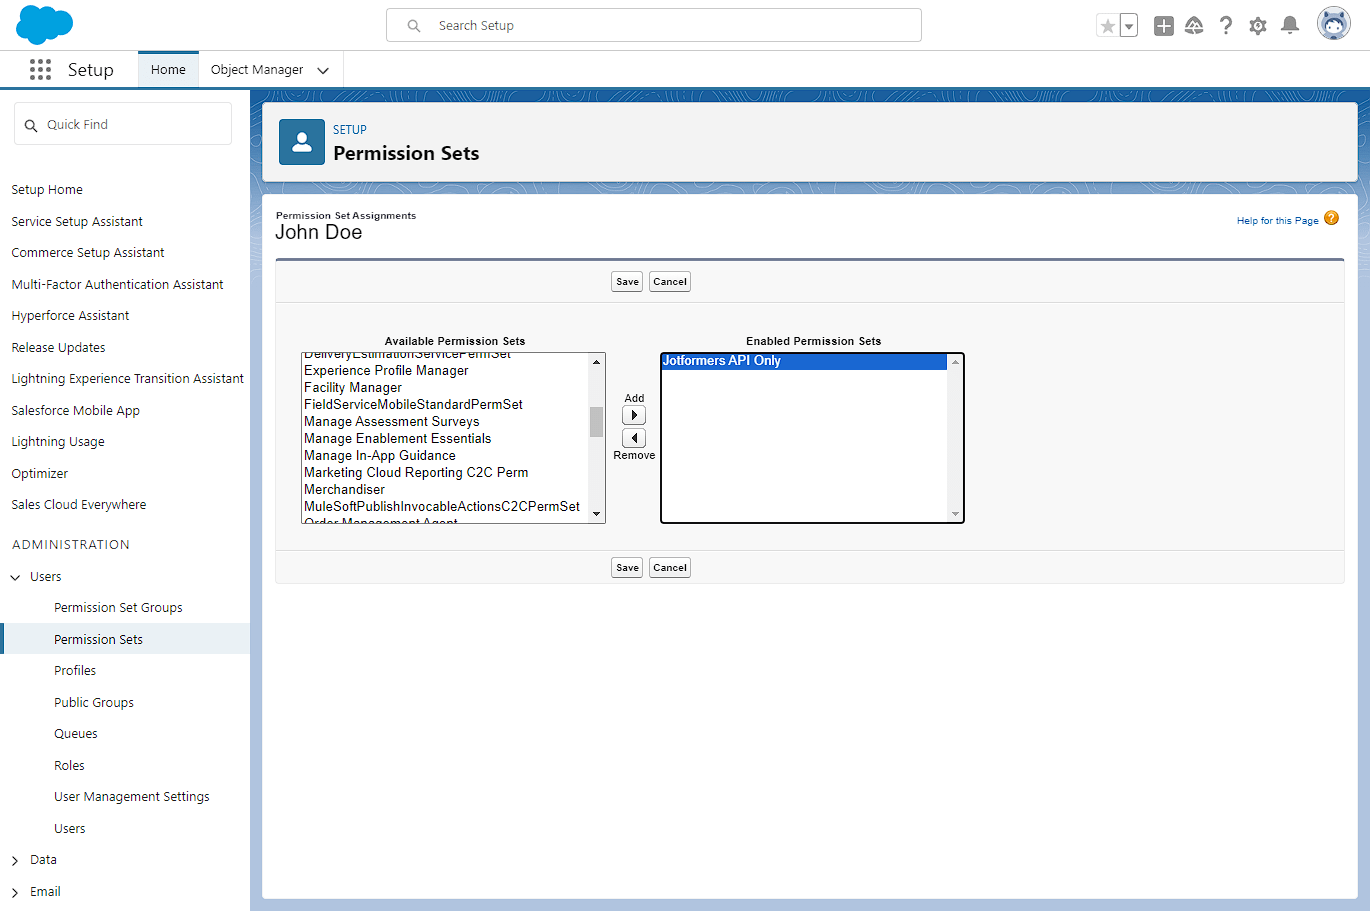
Find the permission set that you created earlier from the Available Permission Sets box and move it to the Enabled Permission Sets box. Click the Save button, and that’s it!
Note
The Salesforce API Integration license with the Minimum Access – API Only Integrations profile won’t be able to use the Jotform App on Salesforce AppExchange as they have no access to the Salesforce UI.
Setting up Salesforce Integration Using API Only User
Now, you are ready to set up the Salesforce integration using the API Only User. Here’s how:
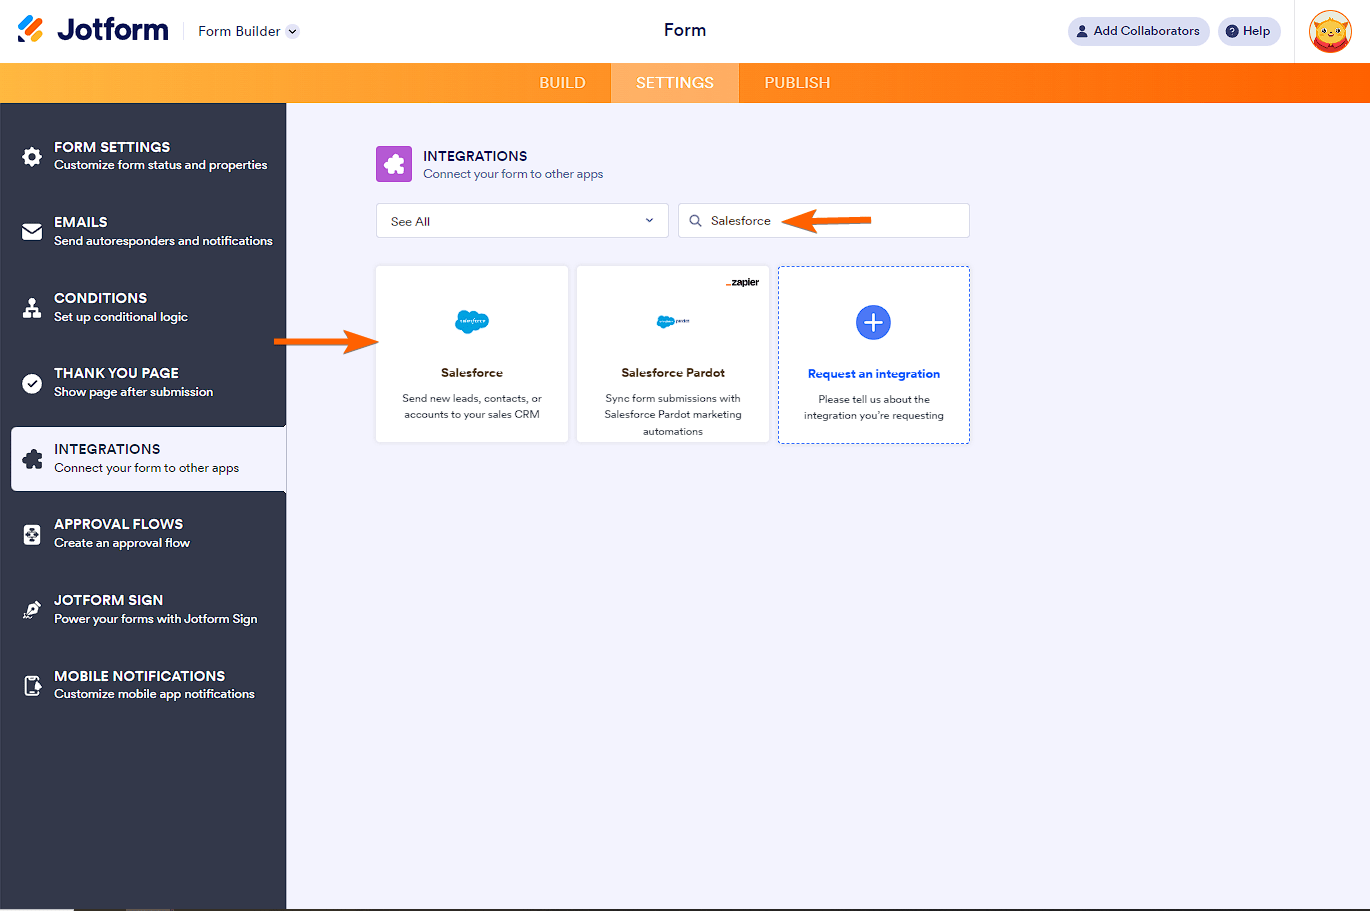
- In the Form Builder, go to the Settings tab.
- Select Integrations from the left panel.
- Search for Salesforce and click it.
- Click the Authenticate button.
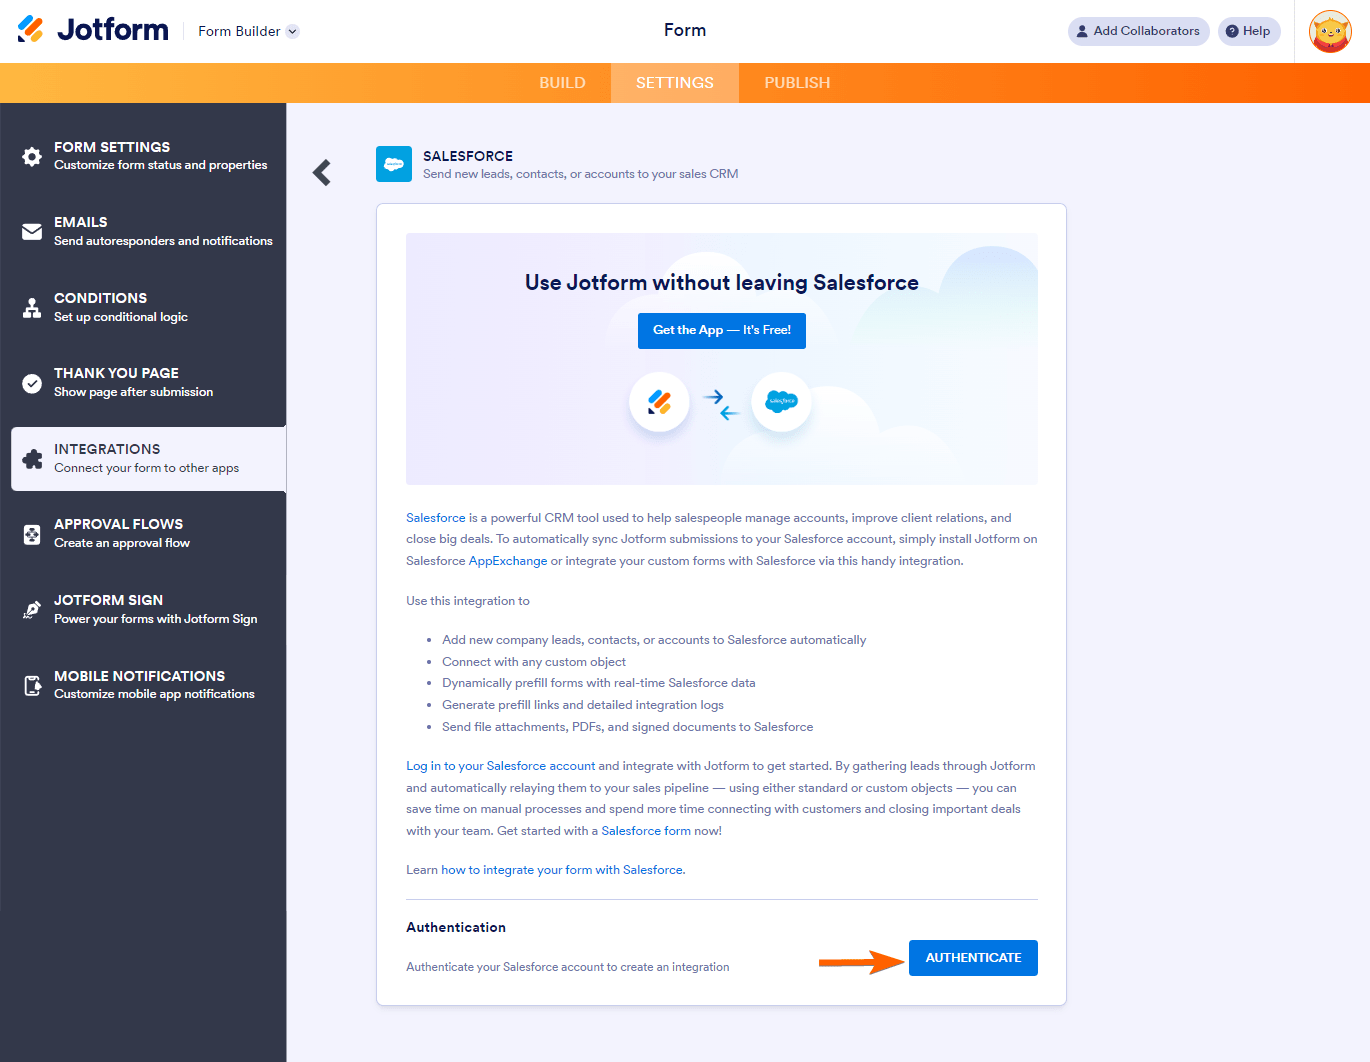
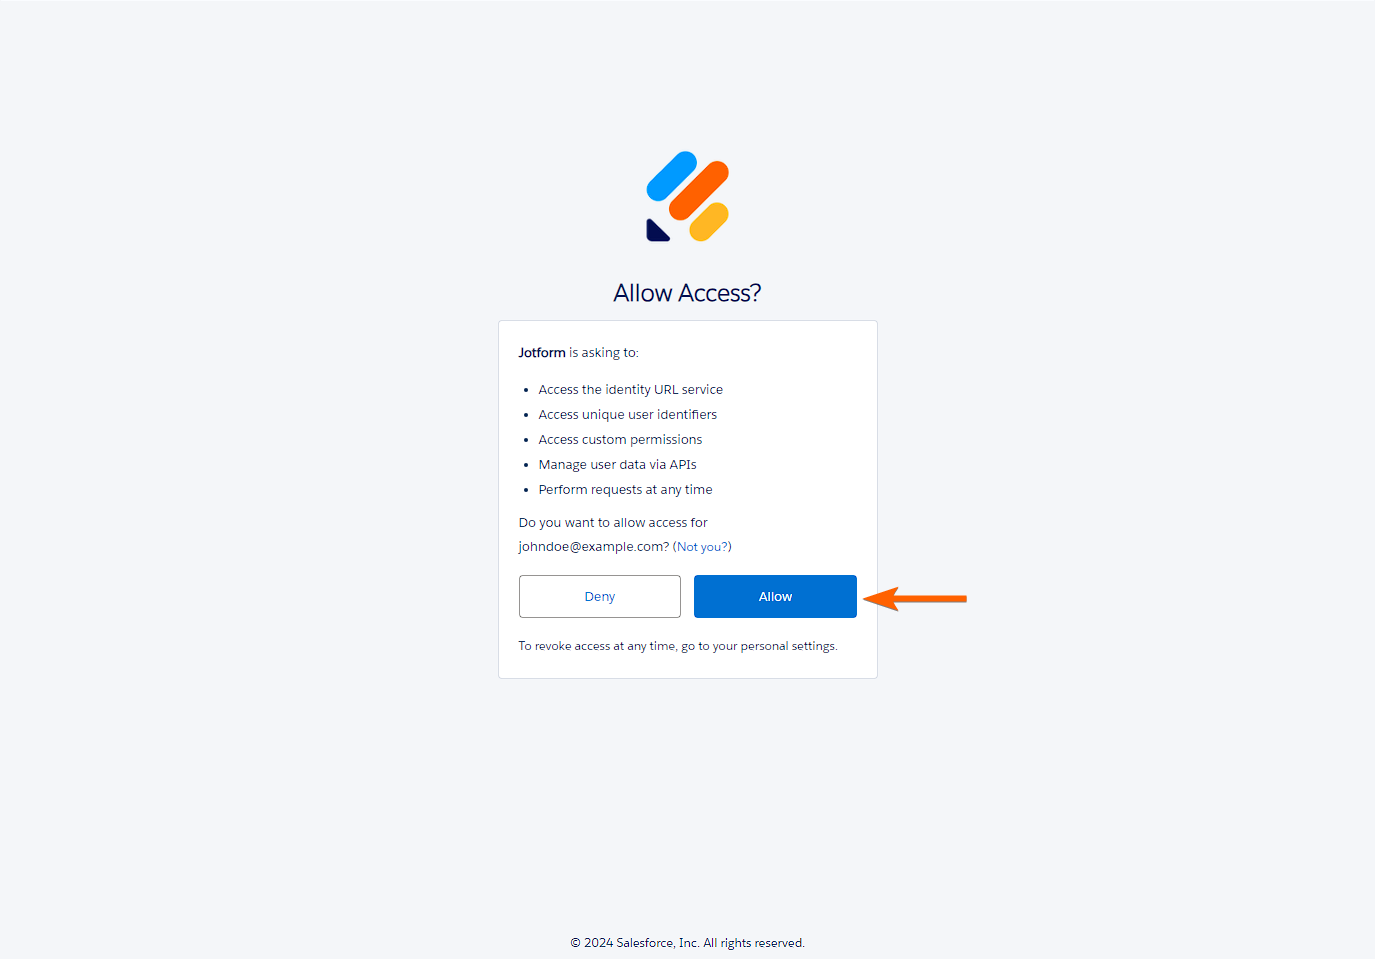
- Log in to the API Only Account, and ensure to click Allow when asked for permissions.
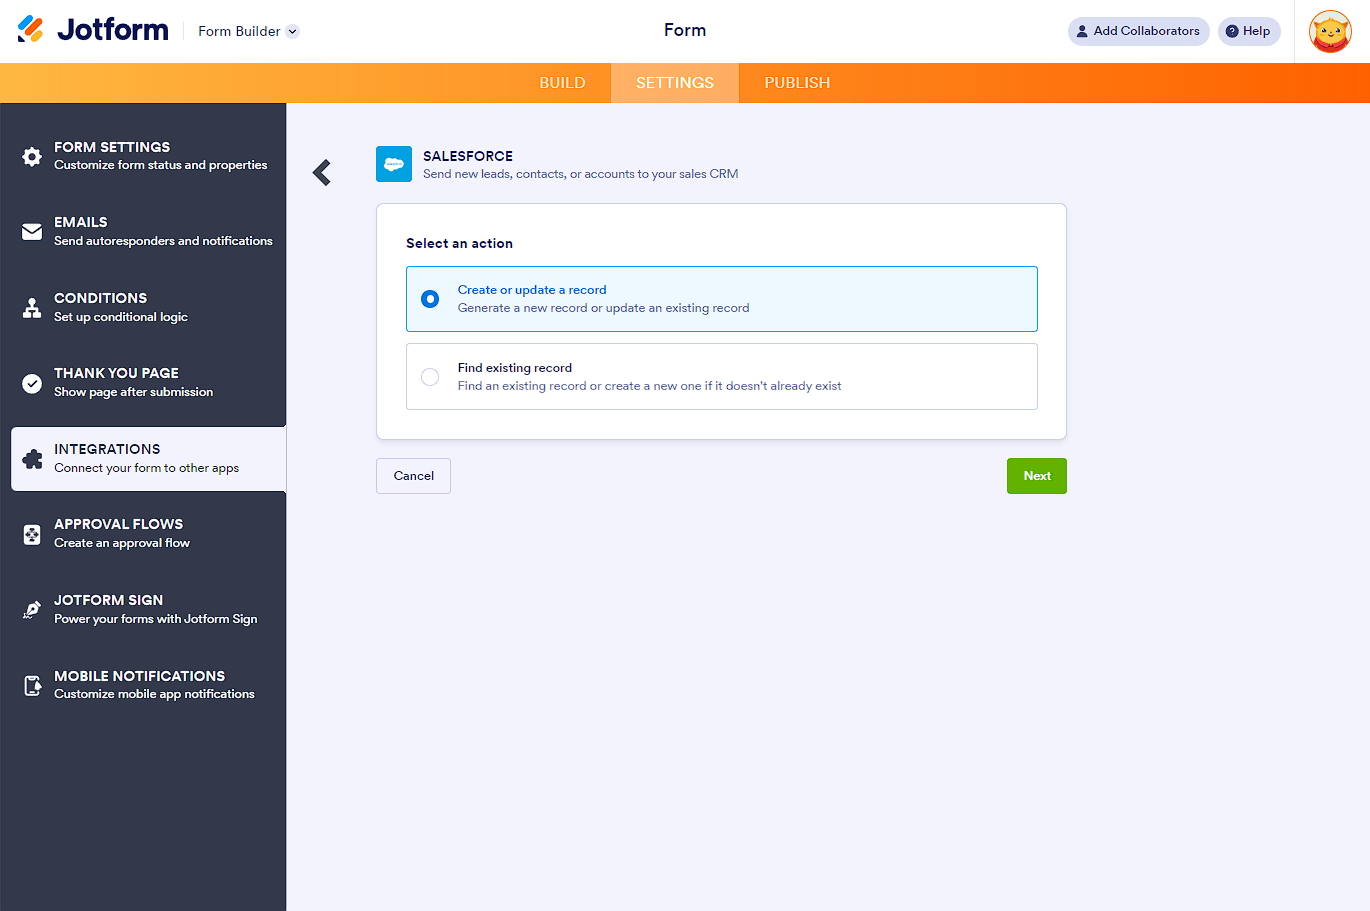
- Choose an action from the list. You can select Create or update a record or Find existing record.
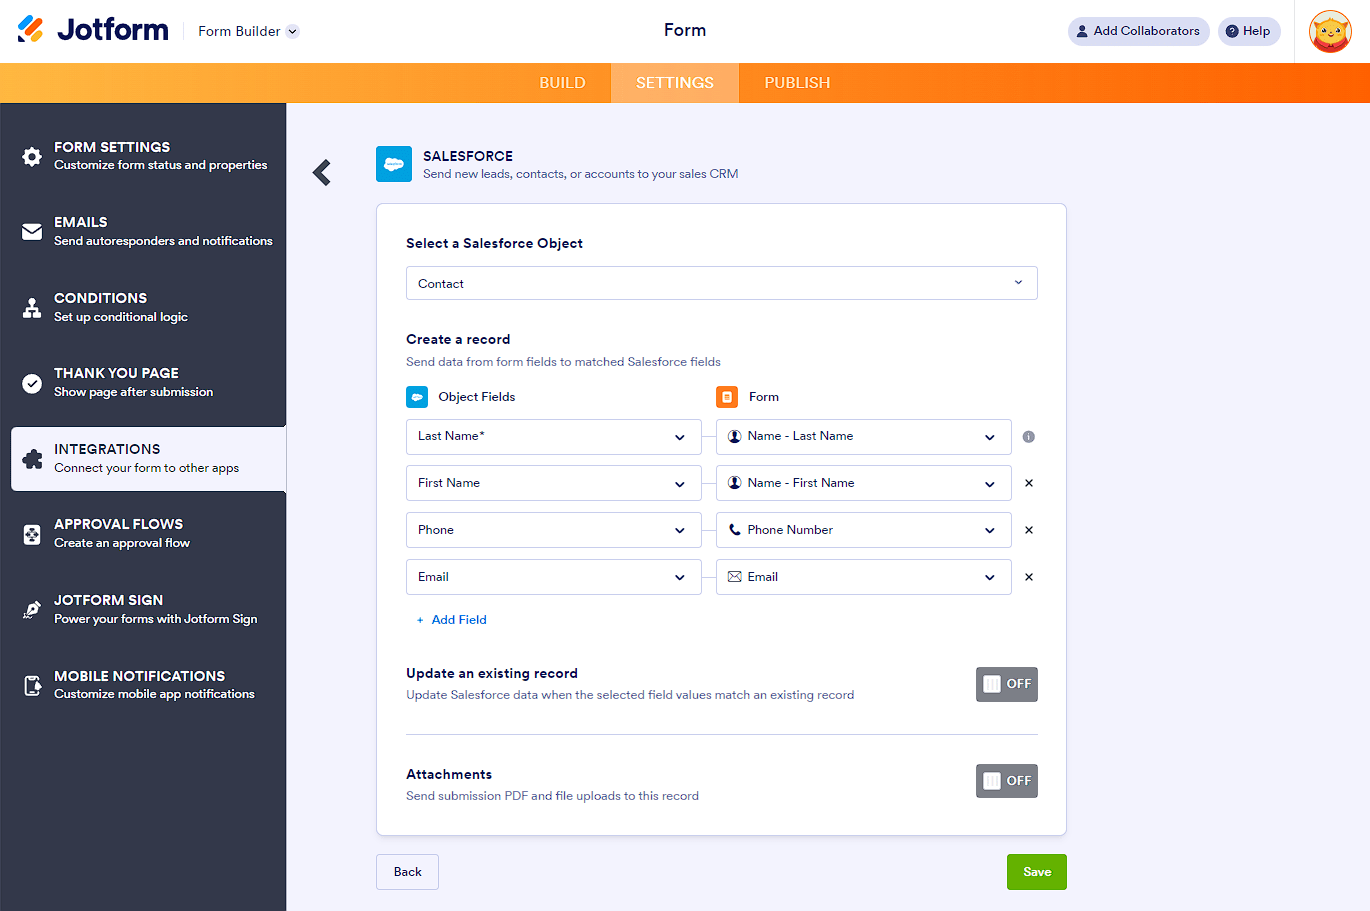
- Select the appropriate Object, and map your form fields accordingly. Optionally, you can toggle the Update an existing record to update the corresponding record based on the matched fields. You can also toggle Attachments to send the File Uploads and Submission PDF to your Salesforce record. Visit How To Send File Uploads and Submission PDFs to Salesforce to learn more.
- Click the Save button to complete the integration.
See also: How to Integrate Jotform with Salesforce.

Send Comment: