Jotform’s Digest Emails give you a quick, easy-to-read summary of your form activity—like submission stats, charts, and detailed entries—all delivered right to your inbox. You can choose how often you get them, so you never miss an important update.
There are several ways to start creating Digest Emails — you can set them up from your My Workspace page, My Reports, or directly through the Emails tab in Form Builder.
Creating Digest Emails on My Workspace Page
The quickest and easiest way to create Digest Emails is through your My Workspace page. You can either select multiple forms at once, or start with just one. Here’s how to do it:
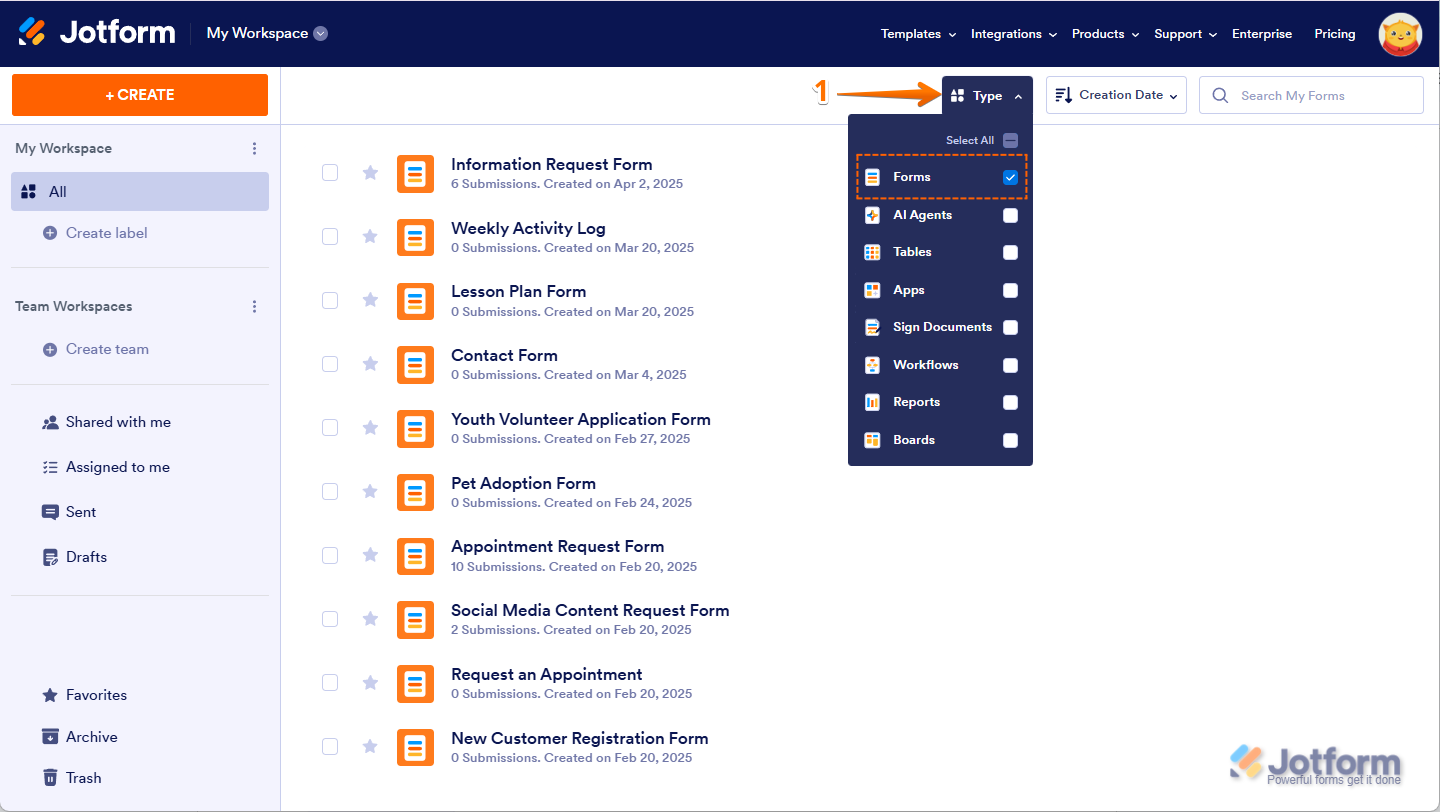
- On your My Workspace page, click on Type at the top and in the Dropdown menu that opens, uncheck the boxes next to all the assets except Forms, so only they’ll be shown on the page.
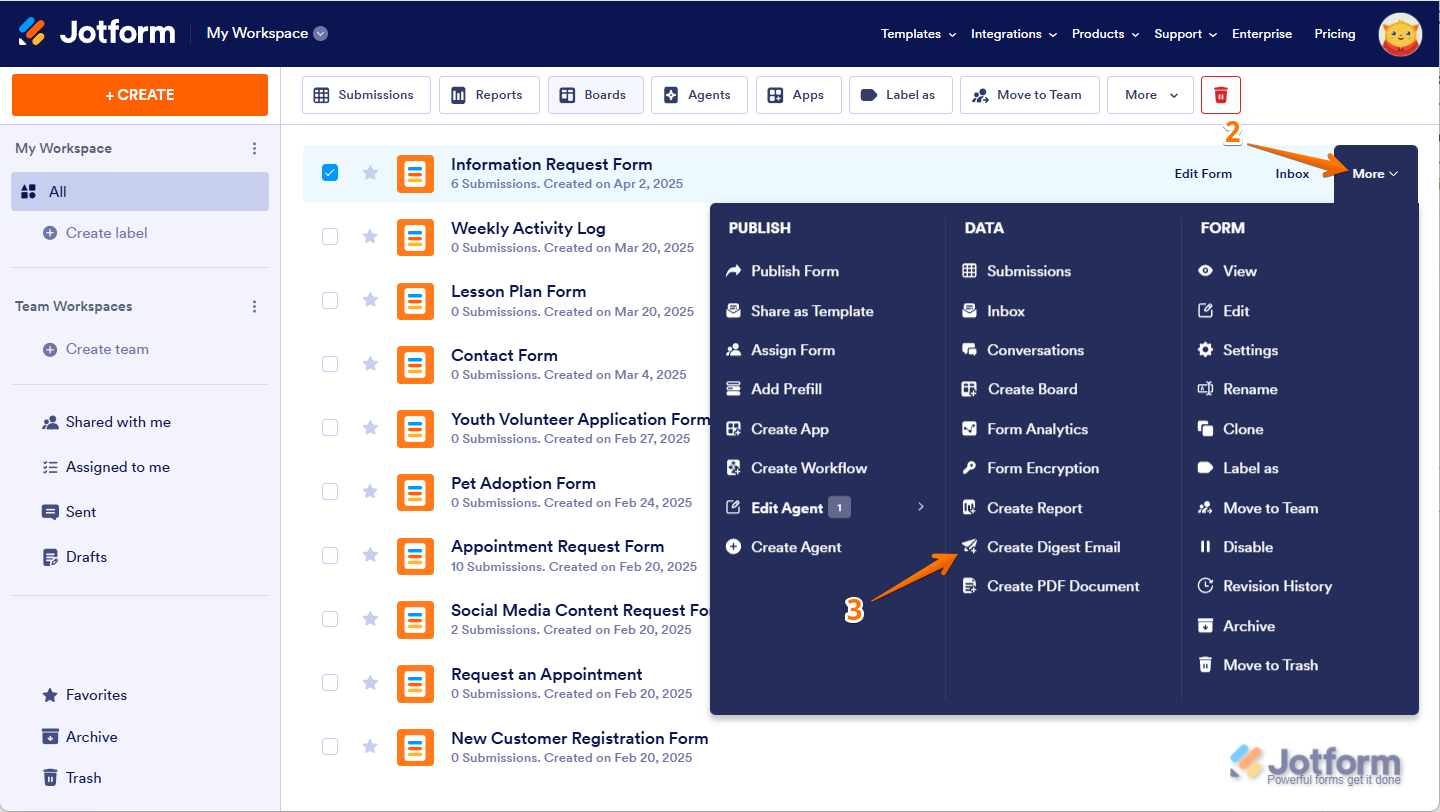
- Now, hover your mouse over the form you want to create Digest Emails for, and click on More on the right side of the page.
- In the Dropdownmenu that opens up, click on Create Digest Email.
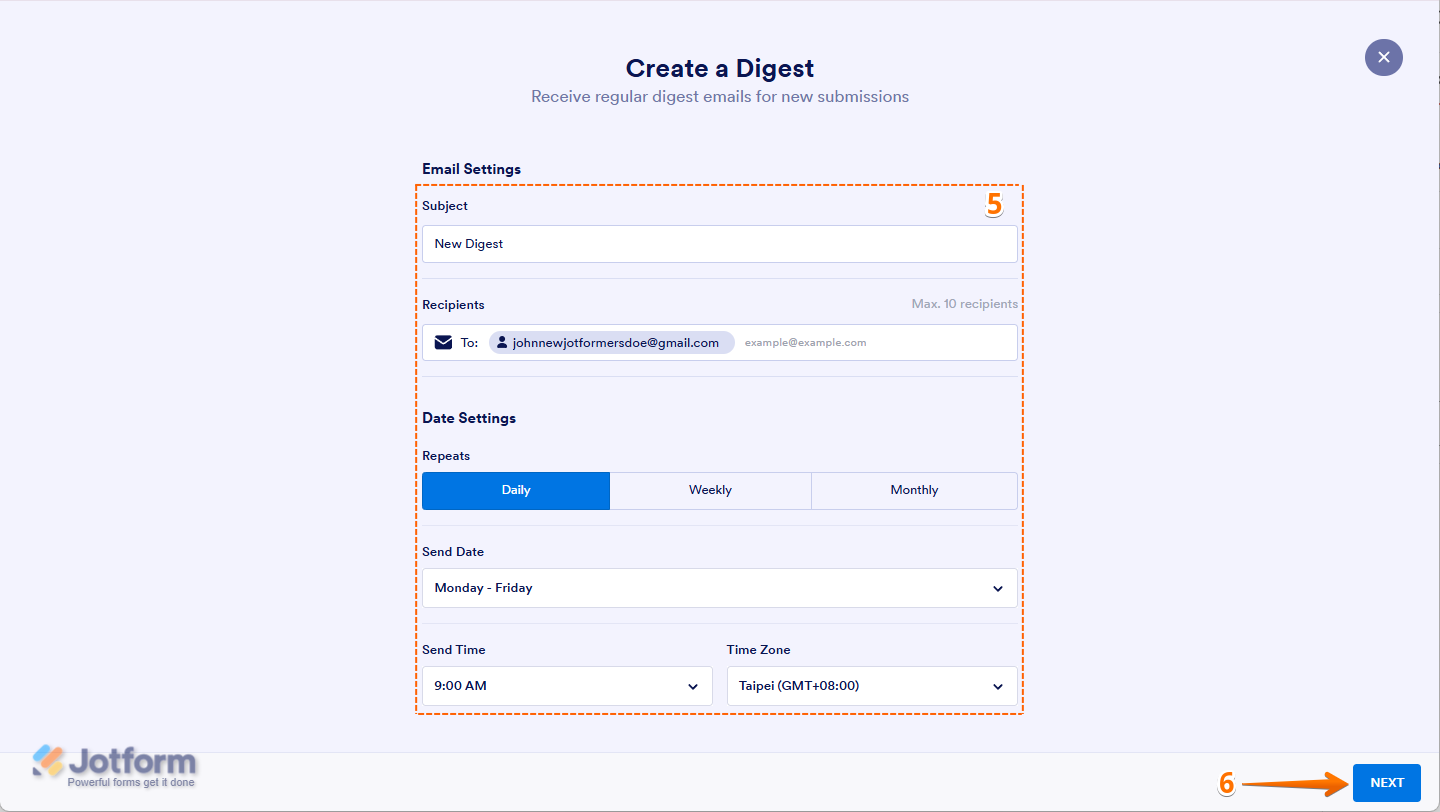
- Next, set up the following Digest Email options:
- Subject — Enter a subject line for it.
- Recipients — Add the recipient’s email address
- Repeats — Choose how often to send: daily, weekly, or monthly.
- Send Date — Select when to send. The available options will change depending on how often you choose to send it.
- Send Time — Select the best time to send it.
- Time Zone — Choose the time zone for it. The default is based on your Account Time Zone Settings.
- Then, click on Next.

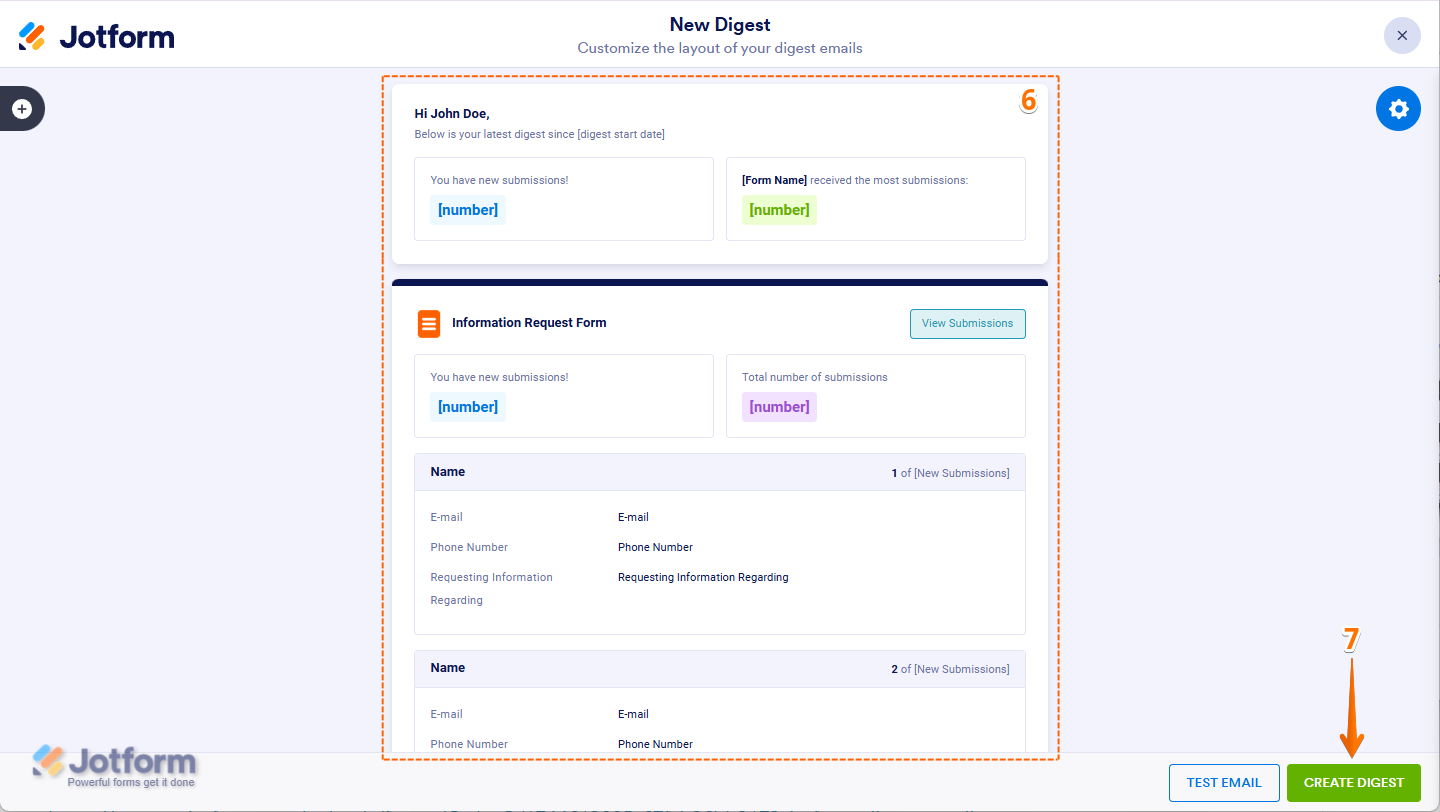
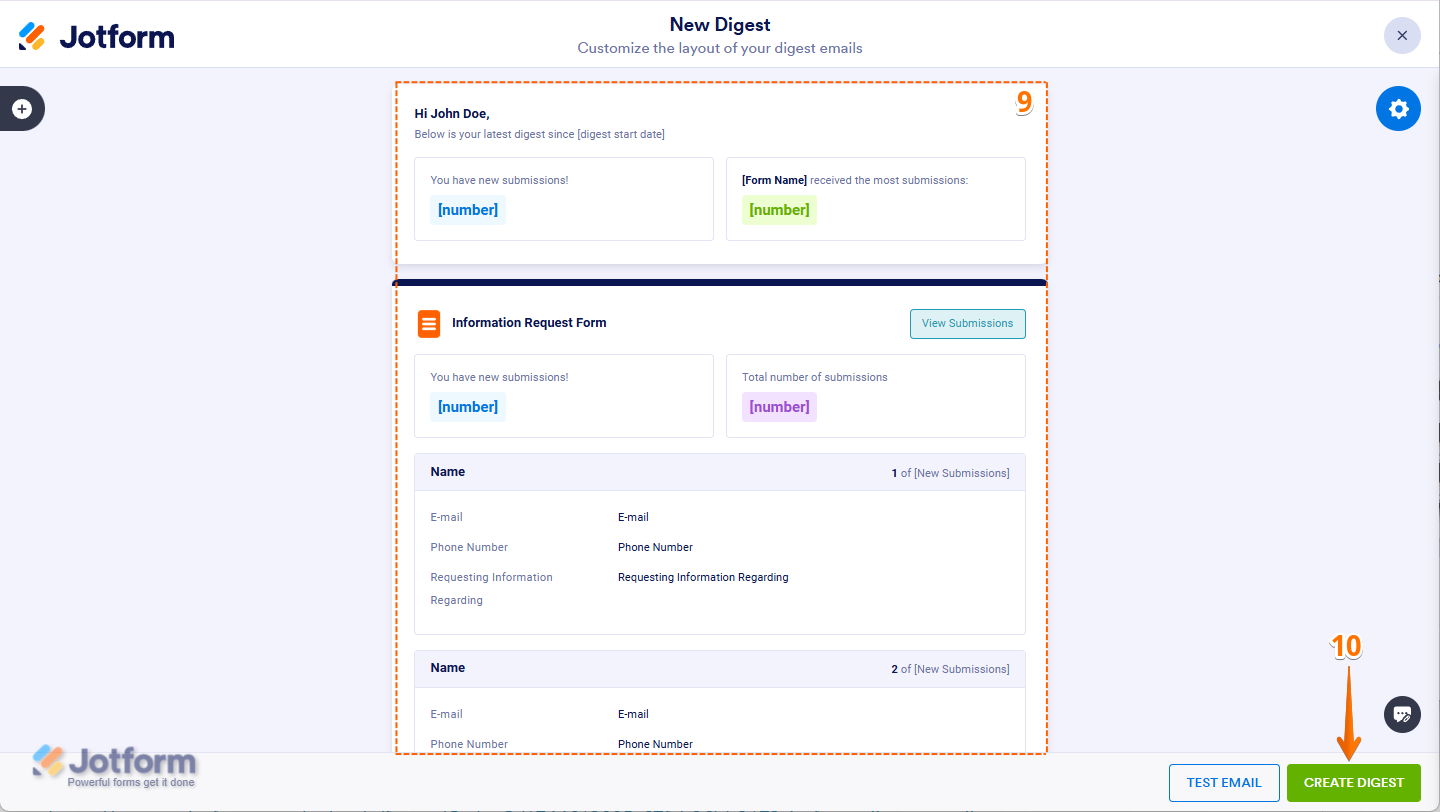
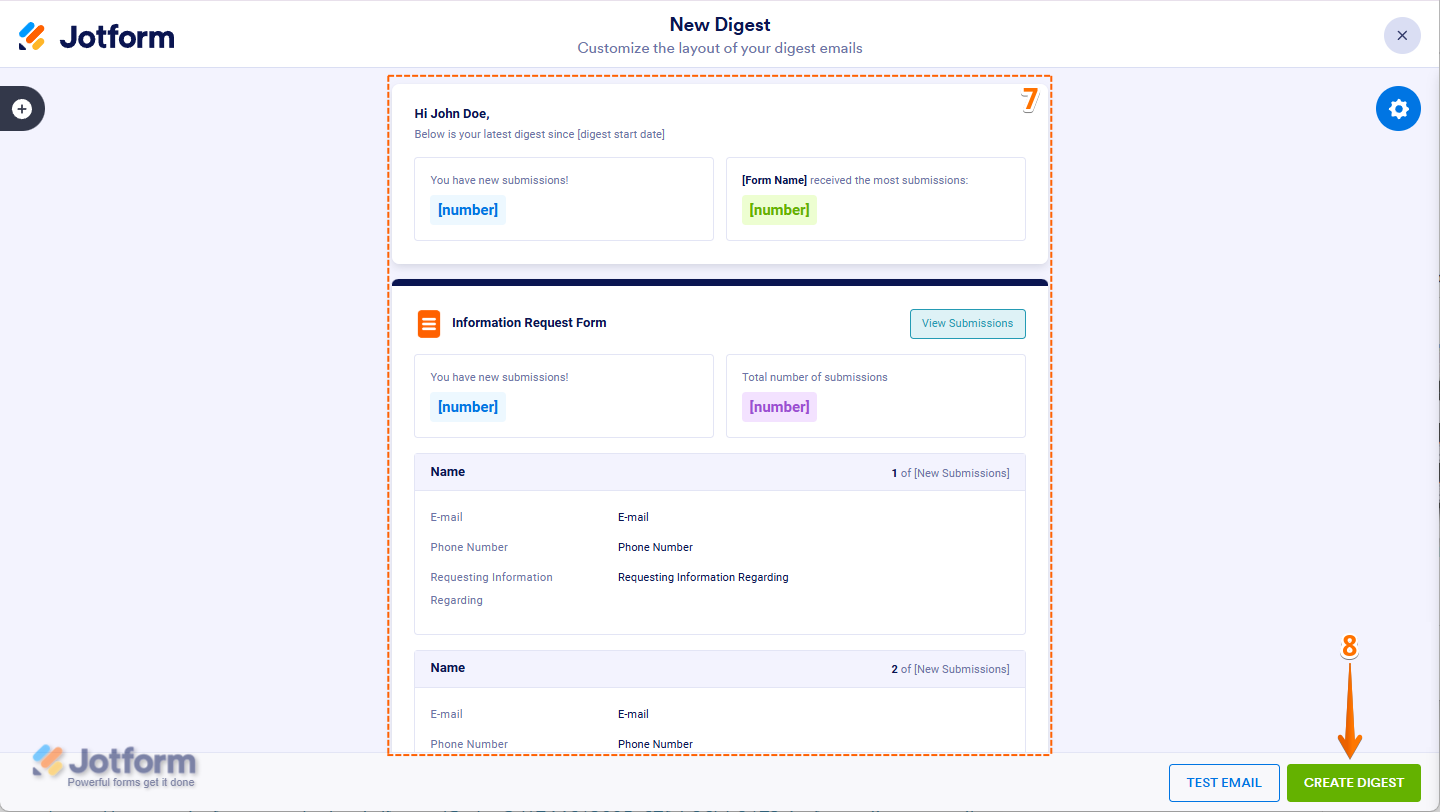
- Now, set up and personalize the content for it. Check out these guide about How to Personalize Digest Emails for more details.
- Then, click on Create Digest in the bottom-right corner of the page.
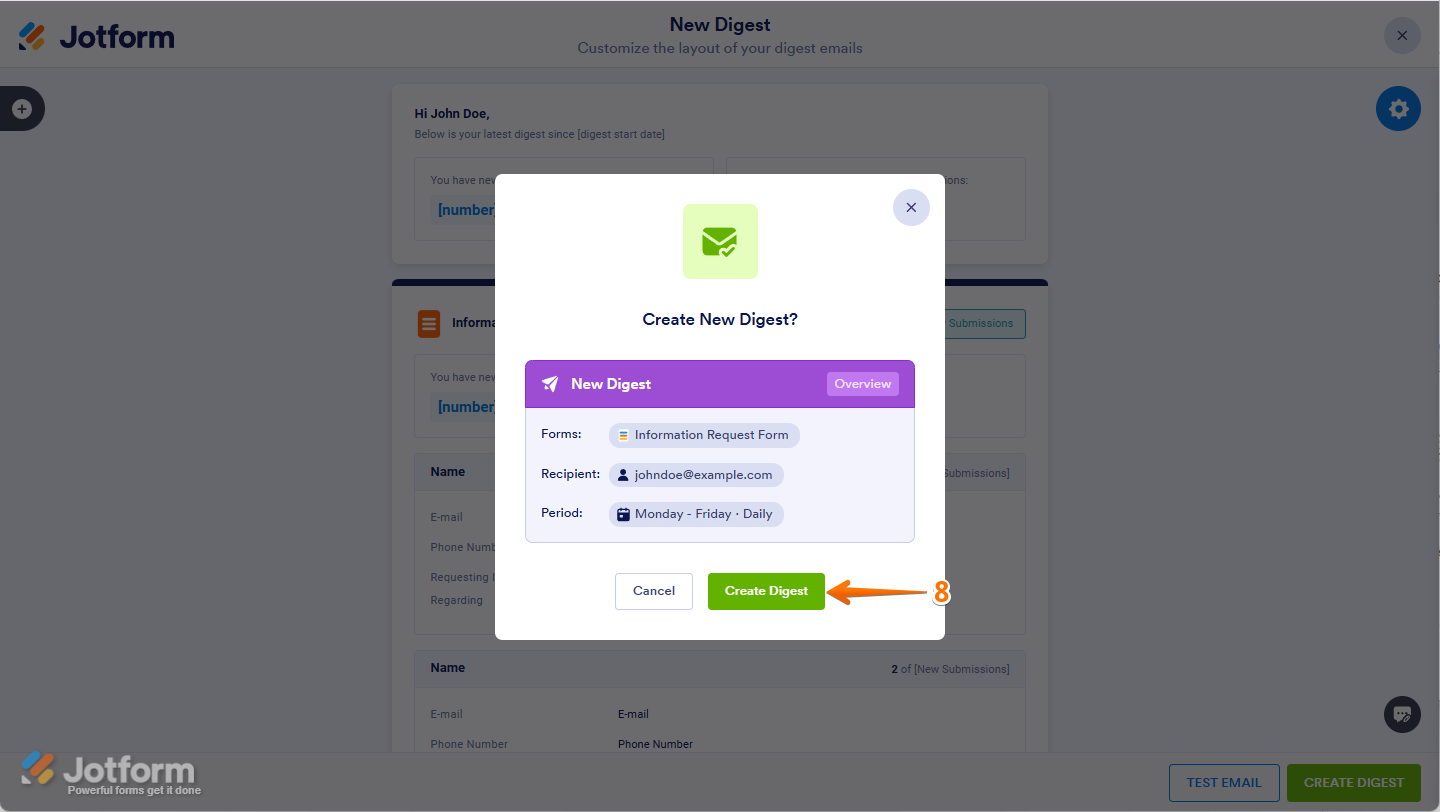
- Finally, in the Confirmation window that opens, click on Create Digest, and you’re all set.
Creating Digest Emails on My Reports Page
If you often use your My Reports page, you can also create Digest Emails from there. The setup flow is a bit different—you’ll configure the email settings first before choosing which forms to include. Here’s how it works:
- On your My Workspace page, click on the Downward Arrow icon on the top-left side of the screen.
- Then, in the menu that opens up, select My Reports.

- Now, on your My Reports page, click on Create Report on the top-left side of the screen.

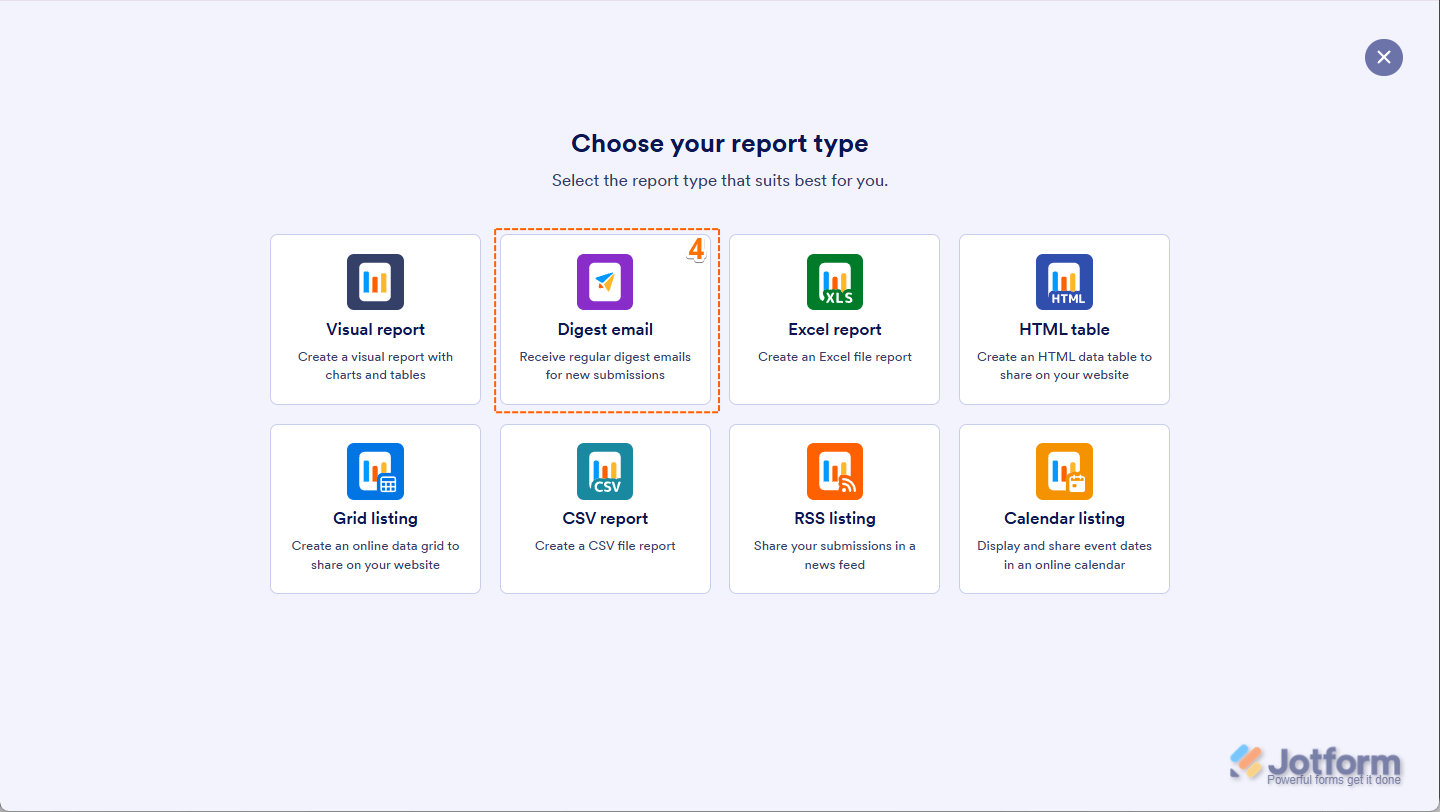
- On the Create Report page that opens, click on Digest Email.
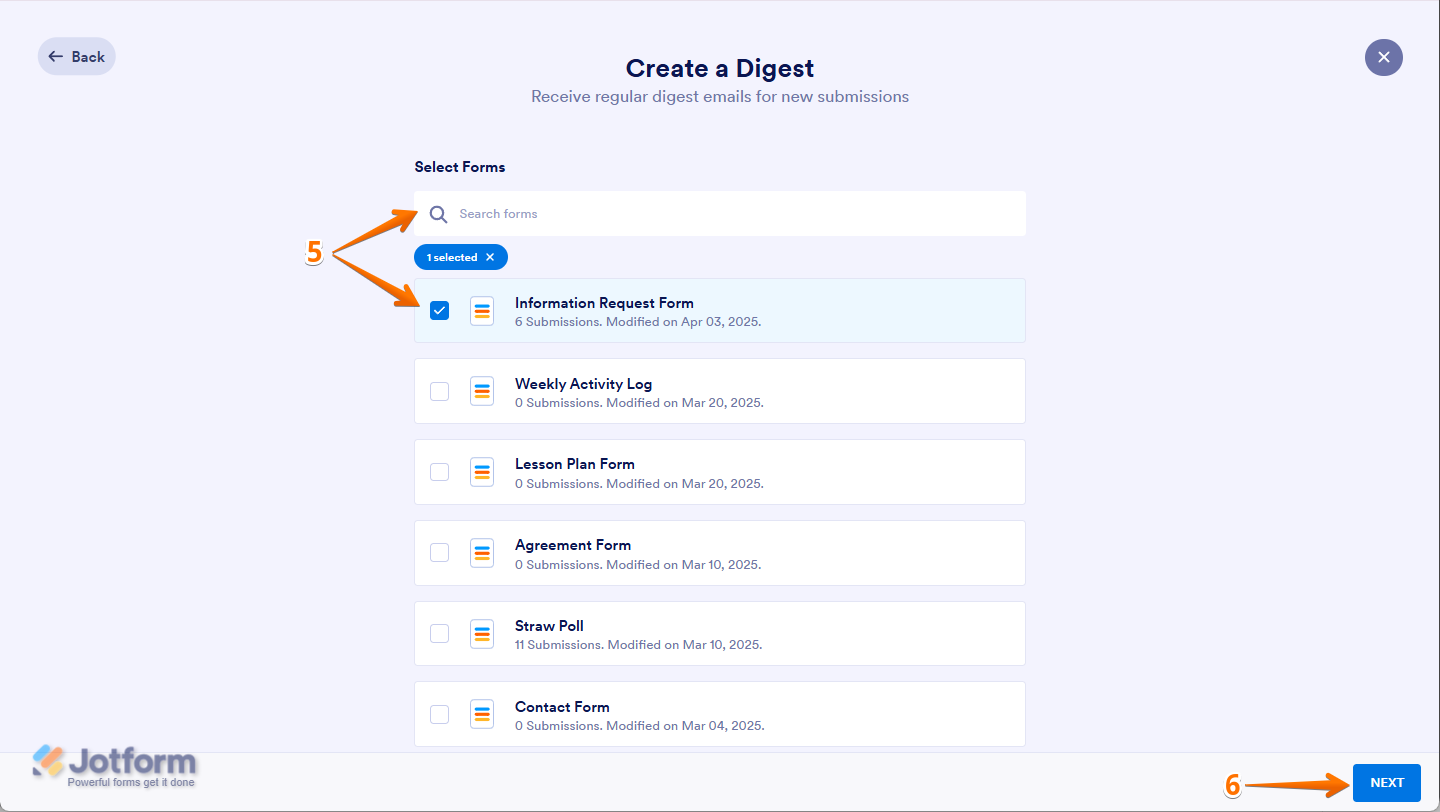
- Next, tick the box next to the form you want to create a Digest Email for, or use the search bar to find it.
- Then, click on Next.
- Next, set up the following Digest Email options:
- Subject — Enter a subject line for it.
- Recipients — Add the recipient’s email address
- Repeats — Choose how often to send: daily, weekly, or monthly.
- Send Date — Select when to send. The available options will change depending on how often you choose to send it.
- Send Time — Select the best time to send it.
- Time Zone — Choose the time zone for it. The default is based on your Account Time Zone Settings.
- Then, click on Next.

- Now, set up and personalize the content for it. Check out these guide about How to Personalize Digest Emails for more details.
- Then, click on Create Digest in the bottom-right corner of the page.
- Finally, in the Confirmation window that opens, click on Create Digest, and you’re all set.

Creating Digest Emails Through the Email Section of the Form Builder
If you’re in Form Builder, you can also create Digest Emails in the Email section. You won’t see it until you choose to create a new email template. Let’s do it:
- In Form Builder, in the orange navigation bar at the top of the page, click on Settings.
- In the menu on the left side of the page, click on Emails.
- Now, click on Add Email.
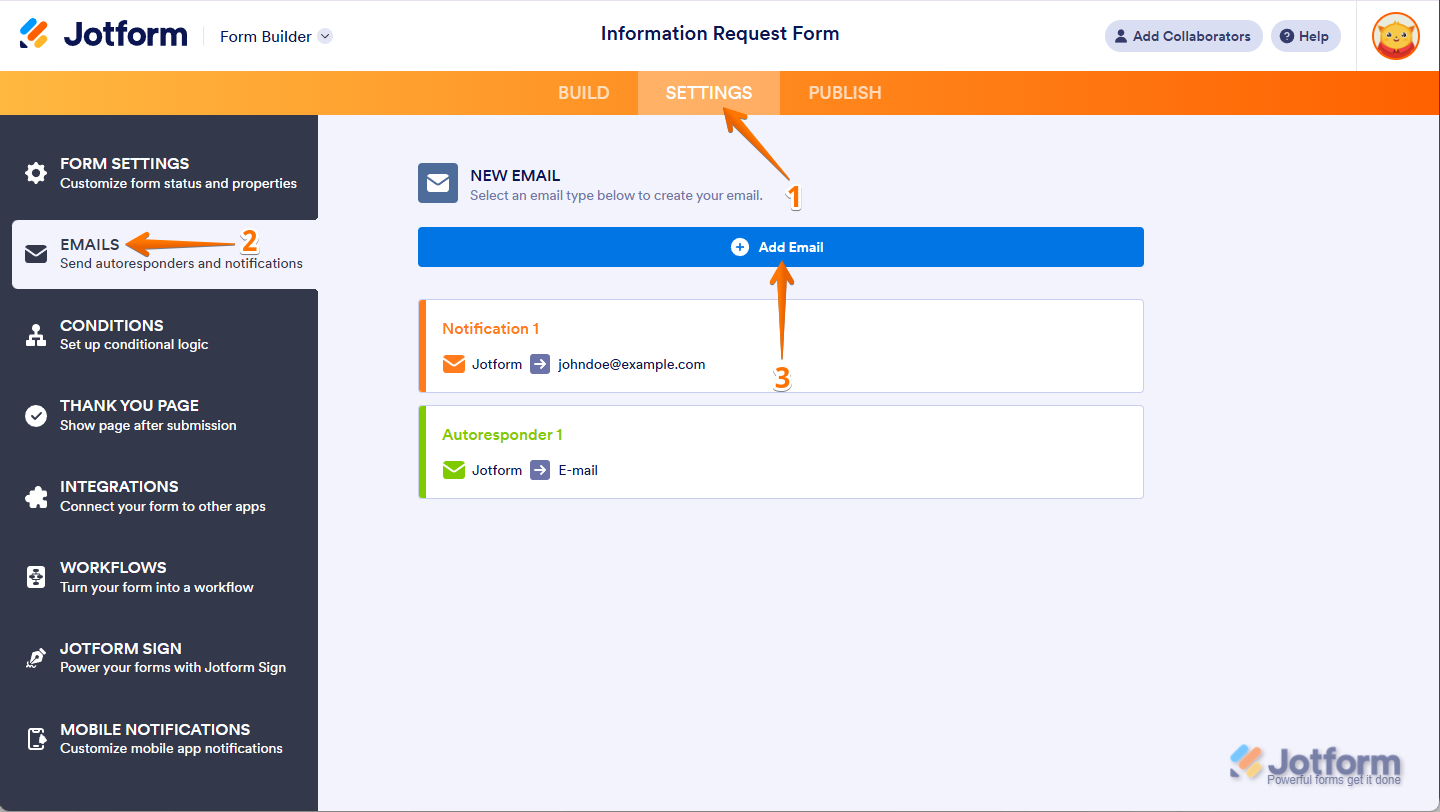
- In the list that comes up, select Digest Email.

- Next, set up the following options:
- Subject — Enter a subject line for it.
- Recipients — Add the recipient’s email address
- Repeats — Choose how often to send: daily, weekly, or monthly.
- Send Date — Select when to send. The available options will change depending on how often you choose to send it.
- Send Time — Select the best time to send it.
- Time Zone — Choose the time zone for it. The default is based on your Account Time Zone Settings.
- Then, click on Next.
- Now, set up and personalize the content for it. Check out these guide about How to Personalize Digest Emails for more details.
- Then, click on Create Digest in the bottom-right corner of the page.
- Finally, in the Confirmation window that opens, click on Create Digest, and you’re all set.

That’s it! Now, you’ve successfully set up your Digest Email! You’ll get a summary of your form activity based on the frequency and settings you selected. This is a great way to keep track of your submissions without constantly checking your forms.

Send Comment:
5 Comments:
More than a year ago
how do I STOP sending the digest. the form is no longer enabled but I'm still getting digests
More than a year ago
Can the Digest Email information go to someone that is not able to log in to my Jotform account?
More than a year ago
Would I be able to send an auto reply to a customer inquiry that would be a PDF with pricing and choices of packages for them to choose from?
We are selling digital marketing display adds and have numerous locations that house our monitors.
Also looking for automated payment system for customers to enter their credit card info to be billed for the number of months they sign up for, which is typically 3-6 months on average.
More than a year ago
Does the digest only include what is new since the last digest was sent? Or does it just continue to grow and grow in size and length? I'm expecting to receive many submissions each day and ideally only want to see the previous days submissions in each daily email digest.
More than a year ago
Can I set up digest emails so they will only send if there is new submission data?