With Jotform’s Voice Call Forwarding feature, you can automatically send incoming calls to different phone numbers depending on the day, time, or location. To get started, just set up Voice Geographic Permissions in Twilio, then hop into your Jotform AI Agent to create your forwarding rules.
Note
To use Call Forwarding in your Jotform Agent, you’ll need to connect your Twilio account and make sure you’ve activated a Twilio phone number. Our guide on How to Connect Your Twilio Account to Jotform AI Agents walks you through it. Once that’s set up, you’re ready to move on to the steps below to get call forwarding up and running.
Setting Up Call Forwarding in Your AI Agent
Once your Twilio account is connected, you can set up your call forwarding rules right inside your Jotform AI Agent. Here’s how to do it:
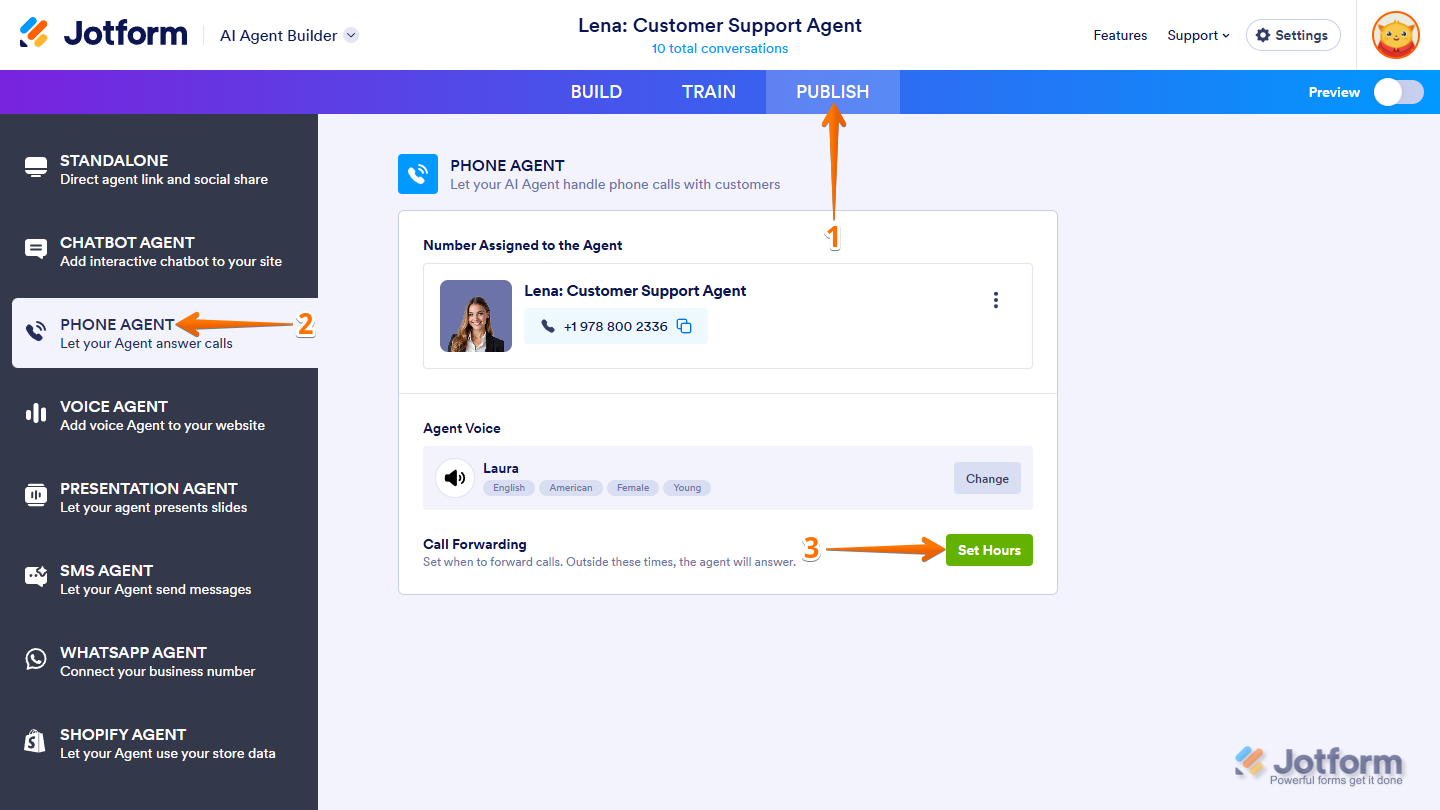
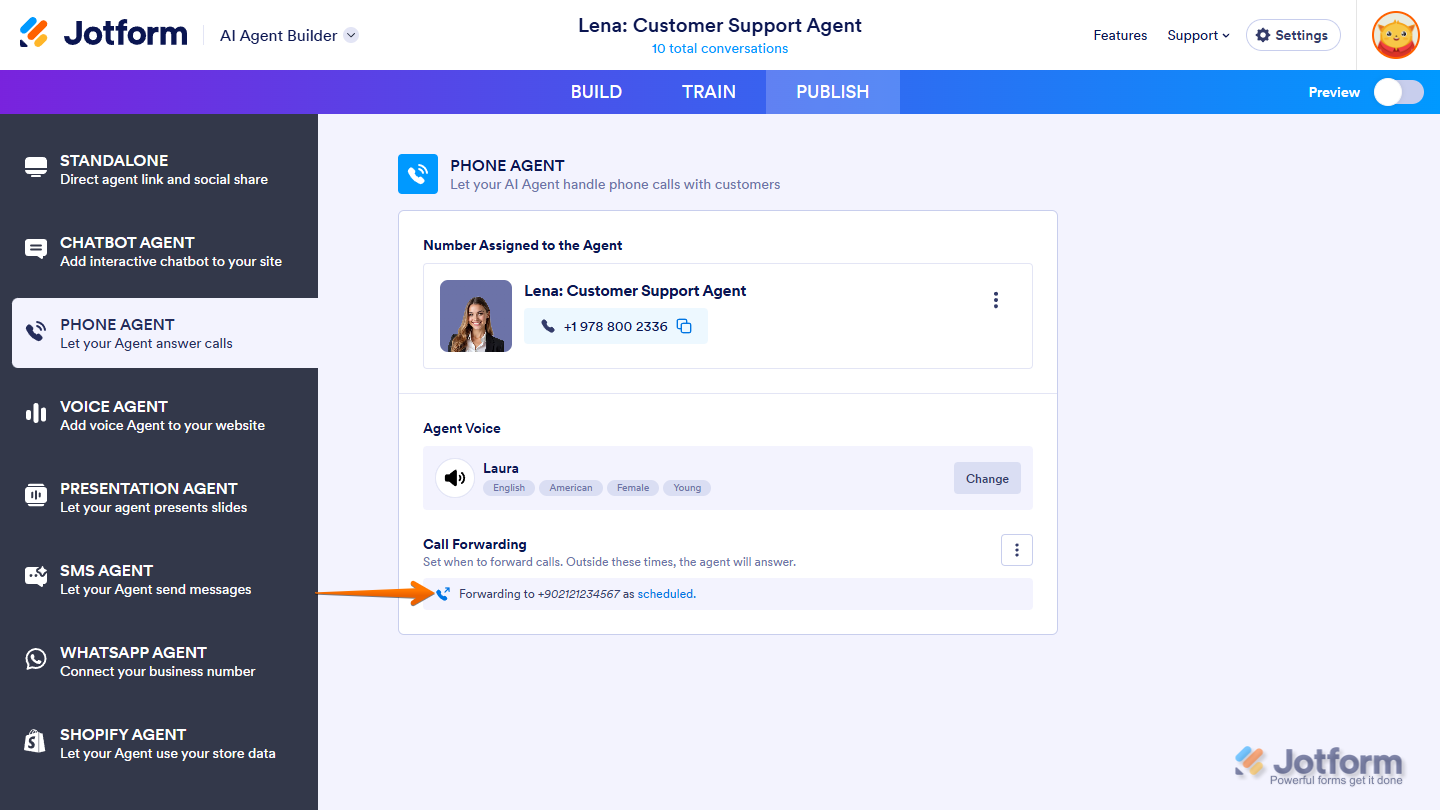
- In Agent Builder, in the blue navigation bar at the top of the page, click on Publish.
- Click on Phone Agent in the menu on the left side of the page.
- Then, click on Set Hours.
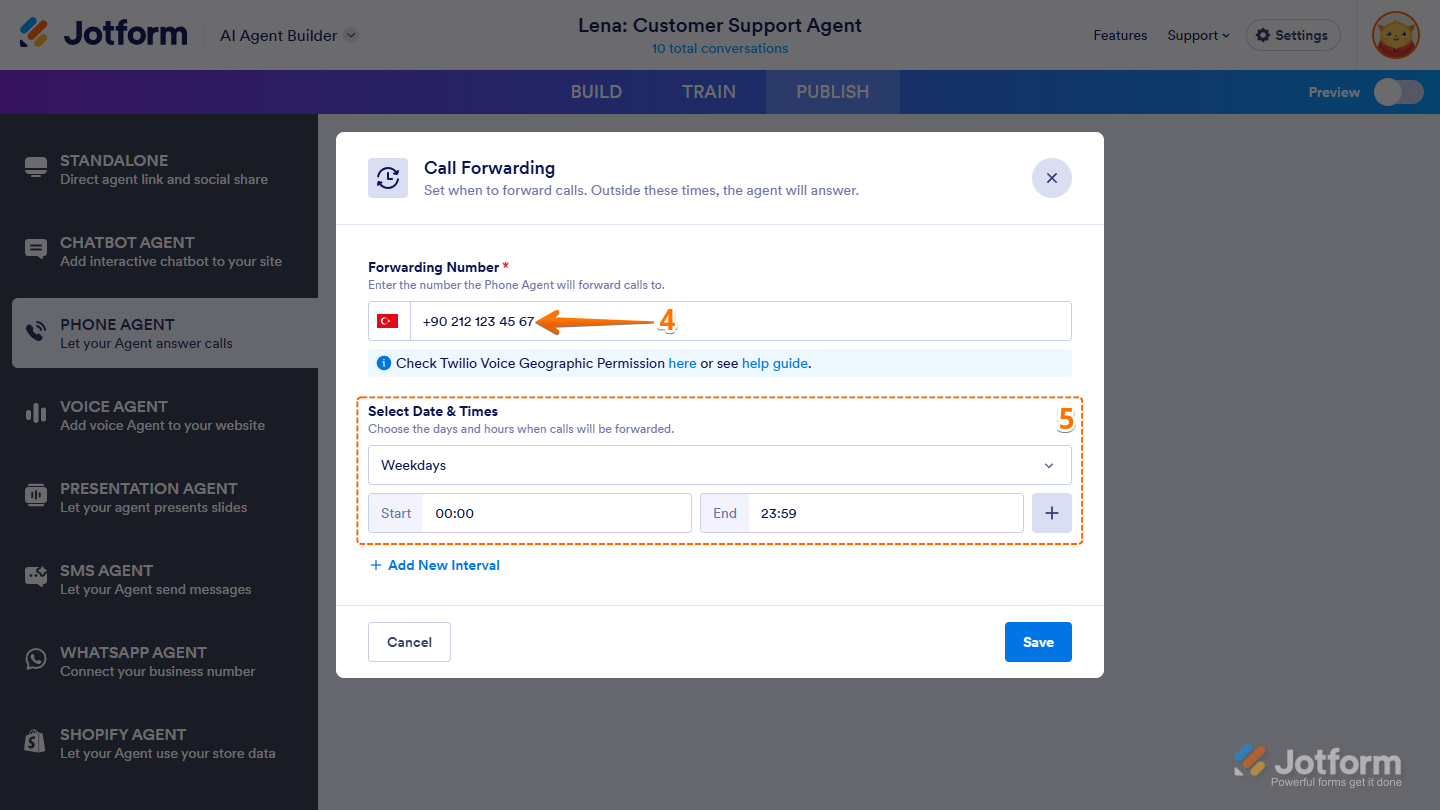
- Now, in the Call Forwarding window that opens, in the Forwarding Number field, enter the number the Phone Agent will forward calls to. For a quick how-to, check out our guide on Enabling Voice Geographic Permissions in Twilio.
- Then, in the Select Dates & Times section, choose the days and hours when calls will be forwarded.
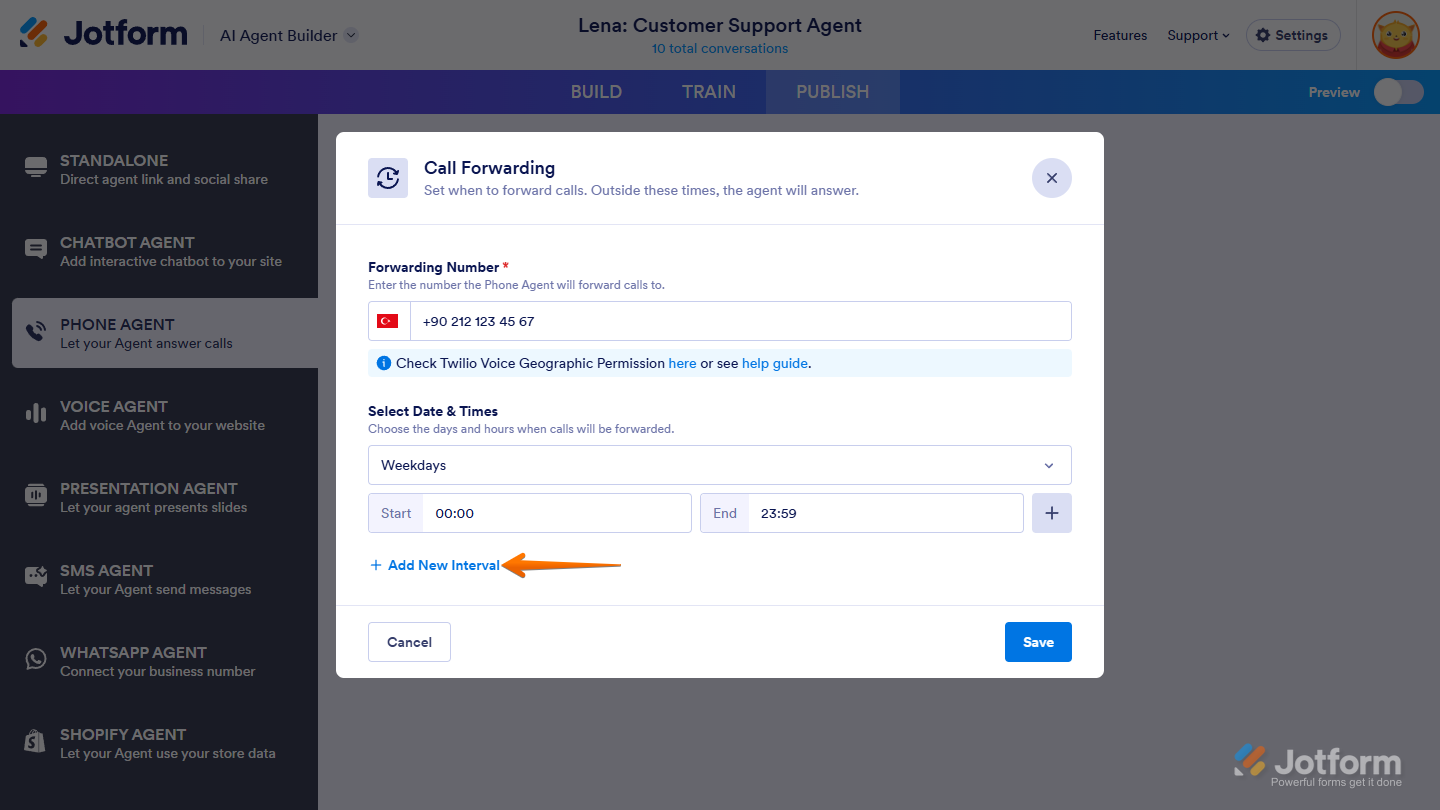
You can also click on the Add New Interval blue text, to optionally add a new interval.
- Now, click on Save and you’re all set.
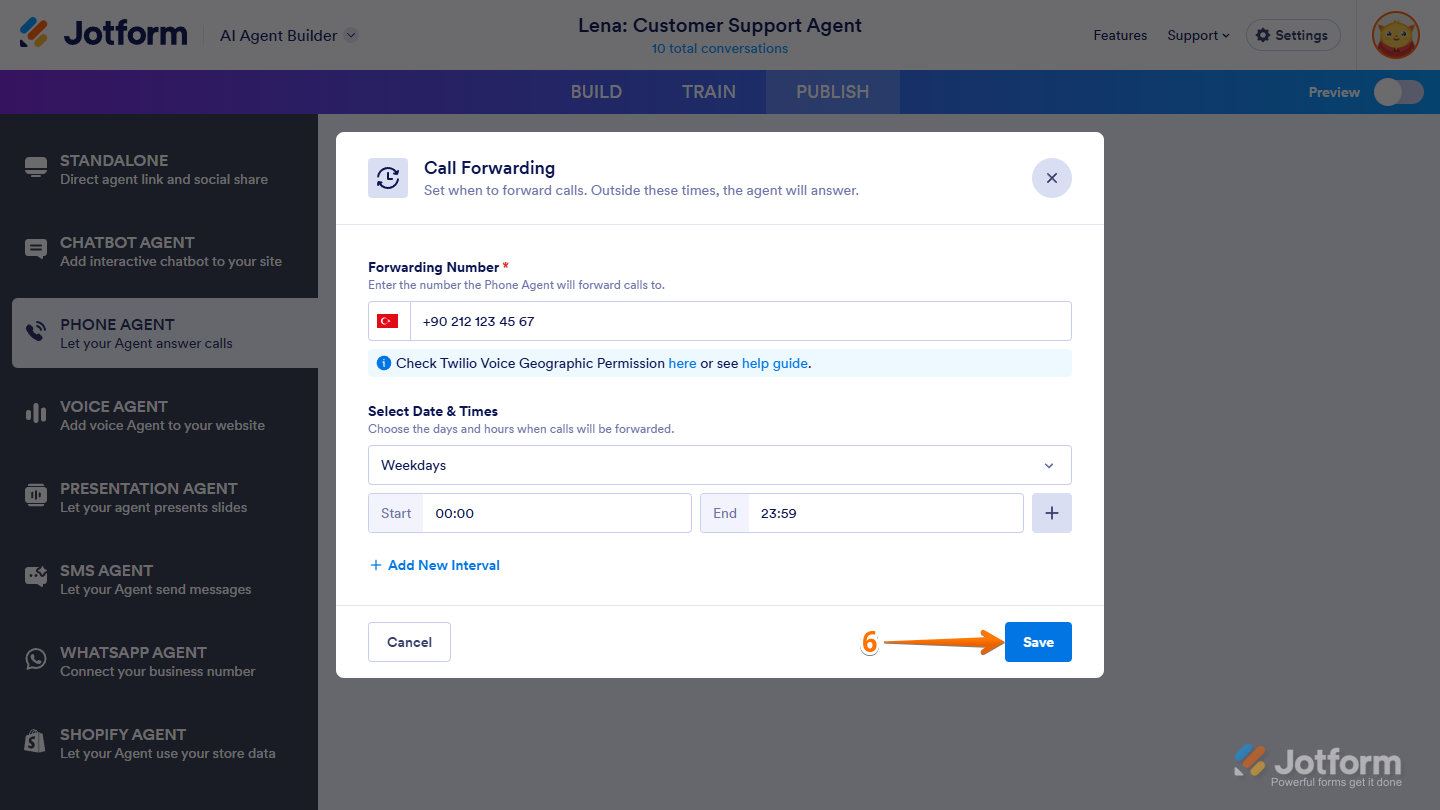
And that’s it! You’ve successfully set up Call Forwarding in your Jotform AI Agent. Incoming calls will now be automatically routed based on how you configured things, ensuring a seamless and efficient experience for your users.
Enabling Voice Geographic Permissions in Twilio
If you’re forwarding calls internationally, you’ll need to allow outbound voice calls to the destination country in your Twilio account. Here’s how:
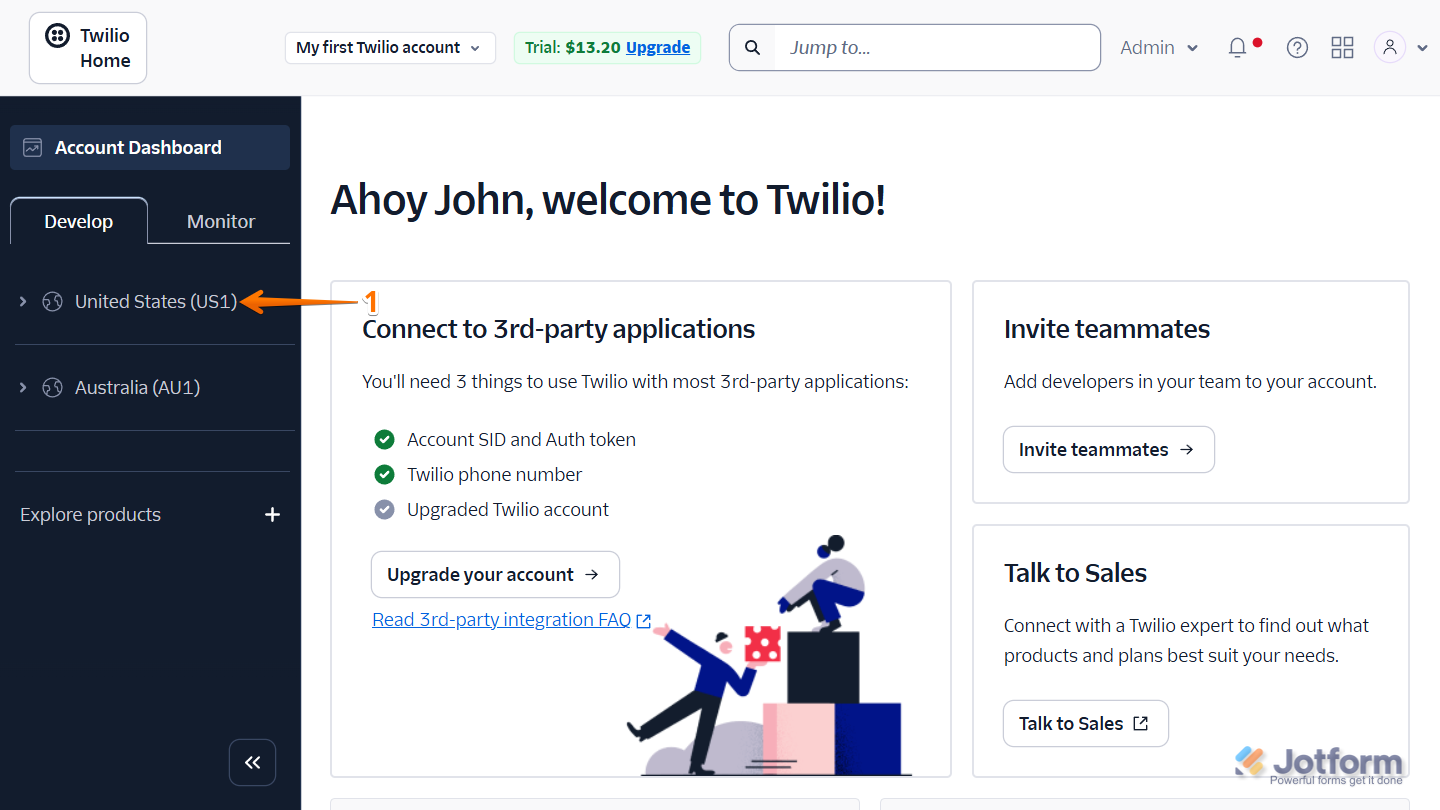
- Login to your Twilio Account and in your Account Dashboard in the menu on the left, click on your Voice Geographic Region you want to configure. For example, the USA.
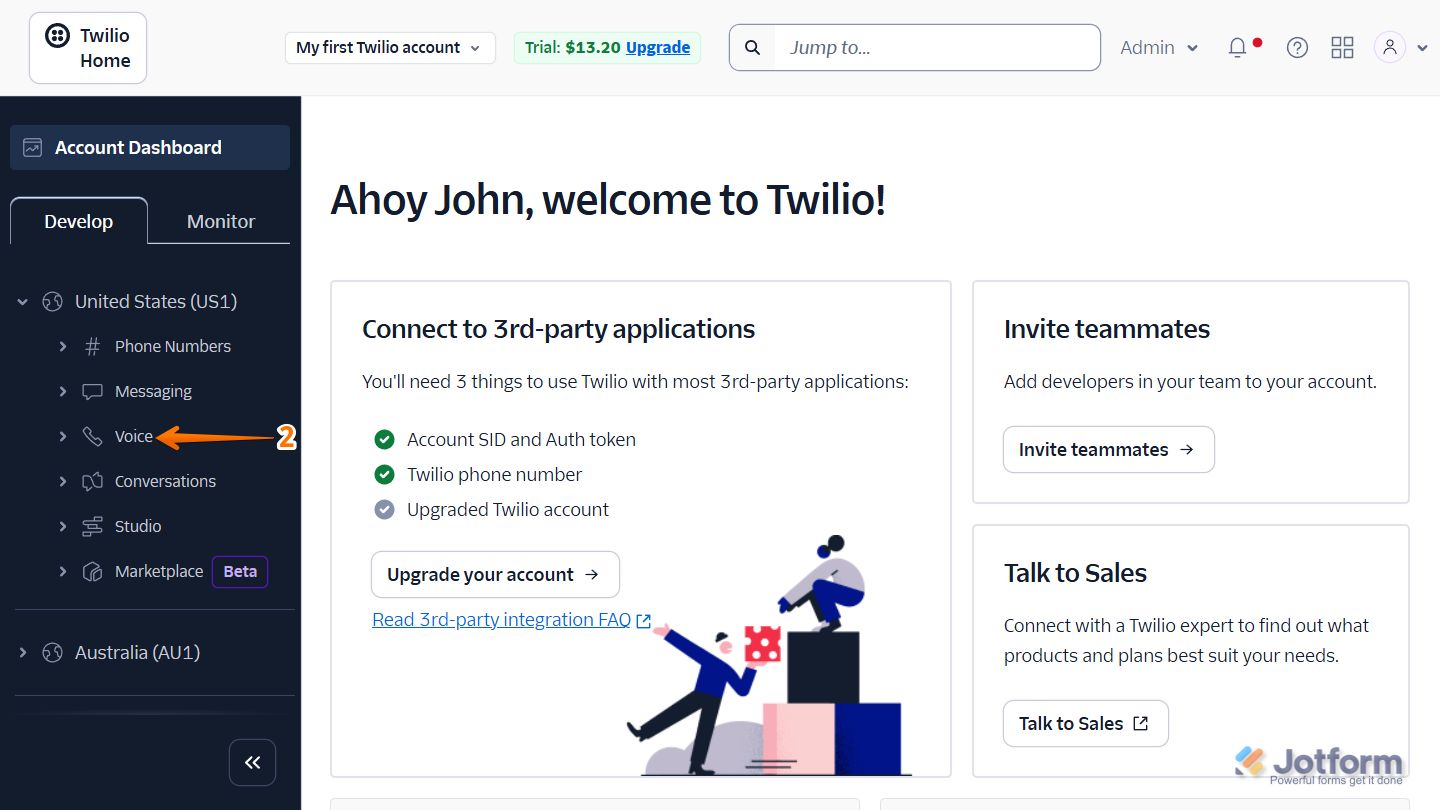
- Then, in the menu that opens, click on Voice.
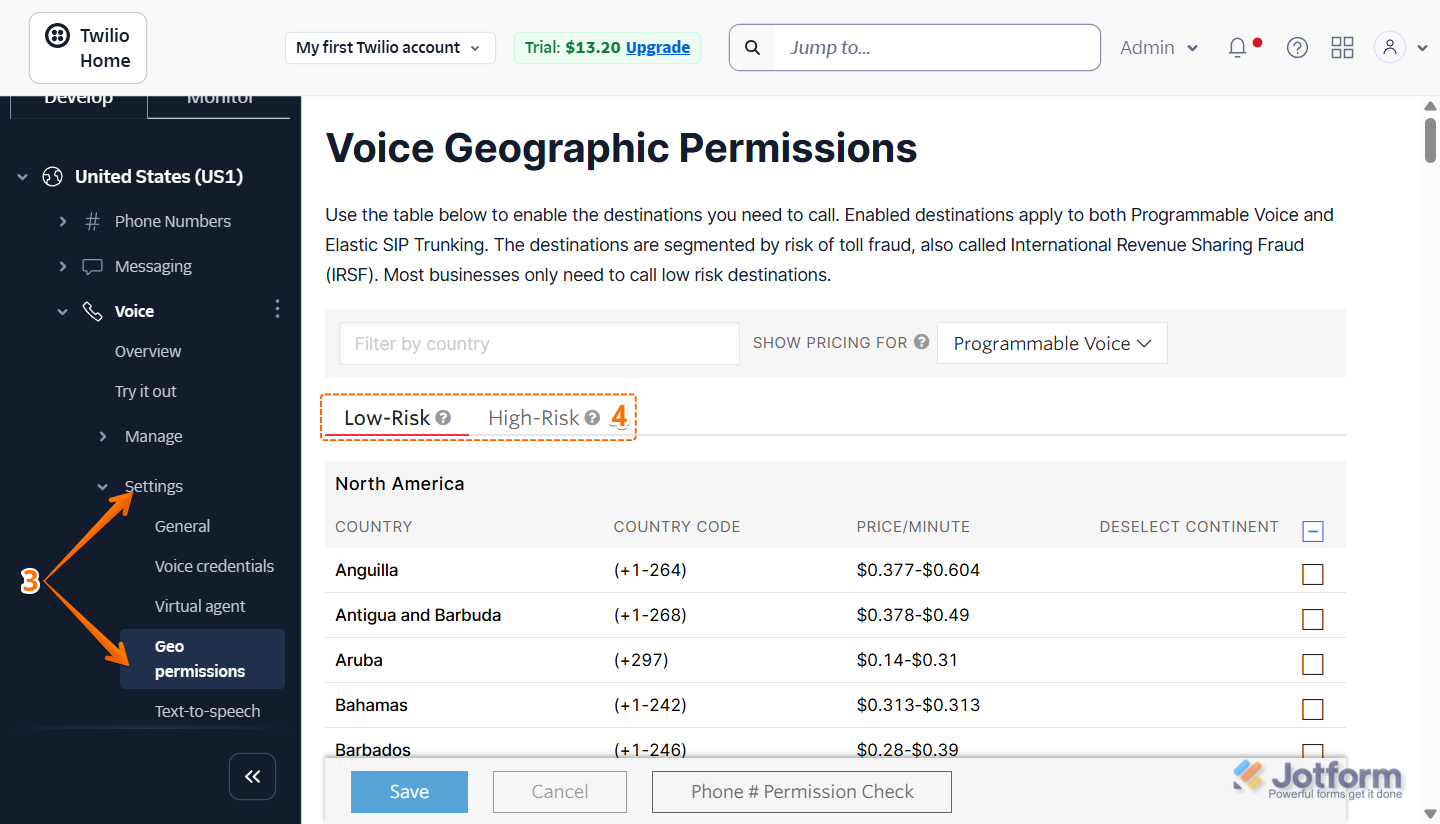
- Next, in the submenu that opens, click on Settings, and then click on Geo Permissions.
- Now, on the Geo Permissions page, you’ll see two destination tabs:
- Low Risk — These destinations have a low risk of toll fraud (IRSF). To reduce risk, only enable the destinations you need to call.
- High Risk — These destinations have a high risk of toll fraud (IRSF). Most businesses do not need to call these destinations.
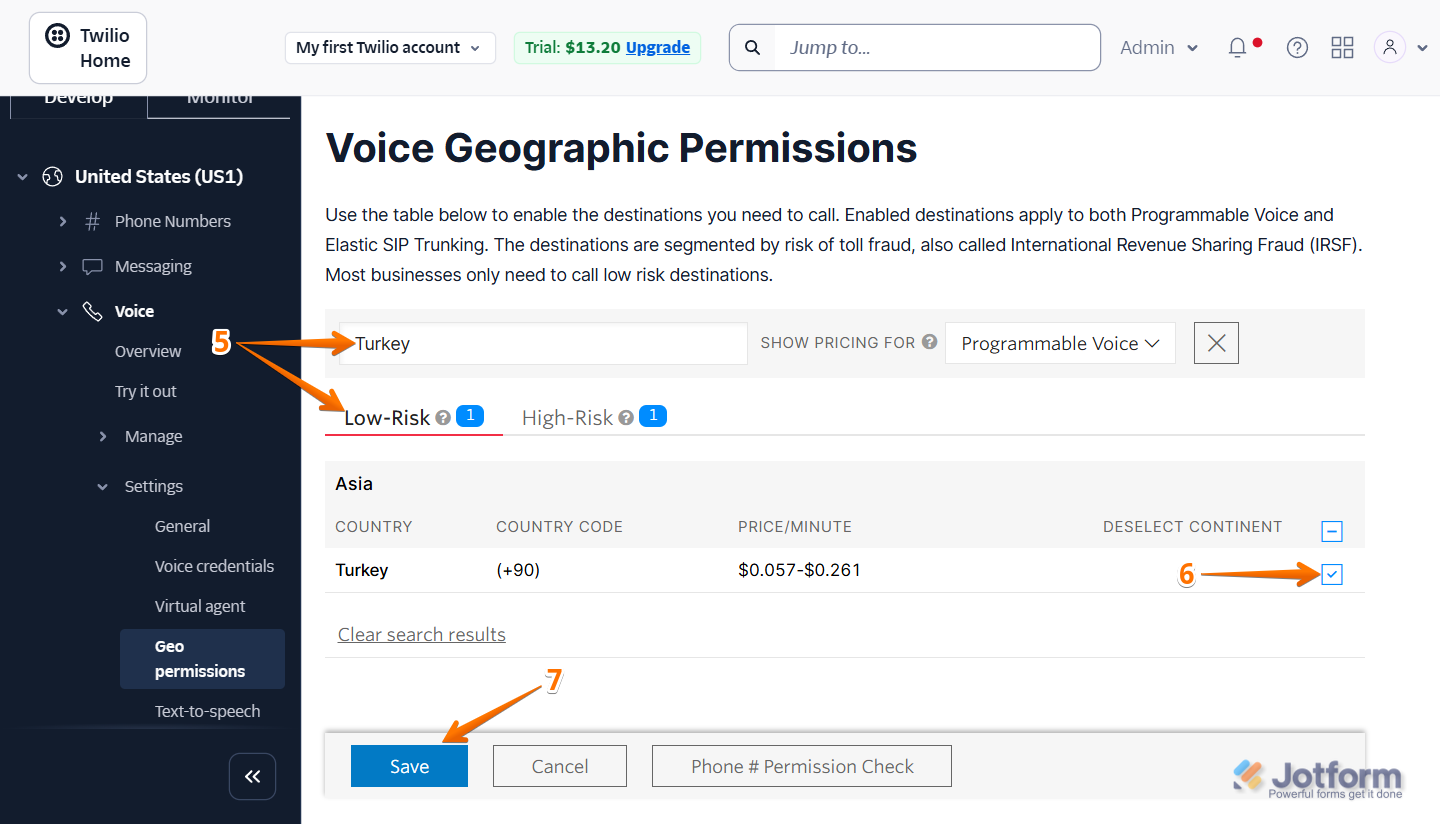
- For example, if you want your call forwarding or outbound calls to go to Turkey, under the Low-Risk tab, use the Search bar at the top of the list and type Turkey.
- Once it comes up, tick the Checkbox on the right side to enable voice calls to that country.
- Now, click on Save, and you’re all set.

Send Comment: