When configuring the Salesforce integration, you can set it to send the file uploads and Submission PDFs as attachments to the corresponding record that the integration creates after the form is submitted. This process ensures you’ll automatically get the files necessary for the record.

Sending File Uploads and Submission PDFs to Salesforce
You can send the uploaded files and the PDF copy of your submissions by enabling Attachments in your Salesforce integration. It is part of the regular Salesforce integration flow, so here’s how you can do it:
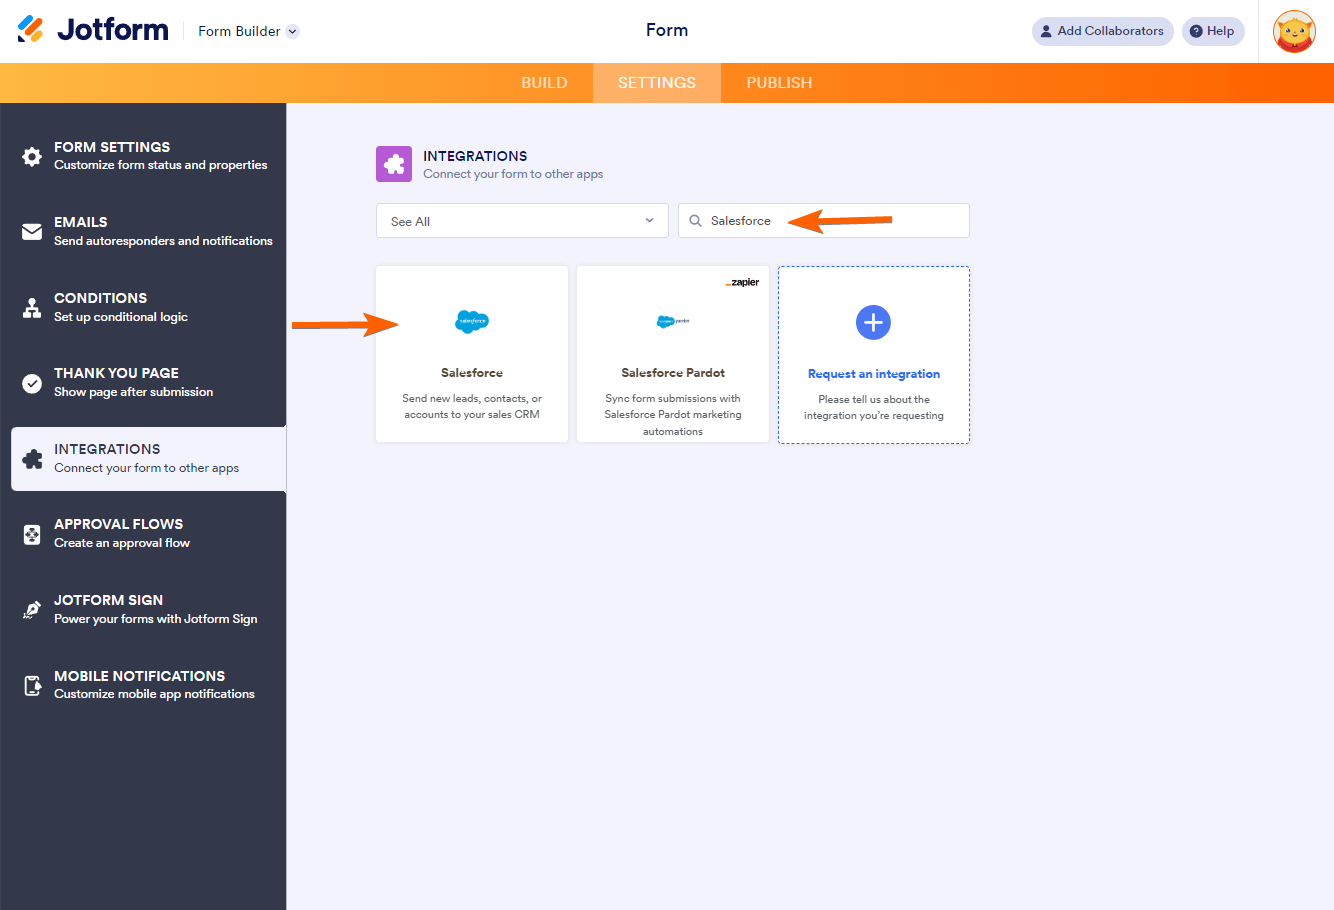
- In the Form Builder, go to the Settings tab.
- Click the Integrations option from the left panel.
- Search for Salesforce, and click it.
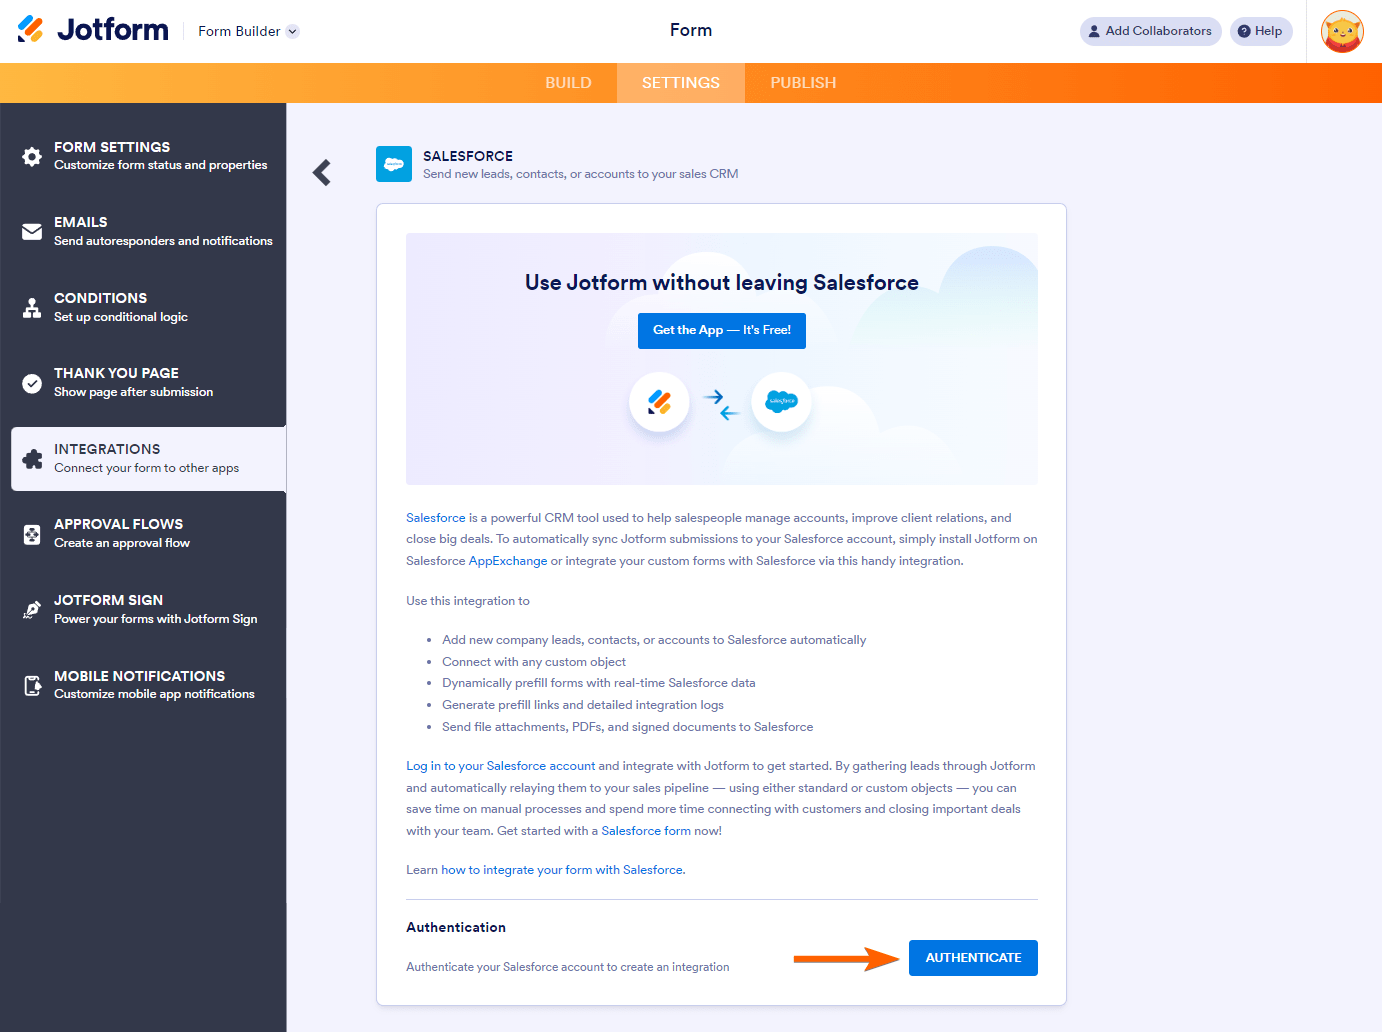
- Click the Authenticate button to connect your Salesforce account.
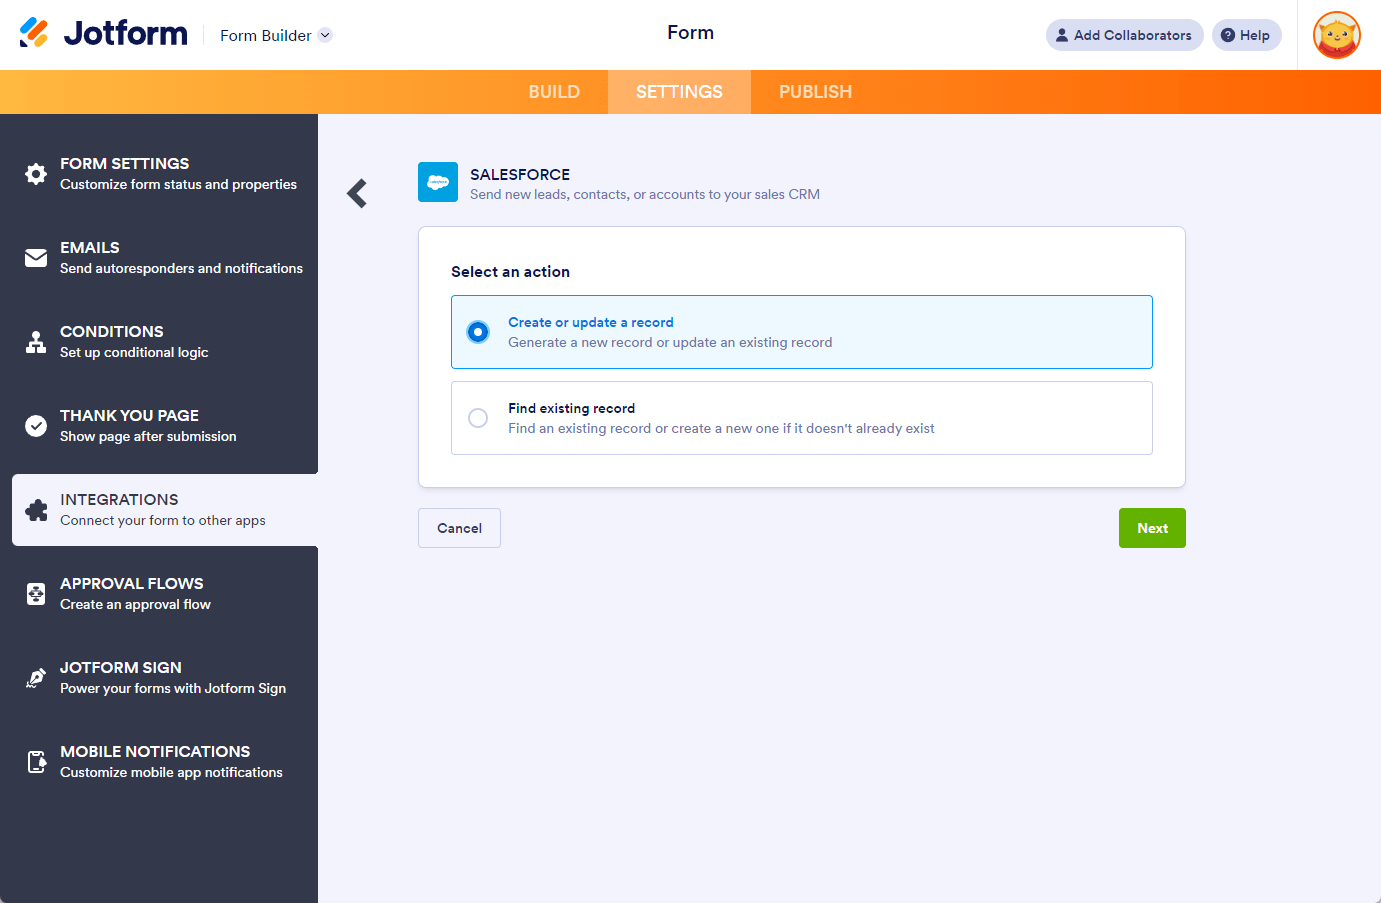
- Select the Create or update a record option from the list of Salesforce actions.
- Click the Next button to proceed.
See also: How to Integrate Jotform with Salesforce.
- Now, select your Salesforce object and map the fields accordingly. At the bottom of the same window, toggle the Attachments to enable it.
- Uploaded Files — For this option, you can select multiple file upload fields from your form to send as attachments.
- Submission PDF — For the Submission PDF, you can only select one document from the dropdown.
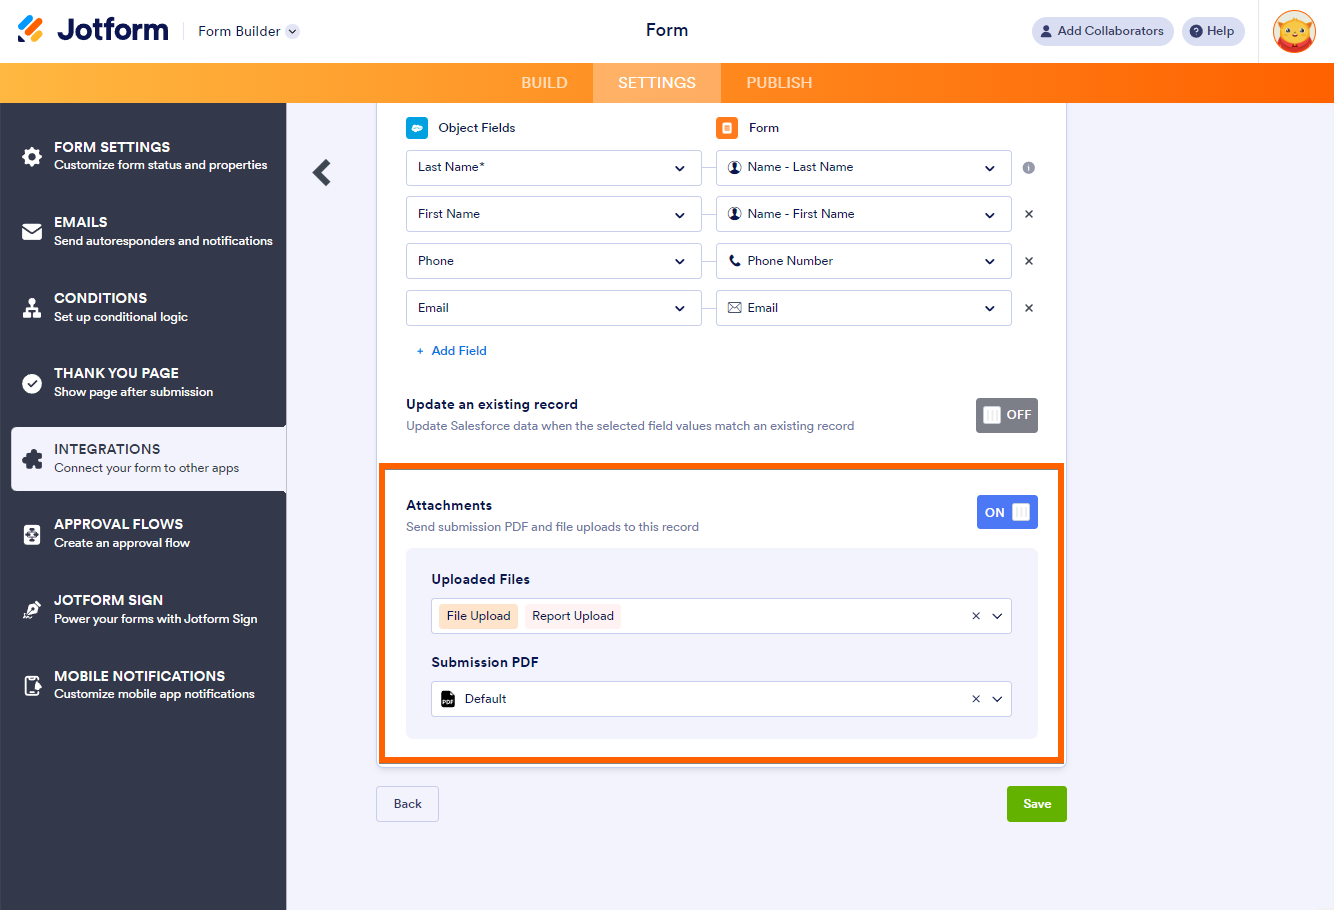
- Finally, click the Save button to complete the integration.
Sending File Uploads to Salesforce Using Content Version Object
You can manually send the file uploads to Salesforce through the Content Version object. We recommend this method if you want to make additional adjustments to the file, such as its title.
Here’s how you can do it.
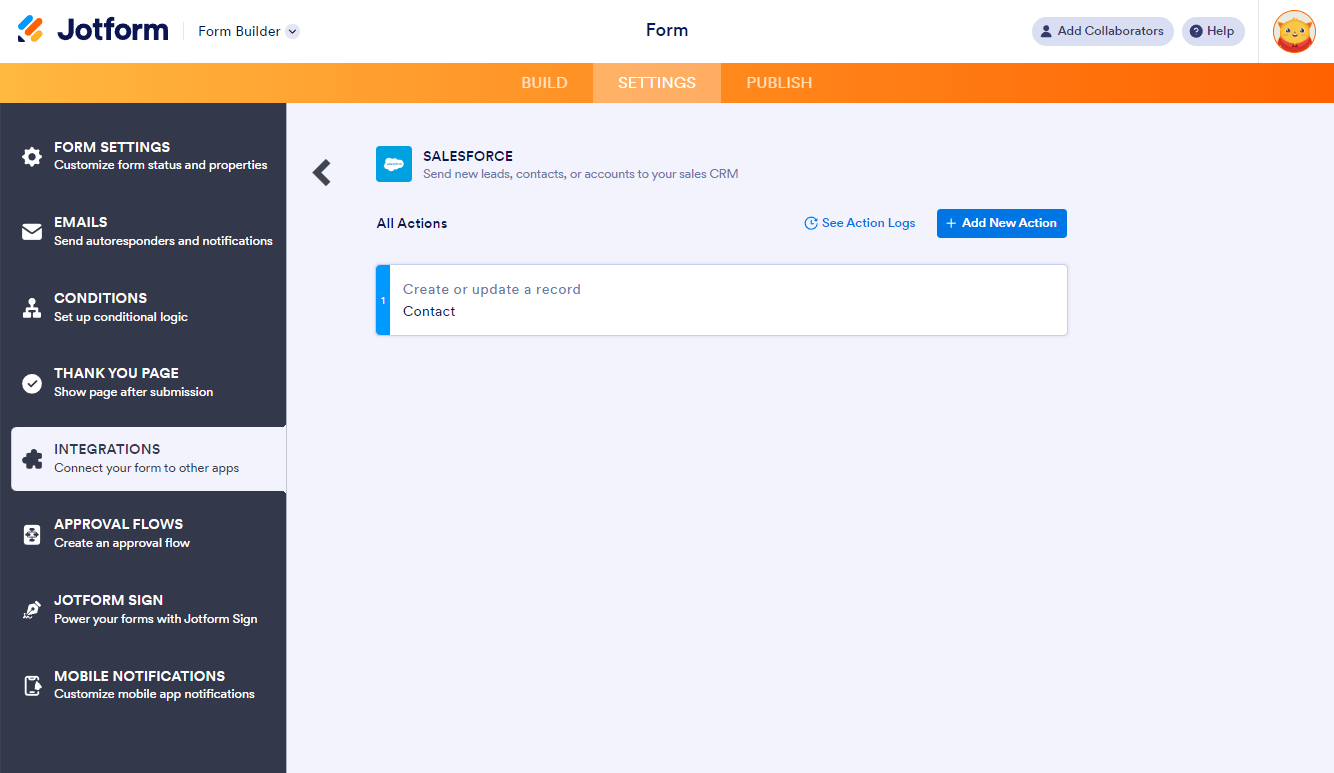
- Integrate your form with Salesforce without enabling the Attachment option. For example, choose Create or update a record of the Contact object, as shown in the image below.
- Next, add the same action, but this time, select Content Version as the Salesforce Object.
- Now, map the following Object Fields to your form, as shown in the below screenshot:
| First Publish Location ID | Version Data | Path on Client |
|---|---|---|
| Step 1: Create Contact Record | File Upload | File Upload |
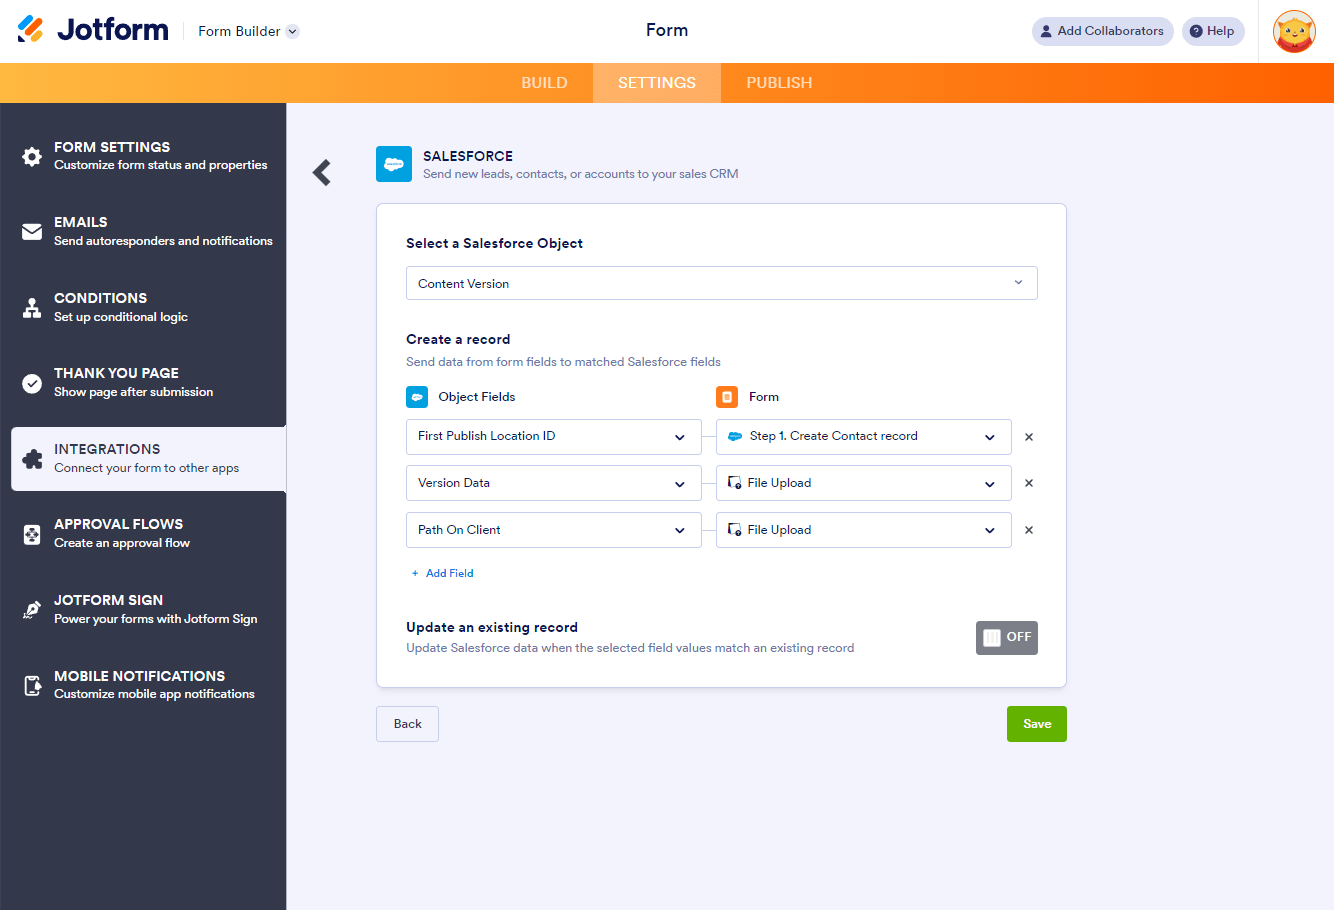
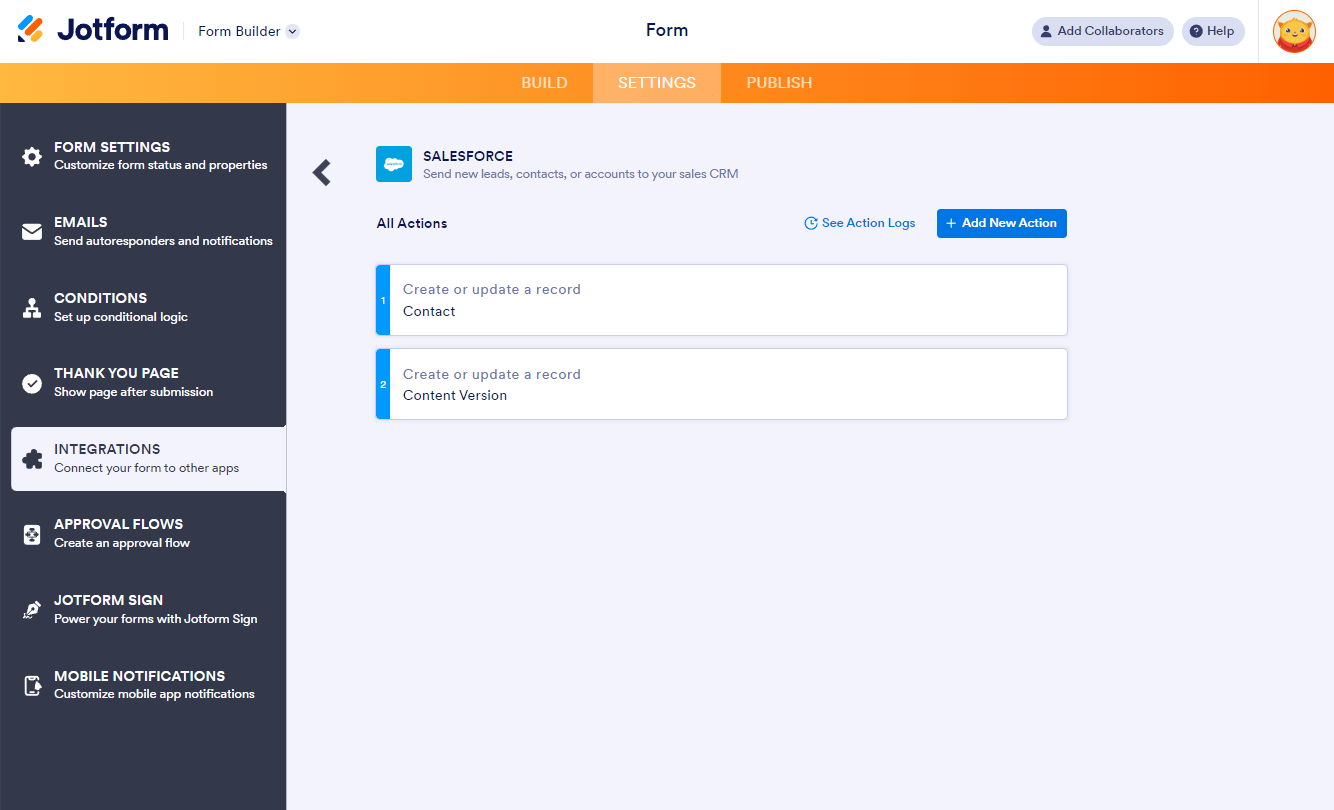
- Finally, click the Save button to complete the integration. Your final integration should look like the following:
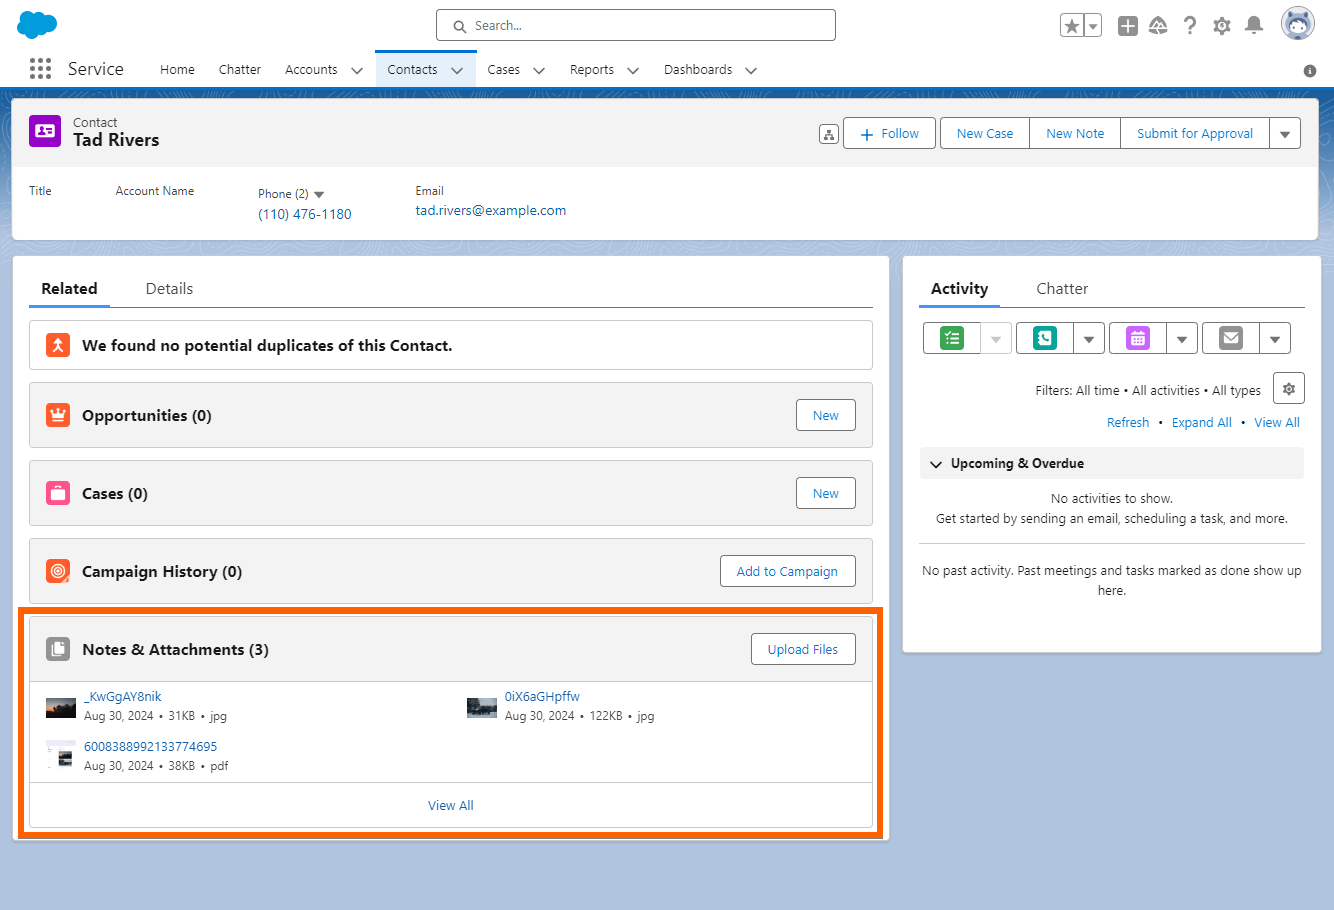
Viewing Files in Salesforce
Once the integration creates the record on Salesforce, you can view the file uploads and the PDF through the Note & Attachments section of the record.
Notes
- For files greater than 20MB, Jotform will send it as a download link to Salesforce.
- Salesforce also sets a storage limit per user license, so ensure you have enough space for your files from Jotform. Visit Salesforce: Data and File Storage Allocations to learn more.
- Check your integration logs if your form does not send file uploads and PDFs. Check How to View Salesforce Integration Log Details for more information.
- The Attachments option isn’t available for the following Salesforce Objects: Attachment, Content Document Link, Content Version, Opportunity Contact Role, and Campaign Member.

Send Comment: