With Jotform’s WhatsApp integration, you can get real-time notifications as soon as someone submits your form—helping you reply faster and stay connected. Since WhatsApp is the world’s most widely used messaging app, it’s a powerful way to reach users instantly. Whether you’re sending confirmations, updates, or follow-ups, this integration keeps the conversation going and makes your communication feel more personal.
Notes
- You’ll need a verified WhatsApp number to use this integration.
- WhatsApp messages are triggered only after a form is successfully submitted, so it’s important to include all the necessary fields in your form setup.
Integrating WhatsApp with your form is a quick and easy way to keep the conversation going and give your users a more personal touch. Setting it up takes no time at all—here’s how:
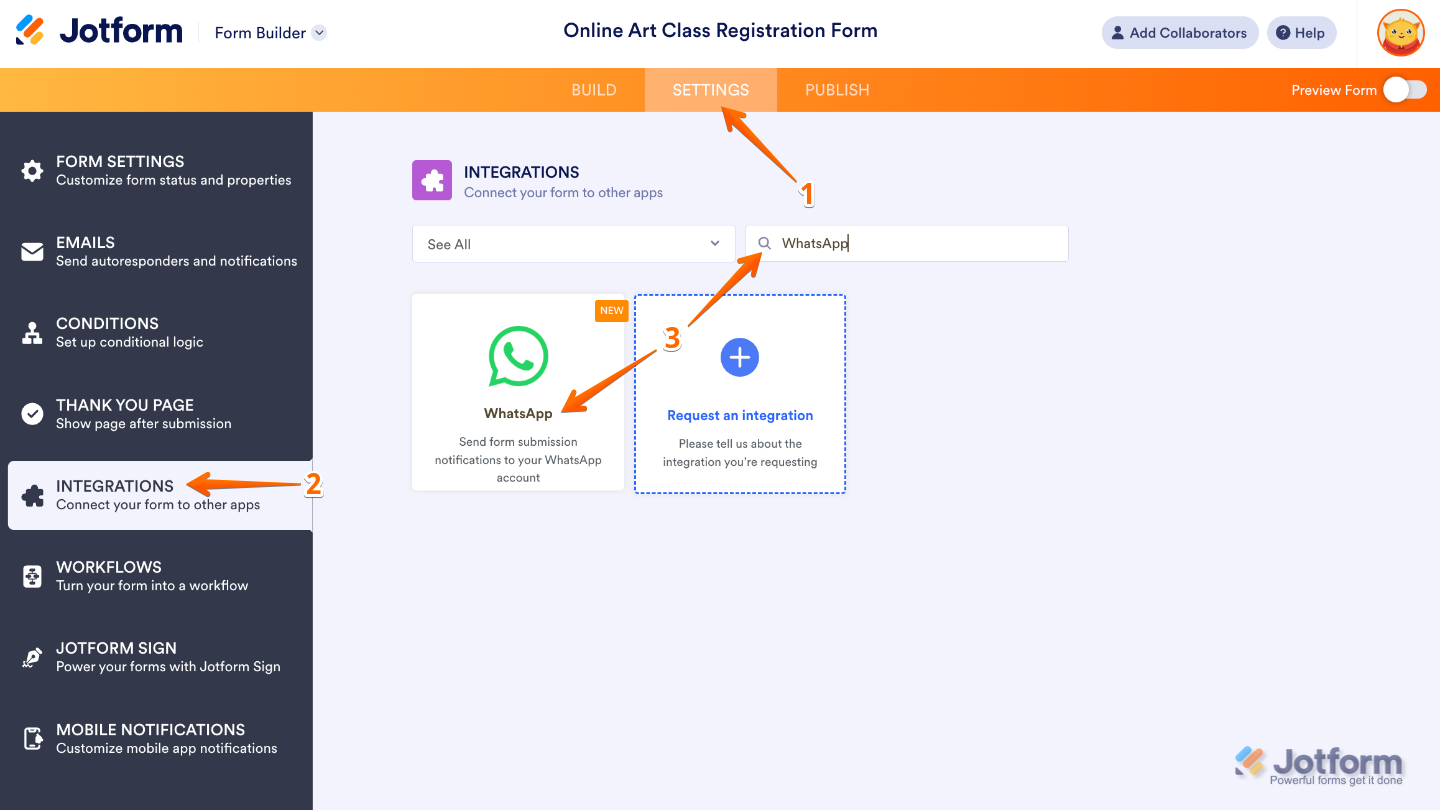
- In Form Builder, in the orange navigation bar at the top of the page, click on Settings.
- Click on Integrations in the menu on the left side of the page.
- Search for WhatsApp, and then click on it.
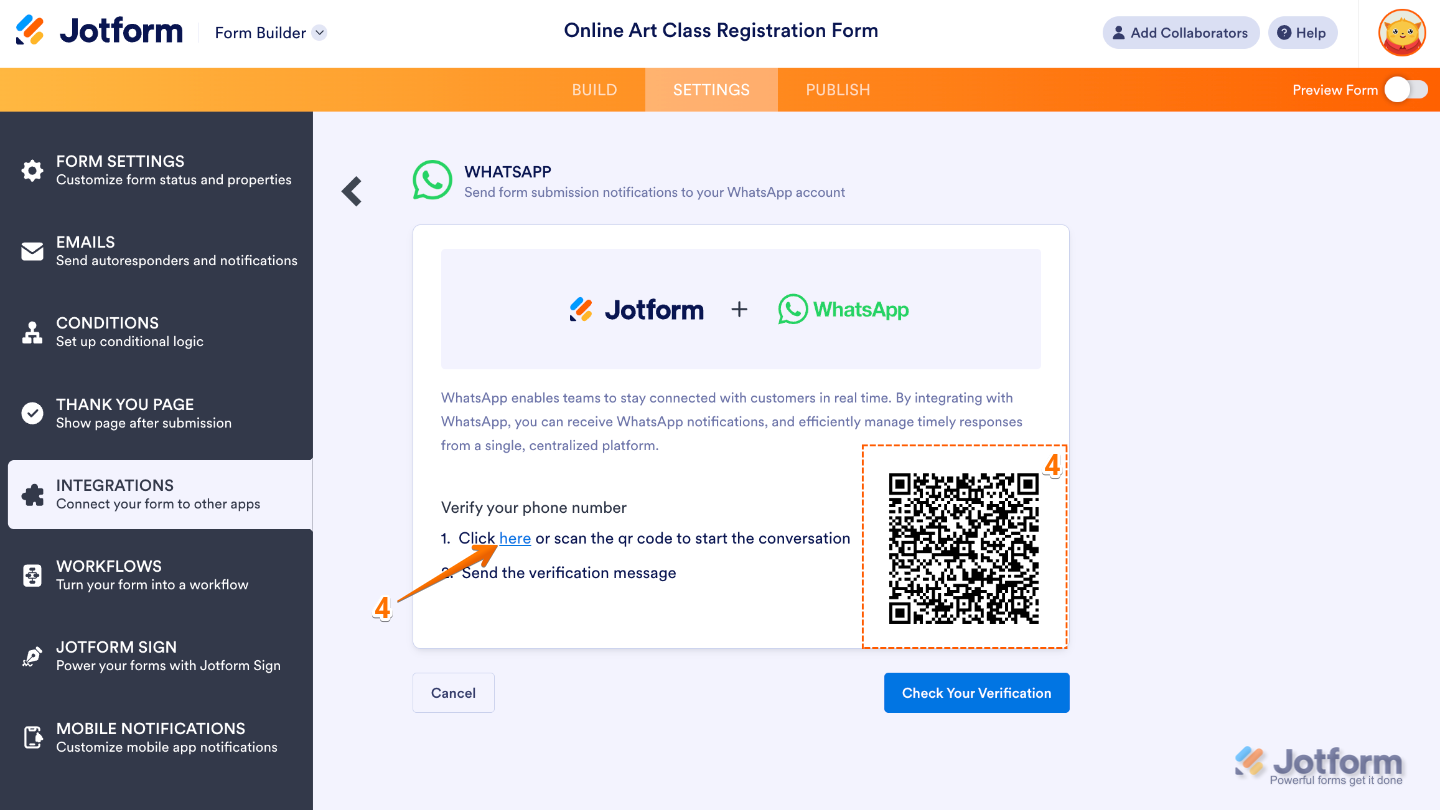
- Next, click on Here or scan the QR code to verify your WhatsApp number.
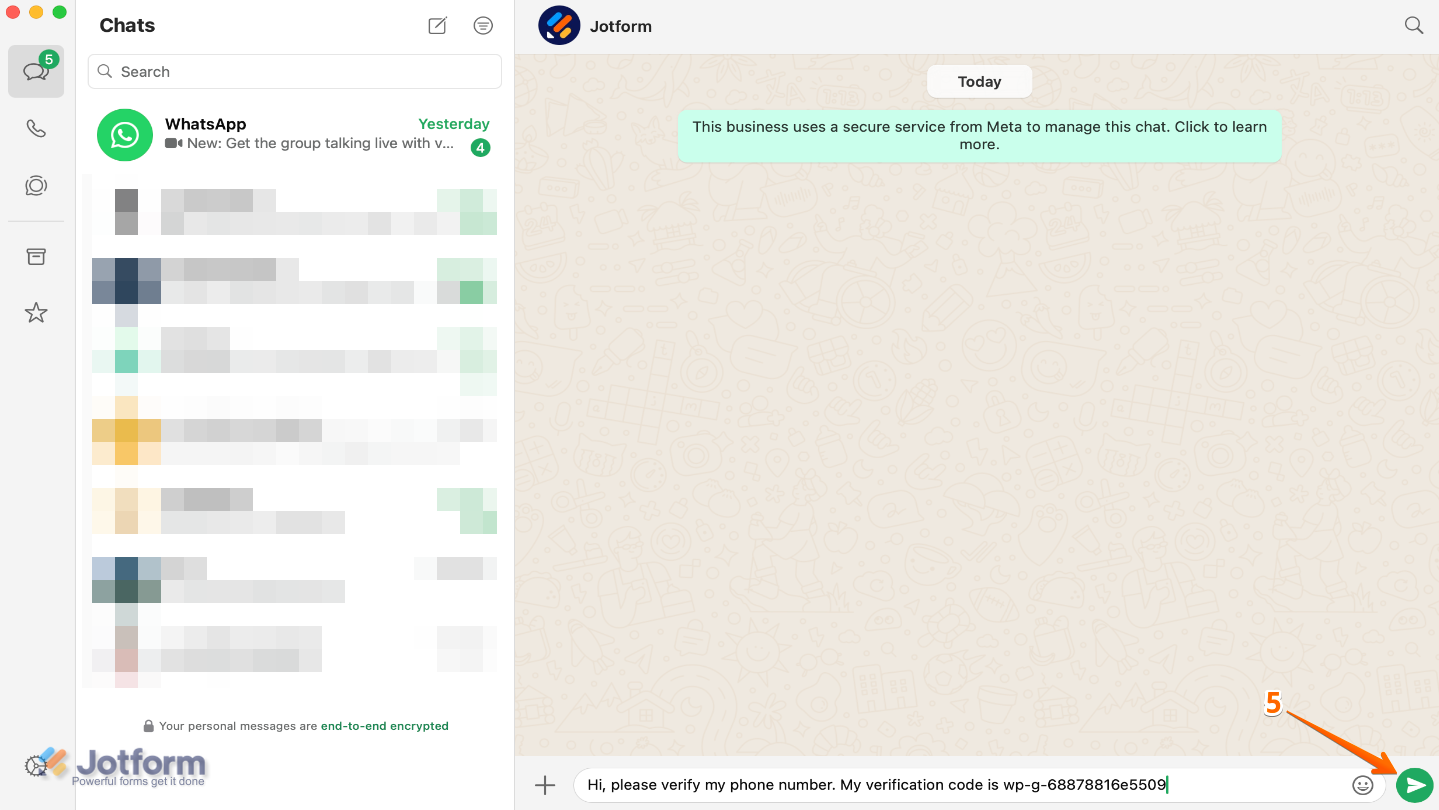
- In the WhatsApp window that opens, click on the Send icon to continue.
- You’ll get a confirmation message in WhatsApp once your number’s verified.
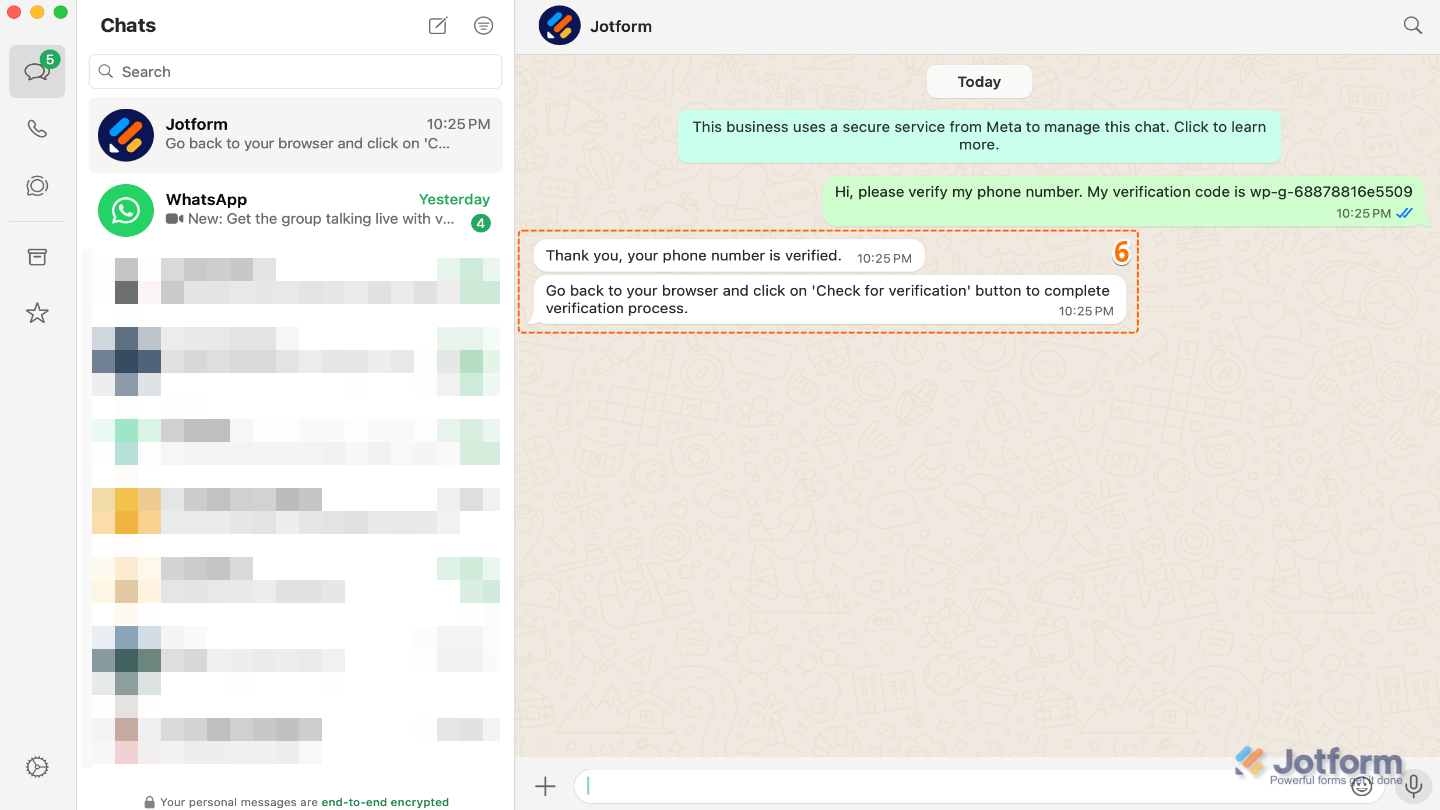
- Now, head back to your form and click on Check Your Verification.

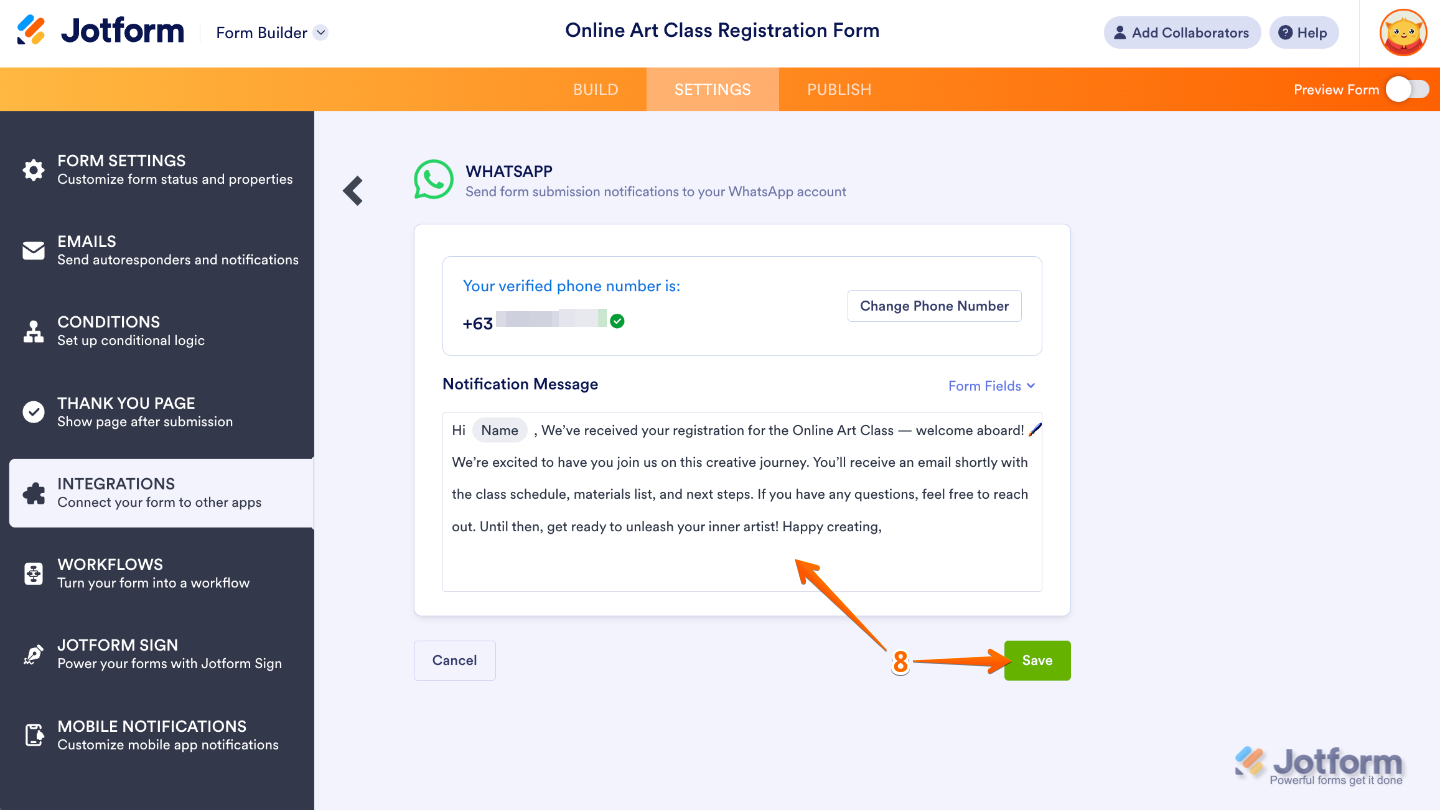
- After that, set up your Notification Message, and then click on Save to finish.
That’s it. Once saved, you’ll see the integration in your list of actions. If you hover your mouse over it, on the right side, you’ll see the Edit icon, where you can edit the integration itself. And if you click on the Three Dots icon, you’ll see these other options:
- See Action Logs — This displays the integration’s successful and failed runs. It’s useful when troubleshooting issues.
- Rename Action — Change this if you want to personalize the action’s title.
- Disable Action — This is useful to temporarily stop the integration from sending files.
- Delete Action — Select this if you want to completely remove the integration from your form.
If you want to edit the integration, click the Edit icon in the top-right corner of the WhatsApp integration window:
Pro Tips
- Use smart form fields in your WhatsApp messages to personalize replies and boost engagement.
- Keep your messages short and clear to match WhatsApp’s fast-paced style—users are more likely to read and respond to brief, friendly messages.
- Test the integration before sharing your form to make sure messages are delivered and formatted correctly in WhatsApp.

Send Comment: