Jotform makes it easy to connect your forms with Microsoft SharePoint so your submissions are sent directly to the folders you select. With this integration, submission PDFs and file uploads are automatically uploaded, keeping everything organized in one place.
This setup helps you manage, store, and share your form data more efficiently so your team stays in sync effortlessly.
Connecting Your SharePoint Account
Whether you’re creating a new form or updating an existing one, connecting your SharePoint account takes no time at all—here’s how:
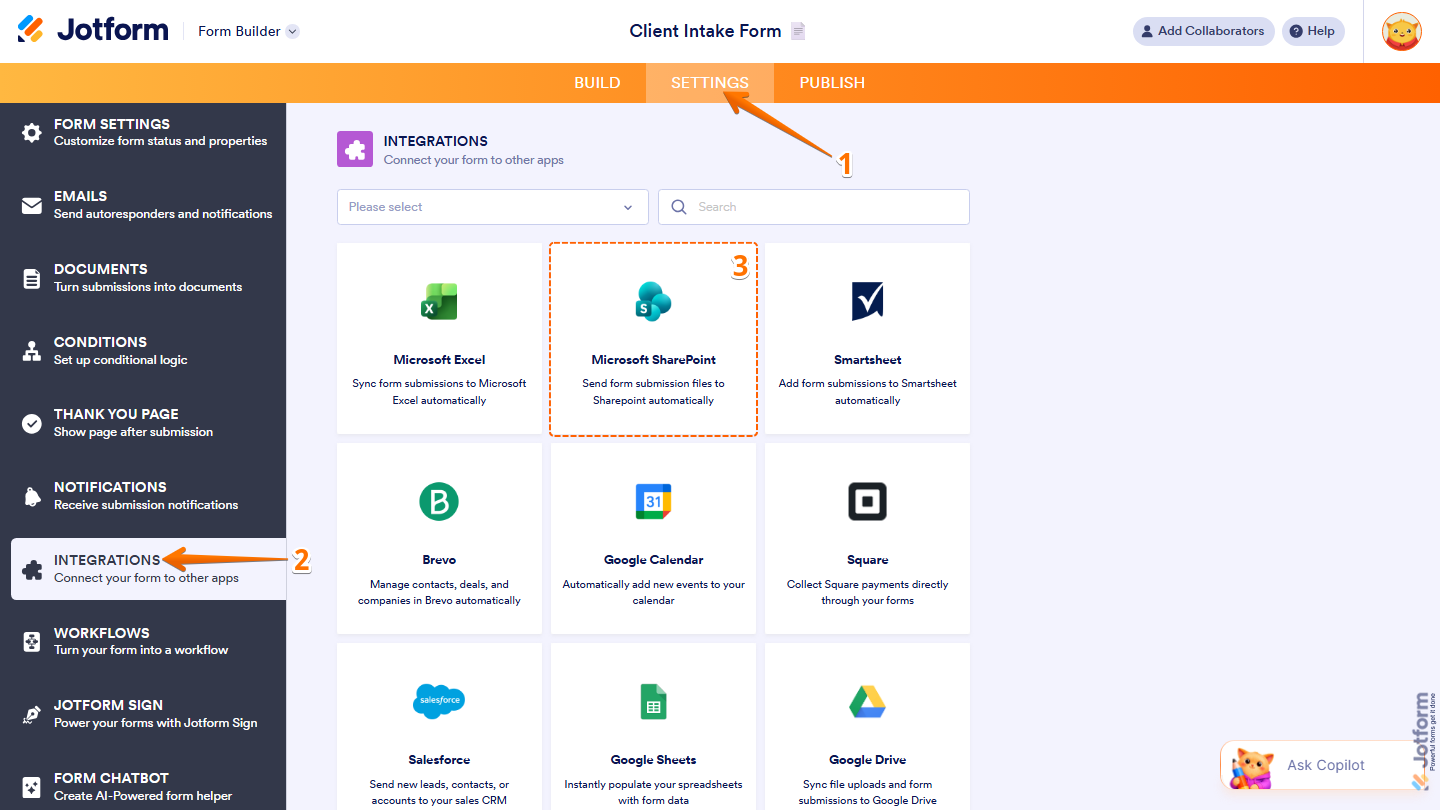
- In Form Builder, in the orange navigation bar at the top of the page, click on Settings.
- Then, in the menu on the left, click on Integrations.
- Now, search for Microsoft SharePoint, and click on it.
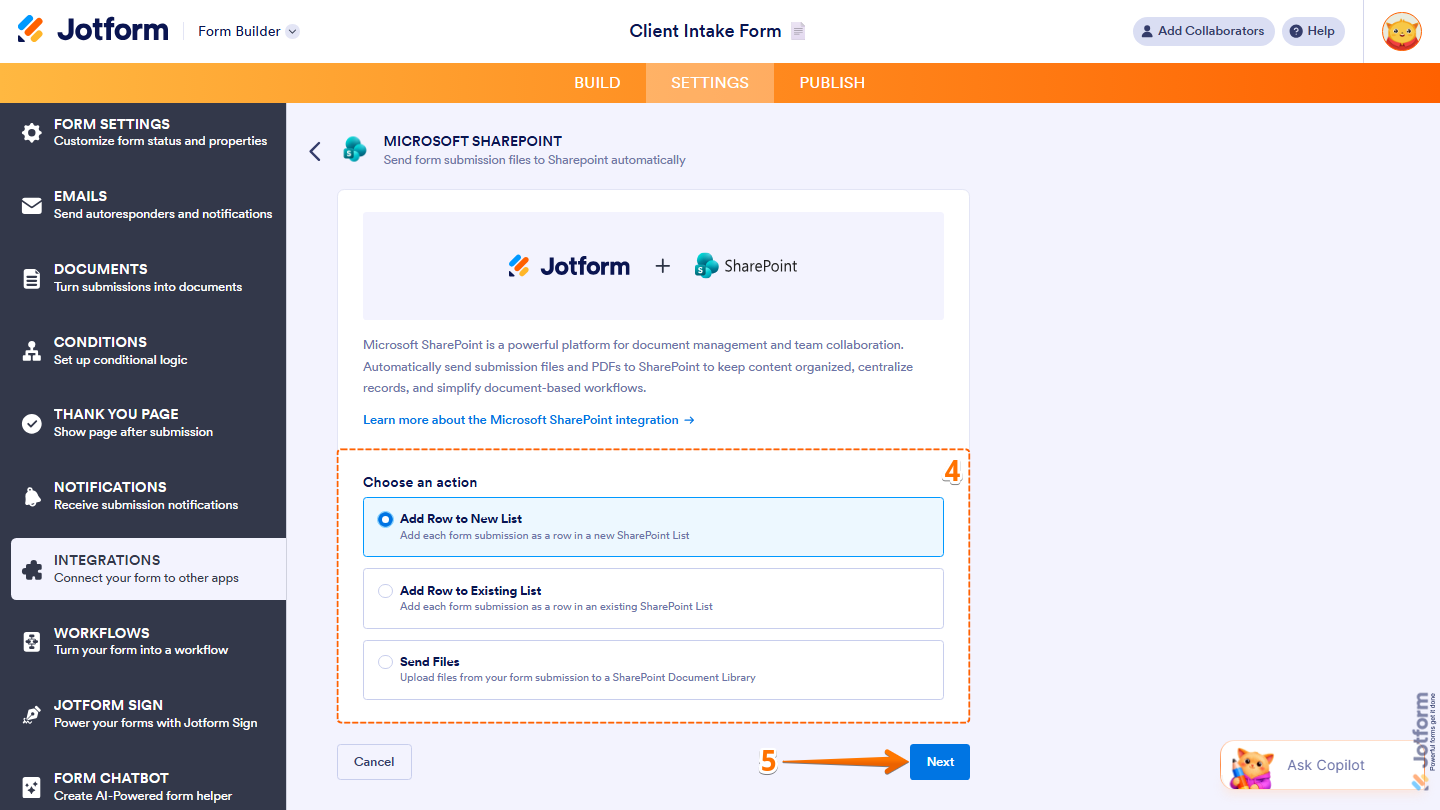
- Next, in the Choose an Action section, select what you want to do:
- Add Row to New List — Add each form submission as a row in a new SharePoint List.
- Add Row to Existing List — Add each form submission as a row in an existing SharePoint List.
- Send Files — Upload files in your form submission to a SharePoint Document Library.
- Then, click on Next.
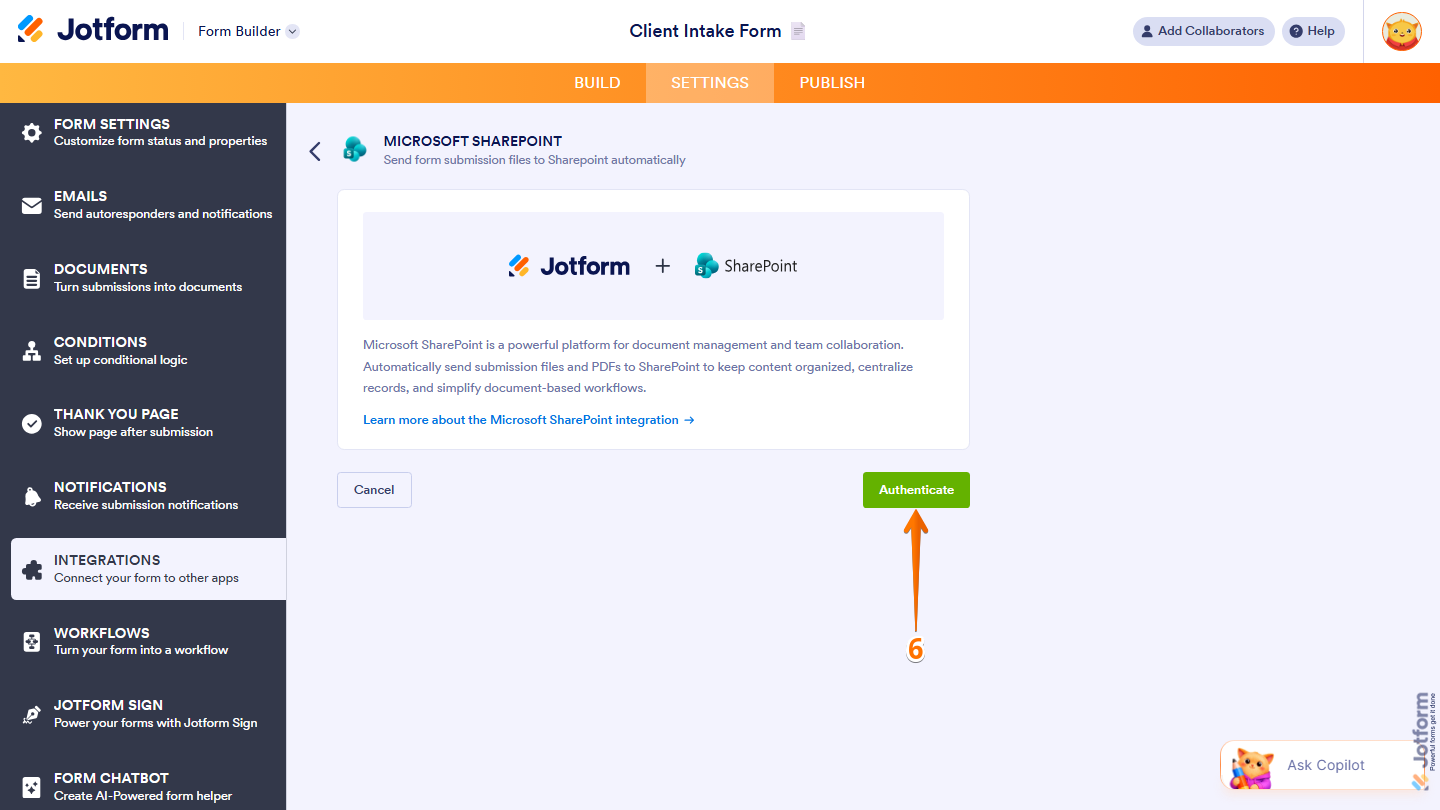
- Now, click on Authenticate and log in to your Microsoft SharePoint account.
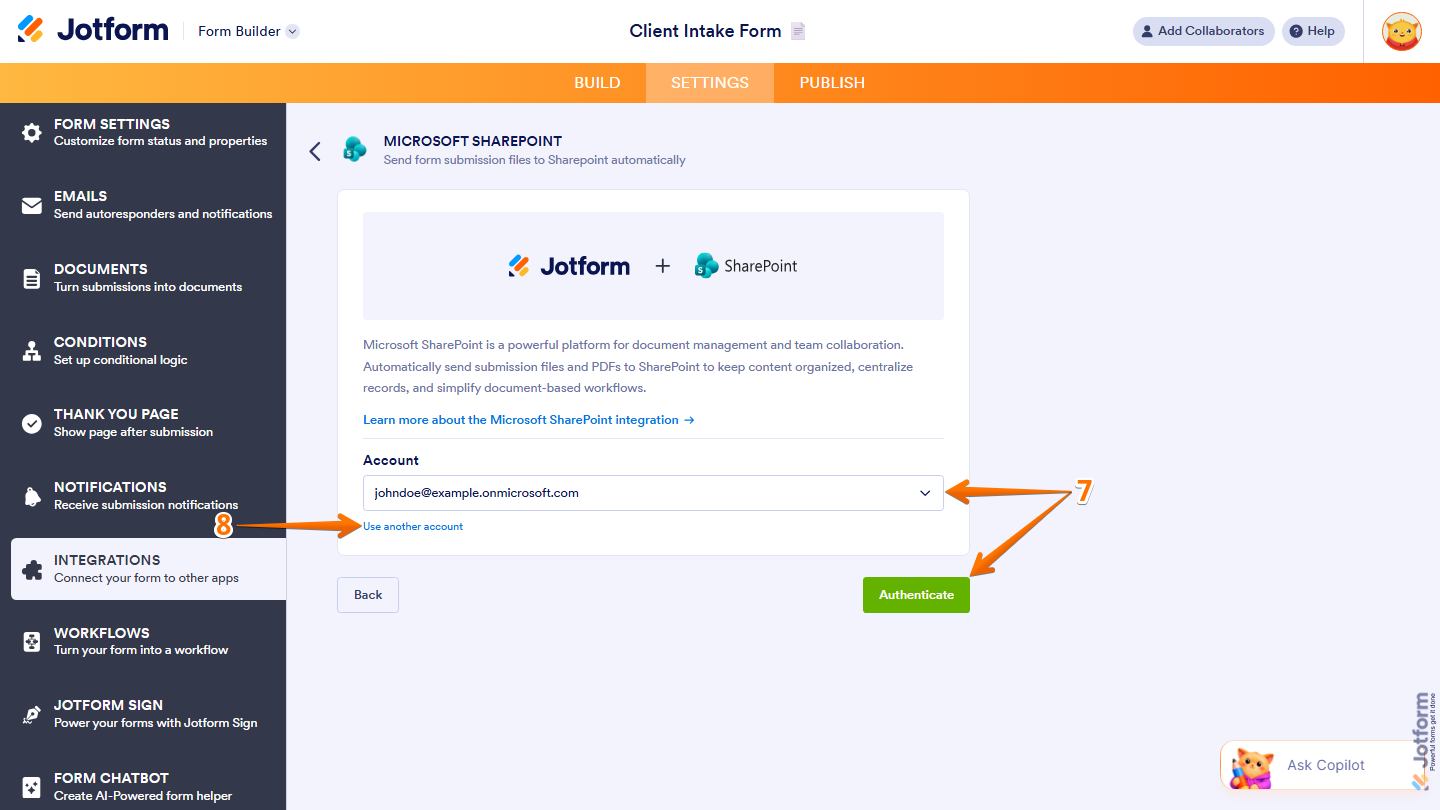
- If you’ve logged in before through one of your other forms, select that Microsoft SharePoint account from the Dropdown menu and then click on Authenticate.
- Or, to use a different one, click on Use Another Account.
Add Row to New List
The Add Row to New List option lets you create a new SharePoint list where each form submission is automatically added as a new row. This is a great option if you want to store your submissions in a newly created list. To get started, here’s what you’ll need to do:
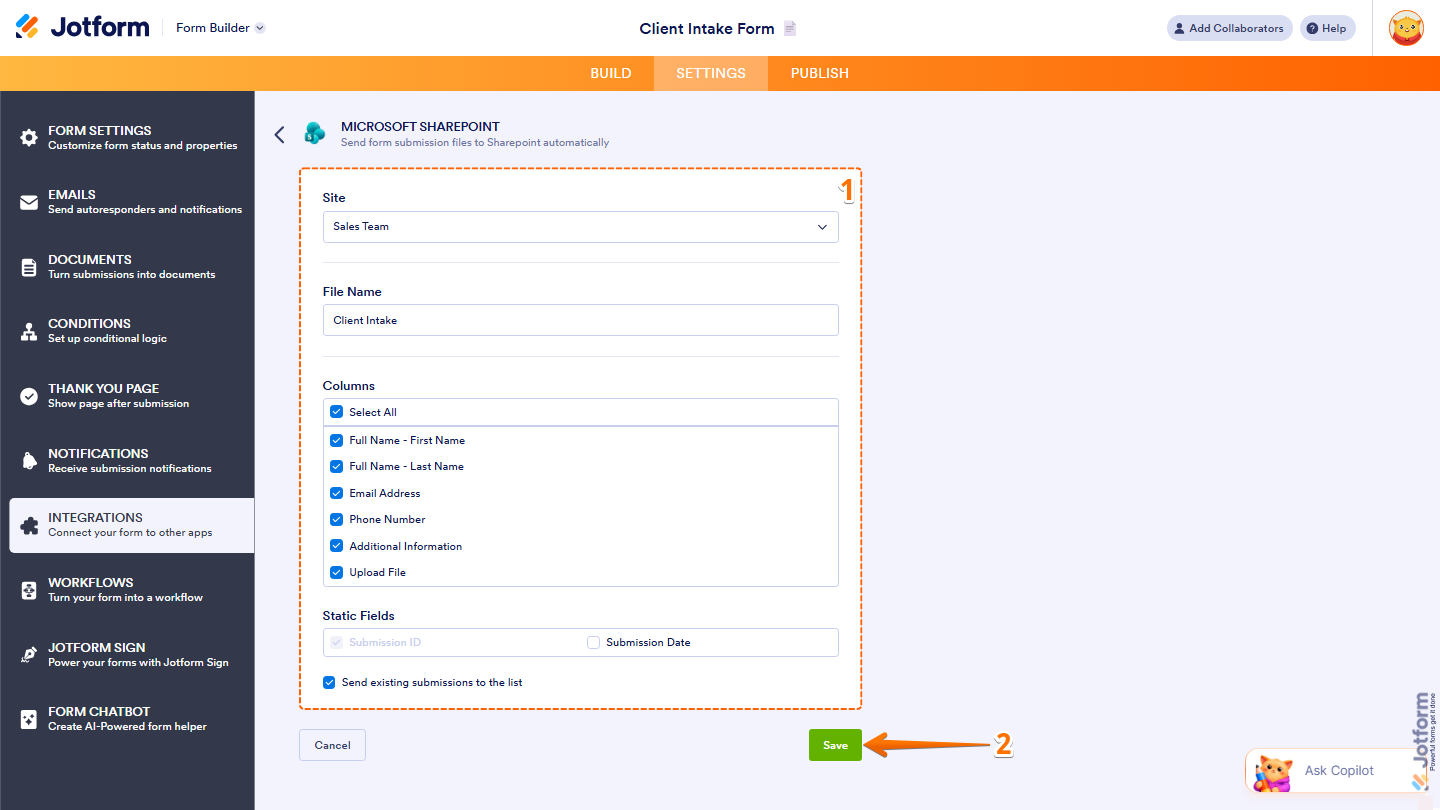
- In the next screen, after authenticating your account, set up these things:
- Site — Select the SharePoint site you want to send your form submissions to.
- File Name — Enter a name for the file that will be created in SharePoint for each submission.
- Columns — Select the form fields you want to include as columns in your SharePoint list. Click Select All to include all fields at once.
- Static Fields — Choose additional data to include with each submission:
- Submission ID — This is automatically included by default and can’t be removed.
- Submission Date — Check this box to include the date of each submission.
- Send Existing Submissions to the List — Check this box to send previously collected submissions to your SharePoint list in addition to new ones.
- Now, click Save, and you’re all set.
That’s it. Every time someone submits your form, the data will automatically be sent to your SharePoint site.
Add Row to Existing List
The Add Row to Existing List option sends each form submission as a new row to an existing SharePoint list. This works best if you already have a list set up and just want to start sending data to it. Setting it up is quick—here’s how:
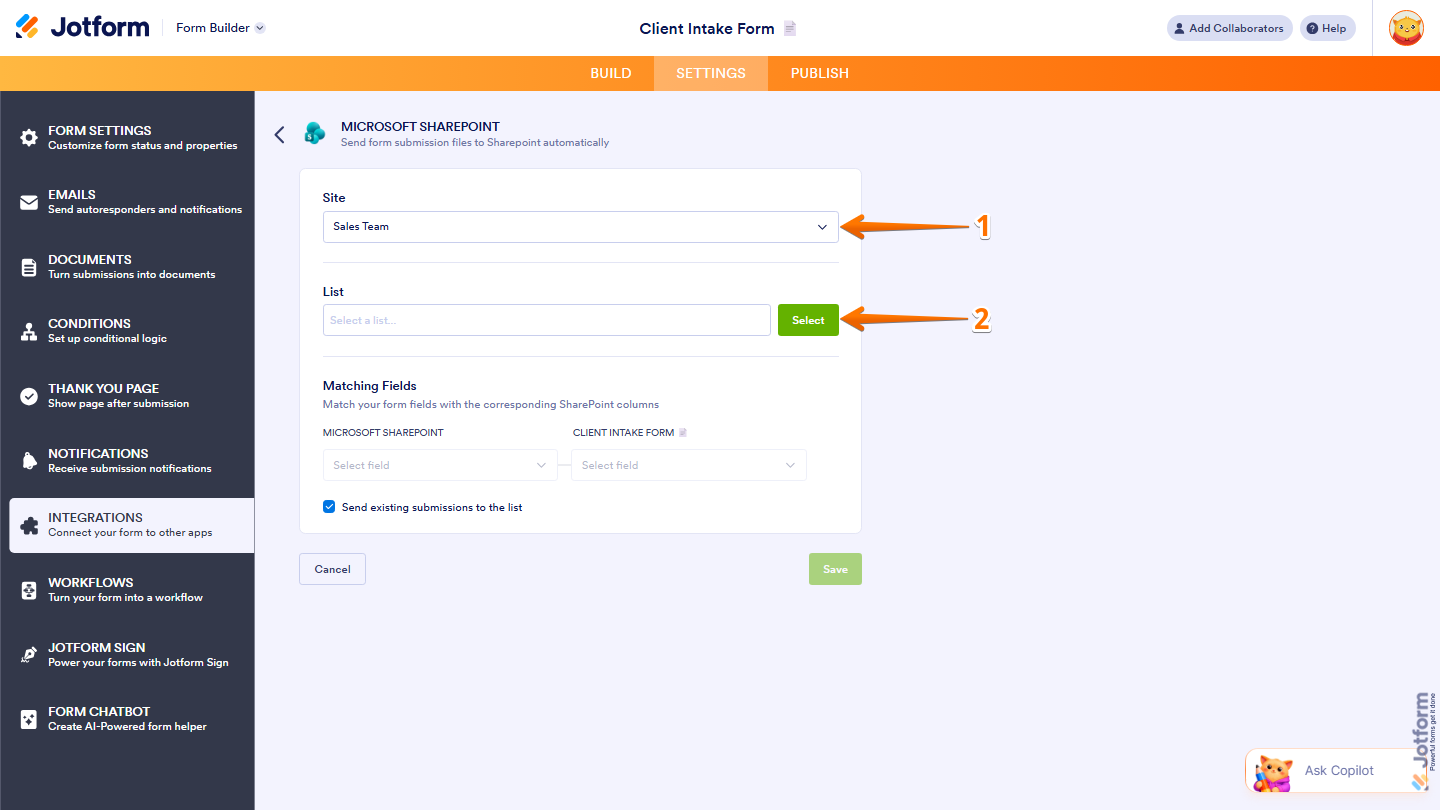
- In the next screen, after authenticating your account, in the Site section, select the SharePoint site you want to send your form submissions to.
- Then, in the List section, click on Select.
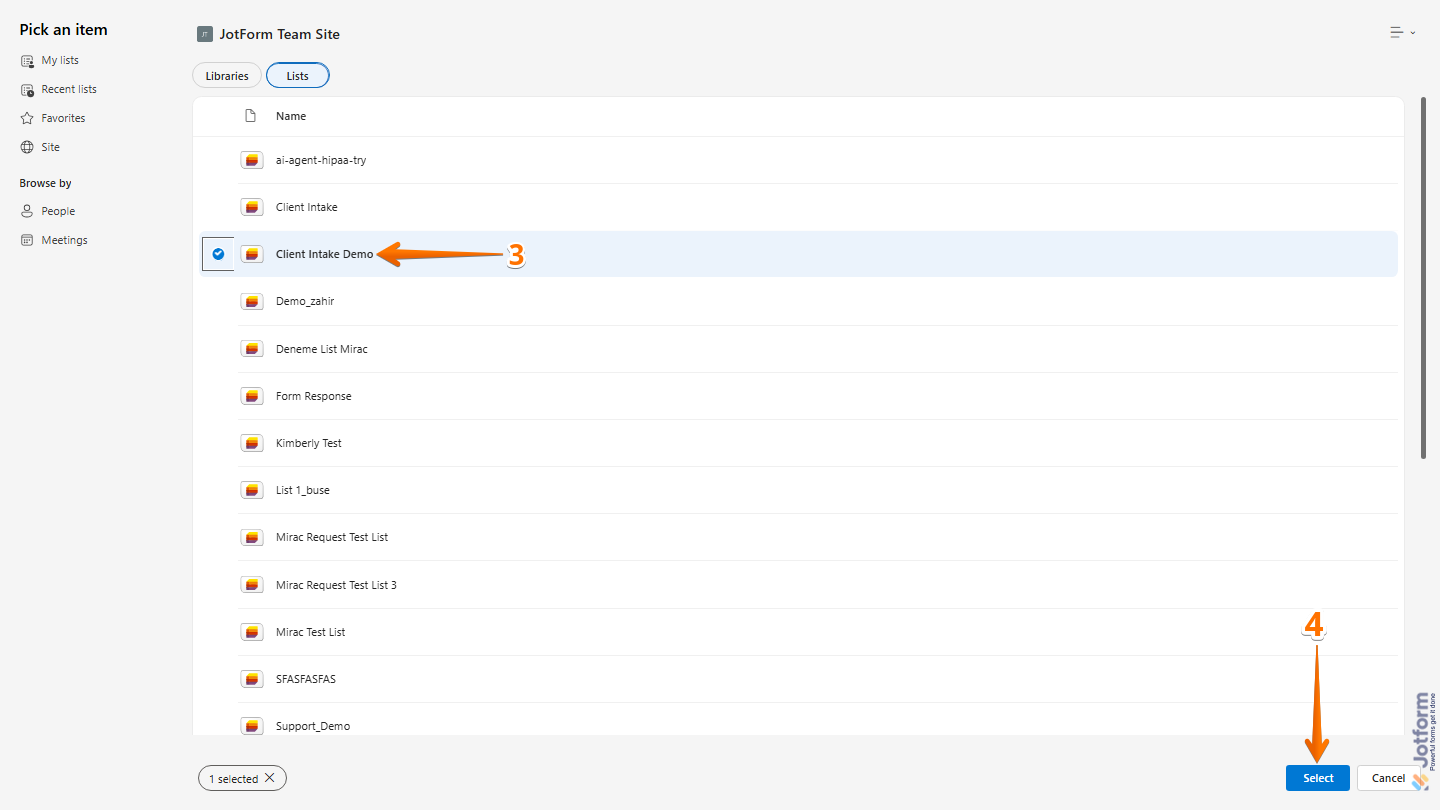
- Now, in the Integration Picker window, under the Lists tab, select the SharePoint list your form submissions will be stored in. For example, Client Intake Demo.
- Then, click on Select at the bottom of the page.
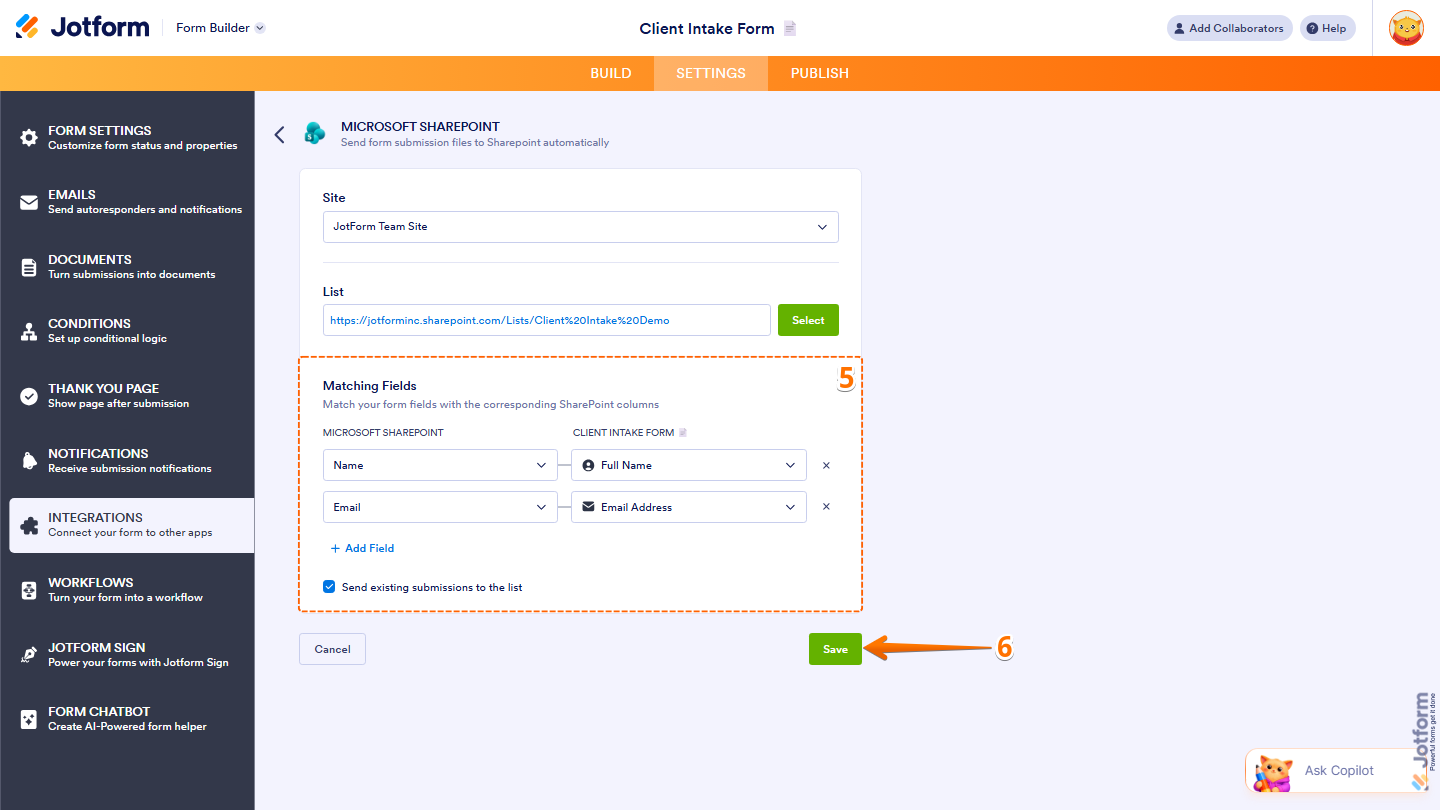
- Next, continue to set up these things:
- Matching Fields — Map your form fields to the corresponding columns in your SharePoint list:
- Send Existing Submissions to the List — Check this box to send previously collected submissions to your SharePoint list in addition to new ones.
- Now, click Save, and you’re good to go.
From now on, every time someone submits your form, the data will automatically be sent to your SharePoint list.
Send Files
The Send Files option allows you to automatically upload files from your form submissions to a SharePoint document library. This makes it easier to store and organize uploaded files in one place. Here’s what to do:
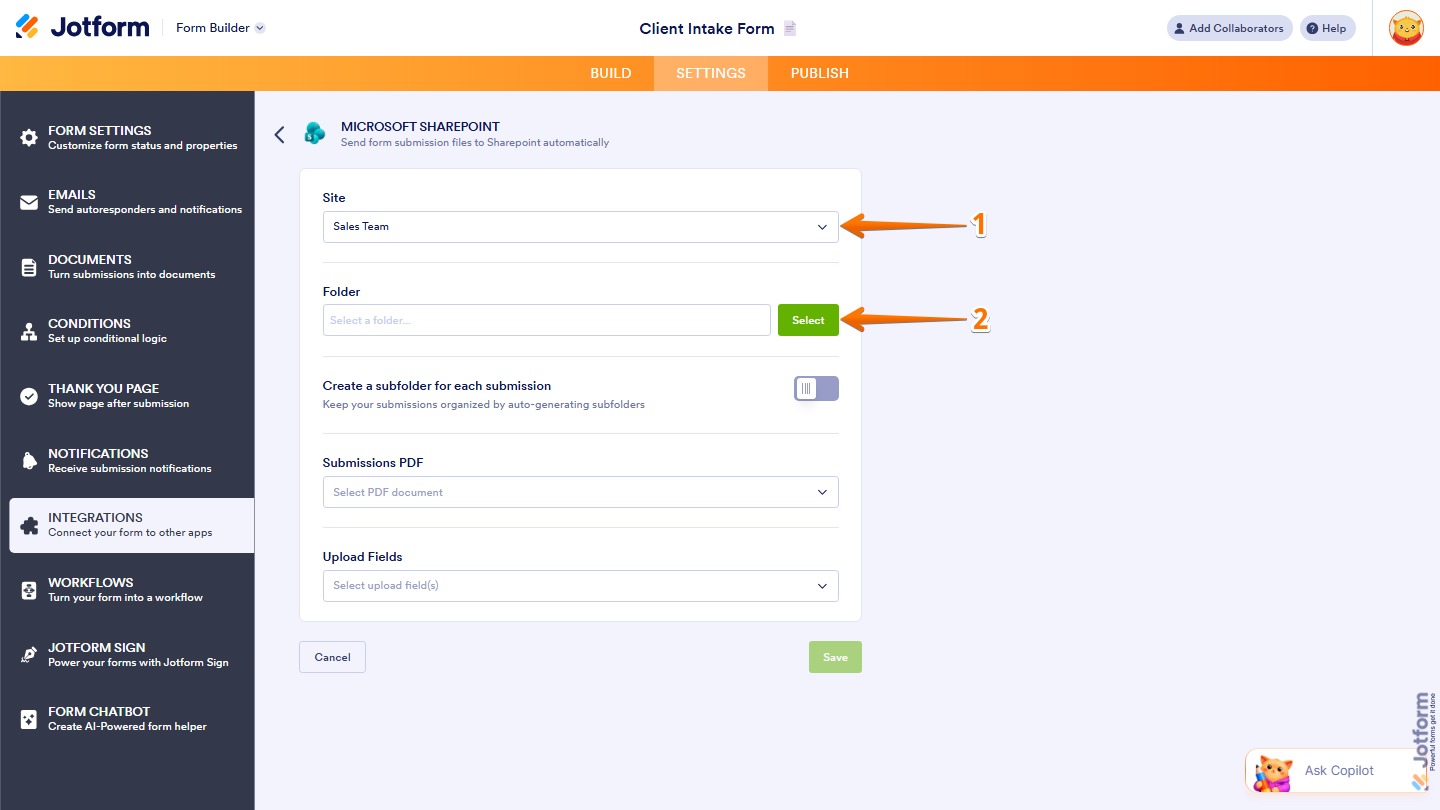
- In the next screen, after authenticating your account, in the Site section, select the SharePoint site you want to send your form submissions to.
- Then, in the Folder section, click on Select.
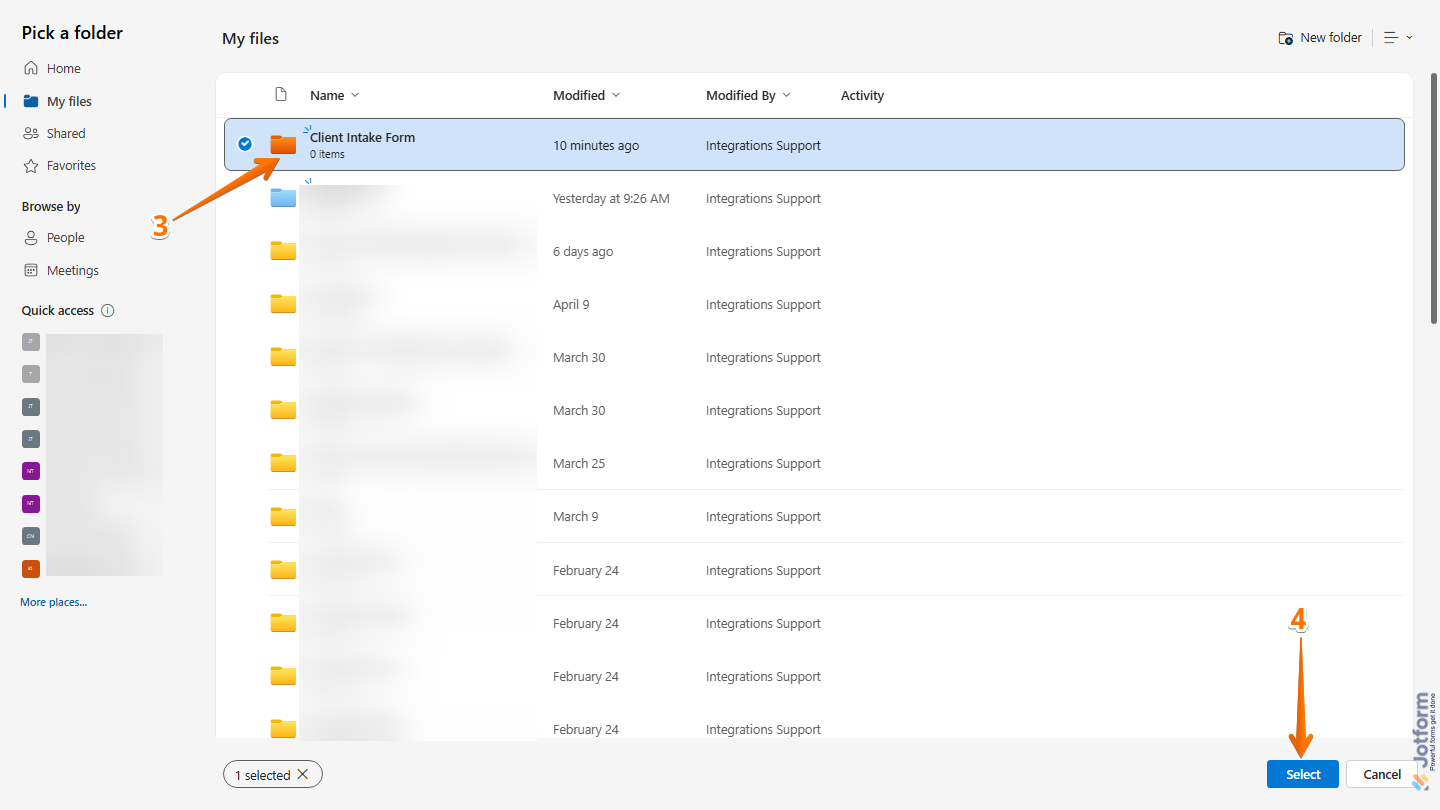
- Now, in the Integration Picker window, select the folder you want the files from your form to go into. For example, the Client Intake Form folder.
- Then, click on Select at the bottom of the page.
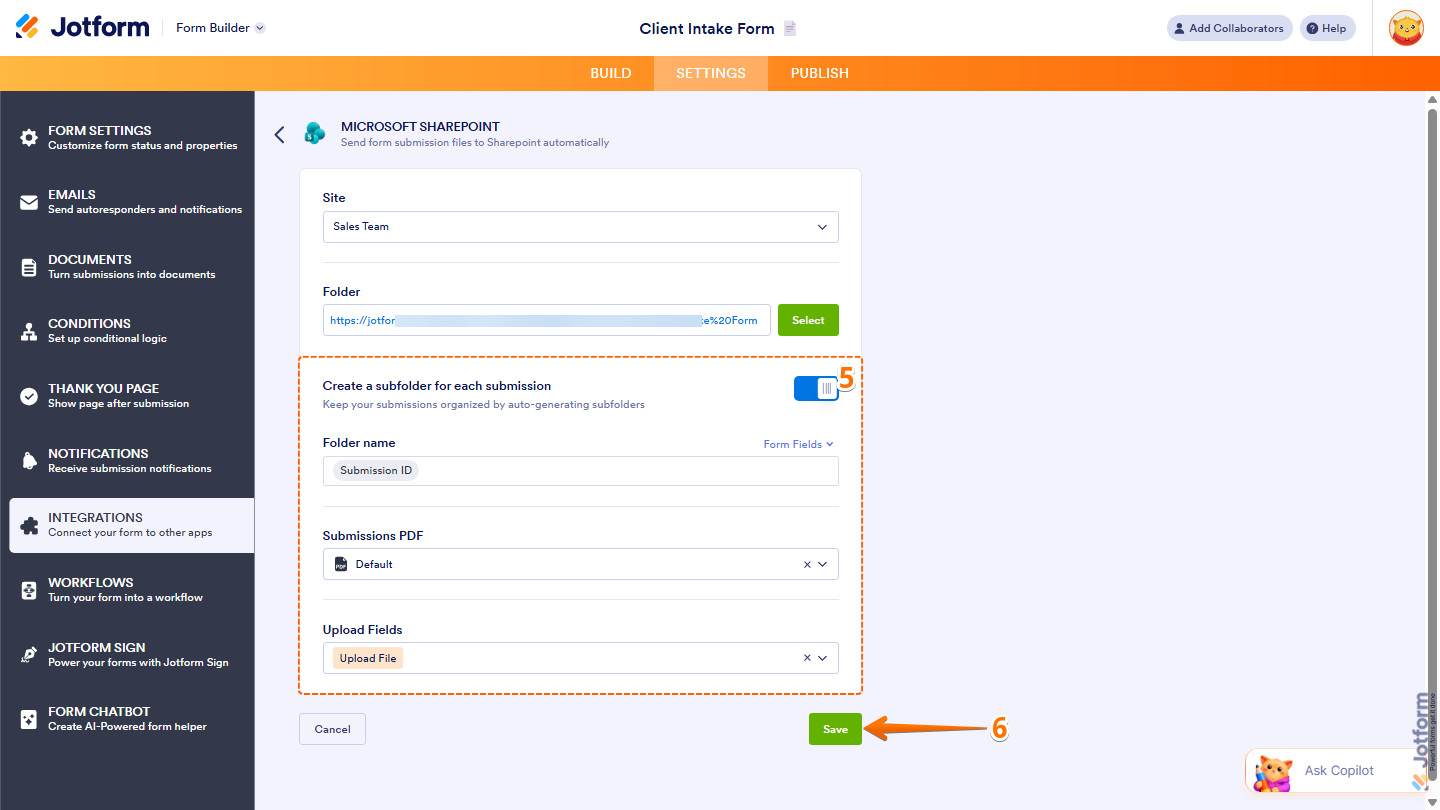
- Now, to keep things organized, you can set up these things:
- Create a Subfolder for Each Submission — Toggle this on to automatically create a separate folder for each form submission.
- Folder Name — Specify the name of the subfolder for each submission. This field is only available when Create a Subfolder for Each Submission is turned on.
- Submissions PDF — Select the PDF document that will be generated and saved for each submission.
- Upload Fields — Select the fields with the data you want to send to SharePoint.
- Create a Subfolder for Each Submission — Toggle this on to automatically create a separate folder for each form submission.
- Finally, click on Save, and you’re done.
Managing Your SharePoint Integration Actions
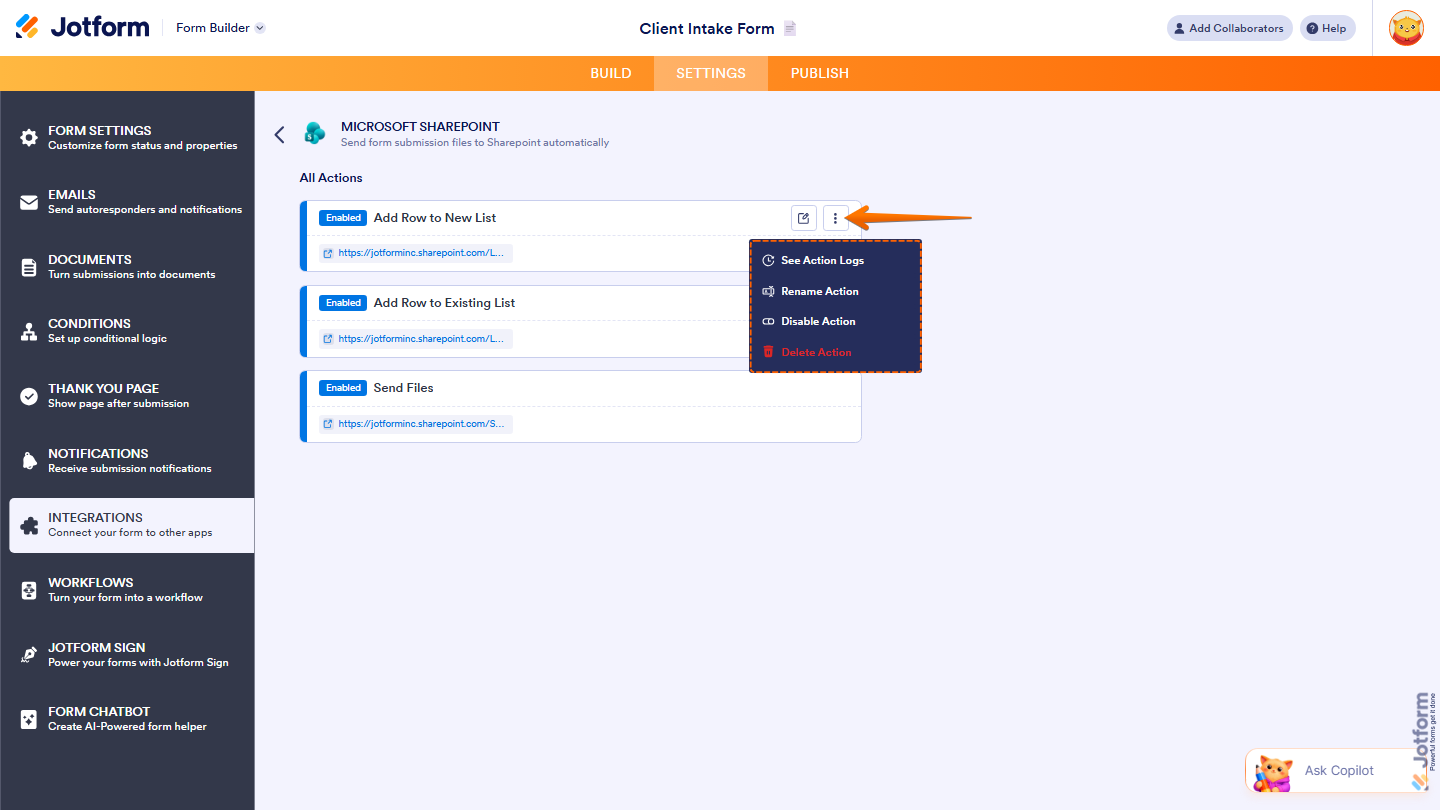
After saving the integration, you’ll see the action you’ve set up on the page. Hover your mouse over it and click on the Pencil icon to edit it or the Three Dots icon to access more options:
- See Action Logs — View successful and failed runs. It’s helpful for troubleshooting.
- Rename Action — Change the action’s title.
- Disable Action — Temporarily stop the integration from sending data.
- Delete Action — Remove the action from your form.
And you’re all set. Now your files will automatically be sent to Microsoft SharePoint, keeping your data structured, synced, and always up to date. Each submission can include a PDF file, uploaded files, and an optional subfolder.
Note
- You can create new lists, update existing lists, or upload files depending on the selected action.
- Make sure your Microsoft account has access to the selected site and destination before setting up the integration.
- You can edit or disable the integration anytime by going back to the Integrations tab.


Send Comment:
1 Comment:
June 5, 2026
It seems the integration only works with text to text fields. For other formats, like multi-choice, I've had to use hidden text fields and conditional formatting. I format the hidden field to reflect the same answer as its corresponding multi-choice question, then link the hidden text field when matching JF fields to SP columns. Is there an easier way to do this (besides using only short text questions on my form)? I feel like I'm making this harder than it needs to be.