Mailsoftly is an intuitive email marketing platform that simplifies and enhances how businesses communicate with their audiences. Built with user-friendly features and advanced automation tools, Mailsoftly helps organizations to create, schedule, and manage email campaigns easily.
Jotform integrates with Mailsoftly. With this integration, you can automatically create a contact on Mailsoftly on form submissions.
Setting up the Mailsoftly Integration
Whether you’re setting up a new form or updating an existing one, integrating your form with Mailsoftly takes no time at all—here’s how:
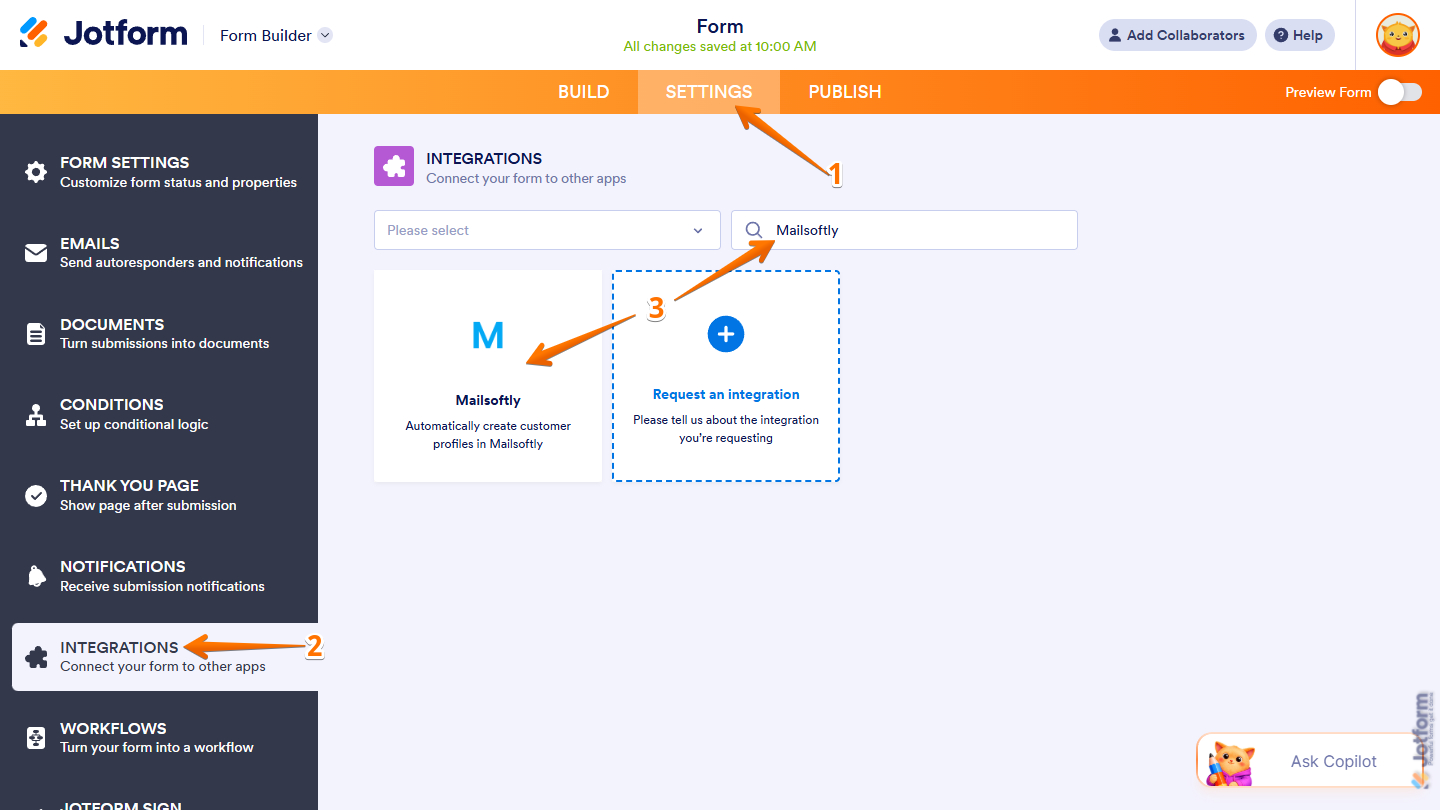
- In Form Builder, in the orange navigation bar at the top of the page, click on Settings.
- Then, in the menu on the left, click on Integrations.
- Next, search for Mailsoftly and click on it.
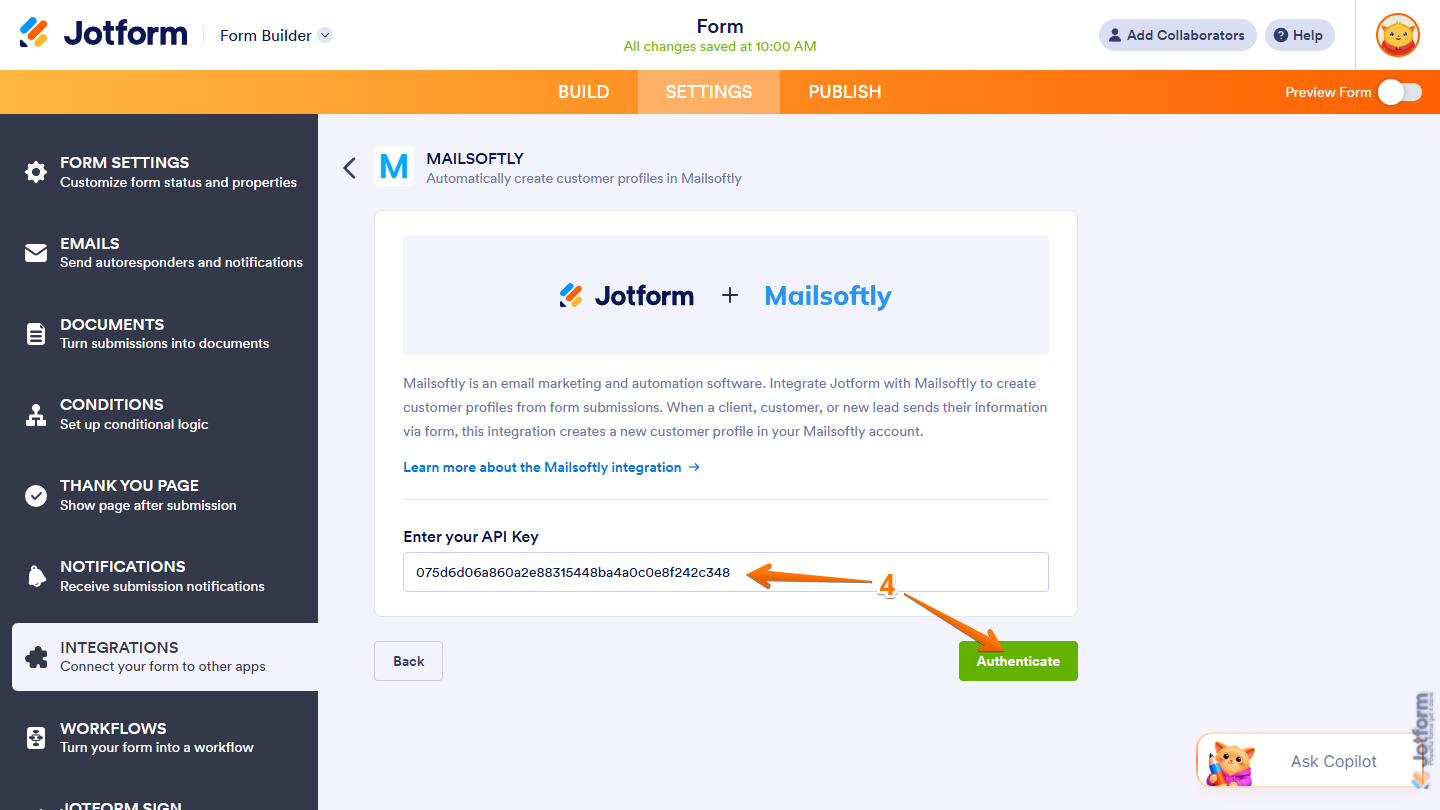
- Now, paste your Mailsoftly Account API key in the Enter Your API Key field and then click on Authenticate.
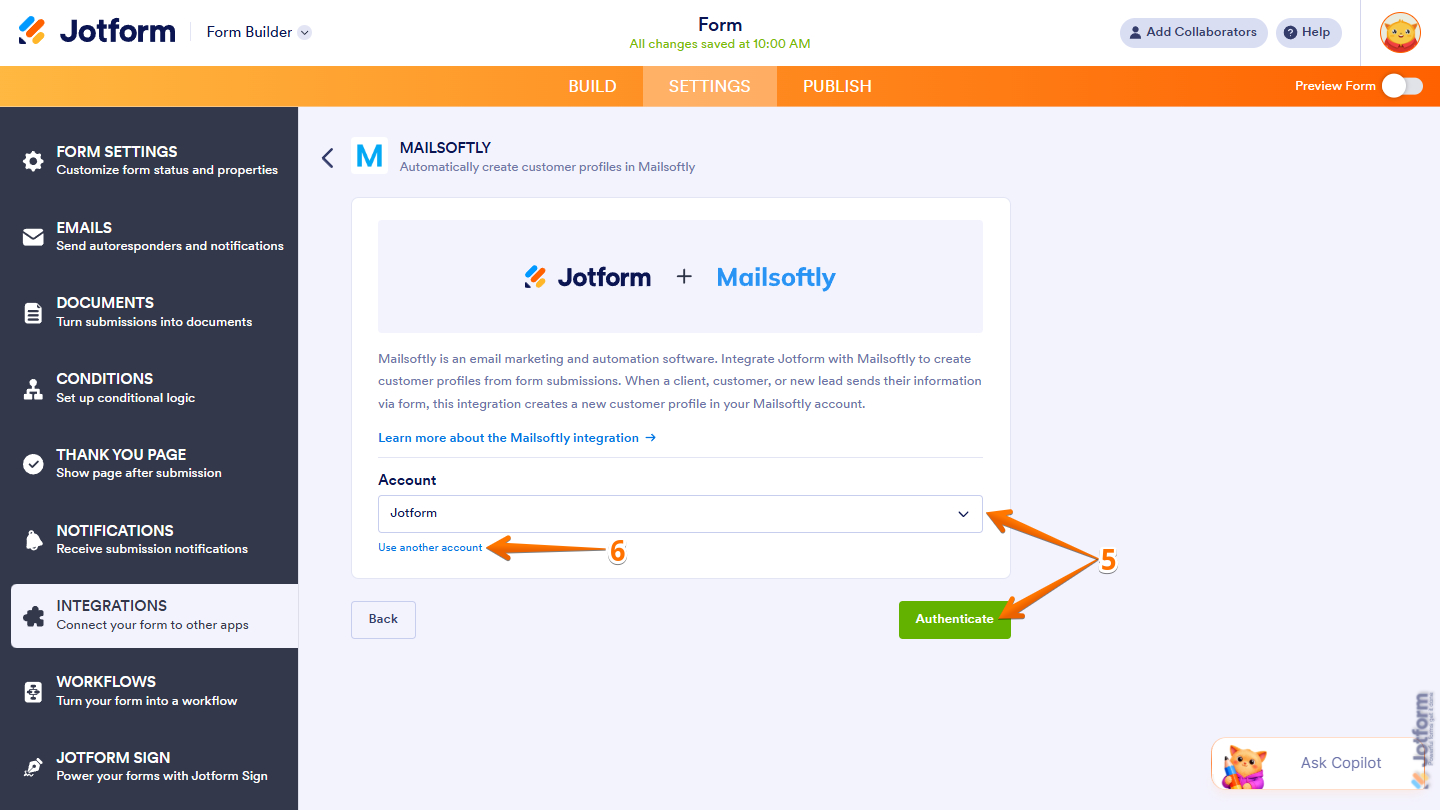
- If you’ve logged in before through one of your other forms, select that Mailsoftly account from the Dropdown menu and then click on Authenticate.
- Or, to use a different one, click on Use Another Account.
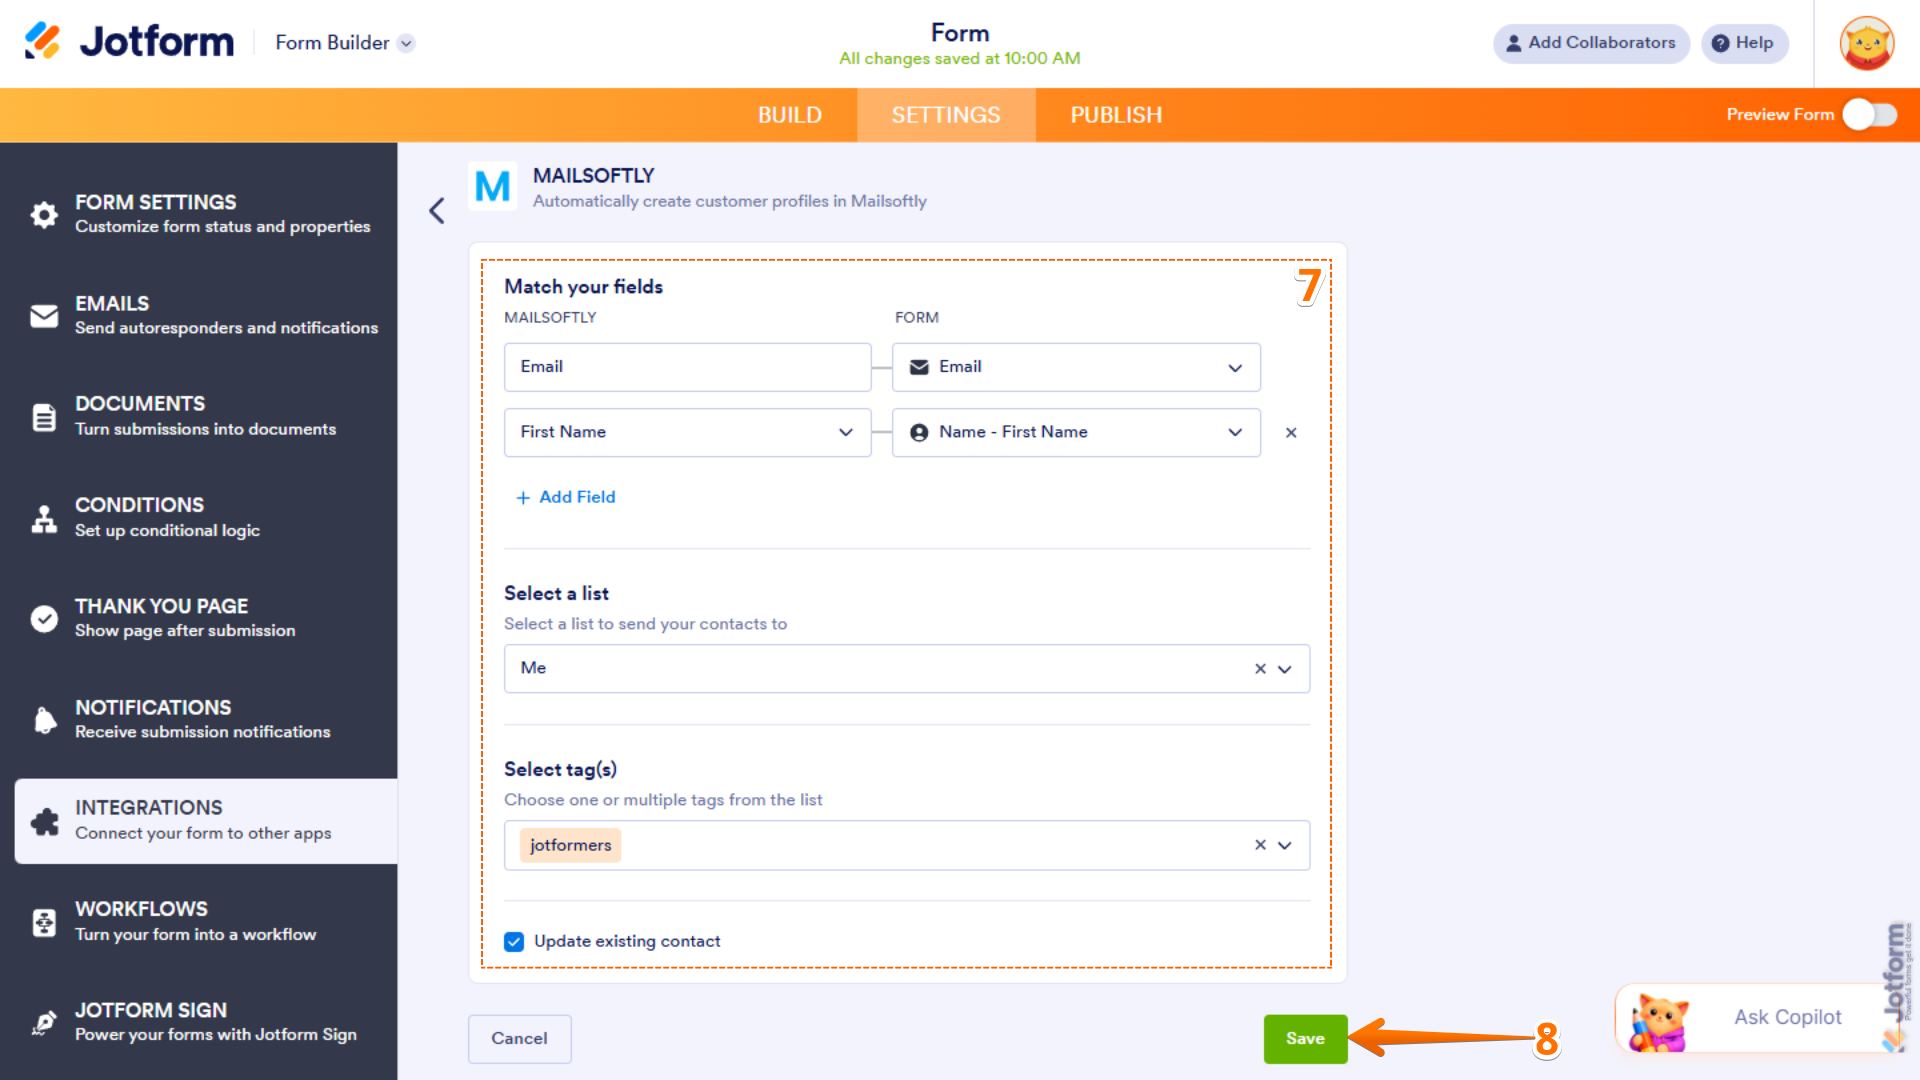
- Now, set up these things:
- Match Your Fields — Match your Mailsoftly fields on the left to your form fields on the right. Click on Add Field to map additional fields.
- Select a List — Select a list to send your contacts to.
- Select Tag(s) — Assign specific tags to the contact. You must have these Tags in your Mailsoftly settings.
- Update Existing Contact — The integration selects this option by default. Check it if you want to update existing contacts based on the data they provide in the form.
- Once those are set, click on Save at the bottom.
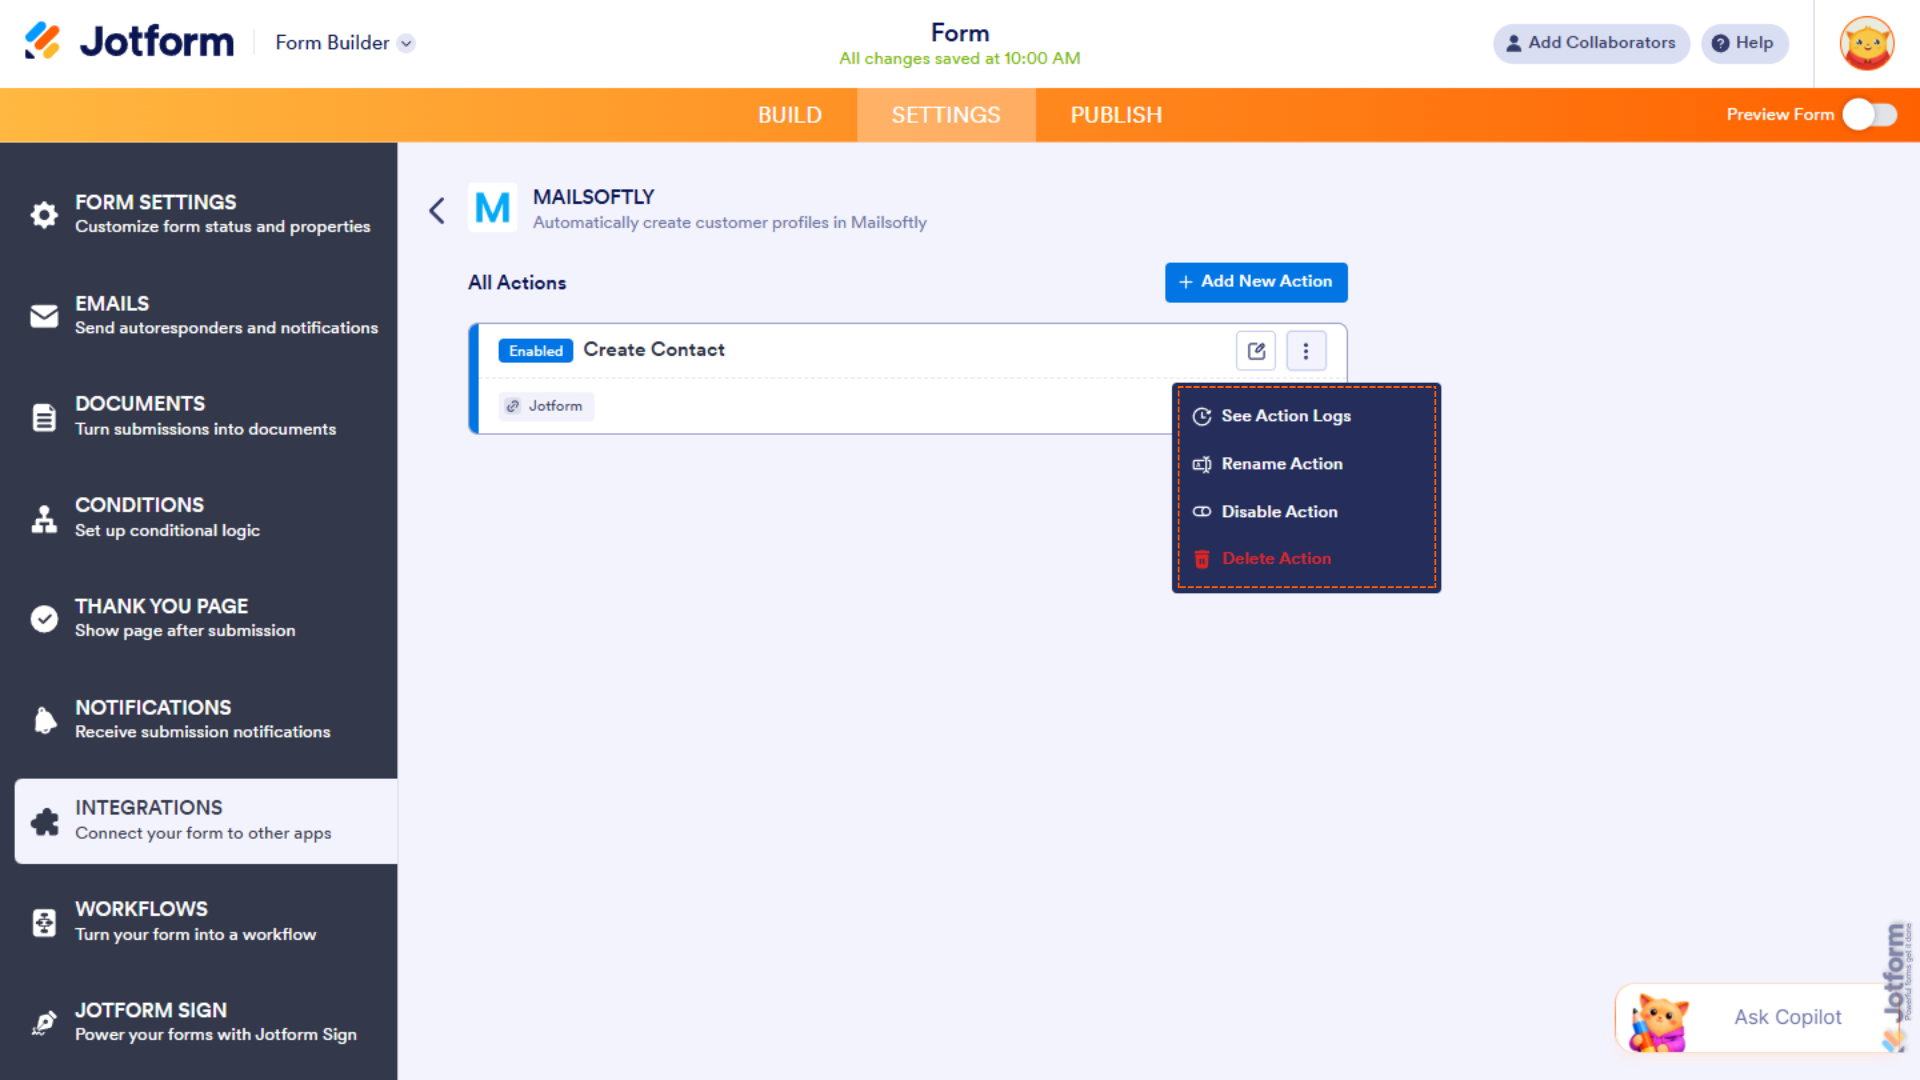
Managing Your Mailsoftly Integration Actions
After saving the integration, you’ll see the list of actions you’ve set up and the Add New Action button on the main page. Hover your mouse over an action and click on the Pencil icon to edit it or the Three Dots icon to access more options:
- See Action Logs — View successful and failed runs, helpful for troubleshooting.
- Rename Action — Change the action’s title.
- Disable Action — Temporarily stop the integration from sending data.
- Delete Action — Remove the action from your form.
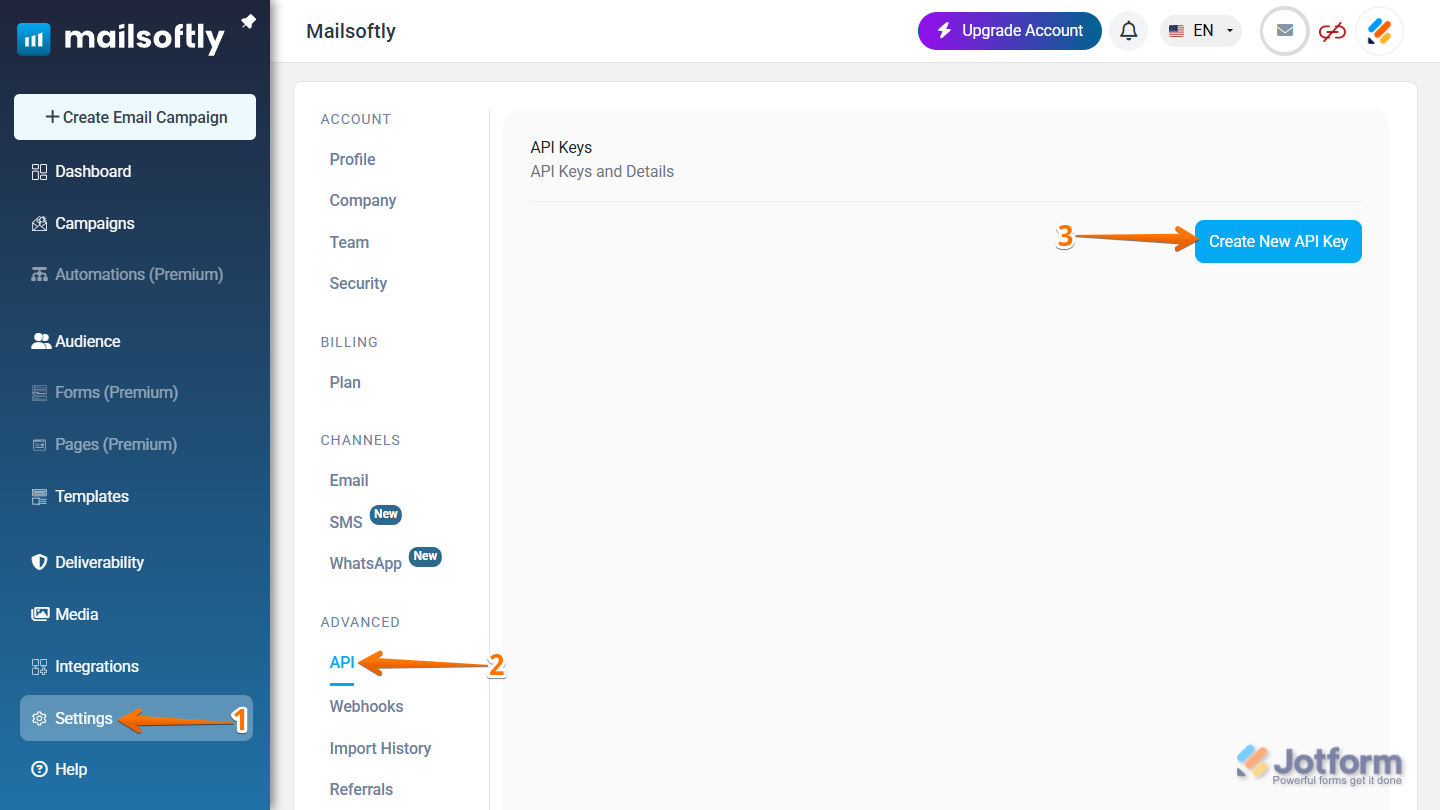
Creating a Mailsoftly API Key
Your Mailsoftly API Key is required for the integration to work. To get one, create it in your Mailsoftly settings. You can do it in a few simple steps:
- In your Mailsoftly dashboard, click on Settings on the left side of the page.
- Then, under the Advanced section, click on API.
- Next, in the API Keys page, click on the Create New API Key button.
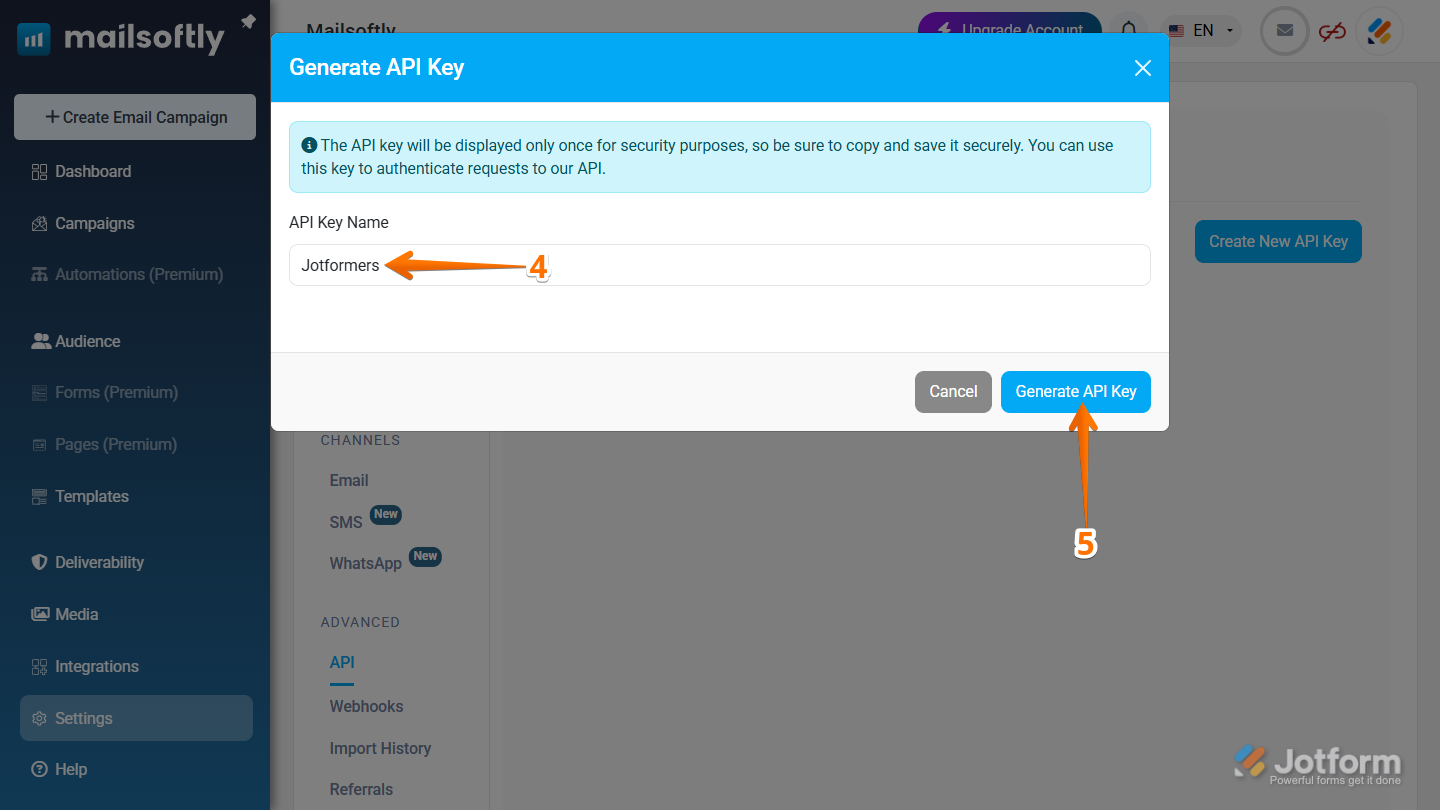
- In the Generate API Key window that opens, give the API Key a name by entering it in the API Key Name field.
- Then, click on the Generate API Key button.
- Now, copy the generated API key. That’s it! You can either click on Cancel or the X icon in the window to close it.
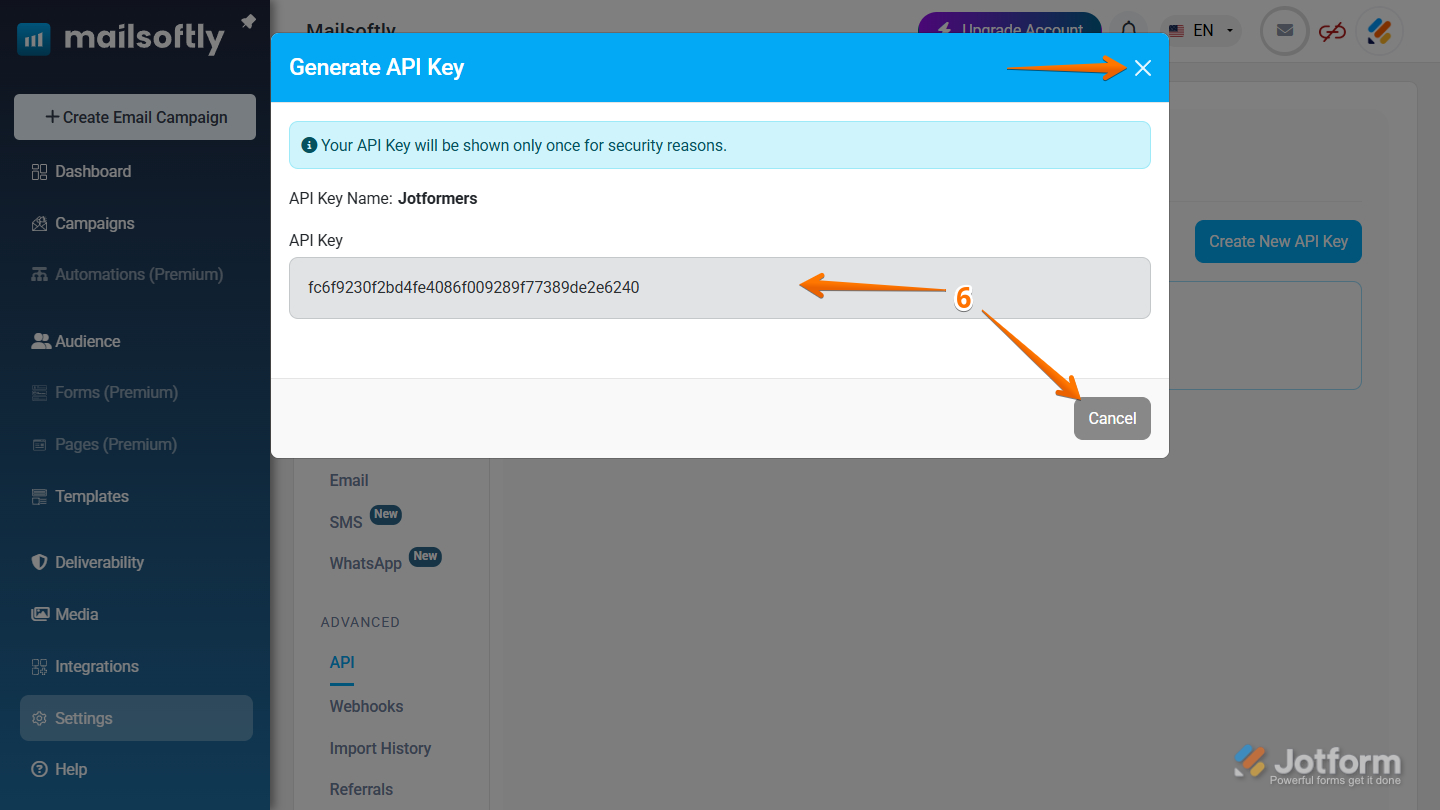
Note
For security reasons, Mailsoftly displays your API key only once, immediately after you generate it through the Generate API Key flow. If you need one again, you can create a new API key at any time.
That’s it for integrating your form with Mailsoftly. Your submissions will now be automatically sent to the right places, helping you streamline your workflow and keep everything organized.

Send Comment: