Jotform makes it easy to connect your forms with MailerLite so you can automatically send new submissions to your mailing lists and groups. This helps you keep your subscribers organized and updated without needing to add contacts manually.
Once your MailerLite account is connected, you can match your form fields, select which group to add subscribers to, and manage how contacts are updated. You can also manage your integration actions later by editing, disabling, renaming, or deleting them whenever needed.
Setting Up the Mailerlite Integration
You can connect your MailerLite account and configure the integration in just a few steps. Here’s how to set it up:
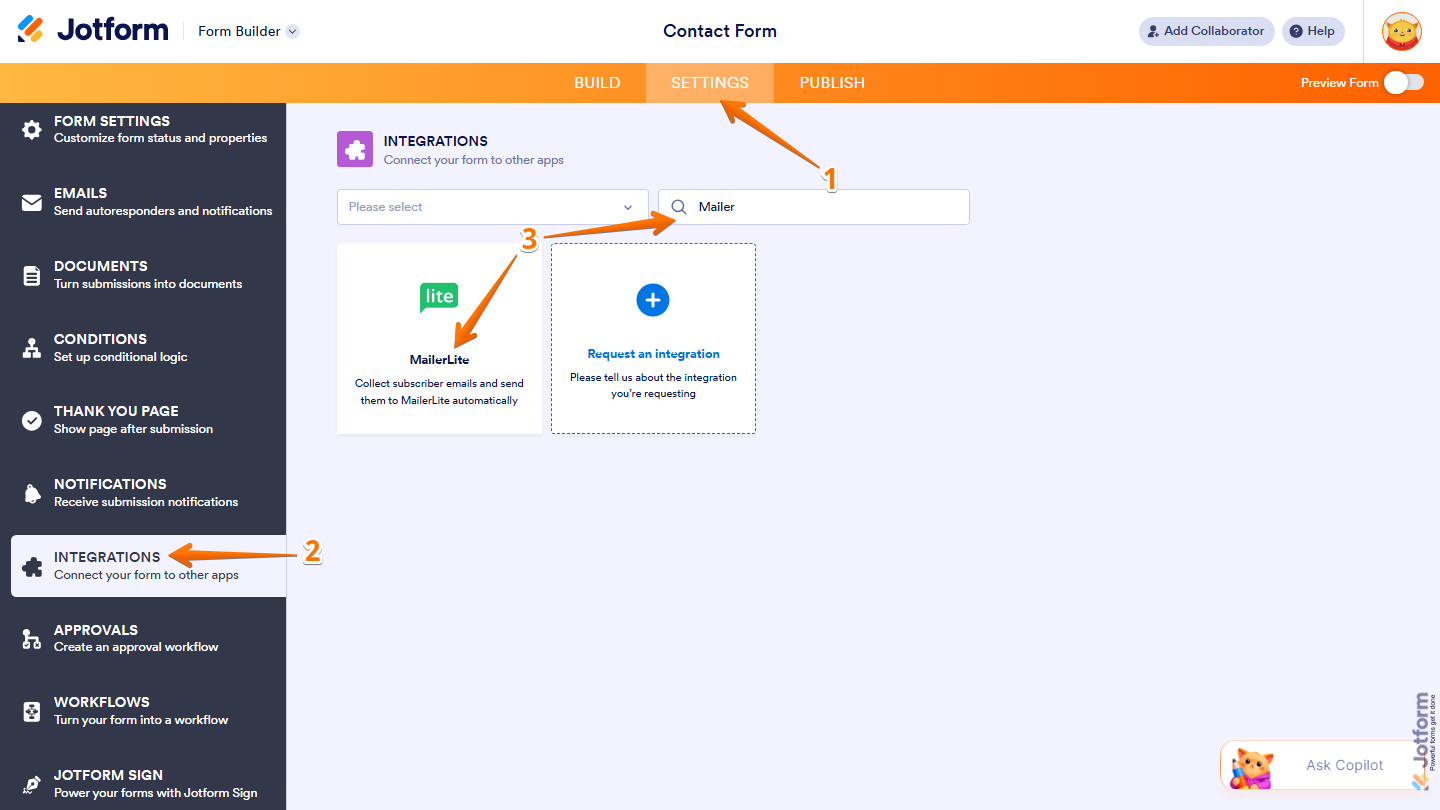
- In Form Builder, in the orange navigation bar at the top of the page, click on Settings.
- Then, in the menu on the left, click on Integrations.
- Now, search for MailerLite and then click on it.
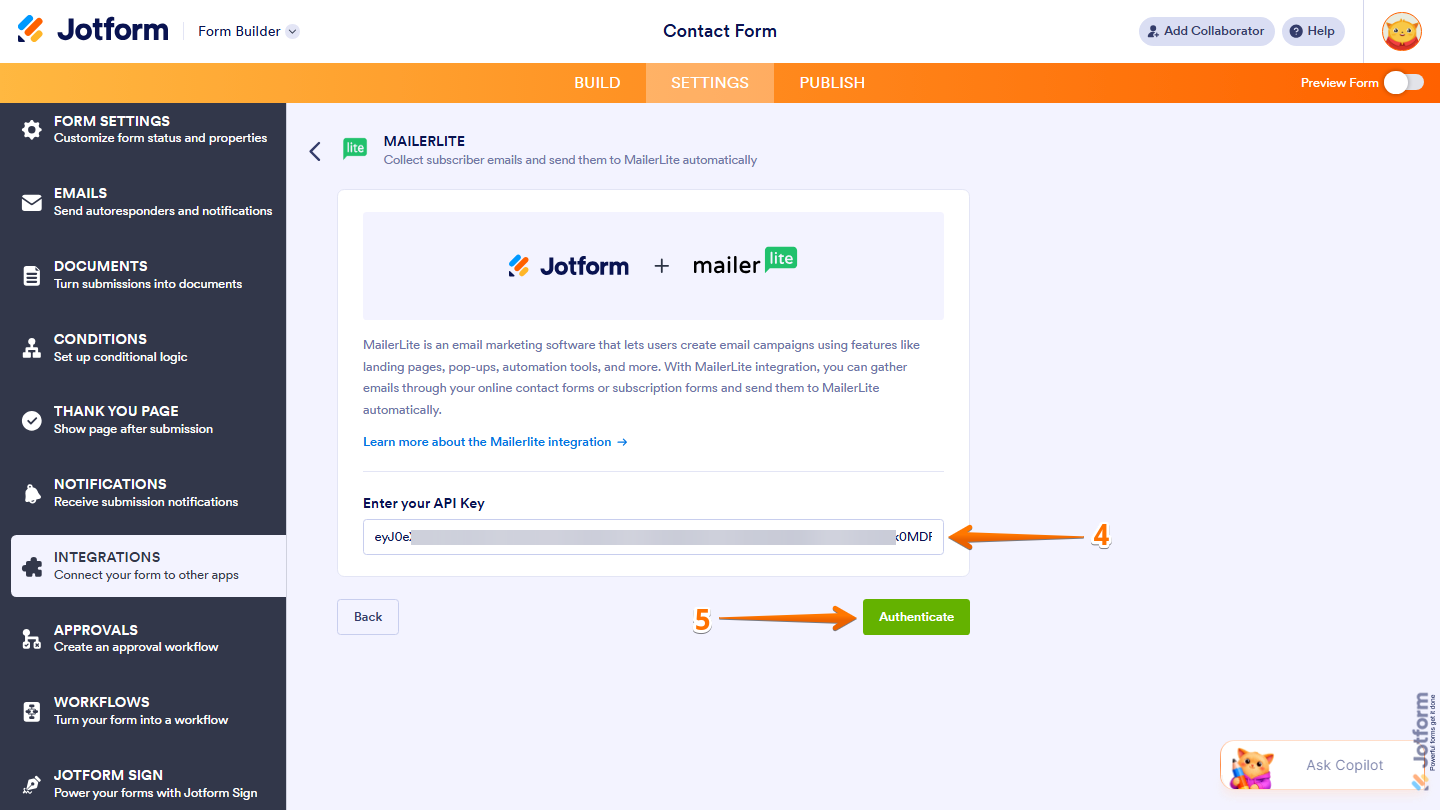
- Now, paste your Mailerlite Account API key into the Enter Your API Key Input box.
- Then, click on Authenticate and then log in to your Mailerlite Account.
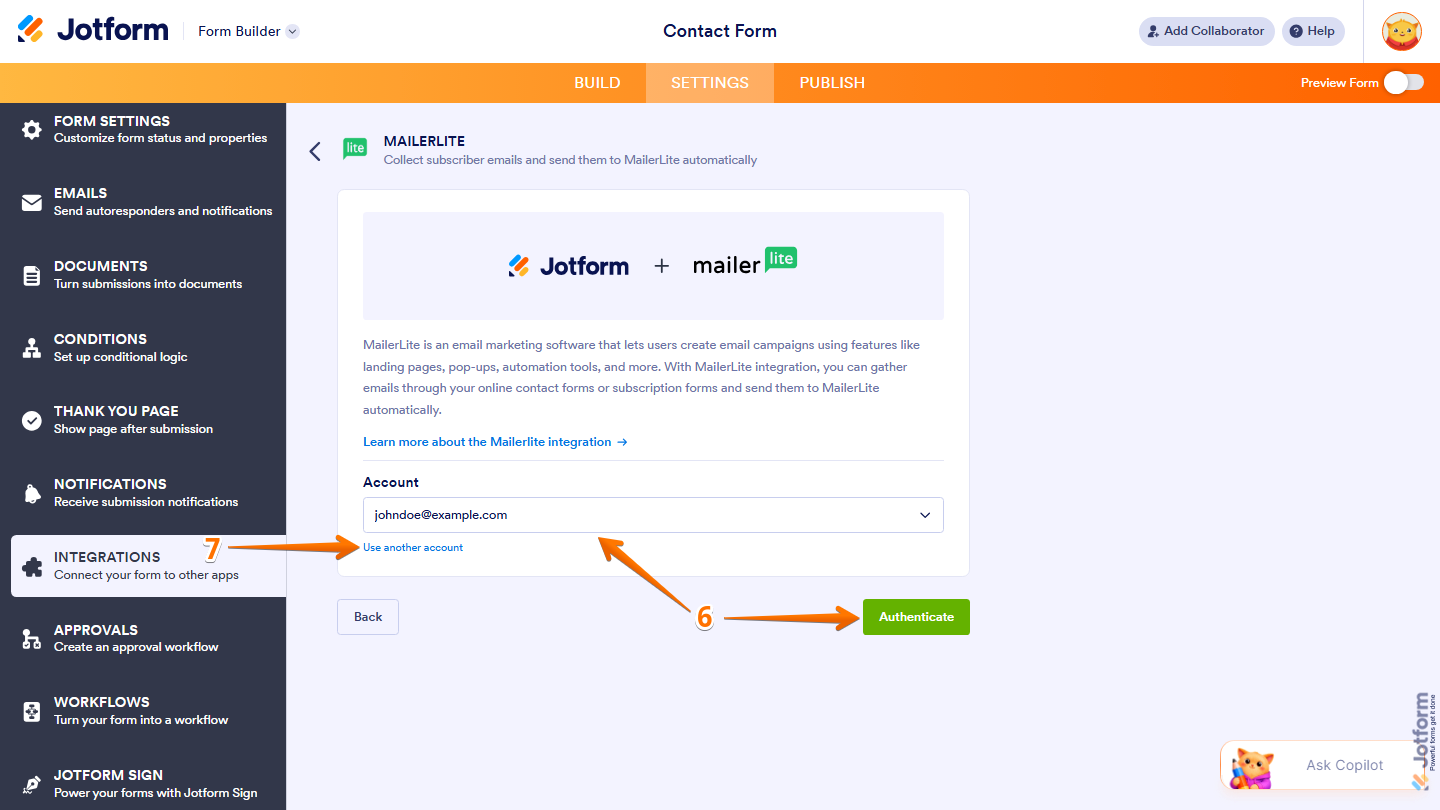
- If you’ve logged in before through one of your other forms, select that Mailerlite account from the Dropdown menu and then click on Authenticate.
- Or, to use a different one, click on Use Another Account.
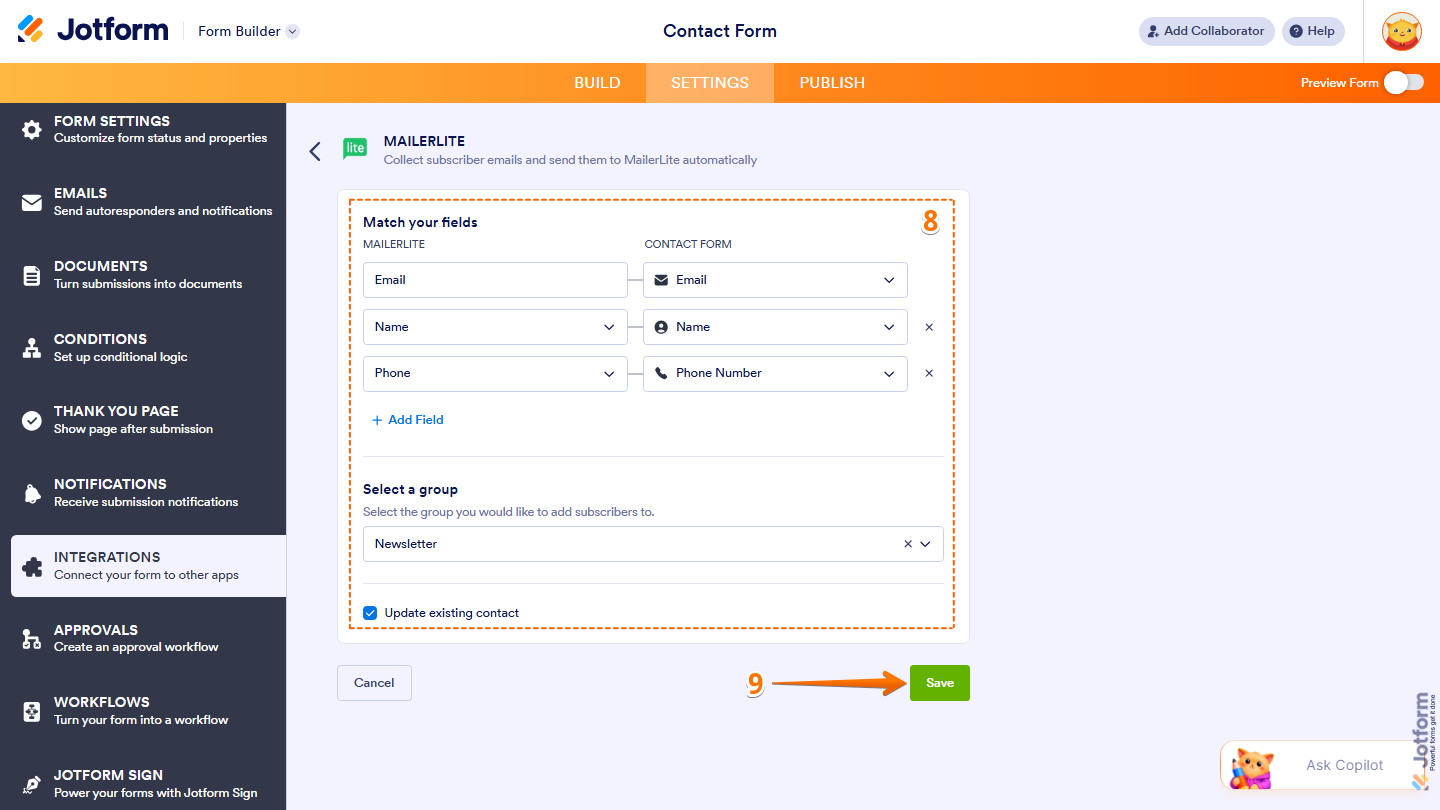
- Once connected, configure these things:
- Match Your Fields — Match your MailerLite subscriber fields with your Jotform form fields.
- Select a Group — Choose which MailerLite group new subscribers will be added to.
- Update Existing Contact — Tick this option if you want existing MailerLite contacts to be updated when they submit the form again.
- Finally, click on Save, and you’re all set.
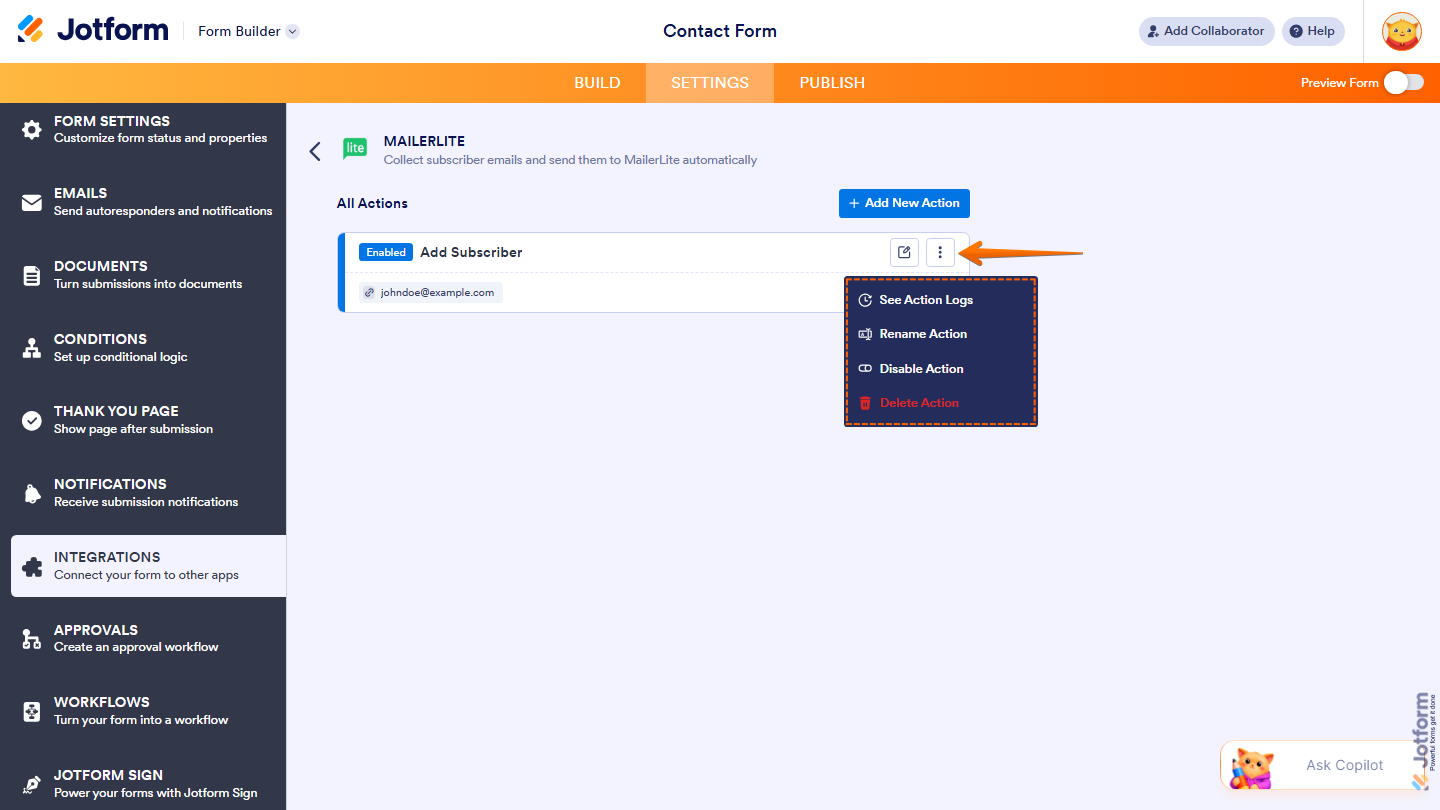
Managing Your Mailerlite Integration Actions
After saving the integration, you’ll see the action you’ve set up on the page. Hover your mouse over it and click on the Pencil icon to edit it or the Three Dots icon to access more options:
- See Action Logs — View successful and failed runs. It’s helpful for troubleshooting.
- Rename Action — Change the action’s title.
- Disable Action — Temporarily stop the integration from sending data.
- Delete Action — Remove the action from your Sign Document.

Send Comment:
4 Comments:
March 6, 2025
Iv gone to settings and added name and then on the next bit it says email.
I selected a group and then it wont allow me to save
March 17, 2023
I'd like to be able to send the data to different groups depending on the content of one of the fields. But… it seems like it’s not possible :(
March 6, 2023
Can we pass custom field data like text generated using the UPDATE / CALCULATE FIELD condition?
Can we pass data to only one group? What if we have to pass custom field data to different groups, not multiple groups at the same time only one group each time.
February 12, 2022
Will this work if the only form to fill out is included with the offer you want people to join? (is part of the process of joining a promotion)