Jotform’s Appointment field supports Two-Way Sync with your calendar. This keeps your availability accurate across platforms and prevents double bookings, whether you’re using Google Calendar, Outlook Calendar, or Calendly.
What is Two-Way Sync?
Two-way sync means:
- External Calendar → Jotform: Events in your calendar automatically block availability in your form.
- Jotform → External Calendar: Appointments booked through your form are added to your connected calendar.
This ensures both systems reflect the same schedule.
Syncing Your Google Calendar with the Appointment Field
Connecting your Appointment field to Google Calendar allows every submission to become a scheduled event in real time. Here’s how to do it:
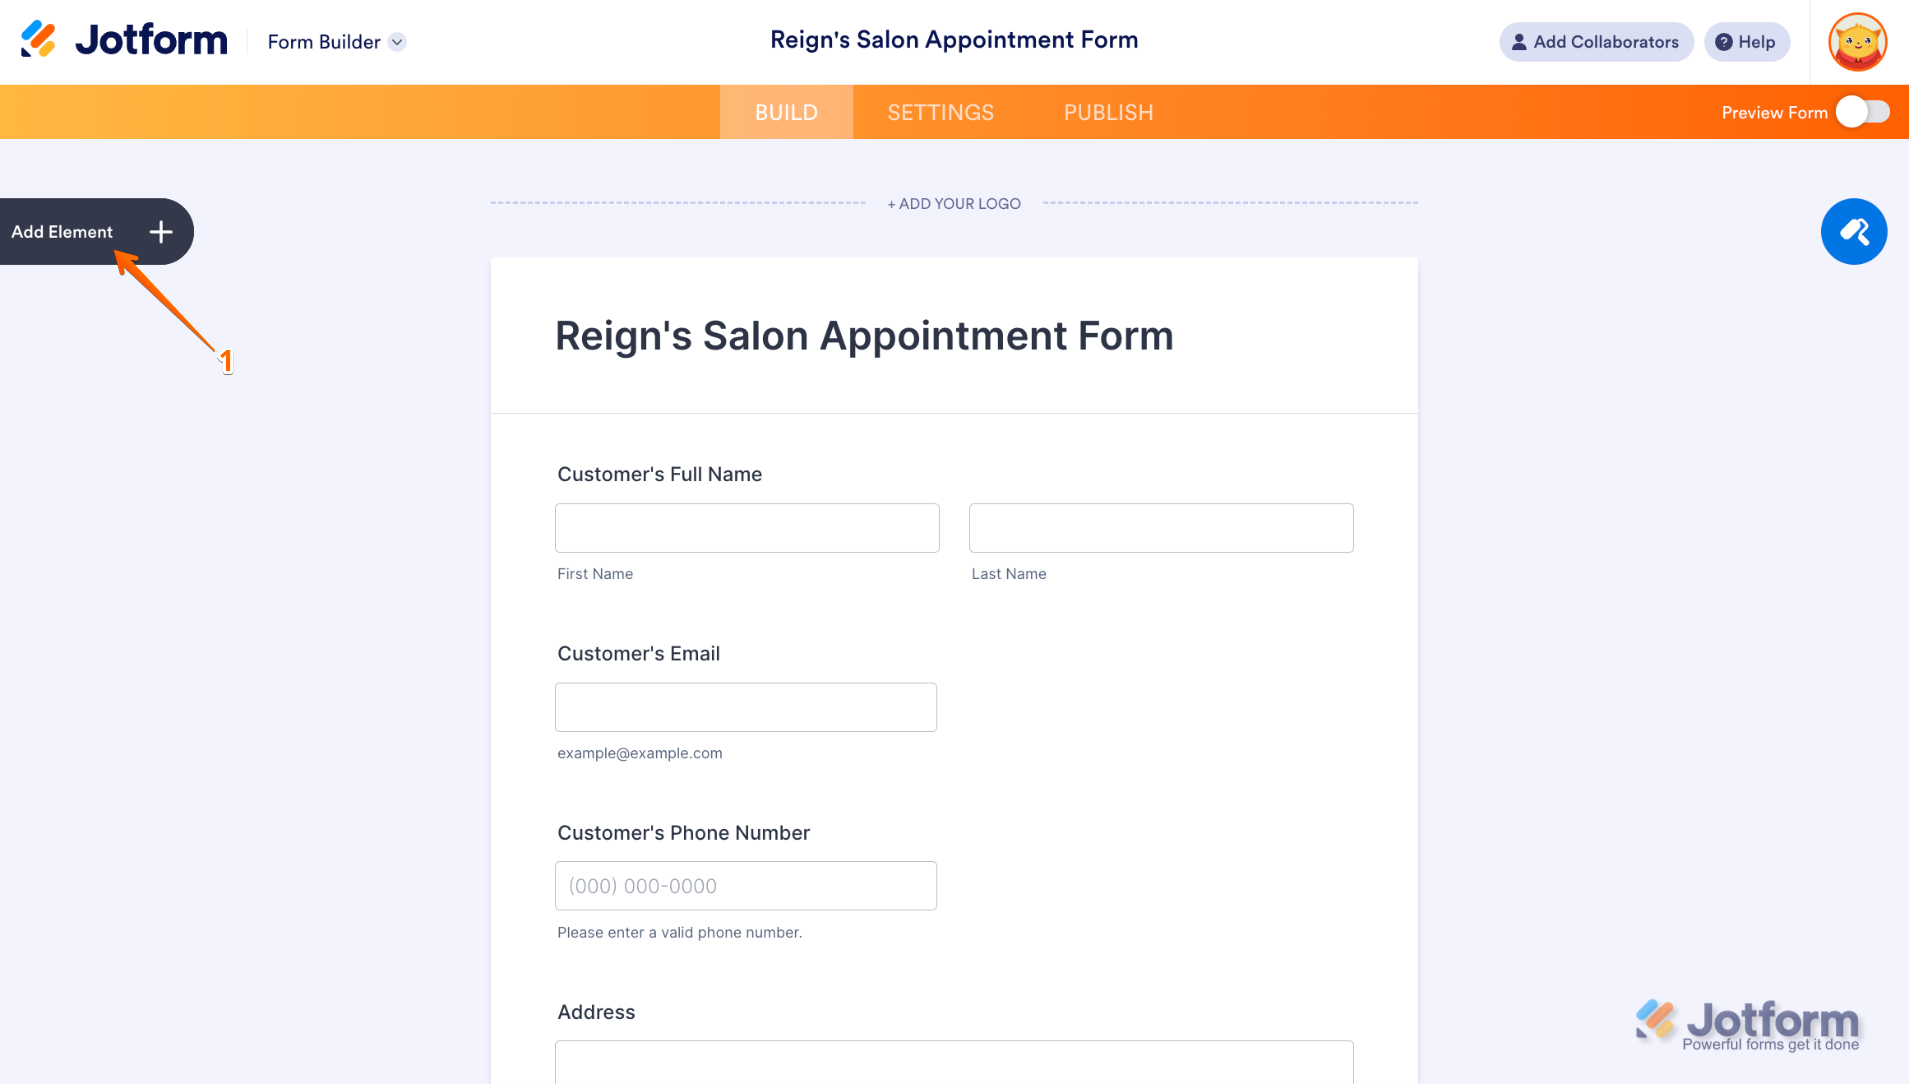
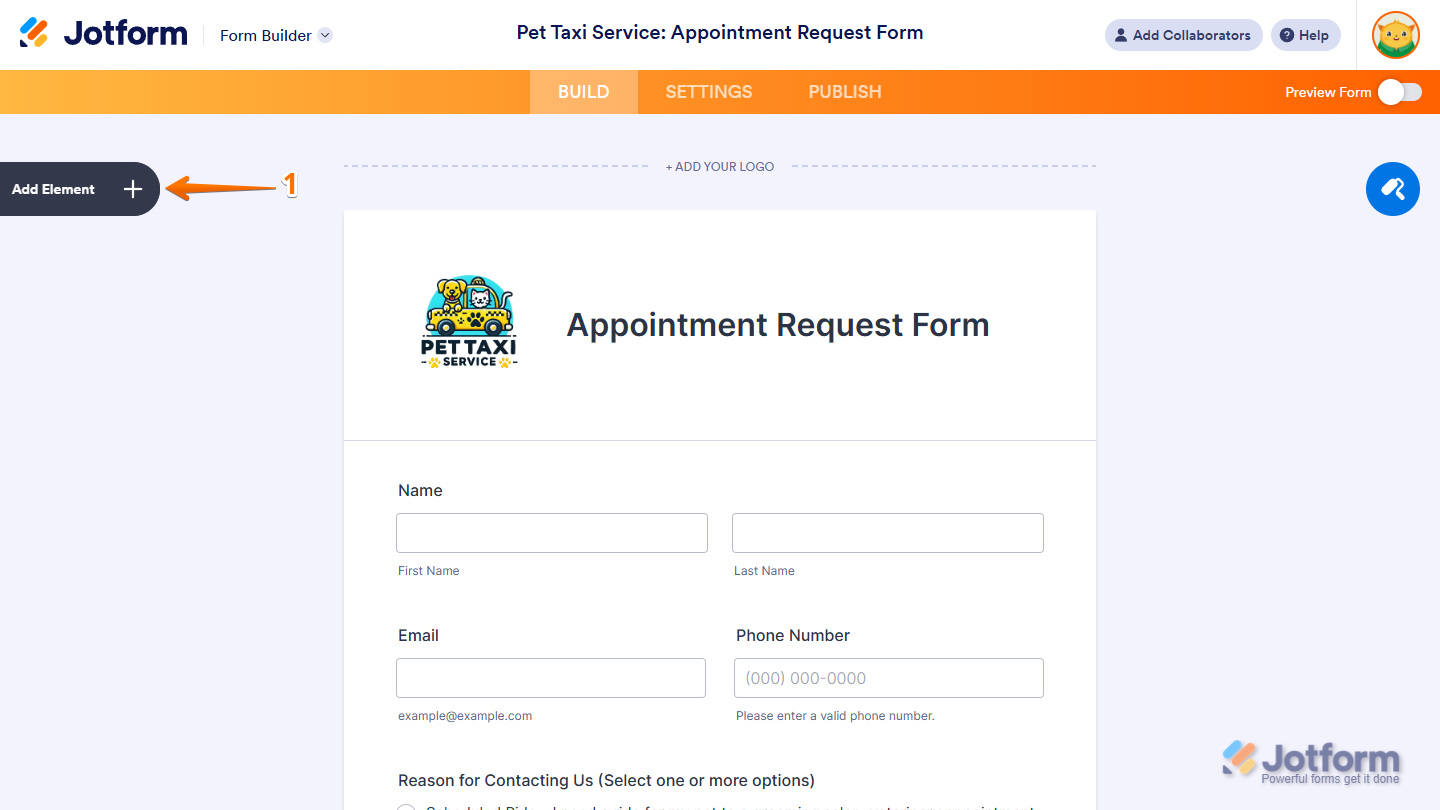
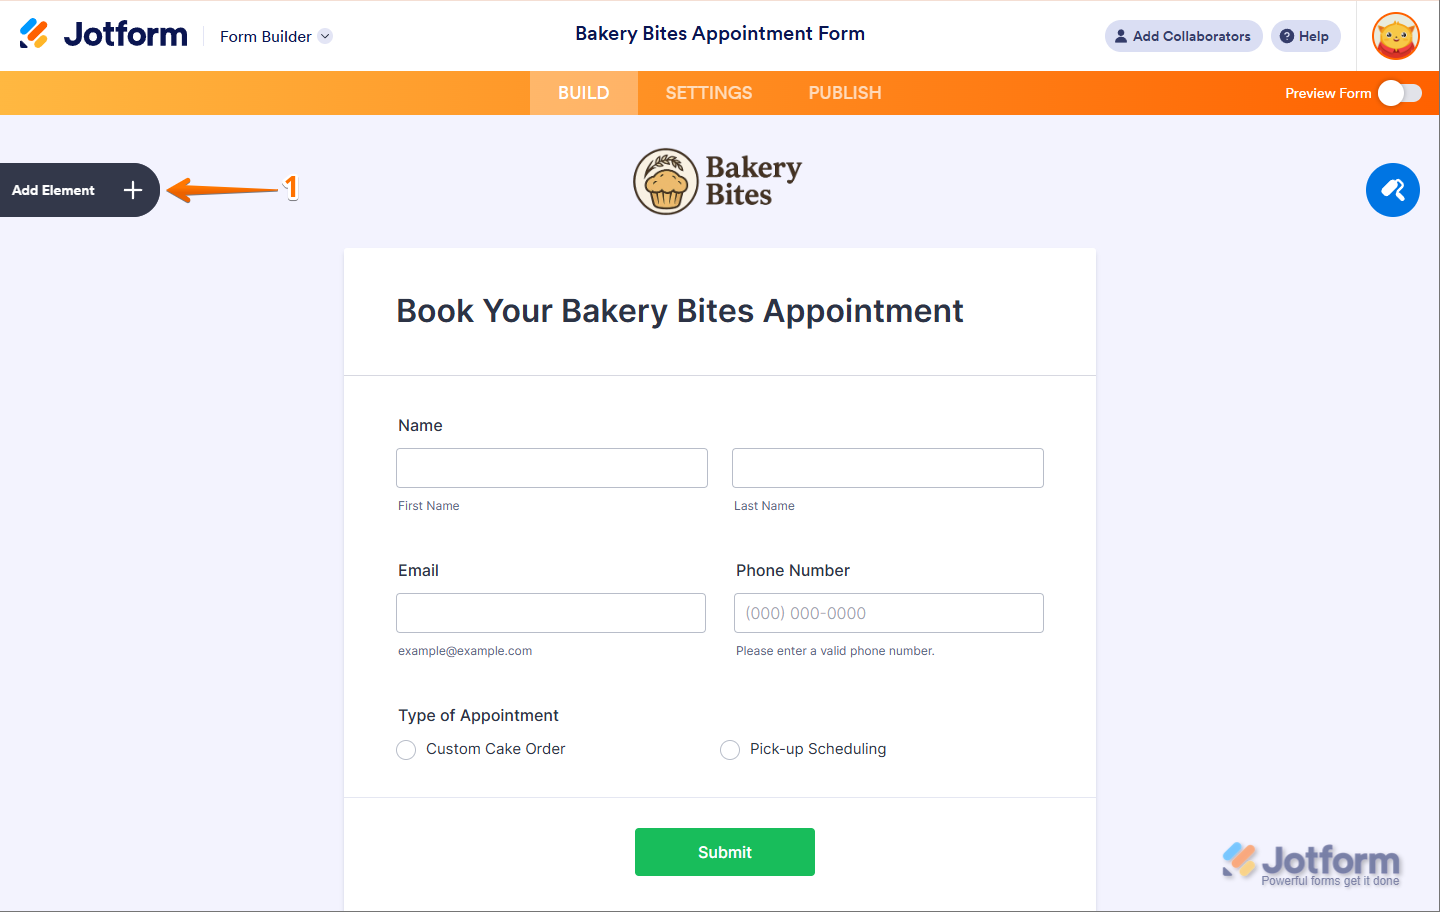
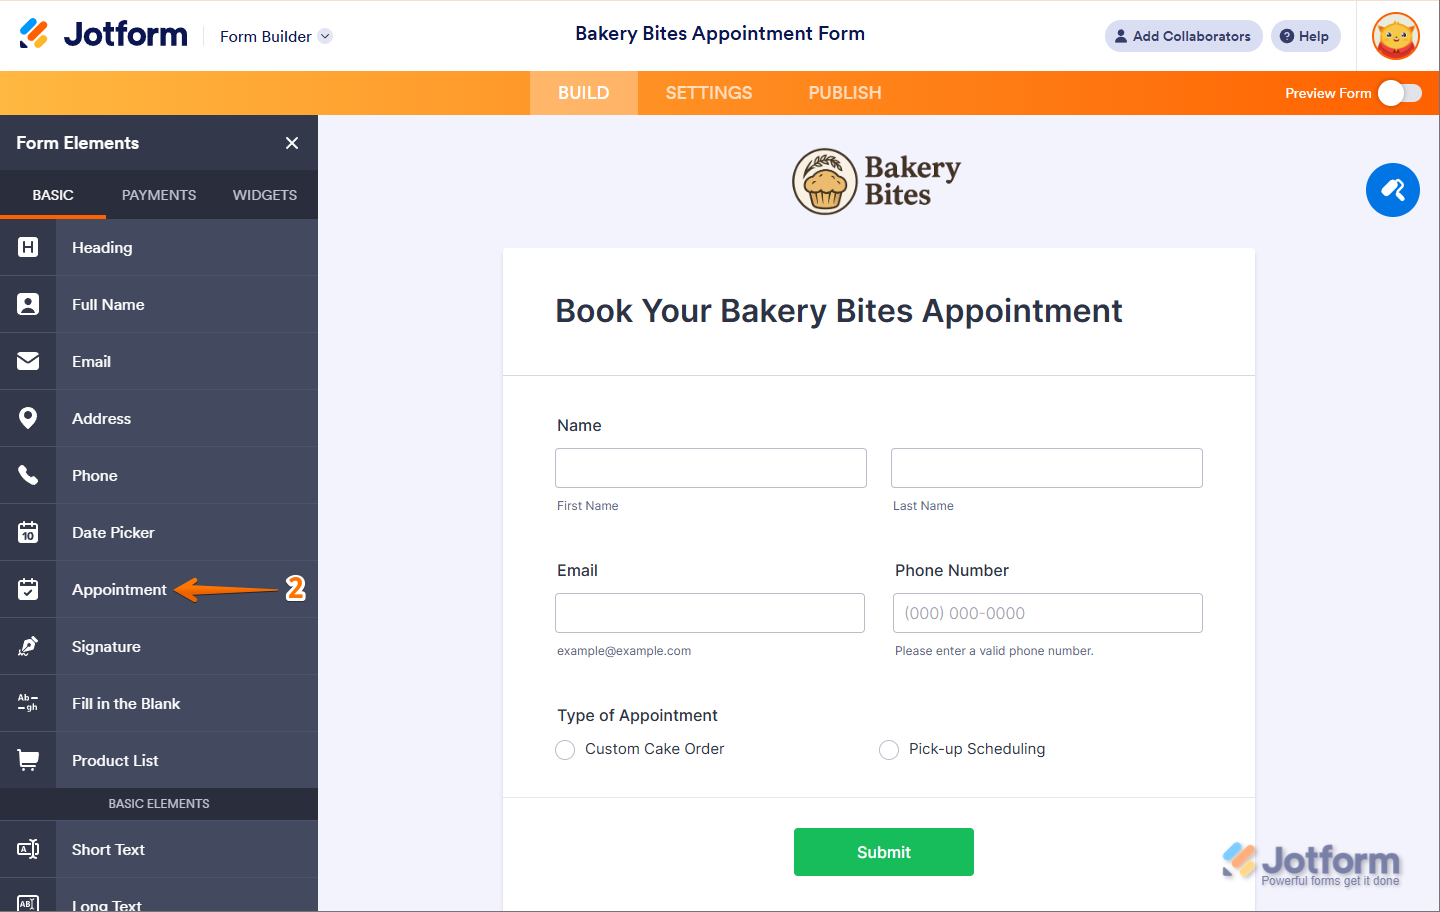
- In Form Builder, click on the Add Element menu on the left side of the page.
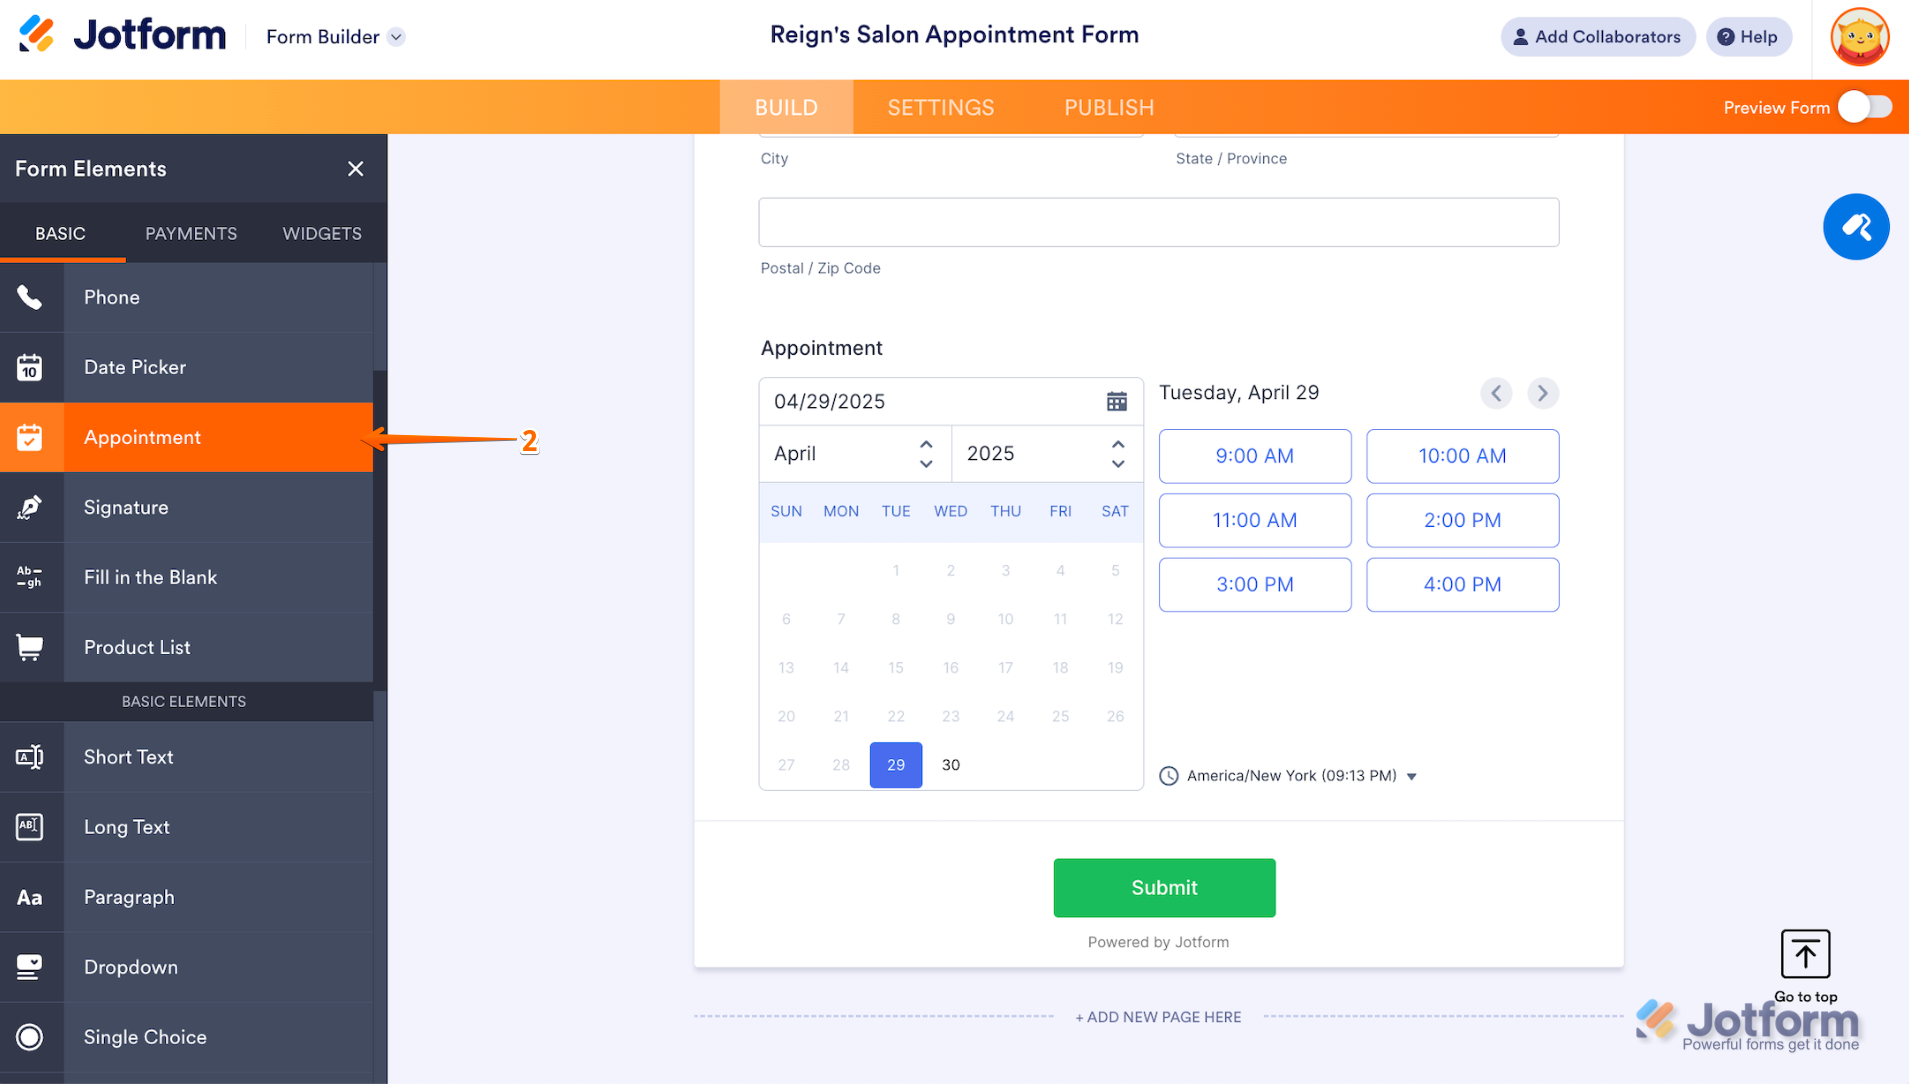
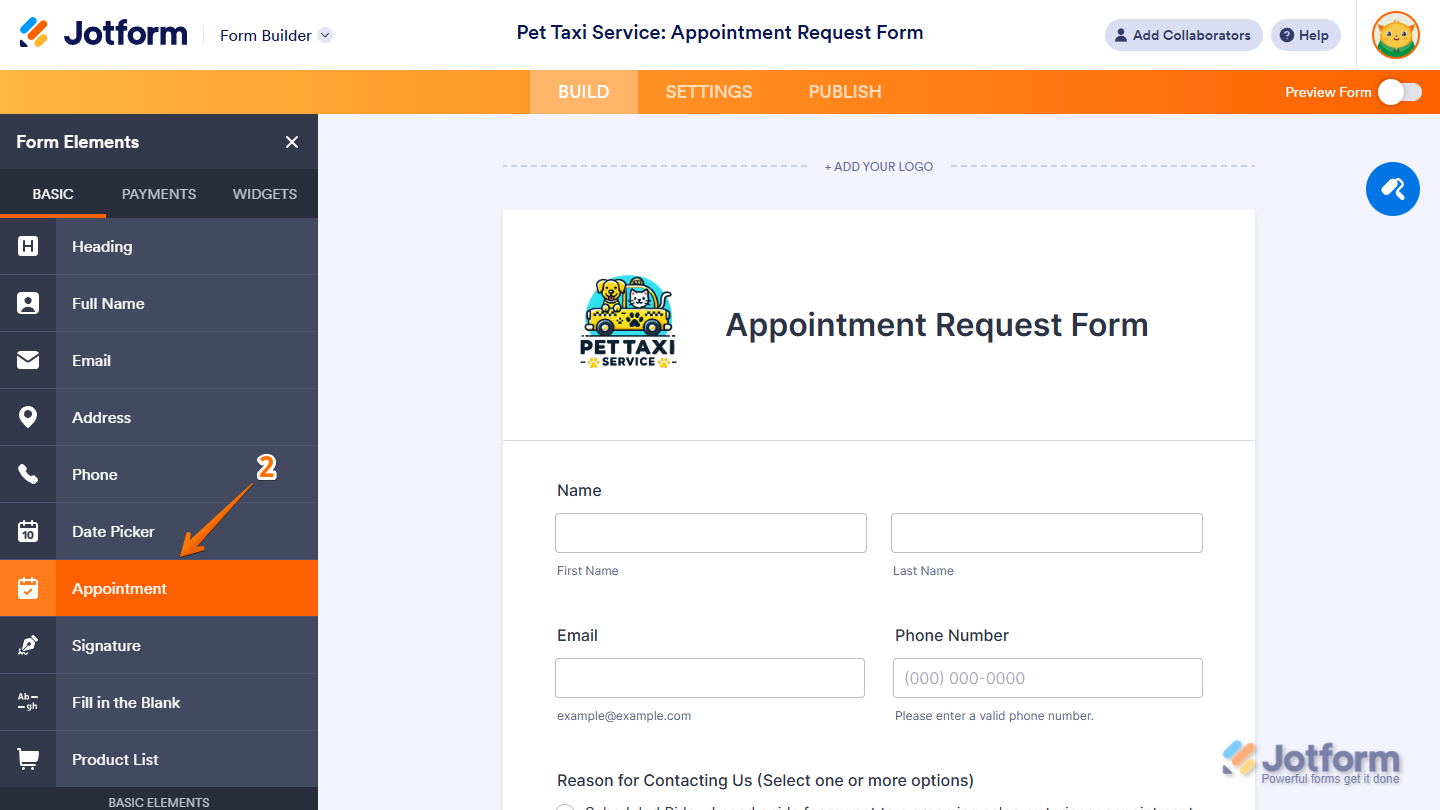
- Under the Basic tab, scroll down the list and click on Appointment.
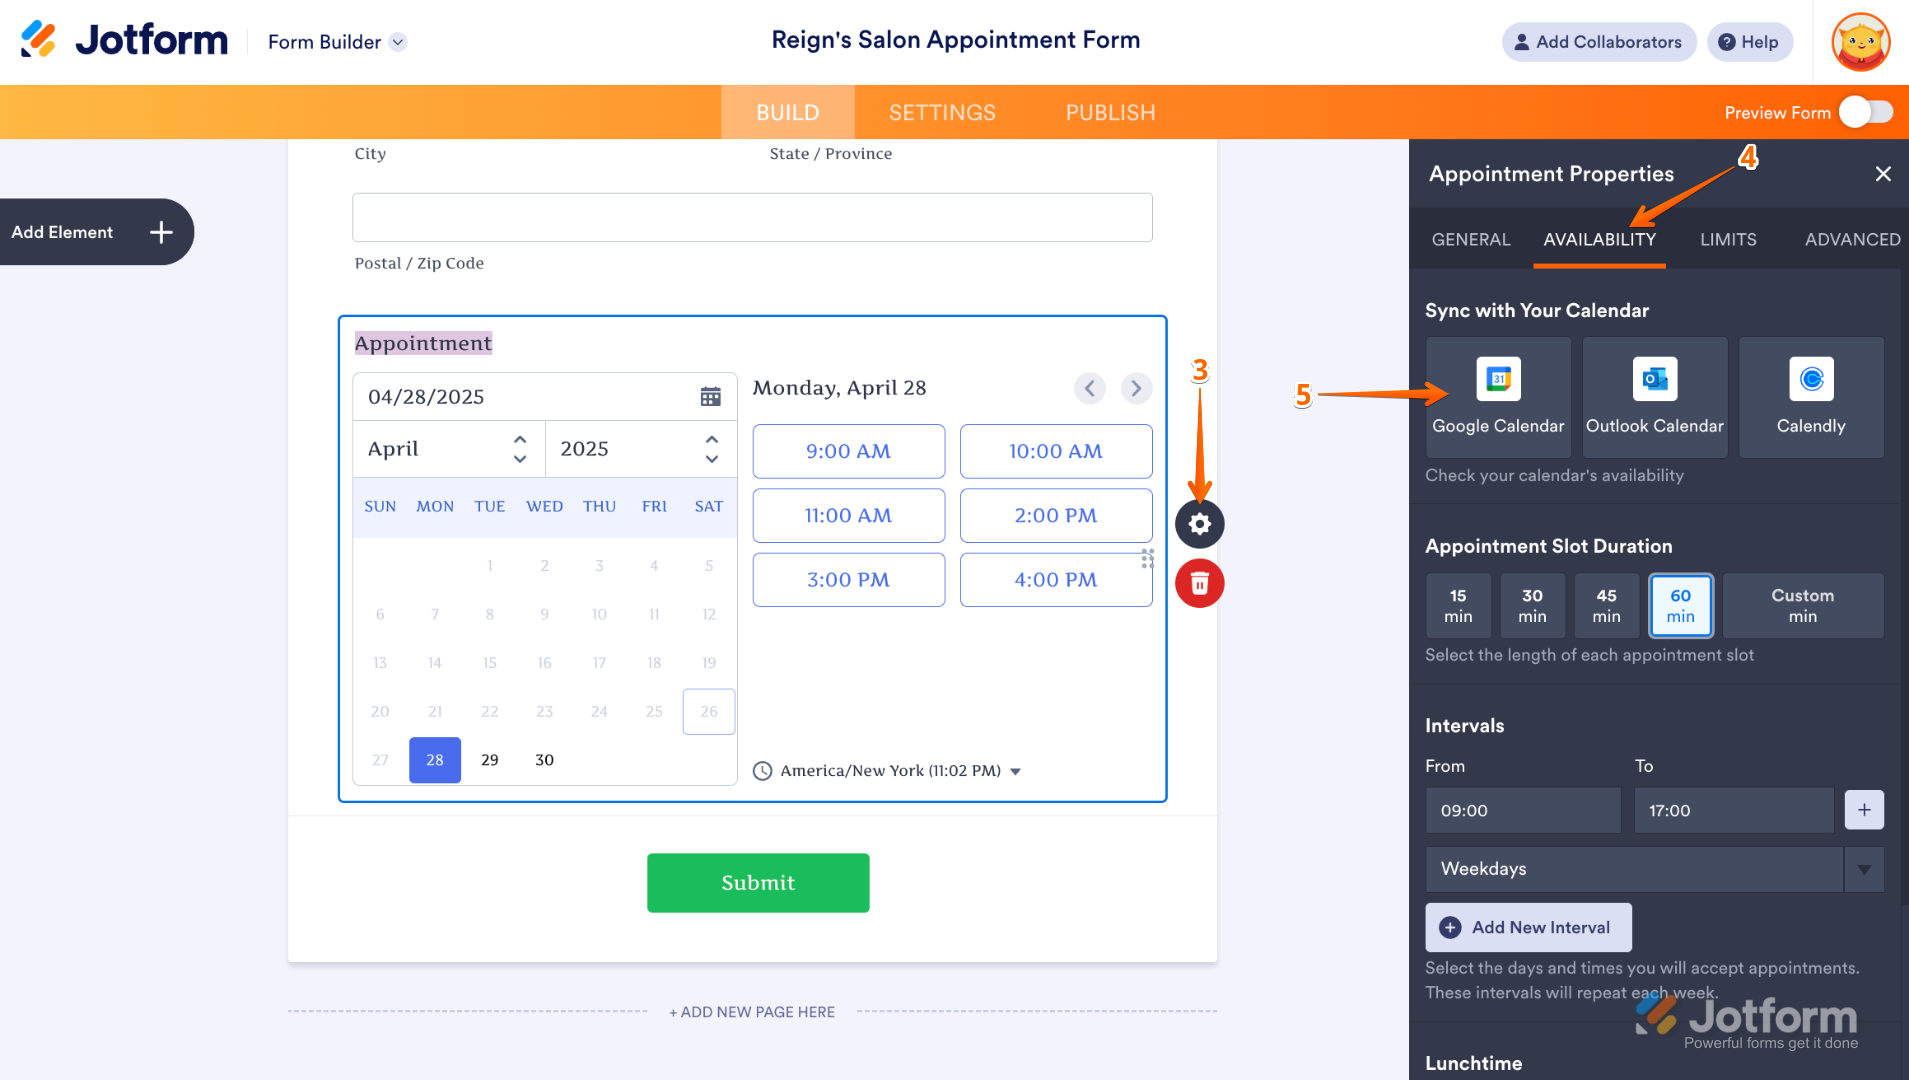
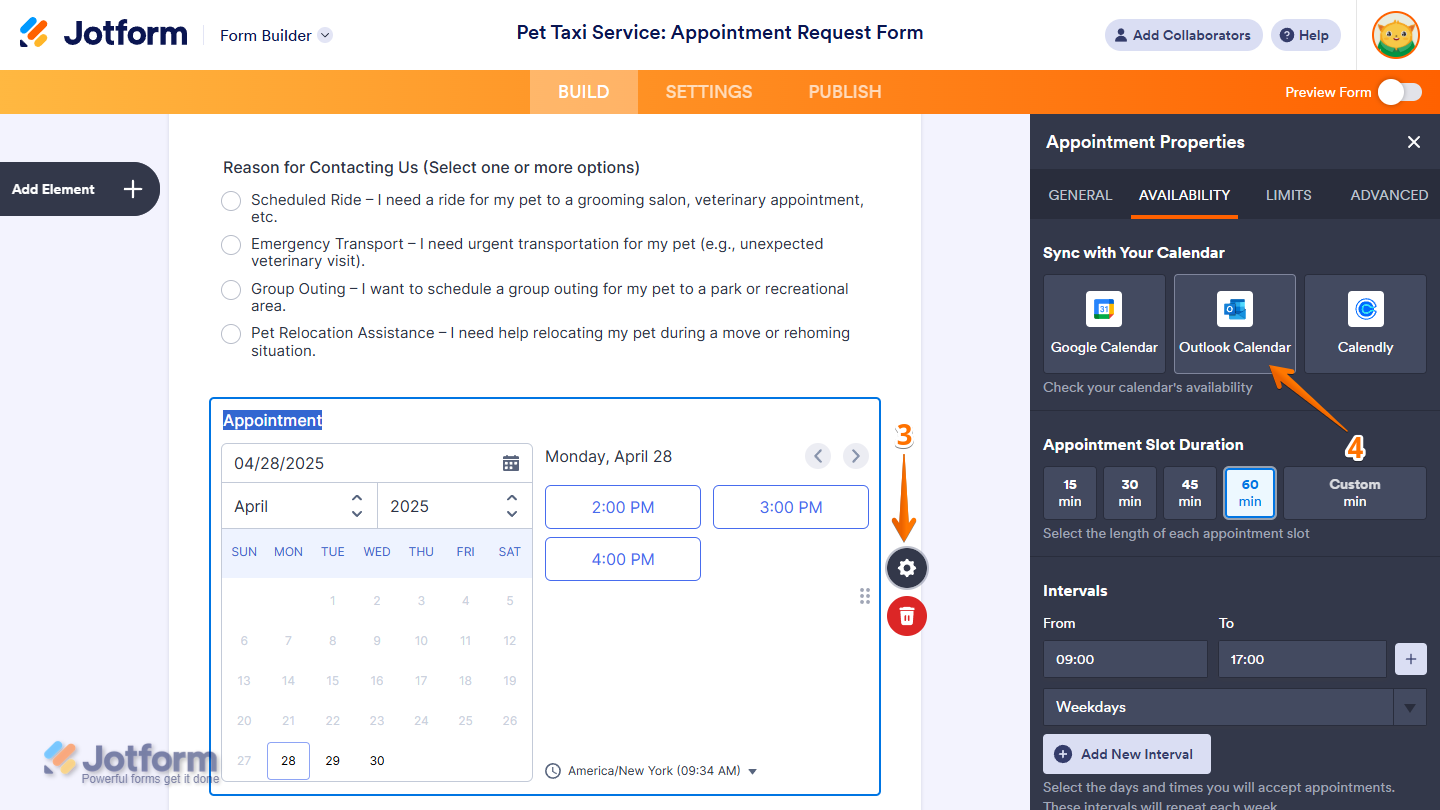
- Then, click on the Gear icon next to the Appointment field.
- In the menu on the right side of the page, click on the Availability tab.
- Now, in the Sync with Your Calendar section, select Google Calendar.
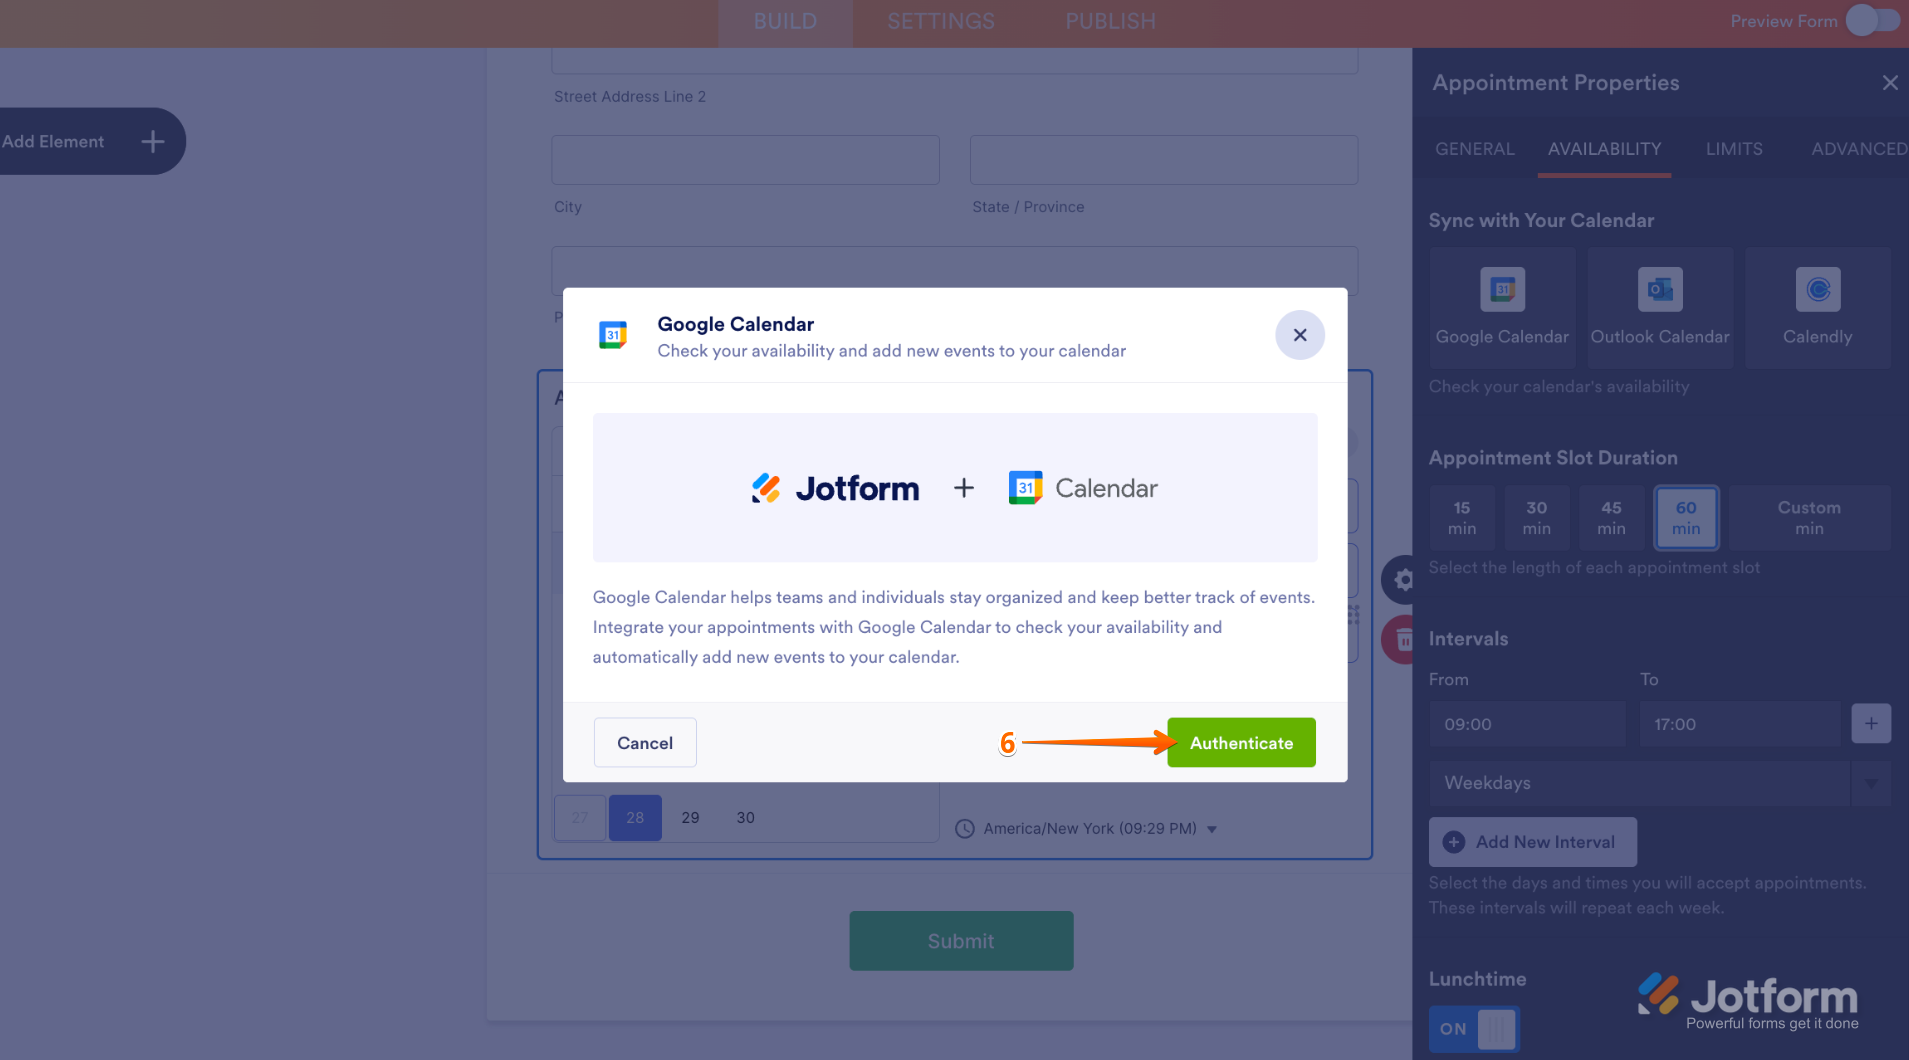
- In the Google Calendar window that comes up, click on Authenticate.
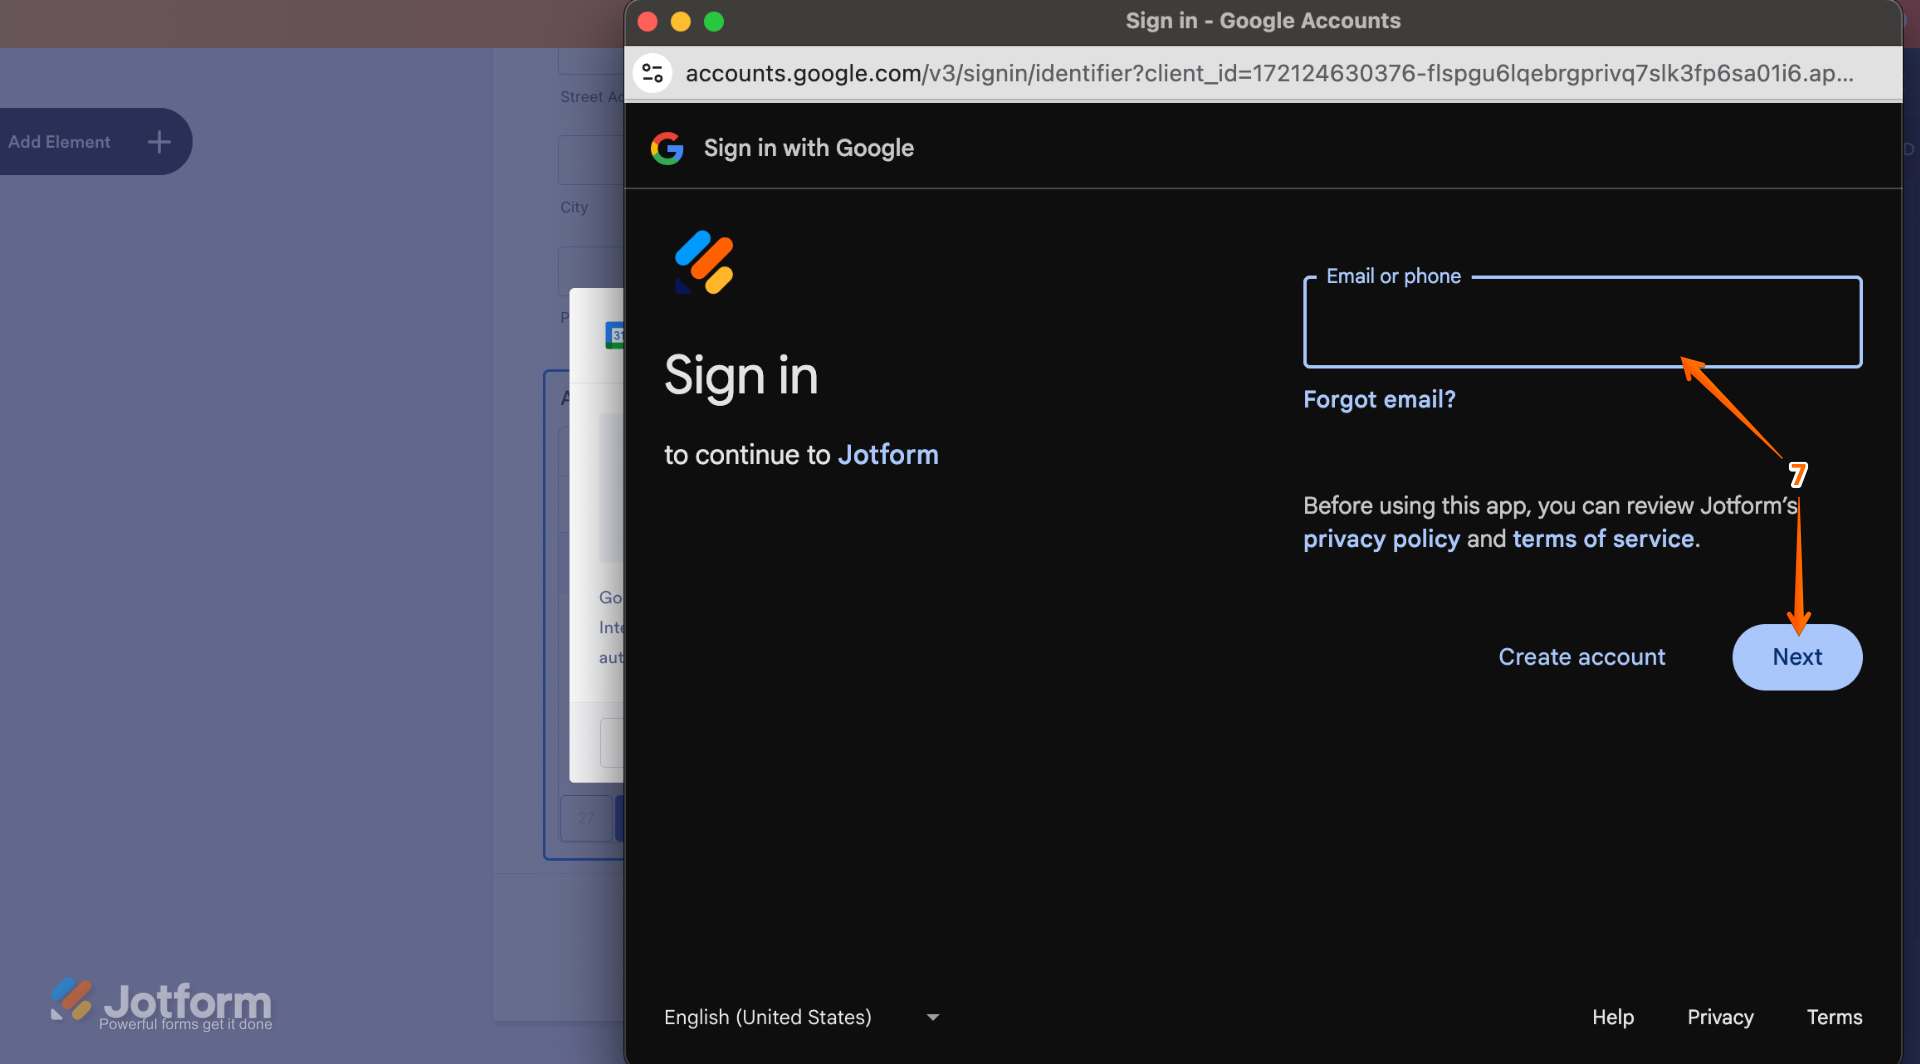
- In the window that pops up, enter the email address for your Google account, and then click on Next.
- Once logged in, tick the Checkbox next to Select All.
- Then, click on Continue.

- Then, in the Select Calendar Dropdown menu, choose the calendar you want to integrate.

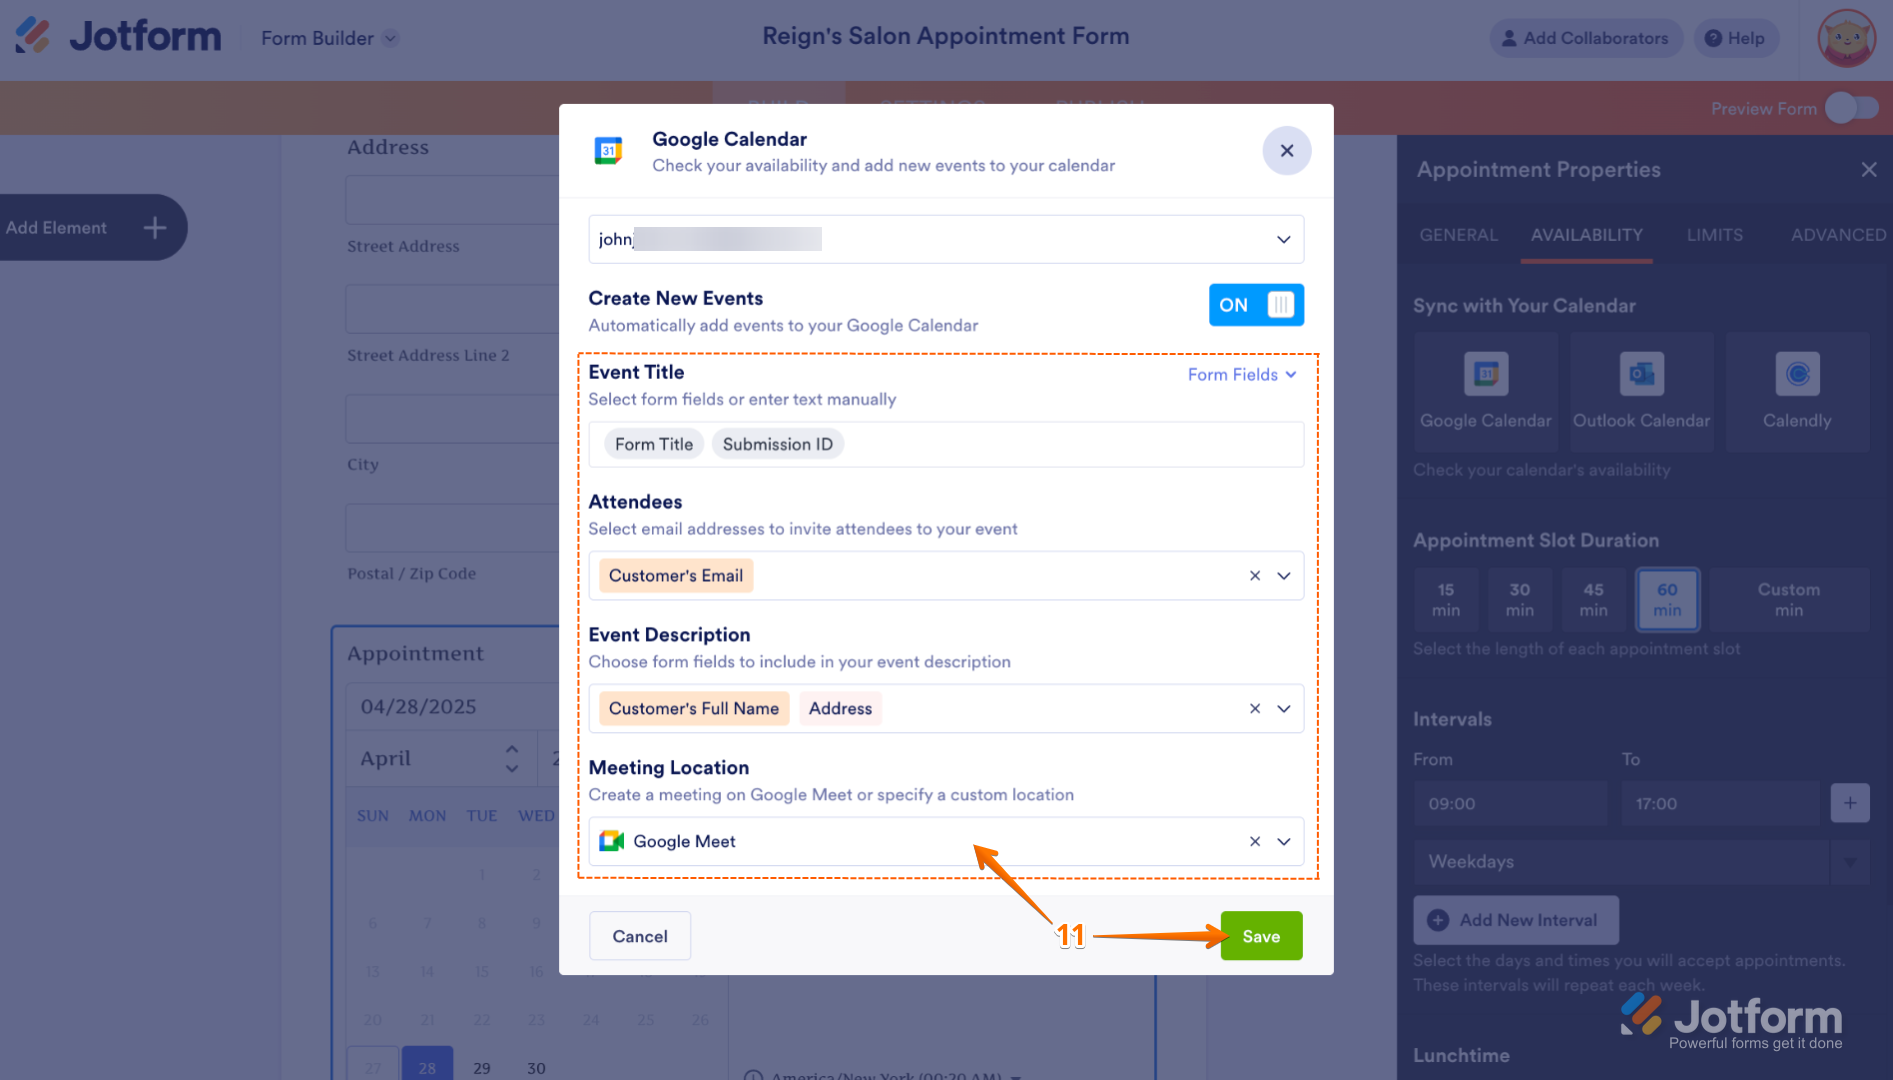
- Then set the Event Title, add the Attendees, write the Event Description, and enter the Meeting Location. Once you’re done, click on Save.
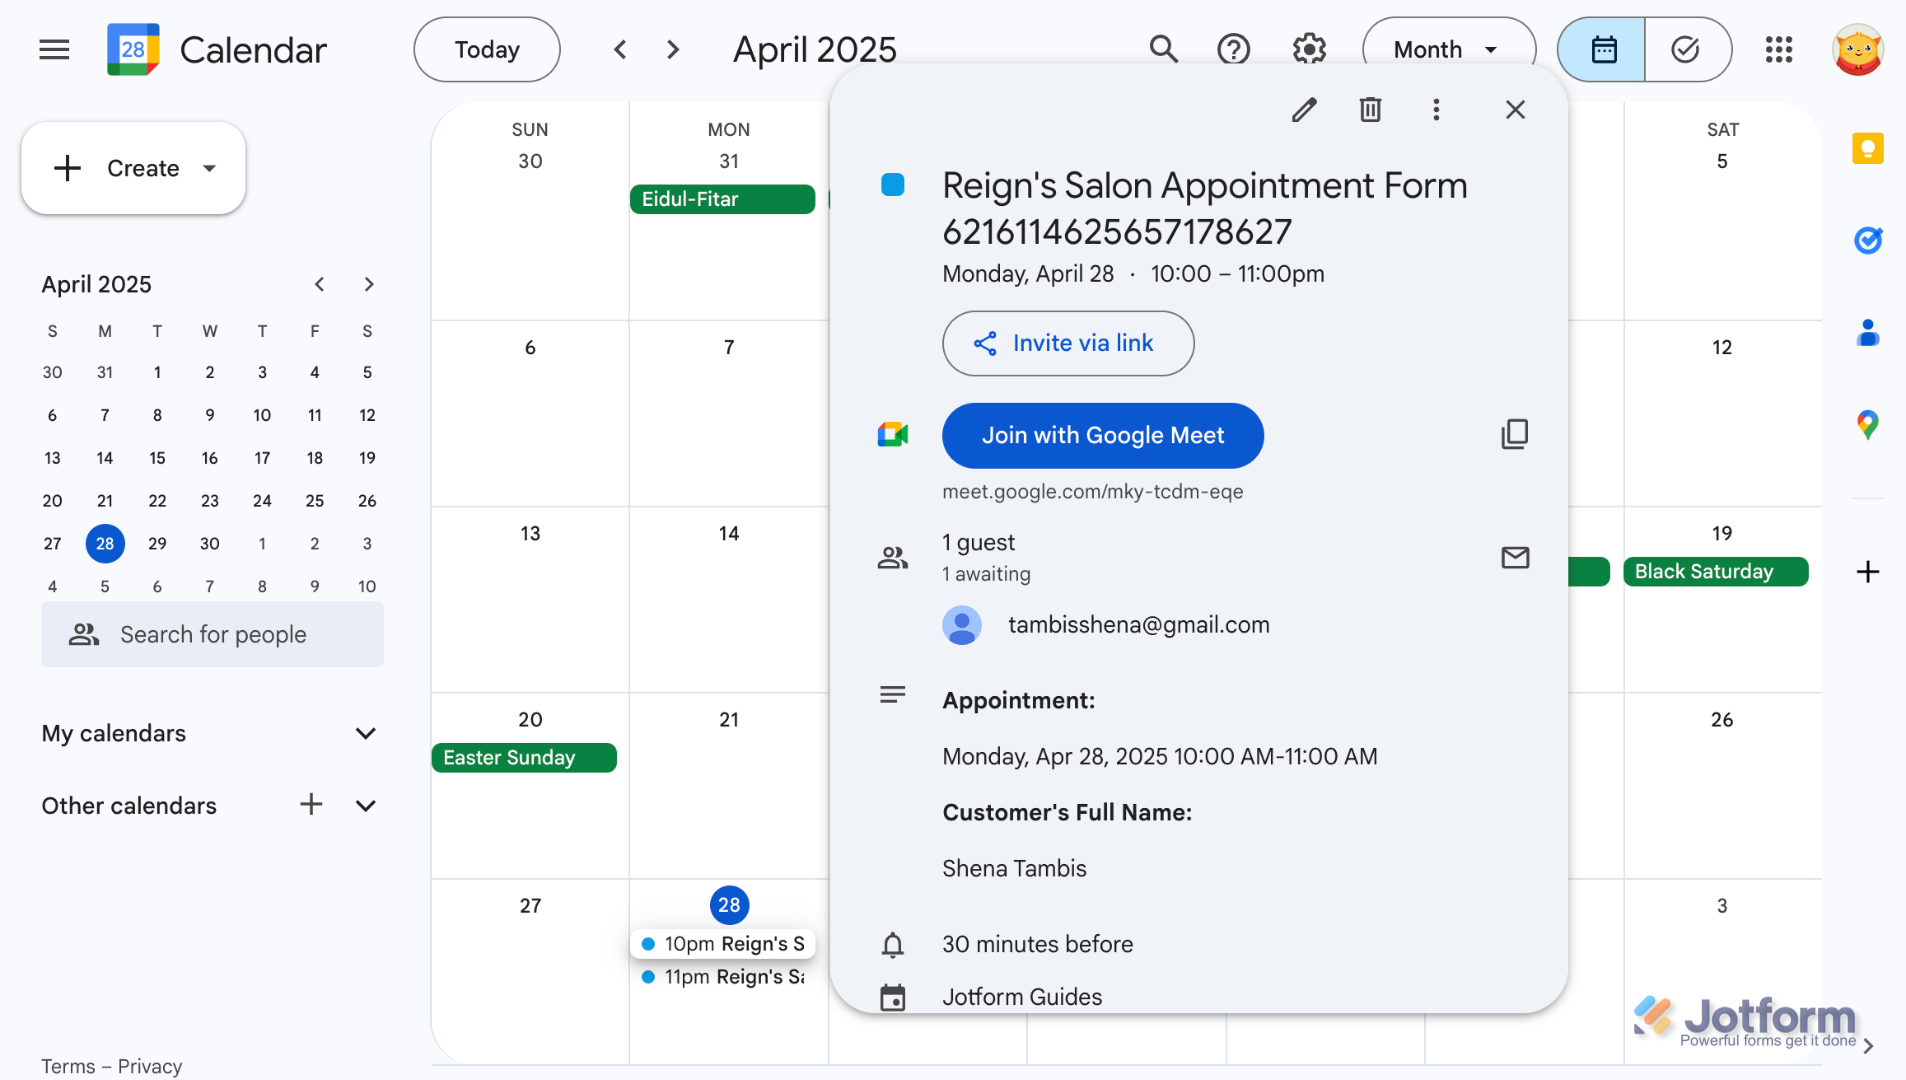
That’s it. Your form is now connected to Google Calendar, and an event will be created when someone submits it. Take a look at the screenshot below to see an example:
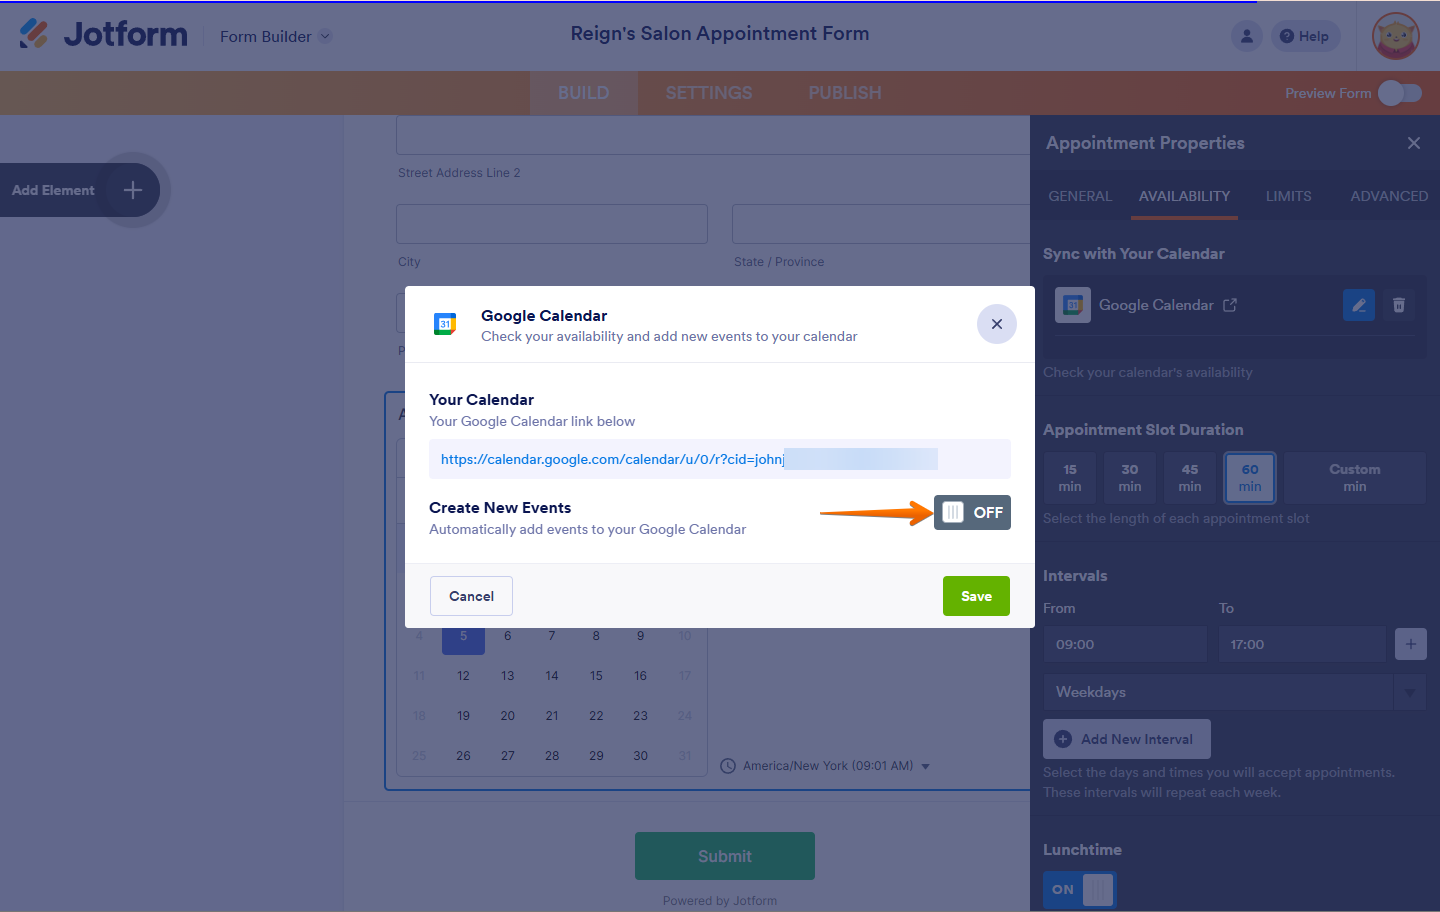
You can toggle Create New Events to the Off position if you want to temporarily stop sending events to your calendar. This will pause event creation without resetting or removing the integration, allowing you to enable it again later when needed.
Syncing Your Outlook Calendar with the Appointment Field
Whether you’re setting up a new form or updating an existing one, integrating it with Outlook Calendar is easy, and you can do it through the Appointment field in a few easy steps. Here’s how:
- In Form Builder, click on the Add Element menu on the left side of the page.
- Now, in the Form Elements menu, under the Basic tab, click on Appointment. Or, just drag and then drop it to where you want it to be on your form.
- Next, on the right side of the Appointment field, click on the Gear icon.
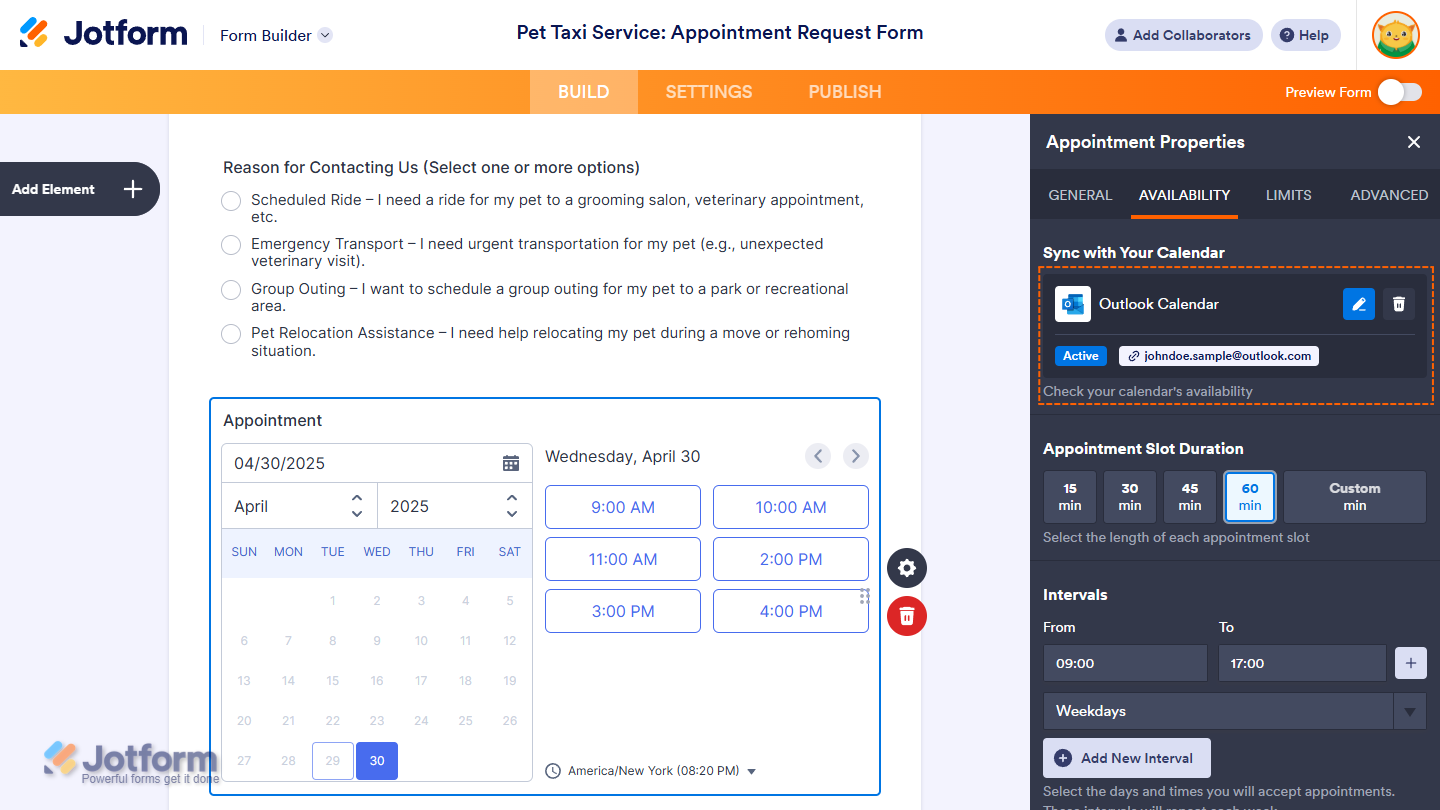
- In the Appointment Properties window, under the Availability tab, click on Outlook Calendar in the Sync with Your Calendar section.
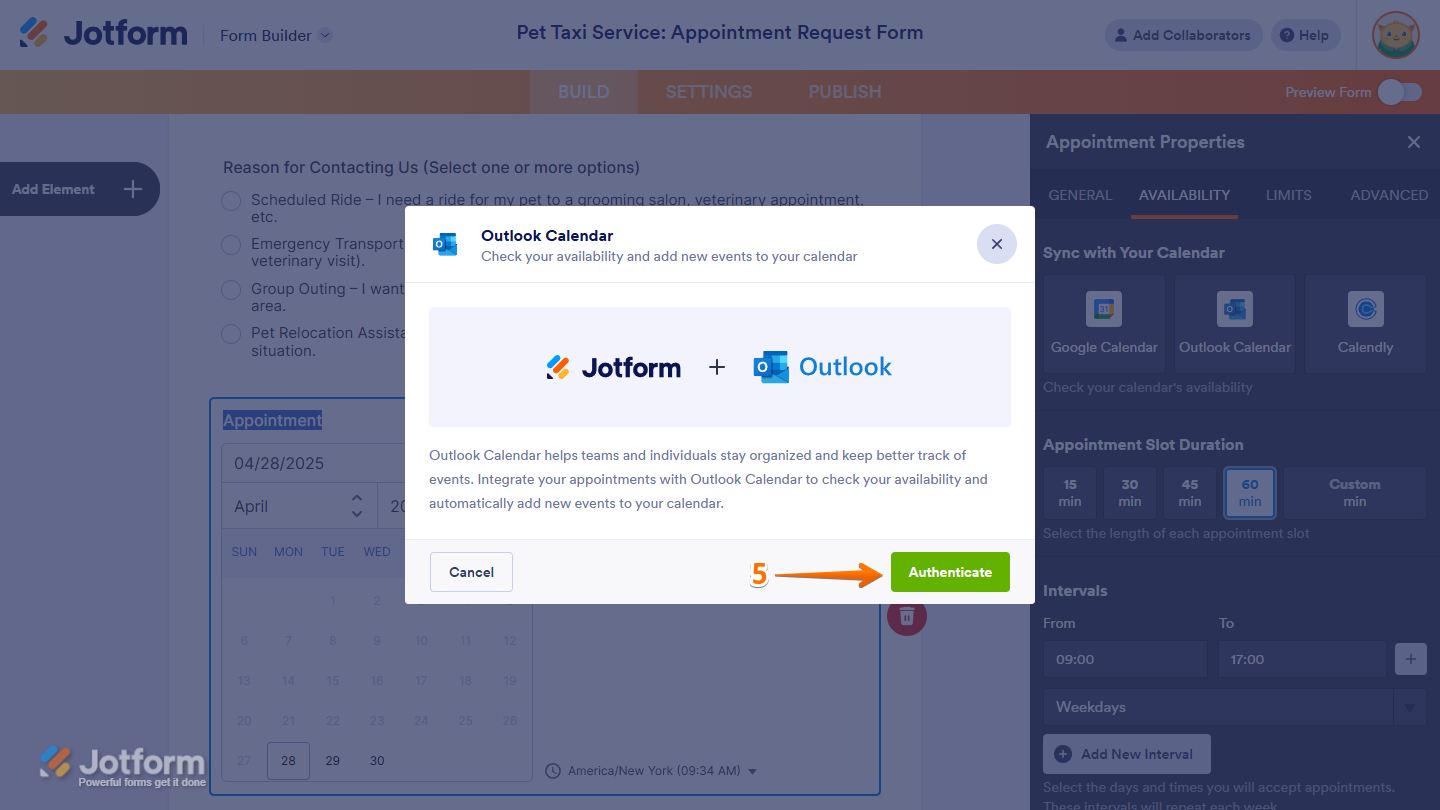
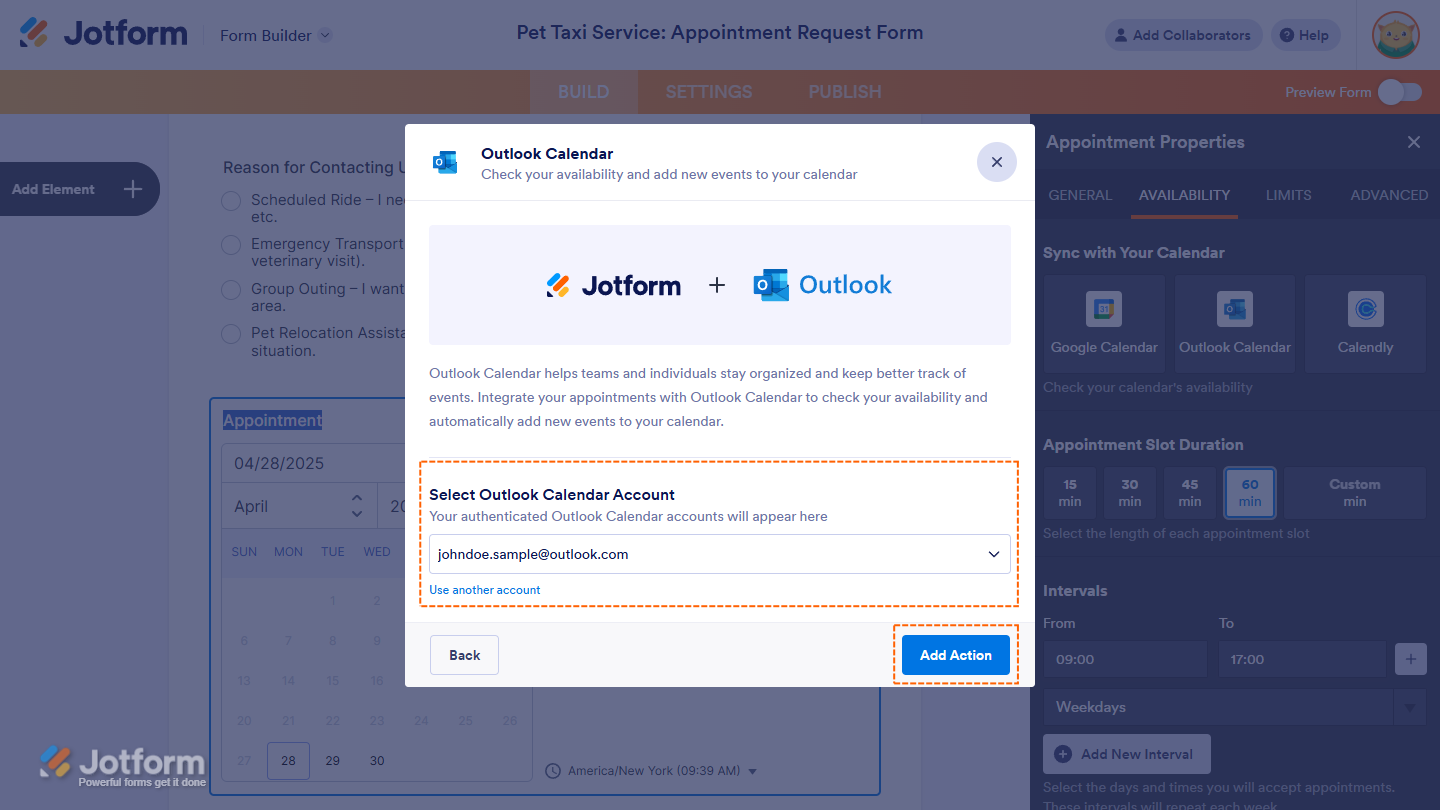
- Now, in the Outlook Calendar modal window, click on Authenticate at the bottom. And then, in the pop-up window, log in and authorize access for the integration to your Microsoft account.
If there is a saved Microsoft account you’ve integrated any of your forms with before, you can choose its email address from the dropdown and click on the Add Action button on the right to use it. Or, you can also click on Use Another Account below the dropdown to log in and authorize access for the integration to a different Microsoft account.
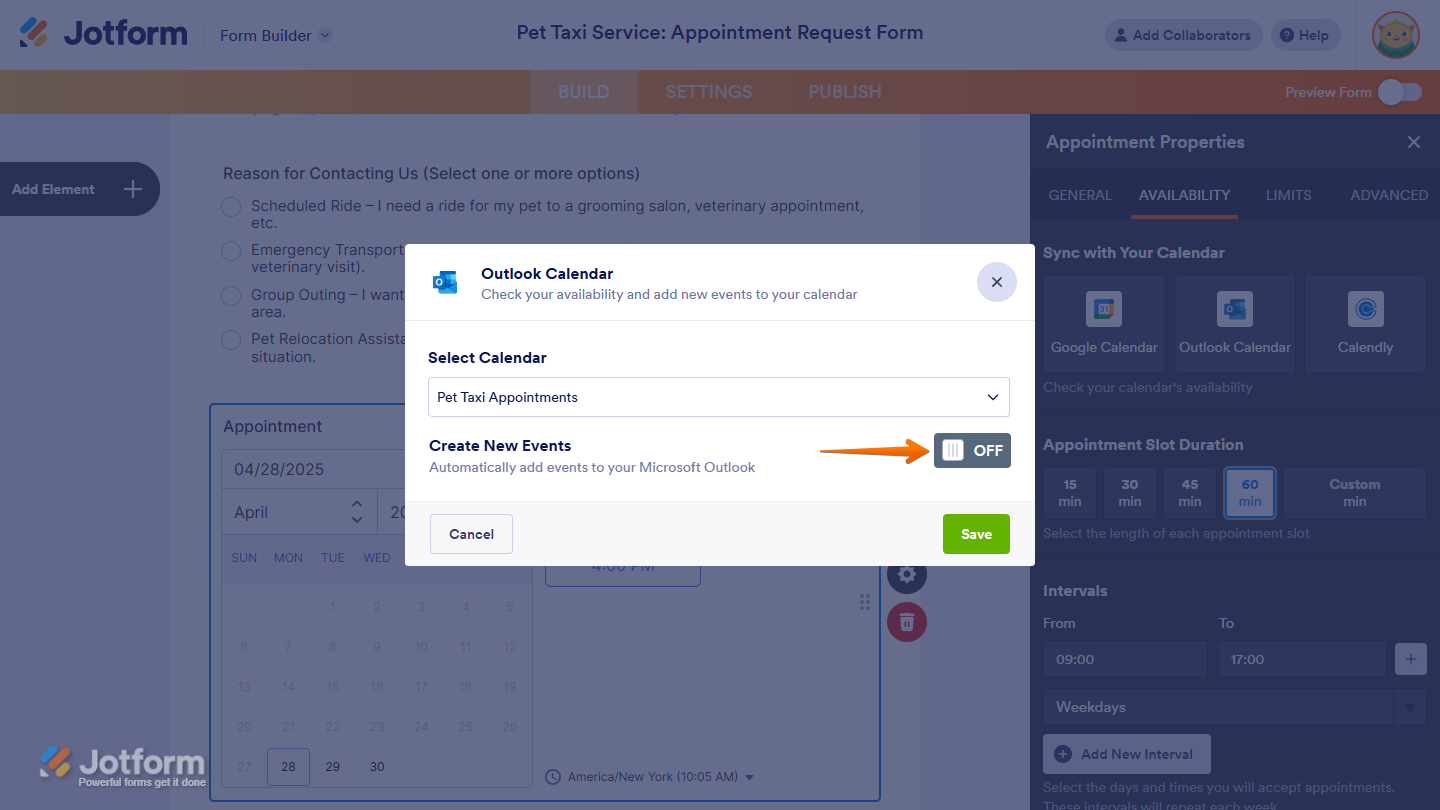
- Next, click on the Select Calendar Dropdown menu to select a calendar and configure the following by entering custom event details and/or matching them to supported form fields:
- Event Title — Set the title that will appear for the event in Outlook Calendar. You can enter a custom title or insert dynamic values from your form by selecting supported form fields such as Full Name, Email, Address, Phone, Date Picker, etc., from the dropdown menu. These fields reflect user selections or answers. You can also insert global fields like Form ID, Form Title, Submission ID, and Submission Date.
- Attendees — Select one or more email fields from your form to send event invitations. Only email fields can be selected. The Event Invitation email will be sent to the email address entered in the selected Email field(s).
- Event Description — Add event details to appear in the event’s description box in Outlook Calendar. Select supported form fields, such as Long Text, Dropdown, Single Choice, Multiple Choice, etc., from the dropdown menu to automatically populate the description with user selections or answers submitted through the form. You can select multiple fields.
- Meeting Location — Select from one of the following options to set the meeting location:
- Microsoft Teams Meeting — Sets Microsoft Teams as the meeting location to indicate the meeting will take place over Microsoft Teams. This is only available when the connected Outlook Calendar is linked to a Microsoft account with Microsoft Teams activated.
- Skype — Sets Skype as the meeting location if Microsoft Teams is not active on the Microsoft account linked to the connected Outlook Calendar.
- Select From Form Fields — When you choose this option, another dropdown will appear where you can select a supported form field, such as Short Text, Long Text, Phone, Address, and Address subfields (street address, city, state, postal code). The selected field’s value will then populate the meeting location for a more dynamic setup.
- Custom — When you select this option, an input box will appear where you can manually enter a preferred location such as an address, business name, or meeting place.
- Then, once everything is set, click on Save.

That’s it! You’ve successfully integrated your form with Microsoft Outlook Calendar.
Now, every time a respondent books an appointment through your form, the details will automatically sync with your Outlook Calendar, ensuring everything stays aligned without manual updates.

You can toggle Create New Events to the Off position if you want to temporarily stop sending events to your calendar. This will pause event creation without resetting or removing the integration, allowing you to enable it again later when needed.
Syncing Your Calendly with the Appointment Field
You can now integrate Calendly directly through the Appointment field on your form, so users can book time with you after submitting it. Here’s how to do it:
- In Form Builder, click on the Add Element menu on the left side of the page.
- Now, in the Form Elements menu, under the Basic tab, click on Appointment to add it to your form.
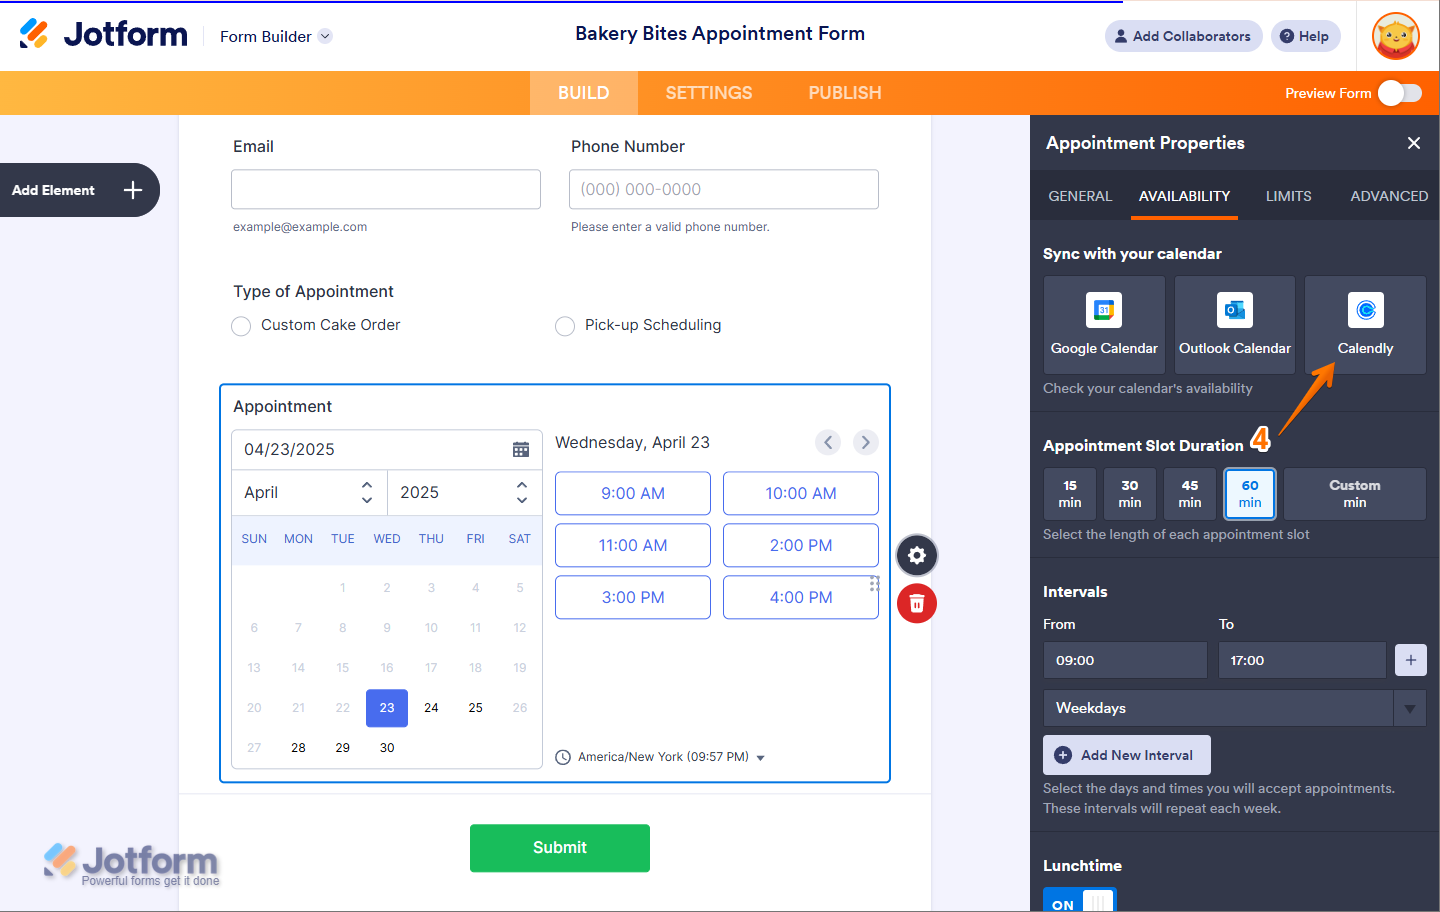
- Then, click on the Gear Icon.
- Now, in the Appointment Properties window that opens on the right side of the page, under the Availability Tab, click on Calendly.
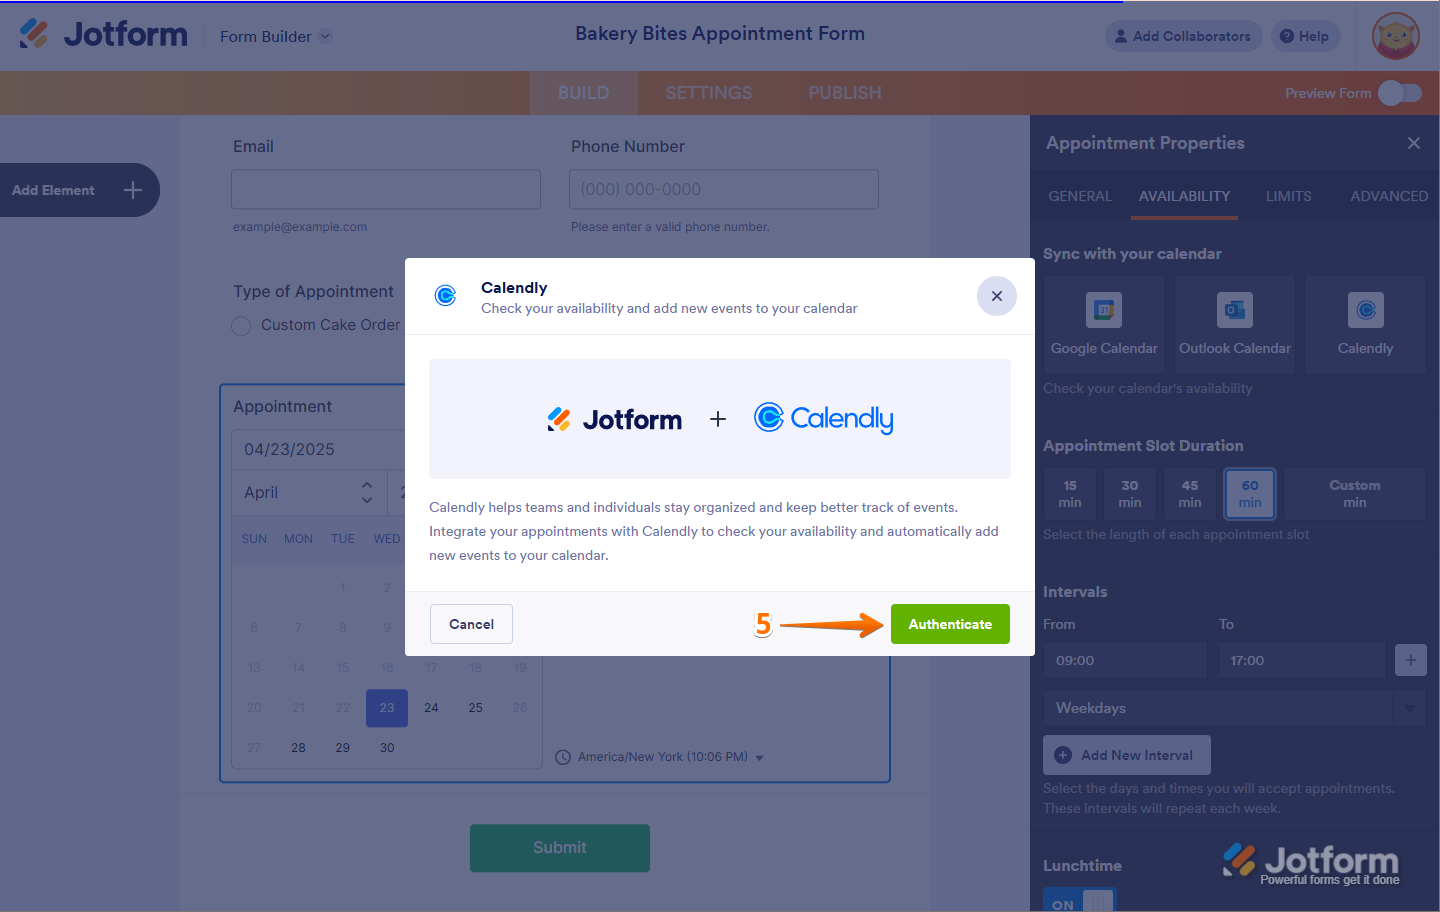
- In the window that opens, click on Authenticate, and then connect your Calendly Account.
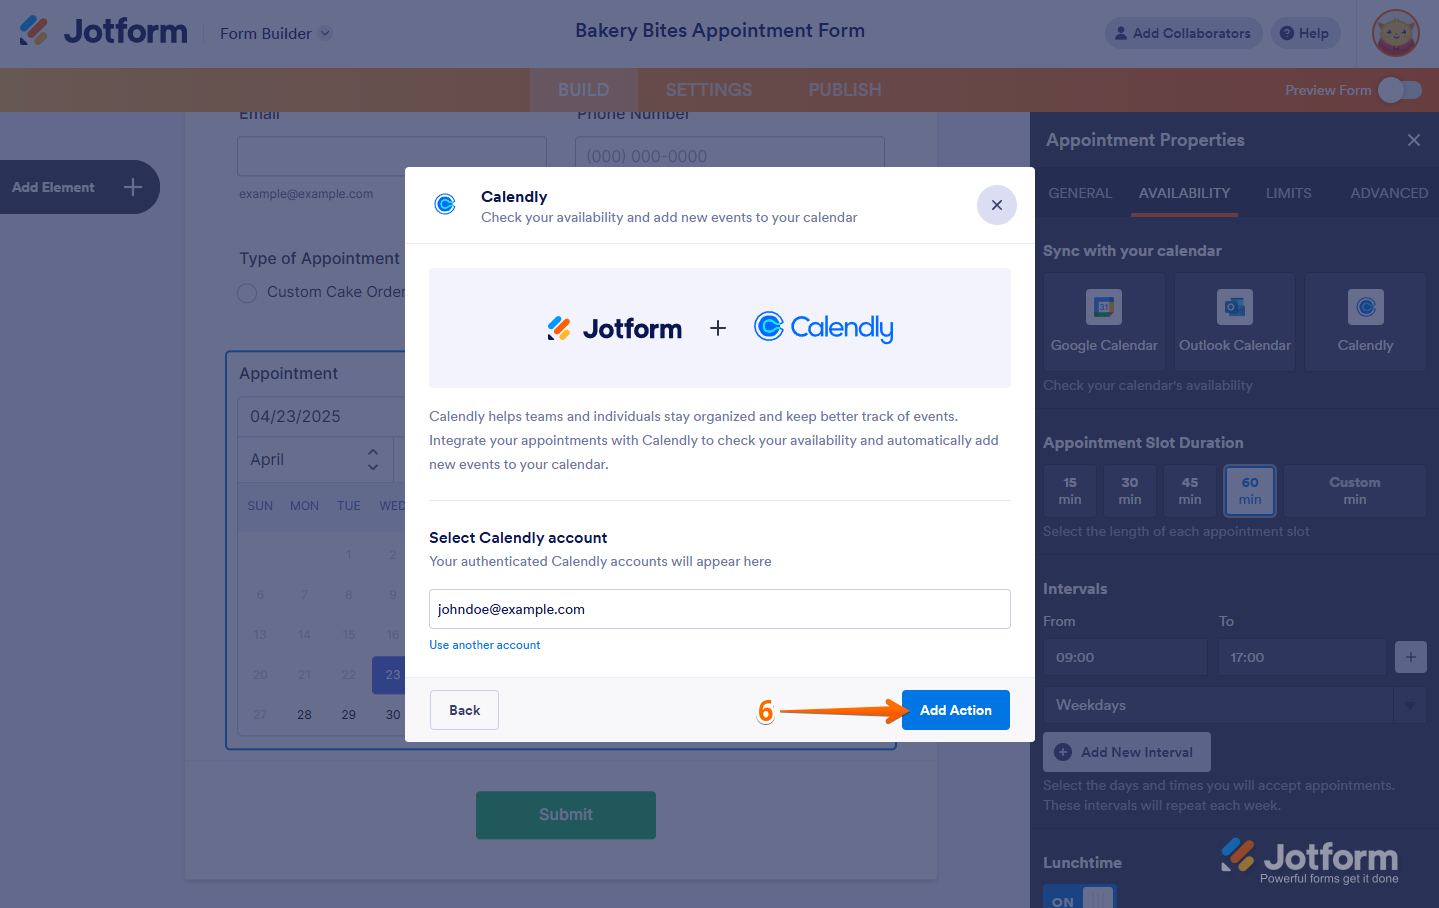
- Then click on Add Action.
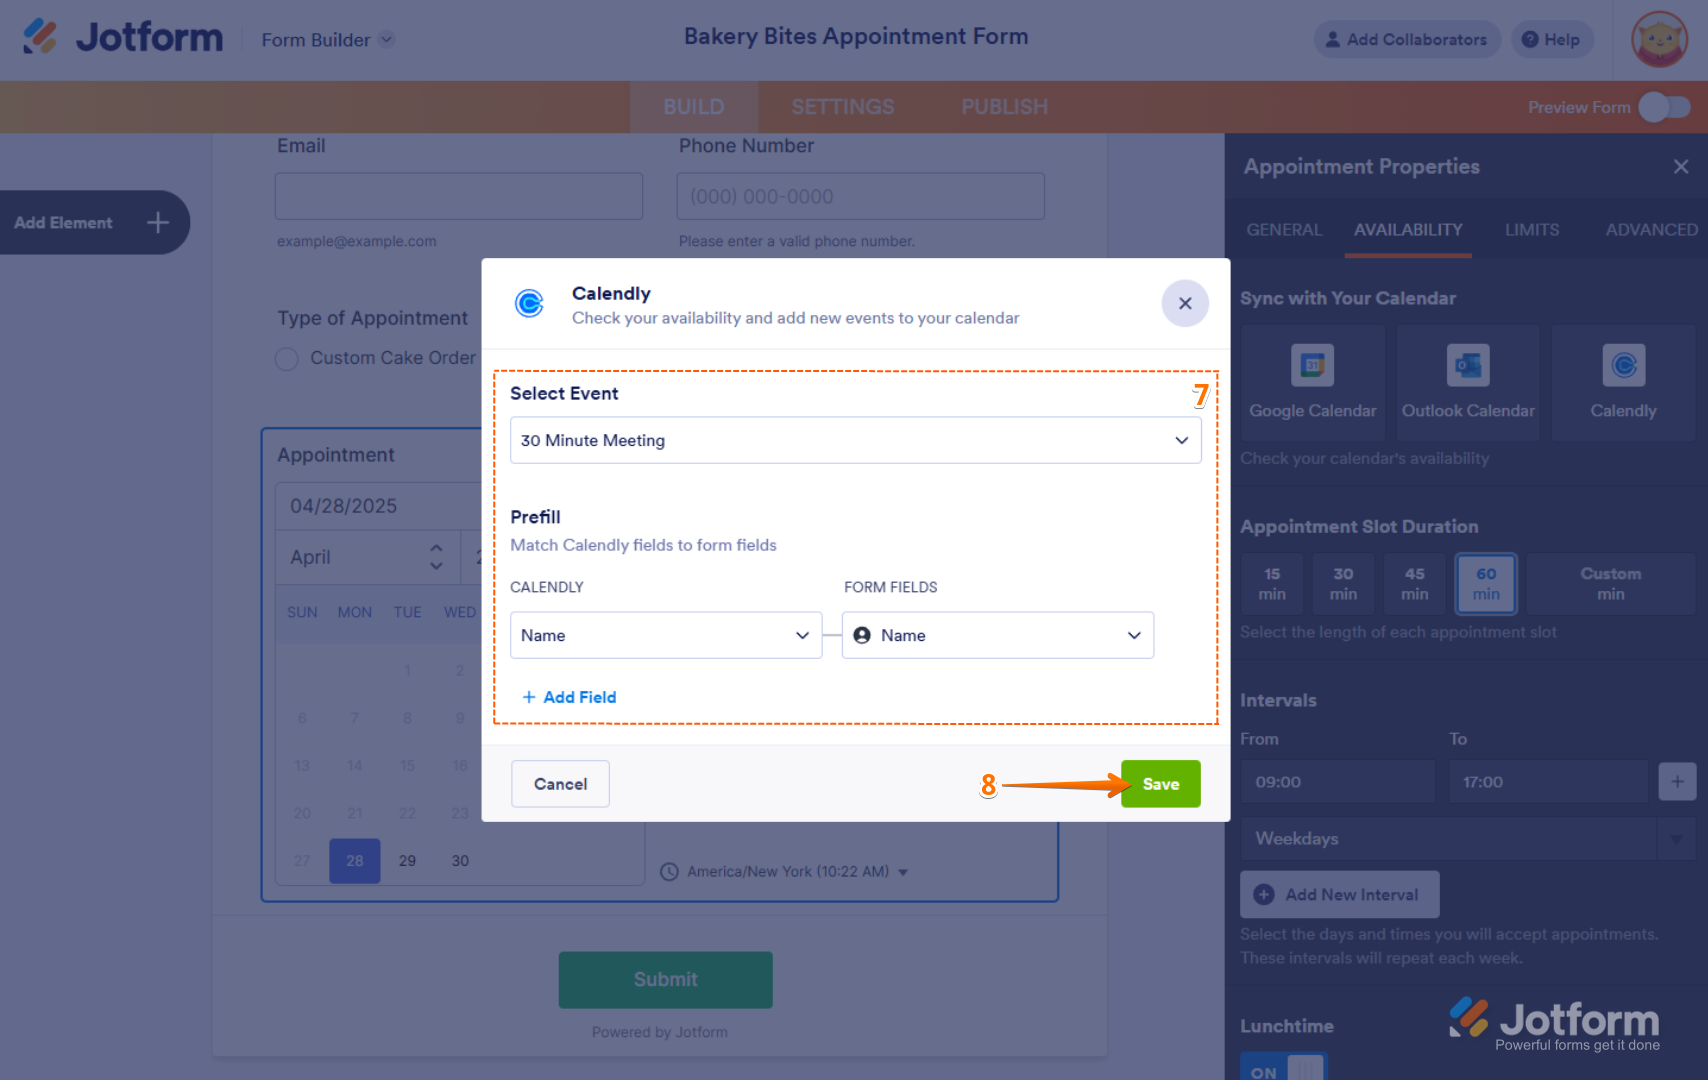
- Next, set up the following things:
- Select Event — Choose a calendar event in the dropdown menu.
- Prefill — Match your Calendly fields to your form fields to automatically prefill information into Calendly.
- Finally, click on Save.
You’re all set! You’ve now successfully integrated Calendly through your Appointment field.
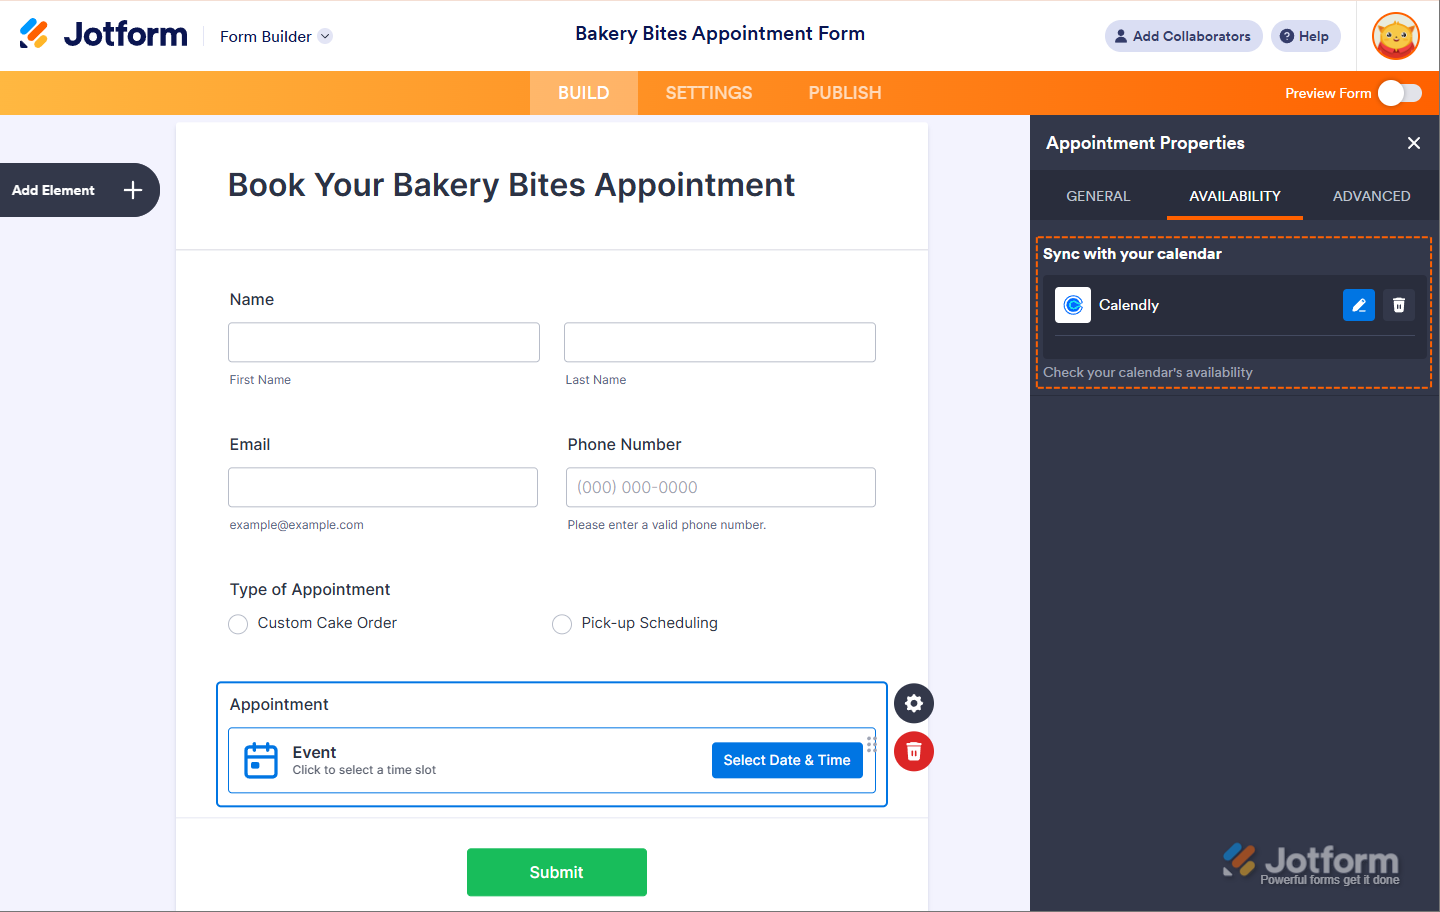
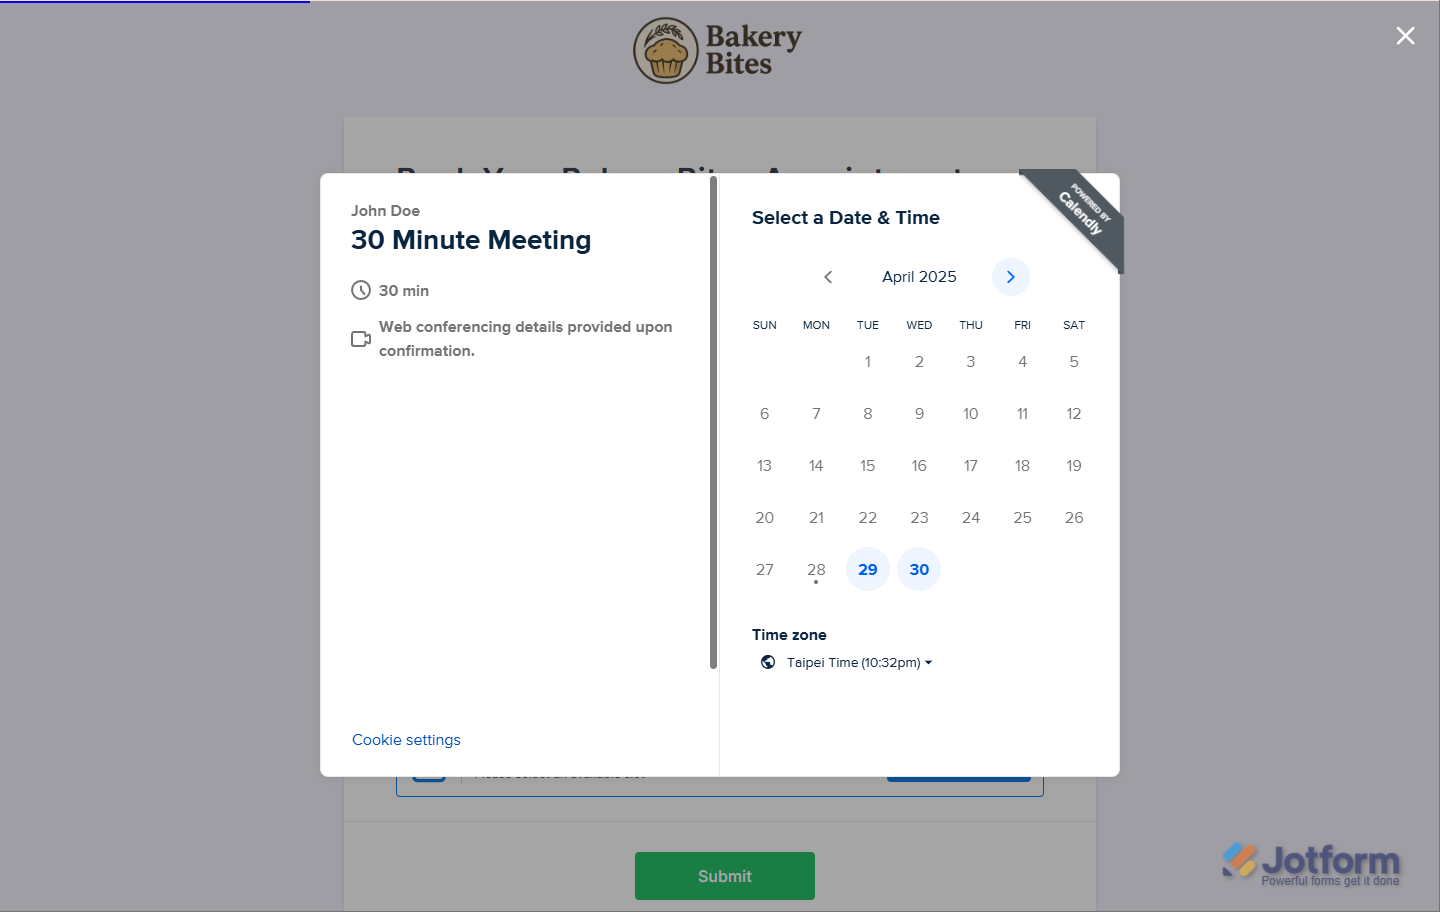
Once users click the Select Date and Time field, Calendly’s event calendar will open, allowing them to choose their preferred date and time slot.
Note
Once Calendly is integrated, the Appointment field properties will no longer be visible. All scheduling configurations must be managed directly in Calendly.

Send Comment: