With Jotform’s Presentation Agent, you can easily edit generated presentations so they match your brand and message. Whether you’re swapping out images, updating color themes, or fine-tuning the text, you can put your own spin on the presentation to better suit your needs. This is especially handy when you’re working with AI-generated content that just needs a personal touch before sharing it with clients, teams, or audiences.
Instead of building from scratch, you get a smart starting point that’s easy to customize. It’s perfect for marketers, business owners, educators—anyone who needs great-looking slides without spending hours designing them. Whether you’re refining a sales pitch, updating a product demo, or tailoring a training deck, Presentation Agent lets you shape the presentation exactly how you want it.
Note
You can edit the content of slides that were generated from a topic or outline. To learn more about creating presentations this way, check out our guide on How to Generate Your Presentation with AI.
When editing your generated presentation, you can do the following things:
- Update Individual Slide Elements
- Change the Slide Layout
- Regenerate Slides
- Edit Slide Narration Script
- Add New Slides
- Delete Slides
Updating Individual Slide Elements
When you want to fine-tune your presentation—whether it’s changing an image, title, subtitle, or description—you can do it in just a few easy steps. Here’s how to get started:
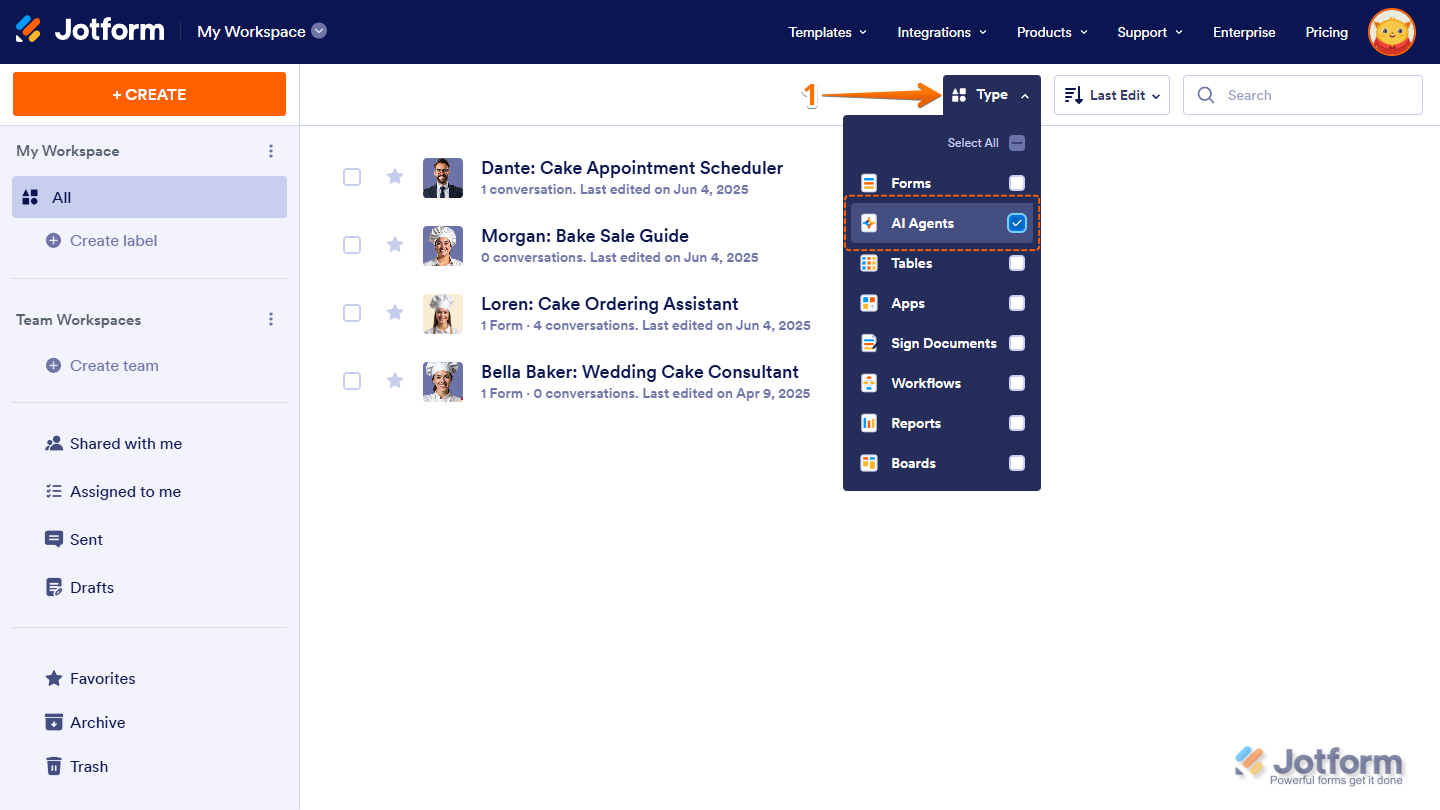
- On your My Workspace page, click on Type at the top and in the Dropdown menu that opens, uncheck the boxes next to all the assets except AI Agents, so only they’ll be shown on the page.
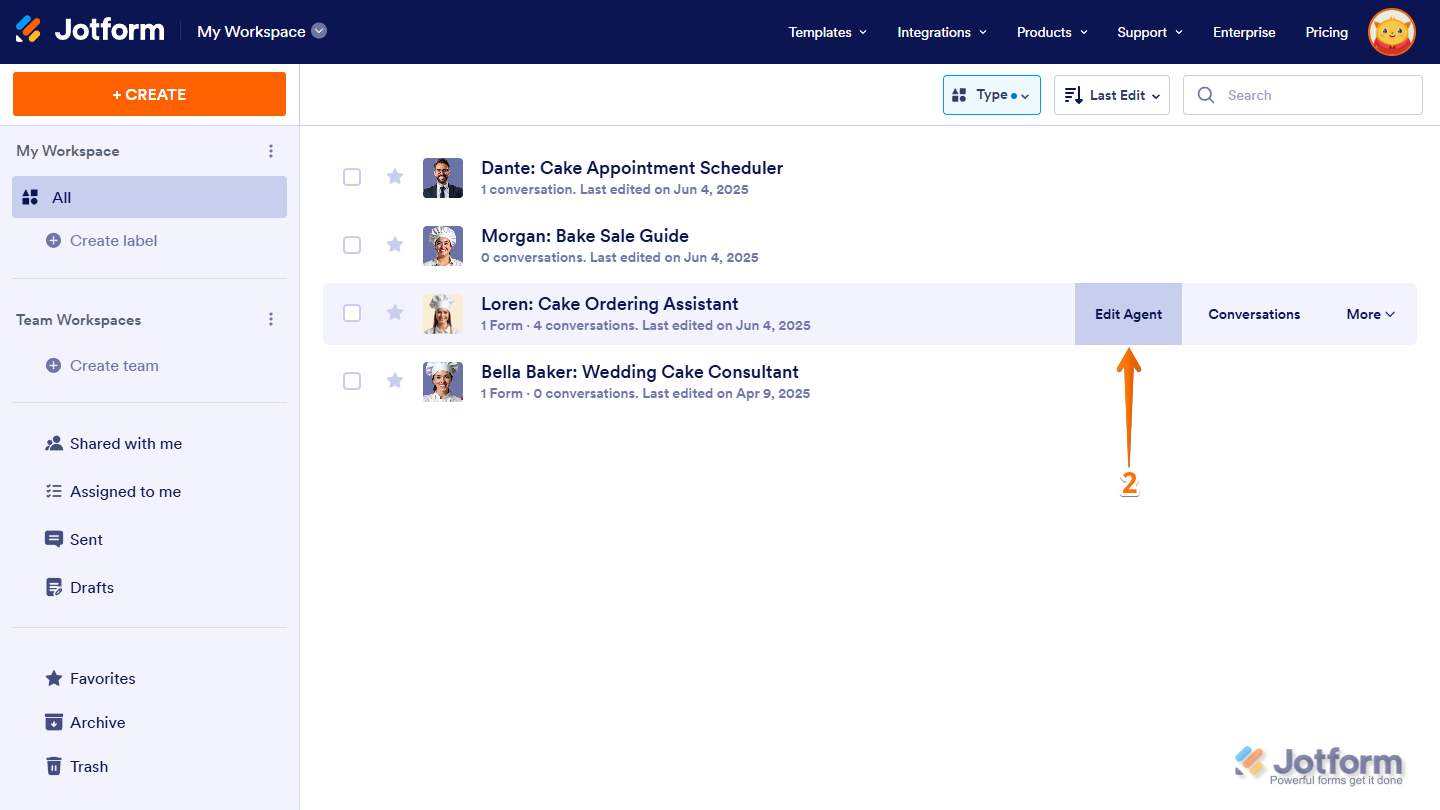
- Hover your mouse over the AI Agent with the generated presentation that you want to edit, and then click on Edit Agent on the right side of the page.
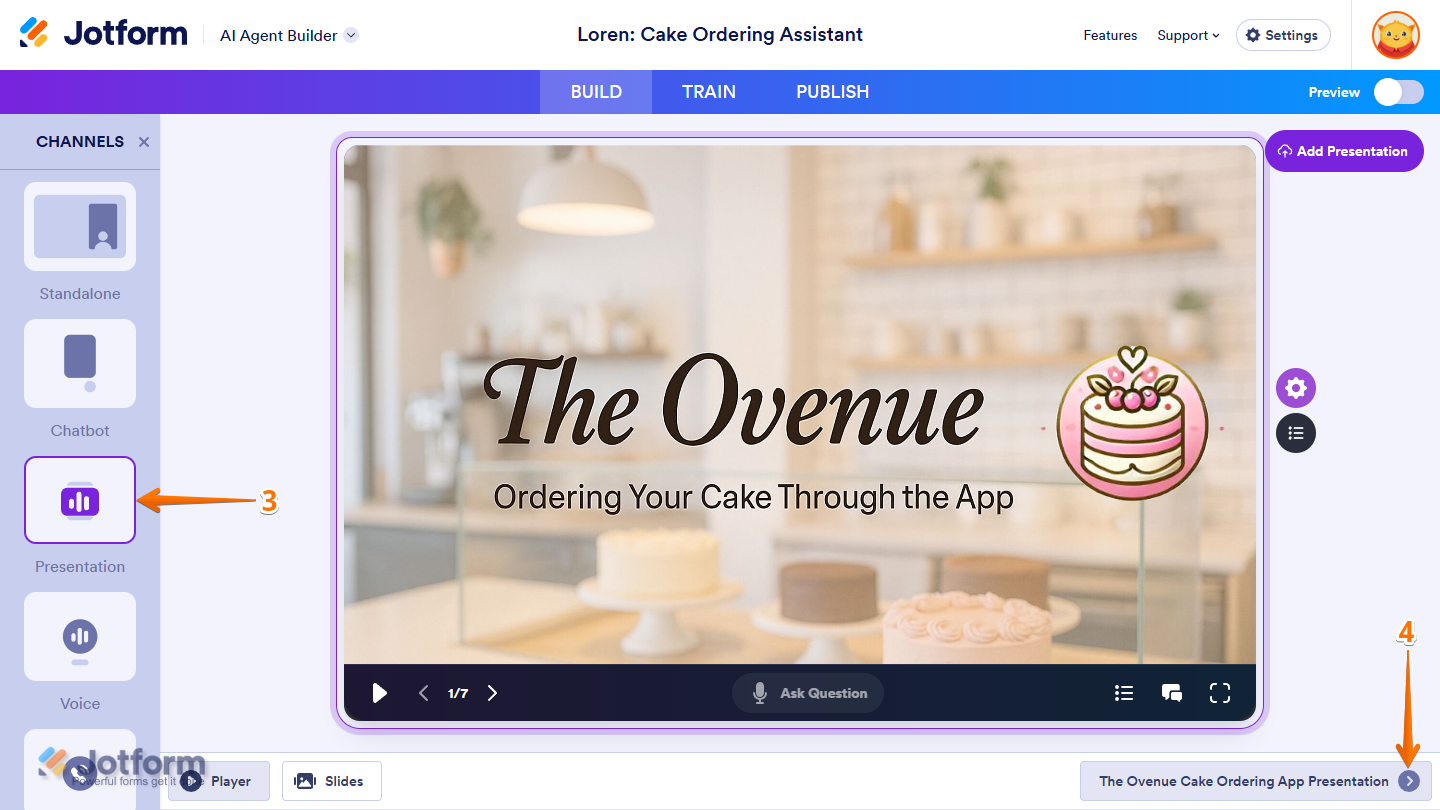
- In AI Agent Builder, in the Channels menu on the left side of the page, click on Presentation.
- Then, on the bottom-right side of Presentation Agent Builder, click on the Rightward Arrow icon.
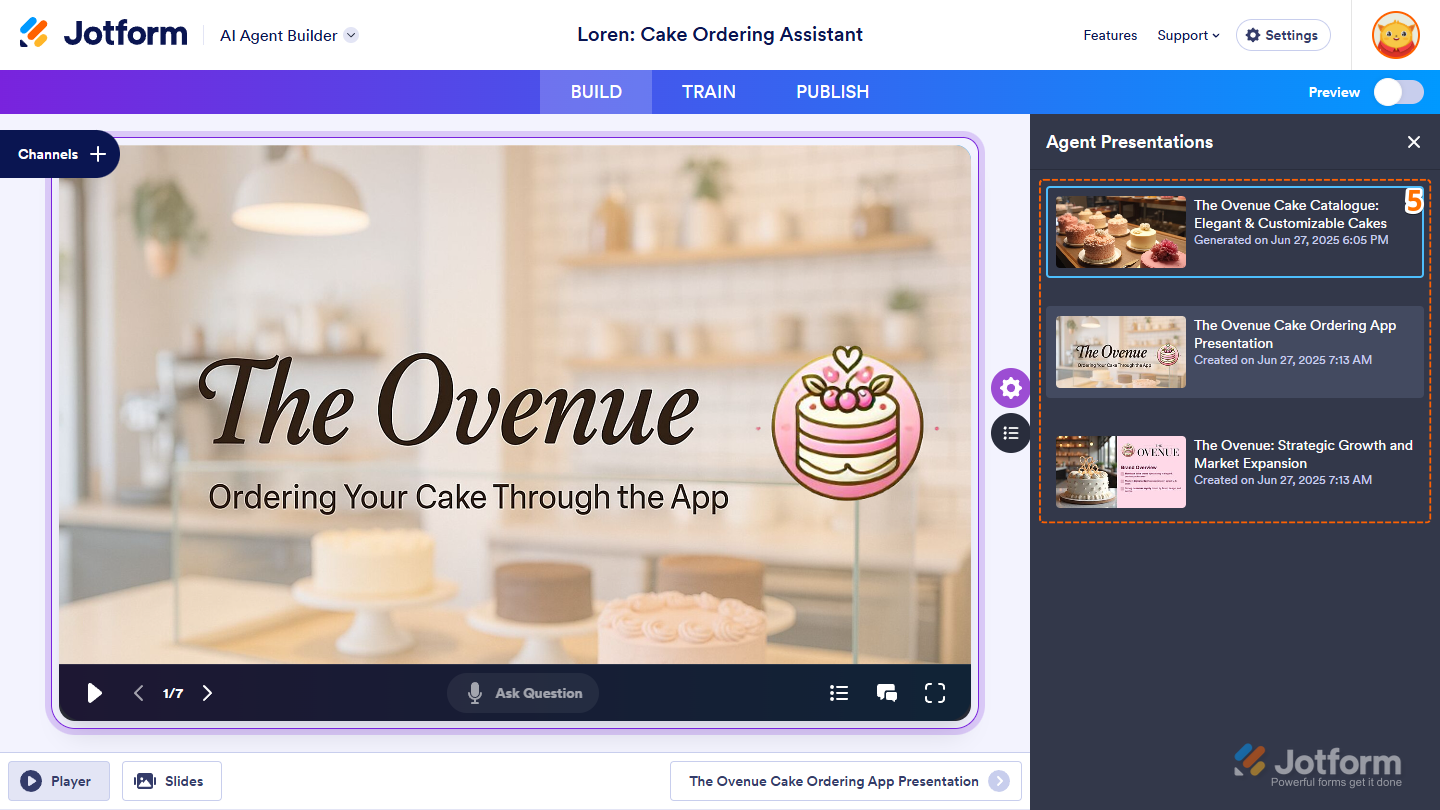
- Now, in the Agent Presentations menu that opens on the right side of the page, select a generated presentation.
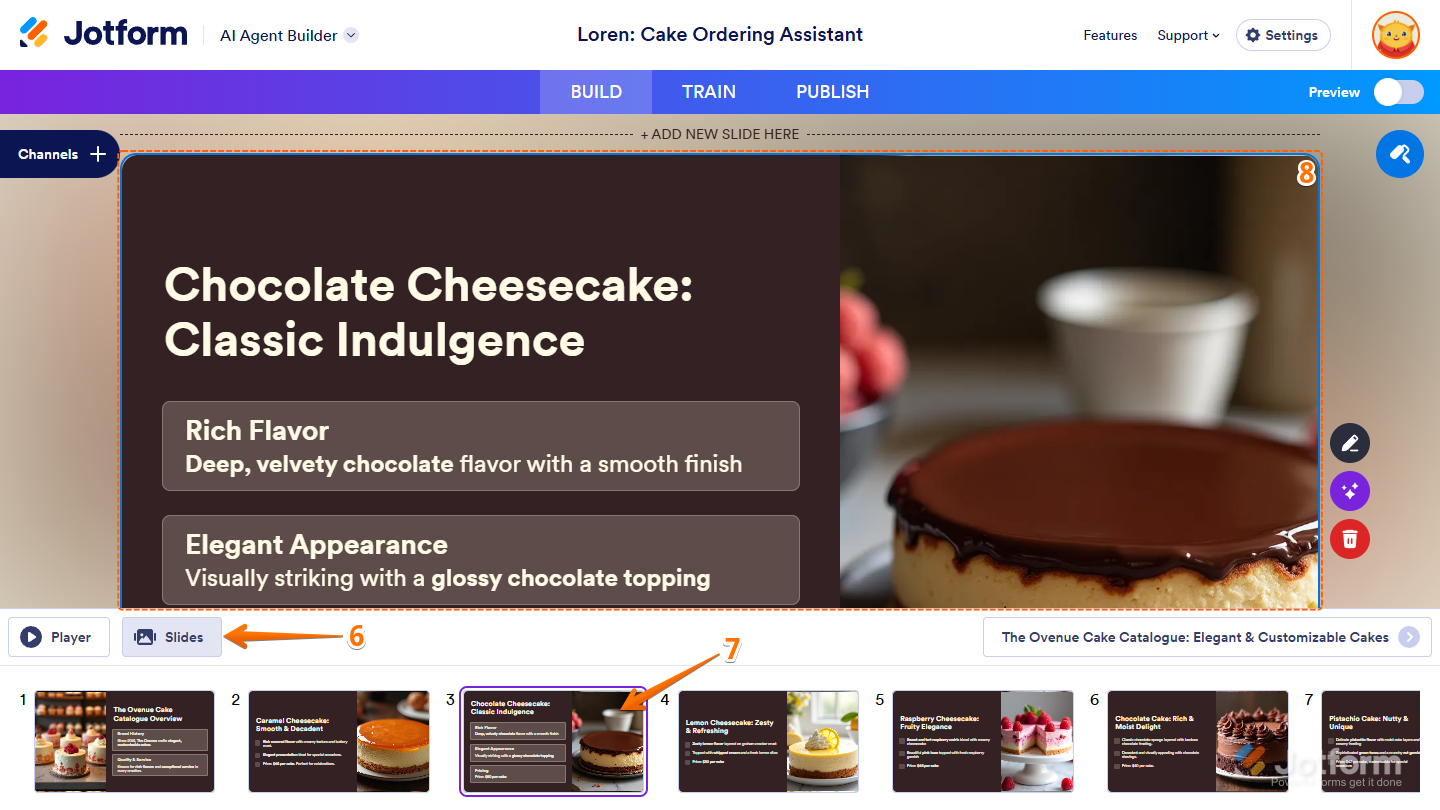
- Next, click on the Slides tab at the bottom of the page.
- Then, in the Slide Filmstrip that opens below it, click on a Slide Thumbnail.
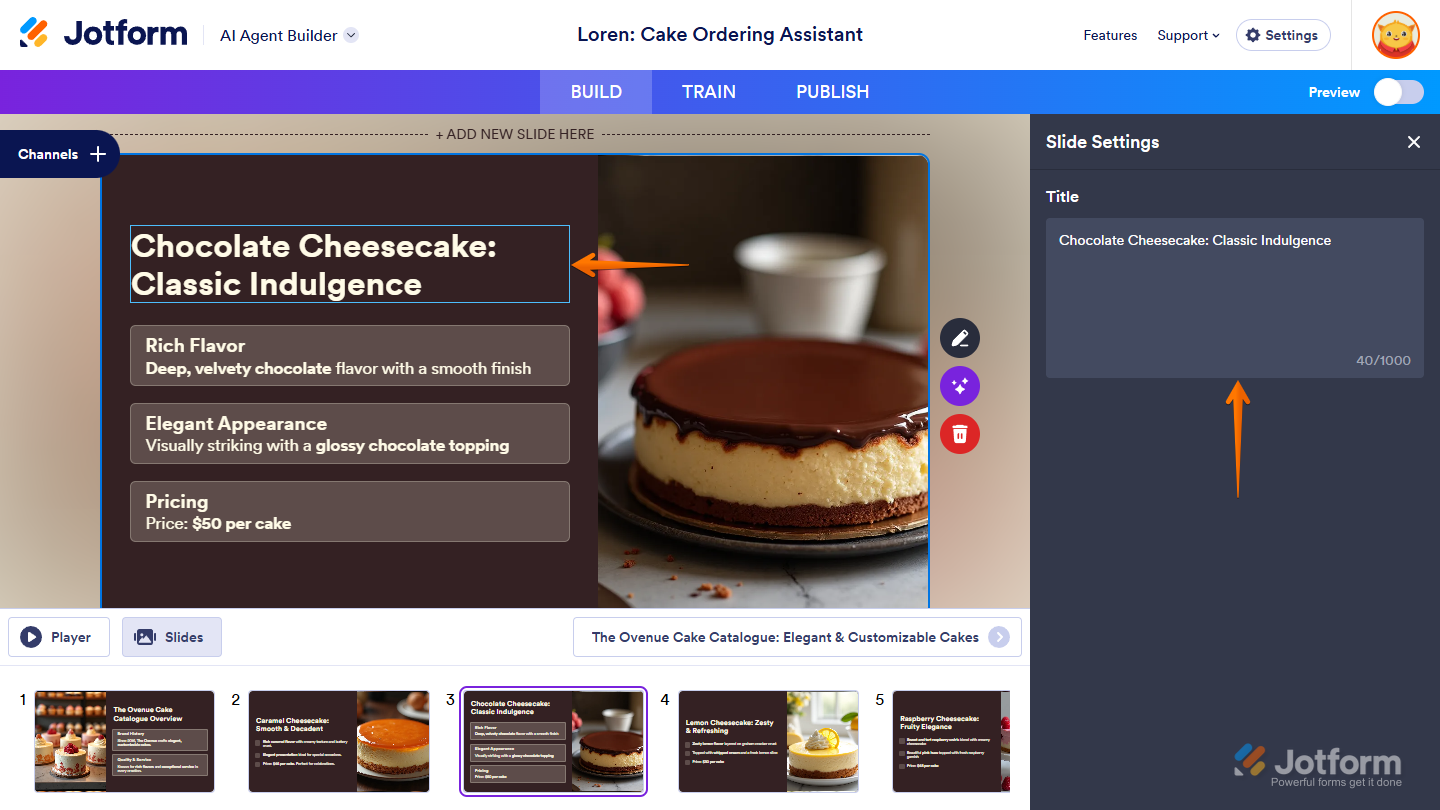
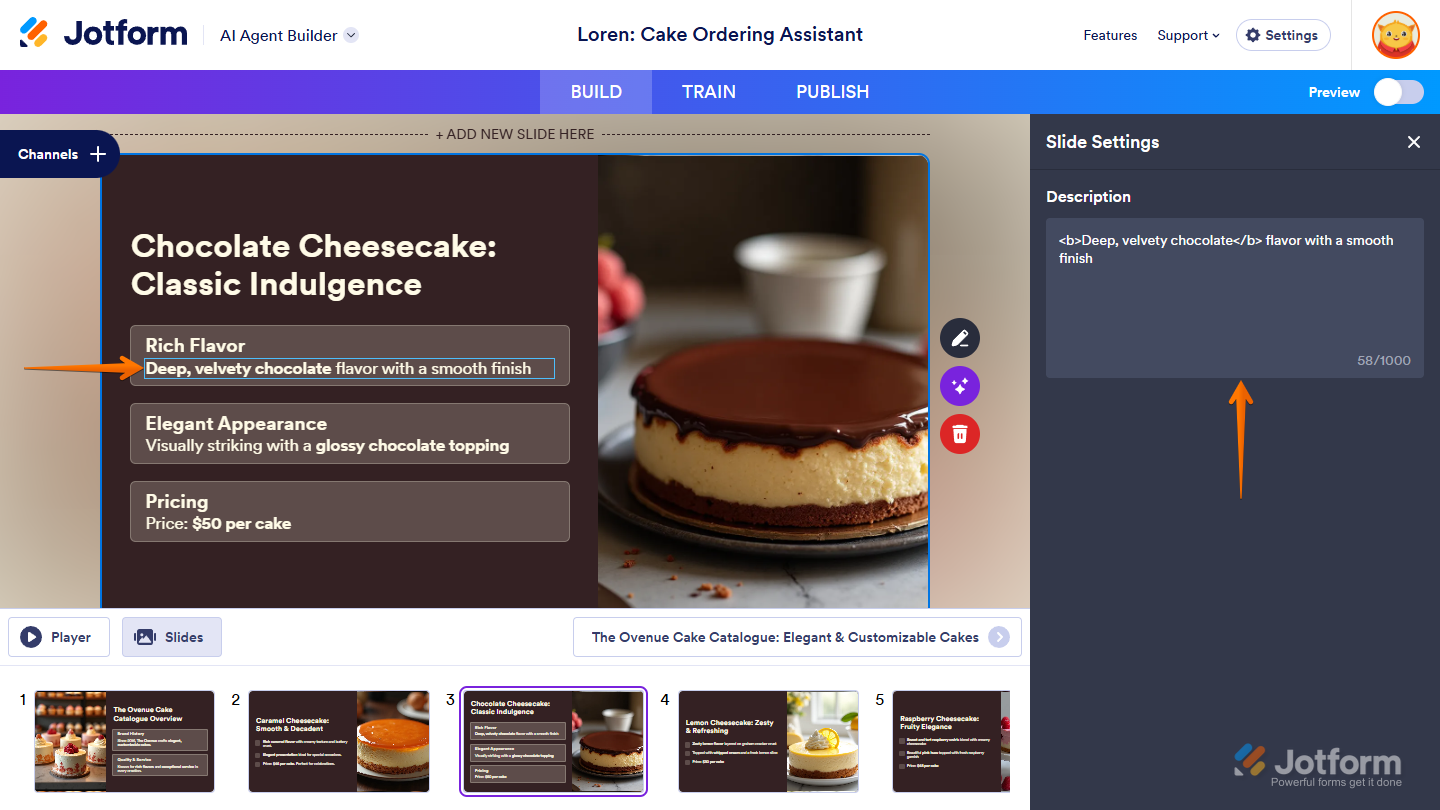
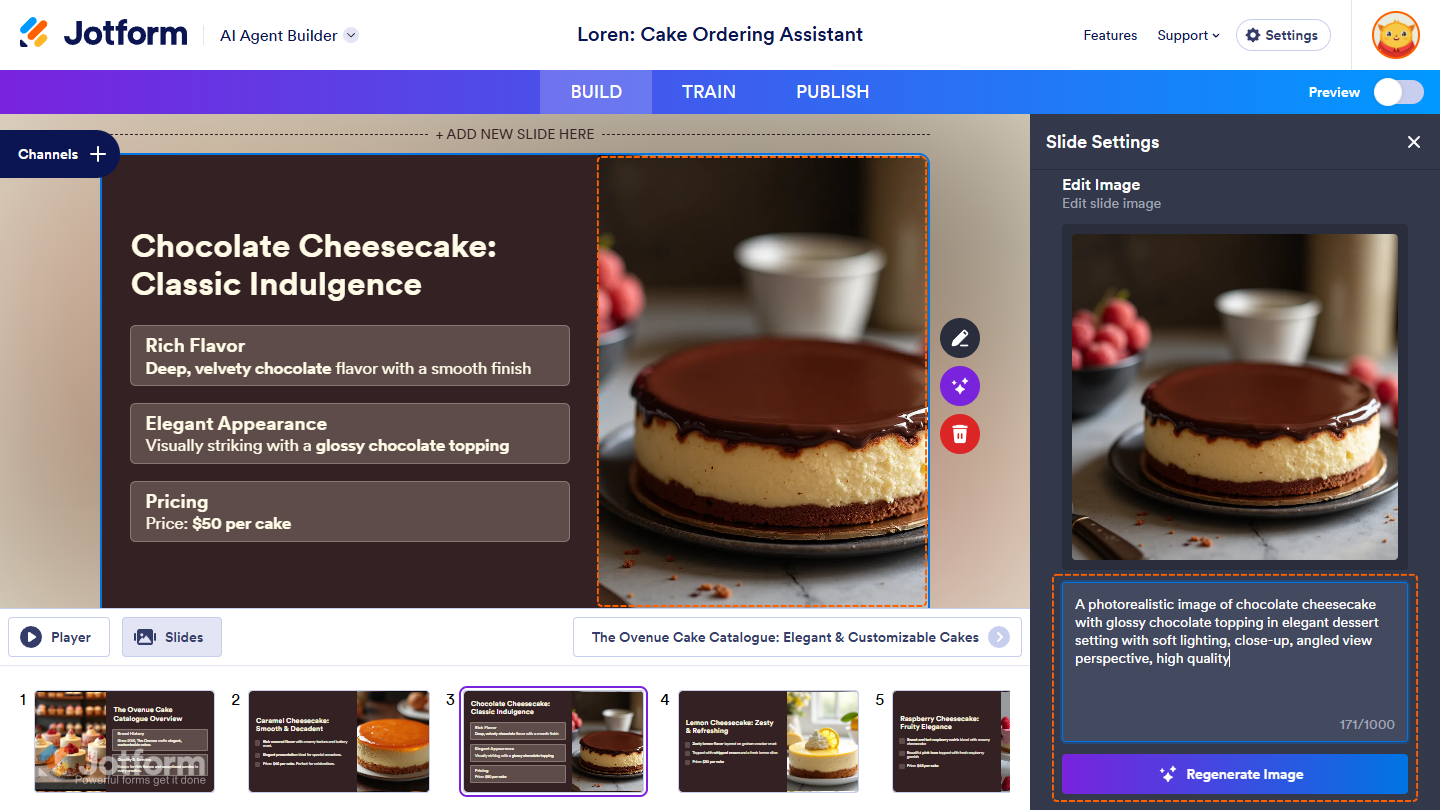
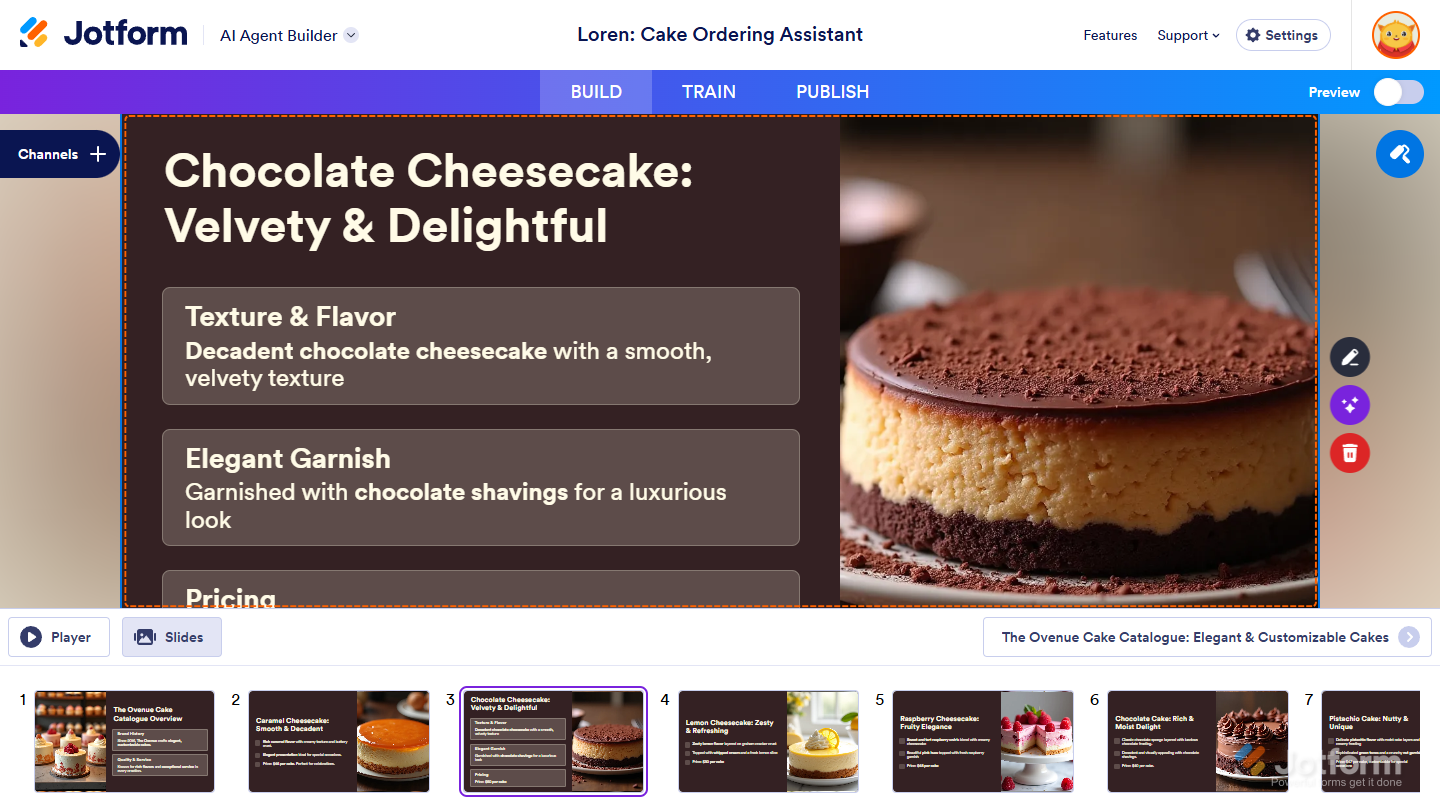
- Now, in the Slide Preview that opens above it, click on the title, subtitle, description, or image, depending on what you want to update.
The title is the main heading of your slide. In the Slide Settings window that opens on the right side of the page, you can enter a new title for it.
The subtitle appears just below the title as supporting text. In the Slide Settings window that opens on the right side of the page, you can update the subtitle.

The description contains the main details or message of your slide. In the Slide Settings window that opens on the right side of the page, you can edit the description.
The image adds visual impact to your slide. In the Slide Settings window that opens on the right side of the page, you can enter a description of the new image you want to generate, and then click on Regenerate Image to replace the current image.
And that’s it! You’ve updated the individual elements on your slide to better match your content.
Notes
- Changes you make in the Presentation Agent Builder are saved automatically and will instantly apply to your Presentation Agent’s behavior and responses.
- You can use HTML formatting tags and inline CSS style attributes to style and format description elements on your slides.
Changing the Slide Layout
When you want to adjust how your content is arranged for better flow or emphasis, you can change the slide layout with just a few clicks. This is how it’s done:
- While in Presentation Agent Builder inside AI Agent Builder, click on the slide you want to change the layout for, and then click on the Pencil icon on the right side of it.
- Next, in the Slide Settings window that opens on the right side of the page, under the Slide tab, select the layout you want to use in the Change Slide Layout section.
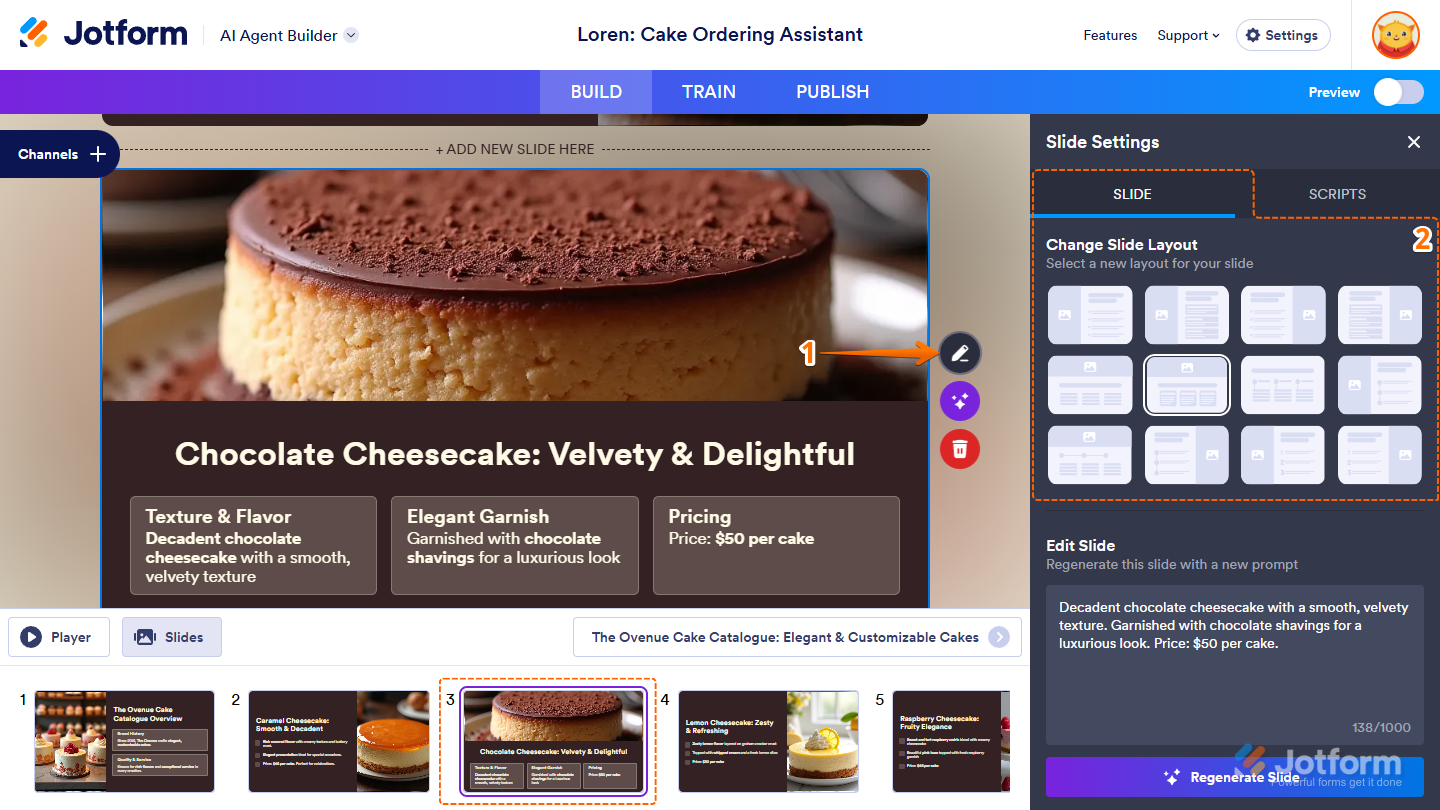
That’s it. Your slide layout is updated, and your content’s now arranged the way you want it.
Regenerating Slides
If you need to refresh a slide with new content that better fits your presentation, you can regenerate it quickly and easily. Here’s what to do:
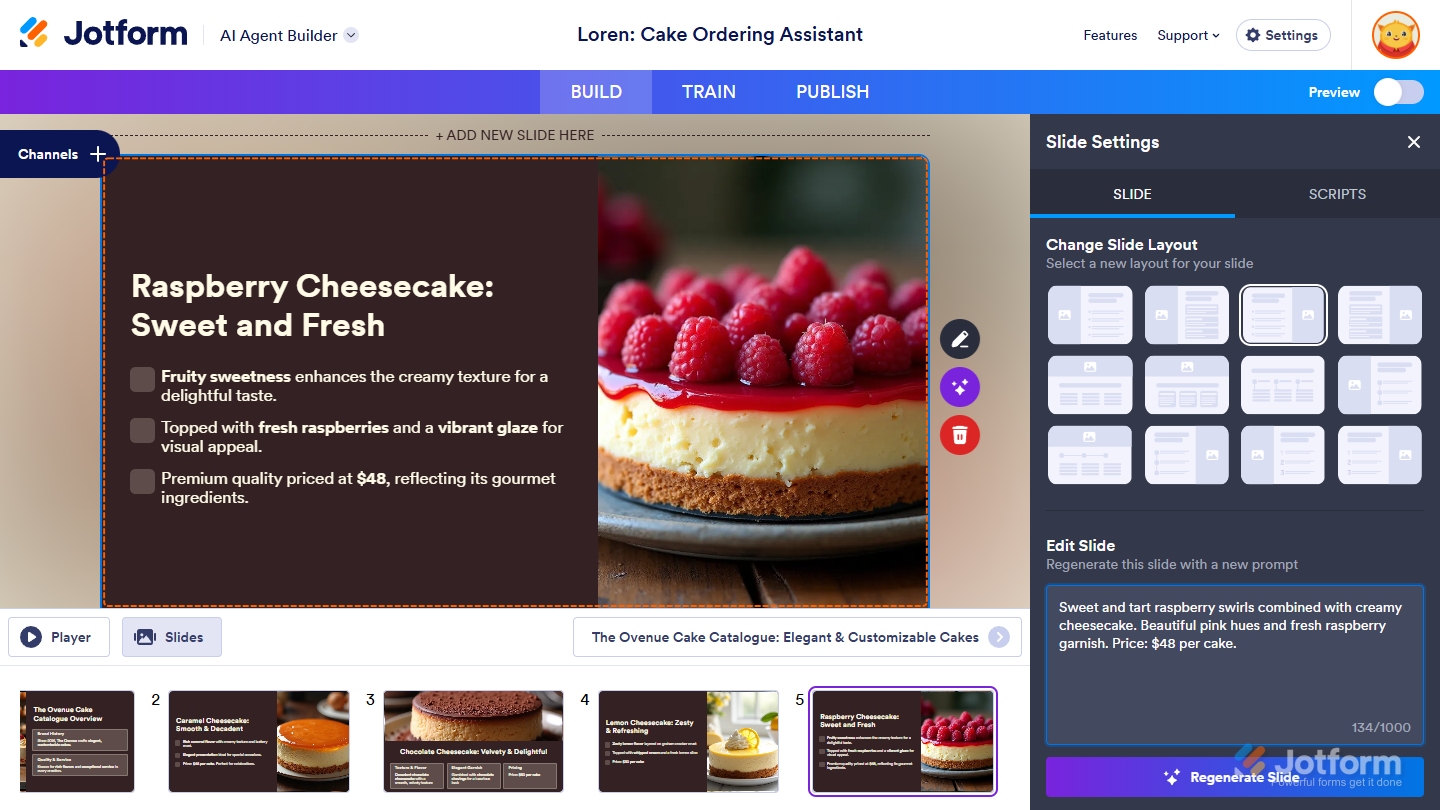
- While in Presentation Agent Builder inside AI Agent Builder, click on the slide you want to regenerate, and then click on the Pencil icon on the right side of it.
- Next, in the Slide Settings window that opens on the right side of the page, under the Slide tab, enter a new prompt in the Edit Slide section and click on Regenerate Slide at the bottom.
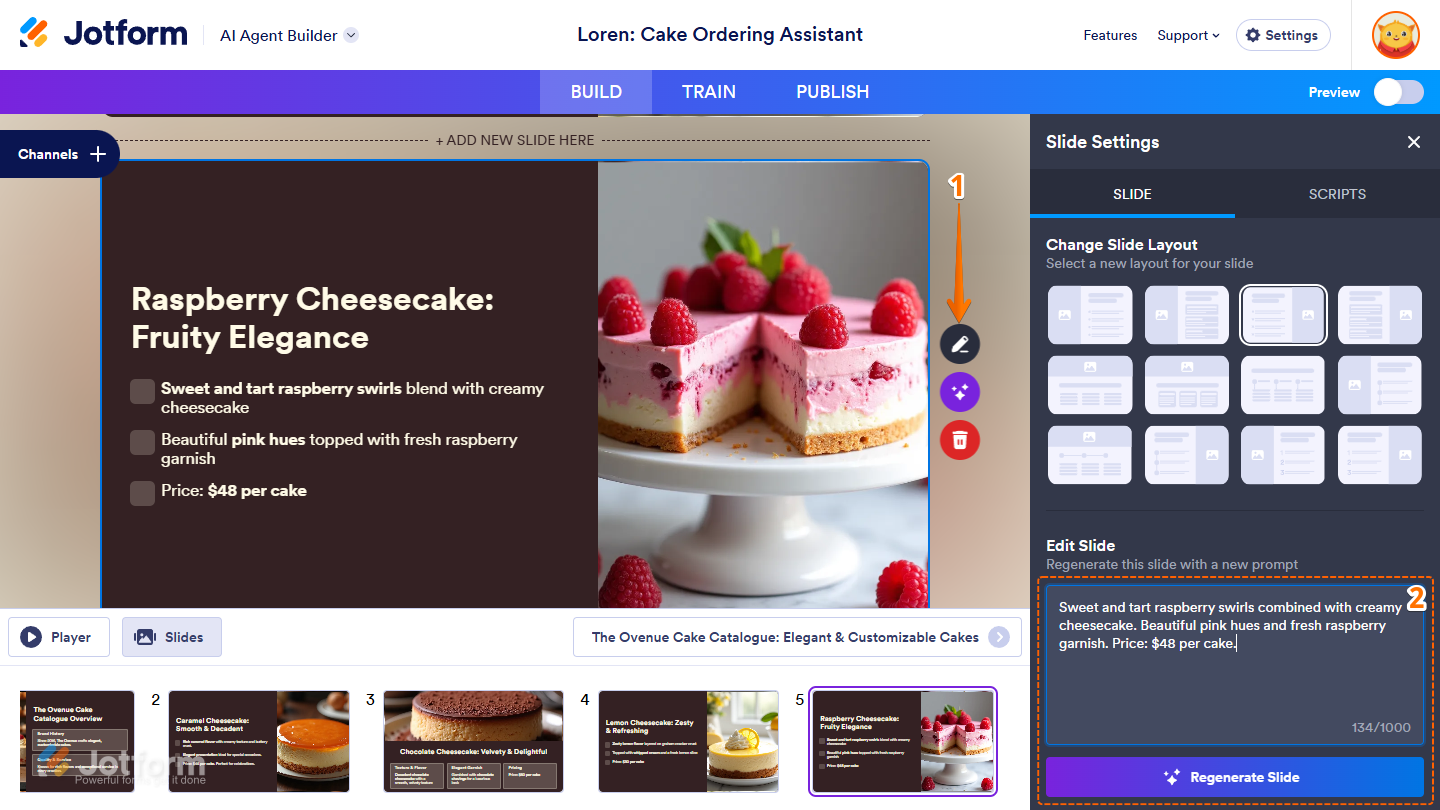
That’s it. Your slide’s been regenerated with new content based on the prompt you gave.
Editing the Slide Narration Script
If you need to update what your Presentation Agent says during the presentation to reflect your message better, you can edit the slide narration script in just a few clicks. You’ll just need to do this:
- While in Presentation Agent Builder inside AI Agent Builder, click on the slide you want to update the Narration Script for, and then click on the Pencil icon on the right side of it.
- Next, in the Slide Settings window that opens on the right side of the page, under the Scripts tab, enter a new script for your Presentation Agent.
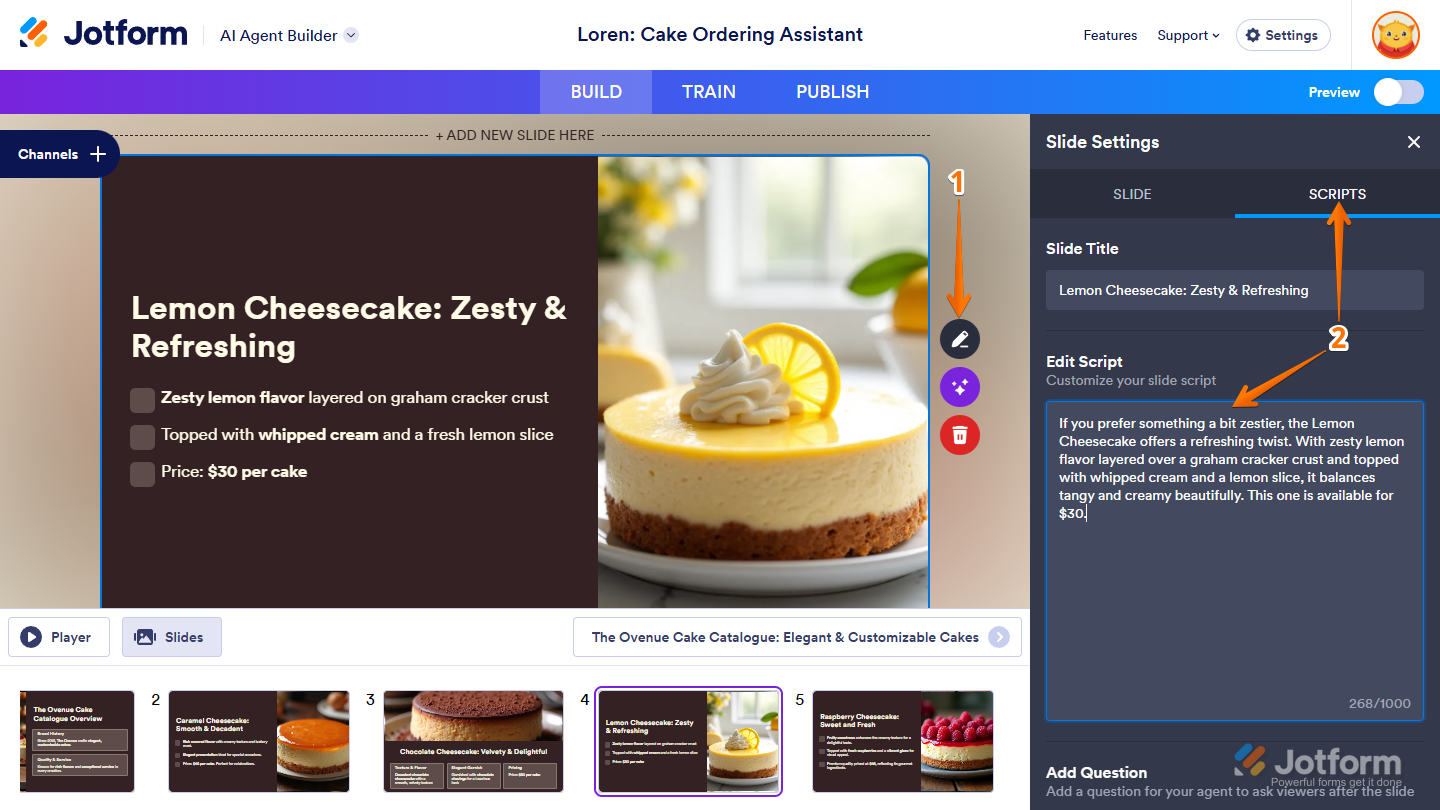
That’s it. The slide narration script’s been updated, and is ready for your Presentation Agent to present.
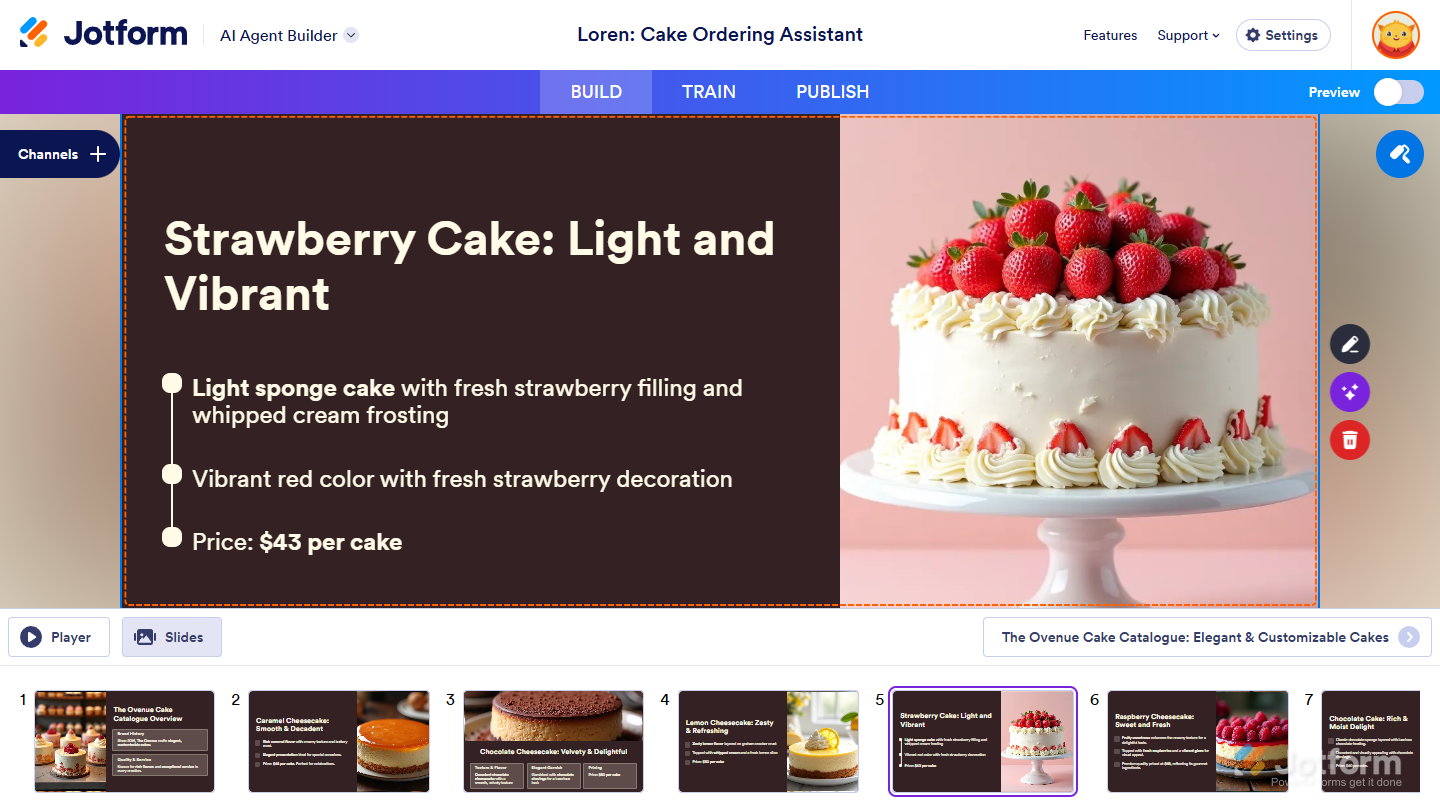
Adding New Slides
When you want to expand your presentation with more content, examples, or ideas, you can add new slides quickly and easily. Here’s how to do it:
- While in Presentation Agent Builder inside AI Agent Builder, click on Add New Slide Here below the slide preview where you want to insert a new one.

- Then, in the Generate Your Slide with AI window, describe the new slide you want to create and click on Generate Slide.
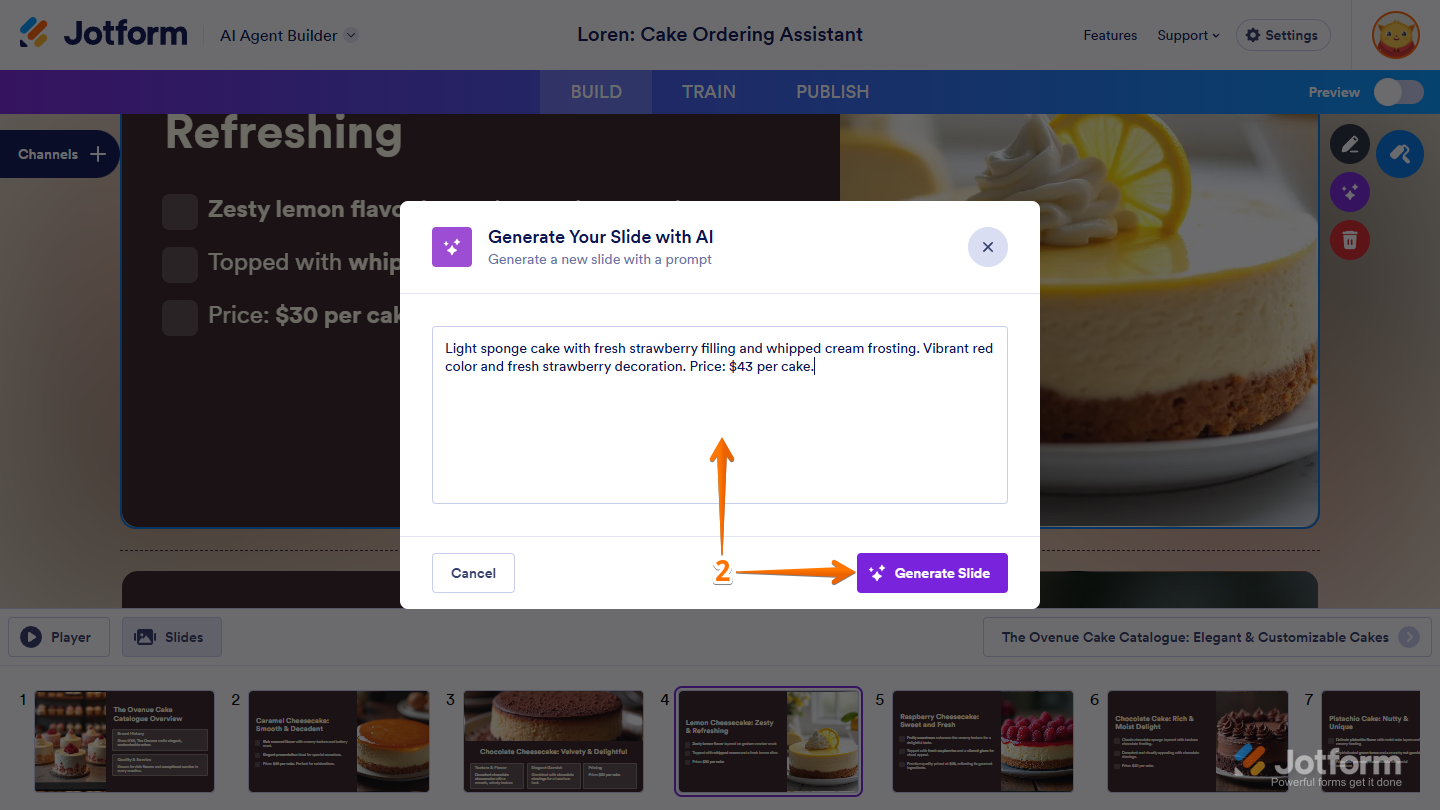
That’s it. Your new slide’s been added to the presentation.
Deleting Slides
If you need to remove slides that are no longer relevant to your presentation, you can delete them in just a few clicks. Here’s the quick way to do it:
- While in Presentation Agent Builder inside AI Agent Builder, click on the slide you want to remove, and then click on the Trash icon on the right side of it.
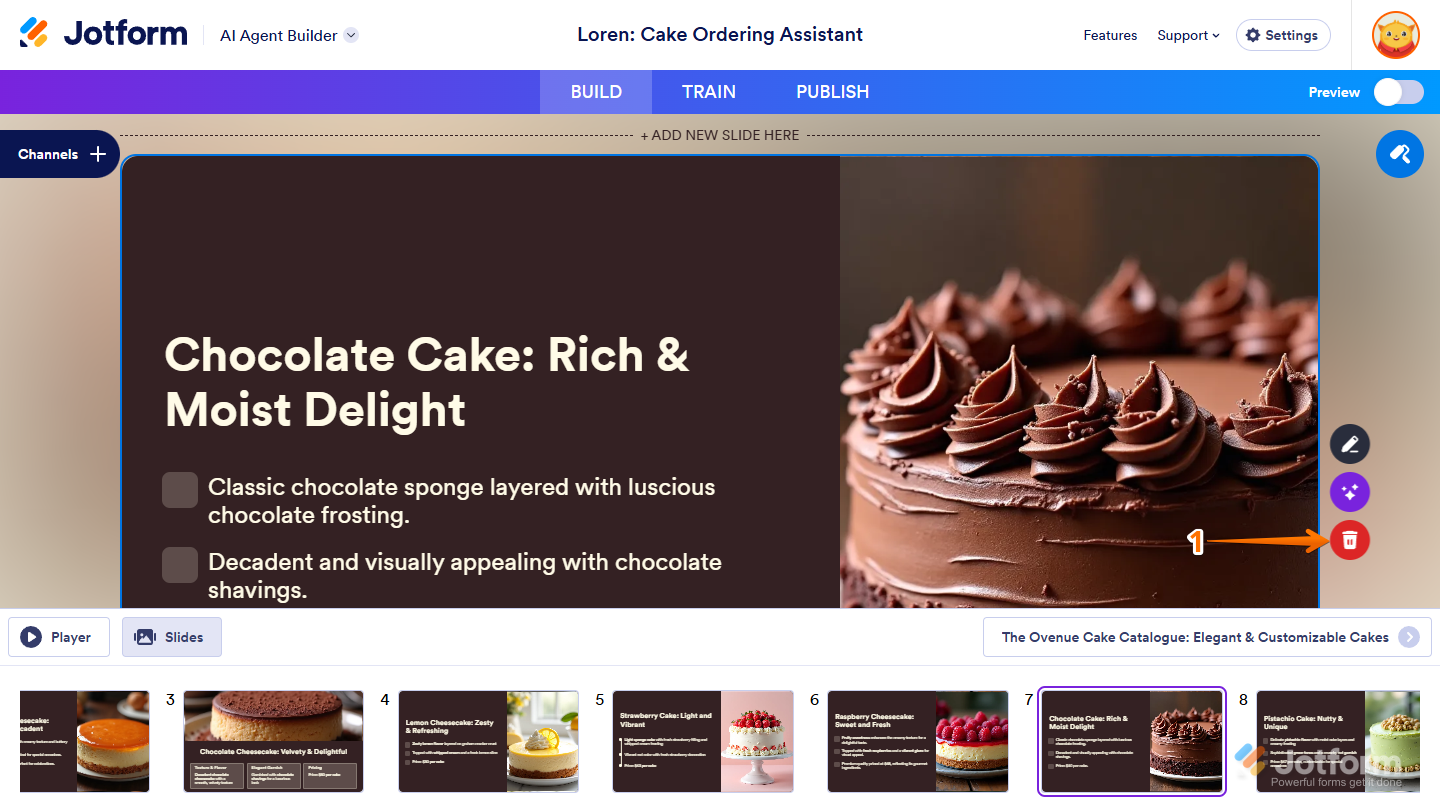
- Then, in the Delete Slide Confirmation window, click on Yes, Delete to confirm it.
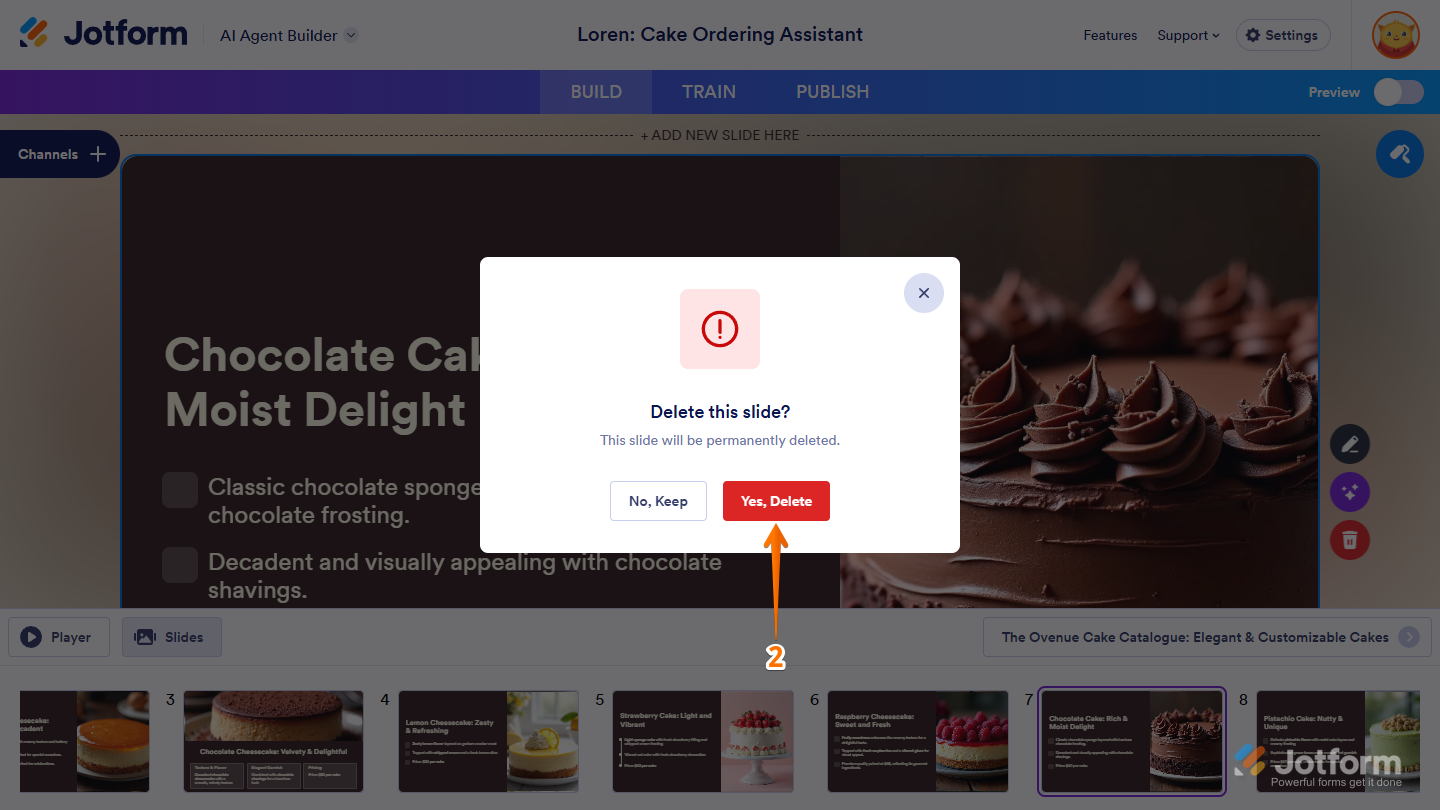
That’s it. The slide’s been removed from your presentation.

Send Comment: