Jotform’s QuickBooks integration offers a seamless way to automate your invoicing process. With this integration, you can instantly generate invoices in your QuickBooks Online account based on form submissions — whether you’re collecting orders, service requests, or payment details. Invoices can be created using a payment integration or through basic form elements like Single Choice, Dropdown, or Multiple Choice fields, giving you flexibility in how you gather billing information. It’s a powerful solution for businesses that want to eliminate manual invoicing, reduce errors, and keep their billing system organized.
By connecting your forms to Jotform’s QuickBooks, you ensure that each transaction is accurately captured and invoiced—saving you time and helping you get paid faster.
Prefer to watch? Head to the end of this guide to see the video tutorial.
Before creating an invoice with the QuickBooks integration, check that everything’s set up properly—and keep in mind there are a few extra steps to complete after the invoice is created:
- Product or Service Items — For a smooth sync, ensure that the items listed on your form line up with the corresponding product or service items in your QuickBooks account.
- Payment Status Handling — If your form is connected to a payment gateway and customers complete their payments through it, the corresponding invoices in QuickBooks won’t be marked as paid automatically. You’ll need to manually update the payment status in QuickBooks.
- Tax Configuration (for users outside the US) — Before integrating with QuickBooks, set up the applicable tax rates in your QuickBooks account. These include:
- Sales VAT – for the United Kingdom.
- GST – for Australia.
- Sales Tax Rate – for Canada.
- Sales Tax Rate – for India.
Creating an Invoice with a Product List
Whether you’re setting up a new form or updating an existing one, integrating your form with QuickBooks to create an invoice takes no time—here’s how:
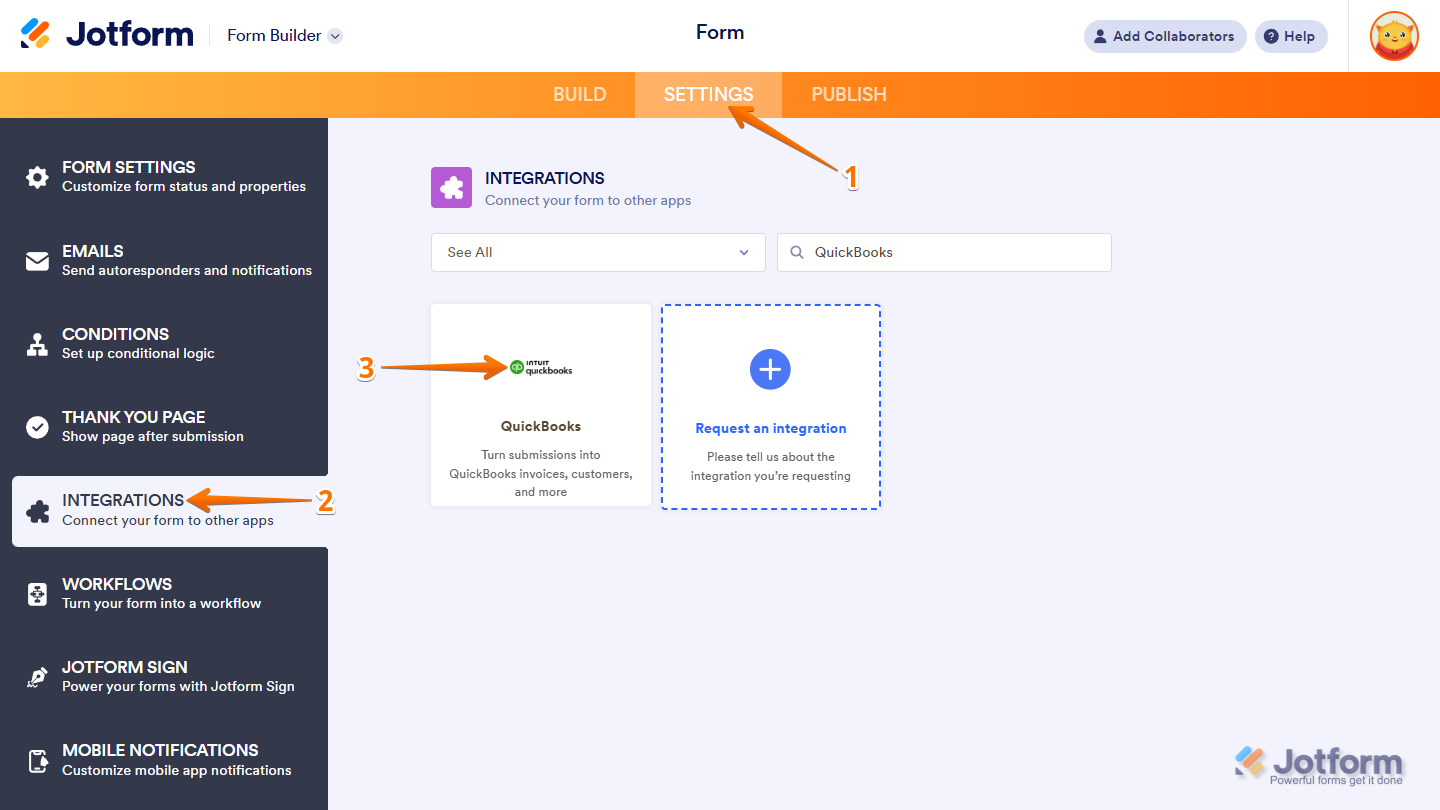
- In Form Builder, in the orange navigation bar at the top of the page, click on Settings.
- In the menu on the left, click on Integrations.
- Then, search for QuickBooks and click on it.
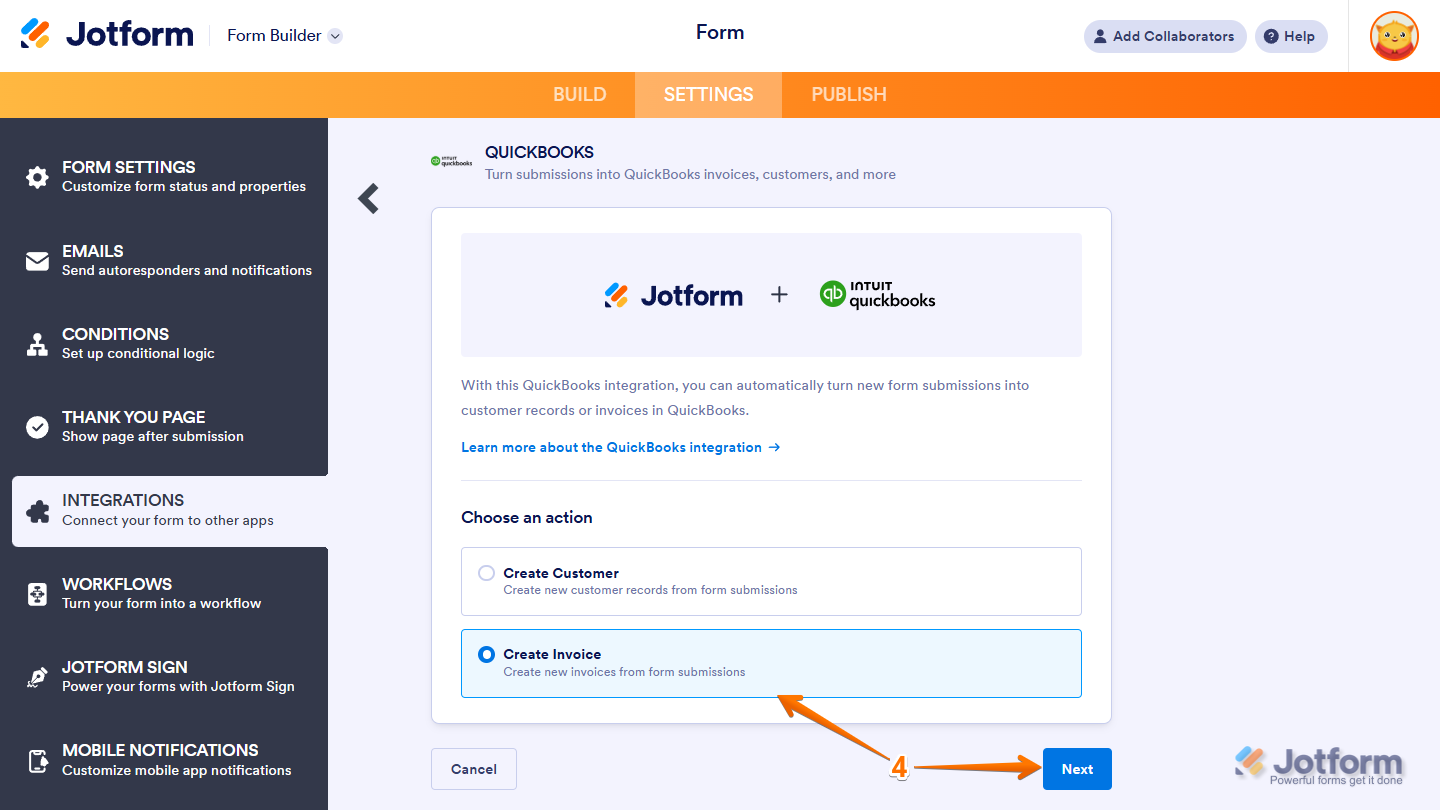
- Now, under the Choose an Action section on the right, select Create Invoice and click on Next.
- Next, under the QuickBooks Mode Type, choose either Production or Sandbox Mode, and then click on Connect to QuickBooks.
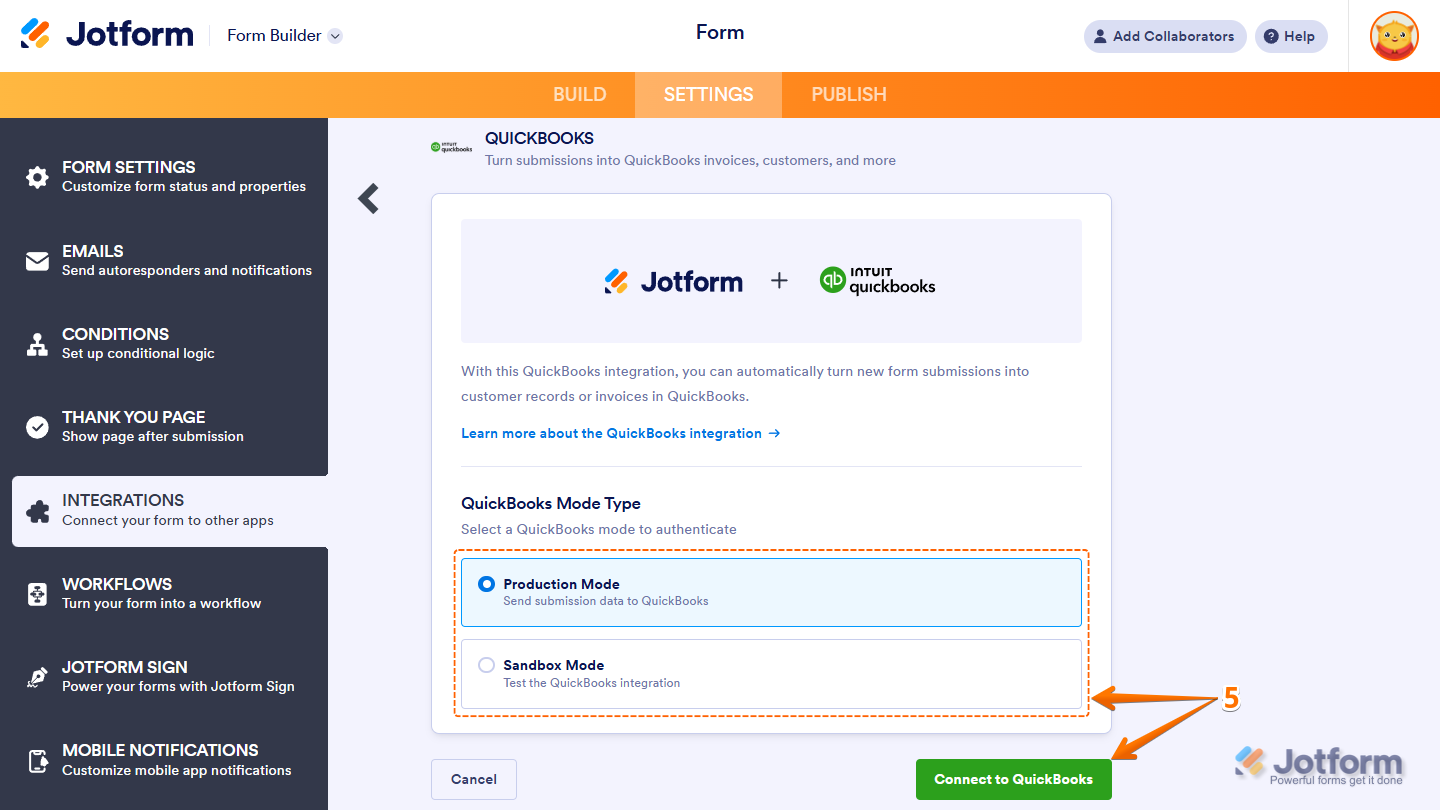
Note
Production Mode means you’re connecting and sending data to a real company account, while Sandbox Mode is for testing the QuickBooks integration. The QuickBooks guide on Create and Test with a Sandbox Company has more details about that.
- In the new browser window that opens, log in with your Email or User ID or by Phone.
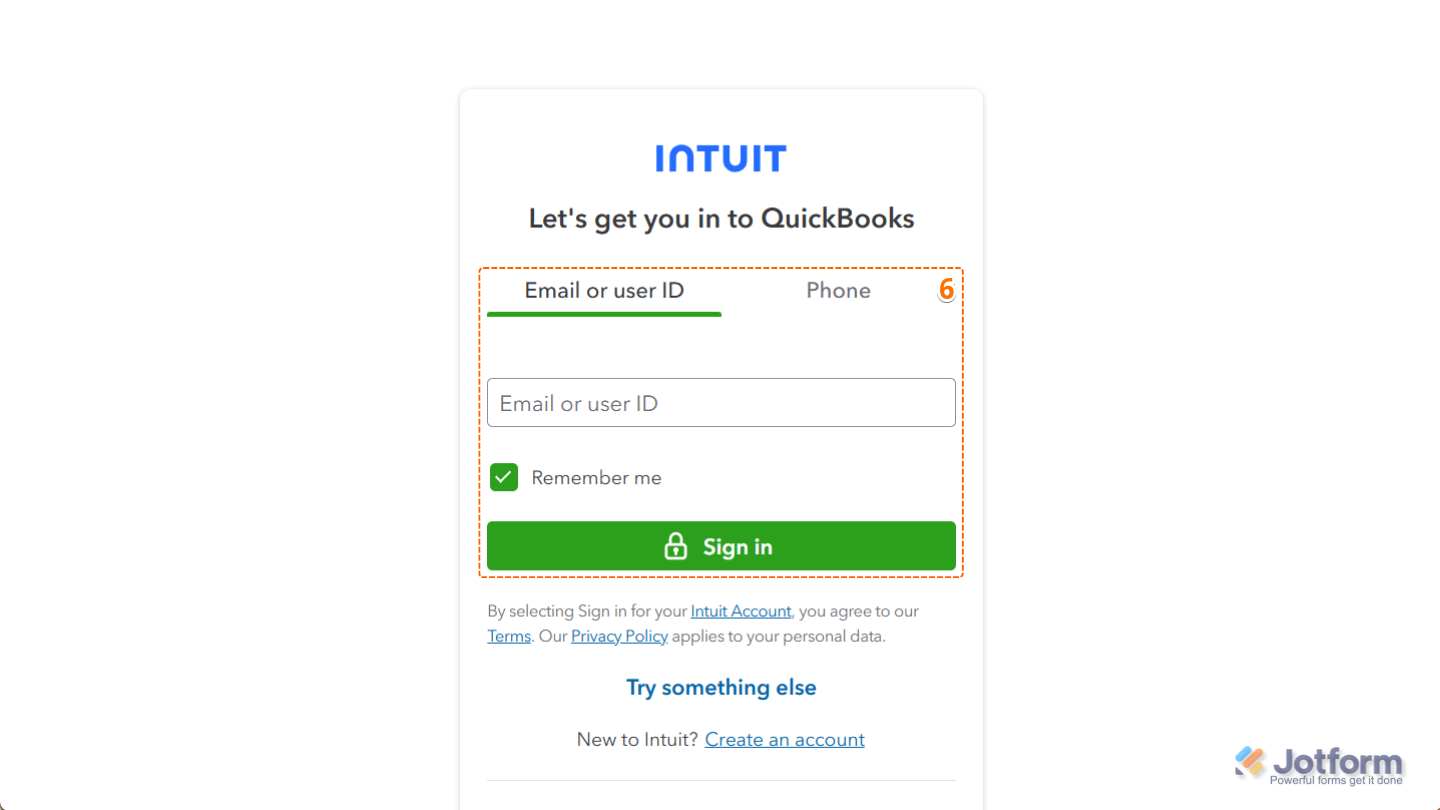
- Then, on the next screen, click on Connect to finally link your QuickBooks accounts.
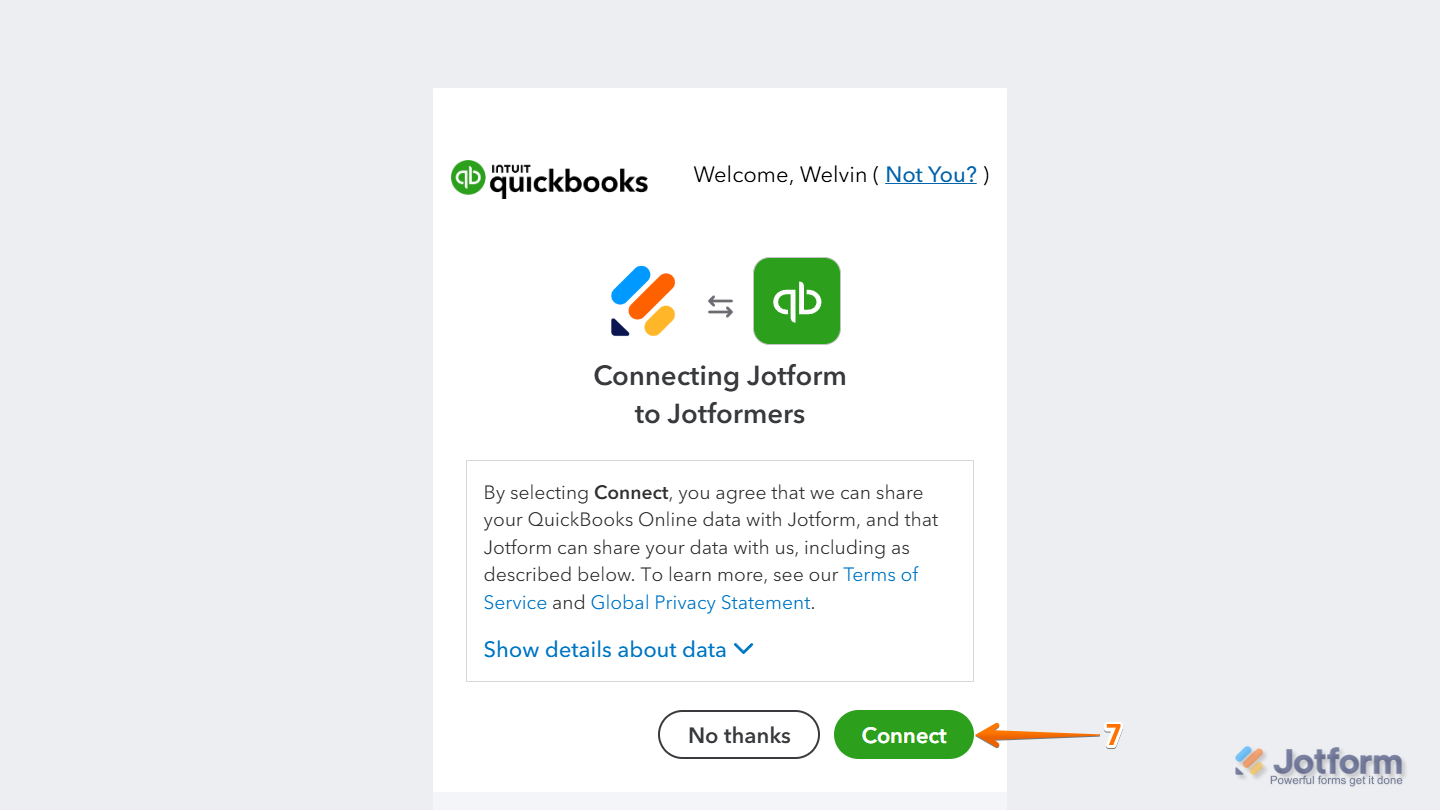
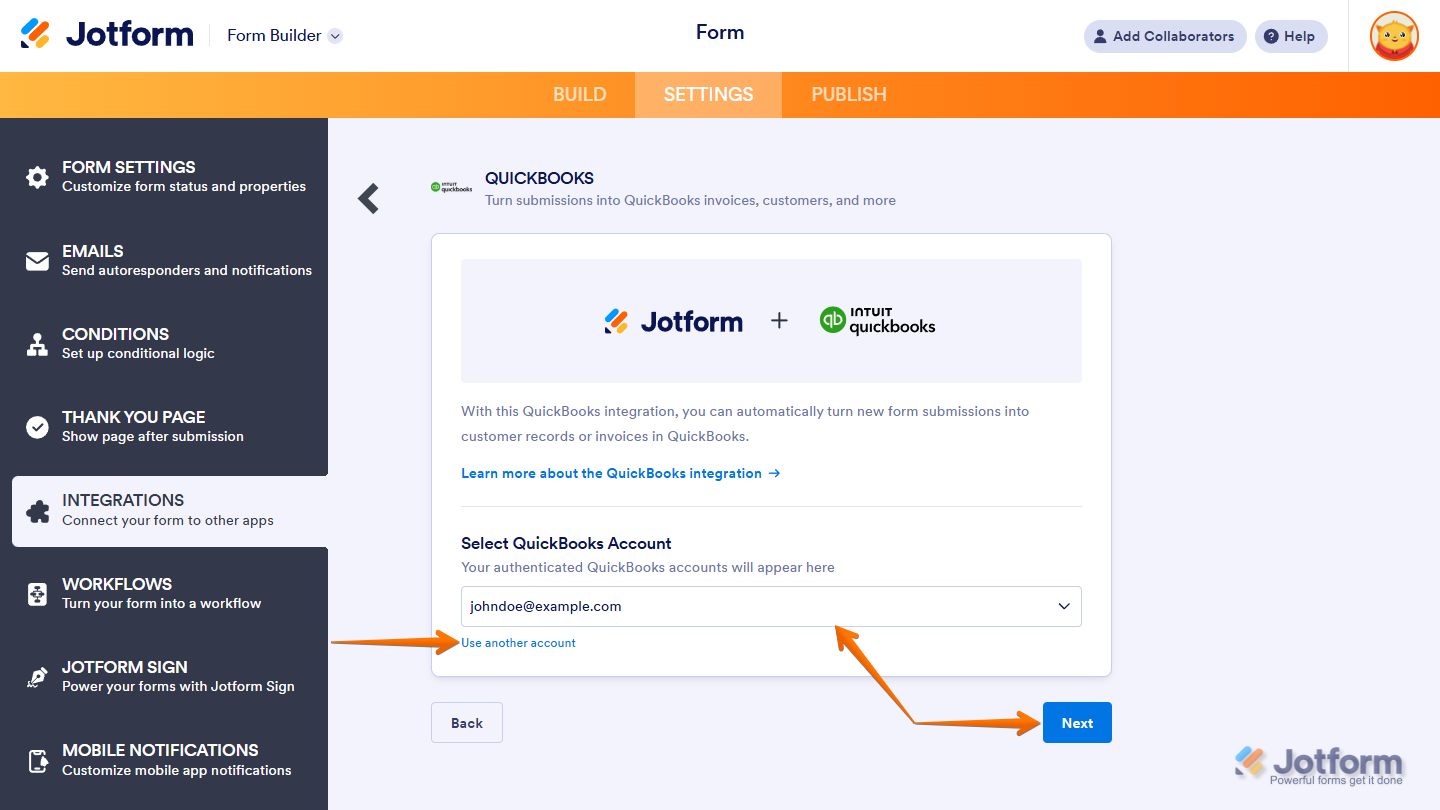
If you’ve logged in before, just pick your QuickBooks account from the dropdown and click on Next. To use a different one, click on Use another account link.
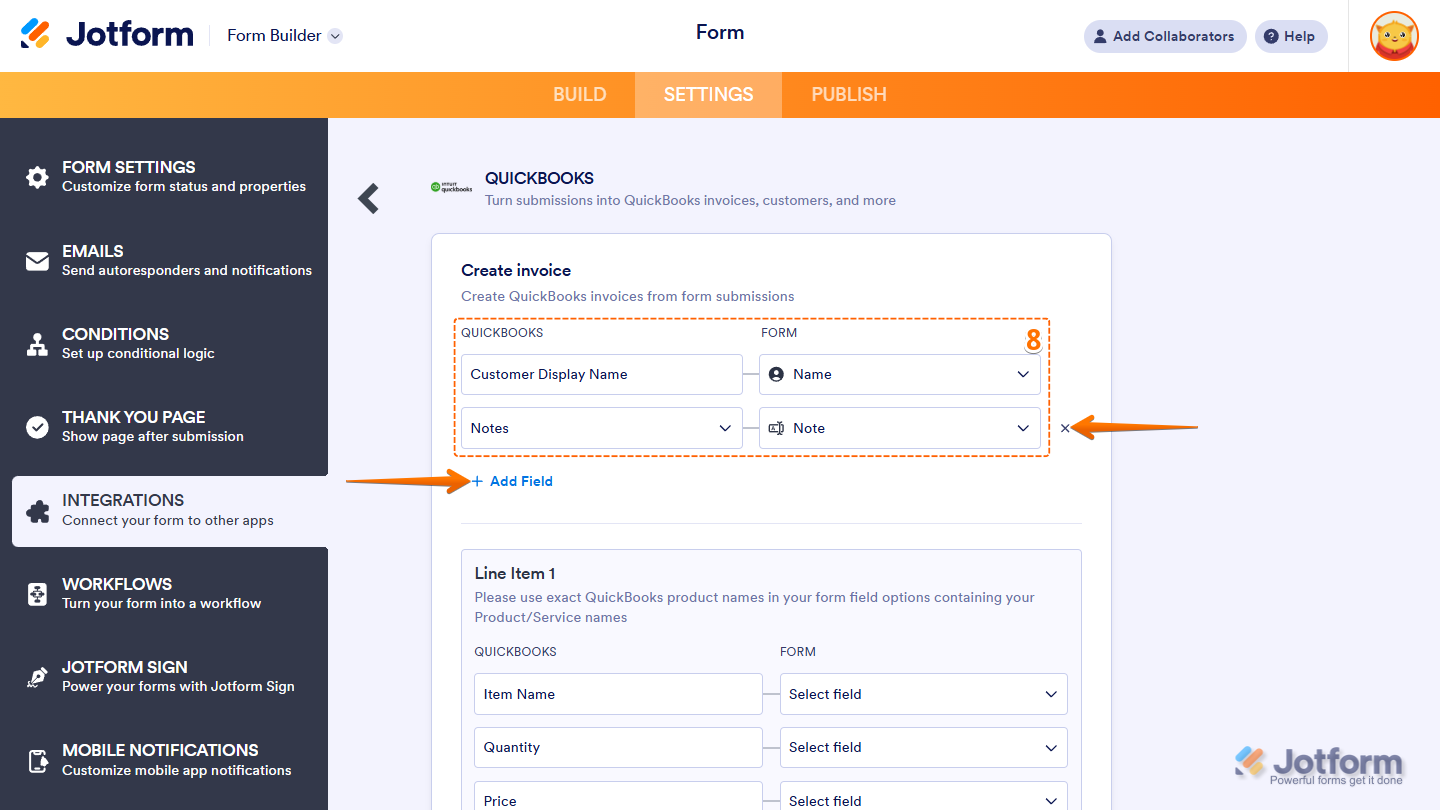
- Now, in the Create invoice on the right, select your QuickBooks fields in the first column and your Form fields in the second to map them accordingly.
Notes
- If invoicing a returning customer, make sure the Customer Display Name in QuickBooks matches the Full Name in Jotform to avoid creating a duplicate record.
- To map more fields, just click + Add Field at the bottom of the section. If you need to remove a mapped field, click the X icon on the right side of the field.
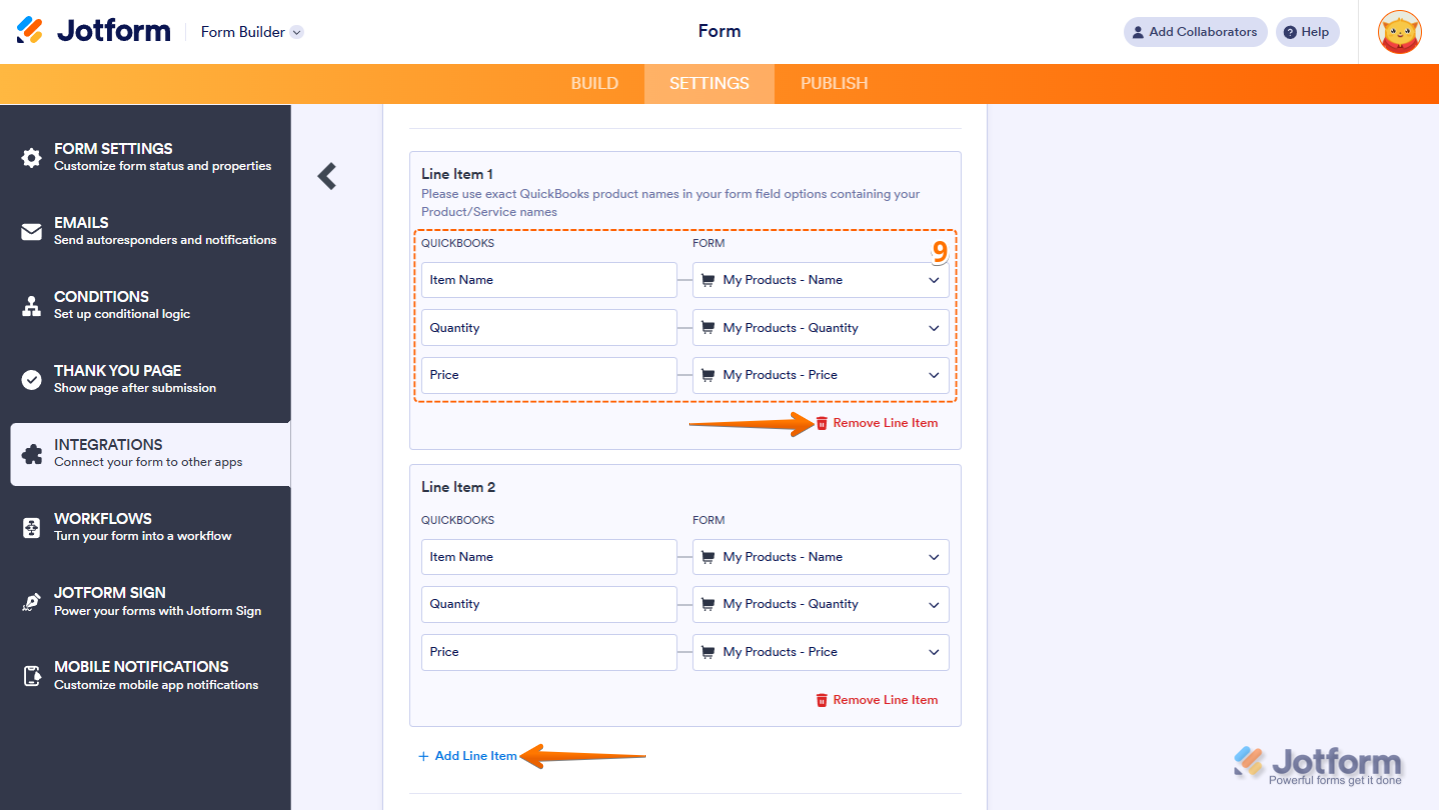
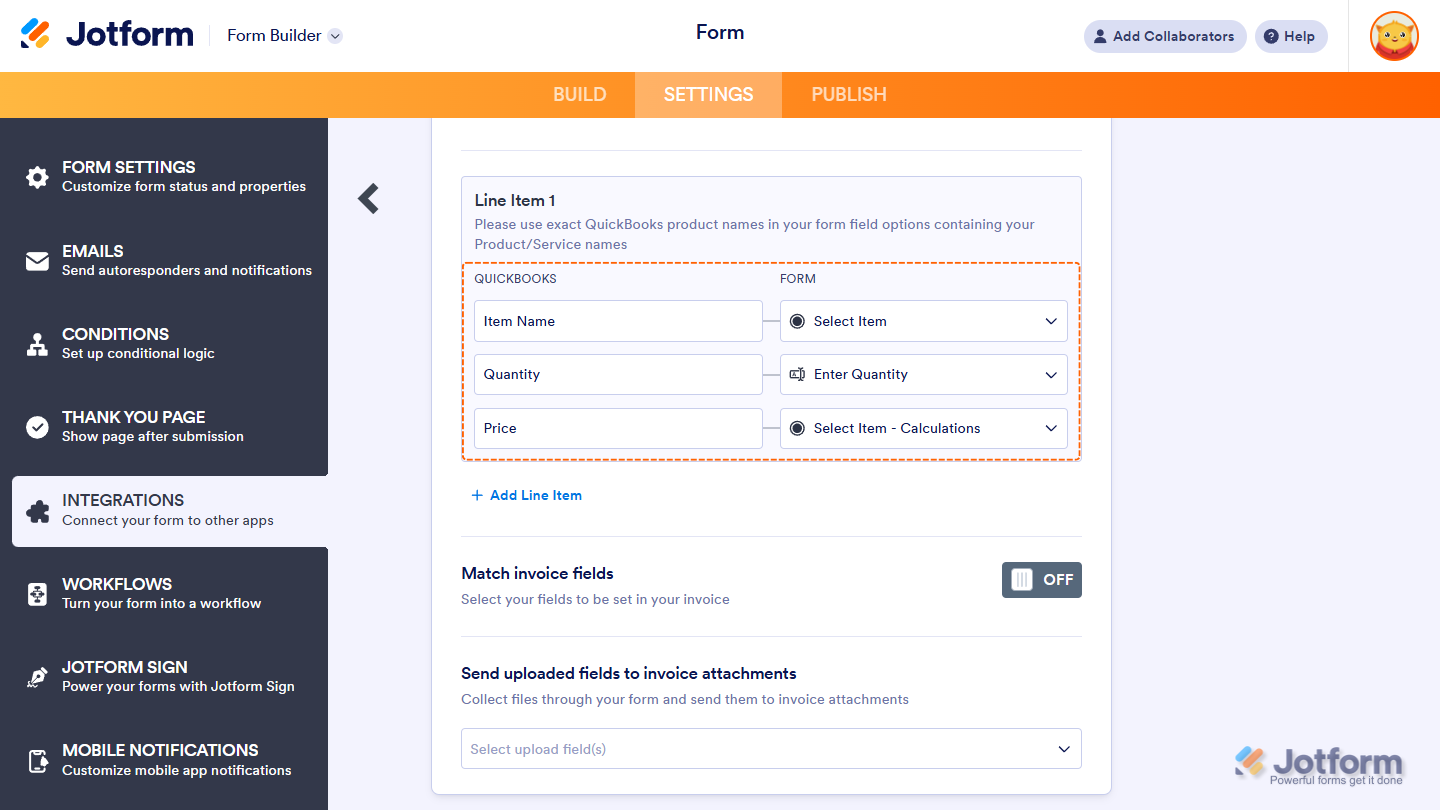
- Now, in the Line Item section, match the following fields:
- Item Name — Select the Product Item from your form’s Product List element or Payment Integration.
- Quantity — Select a fixed quantity from the dropdown or choose the Quantity field from your form’s Product List or Payment Integration.
- Price — Choose the Price field from your form’s Product List element or Payment Integration.
Note
- Click the +Add Line Item at the bottom part of this section to add more items, or click on Remove Line Item to delete the added or existing line item.
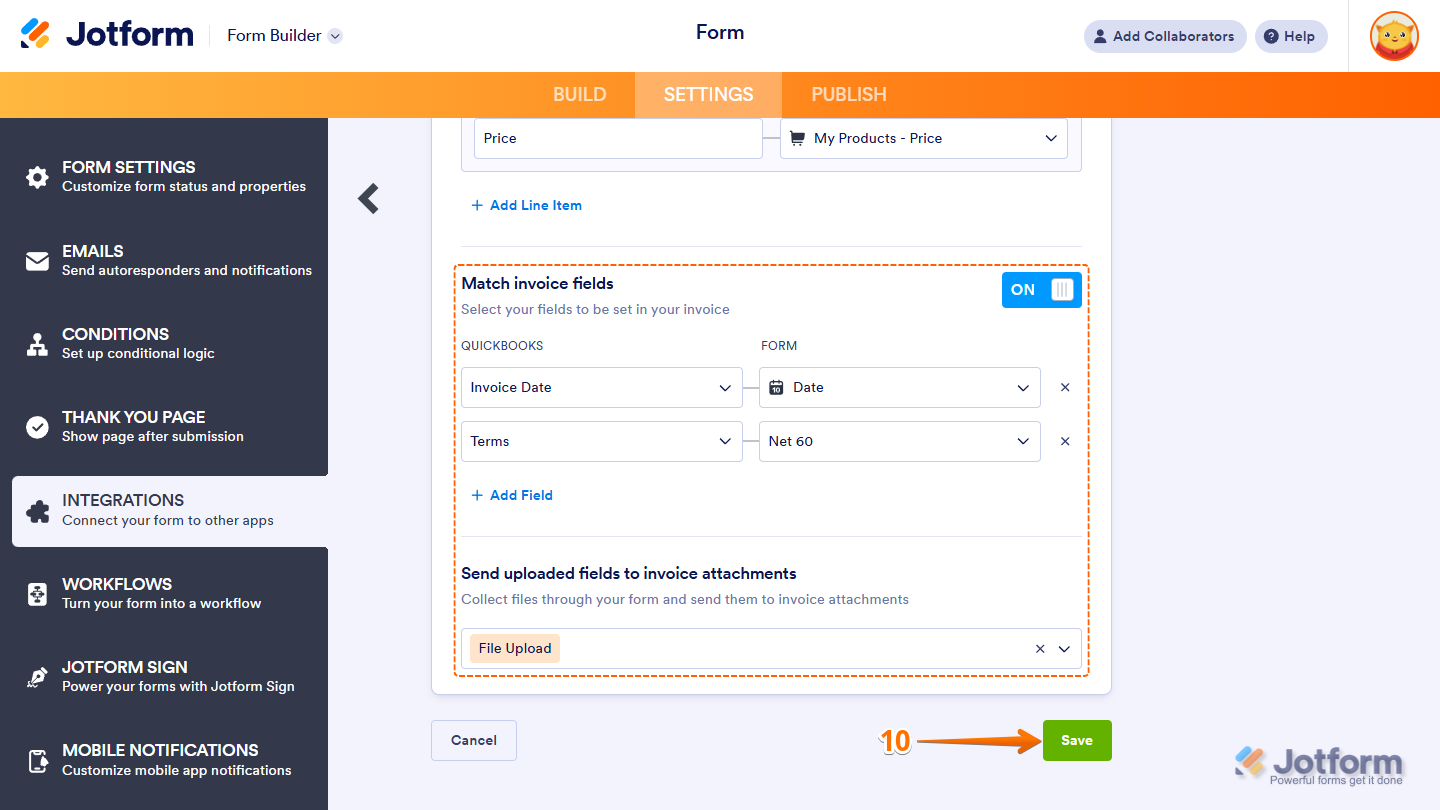
- Optionally, you can toggle the Match invoice fields to map the Invoice Date, Exchange Rate, Terms, and Tax fields and include them on the invoice. You can also select the File Upload fields through the Send uploaded fields to invoice attachments to send the uploaded files as attachments to your invoice(s).
- Once you’re done, click on Save to finally save your integration.
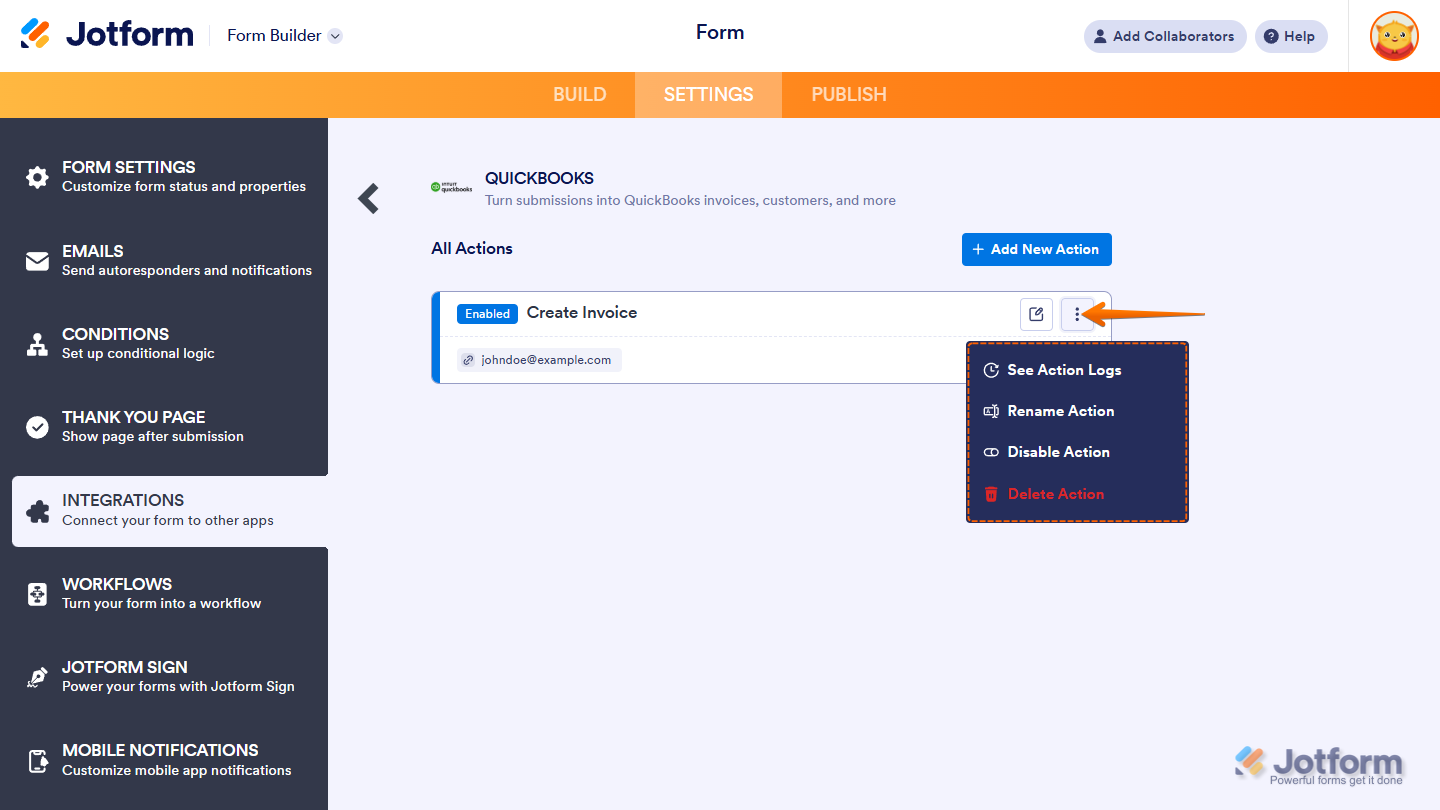
And that’s it! You’ve now successfully integrated your form with QuickBooks to create an invoice.. After saving the integration, you’ll see the list of actions you’ve set up and the Add New Action button on the main page. Hover your mouse over an action and click on the Three Dots icon next to it on the right side to access more options:
- See Action Logs — View successful and failed runs, helpful for troubleshooting.
- Rename Action — Change the action’s title.
- Disable Action — Temporarily stop the integration from sending data.
- Delete Action — Remove the action from your form.
Creating an Invoice with a Dropdown, Single Choice, or Multiple Choice Fields
You can use Dropdown, Single Choice, or Multiple Choice fields to link your inventory to QuickBooks invoicing. Like the Product List element or payment integration, these fields must be mapped using the Line Item mapper.
As a prerequisite, you must ensure that Calculation Values are set for the field options. Our guide on How to Assign Calculation Values has more details about that.
Now, simply map the fields following the same steps above, then you’re all set.
Note
The price is always calculated based on the quantity, whether it’s predefined in the Line Item mapper or entered through an input field.


Send Comment:
26 Comments:
March 6, 2026
So need this for Xero
June 28, 2025
Ive mapped everything asd still facing errors
June 5, 2025
Does the integration describe here work only with Quickbooks online? Is there an integration with the Desktop version of Quickbooks? We use Quickbooks Desktop but I would like to find a way to generate invoices from the jotform submissions. Will the integration work or is there a file I could use to import into Quickbooks desktop to generate the invoice?
May 19, 2025
This is a great post. I like this topic. I found many interesting things on this site. Thanks for posting this.
April 27, 2025
Please, for the love of all things grammar, fix all of the typos on this page.
"exactly" should be "exact"
"your" and "you're" are not the same thing
March 20, 2025
I want to integrate with QuickBooks online without Zap
February 4, 2025
Is this work!?
January 19, 2025
Is it possible to still submit the order forms completed in December into QB to make invoices now, in January?
September 6, 2024
It would be great if it was able to create estimates also.
August 1, 2024
While this is creating the invoice with the line items, the description and class are blank on the invoice line items even though they are predefined in the product/item on QBO. Which means I have to edit each line item before sending the invoice.
July 30, 2024
I tested and it worked well and provided the invoice #, although I will not be using it at this time since it doesnt have options for description in the line items
Although I would love to see my Jotform PO form to allow for intergration :)
June 24, 2024
I would LOVE the ability for employees to use jotforms to log expenses and have that info synced over to QB for easy logging and tracking!
May 22, 2024
would love a feature to add a check to the print check queue!!
May 15, 2024
What if I have one user sign in for QBs but multiple companies? How do I distinguish which company the form integration should use?
April 28, 2024
Would be great to have this create an importable file that could be used in Desktop Quickbooks.
January 15, 2024
Would be great to have this create an importable file that could be used in Desktop Quickbooks. I think there's a bigger installed base of desktop than online for Quickbooks.
November 25, 2023
Thanks for the integration, but why can't we just use the same data from the form and import to QuickBooks like we do when transferring data from one field to another. I do to many calculations and the calculation widget is critical for my forms build. So when can you make that happen?
October 23, 2023
How do you change the payment options once the Quickbooks integration is completed? I do not see an option to pay through Quickbooks and I am not able to change the PayPal payment option.
September 11, 2023
Mention being able to manage the synced invoices fully within QuickBooks Online!!!
August 15, 2023
I was very excited to see this added as an integration, but I noticed in the video that the created invoice is not assigned an invoice number. Testing the integration in my production environment, I had the same outcome.
How can we have invoice numbers associated with invoices that are created through the integration?
July 28, 2023
I'm struggling with how to make sure my form is connecting and creating an invoice. Supposedly I'm in Sandbox mode... I'm not a developer and don't know how to do this. Yes, I have a Sandbox account but it appears to me that JF is only connected to my real QBO account.
I'd love to be able to create forms inside JF that would create an invoice.
July 27, 2023
is there a way to have the form create a invoice number. can you have the unique ID widget be the invoice number for quickbooks please. without this feature the integration is unless as any order generated will get lost in the system
July 27, 2023
Need a way to send Quickbooks an invoice number (provided by jform). Otherwise, invoice number is blank.
July 26, 2023
Y'all should make this available to create bills!!!
July 25, 2023
Is this for QB online only or will it work with desktop?