Jotform’s QuickBooks integration makes it easy to streamline your invoicing and accounting. Every time someone submits your form, a new customer is automatically created in your QuickBooks Online account—perfect for onboarding, orders, or registrations. It’s a great fit for small and medium-sized businesses that want to cut down on manual data entry, avoid mistakes, and keep customer records up to date. By simplifying how you collect and sync information, you’ll spend less time on admin and more time growing your business.
Whether you’re setting up a new form or updating an existing one, integrating your form with QuickBooks to create a customer’s record takes no time—here’s how:
- In Form Builder, in the orange navigation bar at the top of the page, click on Settings.
- In the menu on the left, click on Integrations.
- Then, search for QuickBooks and click on it.

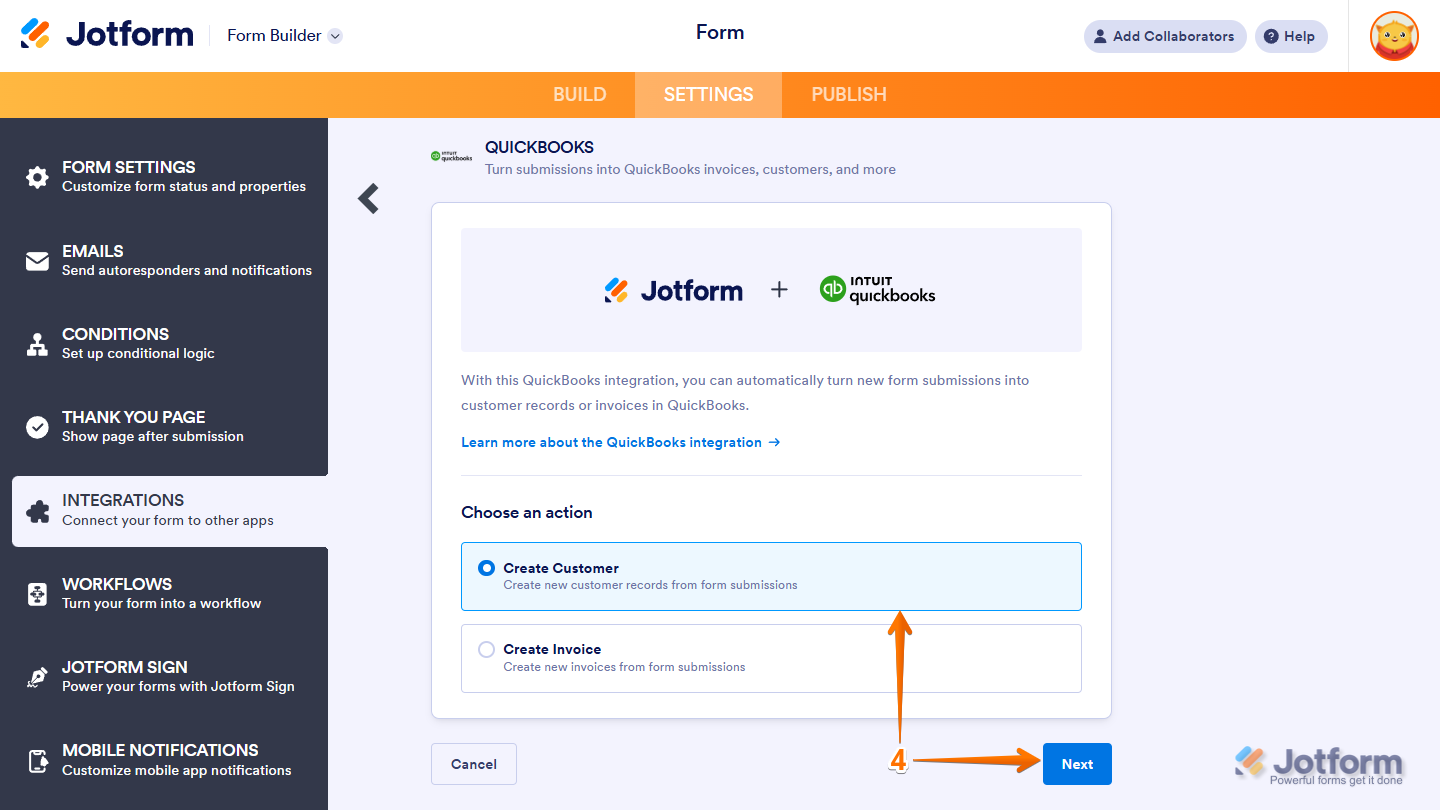
- Now, under the Choose an Action section on the right, select Create Customer and then click on Next.
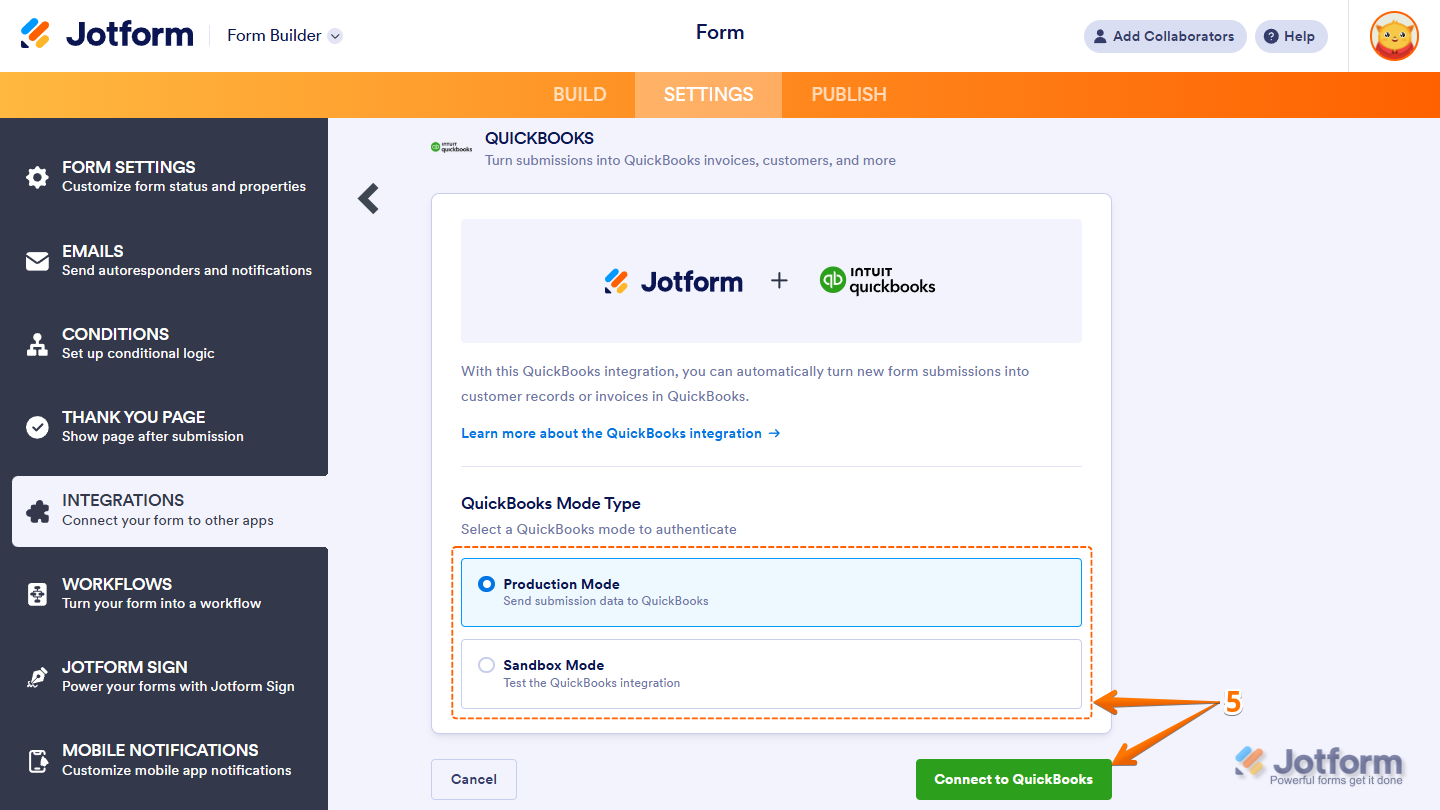
- Next, under the QuickBooks Mode Type, choose either Production or Sandbox Mode, and then click on Connect to QuickBooks.
Note
Production Mode means you’re connecting and sending data to a real company account while Sandbox Mode is to test the QuickBooks integration. QuickBooks’ guide on Create and Test with a Sandbox Company has more details about that.
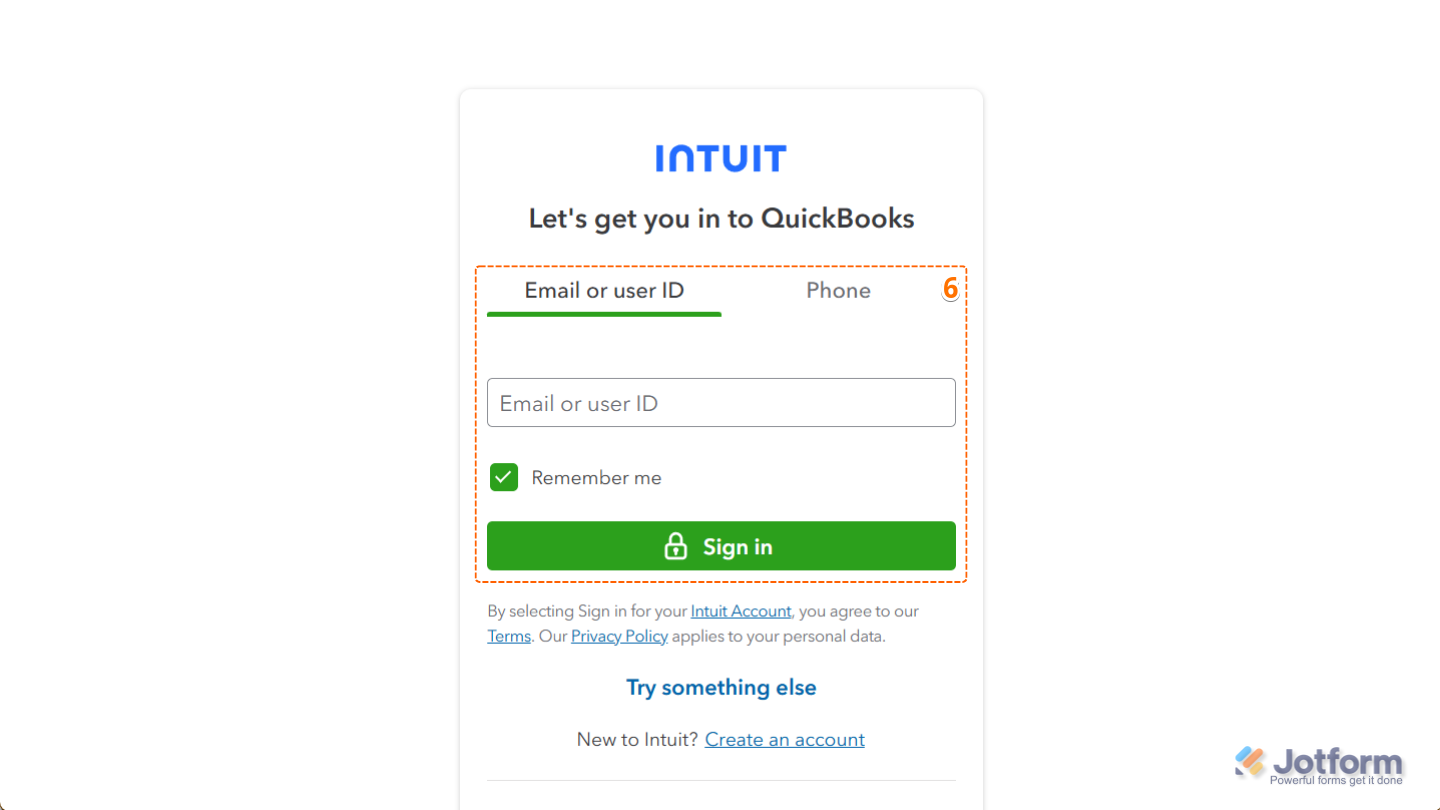
- In the new browser window that opens, log in with your Email or User ID or by Phone.
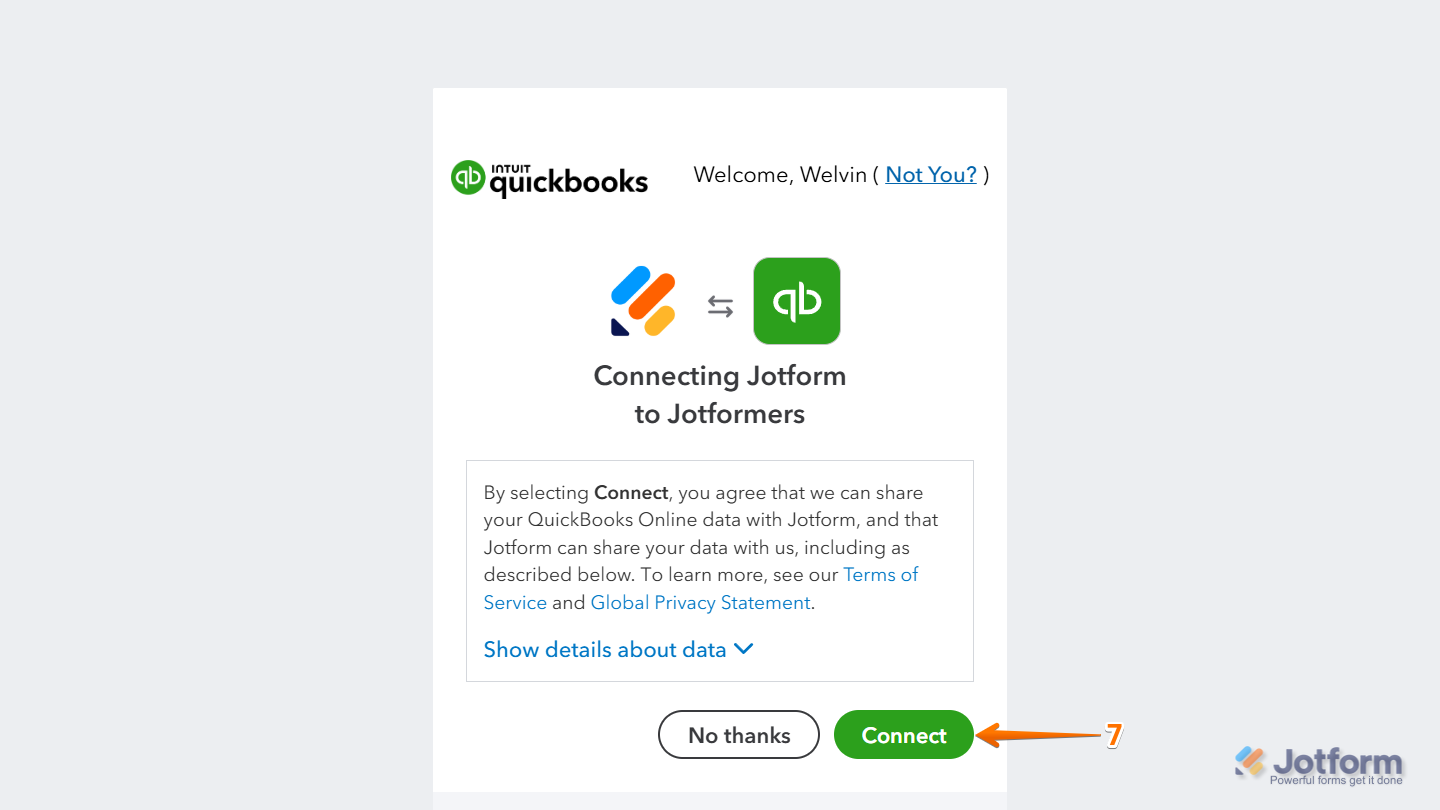
- Then, on the next screen, click on Connect to link your QuickBooks account.
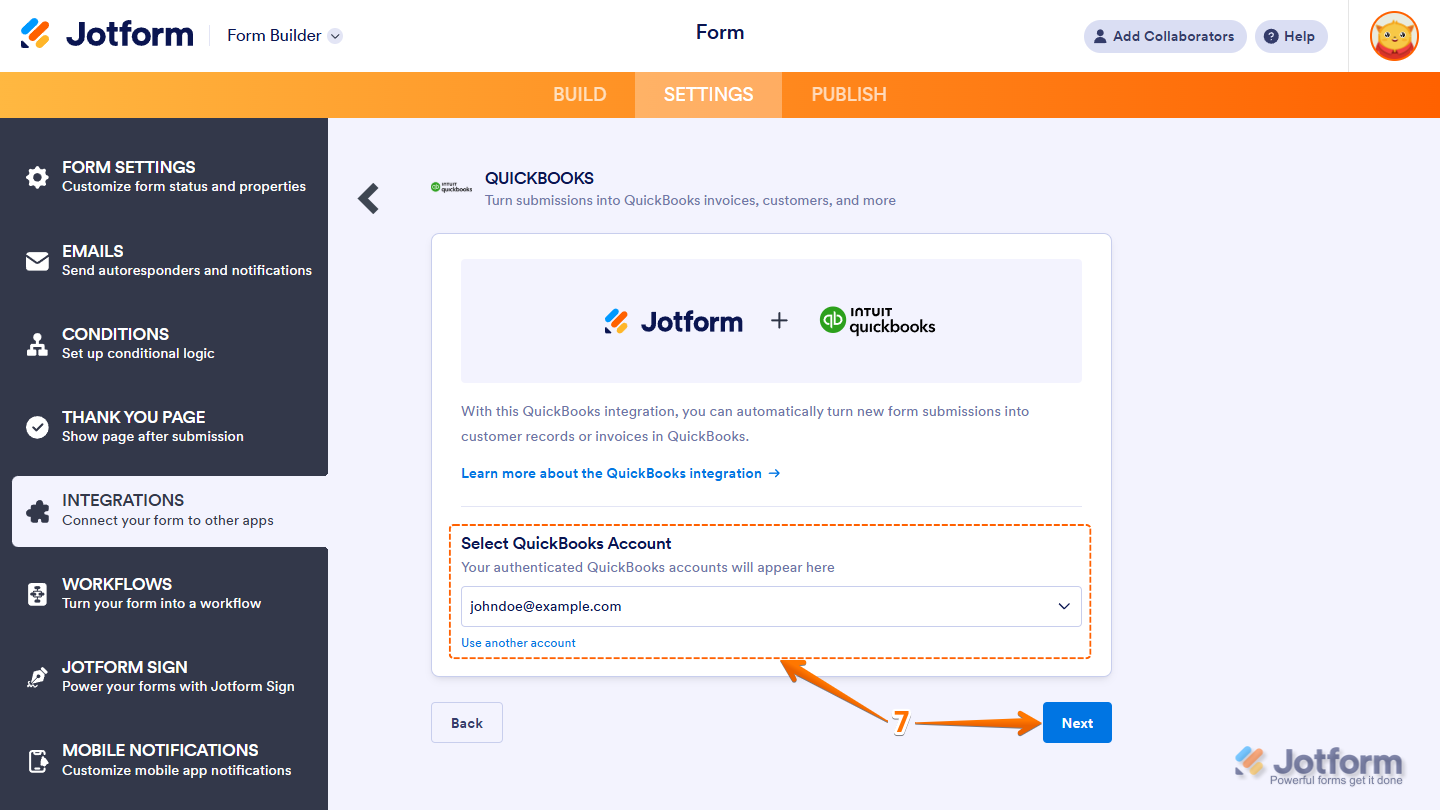
- If you’ve logged in before, just pick your QuickBooks account from the Dropdown menu, and then click on Next. To use a different one, click on the Use Another Account link.
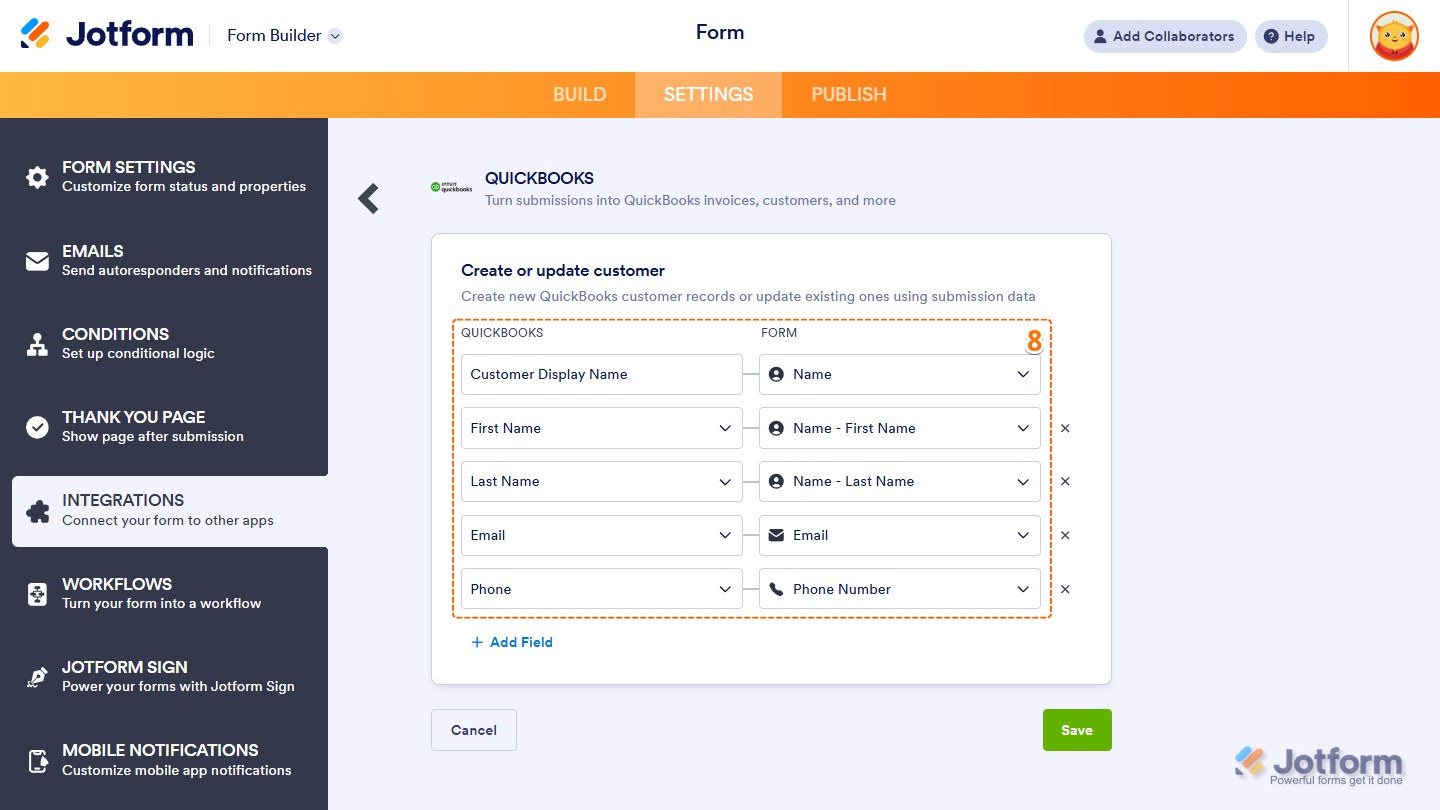
- Now, in the Create or Update Customer section on the right, select your QuickBooks fields in the first column and your Form fields in the second to map them accordingly.
Note
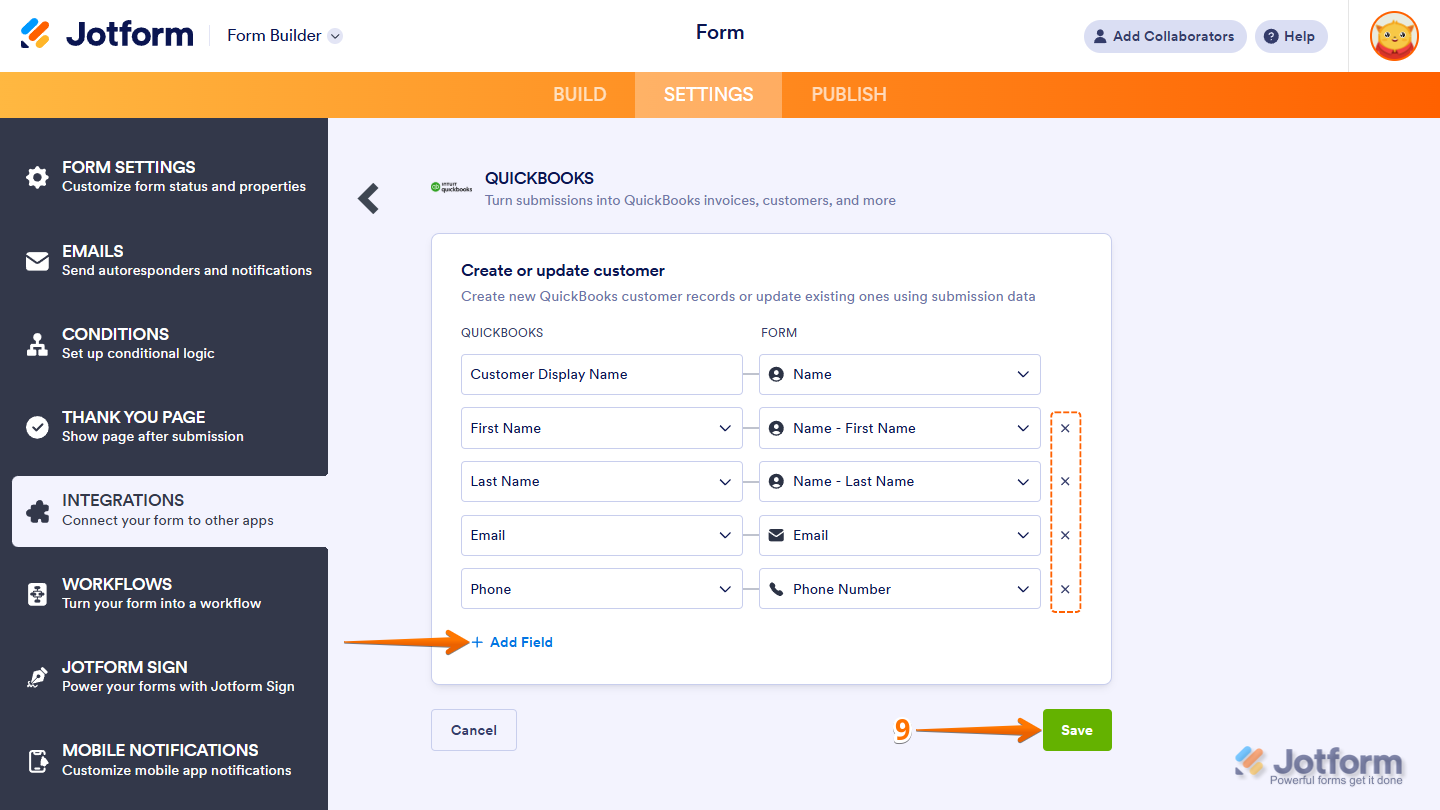
To map more fields, just click on + Add Field at the bottom of the section. If you need to remove a mapped field, click the X icon on the right side of the field.
- Once you’re done, click on Save at the bottom.
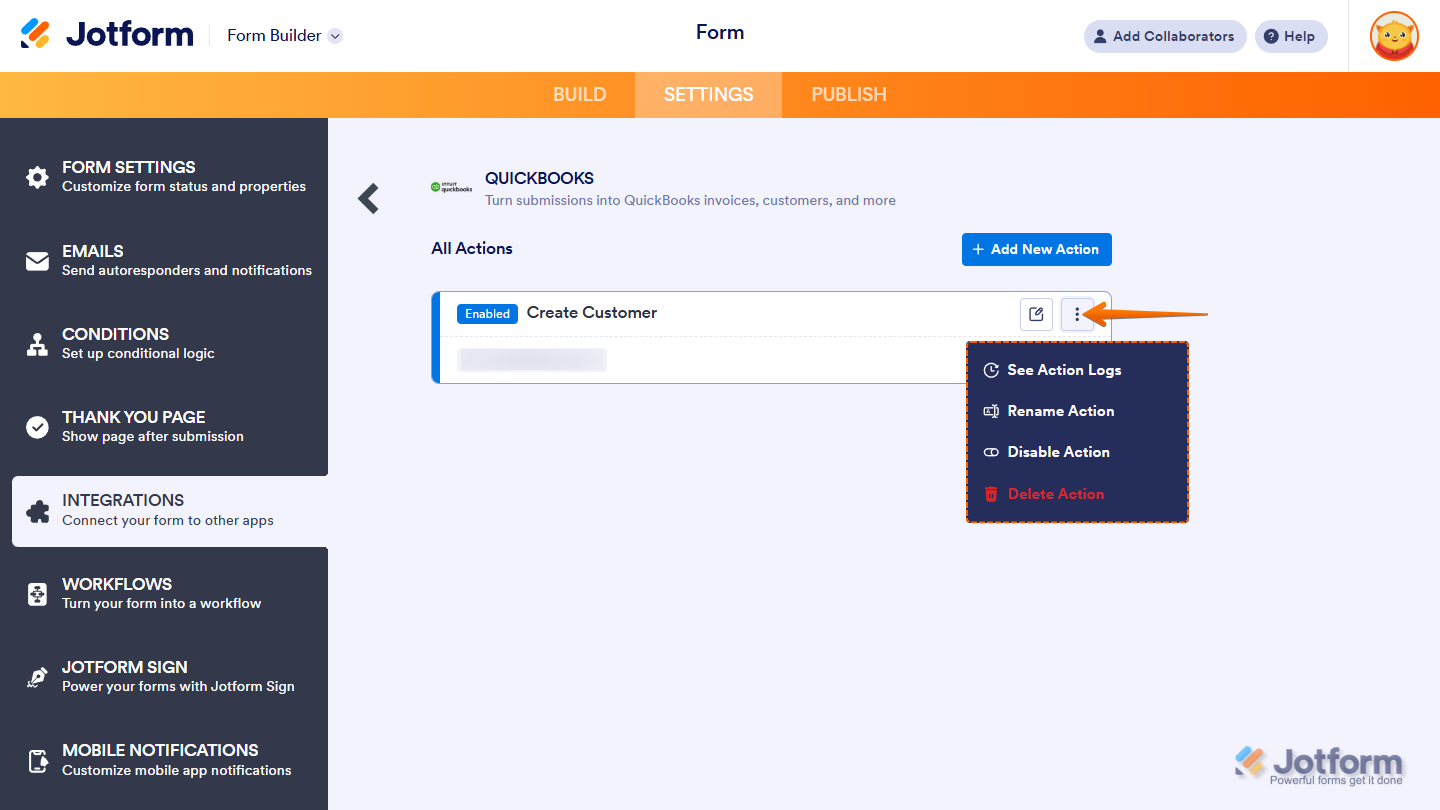
And that’s it! After saving the integration, you’ll see the list of actions you’ve set up and the Add New Action button on the main page. Hover your mouse over an action and click on the Three Dots icon on the right side of it to access these options:
- See Action Logs — View successful and failed runs, helpful for troubleshooting.
- Rename Action — Change the action’s title.
- Disable Action — Temporarily stop the integration from sending data.
- Delete Action — Remove the action from your form.

Send Comment:
8 Comments:
November 14, 2025
We tried this but unfortunately the form cannot map to Quickbooks custom fields. I have searched for a solution but nothing works. The Quickbooks custom fields simply do not appear in the drop down.
September 11, 2024
would like to implement a form for salespeople to request the creation of an invoice. Given that pricing can vary with each deal, I need a workflow where another team member can approve or edit the pricing on the same invoice. Additionally, can the product fields be dynamic, updating based on options from QuickBooks? Furthermore, can we generate a work order form from this invoice, excluding pricing details, and allow someone to approve or edit the information before it is sent to our fulfillment office? Is this possible without using zappier or third apps
August 14, 2024
can i use it on desktop?
February 4, 2024
Will you be able to use with Desktop?
December 28, 2023
If we create an employment applications in Jotform, can we integrate with Quickbooks to create a new employee file?
July 29, 2023
Still want to know if you need to create two jotforms - a Create a Customer and Create an Invoice. If the customer is already on QBO, I just need an invoice created... However, if they are not yet a customer I need to create one.
July 28, 2023
I really appreciate you integrating Quickbooks with Jotform. It will be a real time saver for my. However, I have followed the instructions on the video and set up the customer file matching form data with Quickbooks fields. I did a test submission of the form but the new costomer profile does not show up in my client files in Quickbooks. When I do a search, it does not show up either. Both Quickbooks and Jotform show my accounts linked.
June 23, 2023
It worked for us