With Jotform Enterprise, you can prefill forms using data from Google SSO. To get started, you’ll first need to set up SAML Attribute Mapping. This ensures user details—like the name, email, and phone number—are passed to your form fields correctly. Once everything’s mapped, users can log in and see their information automatically filled in.
Notes
- Before setting up SAML Attribute Mapping, be sure you’ve already created and configured your SAML app in Google Workspace. For steps on getting started, check out our guide on How to Configure Google SSO for Jotform Enterprise.
- You can now let users log in using either Single Sign-On (SSO) or their email and password. You also have the option to require SSO for guest users.
Configuring SAML Attributes for Google Workspace
To send info like the user’s name and email from Google Workspace to Jotform Enterprise, you’ll need to set up SAML Attribute Mapping in your Google Admin Console. Getting started is simple—here’s what to do:
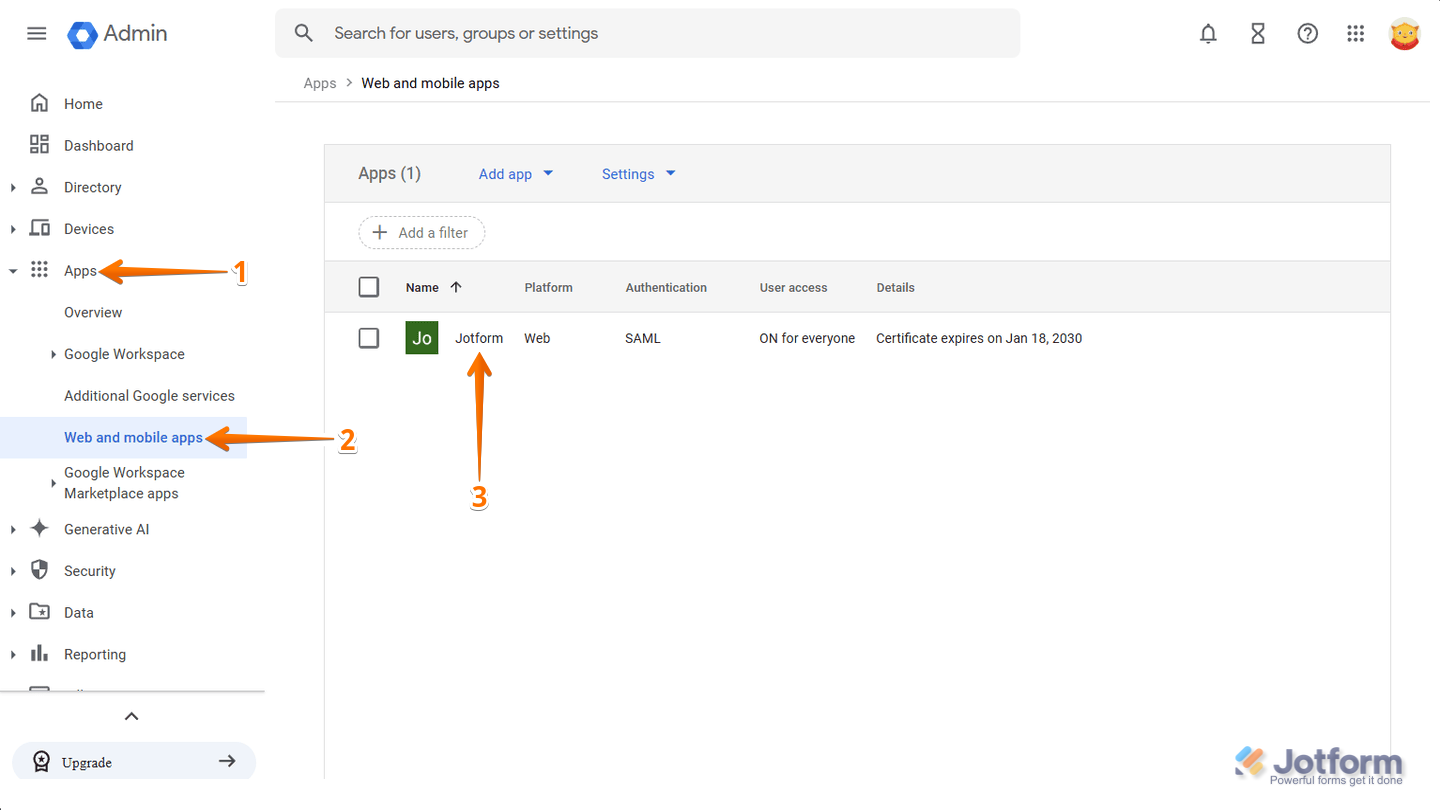
- Log in to your Google Workspace Admin Console, then, in the menu on the left, click on Apps.
- Now, in the menu that comes up, click on Web and Mobile Apps.
- Next, click on the Jotform SAML App you created for Jotform SSO.
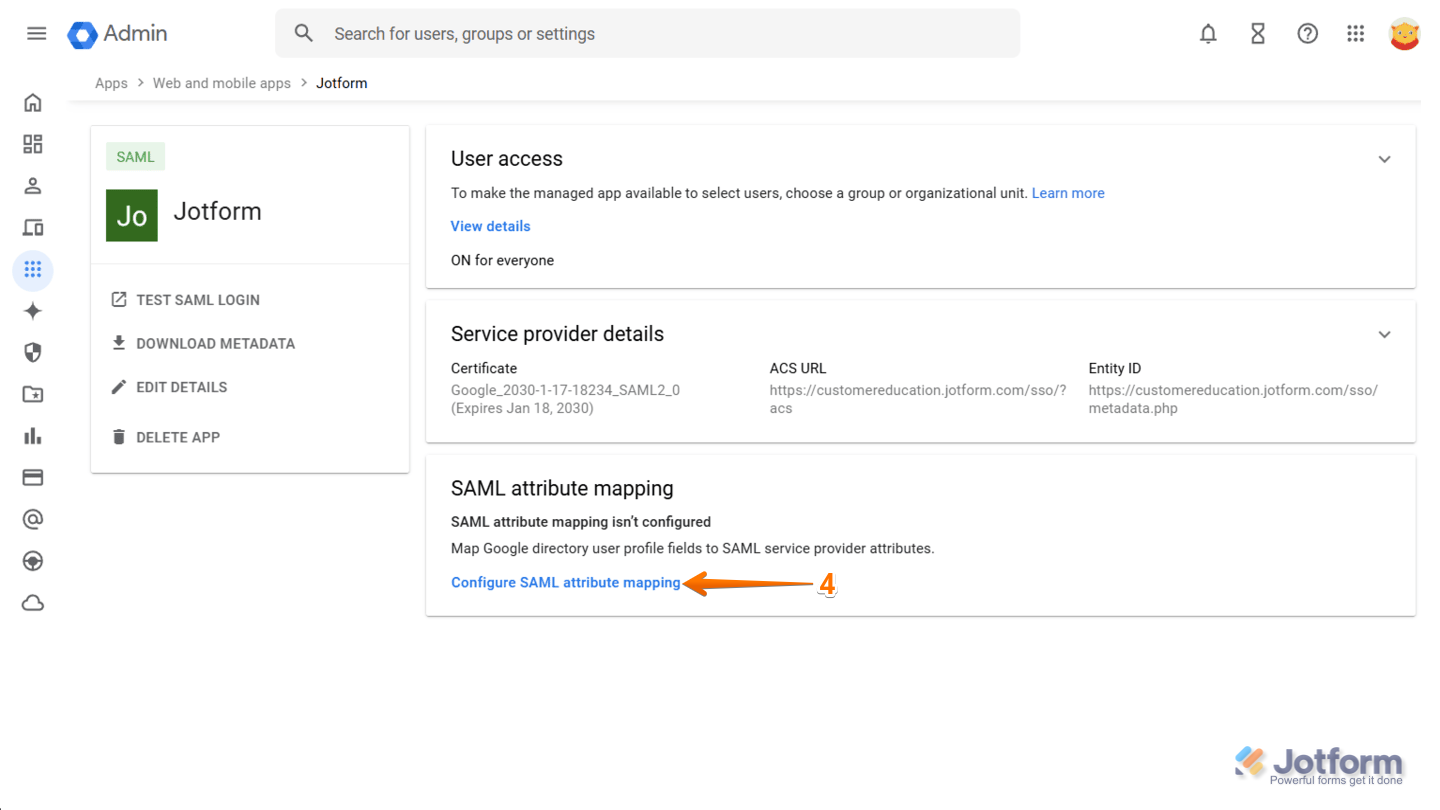
- Then, under the SAML Attribute Mapping section, click on Configure SAML Attribute Mapping.
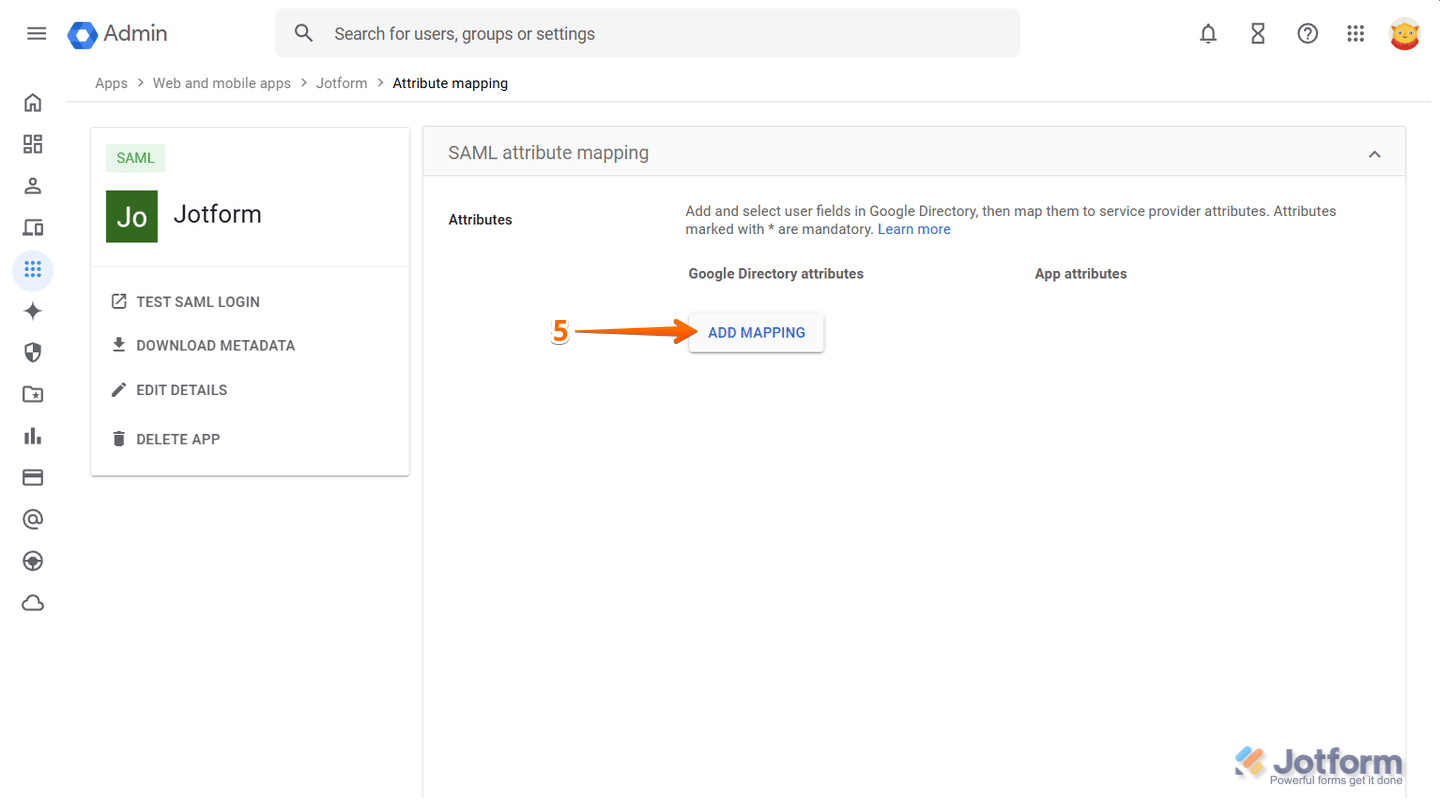
- Next, click on Add Mapping.
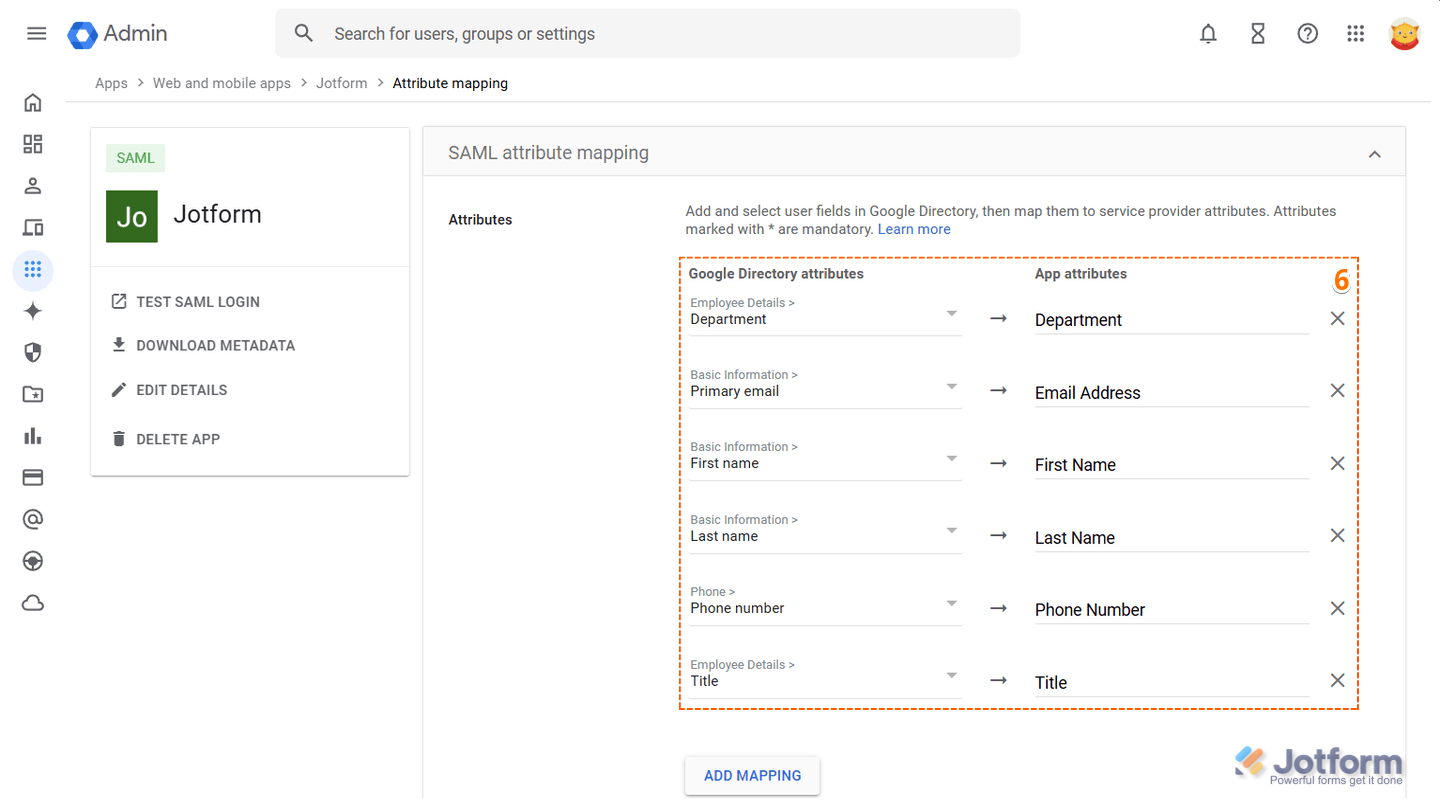
- Now, map your SAML Attributes like you see below, and you’re all set.
Pro Tip
The attributes above are just the basic ones from Google’s directory. To add more, just click the Add Mapping button and map additional fields as needed.
That’s it! Now you can move on to setting up SAML Attribute Mapping in your Jotform Enterprise server.
Setting Up SAML Attribute Mapping in Your Jotform Enterprise Server
Once you’ve mapped the attributes in Google, the next step is to set up the same mappings on your Jotform Enterprise server. This links the data between systems, ensuring user information is passed correctly through SSO. Here’s how to do it:
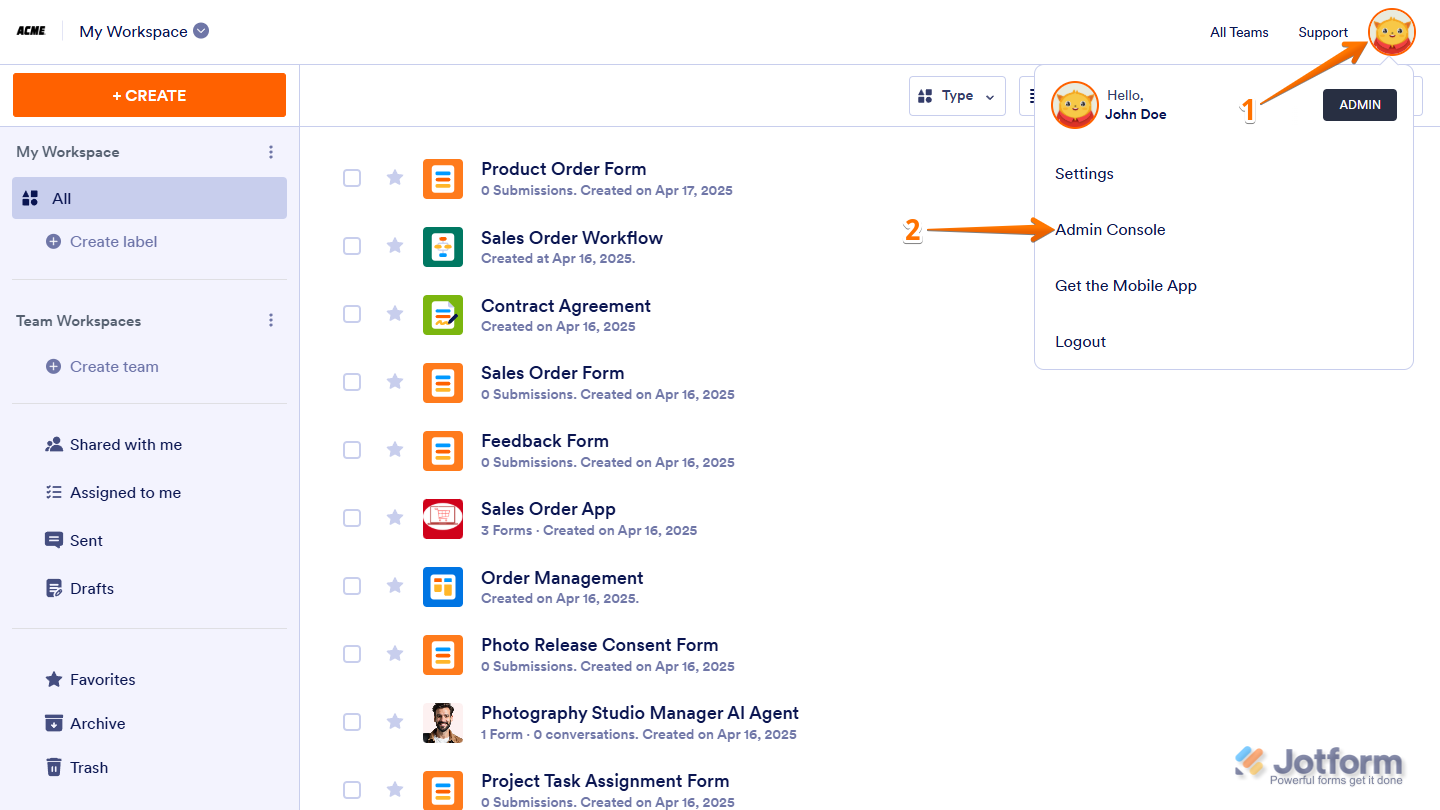
- On your My Workspace page, click on your Avatar/Profile picture in the top-right corner of the screen.
- Then, in the Dropdown menu that comes up, click on Admin Console to open your Admin Dashboard page.
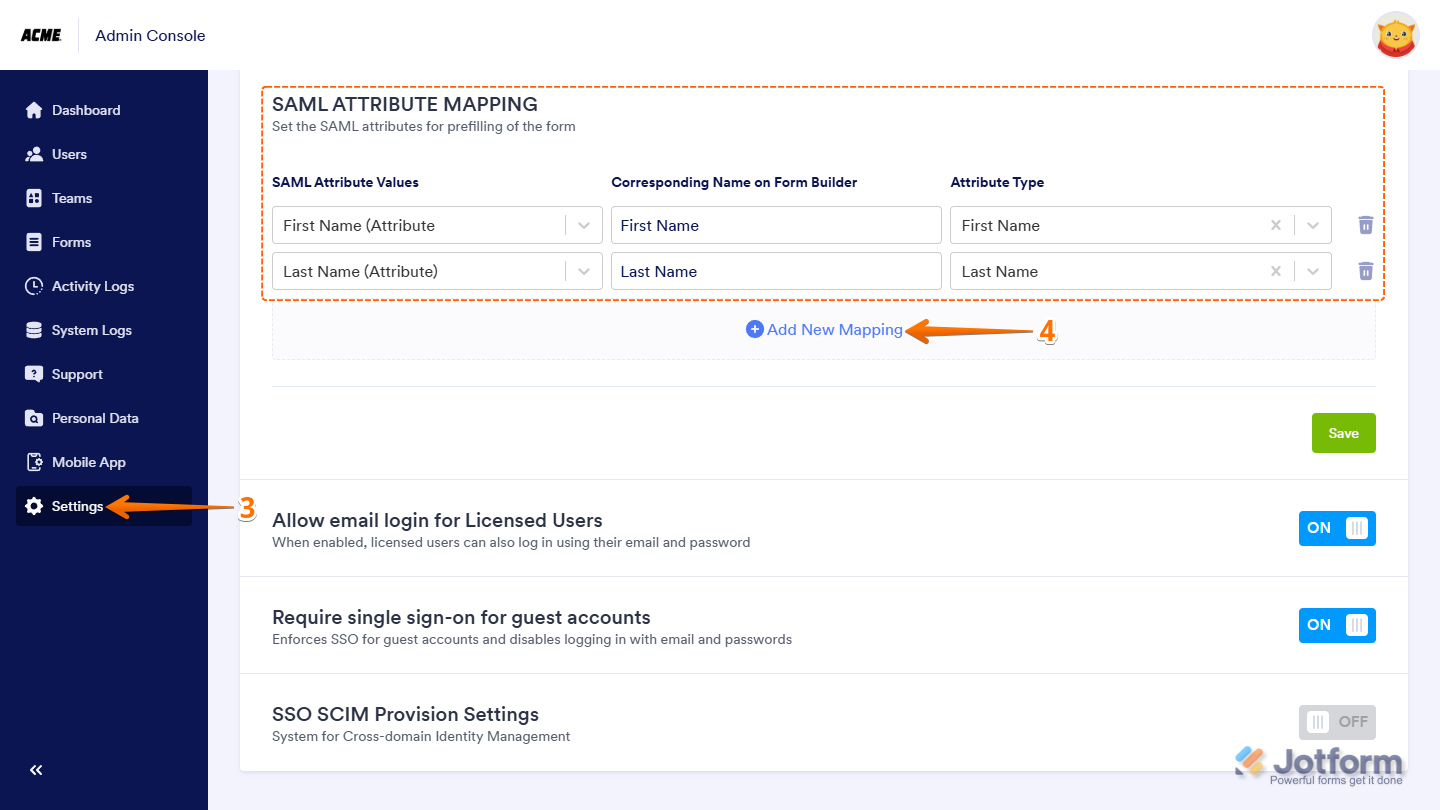
- Click on Settings in the menu on the left to open your Settings Dashboard.
- Scroll down to the SAML Attribute Values section and click on Add New Mapping to start mapping the SAML Attribute Values like you see in the example below:
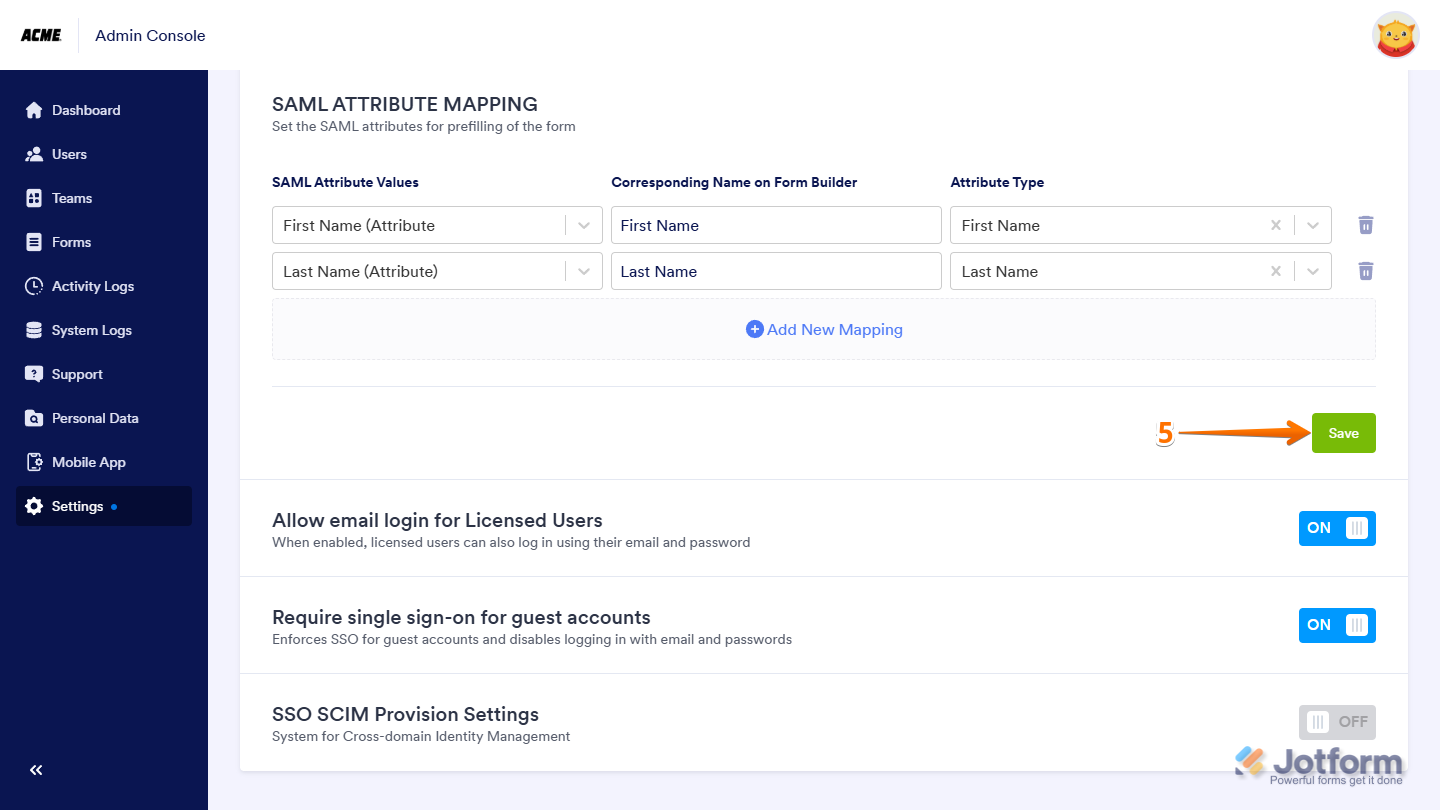
- Now, click on Save, and you’re ready to go.
Note
Jotform Enterprise provides Attribute Types for first name, last name, and email. If you need to map additional fields, you can manually enter both the SAML attribute values and the matching field names from the Form Builder—no need to select an Attribute Type.

Send Comment: