Adding the Jotform AI Chatbot to your Salesforce Experience Cloud site enhances user engagement and provides instant support to visitors. It streamlines communication, improves response times, and delivers a more personalized experience—all within your existing site setup.
The Jotform AI Chatbot can answer common questions, help customers navigate your site, and even connect them to the right team members when needed—all without interrupting their browsing experience. Integrating it into your Experience Cloud site ensures a smoother, more efficient way to support users and maintain consistent communication across your organization’s digital channels.

Notes
- Ensure your Experience Cloud site is properly set up and configured in your Salesforce organization. This will make the Jotform AI Chatbot integration process smoother and easier. Check out Salesforce’s guide on how to Set Up and Configure Your Org for Experience Cloud Sites to learn more.
- Make sure to install the latest version of Jotform from Salesforce AppExchange. This adds the Jotform AI Chatbot to your Custom Components section so you can easily access it when setting up your site.
Once you have everything you need, let’s go ahead and add the Jotform AI Chatbot to your Salesforce Experience Cloud Site. First, edit your existing Salesforce Site, and just set it up like this:
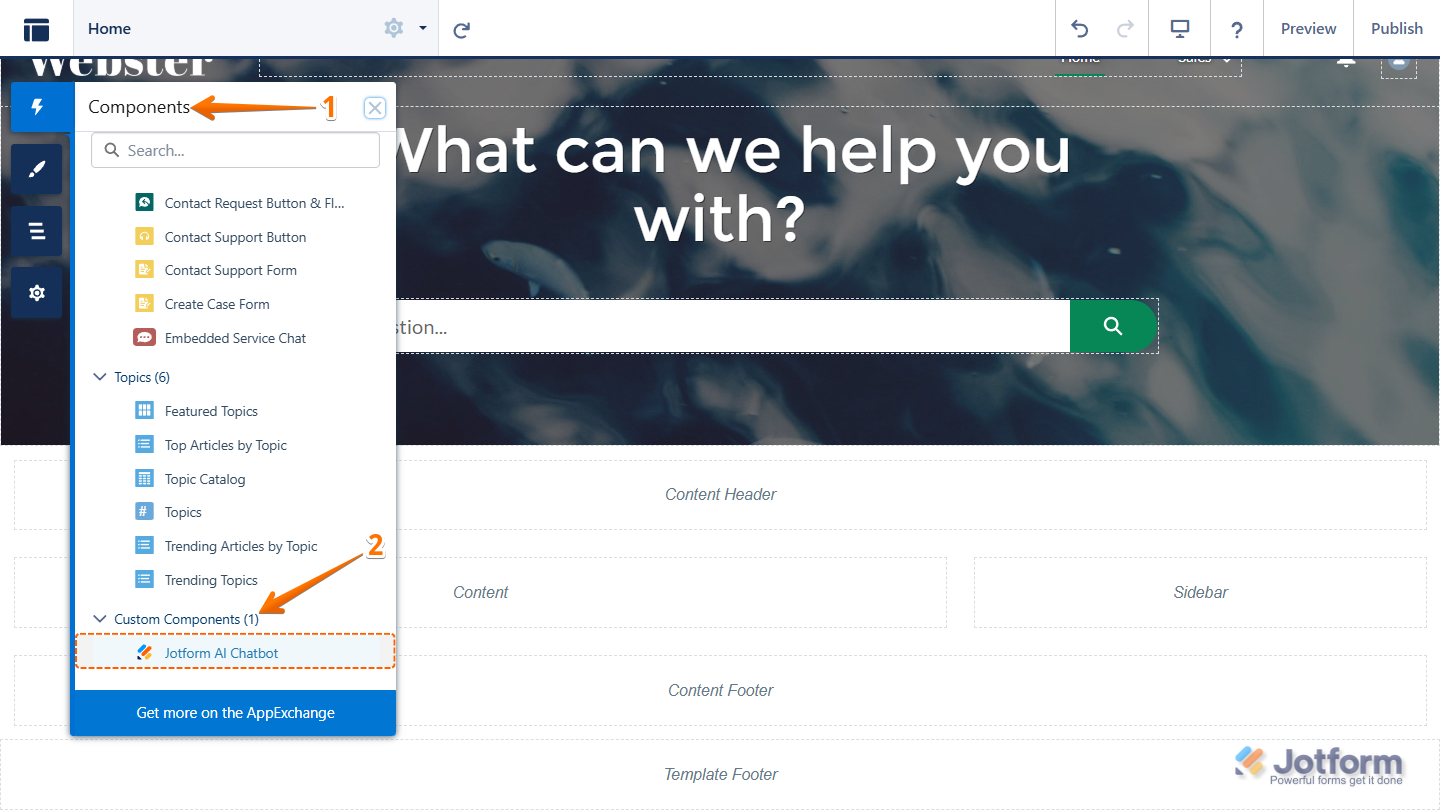
- In your Experience Builder, in the menu on the left side of the page, click on Components.
- Then, scroll down to the Custom Components Dropdown menu, and then drag and drop the Jotform AI Chatbot to the Template Header or Footer section of your site.
Note
For better visibility, add the Jotform AI Chatbot component to your site’s Header or Footer. This way, it stays accessible across all pages instead of just one.
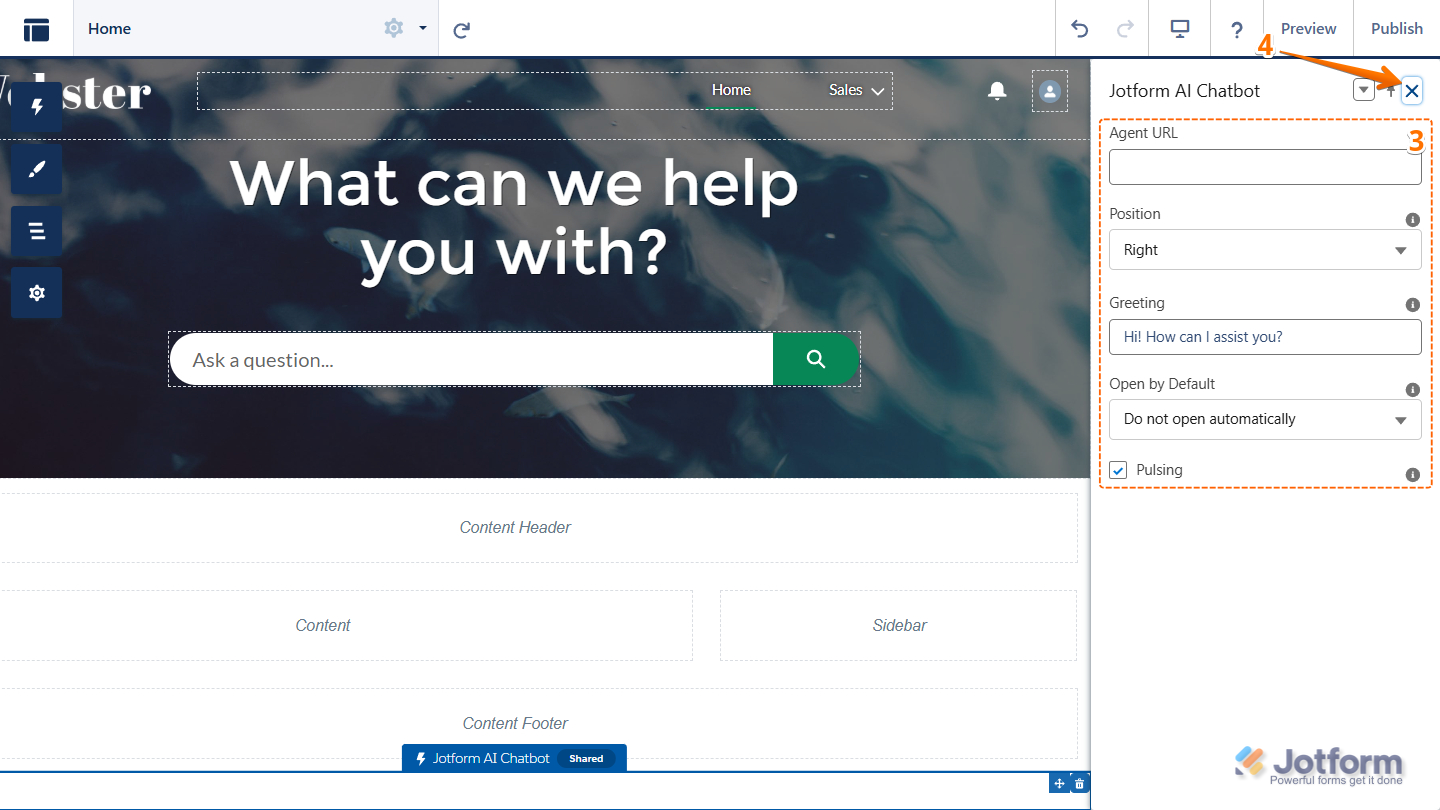
- Next, in the Jotform AI Chatbot menu on the right, set up these things:
- Agent URL — Enter the direct link of your AI Agent. You can check out our guide on How to Share Your AI Agent to learn more.
- Position — Select where the chatbot appears on your site: on the right or left side of the screen.
- Greeting — Enter a short welcome message that greets your users when they open the chatbot.
- Open by Default — Set when the chatbot should appear automatically for visitors.
- Pulsing — Add a pulsing animation to your chatbot avatar, helping it stand out and catch attention.
- Once you’re done, click on the X icon in the top-right corner of the Jotform AI Chatbot menu to close it.
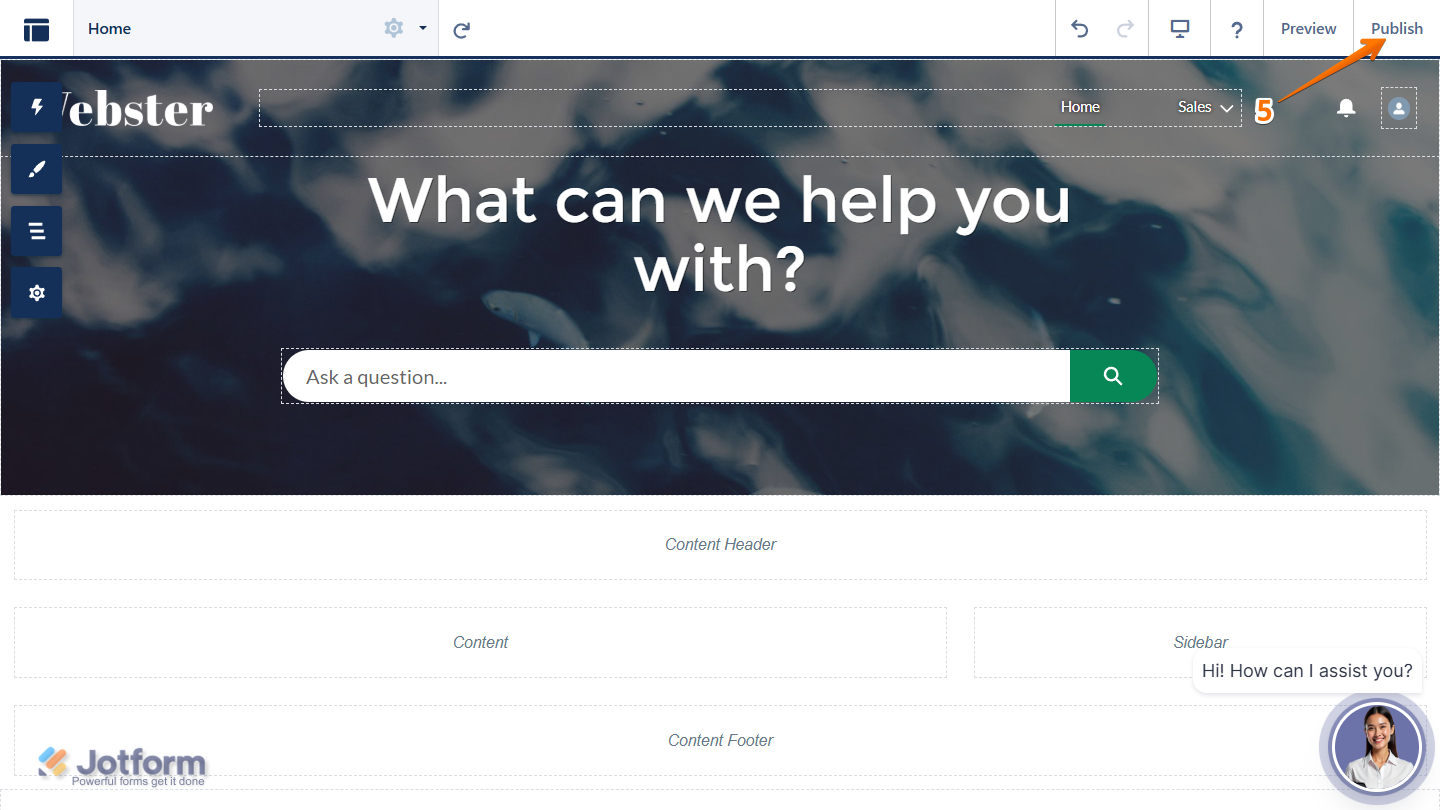
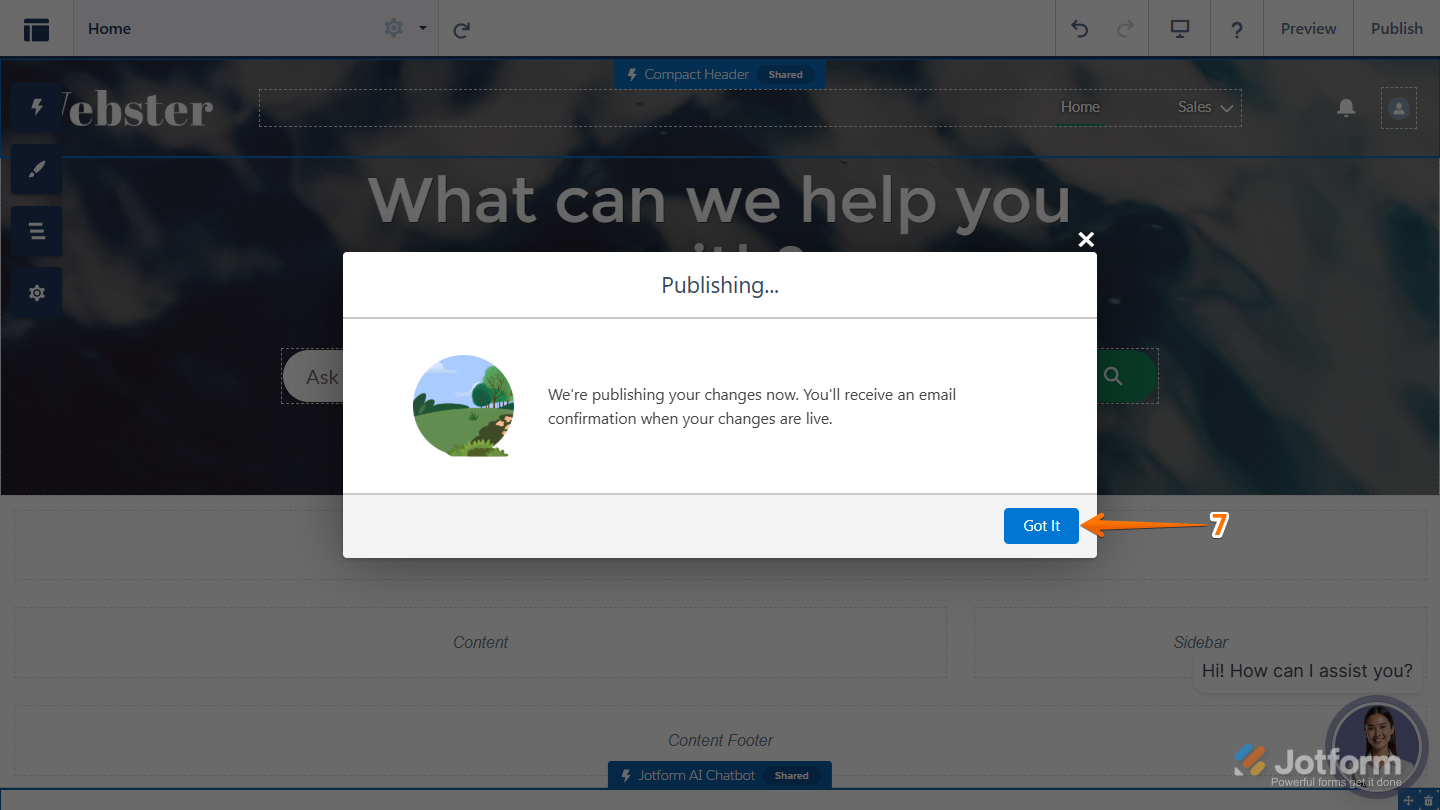
- Then, in the top-right side of your Experience Builder, click on Publish.
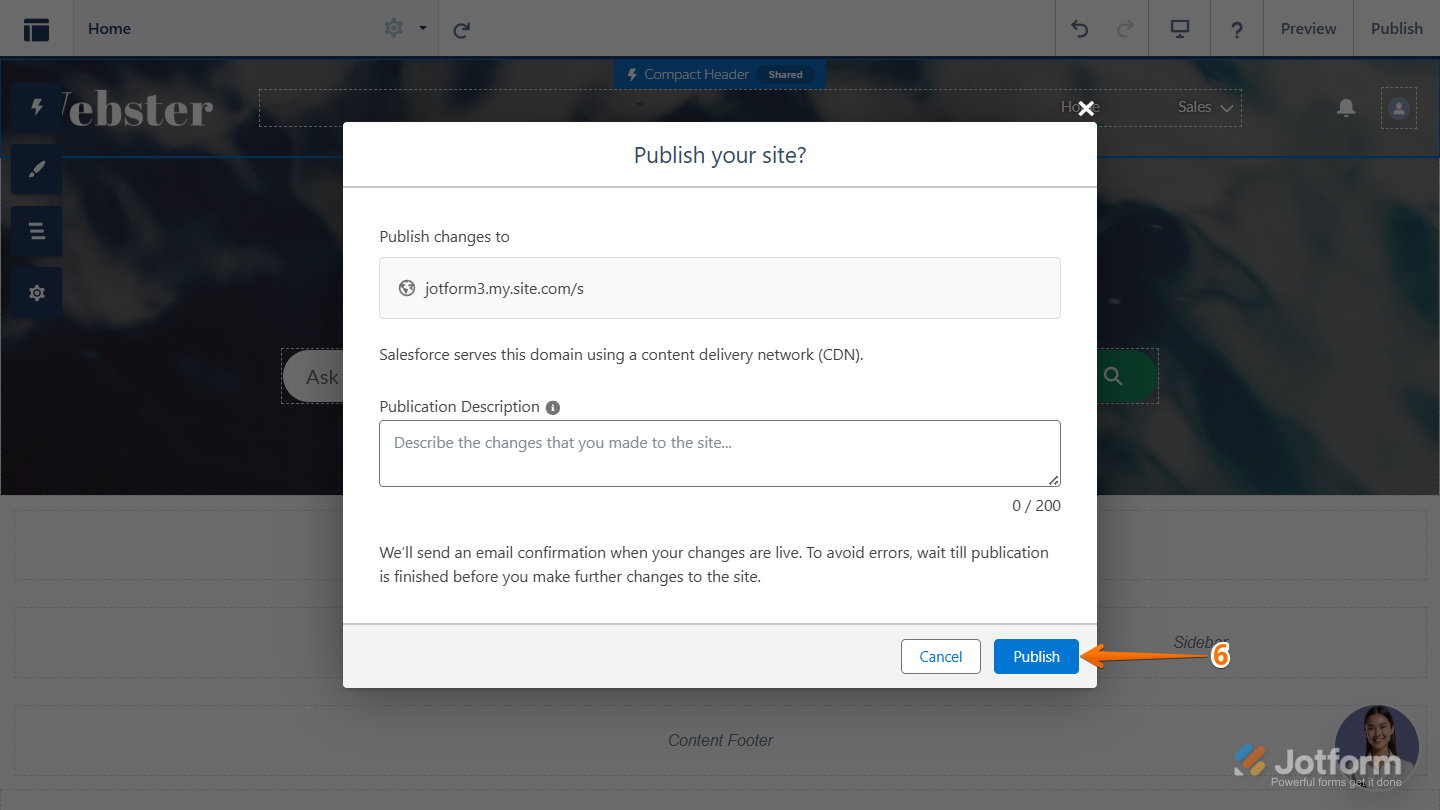
- Next, at the bottom of the window that opens, click on Publish.
- Finally, click on Got it to confirm.
That’s it. You’ve added your Jotform AI Chatbot to your Salesforce Experience Cloud site! Your chatbot is all set up and ready to help visitors and improve their experience.

Send Comment: