Calendly is a popular and innovative scheduling tool that simplifies arranging meetings and appointments. It eliminates the need for endless back-and-forth emails or phone calls by providing a centralized platform for you to share your availability and allow people to book time slots that work best for them.
With Jotform, you can use Calendly in three different ways: using the Appointment field, adding the Calendly widget, or through the Integrations tab.
Integrating Calendly with Your Form Through the Appointment Field
You can now integrate Calendly directly through the Appointment field on your form, so users can book time with you after submitting it. Here’s how to do it:
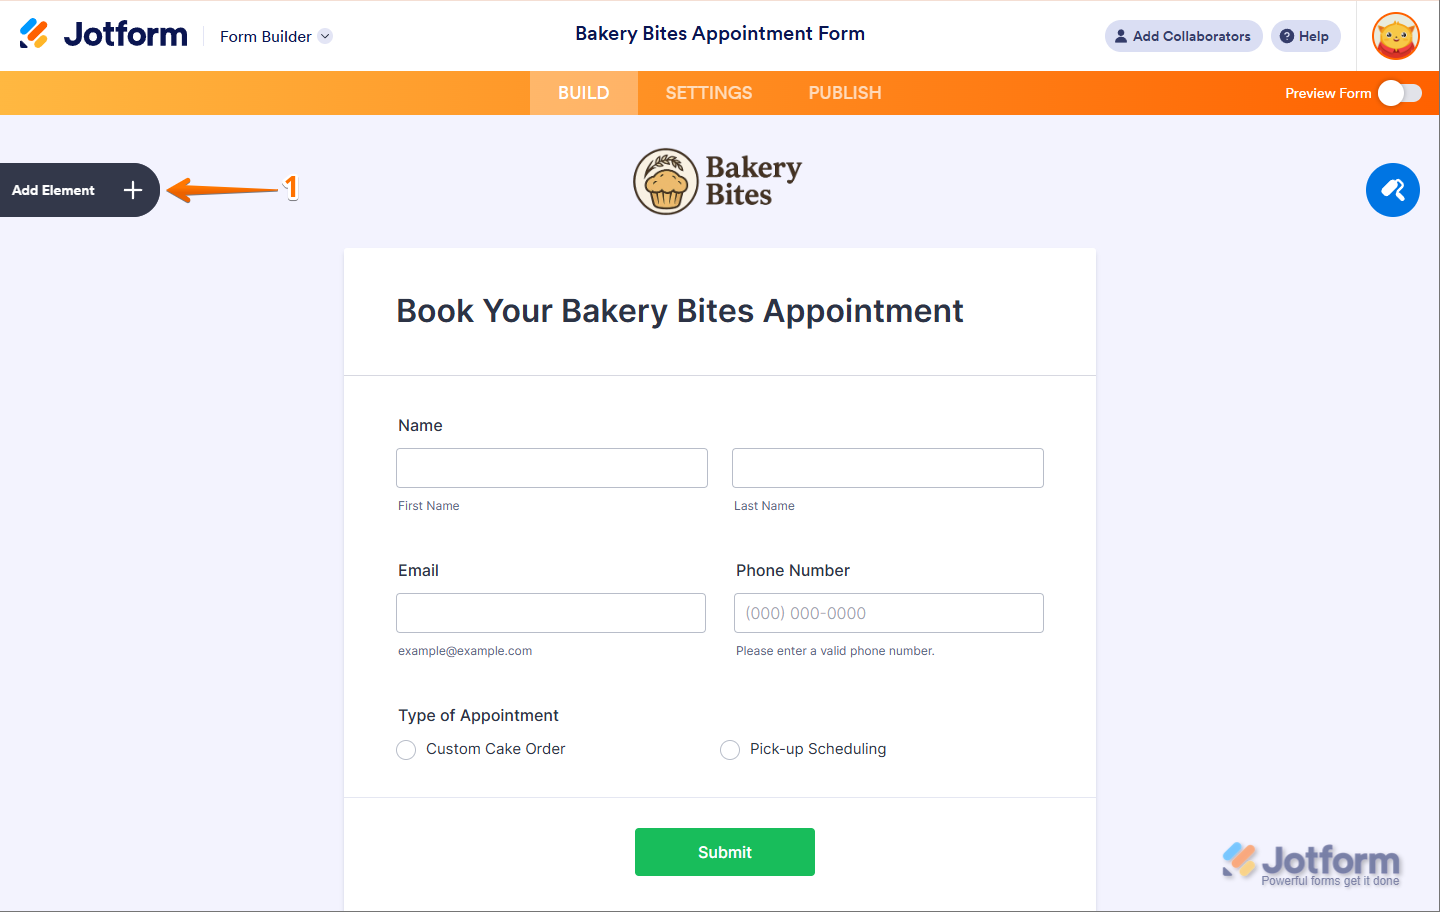
- In Form Builder, click on the Add Element menu on the left side of the page.
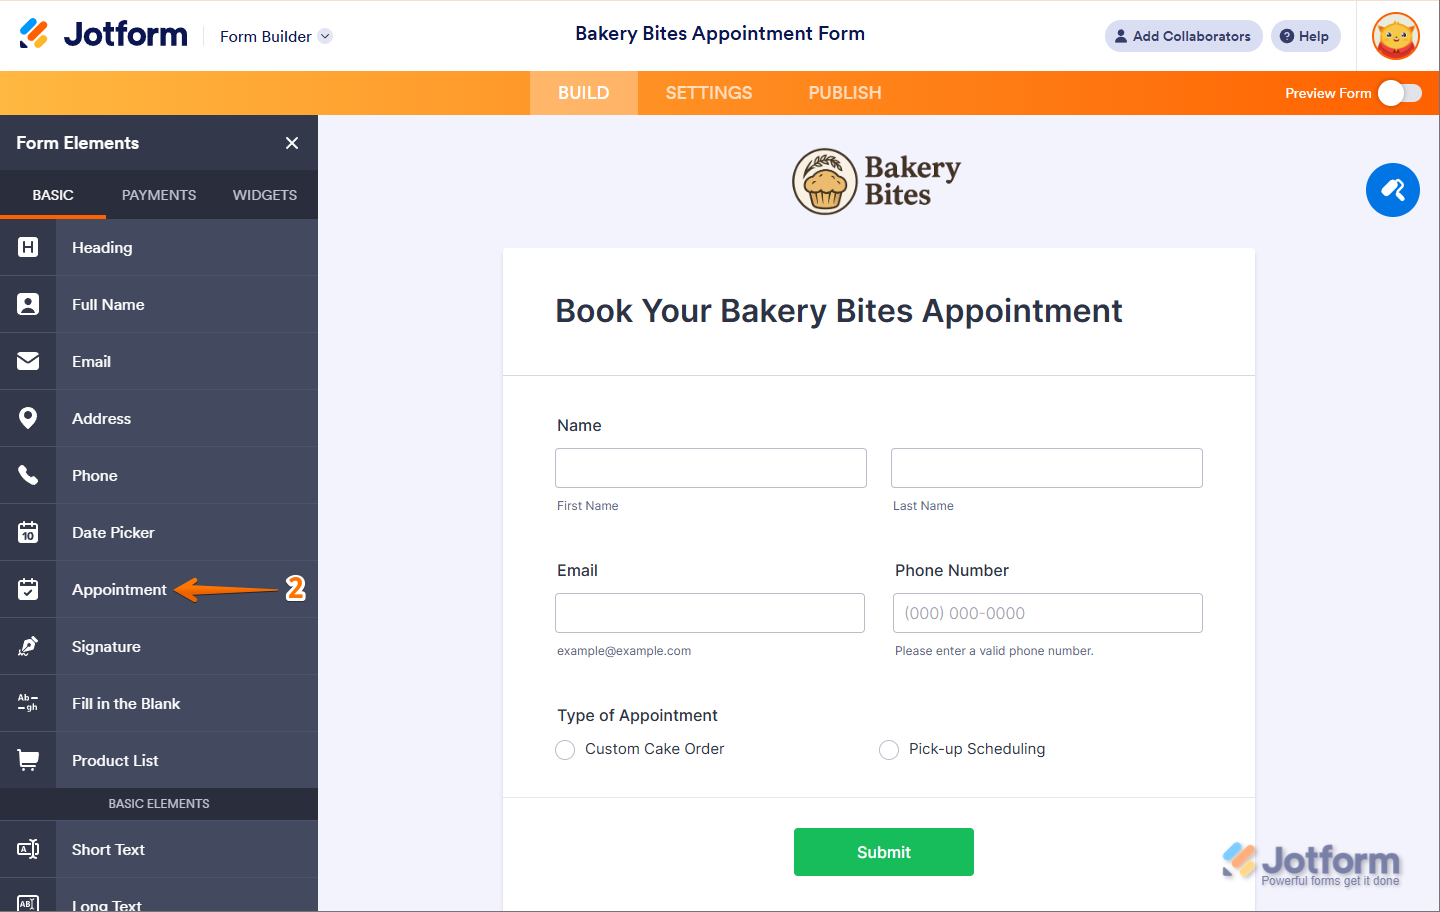
- Now, in the Form Elements menu, under the Basic tab, click on Appointment to add it to your form.
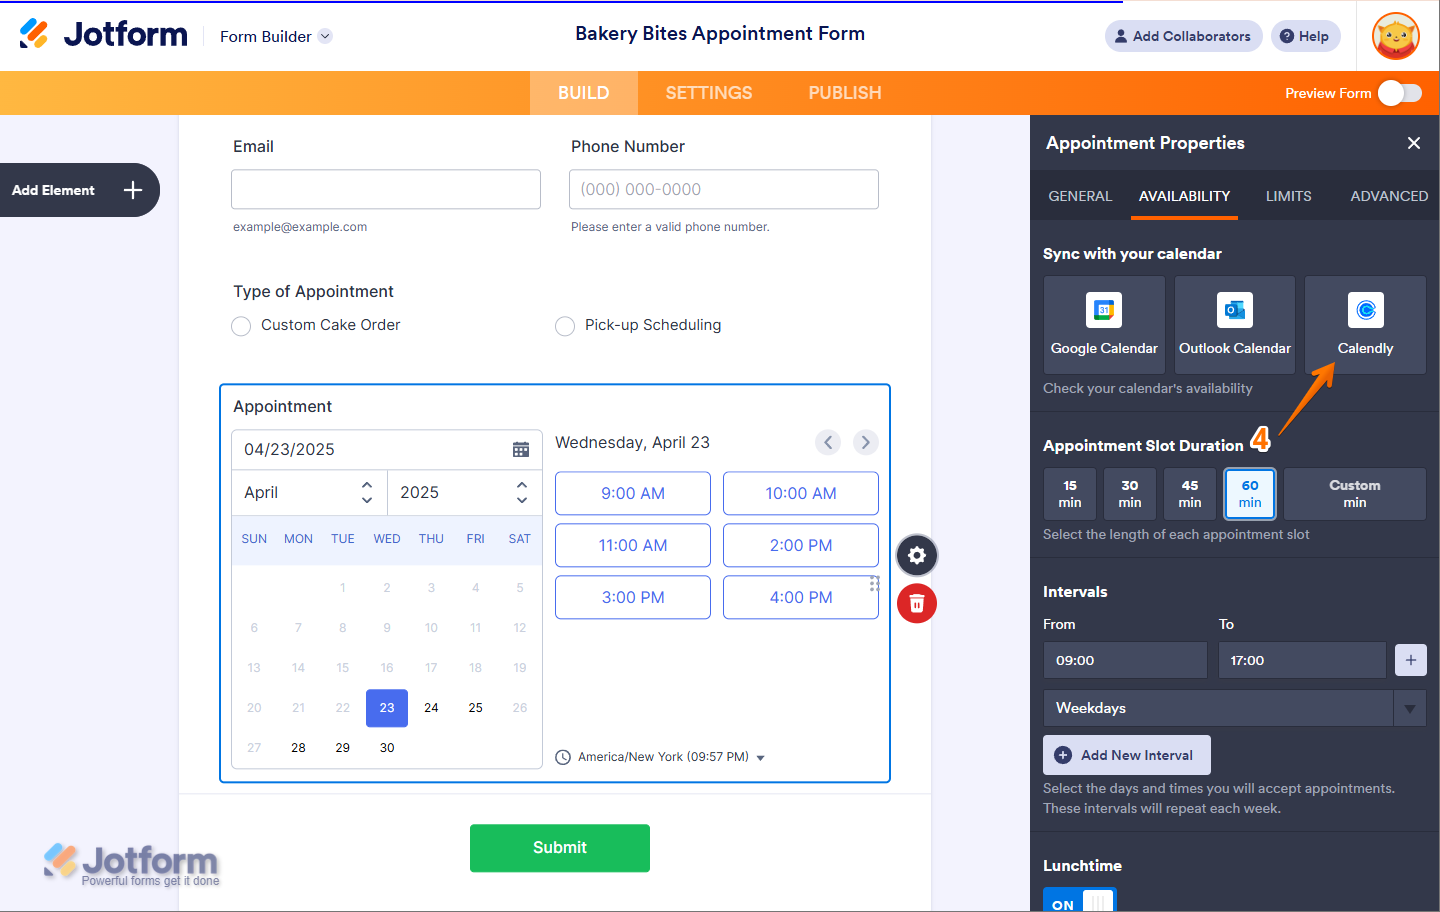
- Then, click on the Gear Icon.
- Now, in the Appointment Properties window that opens on the right side of the page, under the Availability Tab, click on Calendly.
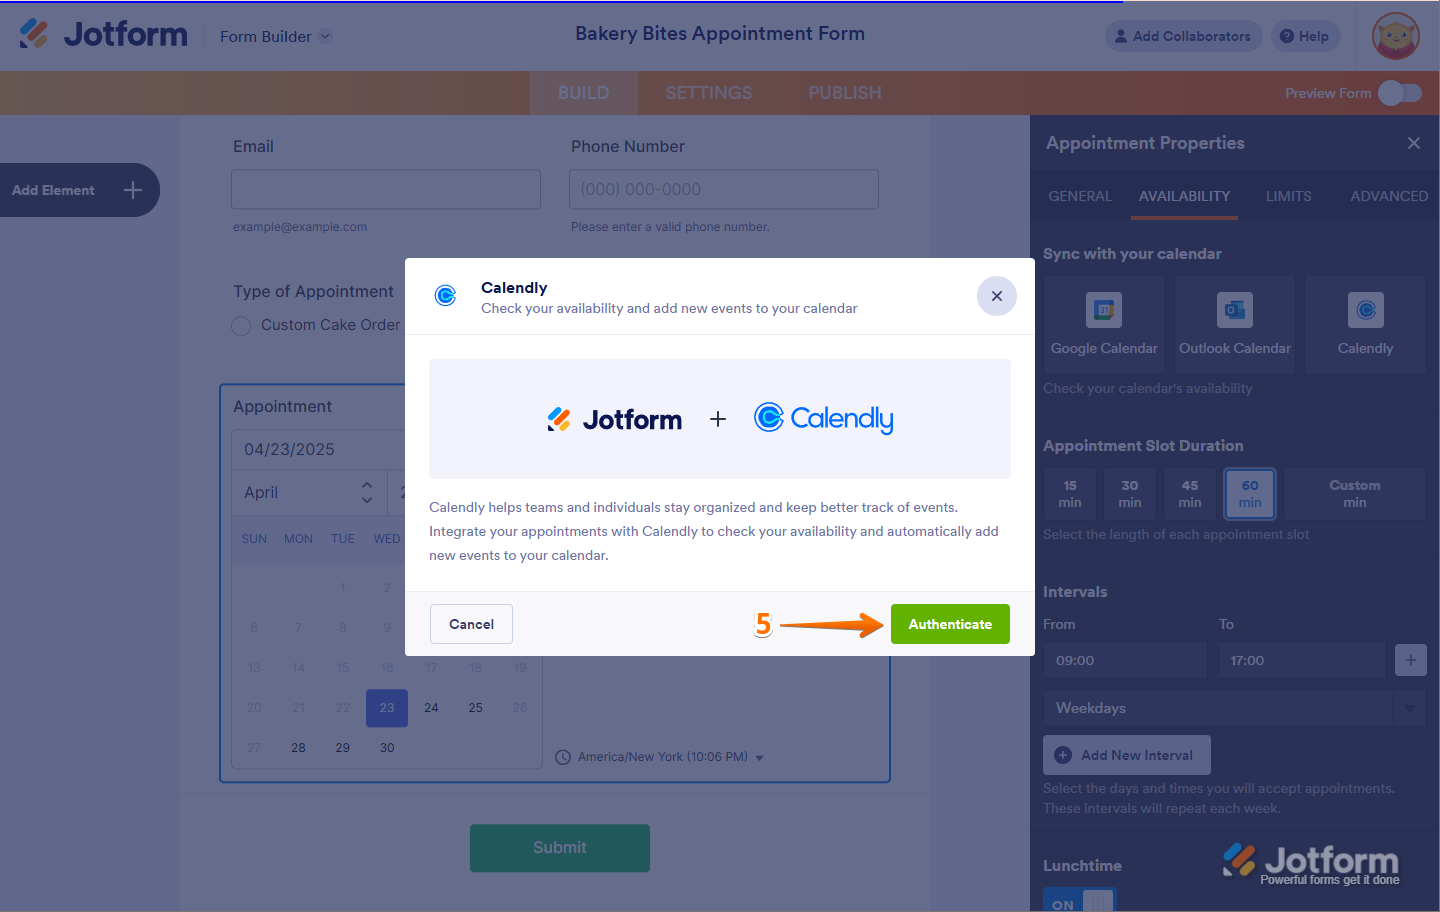
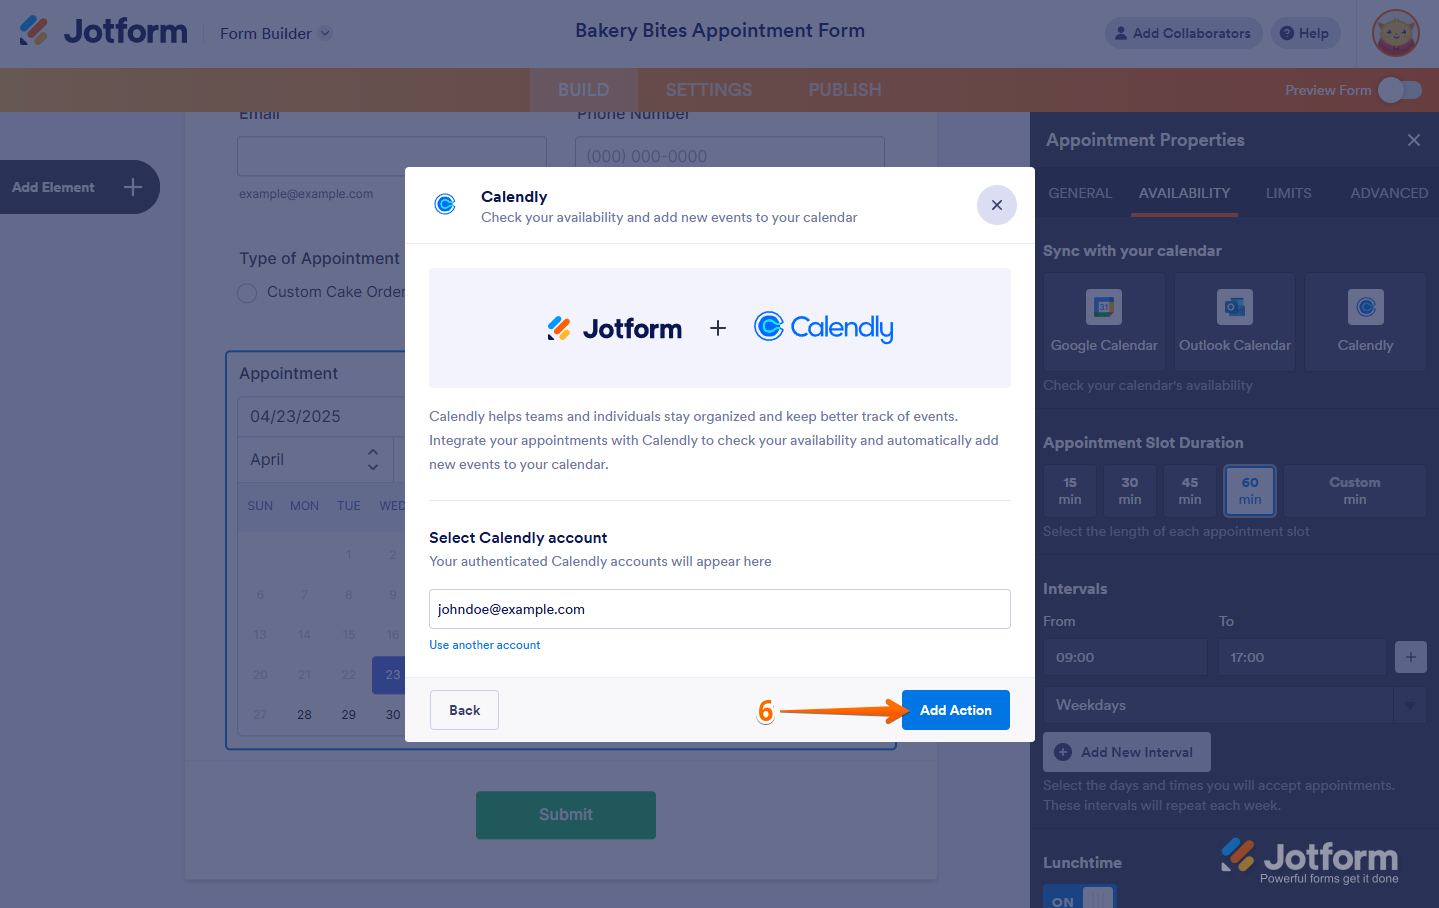
- In the window that opens, click on Authenticate, and then connect your Calendly Account.
- Then click on Add Action.
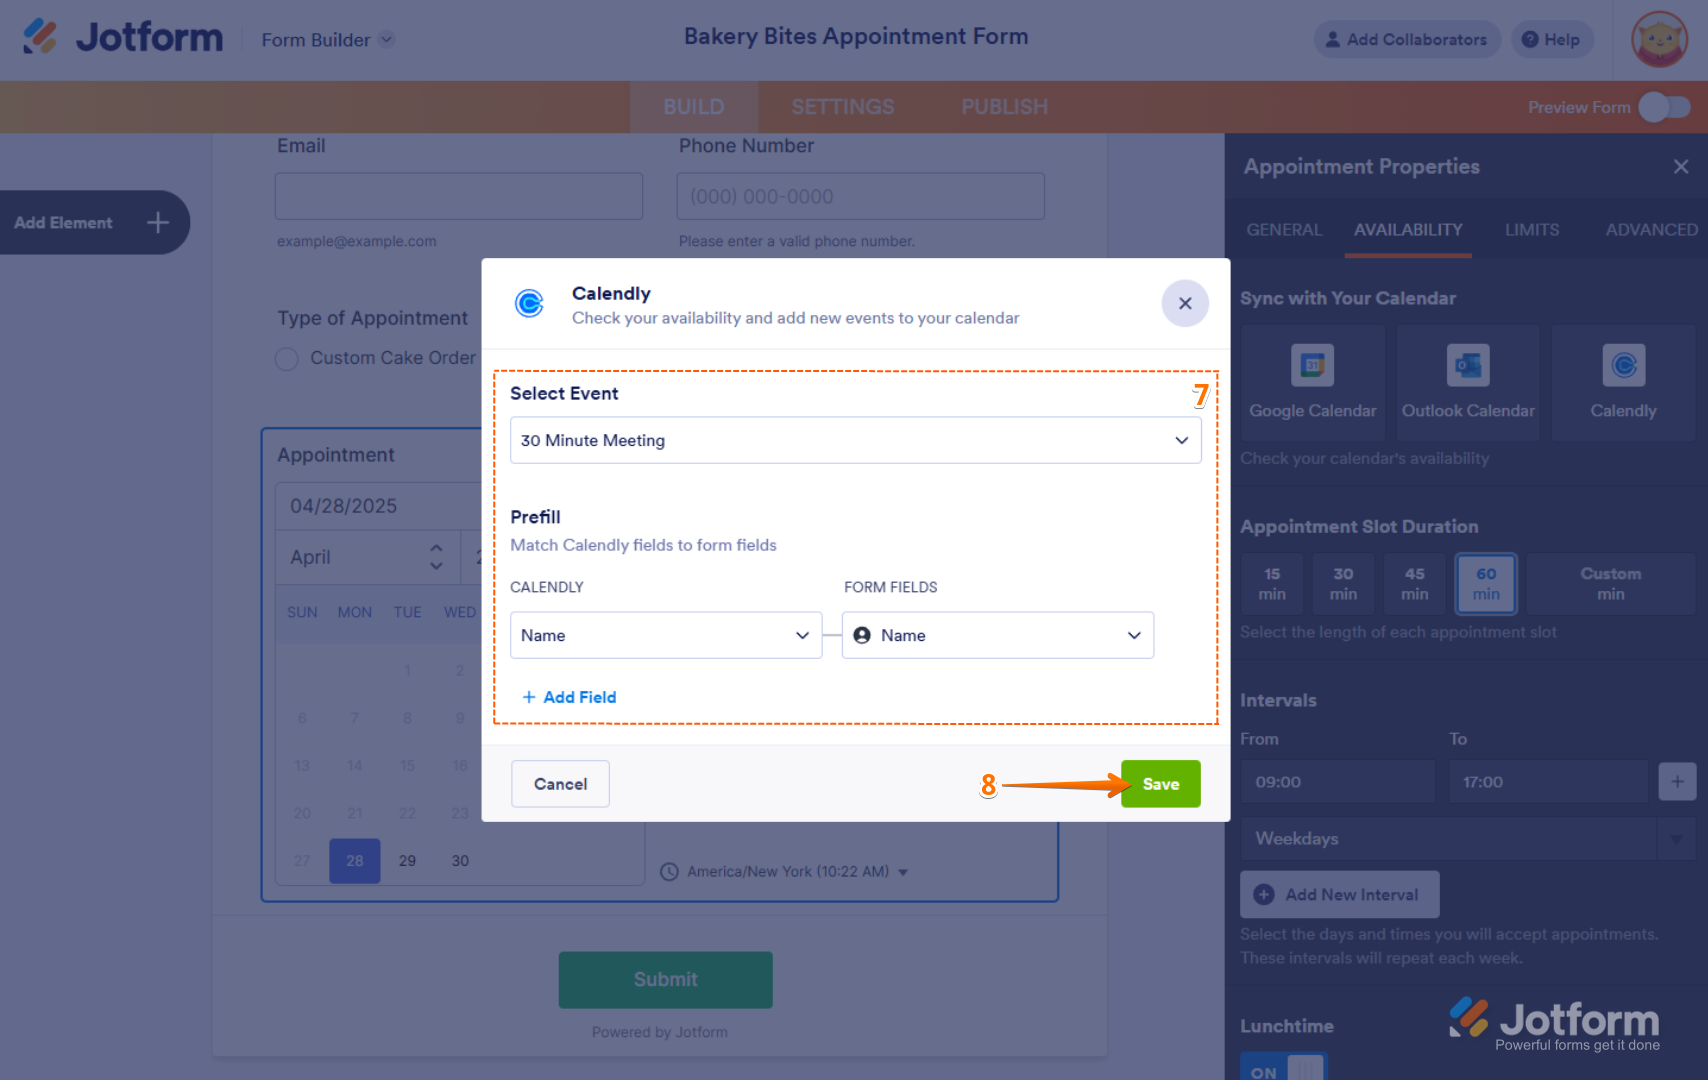
- Next, set up the following things:
- Select Event — Choose a calendar event in the dropdown menu.
- Prefill — Match your Calendly fields to your form fields to automatically prefill information into Calendly.
- Finally, click on Save.
You’re all set! You’ve now successfully integrated Calendly through your Appointment field.
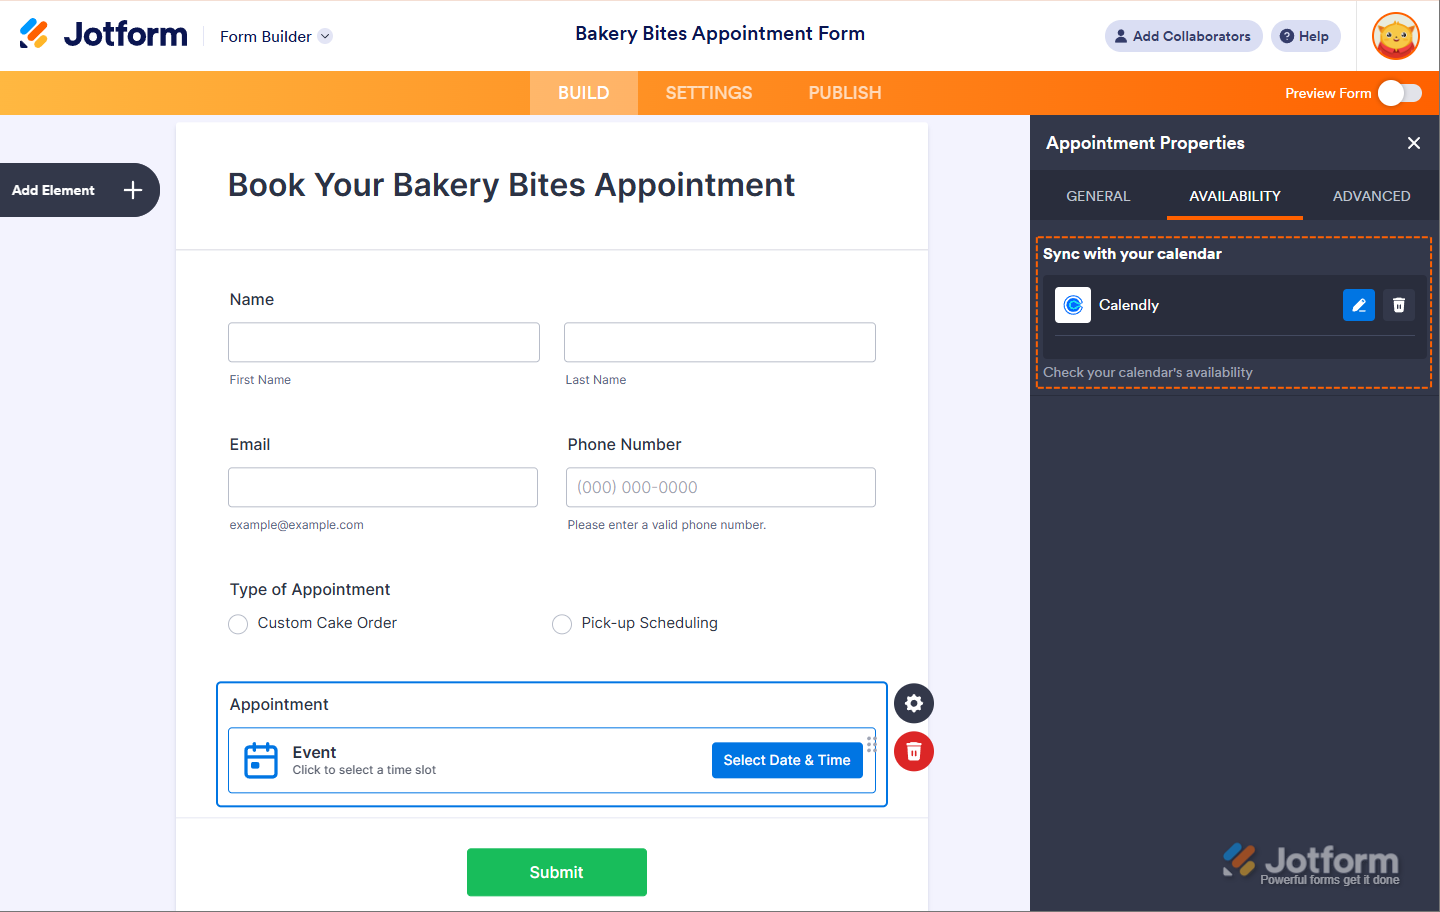
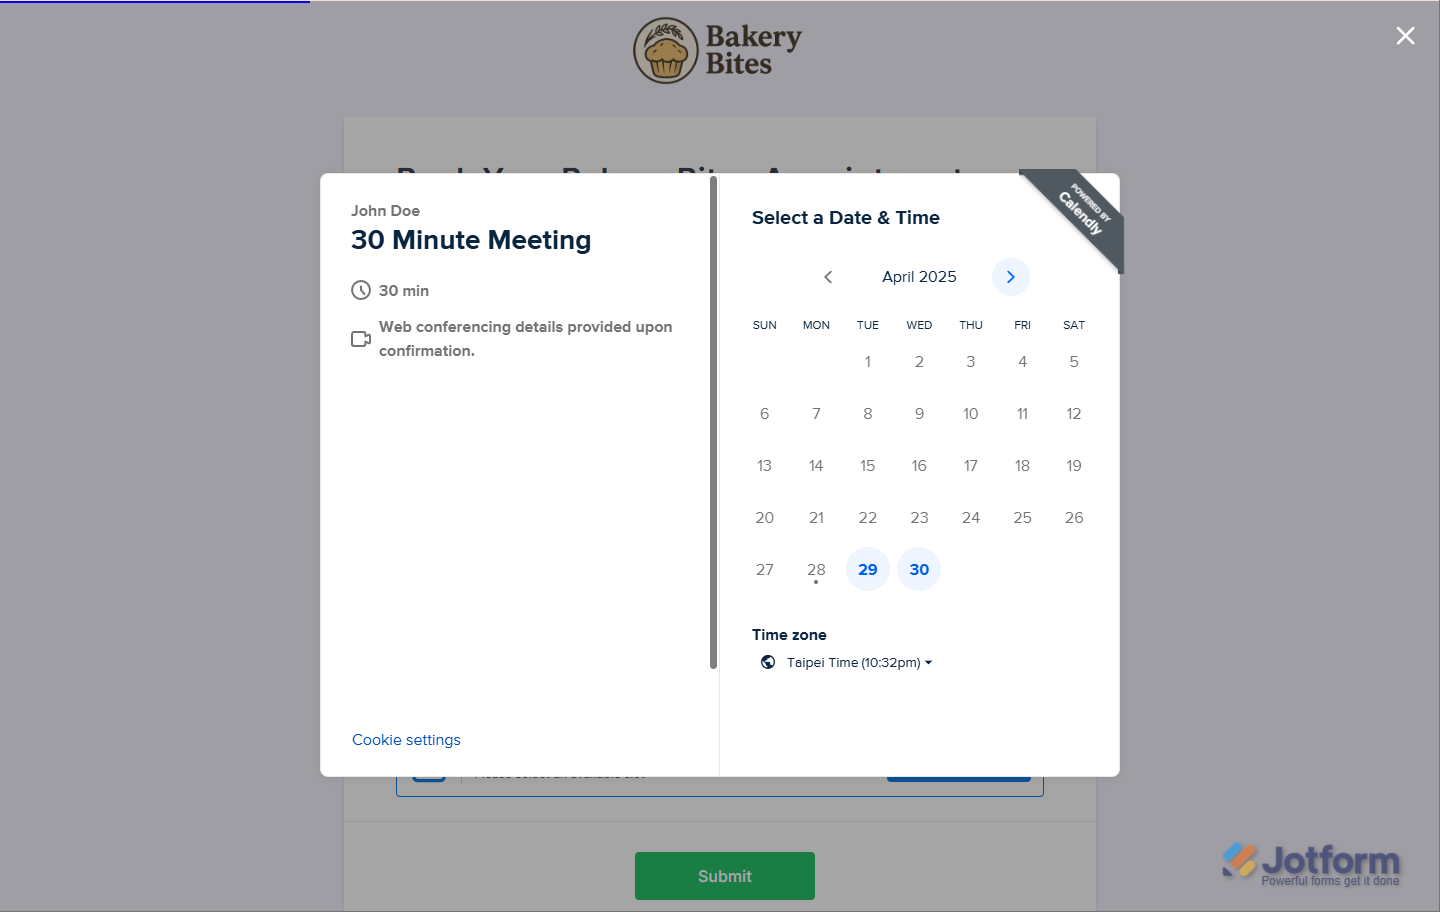
Once users click the Select Date and Time field, Calendly’s event calendar will open, allowing them to choose their preferred date and time slot.
Note
- Once Calendly is integrated, the Appointment field properties will no longer be visible. All scheduling configurations must be managed directly in Calendly.
- Every time a respondent books an appointment through your form, the details will automatically sync with your Calendly Calendar, ensuring everything stays aligned without manual updates.
Integrating Calendly by Adding the Calendly Widget to Your Form
If you want people to book events directly through your Calendly page, the Calendly Widget makes it easy to embed your scheduling link on your form. Here’s how to do it:
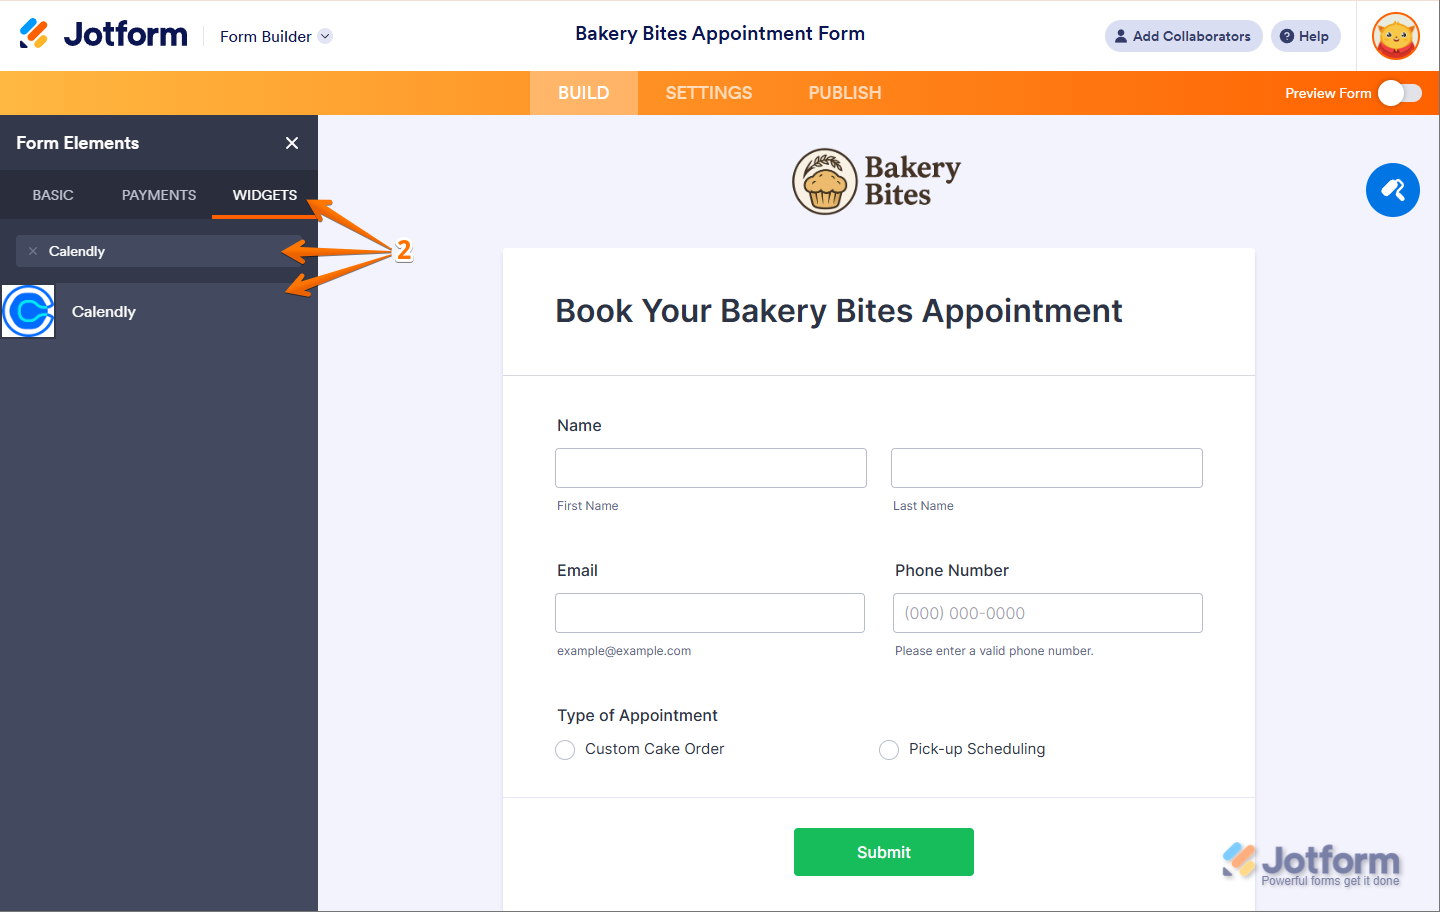
- In Form Builder, click on the Add Element menu on the left side of the page.
- Now, in the Form Elements menu, under the Widgets tab, search for Calendly and click on it to add it to your form.
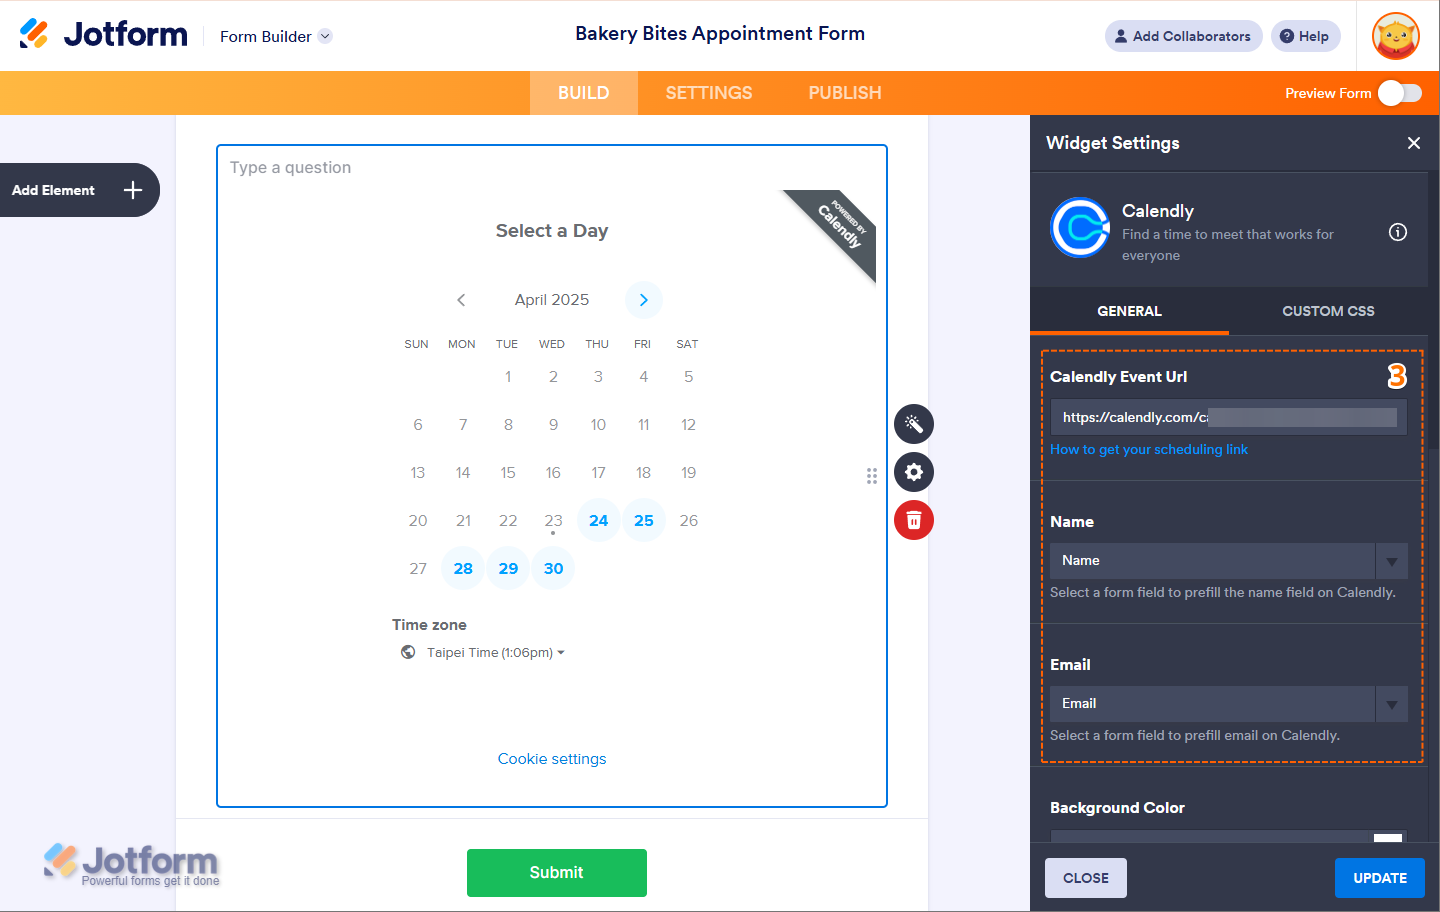
- In the Calendly Properties window that opens on the right side of the page, under the General tab, set up the following options:
- Calendly Event URL — Paste in your Calendly Event URL. Check out this guide about How to Get Your Scheduling Link to learn more about it.
- Name — Select a form field to prefill the name field in Calendly.
- Email — Select a form field to prefill the email field in Calendly.
- Now, scroll down, and you’ll find these options to personalize how the Calendly widget looks and behaves:
- Background Color — Set the background color of your Calendly widget to match your form’s theme.
- Primary Color — Customize the main highlight color used for buttons and links.
- Text Color — Choose a text color that fits your brand or improves readability.
- Hide Event Type — Toggle this On to hide the Event Type title in the embedded calendar.
- Hide Landing Page — Hide any landing pages set up in your Calendly account.
- Hide GDPR Banner — Remove the Cookie Settings banner from the widget.
- Field Height — Adjust the widget height so the full calendar fits nicely in your form without scrolling.
- Then, click on Update and you’re all set.

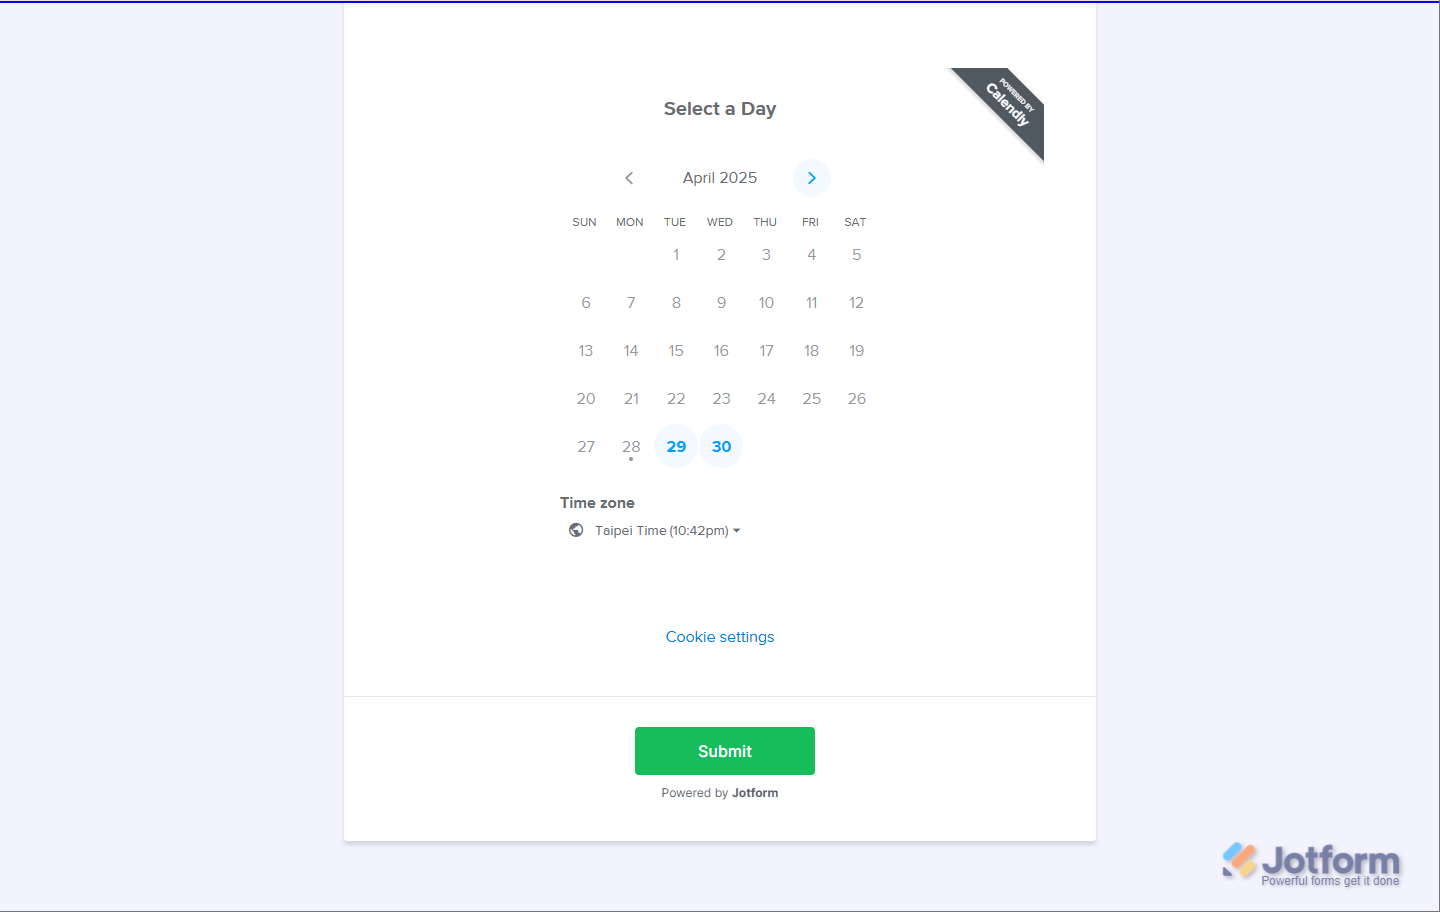
Here’s what it looks like with the Calendly event embedded in the Calendly Widget:
Adding and Integrating the Calendly Widget via the Integrations Tab
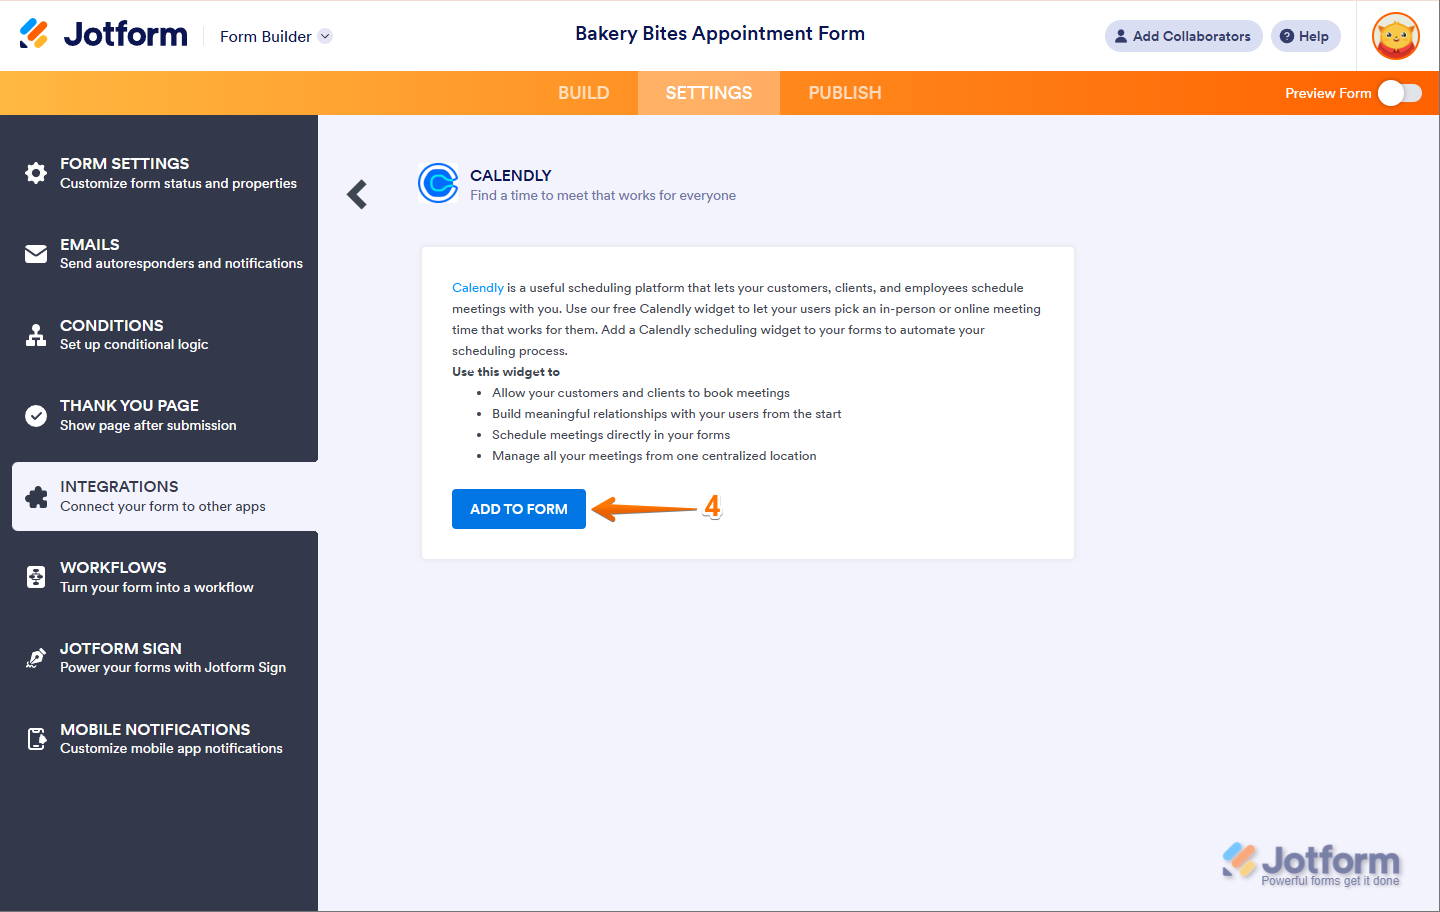
You can also add the Calendly widget by going to the Integrations tab in your form settings and selecting Calendly. Here’s how to do it:
- In Form Builder, in the orange navigation bar at the top of the page, click on Settings.
- In the menu on the left, click on Integrations.
- Then, search for Calendly and click on it.
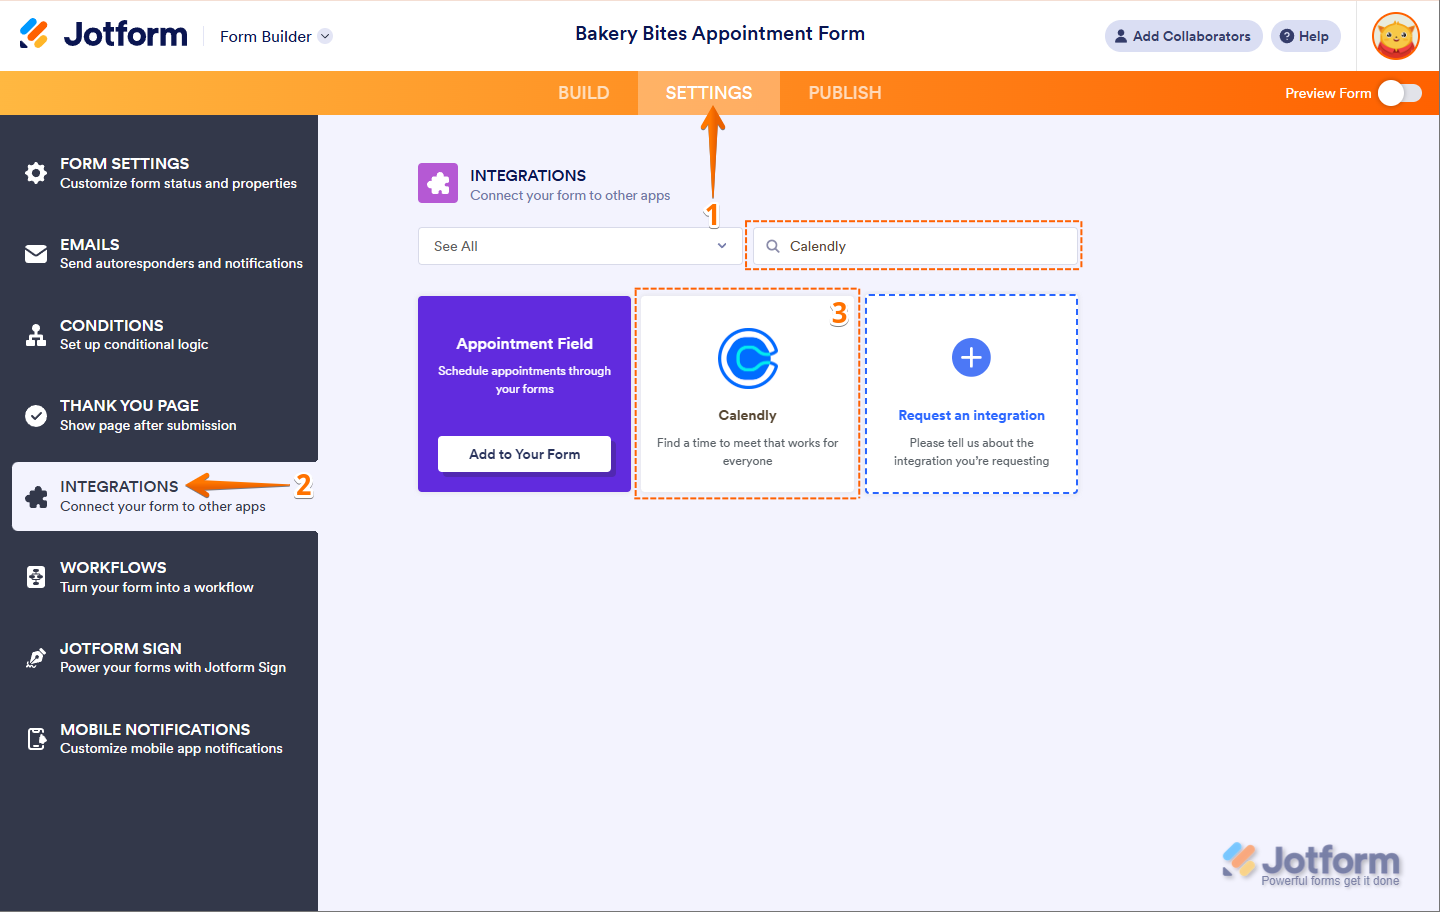
- Now, click on Add to Form.
- In the Calendly Properties window that opens on the right side of the page, under the General tab, set up the following options:
- Calendly Event URL — Paste in your Calendly Event URL. Check out this guide about How to Get Your Scheduling Link to learn more about it.
- Name — Select a form field to prefill the name field in Calendly.
- Email — Select a form field to prefill the email field in Calendly.

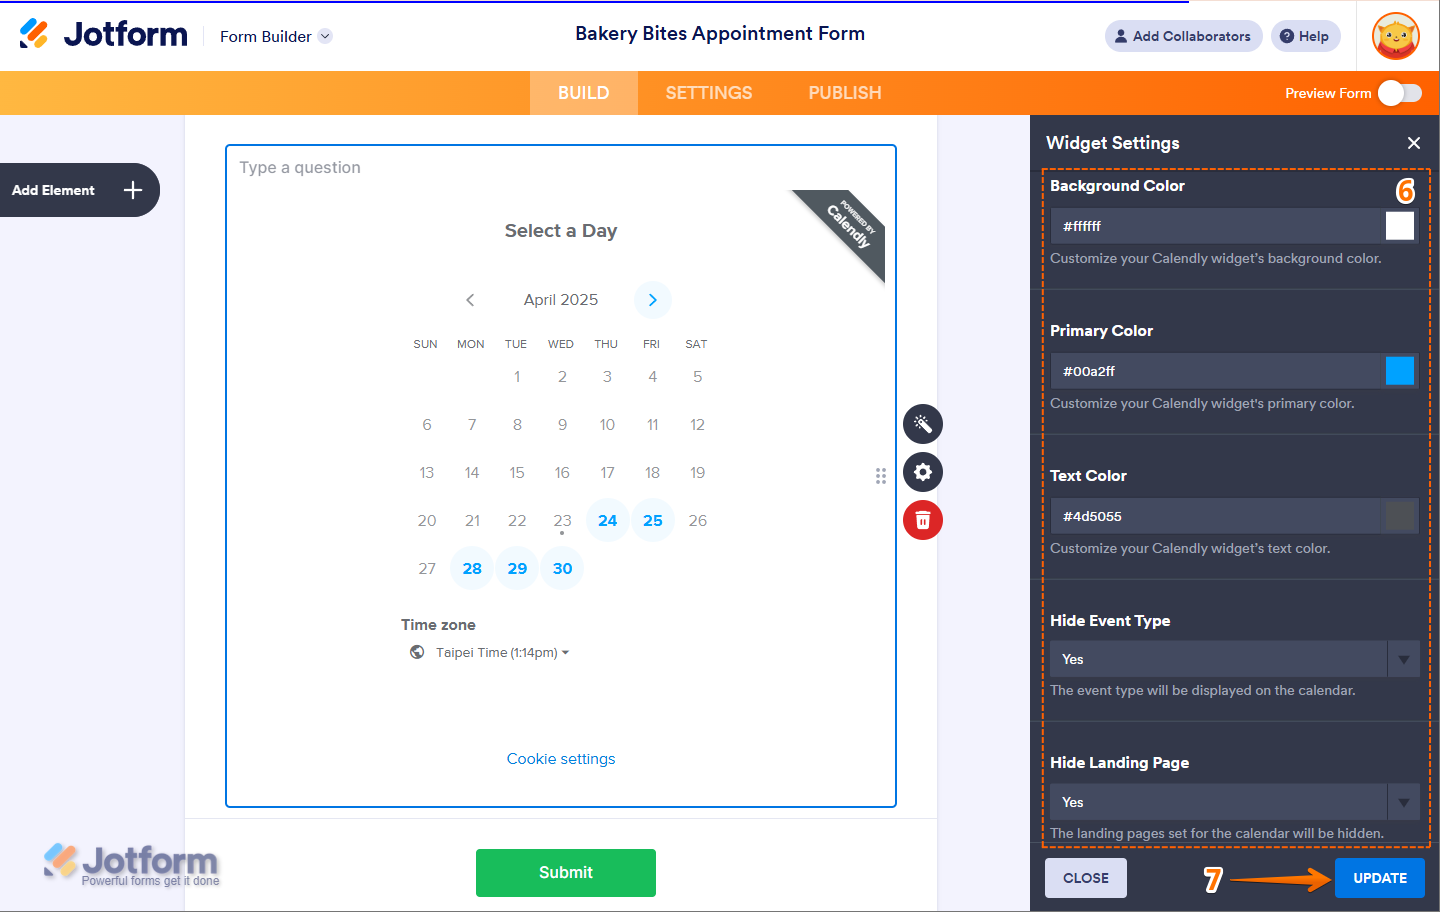
- Now, scroll down, and you’ll find these options to personalize how the Calendly widget looks and behaves:
- Background Color — Set the background color of your Calendly widget to match your form’s theme.
- Primary Color — Customize the main highlight color used for buttons and links.
- Text Color — Choose a text color that fits your brand or improves readability.
- Hide Event Type — Toggle this On to hide the Event Type title in the embedded calendar.
- Hide Landing Page — Hide any landing pages set up in your Calendly account.
- Hide GDPR Banner — Remove the Cookie Settings banner from the widget.
- Field Height — Adjust the widget height so the full calendar fits nicely in your form without scrolling.
- Then, click on Update and you’re all set.
Here’s what it looks like with the Calendly event embedded in the Calendly Widget:

Send Comment:
5 Comments:
More than a year ago
There's so much Calendly branding, including links that take the user offsite disrupting form completion. Is there a way to remove this?
More than a year ago
Hello, I have Calendly embedded via Iframe. But it won't allow Google calendar integration because Google Calendar doesn't read the Iframe widget information such as time and date in order to create me a calendar notification.
I see here that you can add Calendly as a widget directly. That might solve my problem! But when I search my widgets, Calendly isn't an option. Can you help me out with that? Thank you
---
Nevermind. I see Calendly is not available for HIPAA compliance users.
More than a year ago
why can't hipaa accounts use Calendly? I don't see it in widgets, and this would be important to me.
the example you provide is for a medical appointment!
More than a year ago
i appreciate your integration of Calendly into the Jotforms, but it does not play well with the email forms - I think its because Calendly uses java. Nevertheless, id really love to add the main details AT LEAST from my calendly to my jotform thank you email attachment. Currently it doesn't include any of that - they can fill it out bu then they receive an email from calendly not me! It is confusing for them and they often call very confused "is this you? I got a cancelation I scheduled it right?" I just want one stop shop obviously - HELP!
More than a year ago
Might I suggest that a note be included that Calendly Integration is not available if you have a HIPAA account?