Adding an AI Agent to your Shopify store helps boost engagement, improve the customer experience, and provide instant support. With the Jotform AI Chatbot & Live Chat app, you can quickly create and embed an AI-powered assistant without the need for coding.


Installing the Jotform AI Chatbot and Live Chat App
You can easily add the Jotform AI Chatbot & Live Chat app to your Shopify store in just a few simple steps. Here’s how:
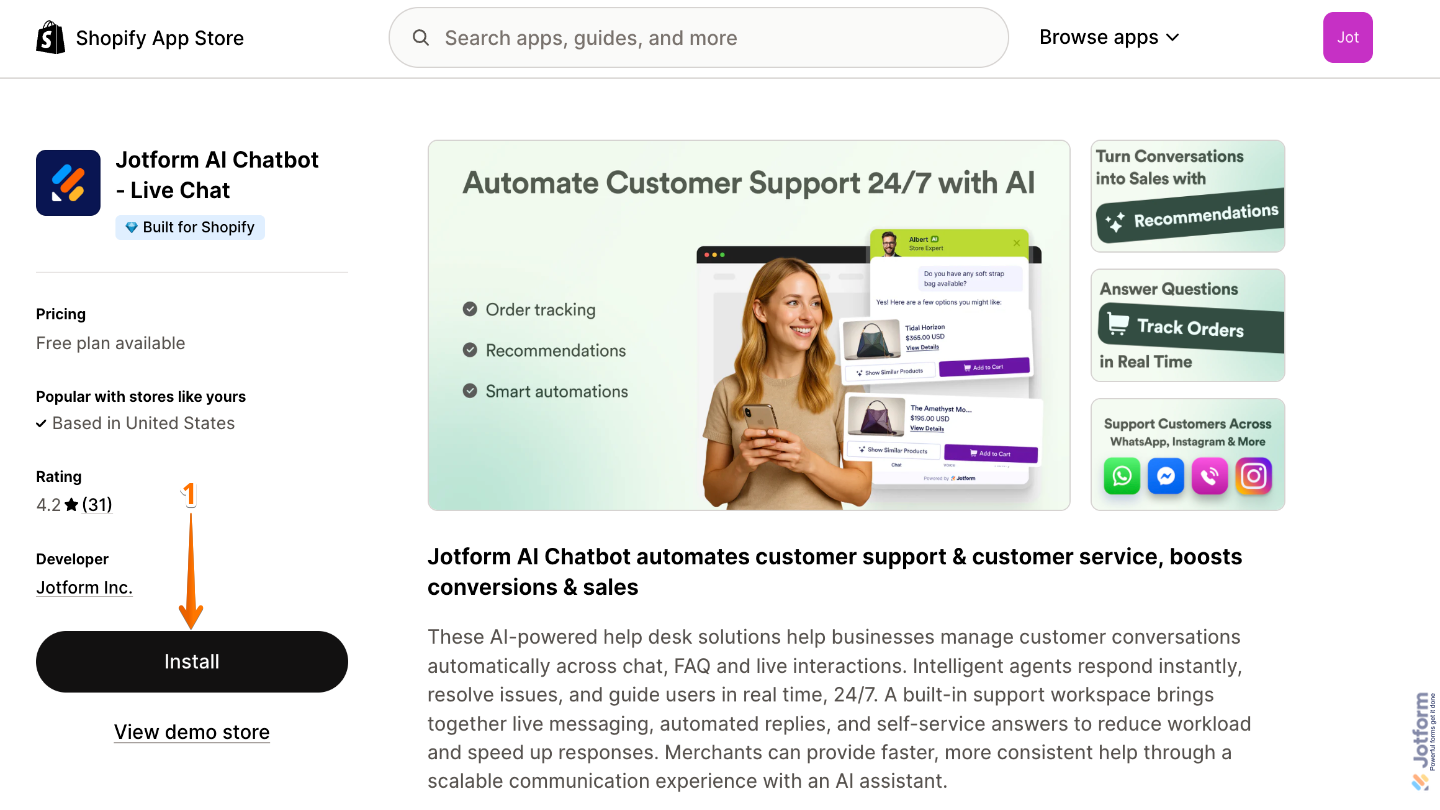
- Log in to your Shopify Store account, and then go to the Jotform AI Chatbot – Live Chat App in the Shopify App Store and click on Install on the left side of the screen.
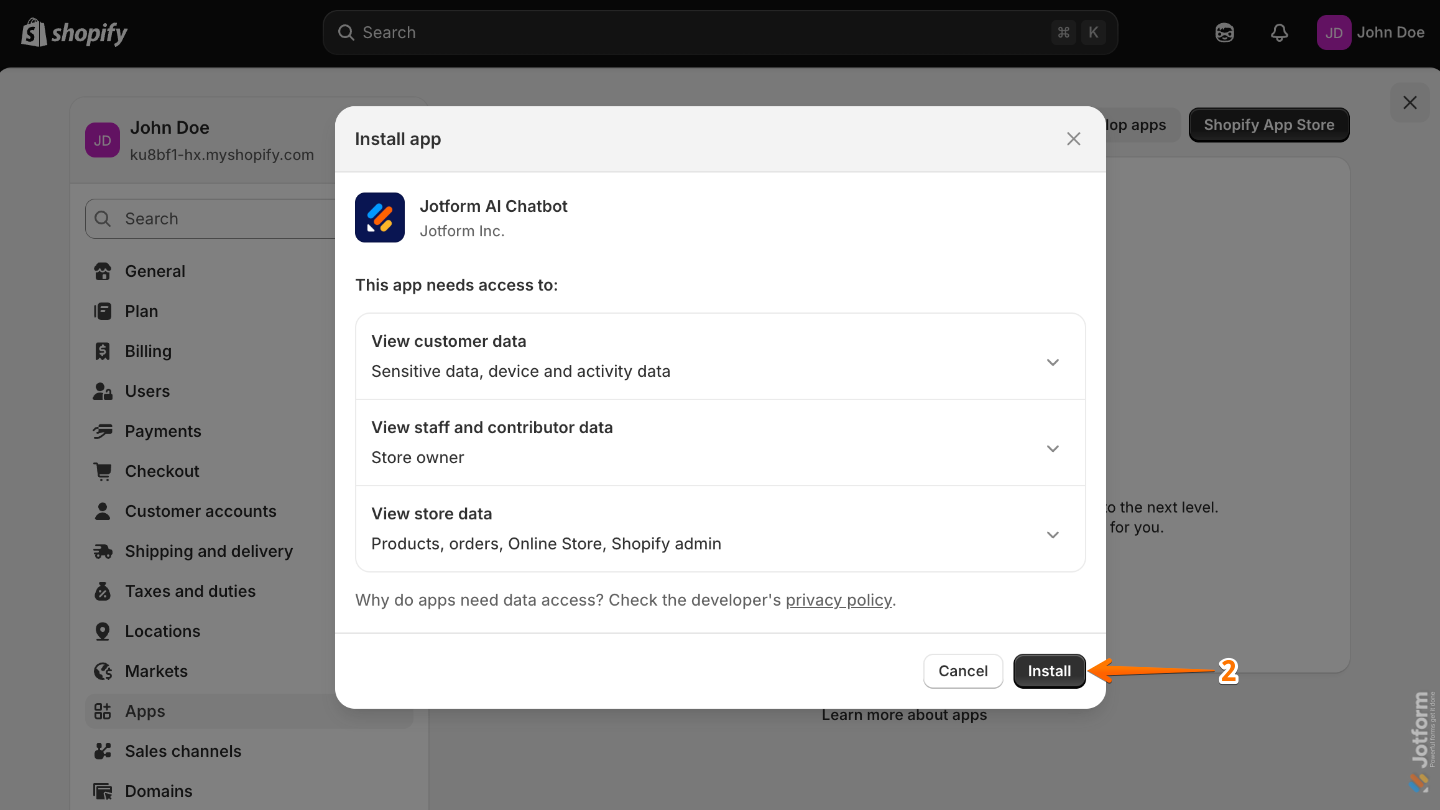
- Next, you’ll be redirected to your Shopify Admin Dashboard page, and in the Install App window that opens, click on Install.
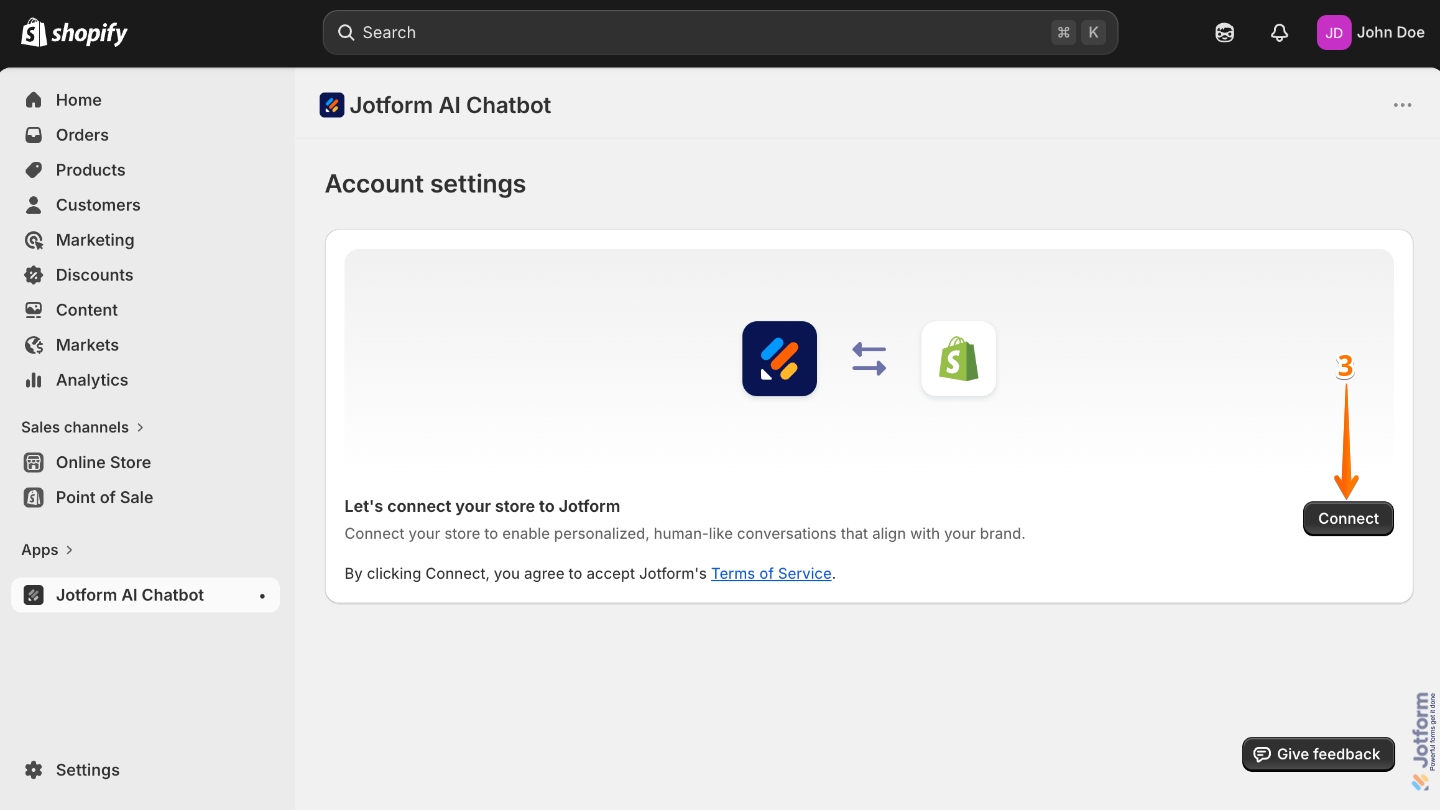
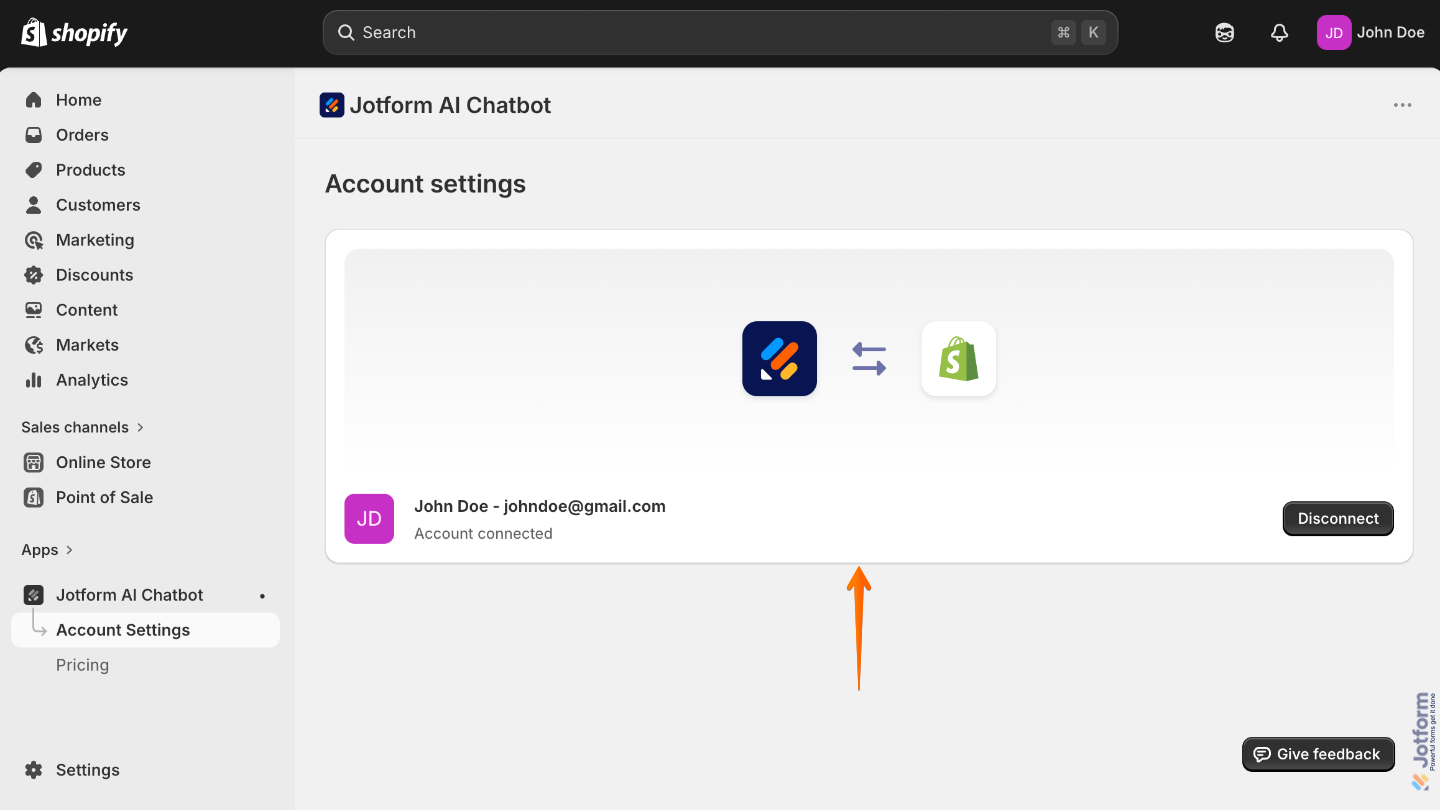
- Then, click on Connect in the middle of the screen.
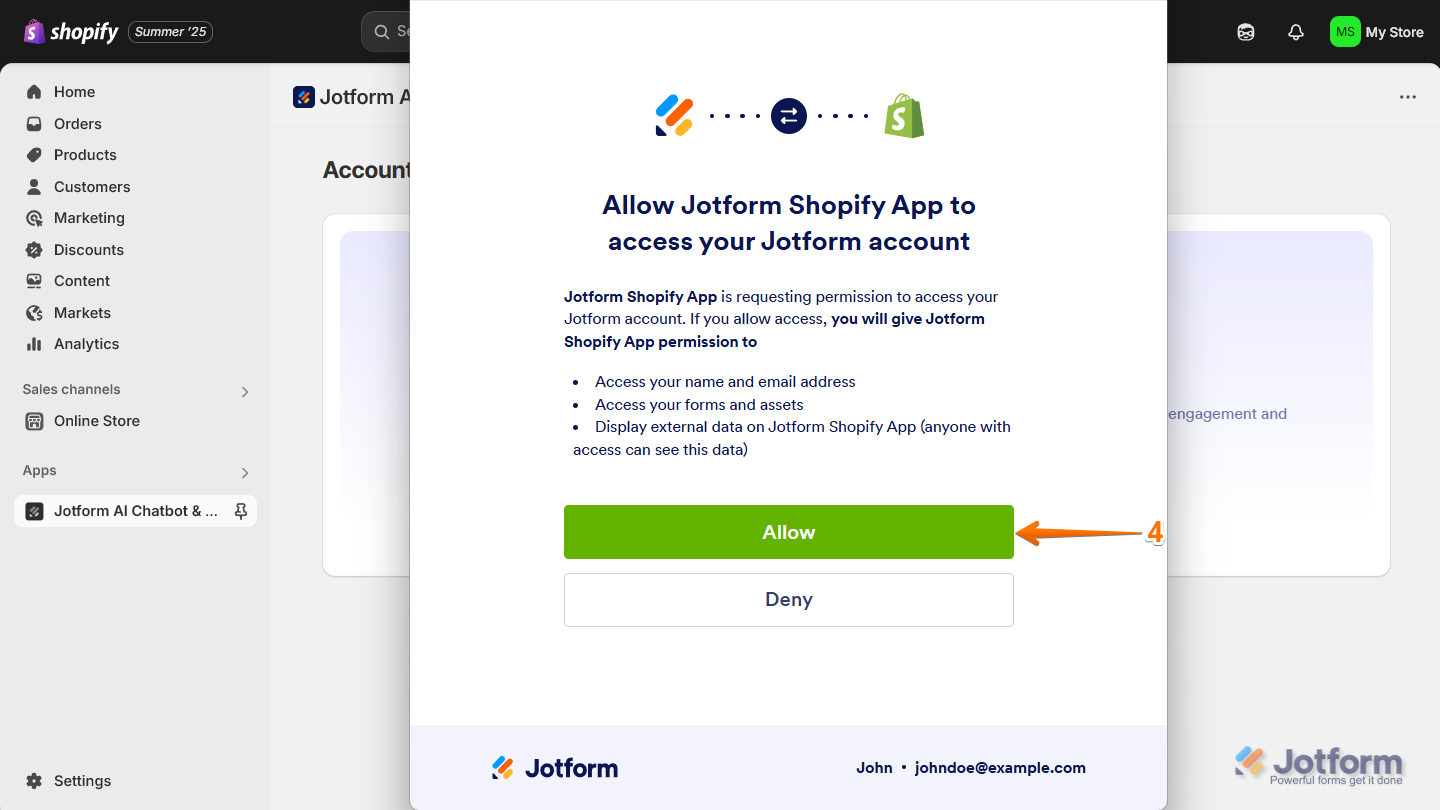
- Now, in the window that opens, log in to your Jotform account and click on Allow.
That’s it! You’ve successfully installed the Jotform AI Chatbot app on your Shopify store and connected it to your Jotform account.
Creating Your Jotform AI Chatbot
Once you’ve installed the Jotform AI Chatbot and Live Chat App and connected it to your Jotform Account. The next step is to create your AI Chatbot. Here’s how to do it:
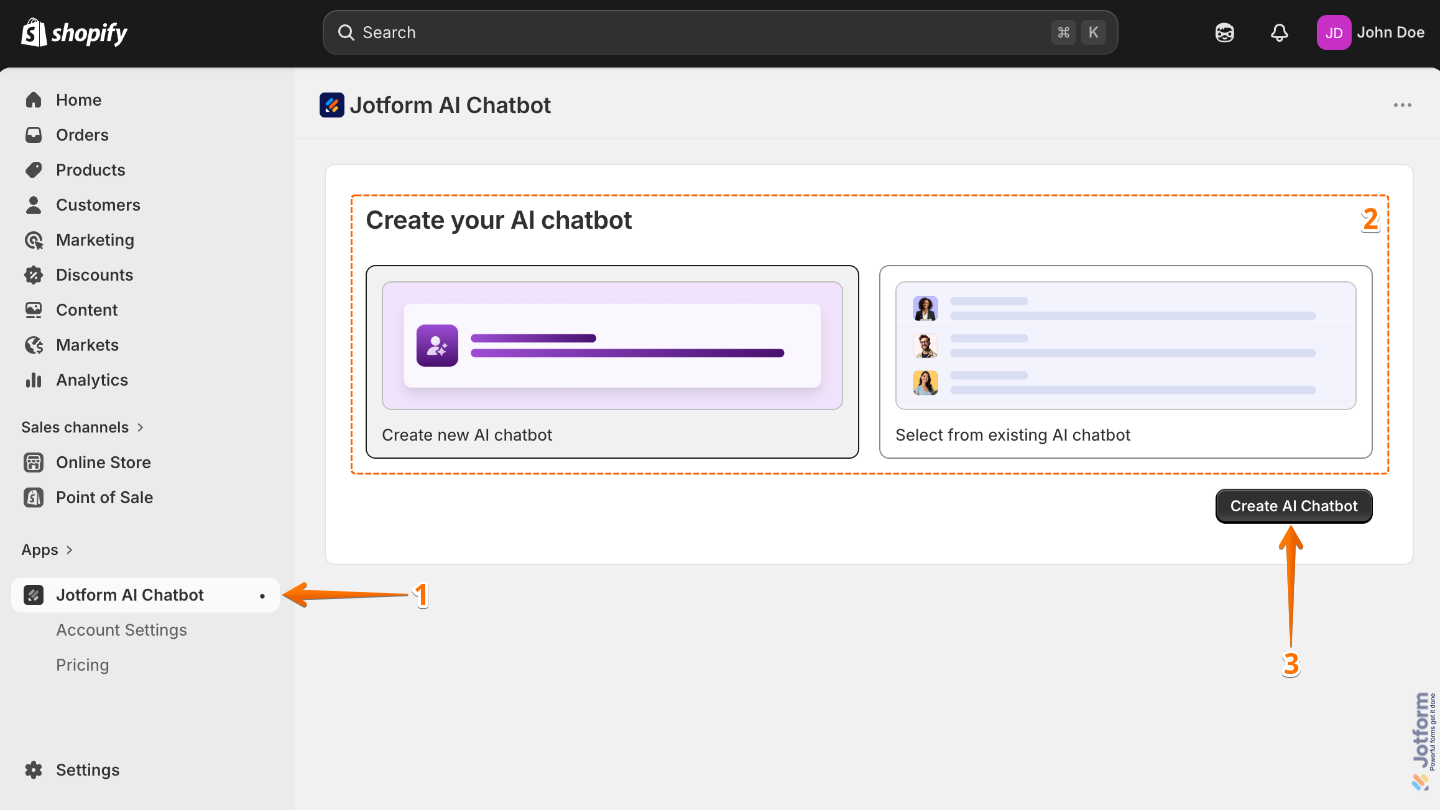
- On your Shopify Admin Dashboard page, click on the Jotform AI Chatbot in the menu on the left.
- Then, choose one of the following options to create your AI Chatbot:
- Create New AI Chatbot — Create a new AI Chatbot from scratch.
- Select From Existing AI Chatbot — Select and use an existing AI Chatbot.
- Now, assuming you’ve selected Create New AI Chatbot, click on Create AI Chatbot on the bottom-right side of the page.
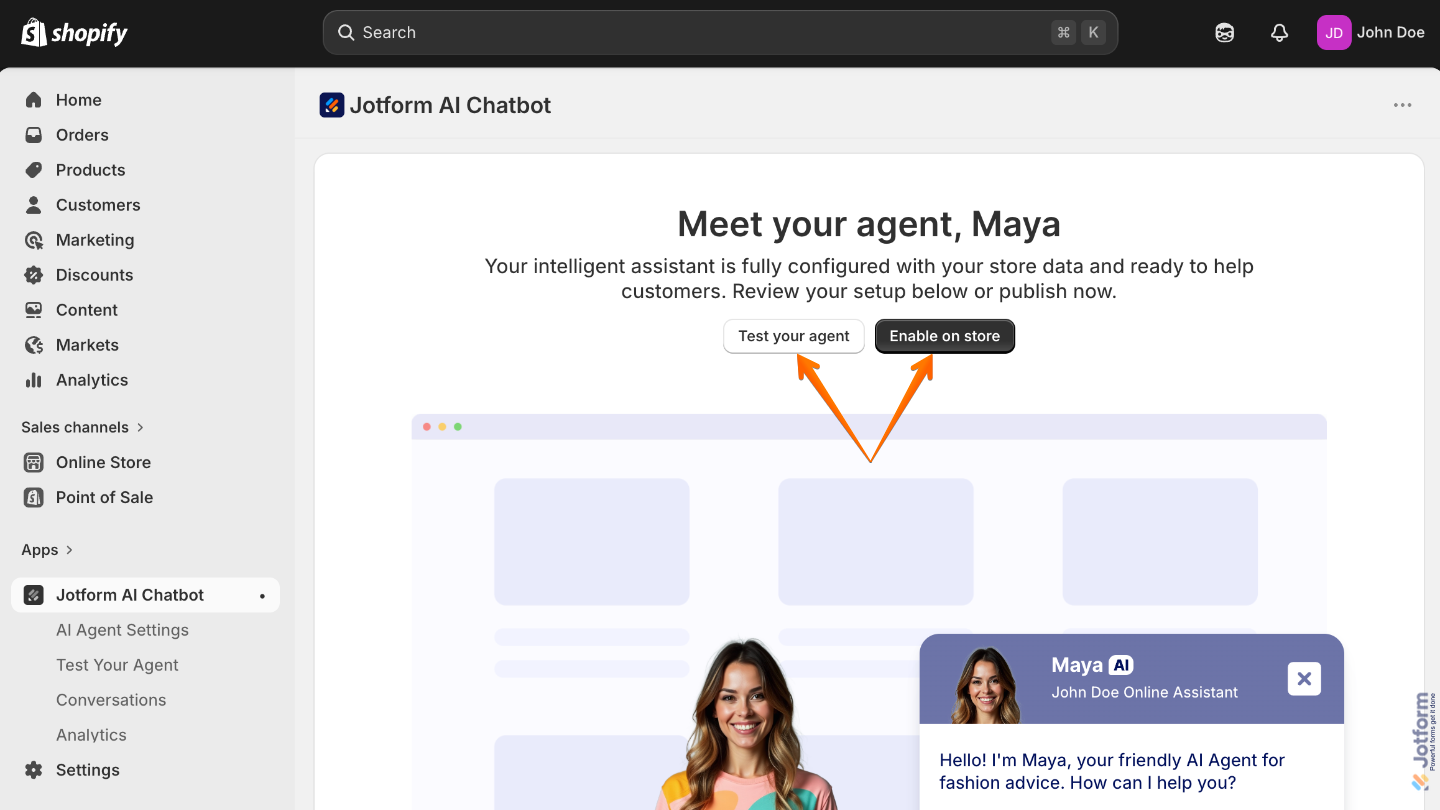
After that, Jotform AI will start setting up your AI Agent by pulling in data from your Shopify store. Once everything is ready, your new AI Agent will be displayed for you. From there, you can Test your agent or go ahead and Enable on your store.
Setting Up Your AI Chatbot Settings
Now that you’ve successfully created your AI Chatbot, you can now set up the Agent Persona, Customize the Agent Style, and Train your AI Chatbot in your AI Chatbot settings. Here’s how to do it:
- On your Shopify Admin Dashboard page, click on the AI Agent Settings in the menu on the left.
- Now, under the AI Chatbot Settings, you’ll find the following tabs:
- Agent Persona — Customize your agent’s avatar, name, role, tone, and chat style to create a unique personality.
- Agent Style — Adjust the colors, fonts, chat window appearance, and behavior to match your brand.
- Train Your AI Chatbot — Teach your chatbot new Shopify and agent skills to provide smarter, personalized customer support.
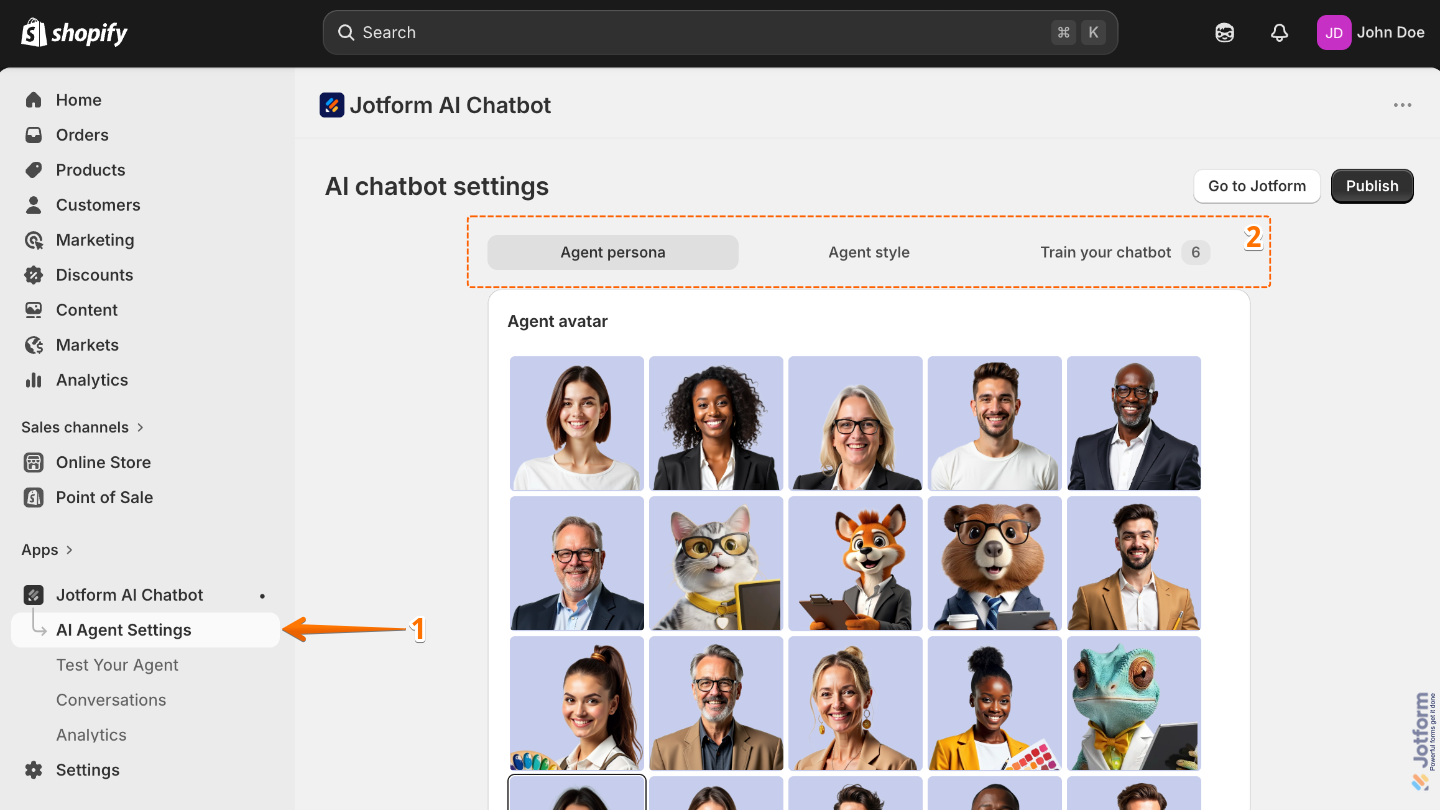
Now, let’s explore each of these tabs in detail.
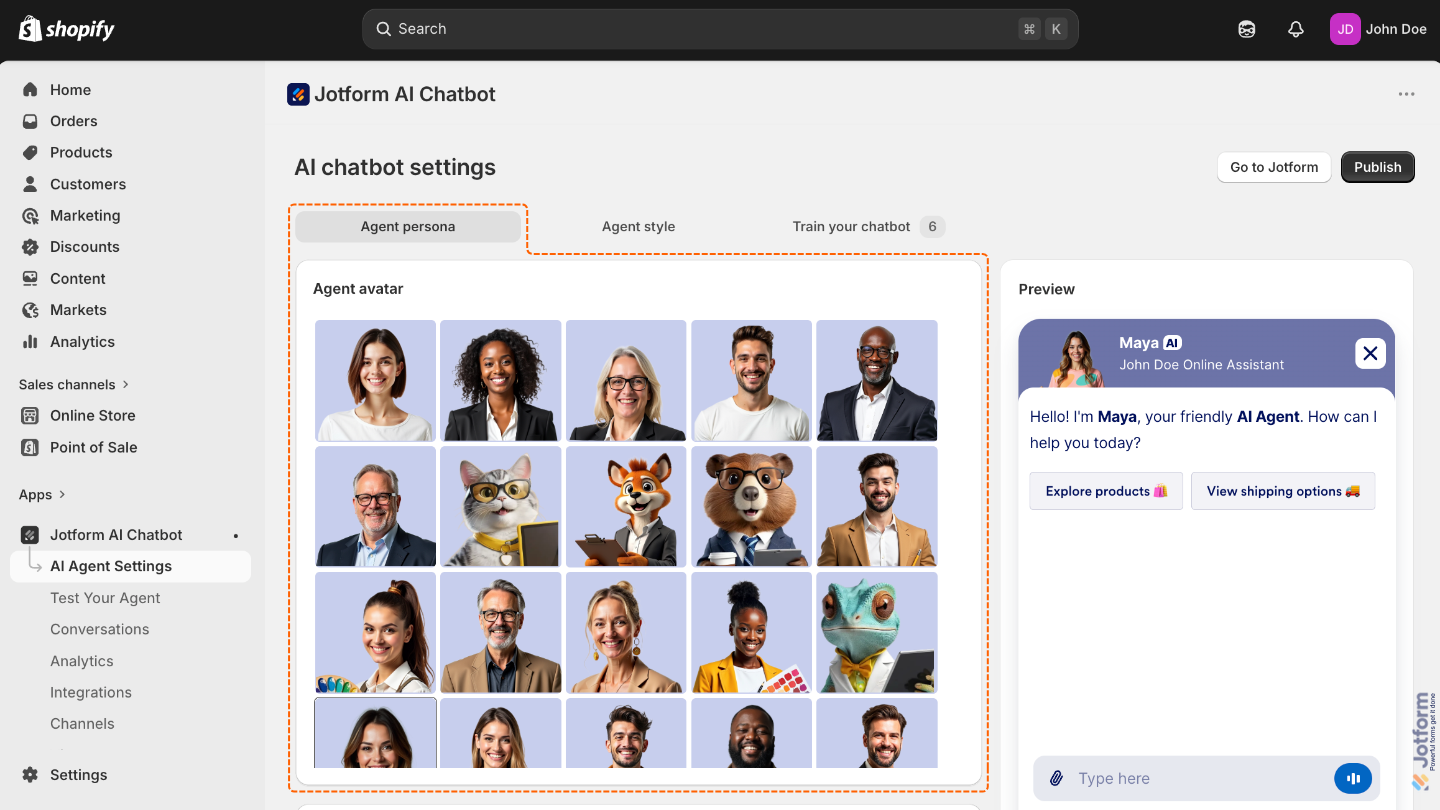
Agent Persona
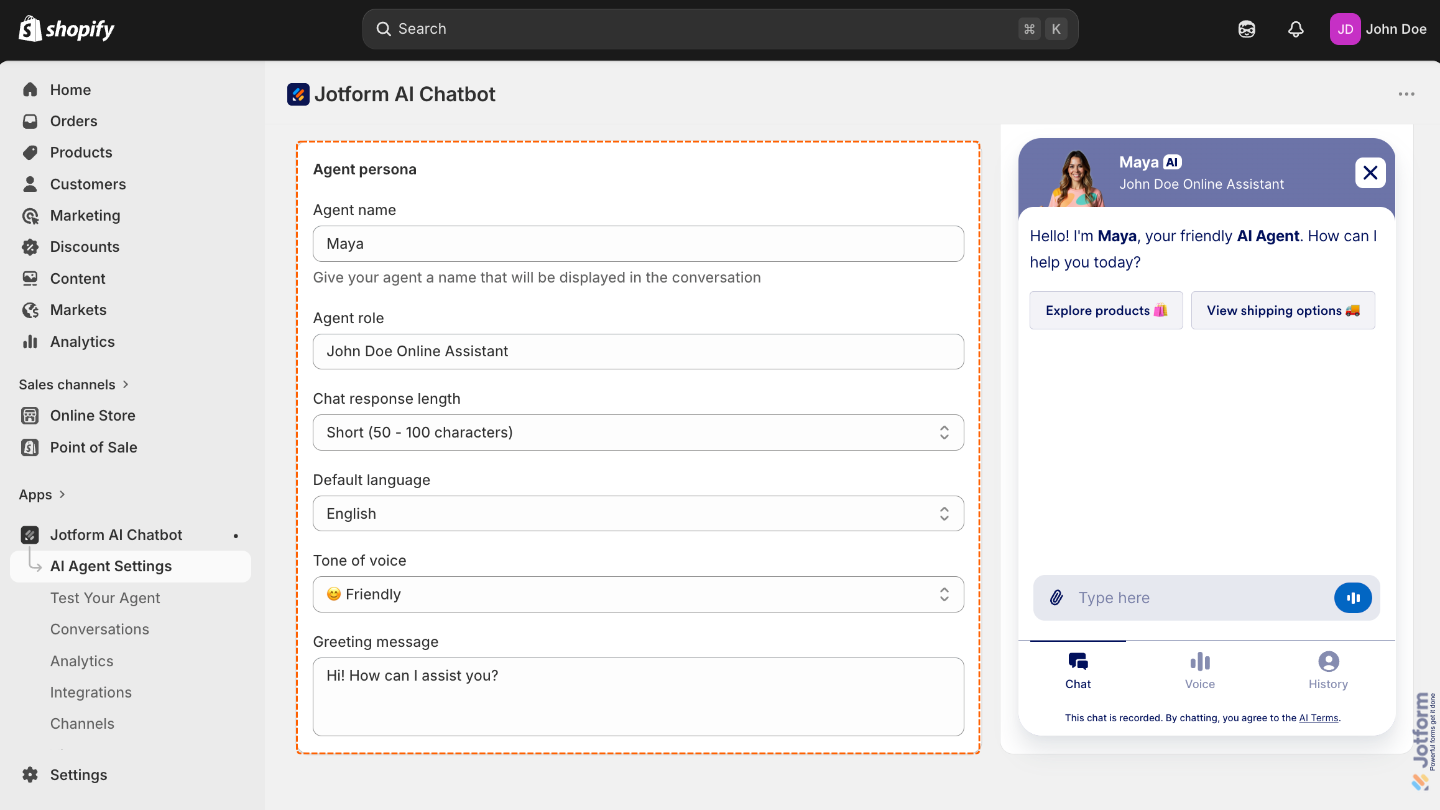
Under the Agent Persona tab, you can browse or search for preset avatars to give your agent instant personality. You can also customize your agent’s name, role, tone, chattiness, language, and greeting message for a more personalized chat experience:
- Agent Avatar — Select a preset avatar to give your agent an instant personality. You can also further customize it using our guide about How to Customize Agent Avatar.
- Agent Name — Enter a name that’ll represent your AI Agent in the chat window.
- Agent Role — Enter your Agent’s role or title to clarify its purpose to users.
- Chat Response Length — Adjust how brief or conversational your AI Agent will be when responding.
- Default Language — Set the primary language your AI Agent will use to interact with visitors.
- Tone of Voice — Choose how formal, friendly, or professional your AI Agent should sound.
- Greeting Message — Write the first message your AI Agent will send to visitors when they open the chat.
If you want to take it a step further, check our guide about How to Customize Agent Persona.
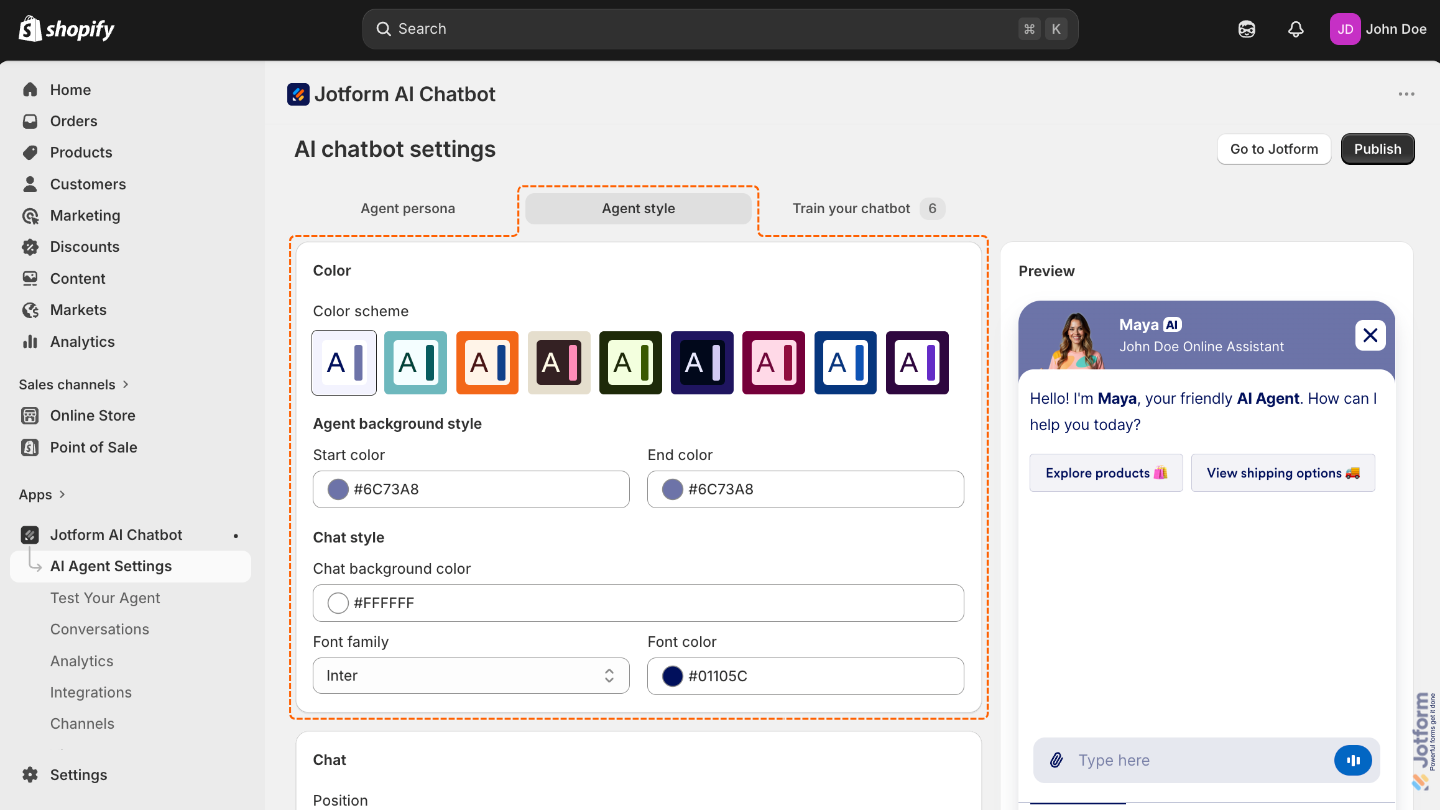
Agent Style
Under the Agent Style tab, you can customize how your AI Chatbot looks and acts. You can adjust settings like:
- Color — This setting lets you choose the primary color of your AI Agent’s interface, helping you match its appearance with your brand and create a more consistent look for your store.
- Color scheme — Pick from a variety of predefined color schemes to give your Chatbot window a look that fits your brand.
- Agent Background Style — Apply a custom background to personalize the area behind your AI Agent’s avatar, using gradients to match your brand or create a specific mood.
- Start Color — Set the top color of the AI Agent’s gradient background.
- End Color — Sets the bottom color of the AI Agent’s gradient background.
- Chat Style — Personalize the chat area where conversations happen by adjusting the background, font, and text color to match your brand or style.
- Chat Background Color — Set the background color of the chat window.
- Font Family — Choose the font used for chat messages. Options include Inter, Circular, Times New Roman, and more.
- Font Color —Set the color of the chat text to improve readability.
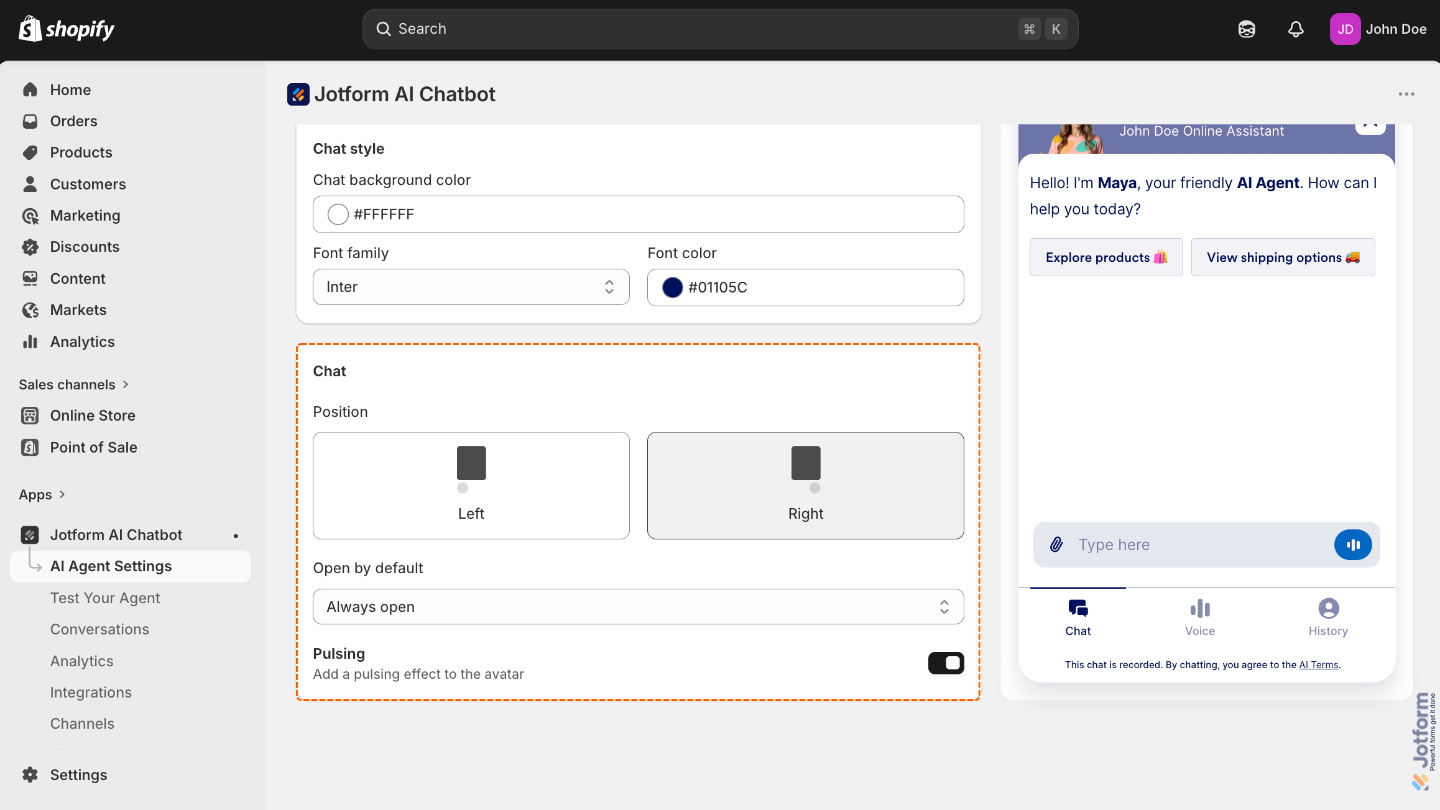
- Chat — Choose how the Chatbot widget behaves on your site.
- Position — Choose whether to display the Chatbot widget on the left or right side of your page.
- Open by Default — Select when the Chatbot window should open.
- Pulsing — Make the Chatbot icon pulse to attract attention when closed.
You can customize your AI Chatbot’s style and appearance even further using our guide about How to Customize Agents Design.
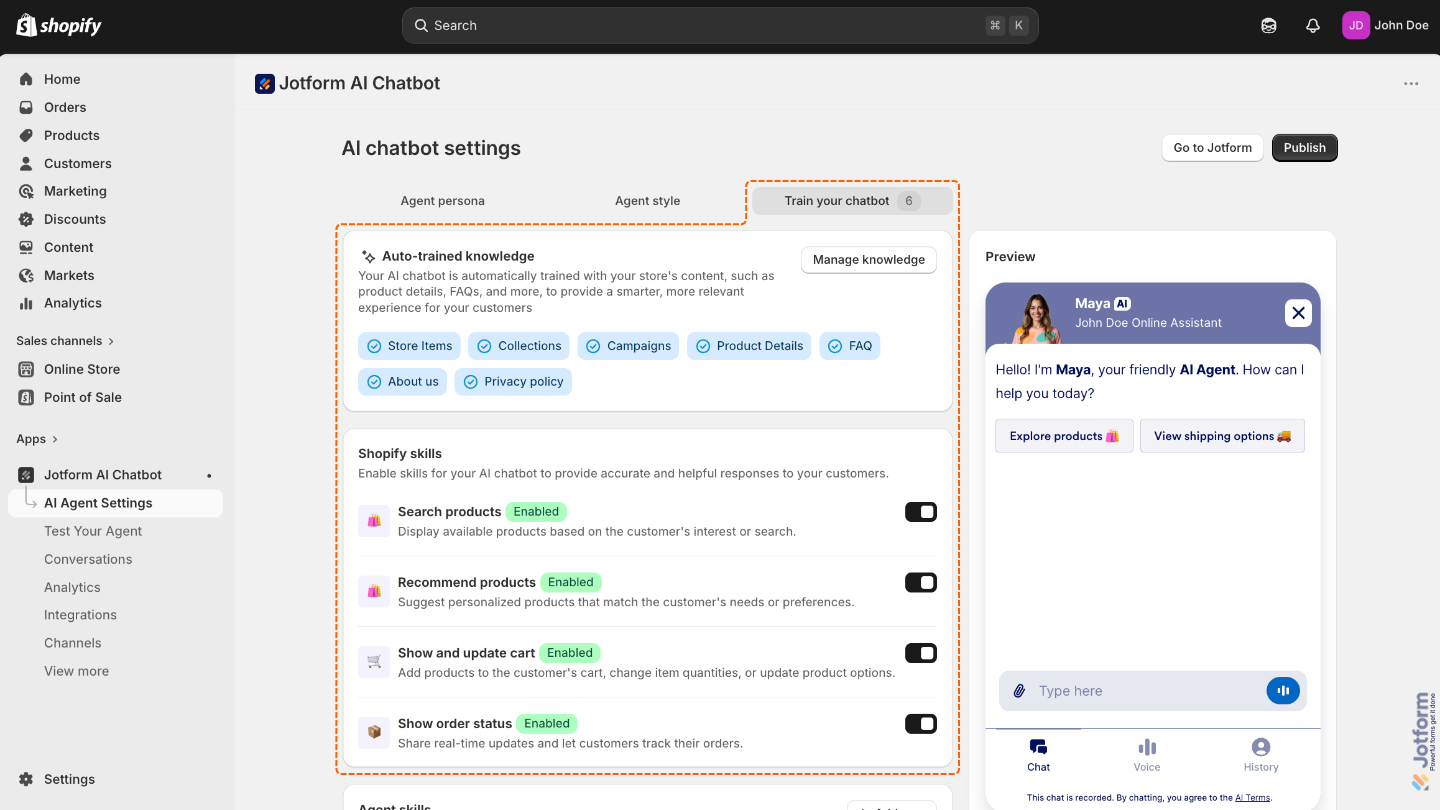
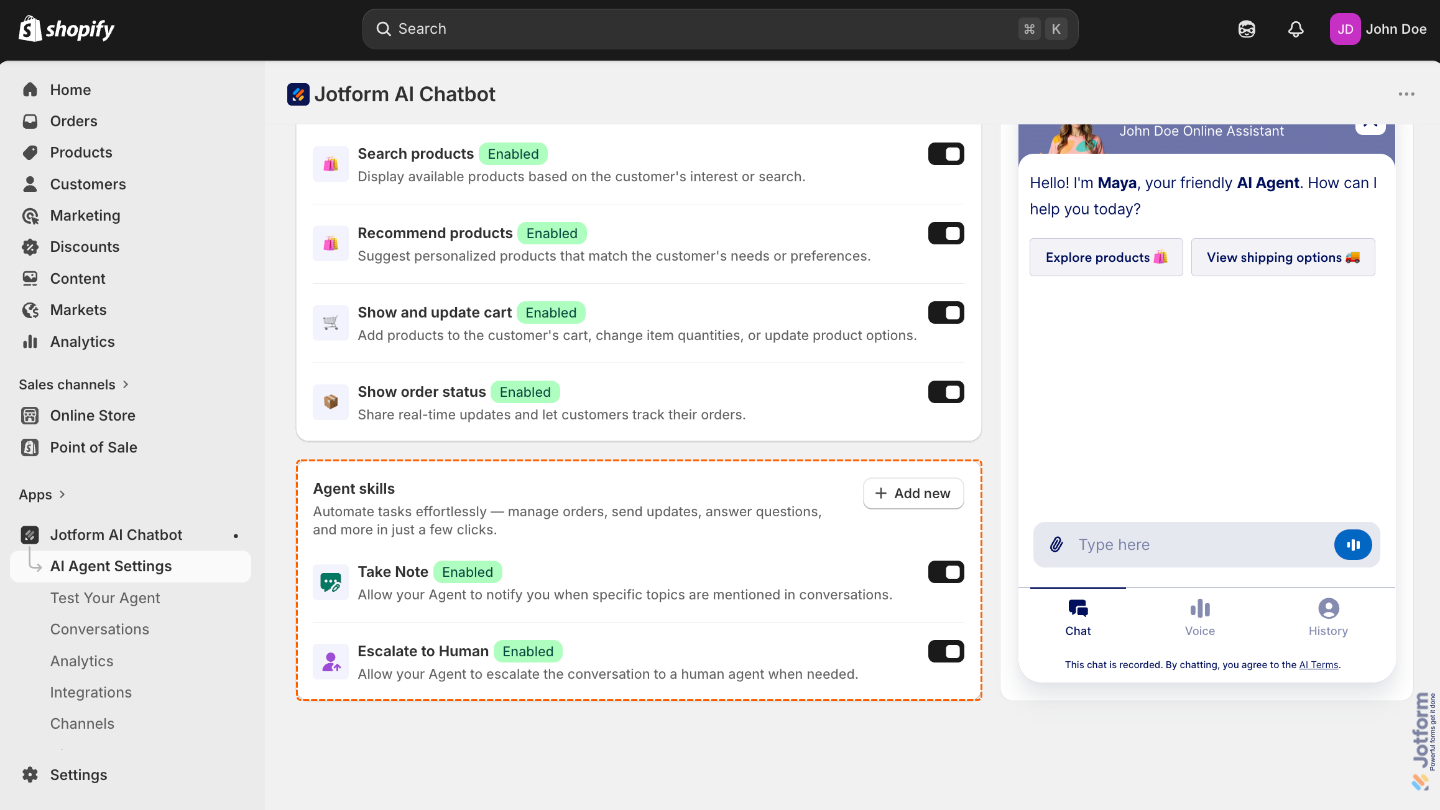
Train Your AI Chatbot
Under the Train Your AI Chatbot tab, you can view and manage settings to improve your Chatbot’s skills for Shopify and other agent features:
- Auto-Trained Knowledge — Your AI Chatbot is automatically trained with your store’s content, such as product details, FAQs, and more, to provide a smarter, more relevant experience for your customers
- Shopify Skills — Enable skills for your AI Chatbot to provide accurate and helpful responses to your customers. By default, there are already a premade Shopify skills:
- Search Products — Turn this on to let the chatbot suggest products based on what the customer is looking for.
- Recommend Products — Use this to allow the Chatbot to suggest personalized products based on customer needs.
- Show and Update Cart — Turn on this option to let the Chatbot add items to the cart, change quantities, or update product options.
- Show Order Status — Enable this to let customers check their order updates in real time.
- Agent Skills — Add agent skills to automate tasks effortlessly. Manage orders, send updates, answer questions, and more in just a few clicks.
- Take Note — Turn this on to let your AI Agent notify you whenever certain topics come up in conversations, so you can stay informed and step in when needed.
- Escalate to Human — Enable this option to allow your AI Agent to hand off the conversation to a real person whenever extra support or a more personal touch is needed.
Pro Tip
You can always train your AI Agent to add new Shopify and Agent skills by clicking Add New next to the Shopify Skills and Agent Skills descriptions. For more detailed information, check out our guide on How to Train Your AI Agent.
Enabling the AI Chatbot to Your Shopify Store
Now that everything’s set up, you can start embedding your AI Chatbot in your Shopify Store. Here’s how to do it:
- On your Shopify Admin Dashboard page, click on the Jotform AI Chatbot section in the menu on the left.
- Then, click on Enable On Store.

- Now, you’ll be redirected to your Shopify Online Store Editor page, and in the App Embeds menu that opens on the left, toggle on Jotform AI Chatbot.
- Next, click on Save in the top-right corner of the page, and you’re all set.

That’s it. This is how it’ll look when the AI Chatbot has been enabled in your Shopify Store:


Send Comment: