With Jotform, you can easily set up actions that help your Salesforce Agent work smarter inside Salesforce. It’s perfect for teams that want their agent to handle everyday tasks—like creating, updating, or showing records during conversations—so customers get faster answers and your team can focus on what really matters.
These actions are helpful for anyone using Salesforce to manage customer relationships or internal data. They make it easy to automate routine tasks, keep information accurate, and ensure your chat and Customer Relationship Management work together seamlessly.
Once you’ve created and connected your Salesforce Agent, adding these actions is easy—here’s how:
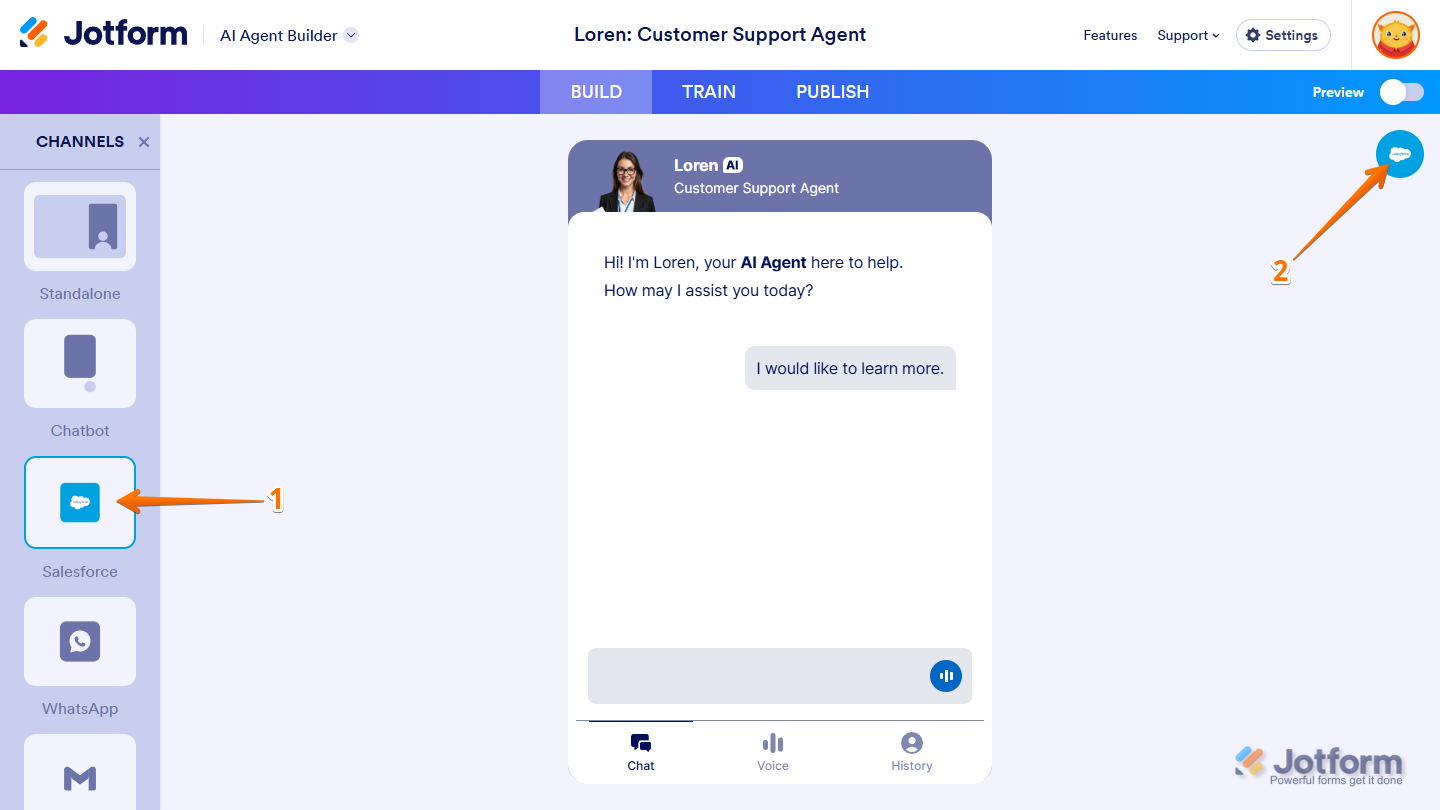
- In the Channels menu on the left side of AI Agent Builder, click on Salesforce.
- Then, on the top-right side of the page, click on the Salesforce icon, which will automatically take you to the Publish tab.
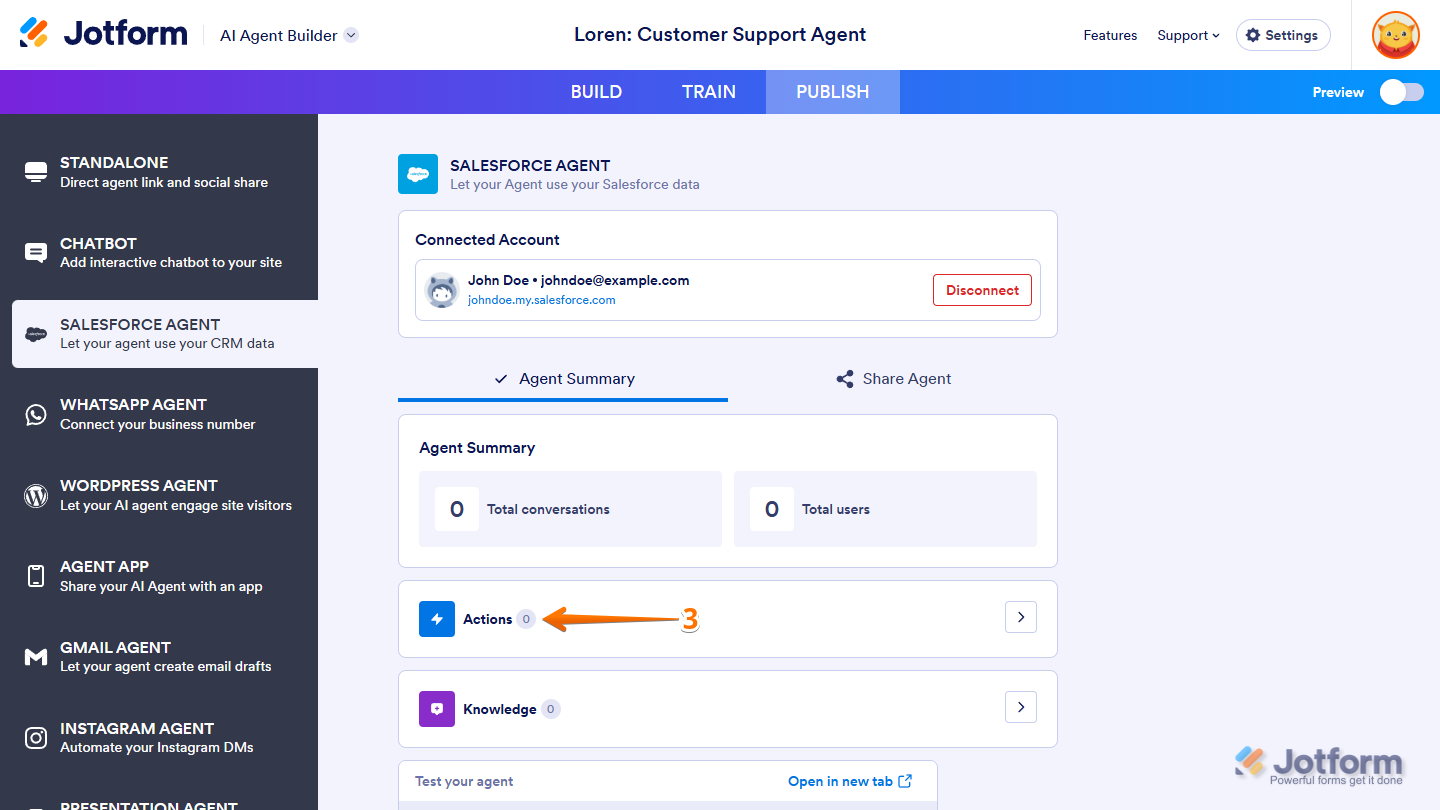
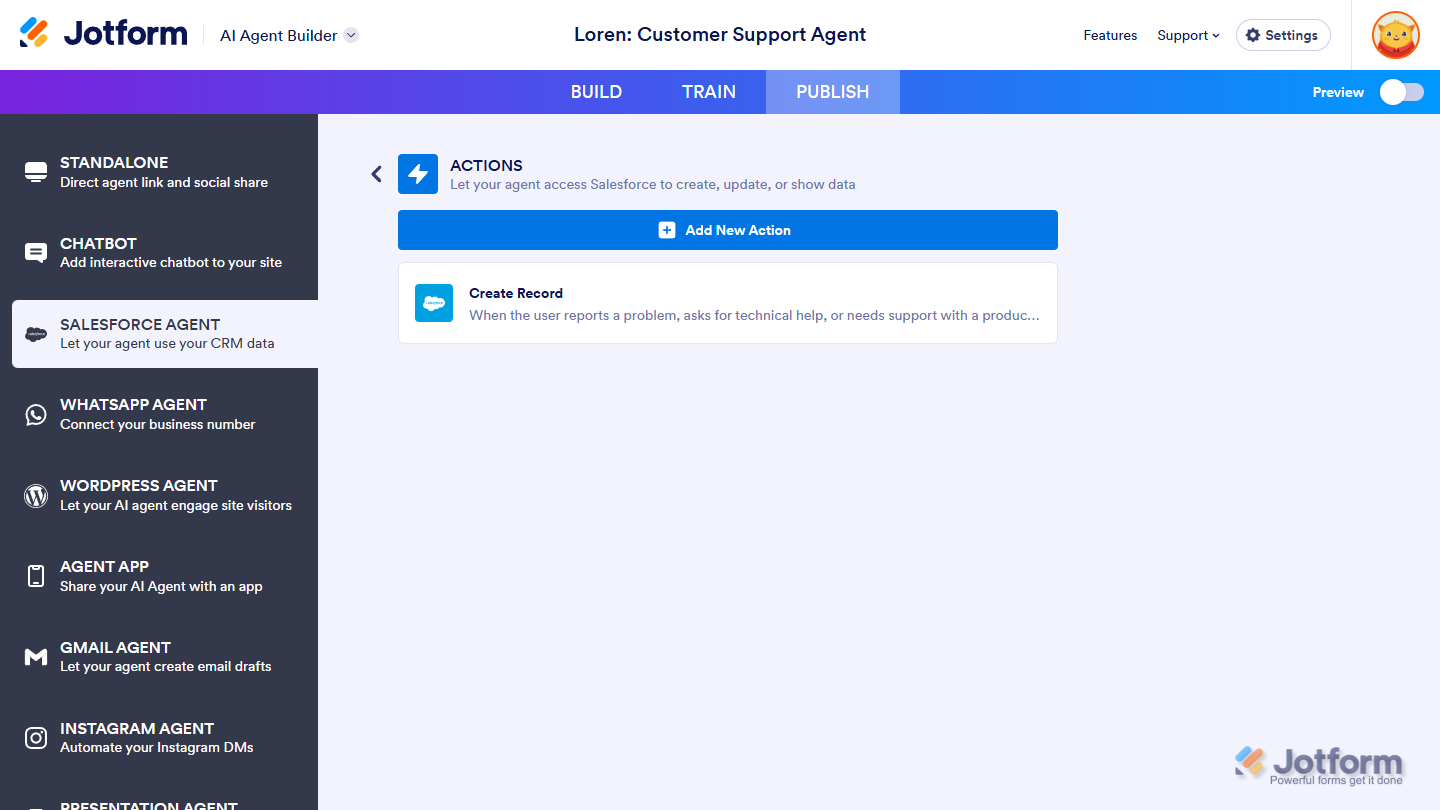
- Now, under the Publish tab, in the Salesforce Agent section, click on Actions.
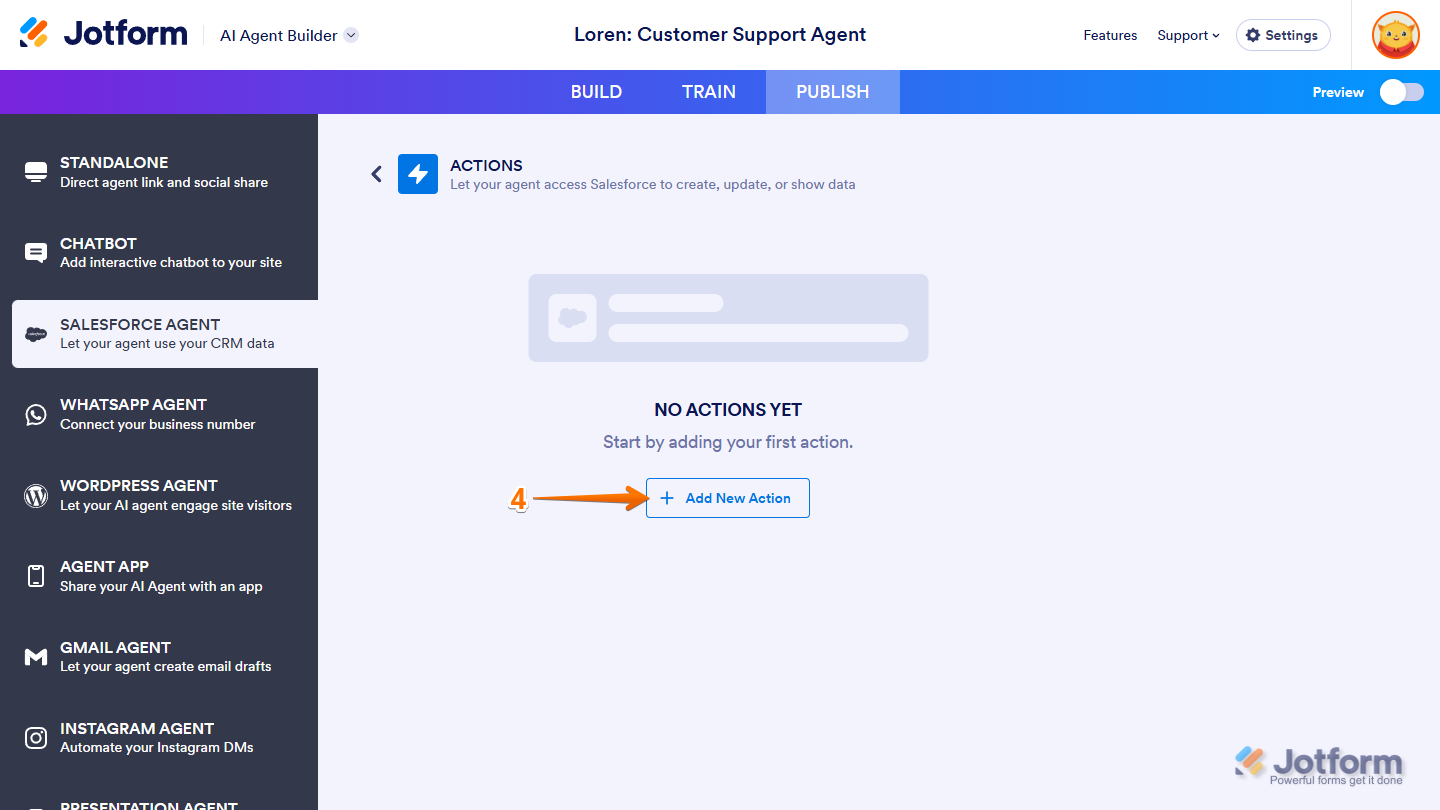
- Then, in the Actions section, click on Add New Action.
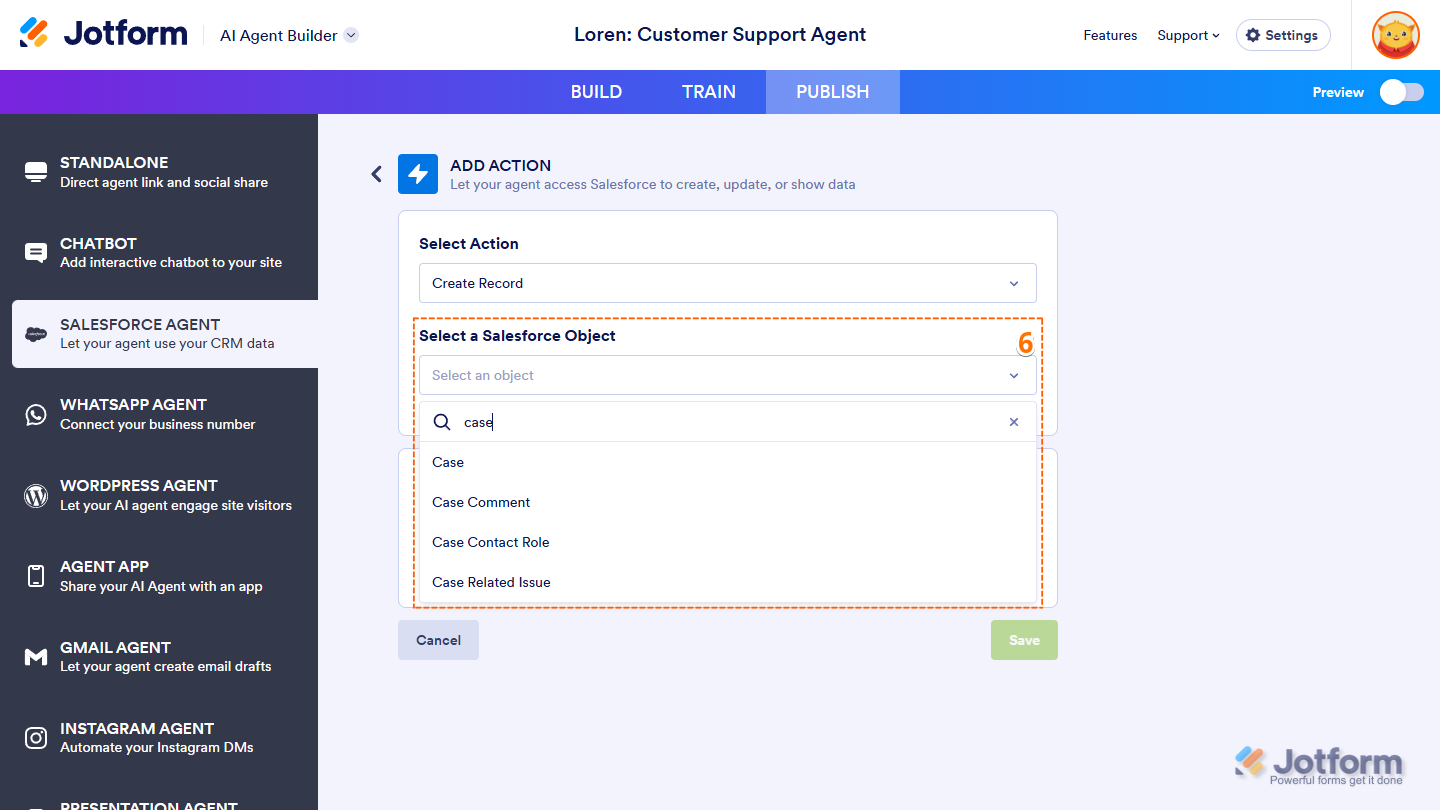
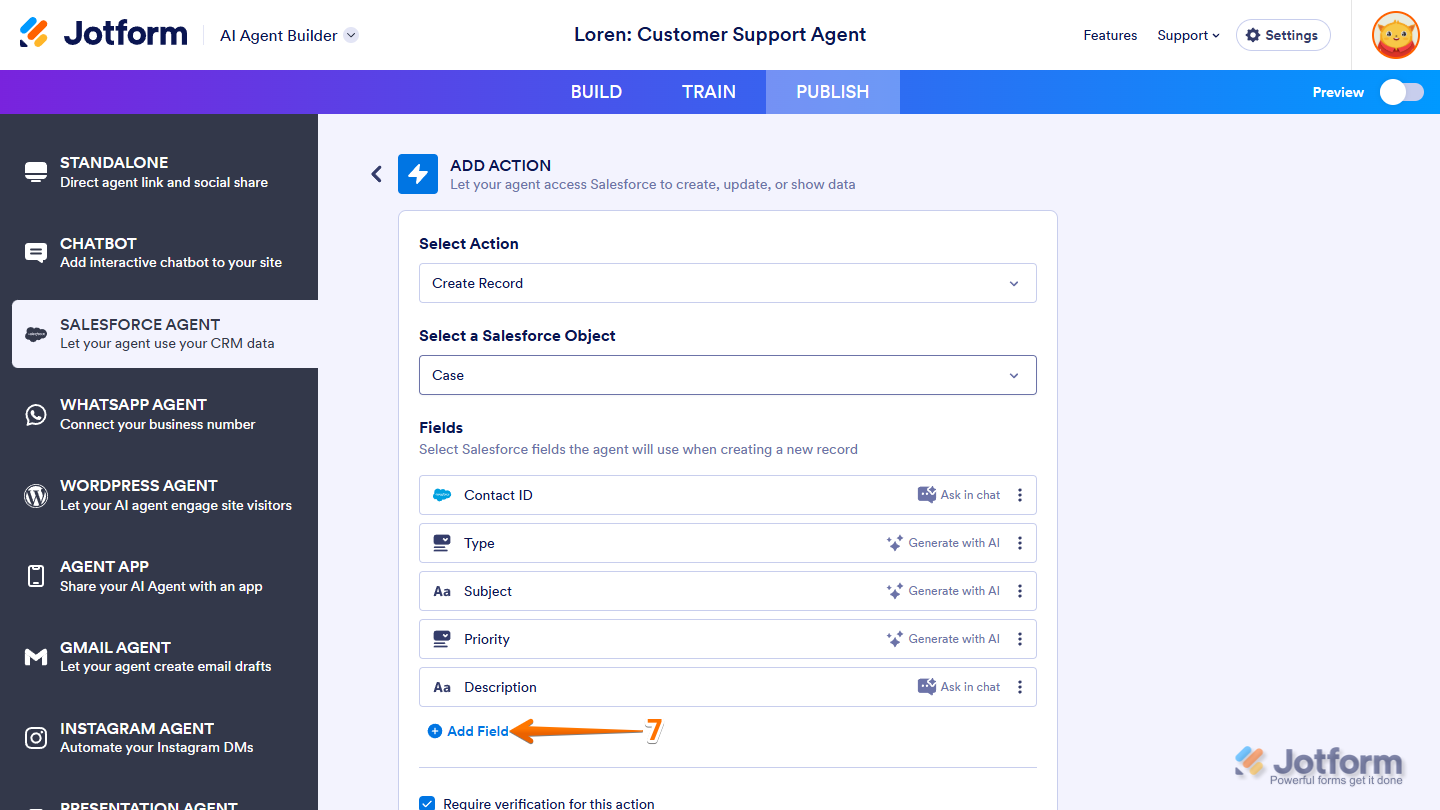
- Next, in the Add Action section, click on the Select Action Dropdown menu, and select the action you want your Salesforce Agent to run.

- Then, depending on the action you chose:
- Click on the Select a Salesforce Object Dropdown menu, and select the object you want your Salesforce Agent to access or update data from. You can use the Search bar at the top of the menu to find a specific one easily.
- The Select a Salesforce Object Dropdown menu is locked and an object is selected for you automatically.
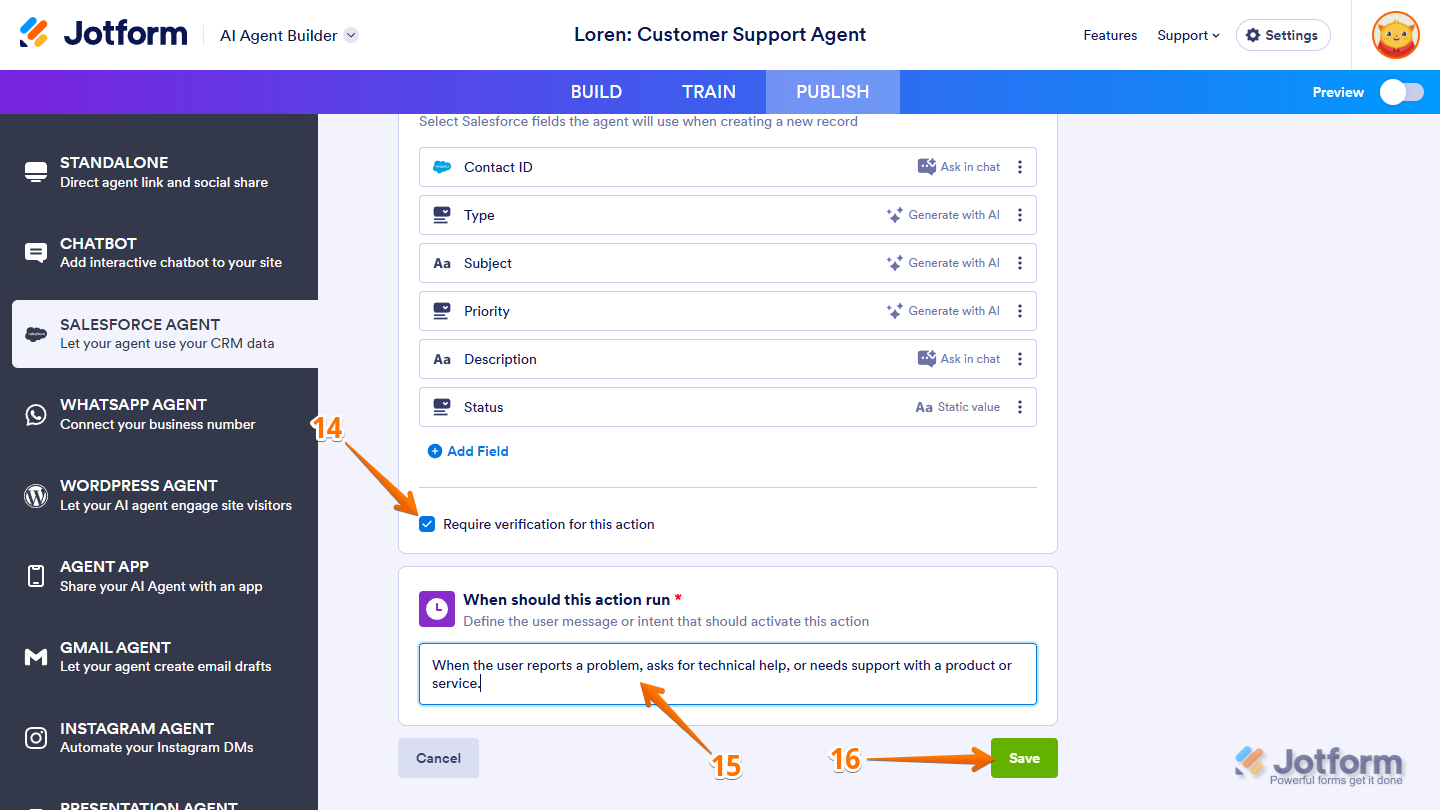
- Now, at the bottom of any of the following sections that appear with default fields already added and aren’t locked, click on Add Field to include more fields:
- Fields — Pick the Salesforce fields your agent will use when creating new records.
- Lookup Fields — Choose the fields your agent will use to search or match Salesforce records to.
- Response Fields — Set which fields your agent will include when replying in a conversation.
- Update Fields — Select the fields your agent will use when updating existing records.
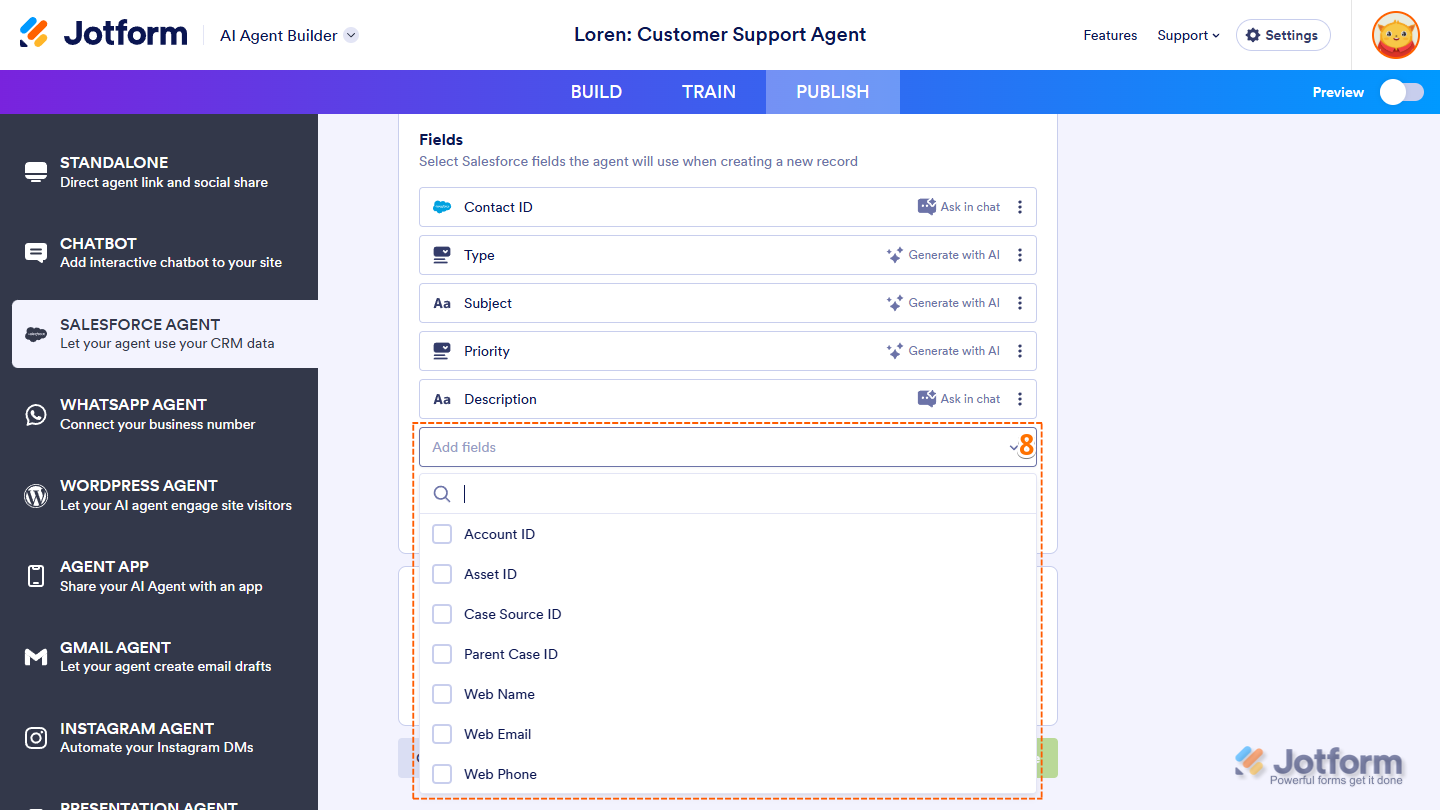
- Then, click on the Add Fields Dropdown menu that comes up and select a field.
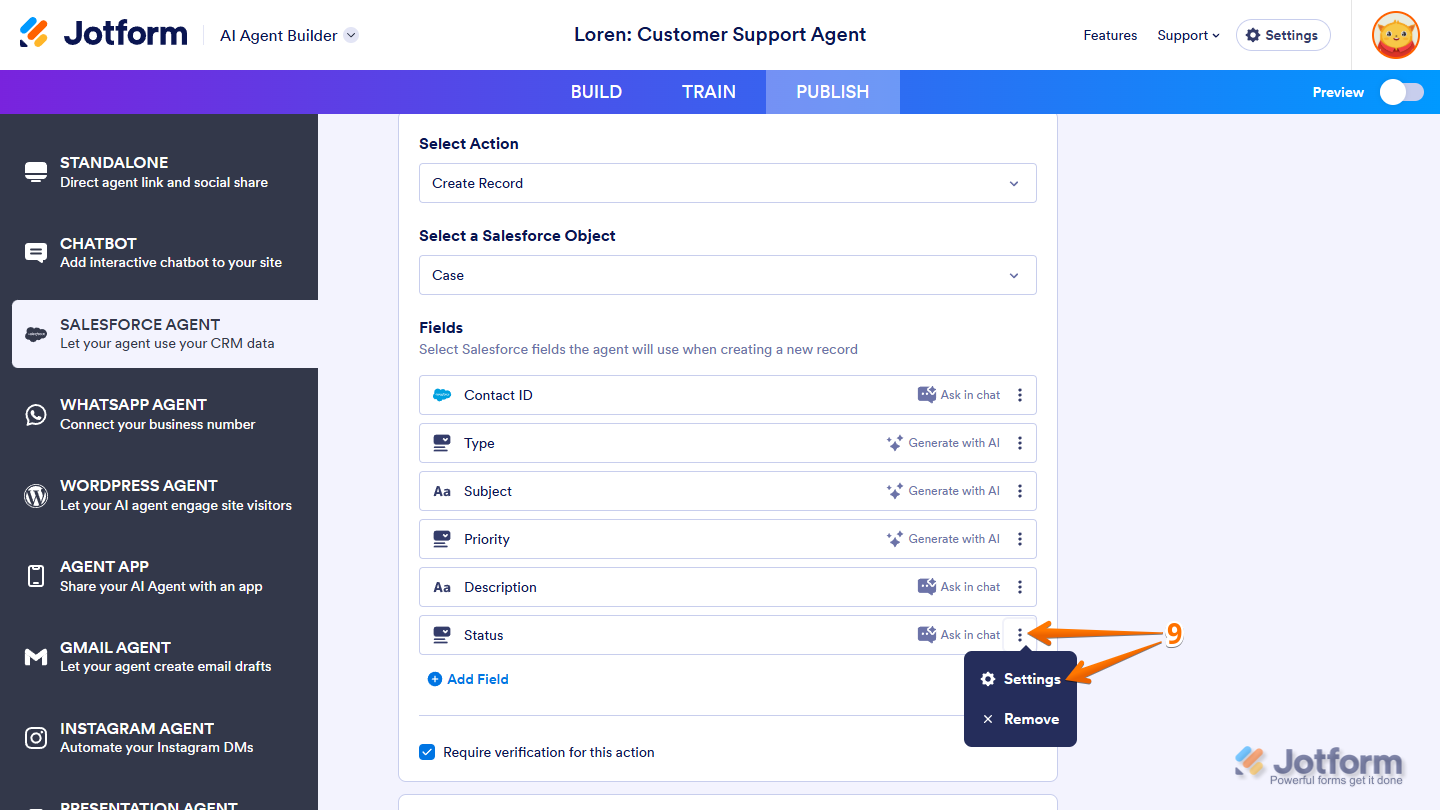
- Next, on the right side of the field you just added, click on the Three Dots icon, and in the menu that comes up, select Settings.
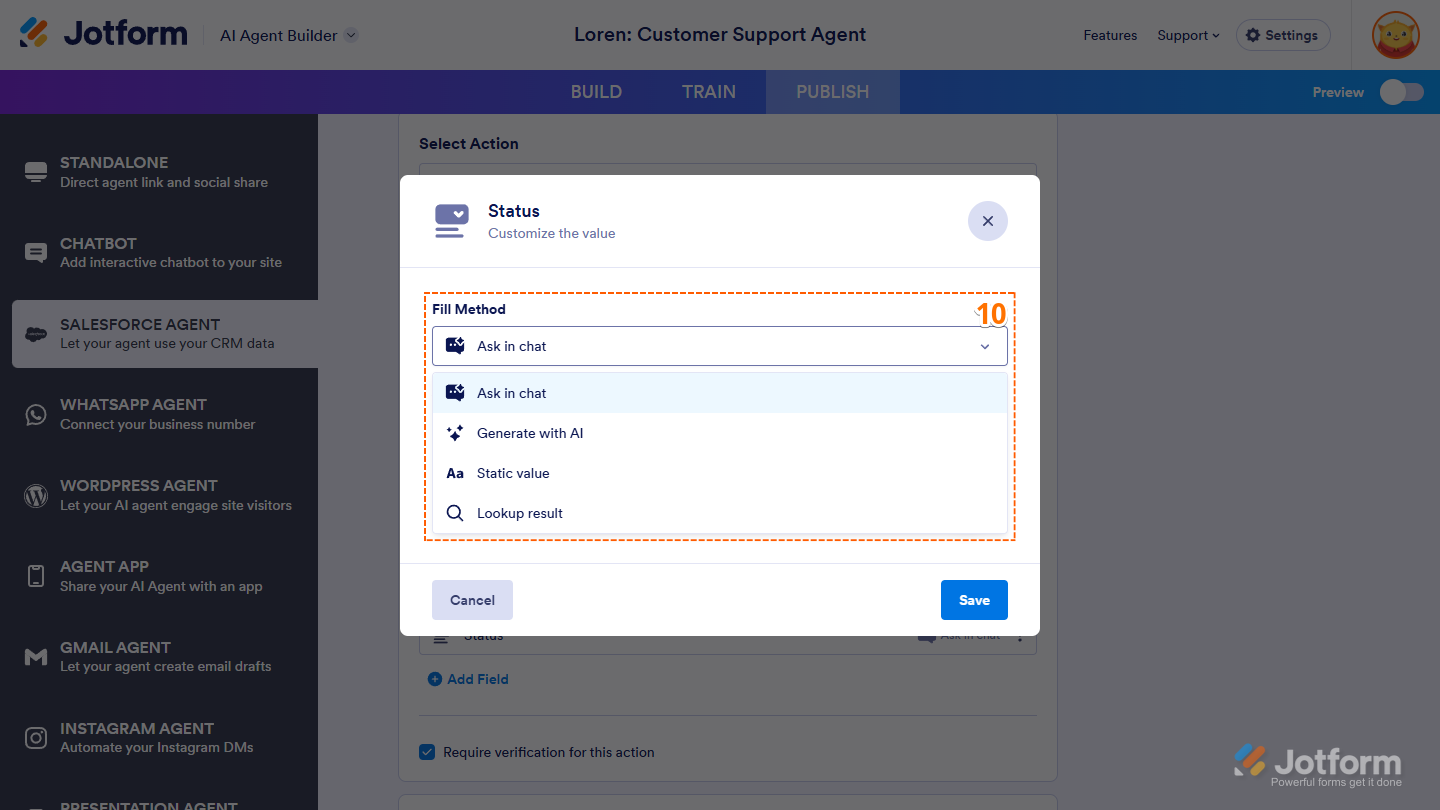
- In the Fields window that pops up, click on the Fill Method Dropdown menu, and select one of the following fill methods:
- Ask in Chat — Your agent will ask the user for this information during the conversation.
- Generate With AI — Your agent will generate the value automatically based on the chat context.
- Static Value — Your agent will use a fixed value.
- Lookup Result — Your agent will pull the value from a matched Salesforce record.
Check out our guide on Understanding Field Fill Options in Salesforce Agent to learn more.
- Then, depending on the method you chose:
- Enter a prompt in the AI Prompt box.
- Click on the Value Dropdown menu and select an option.
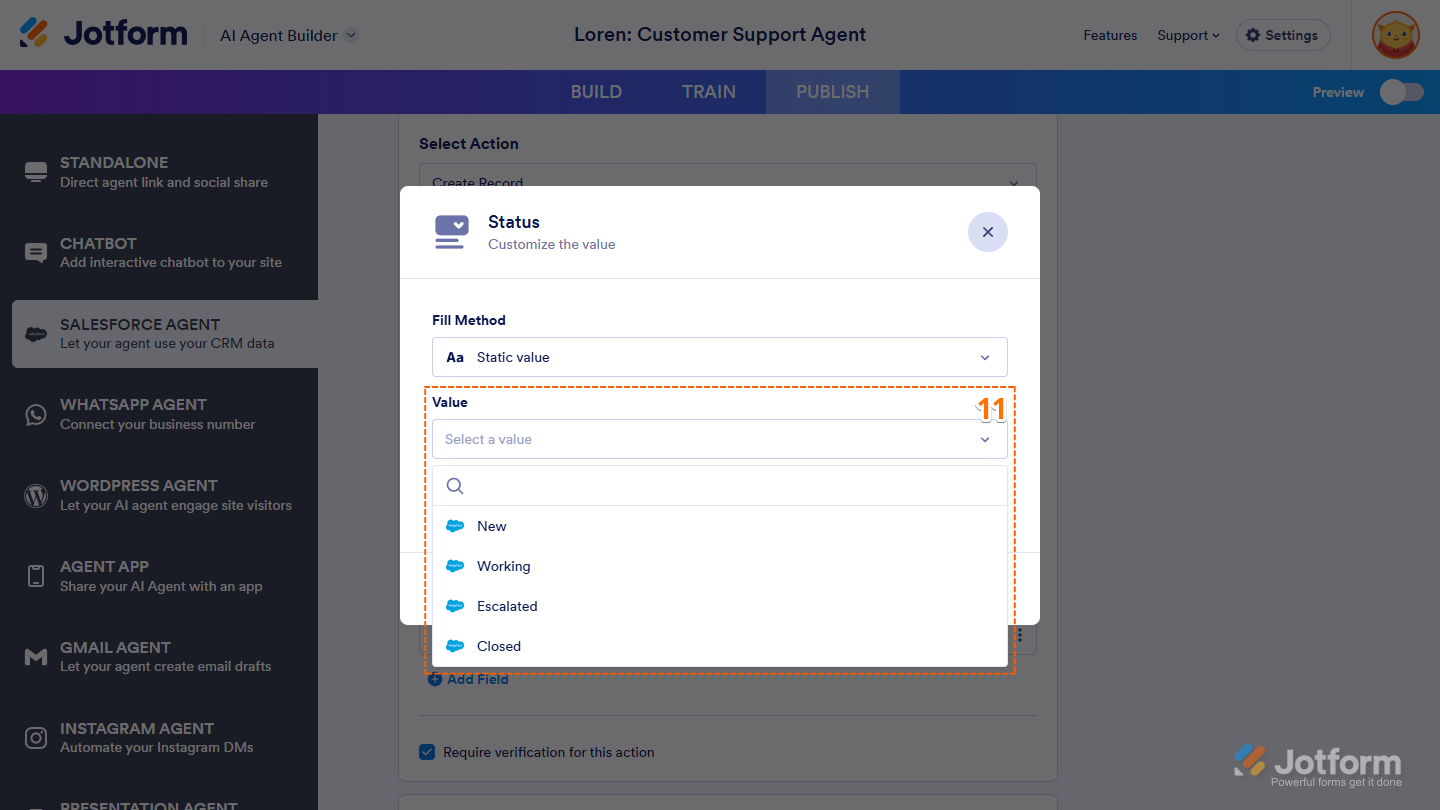
- Next, toggle on Required if you want to make sure the field is always filled whenever the action runs.
- After that, click on Save.

- Now, in the Salesforce Agent section, keep the box next to Require Verification for This Action checked so your AI Agent verifies the user before completing this action. Or, uncheck it if the action doesn’t need user verification.
- Then, scroll down to When Should This Action Run and, in the box under it, enter a message that should activate your chosen action.
- Finally, click on Save.
That’s it. You’ve successfully added actions for your Salesforce Agent.
If you want to test it first and make sure everything works as expected, check out our guide on How to Test Your Salesforce Agent Before Going Live.

Send Comment: