With Jotform’s Presentation Agent, it’s easy to help your audience take the next step right after the presentation ends. Adding a form lets you collect leads, book appointments, accept payments, take orders, run quizzes, or handle any next steps—seamlessly, without interrupting the experience. It’s ideal for marketers, sales teams, educators, or anyone who wants viewers to engage beyond just watching.
Once the presentation wraps up, your form follows as the final slide, making it simple for users to connect, place an order, or follow through—no extra setup needed. It’s a great fit for marketers, sales teams, educators, or anyone who wants their audience to do more than just watch.
Connecting a Form to a New Presentation
As soon as you’ve added a presentation—whether by uploading a PDF or PPTX, generating it with AI, or importing it from Google Slides—you can attach a form at the end in just a few quick steps. Here’s how to do it:
- In AI Agent Builder, in the blue navigation bar at the top of the page, click on Publish.
- Now, click on Presentation Agent in the menu on the left, and then, under the Presentation Agent section on the right, click on the Presentation Agent you want to connect a form to.

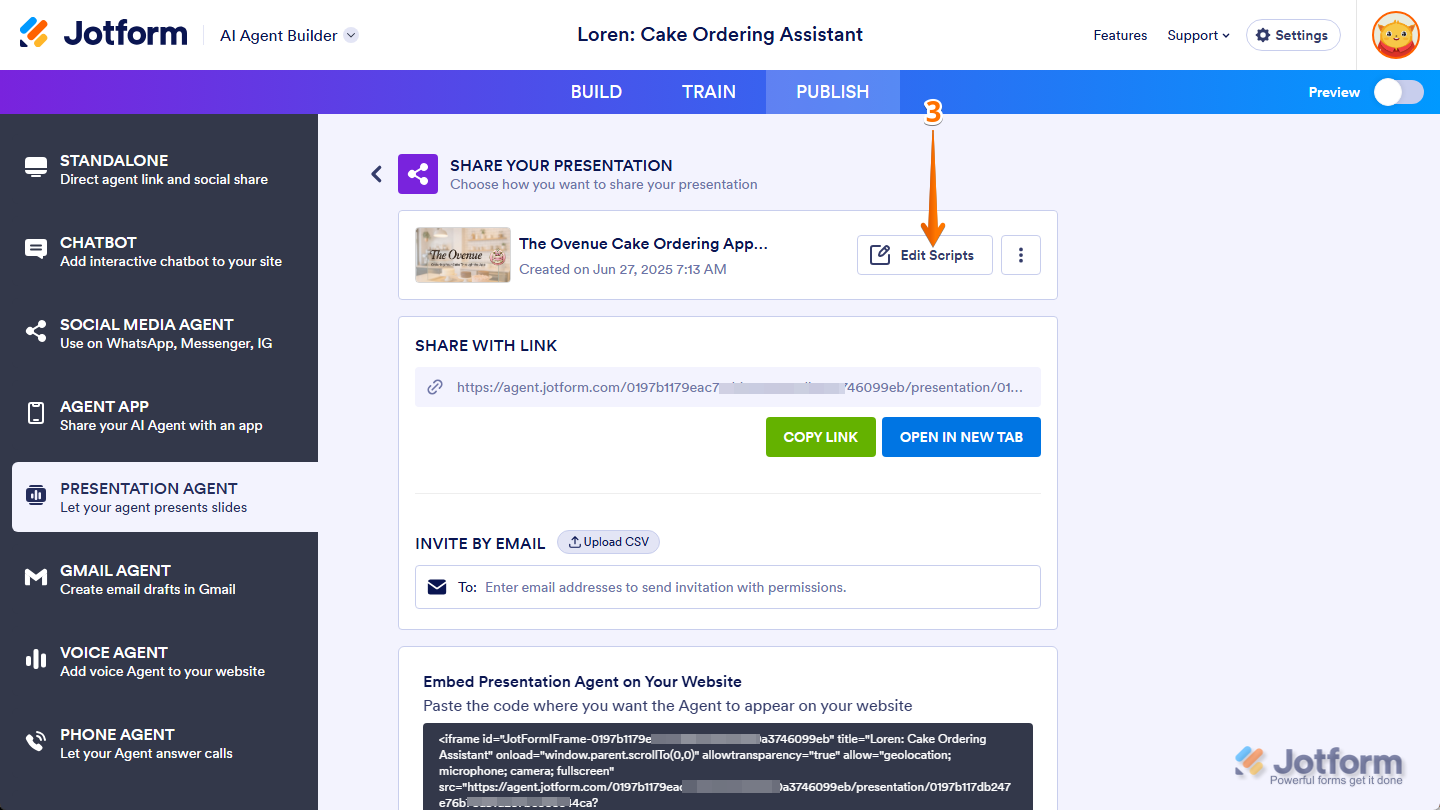
- Then, in the Share Your Presentation section, on the right side of the presentation’s name, click on Edit Scripts.
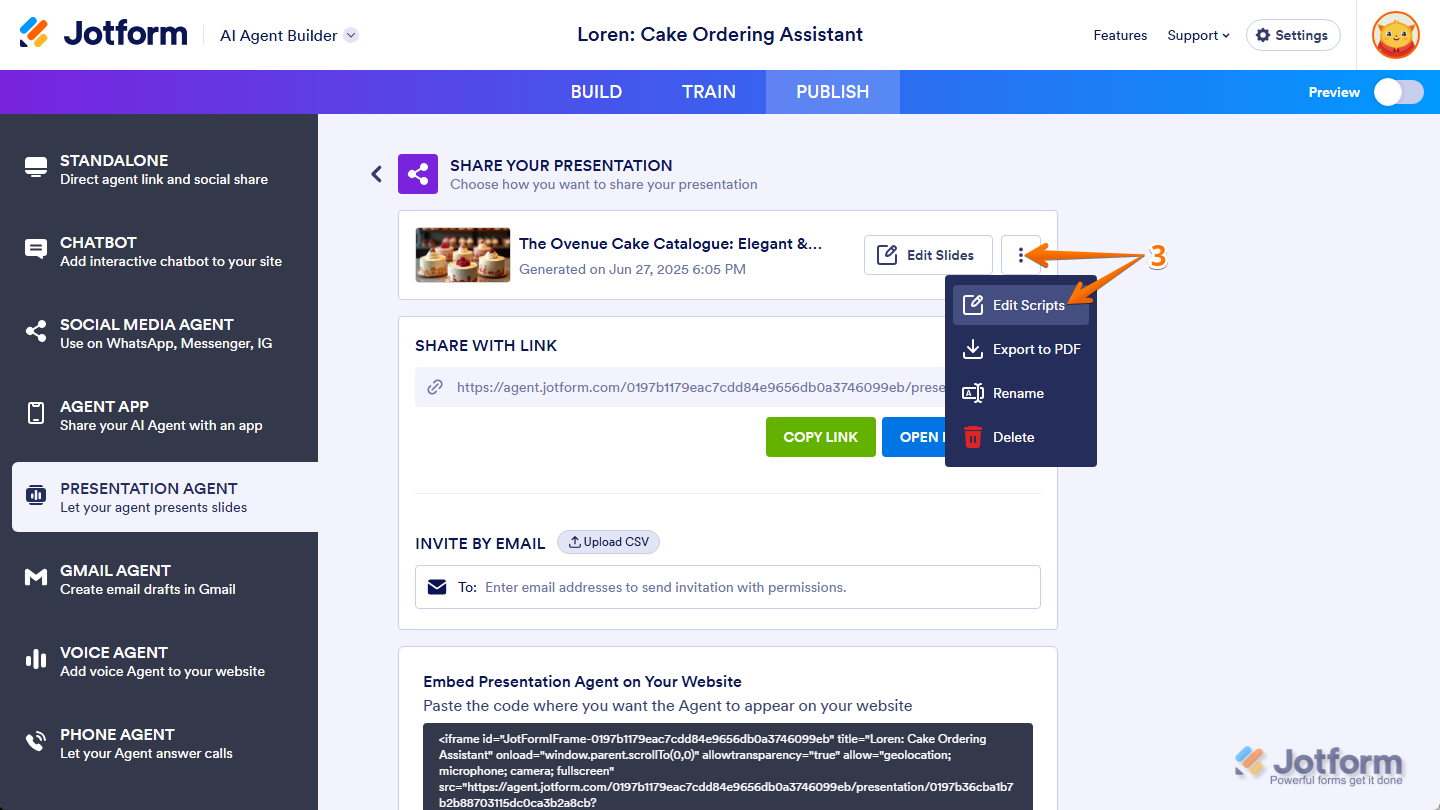
- If you generated your presentation using AI, click on the Three Dots icon first, and then, in the menu that opens up, select Edit Scripts.
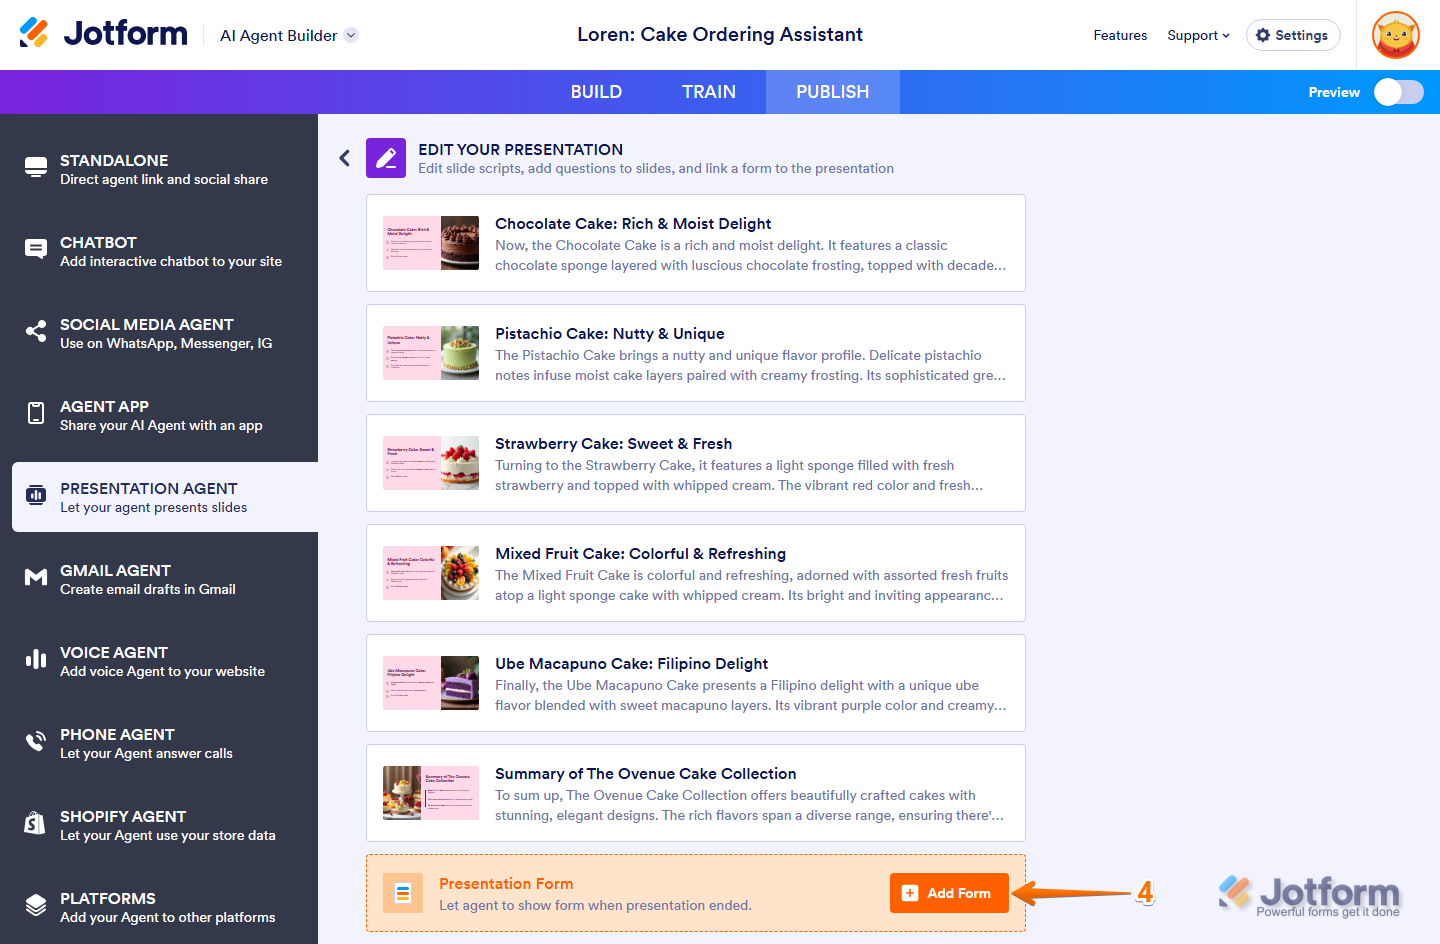
- Next, in the Edit Presentation section, click on Add Form at the bottom of the page.
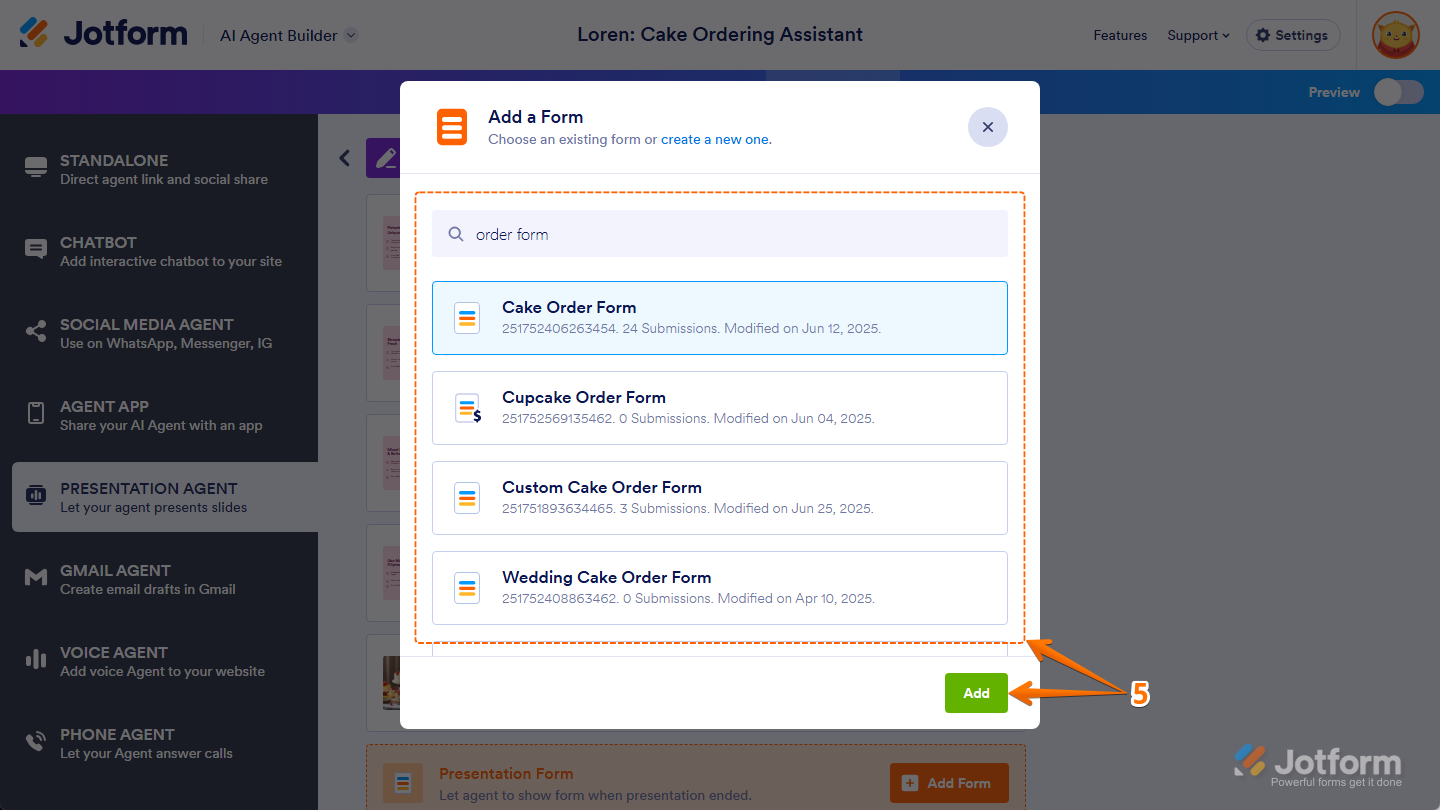
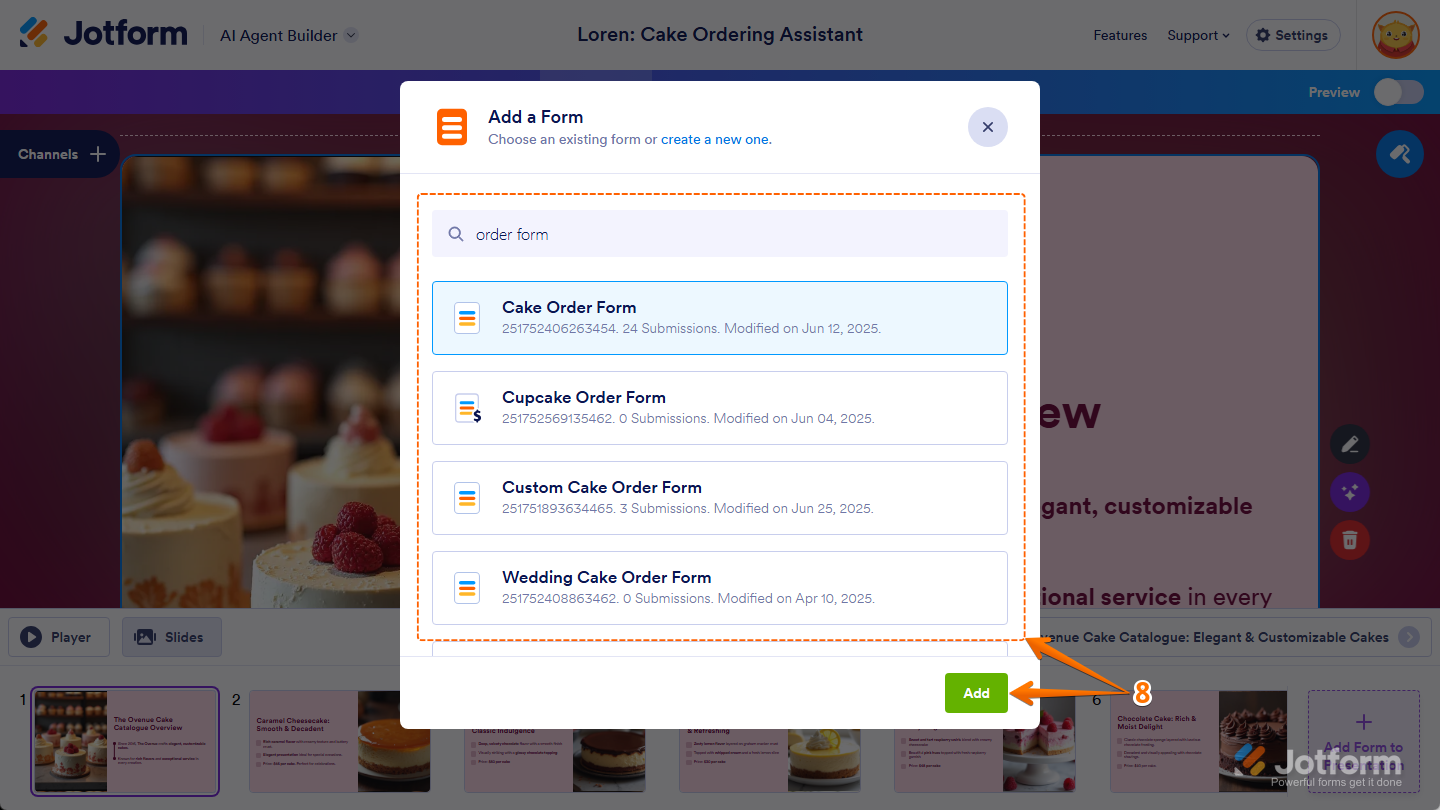
- Then, in the Add a Form window that opens, select the form you want to add to your presentation and then click on Add at the bottom. Or, use the Search bar at the top of the form list to find a specific one easily.
Note
The Create a New One link at the top of the Add a Form window lets you create a new form in Form Builder, which opens in another browser tab. The new form will be automatically connected to your presentation.
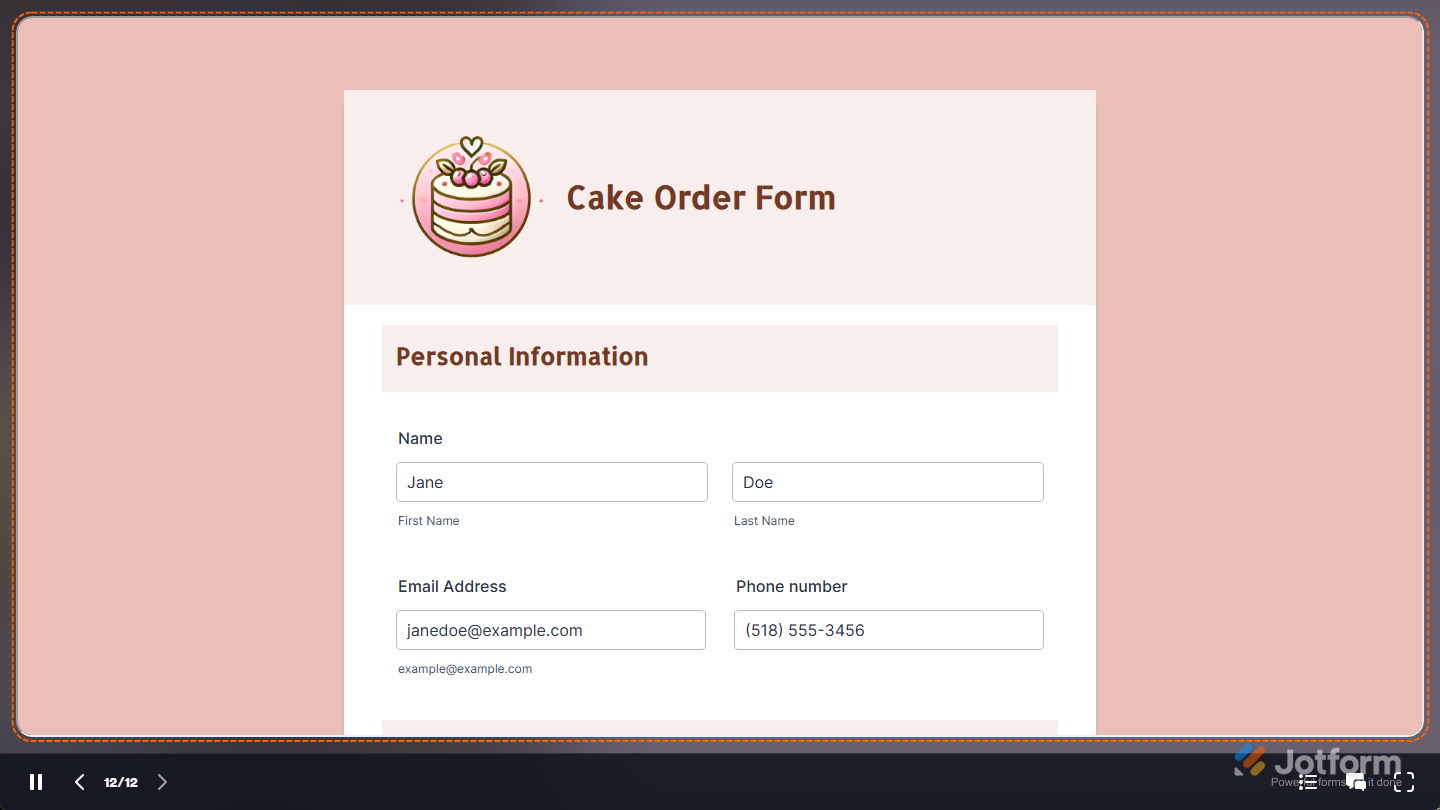
That’s it. Your audience will see the form at the end of your Presentation, so they can respond or take action right after it finishes.
You can also easily replace or remove the form you’ve added, edit the slide’s narration script, or require users to complete the form to finish the presentation. Here’s how:
- At the bottom of the Edit Presentation section, hover your mouse over the slide with your form in it and click on the Edit button on the right side of it.
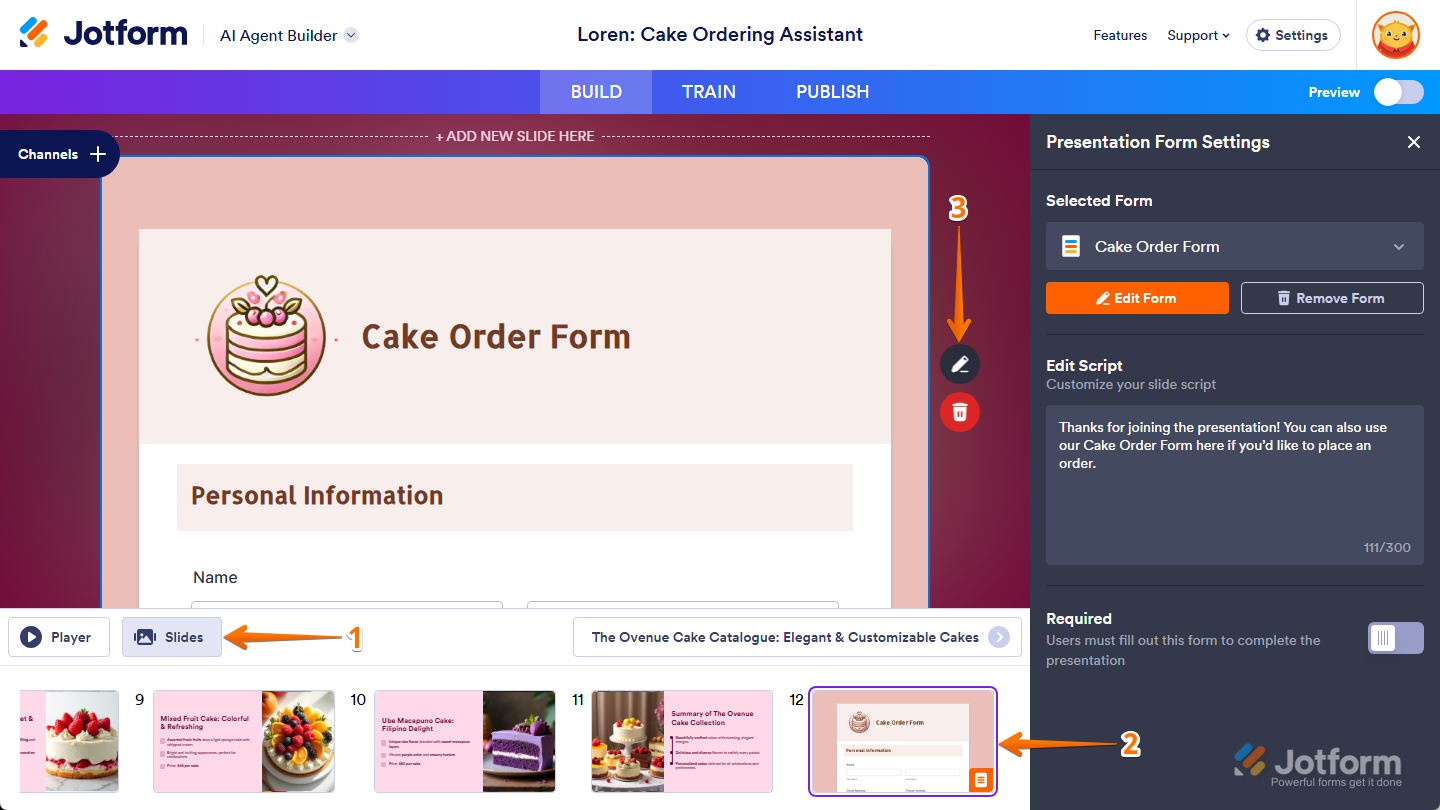
- Then, in the Presentation Form Settings window that opens on the right side of the page, you can manage the form you added to the presentation using the following settings:
- Selected Form — Click on the Dropdown to select a different form from your account if you want to replace the current one.
- Edit Form — Click this to open the form in Form Builder in a new browser tab if you need to make changes to the form itself.
- Remove Form — Click on this to delete the slide with your form if you no longer need it in the presentation.
- Edit Script — Enter a new script to update the narration for the slide where the form was added.
- Required — Toggle this On to make the form required or optional. When required, users must complete the form to finish the presentation.

Note
Any changes you make in the Presentation Form Settings window are saved automatically and applied to your presentation right away.
Connecting a Form in the Presentation Agent Builder
You can also connect a form to an existing Presentation Agent anytime through the Presentation Agent Builder in AI Agent Builder in just a few quick steps. Here’s how to do it:
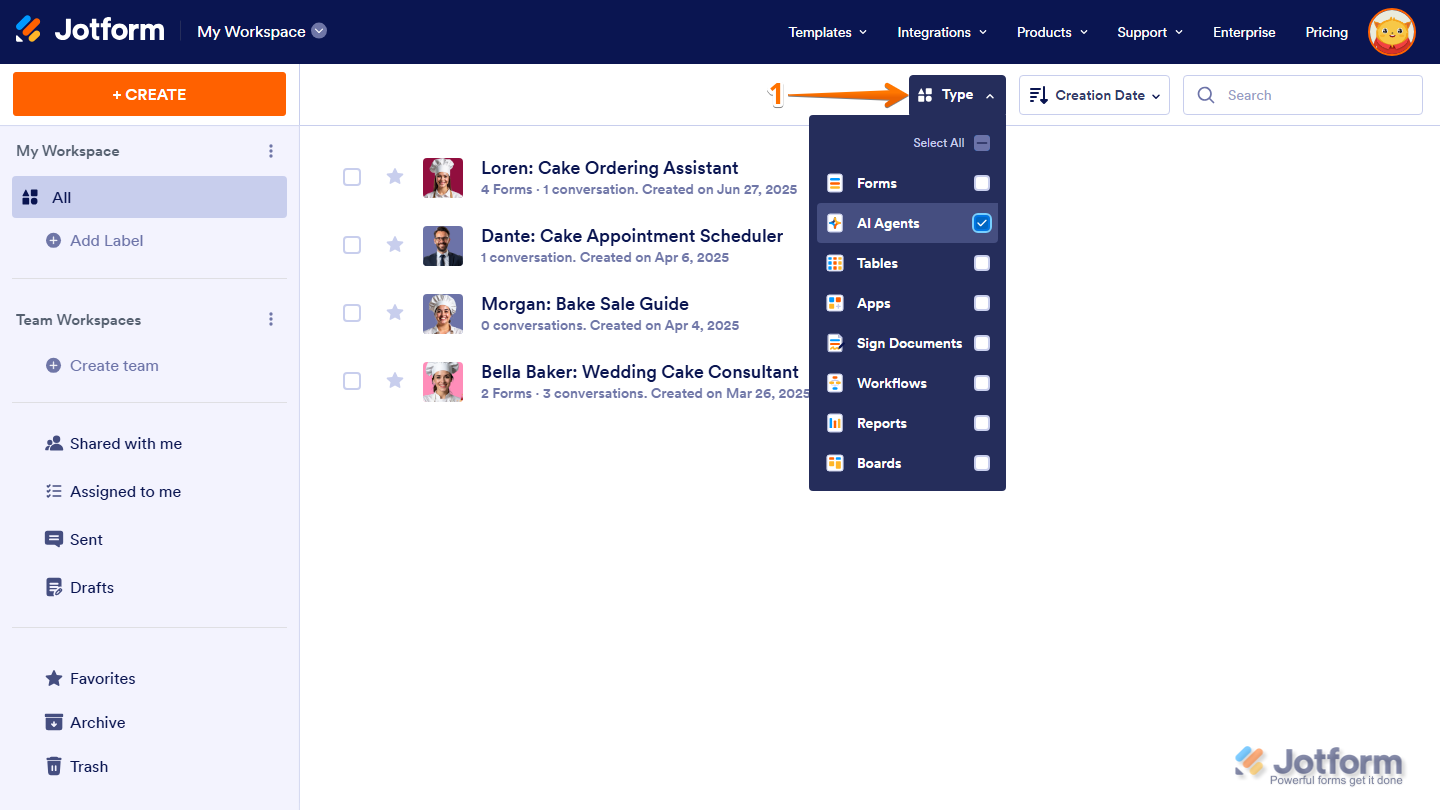
- On your My Workspace page, click on Type at the top and in the Dropdown menu that opens, uncheck the boxes next to all the assets except AI Agents, so only they’ll be shown on the page.
- Hover your mouse over the AI Agent with the presentation that you want to add a form to, and then click on Edit Agent on the right side of the page to set it up.

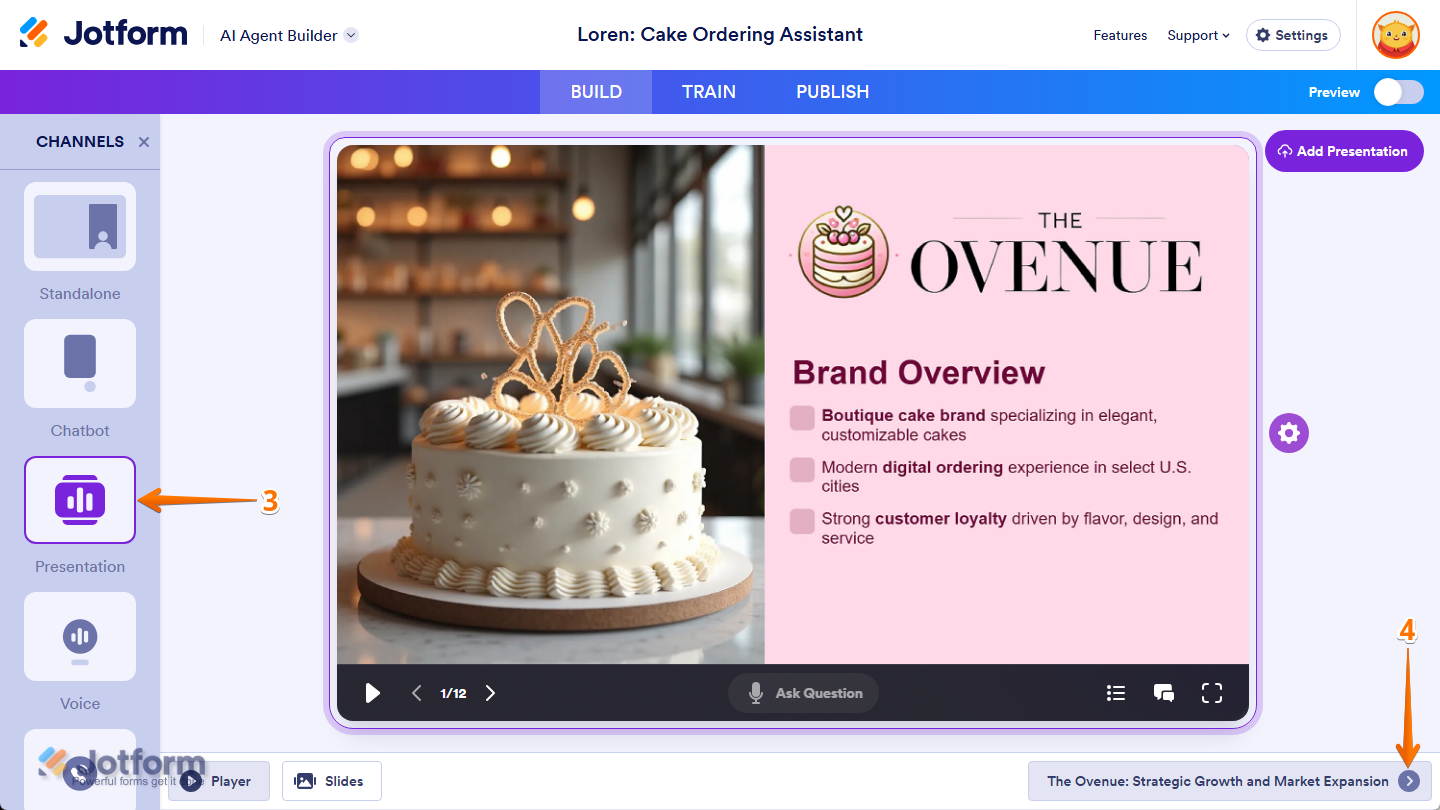
- In AI Agent Builder, in the Channels menu on the left side of the page, click on Presentation.
- Then, on the bottom-right side of the Presentation Agent Builder, click on the Rightward Arrow icon.
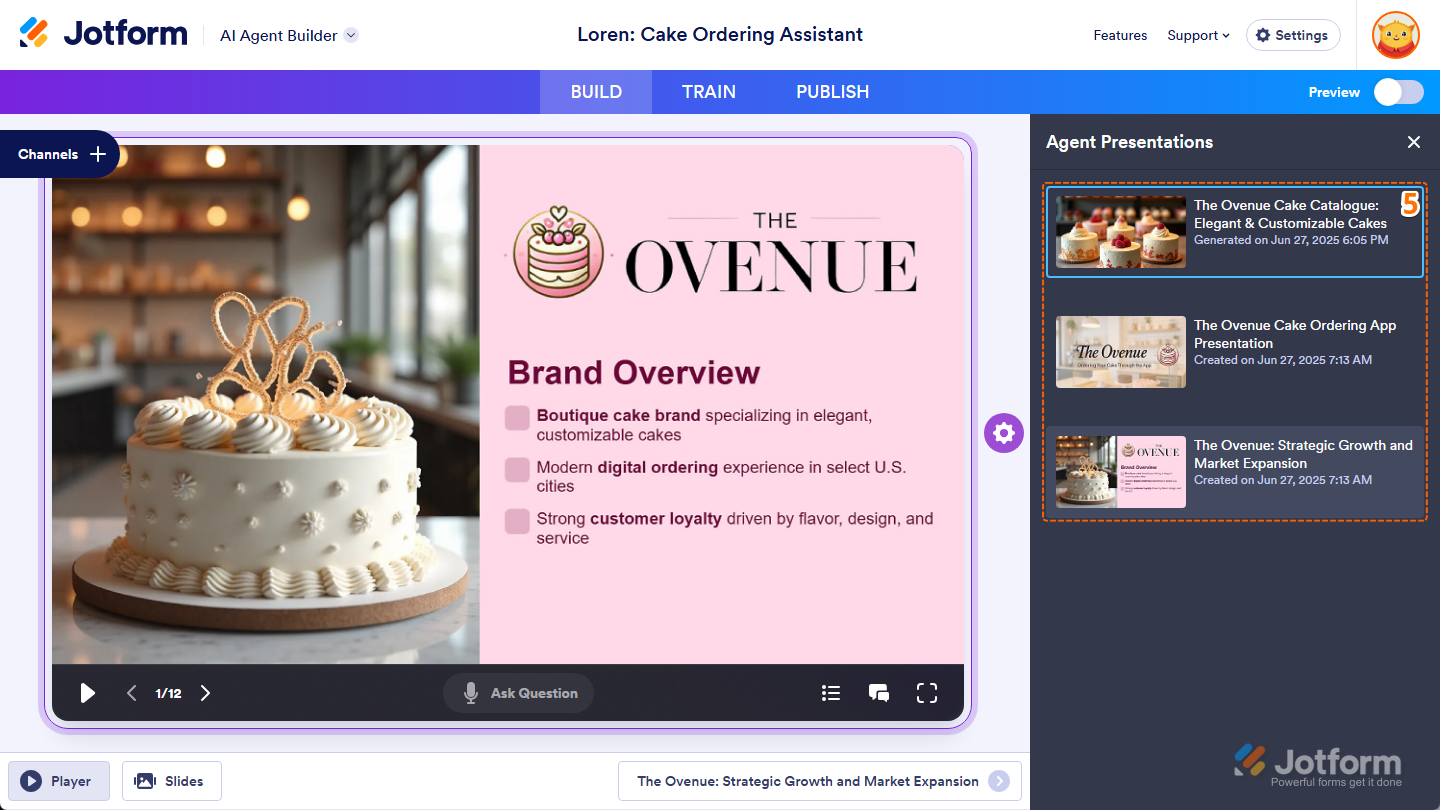
- Now, in the Agent Presentations menu that opens on the right side of the page, select a presentation.
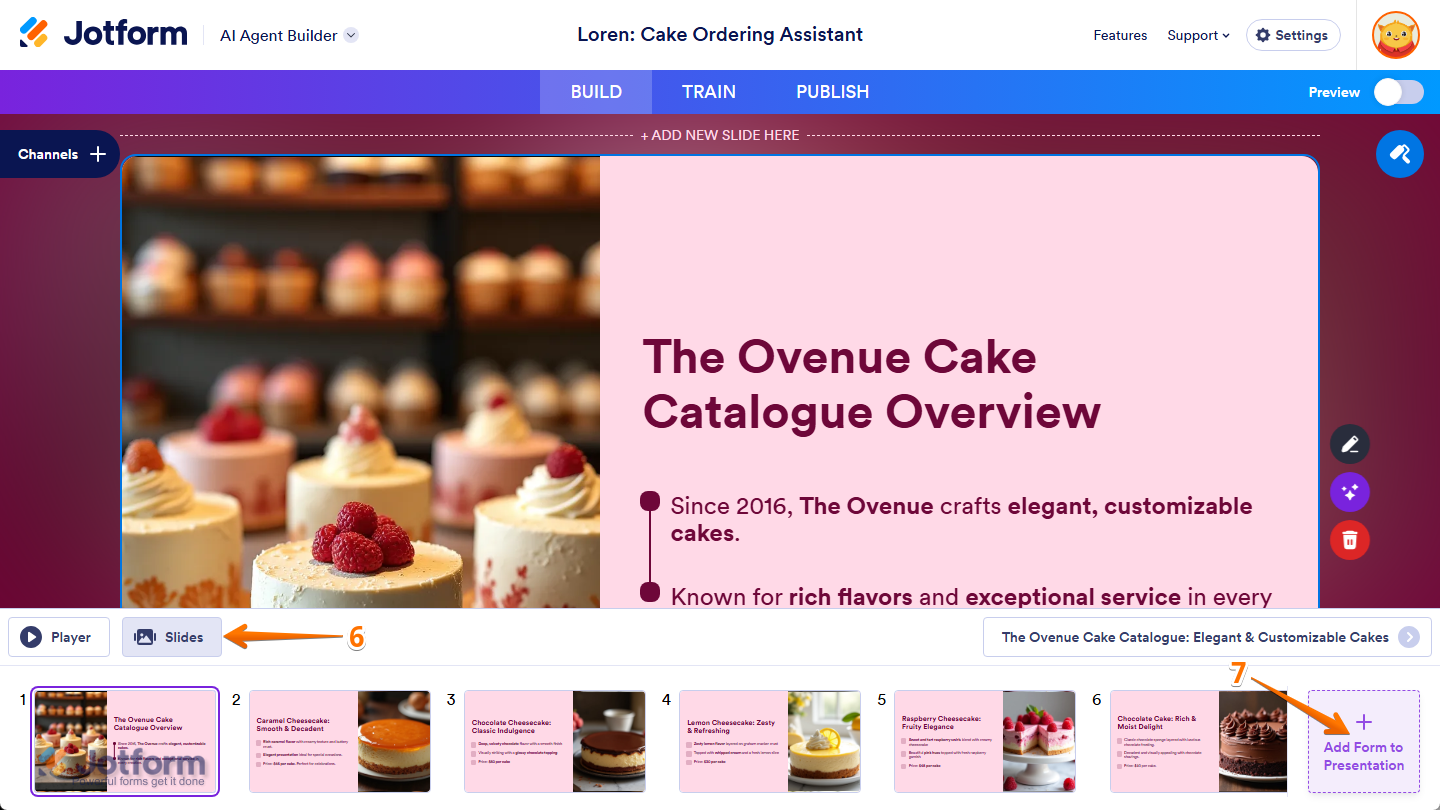
- Next, click on the Slides tab at the bottom of the page.
- Then, on the right side of the Slide Filmstrip that opens below it, click on Add Form to Presentation.
- In the Add a Form window, select the form you want to add to your presentation, and then click on Add at the bottom. Or, use the Search bar at the top of the form list to find a specific one easily.
That’s it. In the Presentation Form Settings window that opens on the right side of the page when you add your form, you can easily replace or remove the form, edit the slide’s narration script, or require users to complete the form to finish the presentation.
If you need to access these settings later, that’s easy too. Here’s how:
- At the bottom of the Presentation Agent Builder, click on the Slides tab.
- Now, in the Slide Filmstrip that opens below it, click on the last Slide Thumbnail with your form in it.
- Next, on the right side of the Slide Preview that opens above, click on the Pencil icon to open the Presentation Form Settings window, and then make your changes.
You can view your audience’s interaction with your presentation and their form responses anytime on the Conversations page.
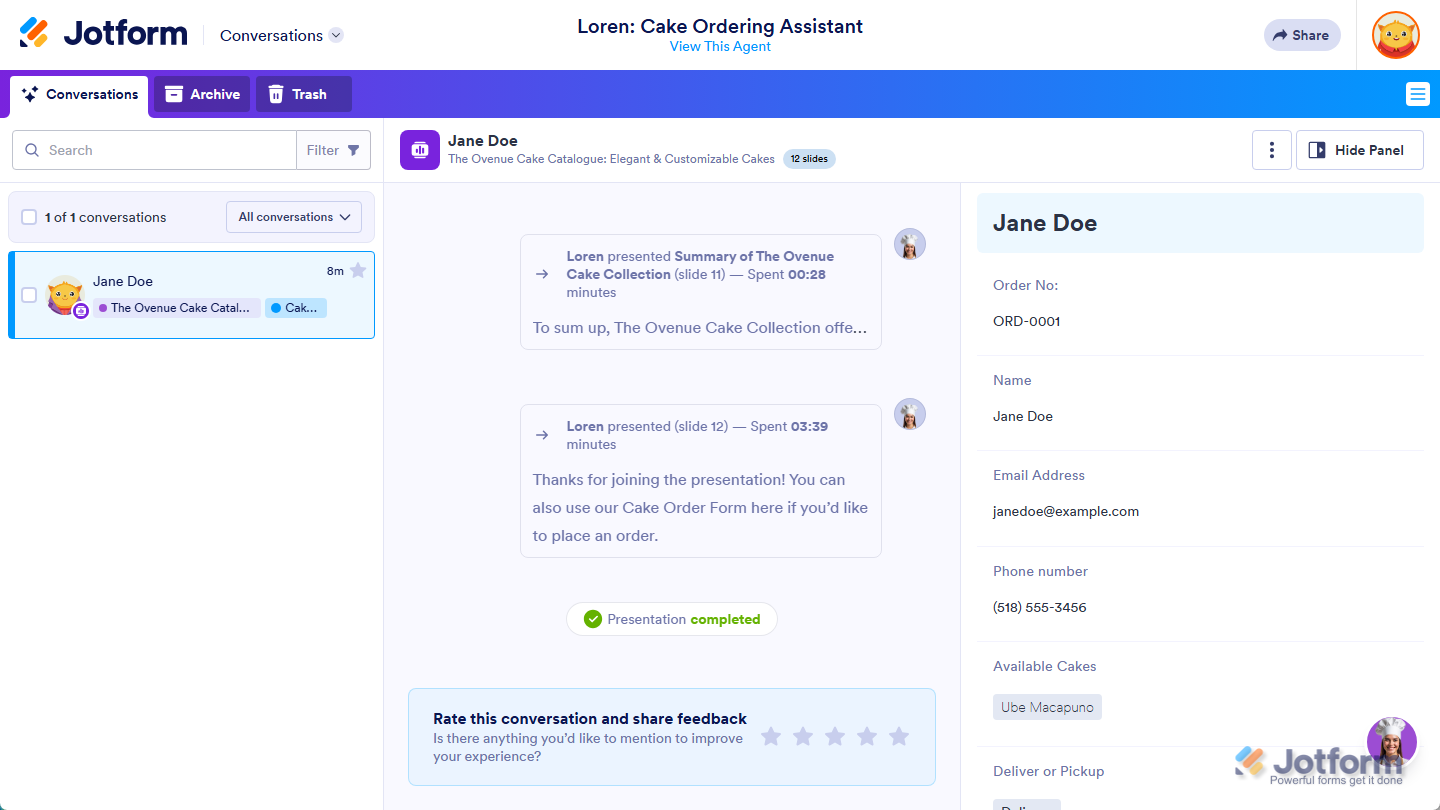
For more details, check out our guides on How to View and Manage AI Agent Conversations and How to Track User Conversations and Engagement in Your AI Presentation Agent.

Send Comment: