CyberSource is a Visa subsidiary that offers a robust payment processing platform and fraud detection service, making it easy for merchants and organizations to collect payments securely online. It supports transactions in over 190 countries and territories.
Adding and Setting Up the CyberSource Payment Field
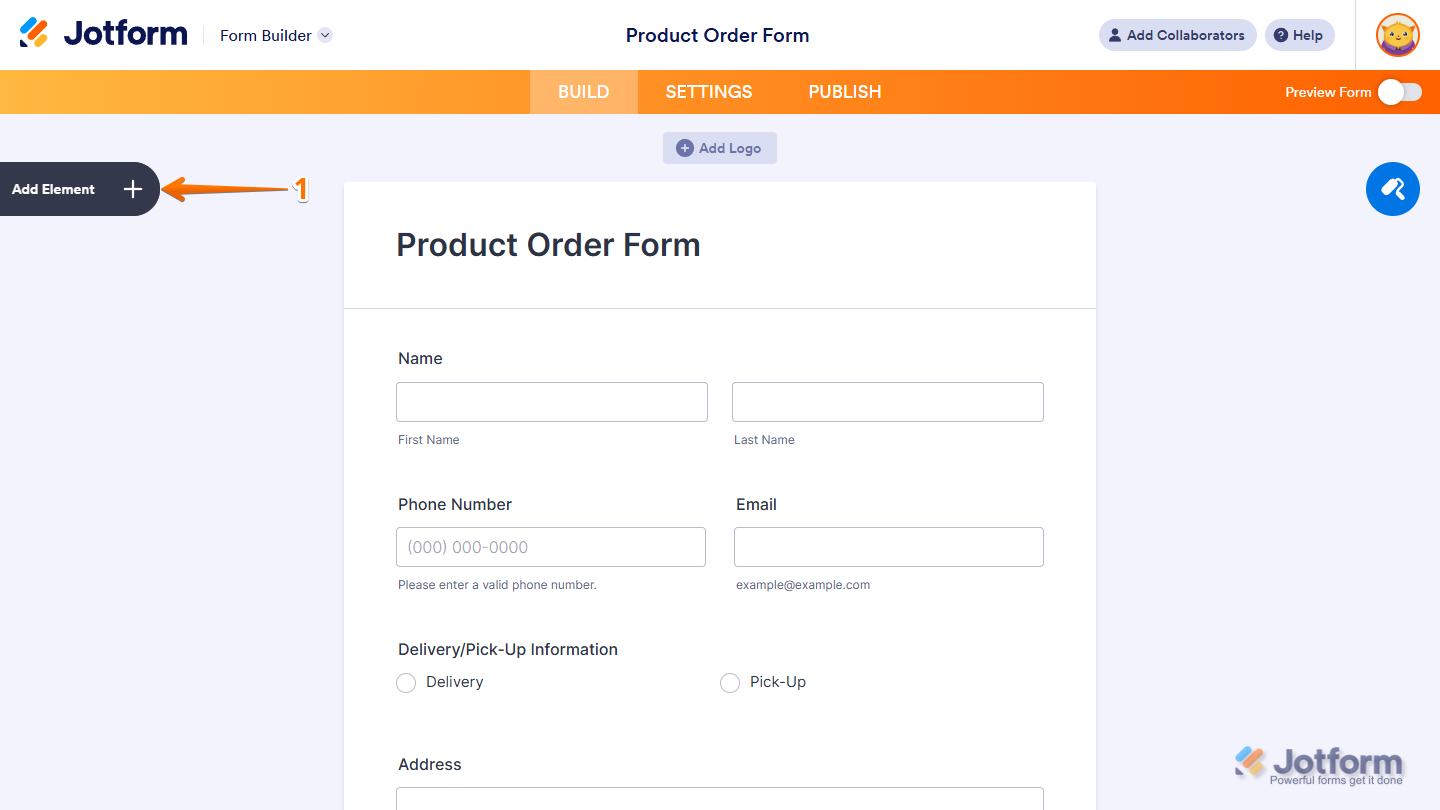
Whether you’re creating a new form or updating an existing one, adding and setting up the CyberSource payment field is quick and easy. Here’s how to do it:
- In Form Builder, click on Add Element on the left side of the page.
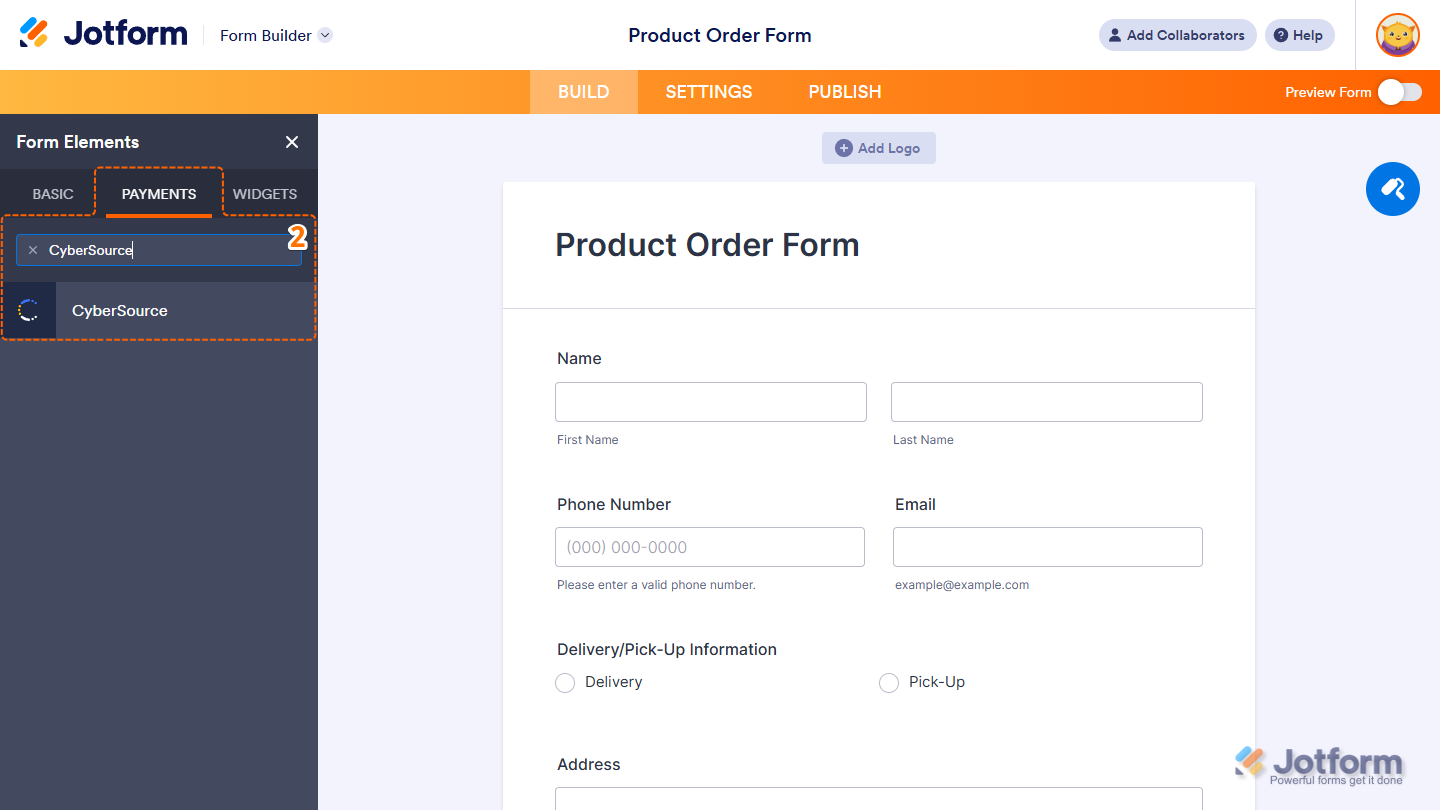
- Now, in the Form Elements menu, under the Payments tab, search for CyberSource, and then click on it. Or, just drag and then drop it to where you want it to be on your form.
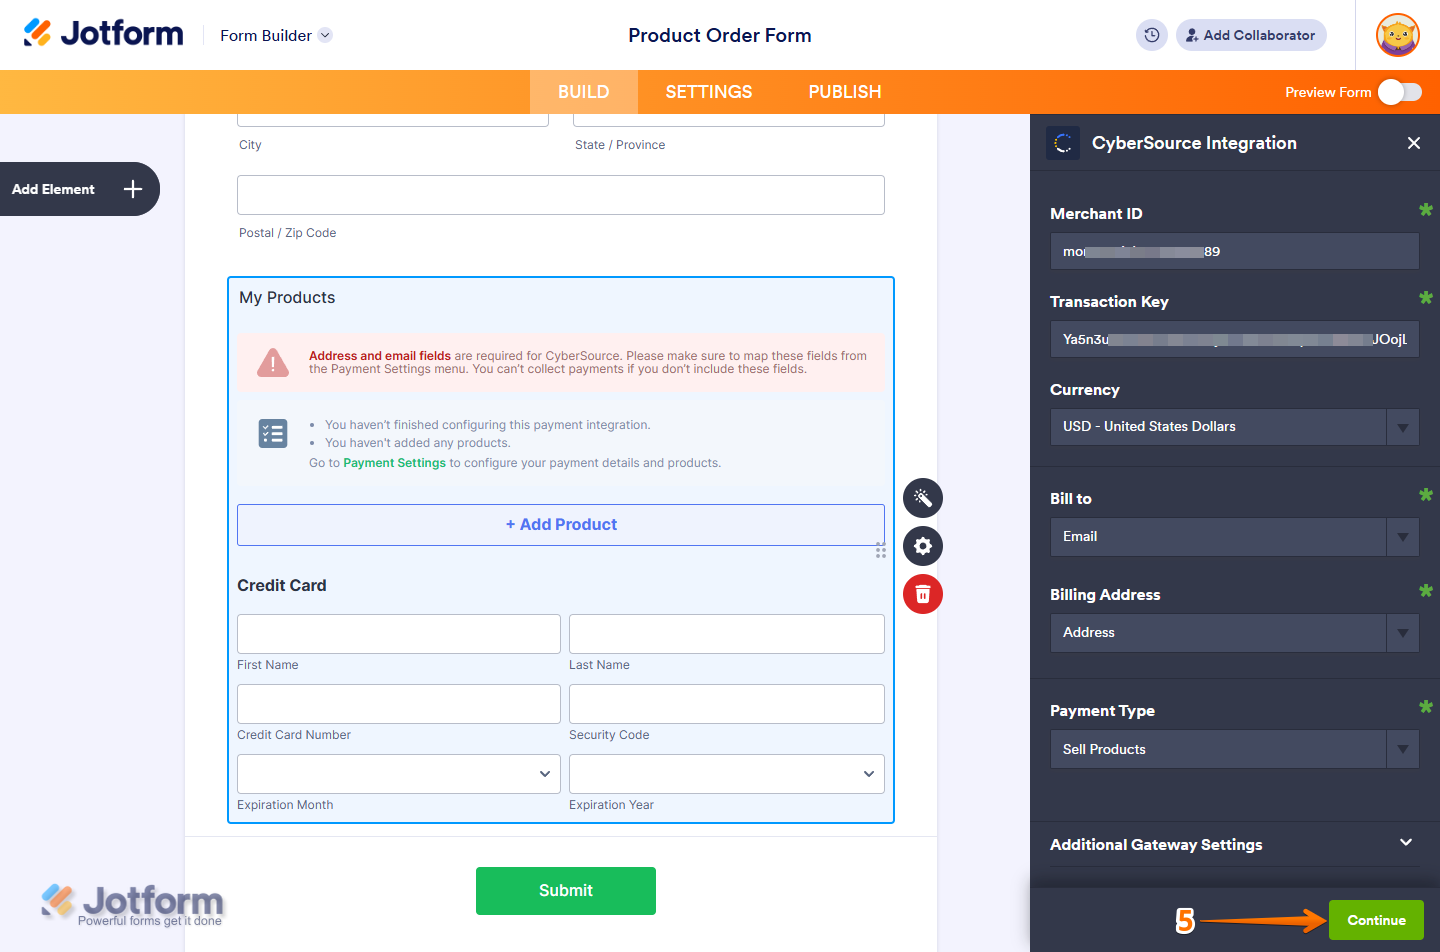
- Next, in the CyberSource Integration window that opens on the right side of the page, set up the following things:
- Merchant ID — This is a unique identifier for your CyberSource account.
- Transaction Key — CyberSource generates this secure key in your Business Center. It authorizes and encrypts transaction requests between Jotform and CyberSource.
- Currency — Select one of the currencies available with the integration.
- Bill to — This is required. Enable this to collect the customer’s billing information during checkout. Make sure it matches the Email Address field on your form.
- Billing address — This is also required. Enable this to collect the customer’s full billing address, including street, city, state, and ZIP/postal code. Make sure your form includes an Address field to capture this information.

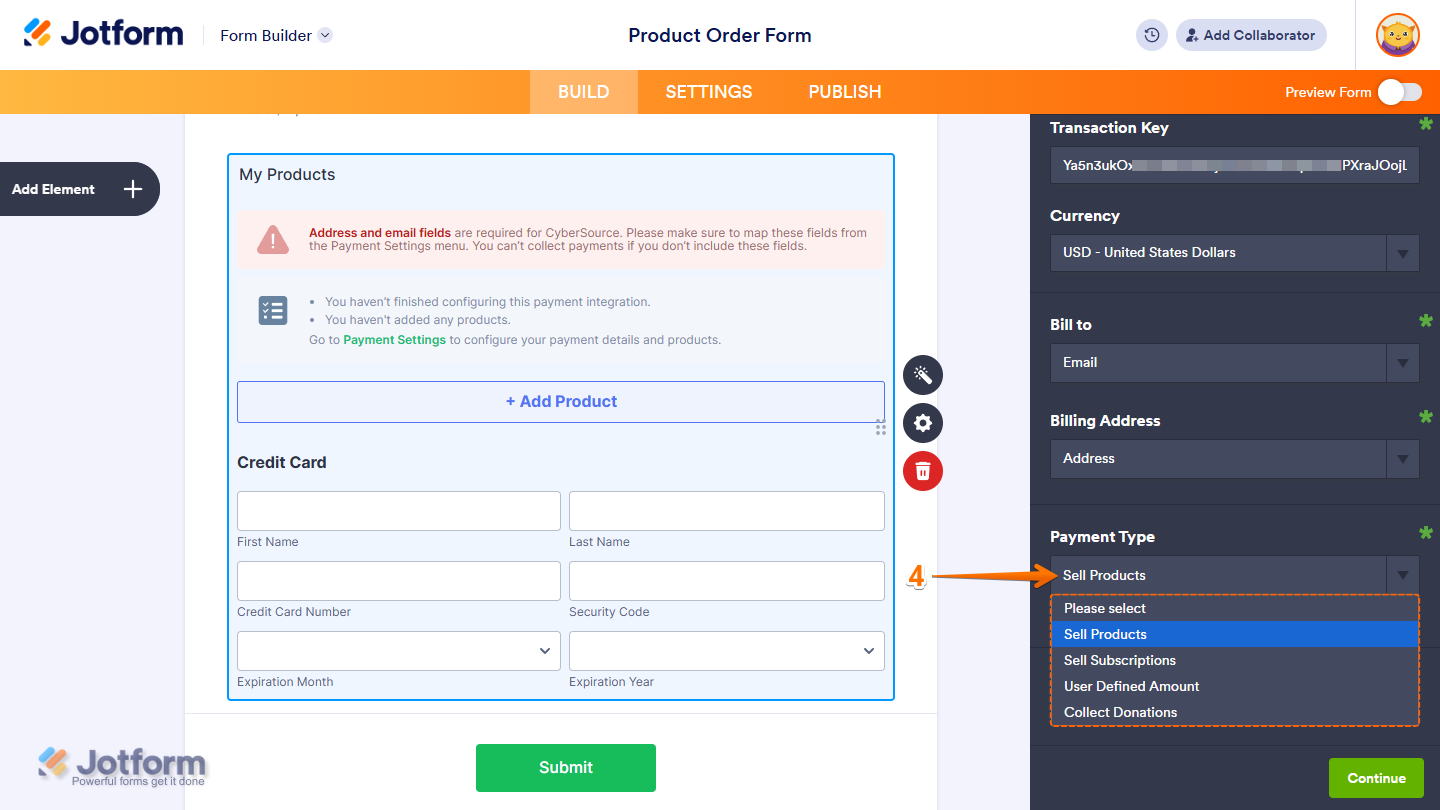
- After that, in the Payment Type Dropdown menu, select what you’d like the payment to be processed for:
- Sell Products — This is selected by default. Use this to sell physical or digital goods at a fixed price, allowing customers to make a one-time purchase.
- Sell Subscriptions — Choose this to charge customers on a recurring basis for services, memberships, or other ongoing access.
- User-Defined Amount — This lets customers enter the amount they want to pay. It’s useful for tipping, custom amount pricing, or flexible payments.
- Collect Donations — Select this to accept voluntary contributions, commonly used for fundraising, nonprofit support, or charitable causes.
- Once everything is set for the Sell Products and Sell Subscriptions payment types, click on Continue to start creating products and subscriptions for your payment field. For the User Defined Amount and Collect Donations payment types, just click on Save at the bottom.
For the User-Defined Amount and Collect Donations payment types, you can add a description that appears below the payment box on your form. You can also set a suggested amount, make it the minimum, or get the price from a Form Calculation widget. This is useful when you want to pass a calculated amount to your payment field instead of having users enter it. For a full breakdown of how to do it, head over to our guide on How to Pass a Calculation to a Payment Field.

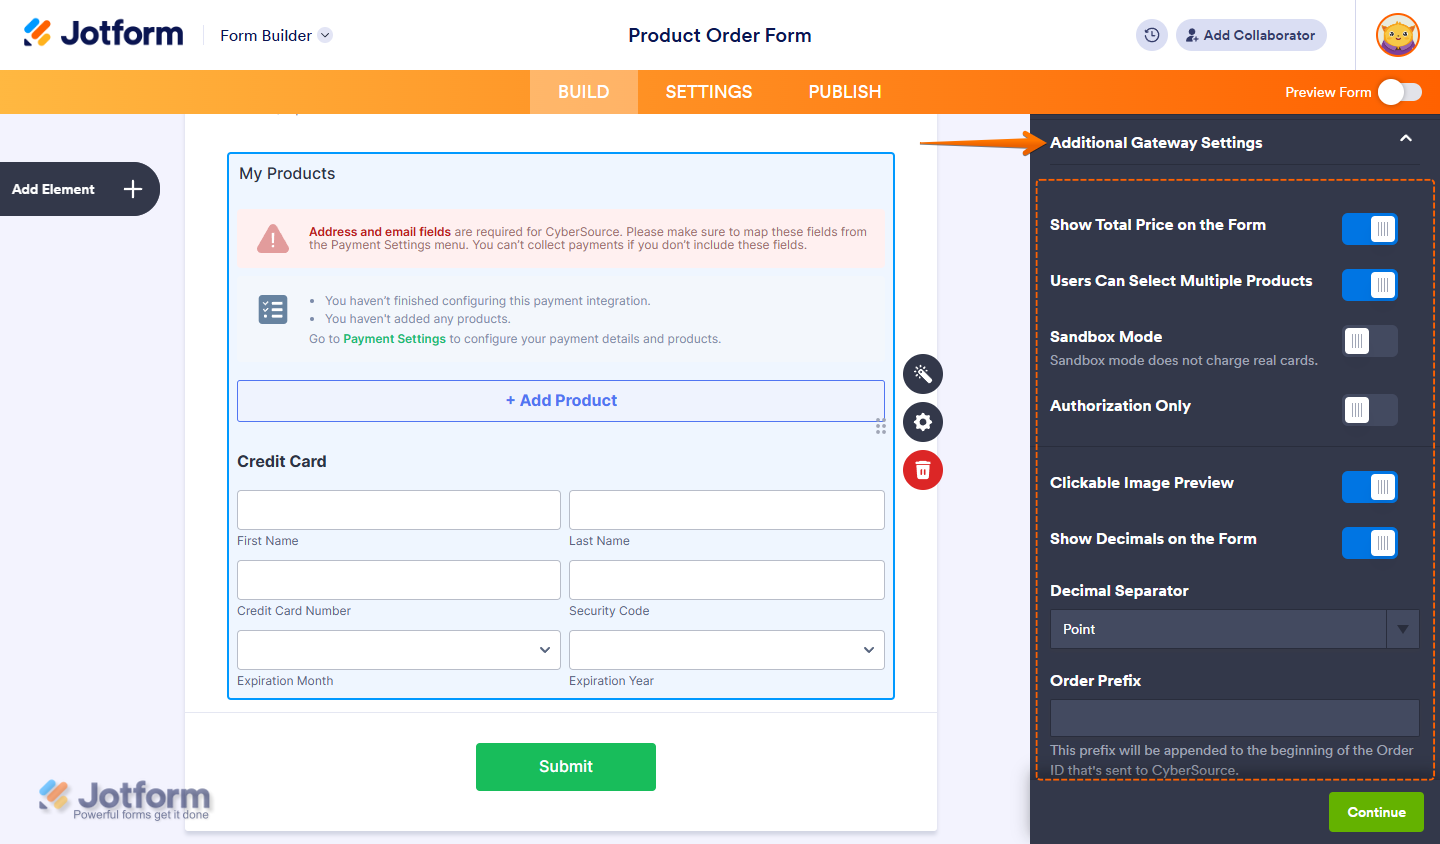
When you expand the Additional Gateway Settings in the CyberSource Integration section, you’ll see this list of options you can adjust based on the payment type you chose:
- Show Total Price on the Form — This is only available with the Sell Products payment type and is enabled by default. Toggle this Off if you want to hide the total price of selected products on your form.
- User Can Select Multiple Products — This is only available with the Sell Products payment type and is enabled by default. Toggle this Off if you want customers to select only one (1) product per submission.
- Sandbox Mode — Toggle this On to run test transactions before going live.
- Authorization Only — This authorizes the card without collecting funds immediately.
- Clickable Image Preview — This is only available with the Sell Products and Sell Subscriptions payment types and is enabled by default. Toggle this Off to prevent customers from enlarging product or subscription images.
- Show Decimals on the Form — This is only available with the Sell Products and Sell Subscriptions payment types and is enabled by default. Toggle this Off to hide decimals on both the item prices and total amount.
- Decimal Separator — Choose the symbol used to separate decimals (e.g., period or comma).
- Order Prefix — This prefix will be appended to the beginning of the Order ID that’s sent to CyberSource.
Setting Up a CyberSource Reusable Payment Connection
With Jotform’s Reusable Payment Connections feature, you can set up payment integrations like CyberSource and reuse the same configuration on your other forms without needing to configure it again. Here’s how to get started:
- In Form Builder, click on Add Element on the left side of the page.

- Now, in the Form Elements menu, under the Payments tab, search for CyberSource, and then click on it. Or, just drag and then drop it to where you want it to be on your form.

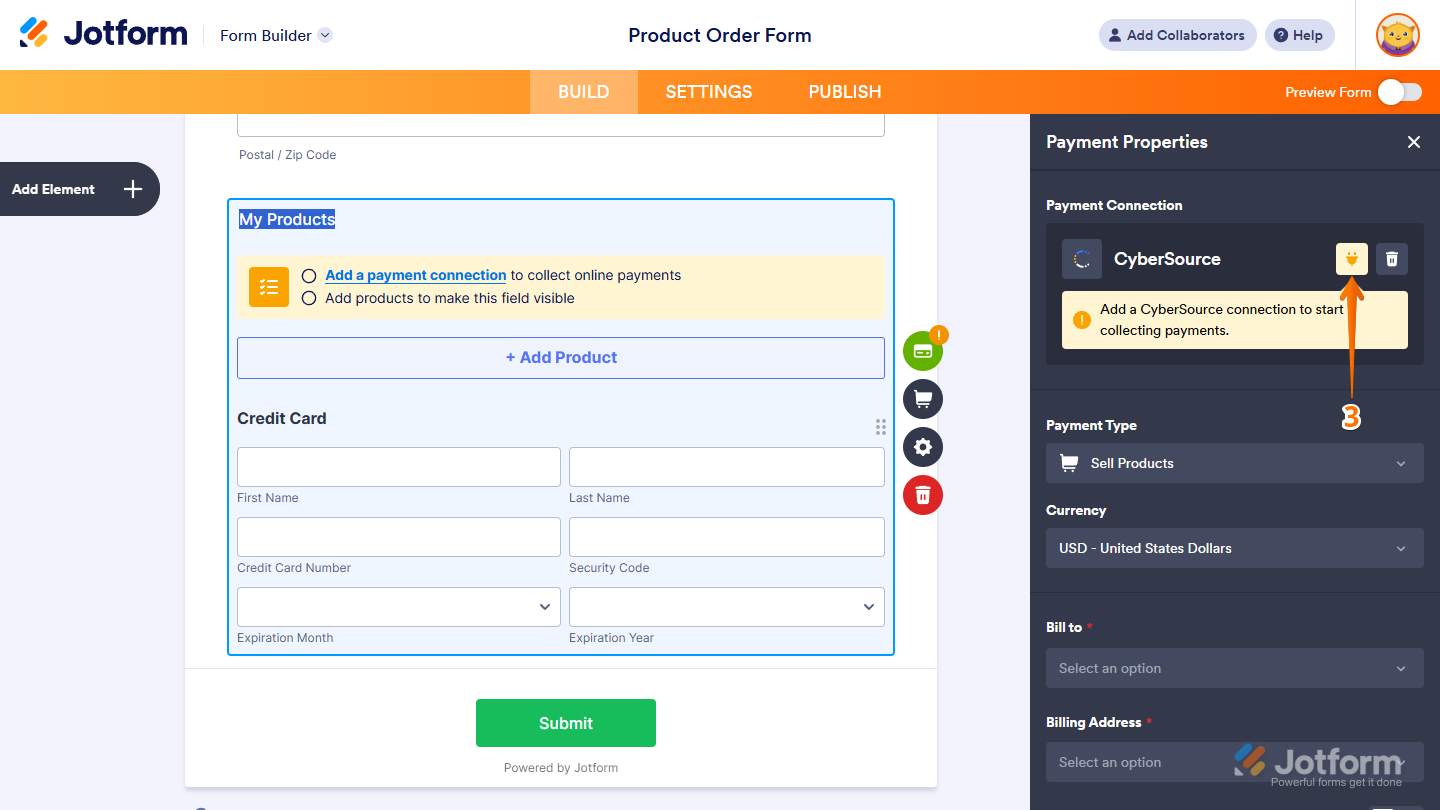
- Then, in the Payment Properties section that opens on the right side of the page, click on the Plug icon.
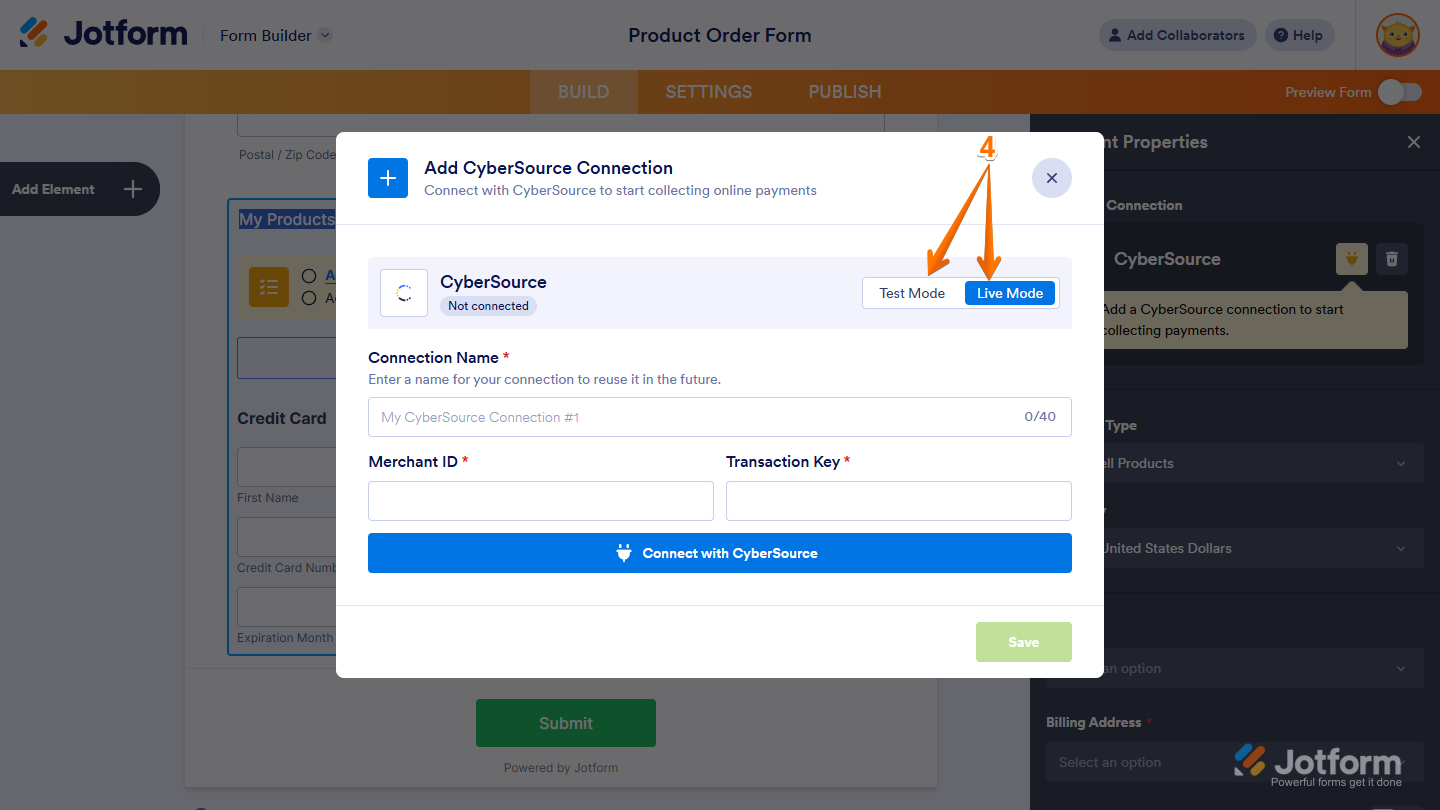
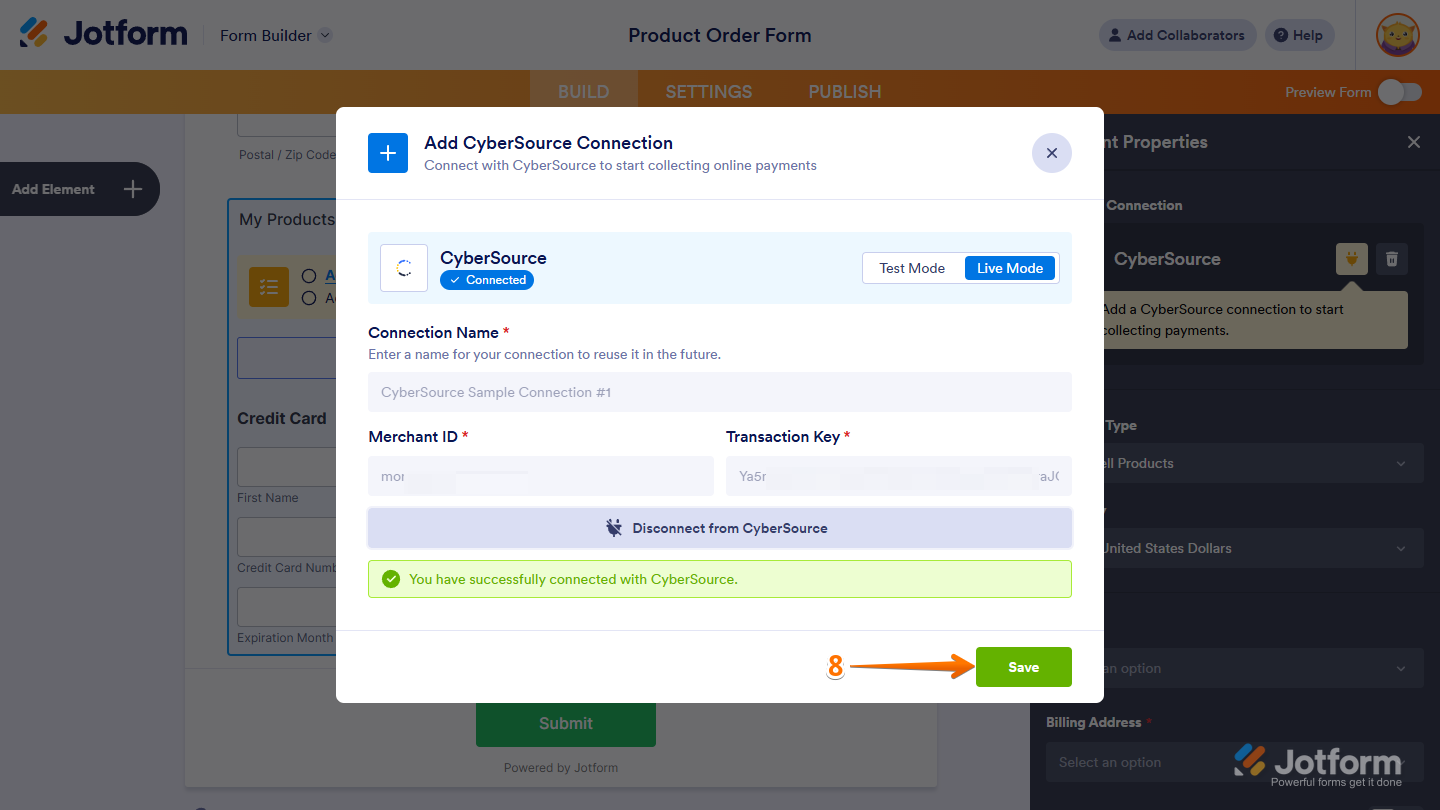
- Now, in the Add CyberSourceConnection window, click on either Test Mode or Live Mode at the top to select the environment for your payment connection.
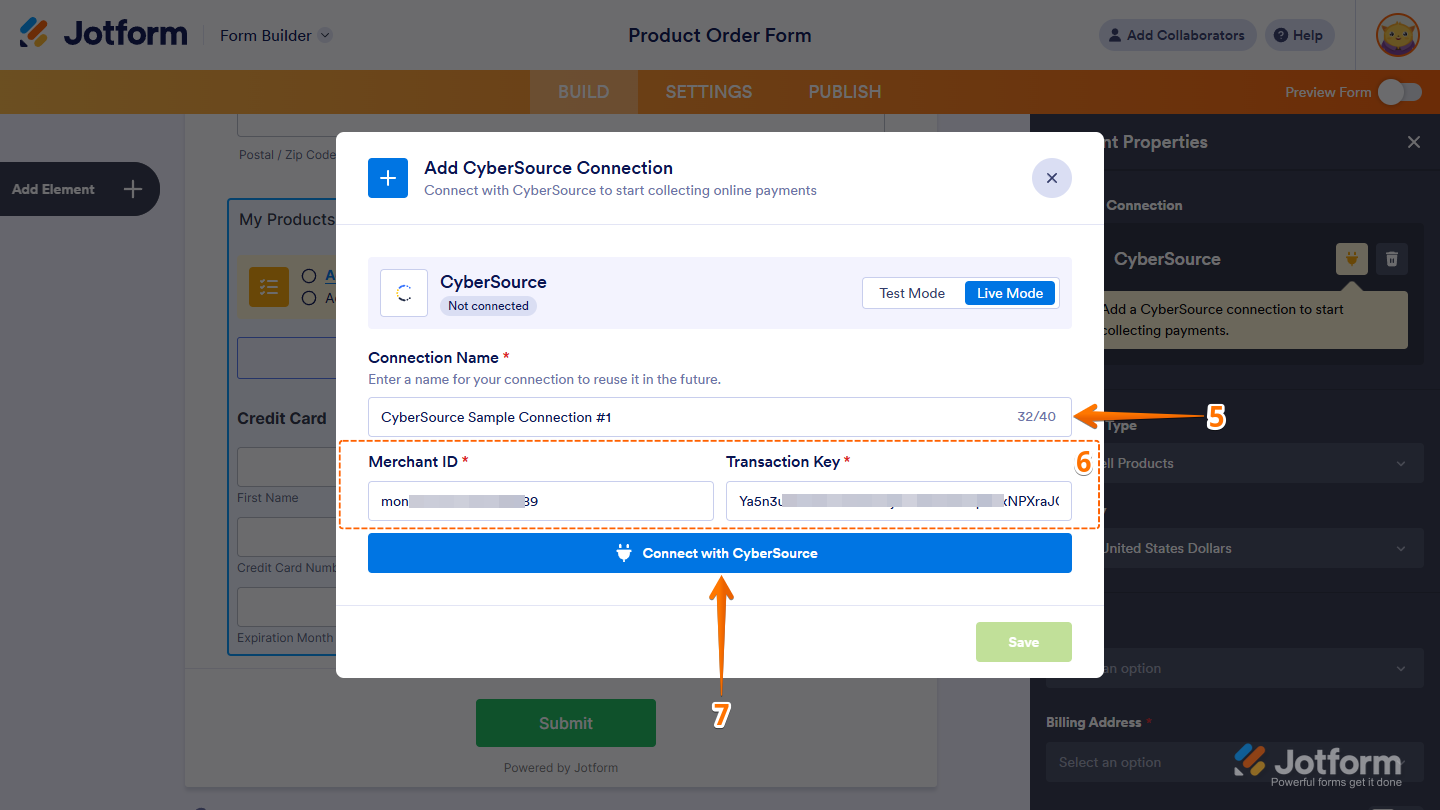
- Then, in the Connection Name section, enter a name you haven’t used in other reusable payment connections in your account, if there are any.
- After that, enter the following information:
- Merchant ID — This is a unique identifier for your CyberSource account.
- Transaction Key — CyberSource generates this secure key in your Business Center. It authorizes and encrypts transaction requests between Jotform and CyberSource.
- Then, click on Connect With CyberSource.
- Once it’s connected, click on Save at the bottom to add the reusable payment connection to your account.
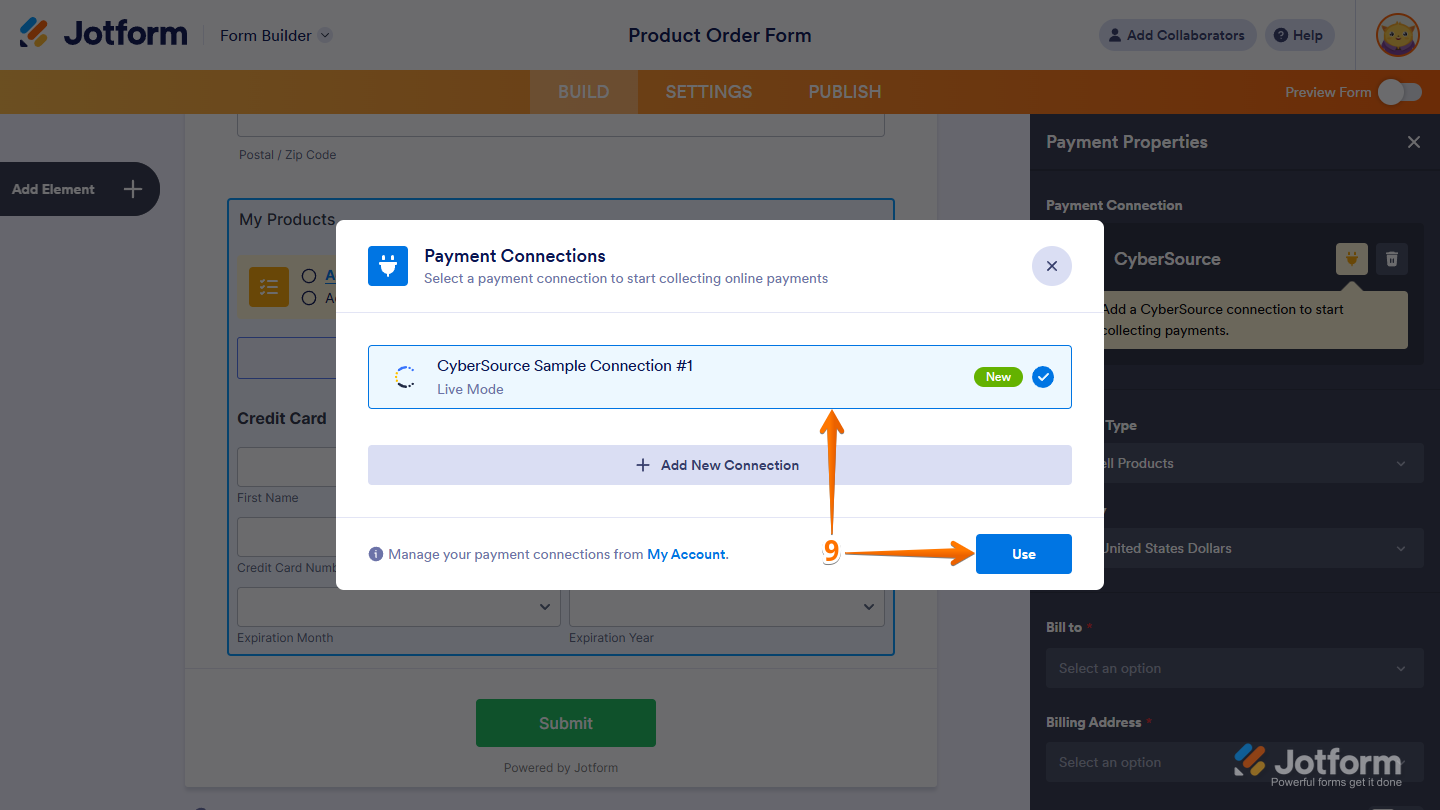
- Now, in the Payment Connections window, click on the CyberSource Payment Connection you just added, and then click on Use at the bottom.
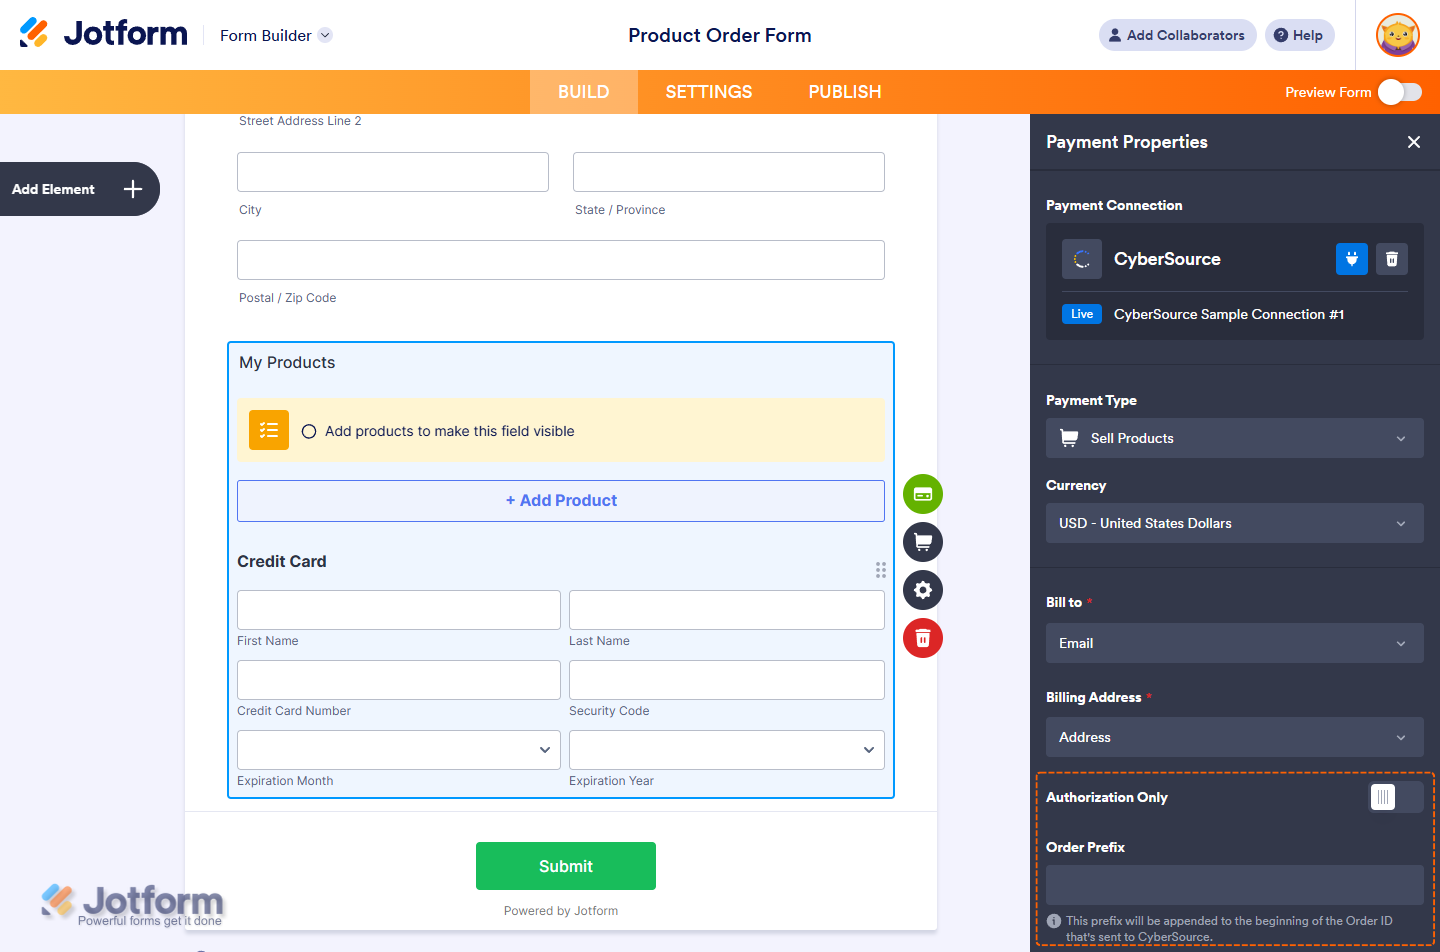
- After that, in the Payment Properties window, set up the following things:
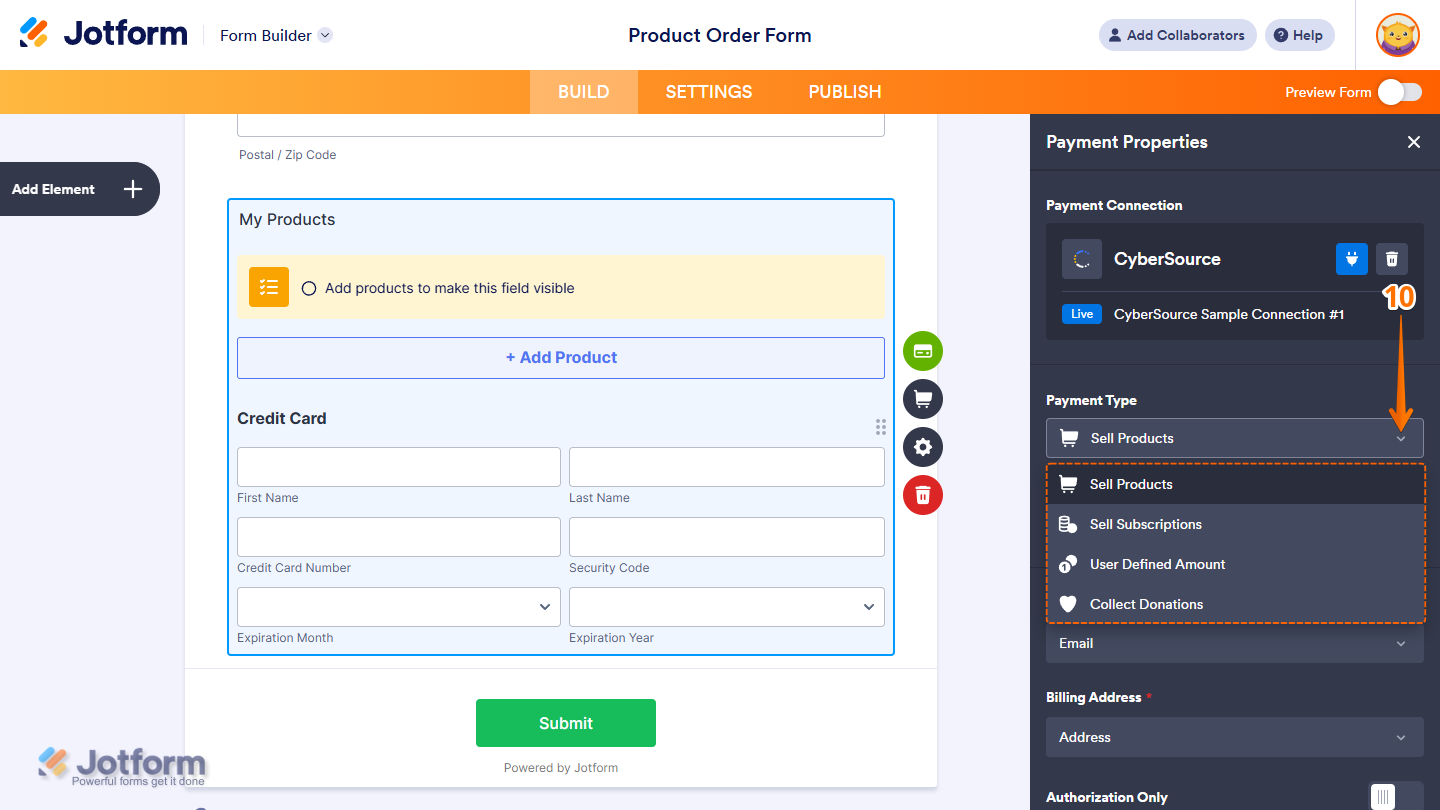
- Payment Type — Select what you want the payment to be processed for:
- Sell Products — This is selected by default. Use this to sell physical or digital goods at a fixed price, allowing customers to make a one-time purchase.
- Sell Subscriptions — Choose this to charge customers on a recurring basis for services, memberships, or other ongoing access.
- User-Defined Amount — This lets customers enter the amount they want to pay. It’s useful for tipping, custom amount pricing, or flexible payments.
- Collect Donations — Select this to accept voluntary contributions, commonly used for fundraising, nonprofit support, or charitable causes.
- Payment Type — Select what you want the payment to be processed for:
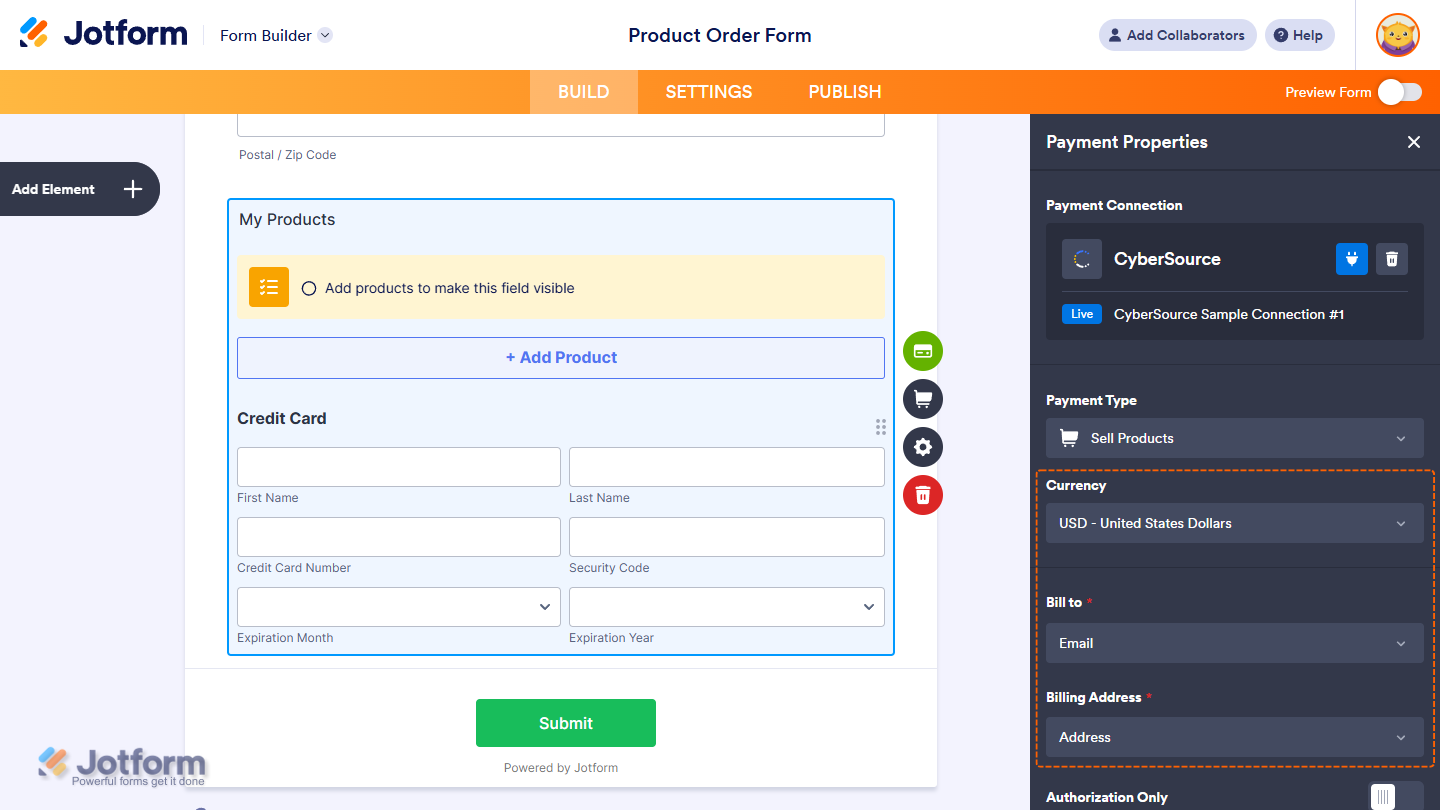
- Currency — Select one of the currencies available with the integration.
- Bill to — This is required. Enable this to collect the customer’s billing information during checkout. Make sure it matches the Email Address field in your form.
- Billing address — This is also required. Enable this to collect the customer’s full billing address, including street, city, state, and ZIP/postal code. Make sure your form includes an Address field to capture this information.
You can also adjust these other gateway settings if needed:
- Authorization Only —Toggle this On if you want to authorize the transaction now but capture the payment later.
- Order Prefix — This prefix will be appended to the beginning of the Order ID that’s sent to CyberSource.
And you’re all set! You’ve successfully set up your CyberSource Reusable Payment Connection. Now, you can use this same configuration on any other form or app you create. If you’re looking for more info, our guide on How to Add and Manage Reusable Payment Connections walks you through everything.
We’ve also got some other helpful guides that you might want to take a look at:
- Setting Up Your First Order Form
- How to Set Up a Recurring Payment Option
- How to Add Options to Payment Forms
- How to Add Coupon Code to Payment Forms
- How to Add Tax to Your Payment Form
- How to Add Shipping Cost to Payment Forms
- How to Generate an Invoice for Your Payment Form
- How to Enable and Manage Product Stocks in Payment Fields

Send Comment:
2 Comments:
August 8, 2023
How do you process a refund for an item?
April 15, 2022
How can you sent invoice information or merchant defined fields to Cybersource via this form?