Creating your first form with Jotform Mobile Forms is just as easy as using the desktop version. With the Jotform Mobile App, you can build forms anytime, anywhere — making it easy to stay productive on the go.
You can easily create your first Jotform Mobile Form. Here’s how to do it:
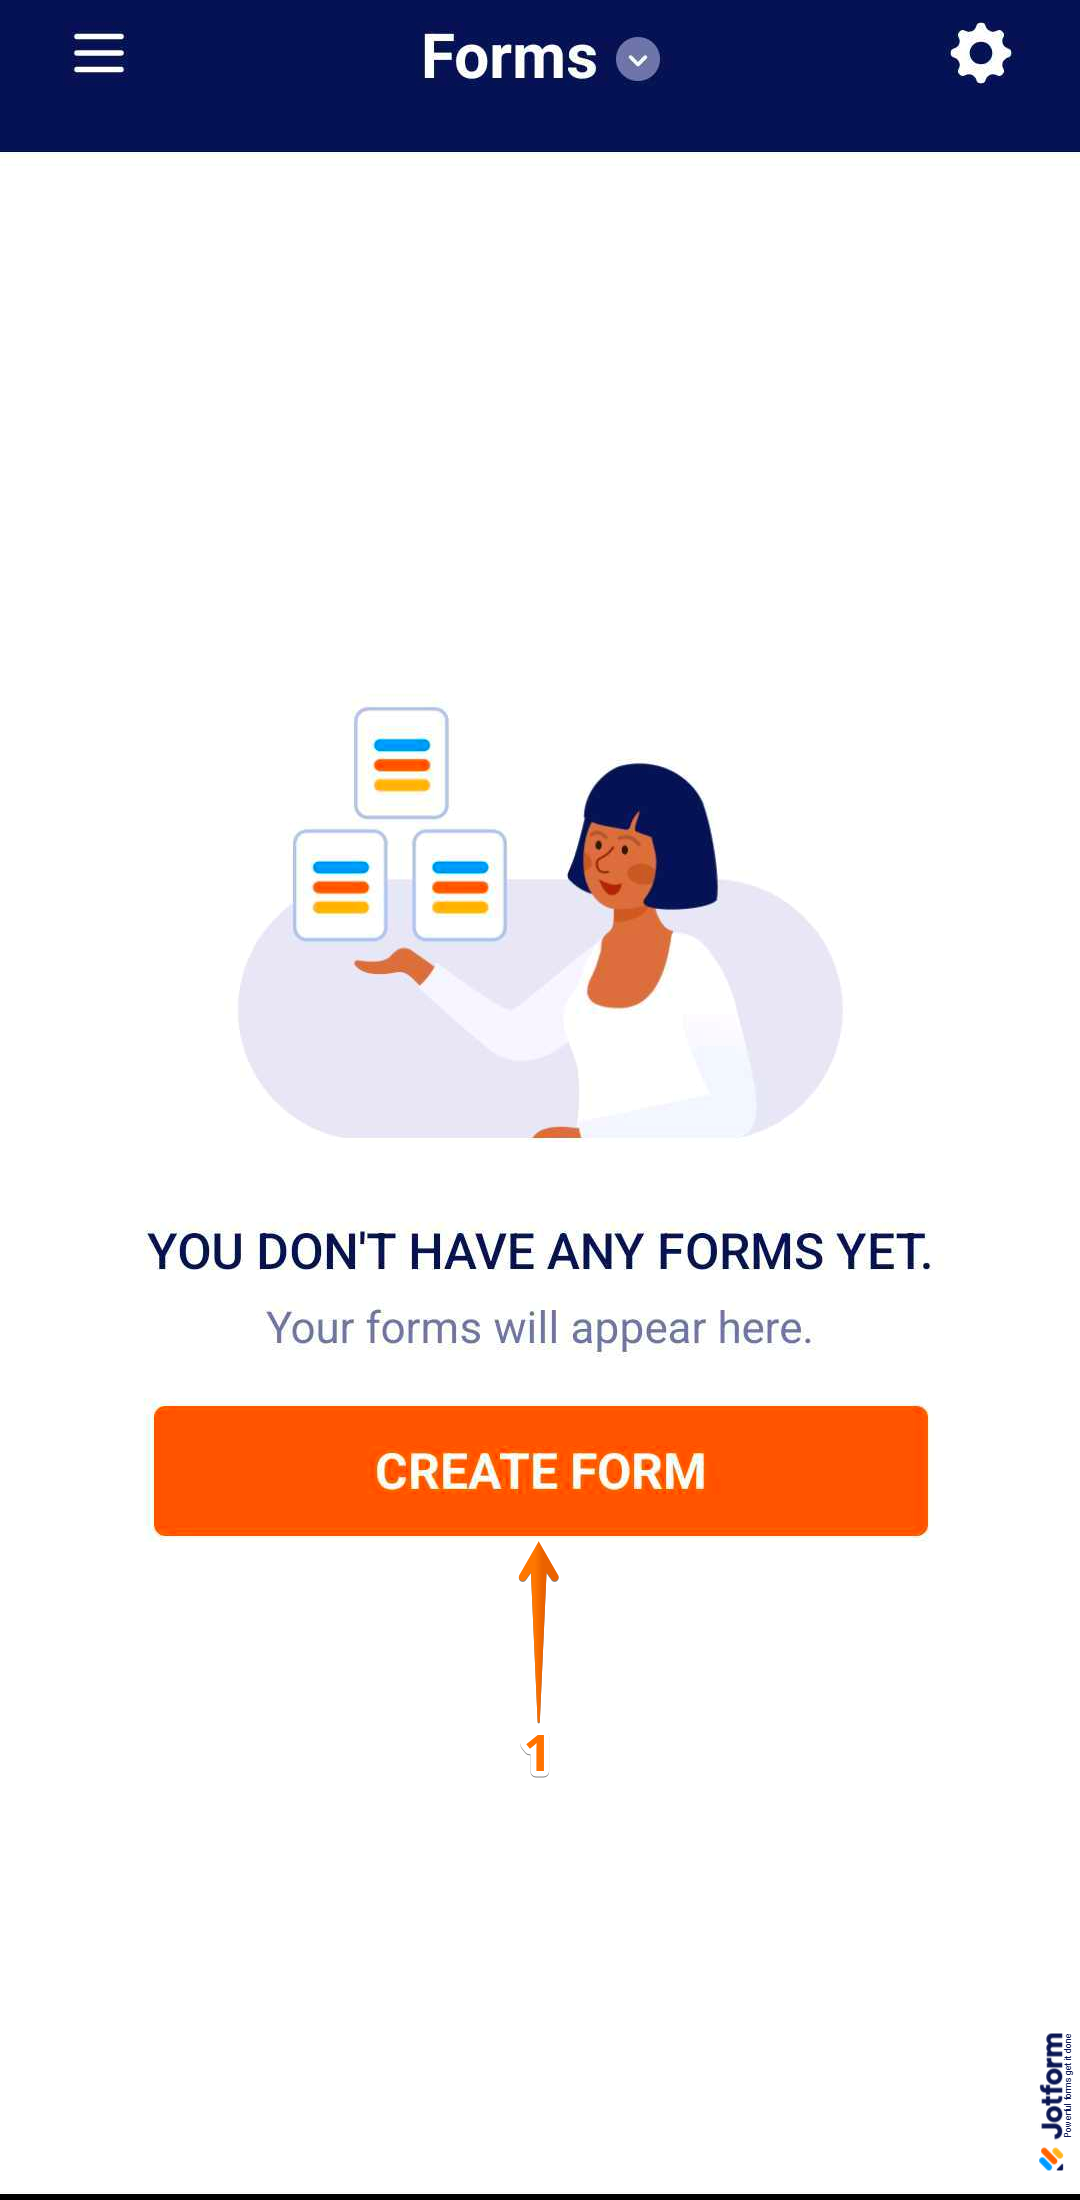
- On your Jotform Mobile App, tap on Create a Form in the middle of the screen.
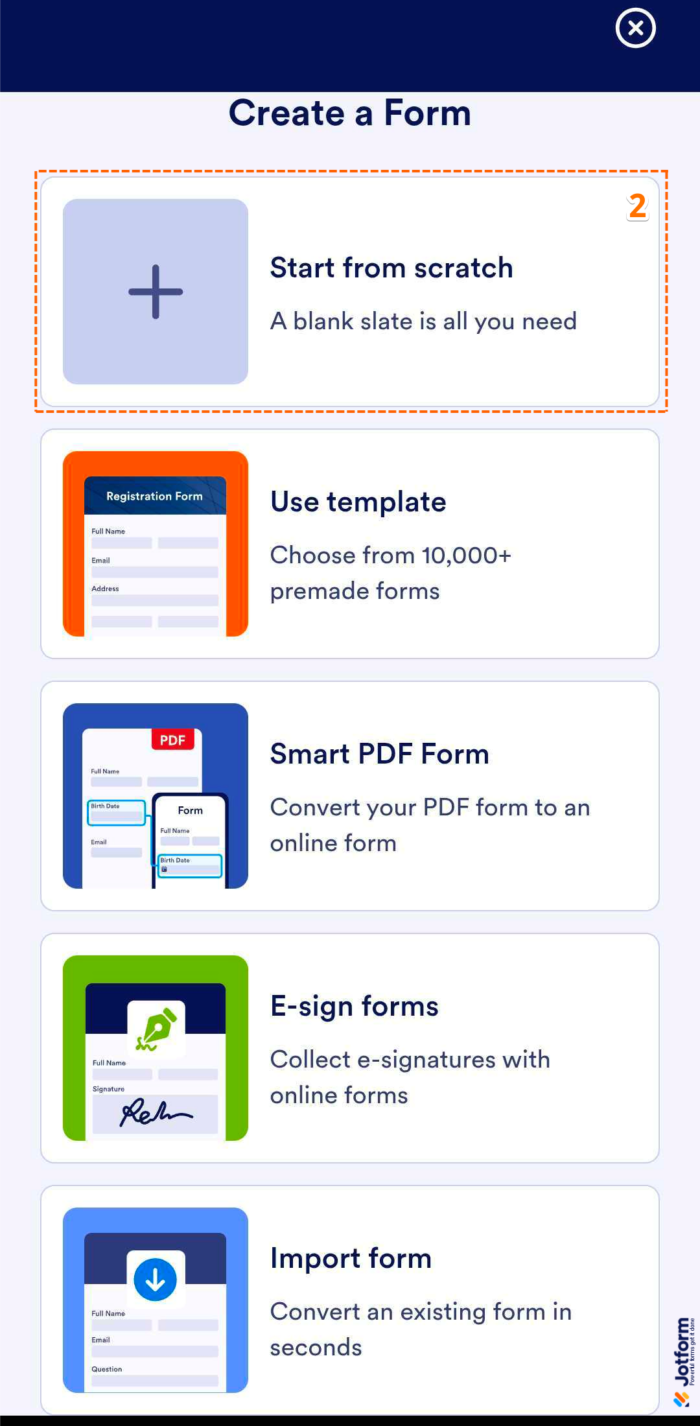
- Next, choose Start From Scratch to begin with a blank form.
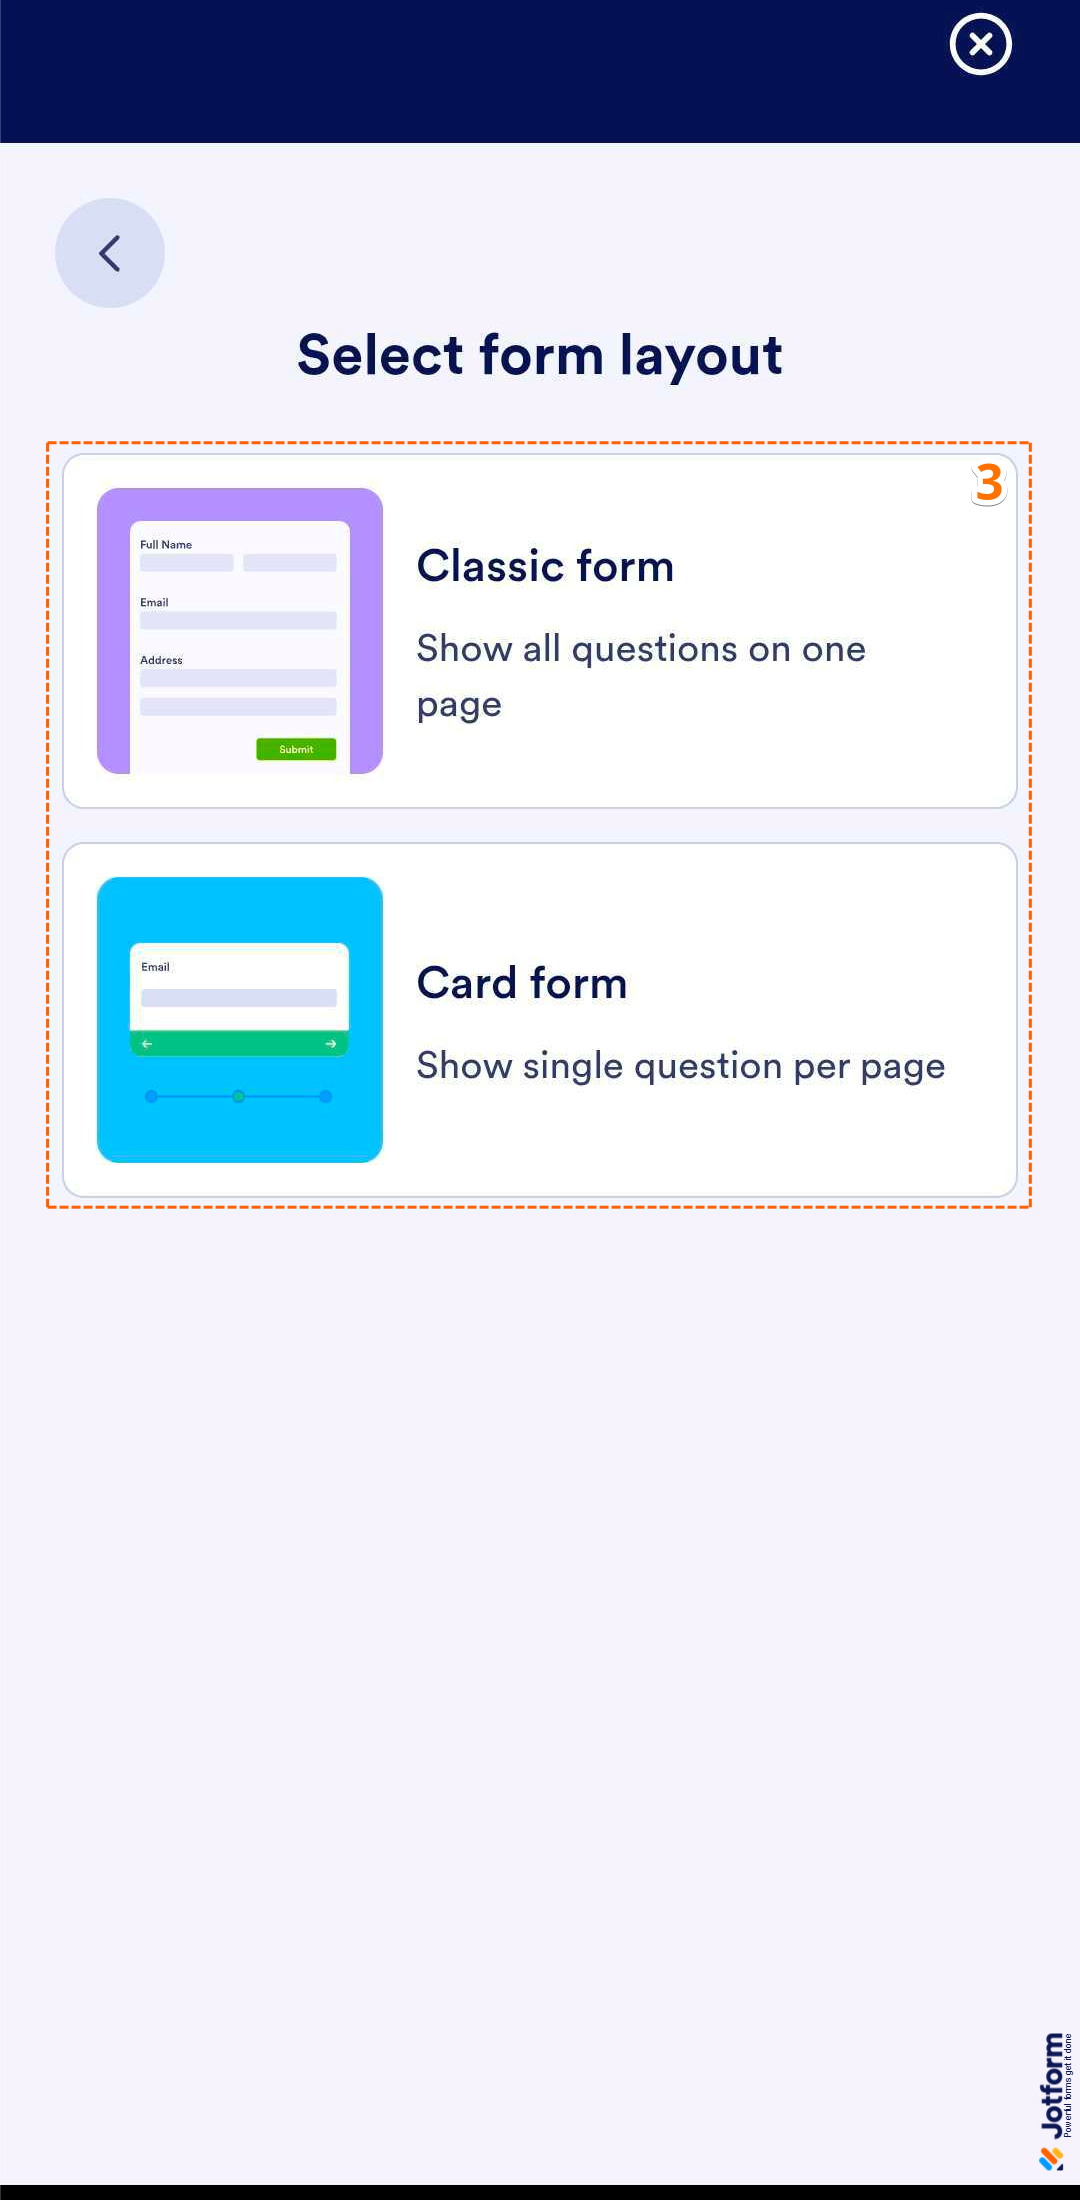
- Then, select one of the following layouts:
- Classic Form — Displays all the questions on a single page.
- Card Form — Shows one question on each page for a guided experience.
- Now, in Form Builder, tap on the Plus Sign icon in the lower-left corner of the screen.
Pro Tip
The Jotform Mobile App version of Form Builder has the same tabs and features as the web version.
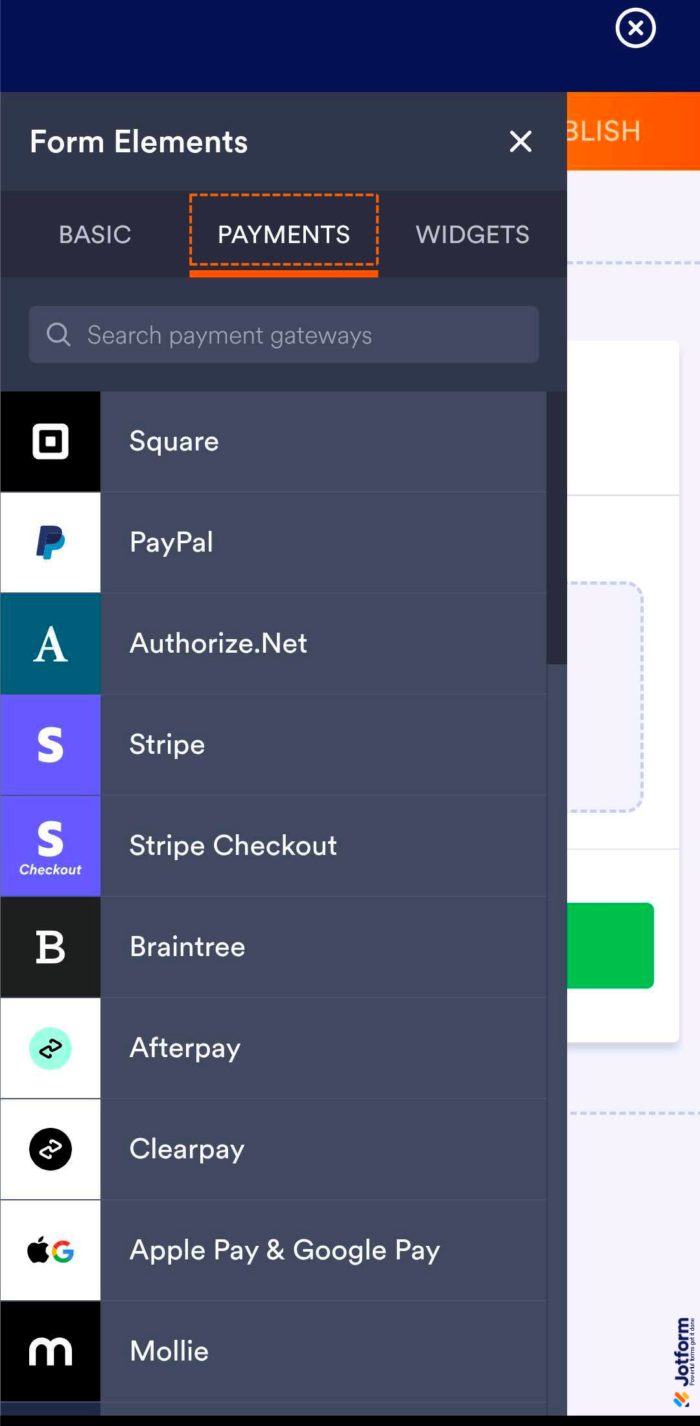
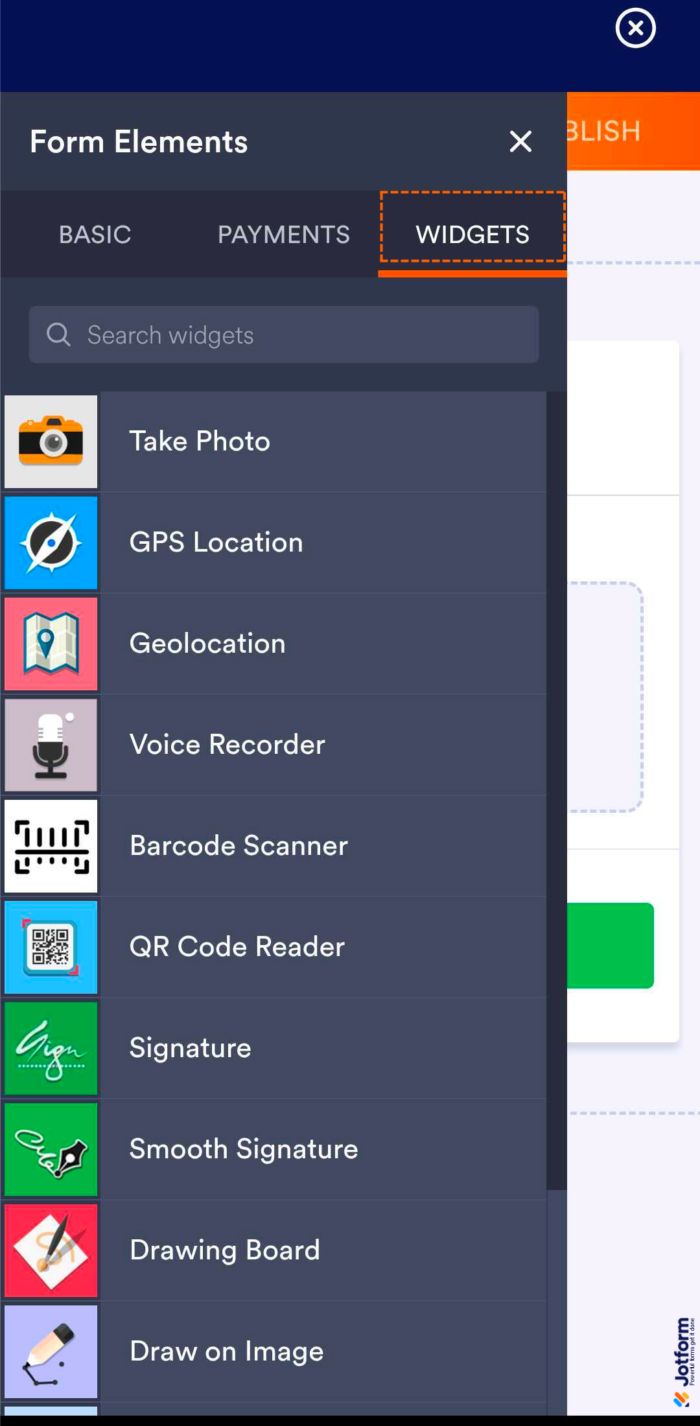
- Now, in the Form Elements, you can see the following tab where you can start adding it to your form:
- Basic Tab — You can see and add all the basic fields to your form, such as text boxes, dropdowns, checkboxes, and radio buttons.
- Payment Tab — Here, you can integrate payment systems like PayPal, Stripe, and Square to securely process payments.
- Widgets Tab — This section offers a variety of widgets that can enhance your form’s capabilities, such as calendars, file uploaders, and custom integrations.

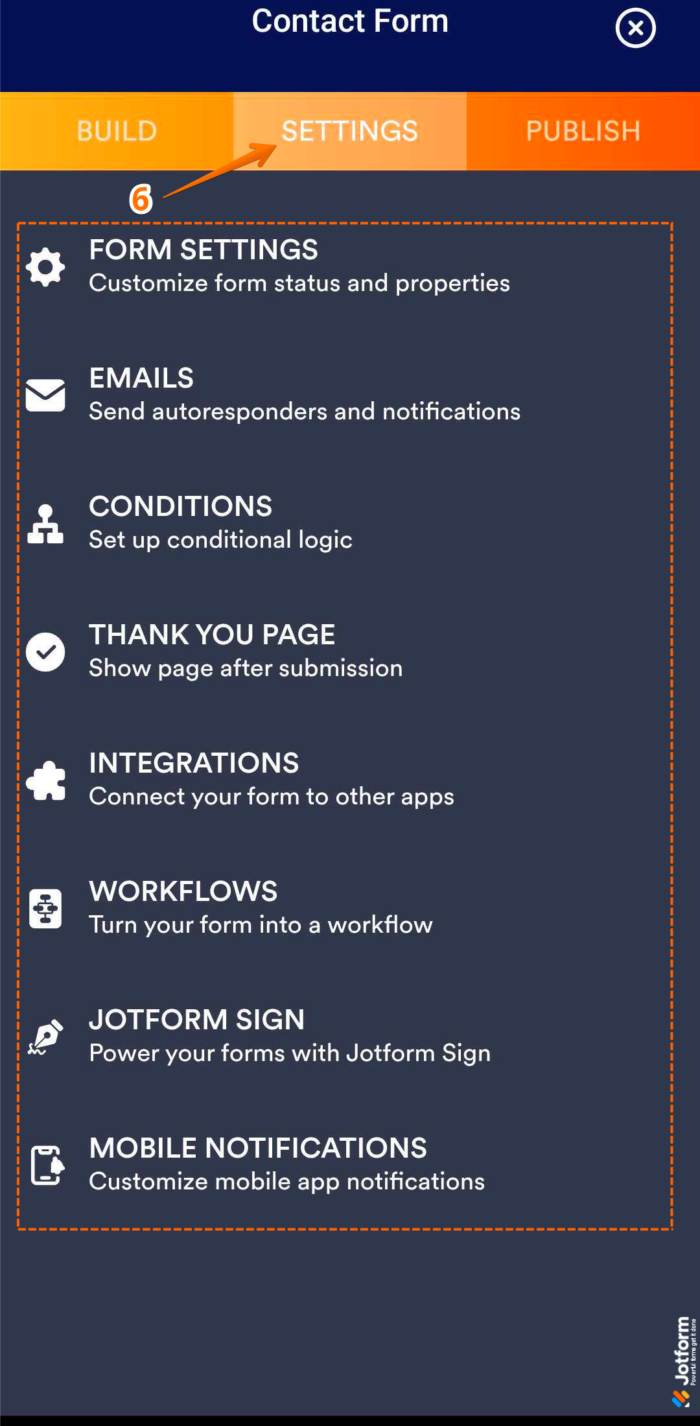
- Once you’ve added your fields, you can now go to the Settings tab, where you can setup the following things:
- Form Settings — Control the overall behavior of your form, including the title, status (enabled/disabled), language, and password protection.
- Emails — Set up Email Notifications for you or your team and Autoresponders for users who fill out the form.
- Conditions — Use Conditional Logic to dynamically show/hide fields, send emails, skip pages, or update form values based on user input.
- Thank You Page — Customize the post-submission message or redirect users to an external URL.
- Integrations — Connect your form with external apps like Google Sheets, Mailchimp, Zoom, HubSpot, and more to automate your workflow.
- Workflows — Create approval flows using Jotform Approvals to route submissions, assign tasks, and track decisions.
- Jotform Sign — Add e-signature fields for collecting legally binding signatures with audit trails and compliance features.
- Mobile Notifications — Receive real-time push notifications via the Jotform Mobile App when someone submits your form.
- Once you’ve set it up your Settings, you can now go to your Publish tab to see sharing and embedding options, or to send the form by email. Here are the options you can do:
- Preview Form — Test your form before publishing to see how it looks and functions.
- Quick Share — Get a direct link to your form and access social sharing options or QR code generation.
- AI Agent — Create an AI Agent to help users, answer questions, and guide them through your form.
- Embed — Copy the embed code to display your form on a website.
- Assign Form — Share your form with team members or specific people who need to fill it out regularly.
- Email — Send your form directly via email to recipients with a customized message.
- Prefill — Pre-populate form fields using data from previous submissions, URLs, spreadsheets, or integrations.
- Platform — Get platform-specific embed guides for WordPress, Shopify, Facebook, and other tools.


Send Comment:
7 Comments:
More than a year ago
please why is it impossible to create the form, like, mine stop at where they said create form, the rest of the spaces will be blank, why
More than a year ago
I don't know how make it is thre someone who can create a sample how to create it?? 😅 😁
More than a year ago
I won't to open my own form
More than a year ago
Thanks for the update with jotform creation
More than a year ago
I was confused because I applied for mtv casting and after I submitted the application it told me to make a account with jot form and was just confused on what I have to do on it
More than a year ago
How do I add a form from my company
More than a year ago
Someonepleasecallme