Skrill is a streamlined payment solution that allows merchants around the world to send and receive money online. With Jotform’s Skrill Integration, you can connect your forms and start accepting secure payments in over 40 currencies across more than 200 countries.
Whether you’re selling products, collecting donations, or accepting custom payments, Jotform’s Skrill payment forms are built for flexibility—making it easy to sell products or services, collect donations, or accept custom payments—whether through an order form, registration form, or donation form. Simply create your form, link your Skrill account, and publish it. Once it’s live, you can start processing global payments with built-in fraud protection and quick payouts directly to your Skrill account.
Adding and Setting Up the Skrill Payment Field
Whether you’re creating a new payment form or updating an existing one, it only takes a minute to add and set up the Skrill payment field. Here’s how to get started:
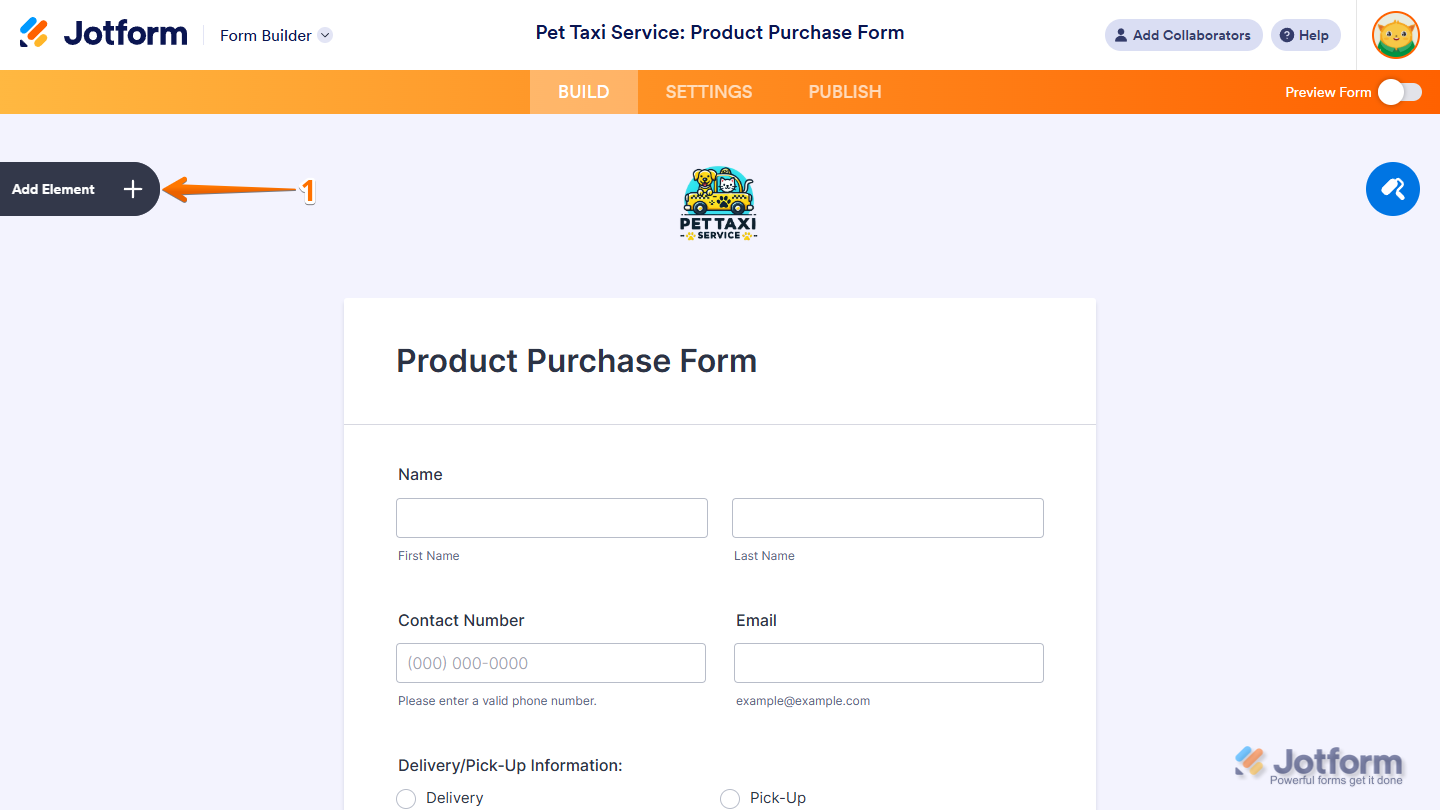
- In Form Builder, click on Add Element on the left side of the page.
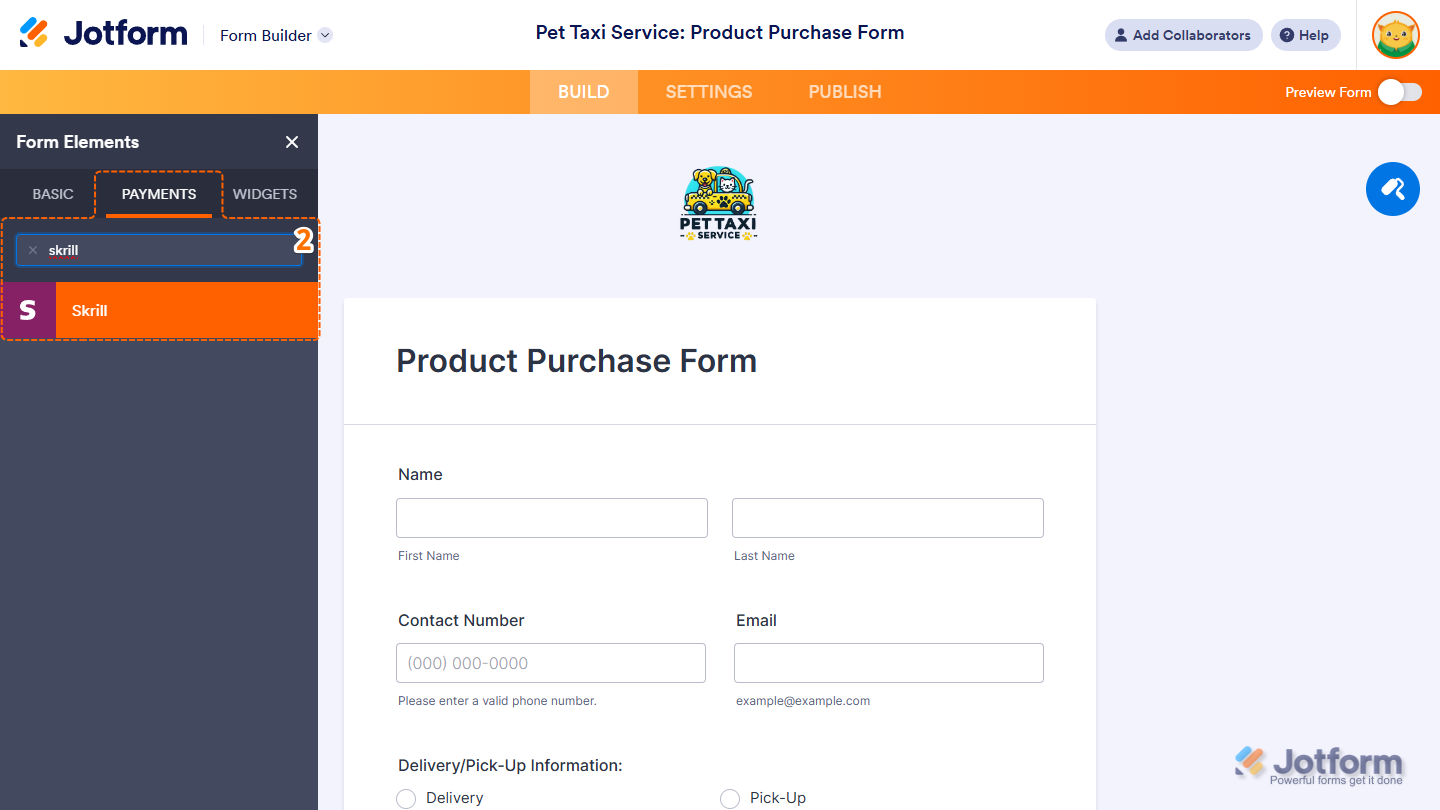
- Now, in the Form Elements menu, under the Payments tab, search for Skrill and click on it. Or, just drag and drop it to where you want it to be on your form.
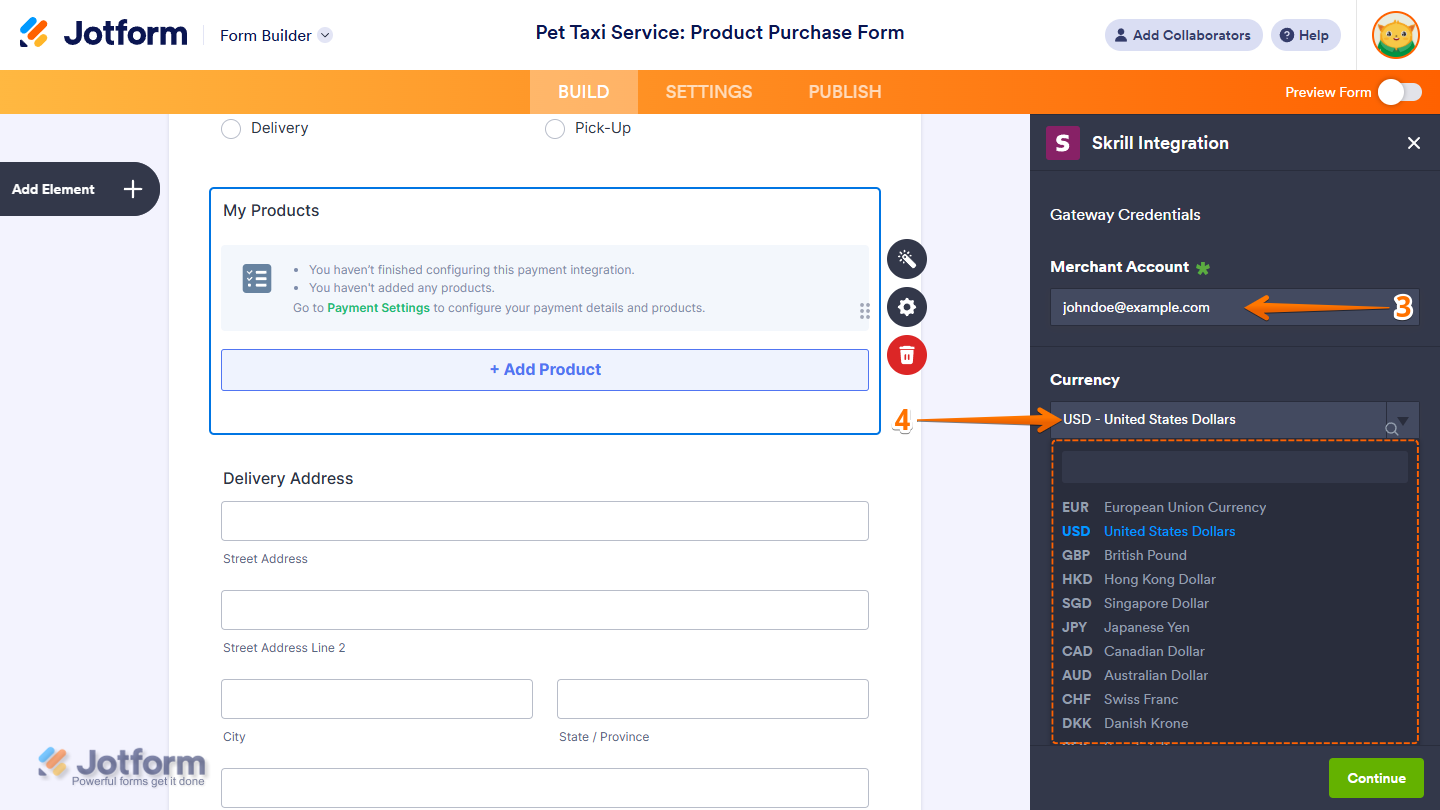
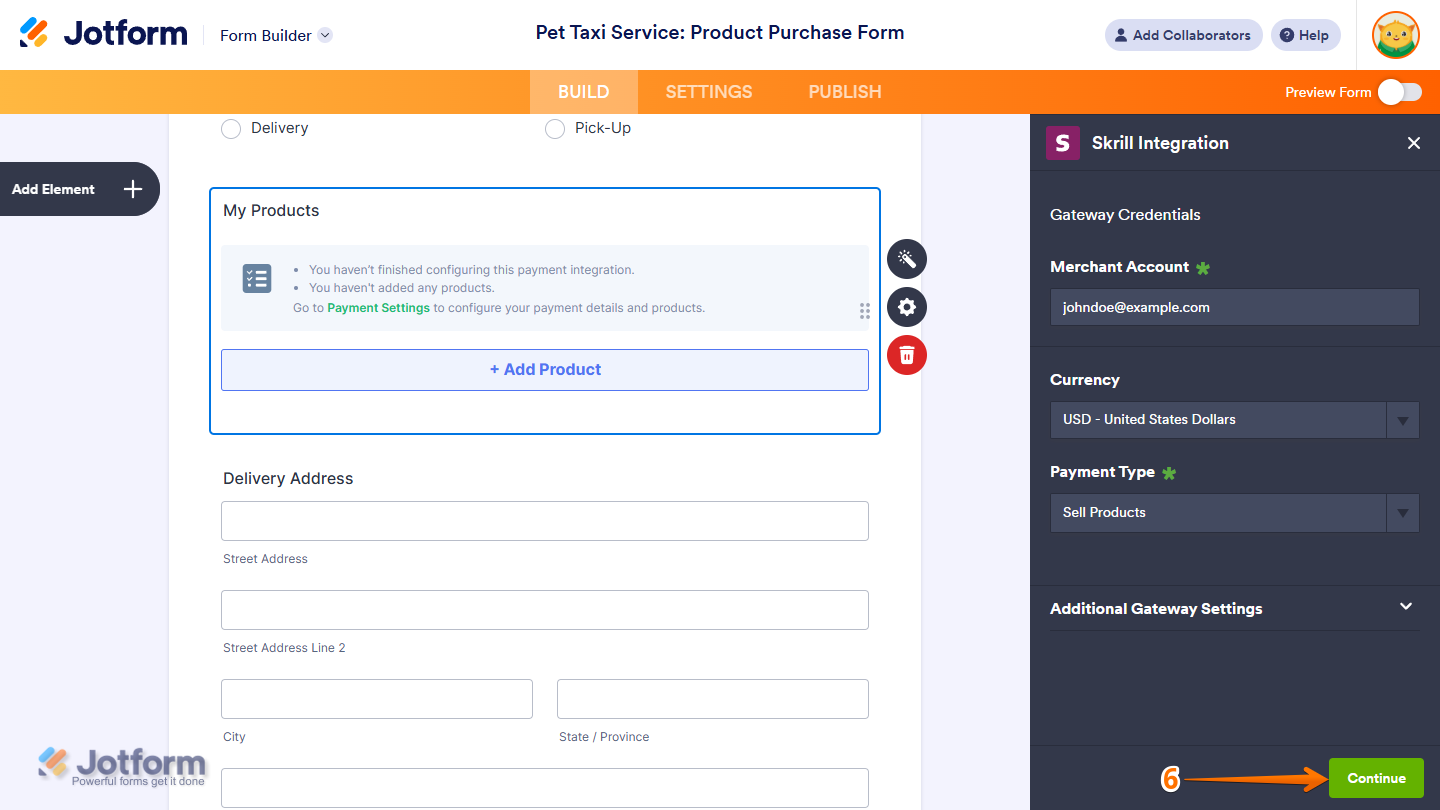
- Next, in the Skrill Integration window that opens on the right side of the page, enter your Skrill Business Account email address in the Merchant Account input box. If you don’t have one yet, you can register here.
- Then, in the Currency Dropdown menu, select one of the currencies available with the integration:
- EUR — European Union Currency
- USD — United States Dollars
- GBP — British Pound
- HKD — Hong Kong Dollar
- SGD — Singapore Dollar
- JPY — Japanese Yen
- CAD — Canadian Dollar
- AUD — Australian Dollar
- CHF — Swiss Franc
- DKK — Danish Krone
- SEK — Swedish Krona
- NOK — Norwegian Krone
- ILS — Israeli New Sheqel
- MYR — Malaysian Ringgit
- NZD — New Zealand Dollar
- TRY — Turkish Lira
- AED — United Arab Emirates Dirham
- MAD — Moroccan Dirham
- QAR — Qatari Riyal
- SAR — Saudi Riyal
- TWD — New Taiwan Dollar
- THB — Thai Baht
- CZK — Czech Koruna
- HUF — Hungarian Forint
- BGN — Bulgarian Lev
- PLN — Polish Złoty
- ISK — Icelandic Króna
- INR — Indian Rupee
- KRW — South Korean Won
- ZAR — South African Rand
- RON — Romanian Leu
- JOD — Jordanian Dinar
- OMR — Omani Rial
- RSD — Serbian Dinar
- TND — Tunisian Dinar
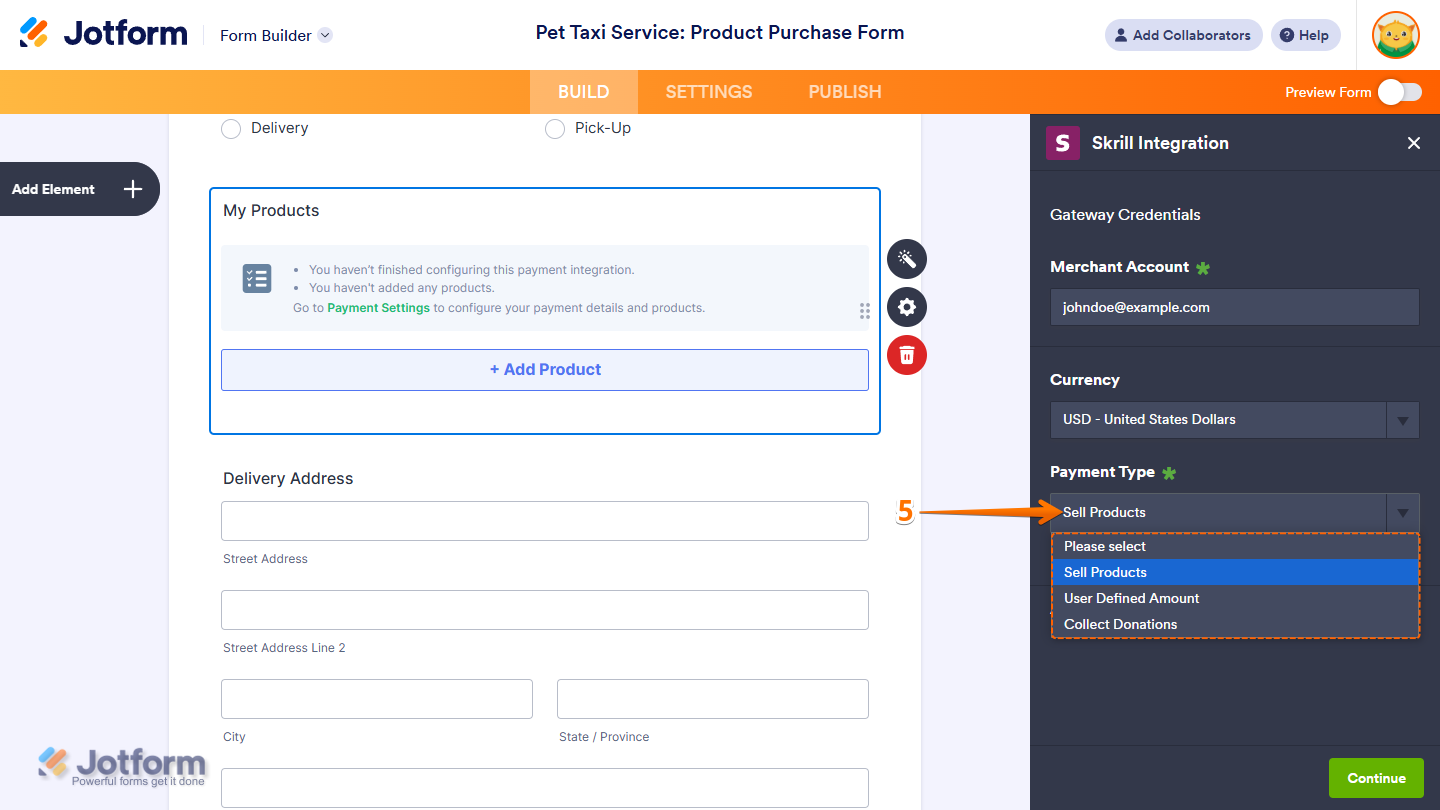
- Now, in the Payment Type Dropdown menu, select what you’d like the payment to be processed for:
- Sell Products — This is selected by default. Use this to sell physical or digital goods at a fixed price, allowing customers to make a one-time purchase.
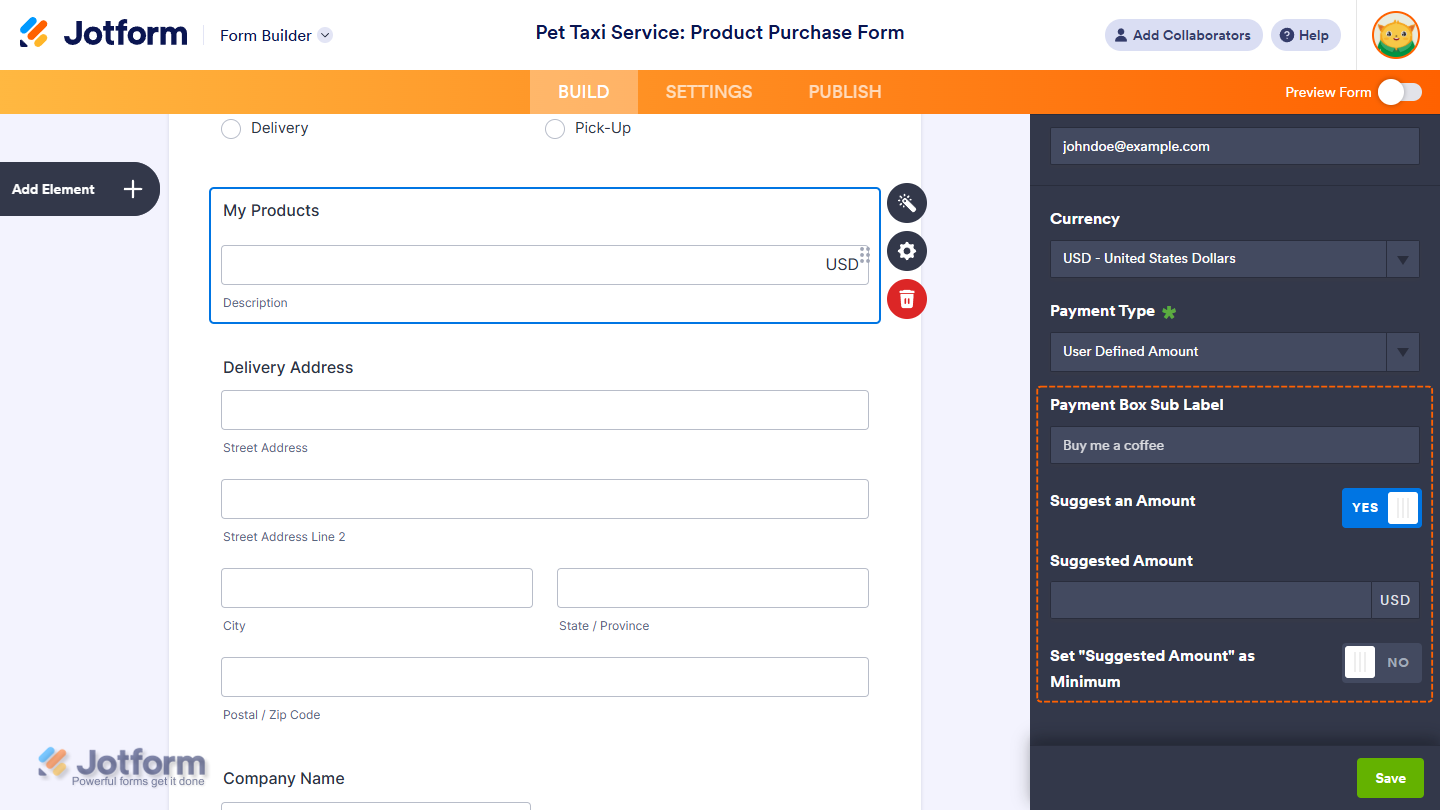
- User-Defined Amount — This lets customers enter the amount they want to pay. It’s useful for tipping, custom amount pricing, or flexible payments.
- Collect Donations — Select this to accept voluntary contributions, commonly used for fundraising, nonprofit support, or charitable causes.
- Once everything is set for the Sell Products payment type, click on Continue to start creating products for your payment field. For the User Defined Amount and Collect Donations payment types, just click on Save at the bottom.
When setting up your products, you might also want to check out these helpful guides:
- Setting Up Your First Order Form
- How to Add Options to Payment Forms
- How to Add Coupon Code to Payment Forms
- How to Add Tax to Your Payment Form
- How to Add Shipping Cost to Payment Forms
- How to Generate an Invoice for Your Payment Form
- How to Enable and Manage Product Stocks in Payment Fields
For the User Defined Amount and Collect Donations payment types, you can enter a description that’ll appear under the payment box on your form. You can also provide a suggested amount and set it as minimum or get the price from a Form Calculation widget, which is useful when you want to pass a calculated amount to your payment field instead of getting it from users. Our guide on How to Pass a Calculation to a Payment Field has more details about it.
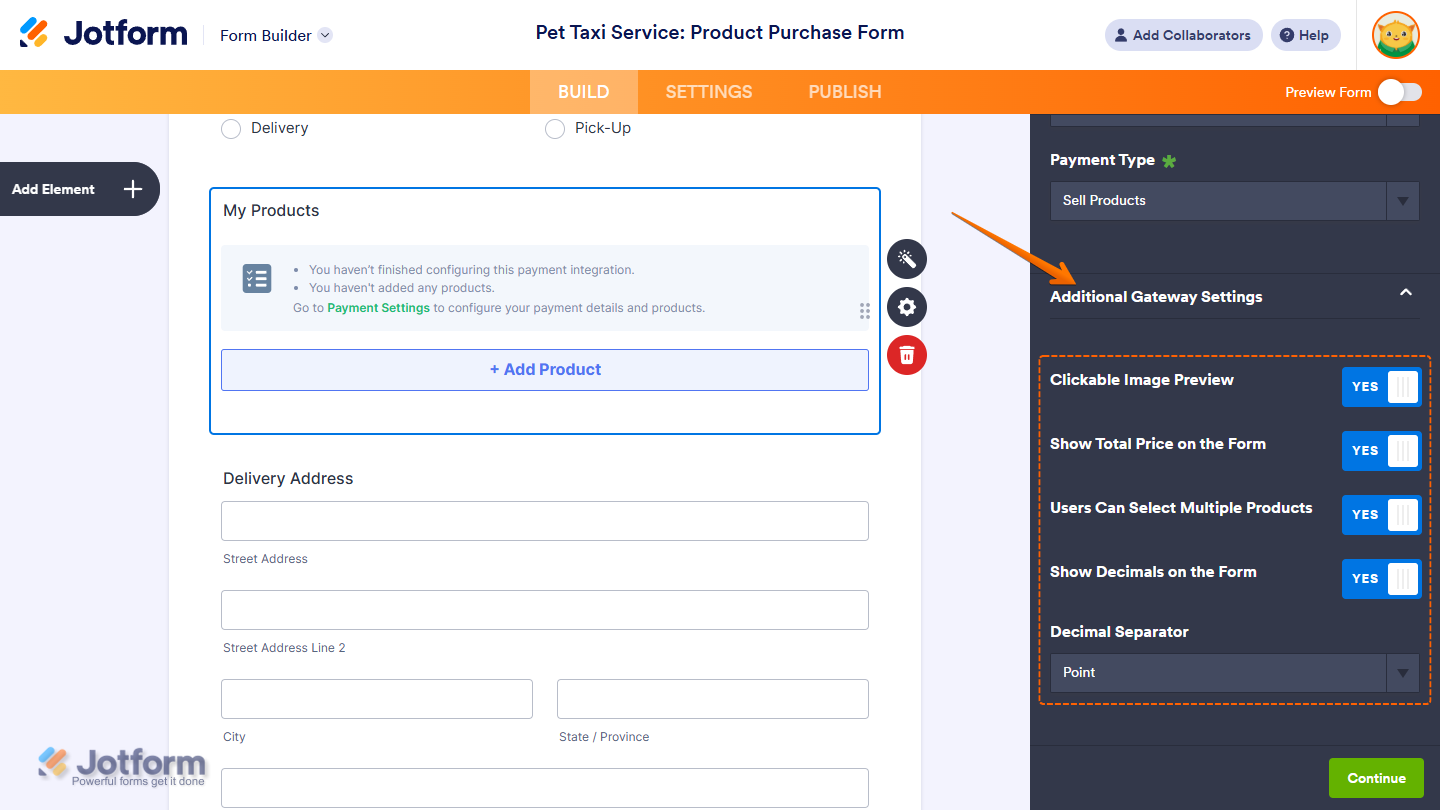
When you expand the Additional Gateway Settings in the Skrill Integration section, you’ll see this list of options you can adjust based on the payment type you chose:
- Clickable Image Preview — This is only available with the Sell Products payment type and is enabled by default. You can toggle this Off to prevent customers from enlarging product images.
- Show Total Price on the Form — This is only available with the Sell Products payment type and is enabled by default. You can toggle this Off if you want to hide the total price of selected products on your form.
- Users Can Select Multiple Products — This is only available with the Sell Products payment type and is enabled by default. You can toggle this Off if you want customers to select only one (1) product per submission.
- Show Decimals on the Form — This is only available with the Sell Products payment type and is enabled by default. You can toggle this Off to hide decimals on both the item prices and total amount.
- Decimal Separator — When decimals are shown on your payment field, you can select between a period, which is used in English-speaking countries, or a comma, which is used in many European countries.
Setting Up a Skrill Reusable Payment Connection
Reusable Payment Connections is a feature that lets you set up Payment Processor Integrations, like Skrill, once with the same payment gateway credentials and configuration, and use them across different assets in your account, such as Forms and Apps.
Whether you’re creating a new payment form or updating an existing one, it only takes a minute to add a payment field and set up a Skrill Reusable Payment Connection. Here’s how to get started:
- In Form Builder, click on Add Element on the left side of the page.

- Now, in the Form Elements menu, under the Payments tab, search for Skrill and click on it. Or, just drag and drop it to where you want it to be on your form.

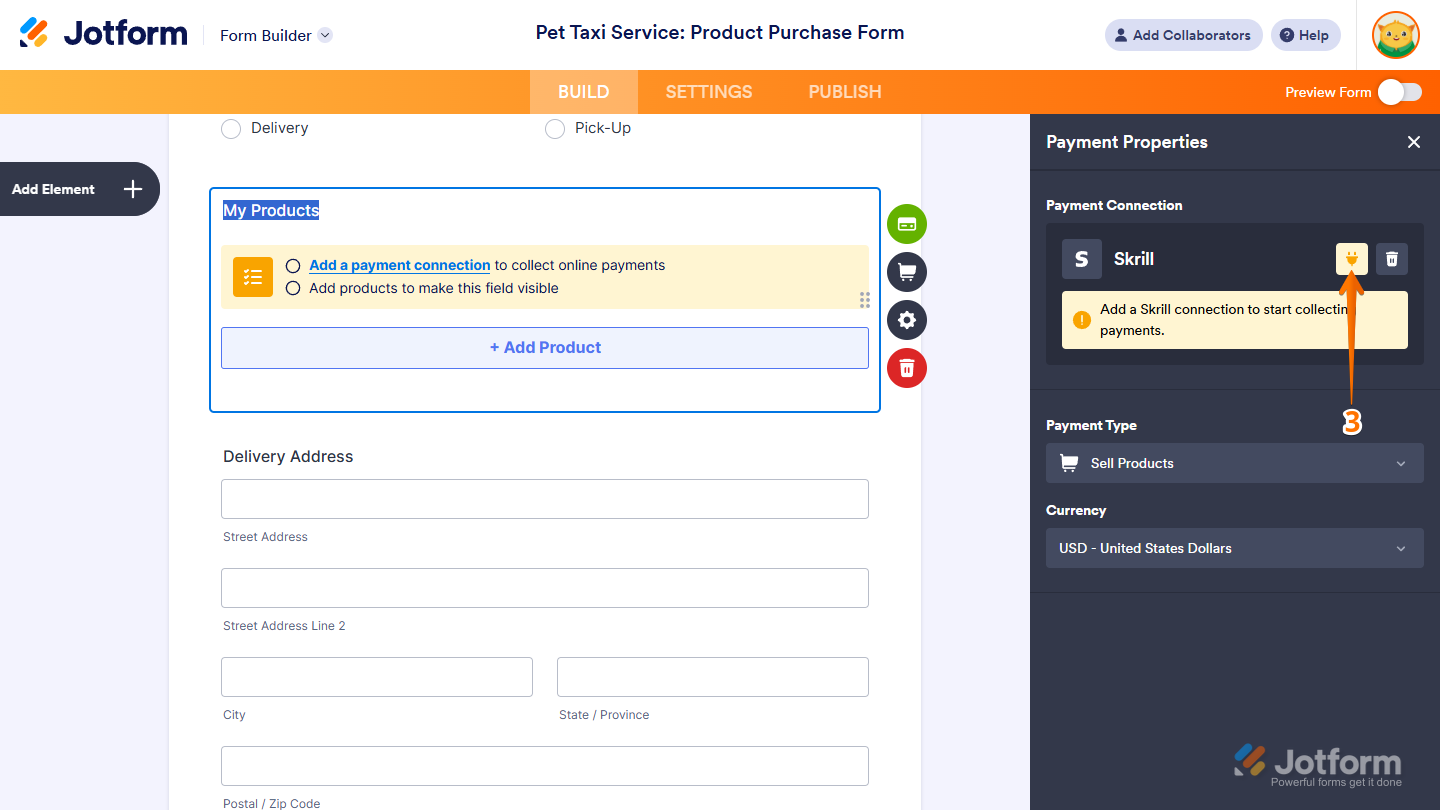
- Then, in the Payment Properties section that opens on the right side of the page, click on the Plug icon to add a reusable Skrill payment connection.
- Then, in the Connection Name section, enter a name you haven’t used in other reusable payment connections in your account, if there are any.
- After that, enter your Skrill Business Account email address into the Merchant Account input box and click on Connect with Skrill at the bottom. If you don’t have one yet, you can register here.
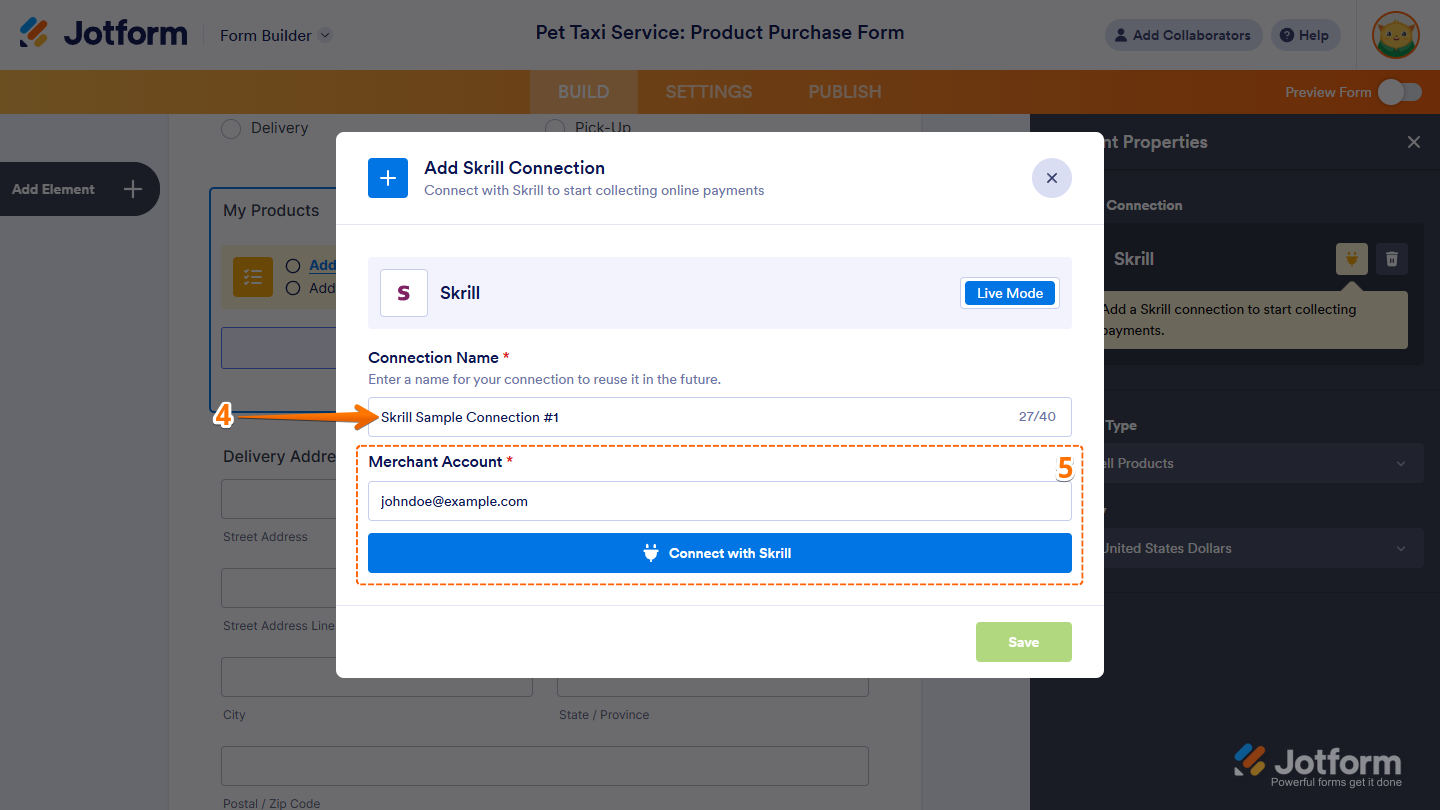
- Once it is connected, click on Save at the bottom to add the reusable payment connection to your account.

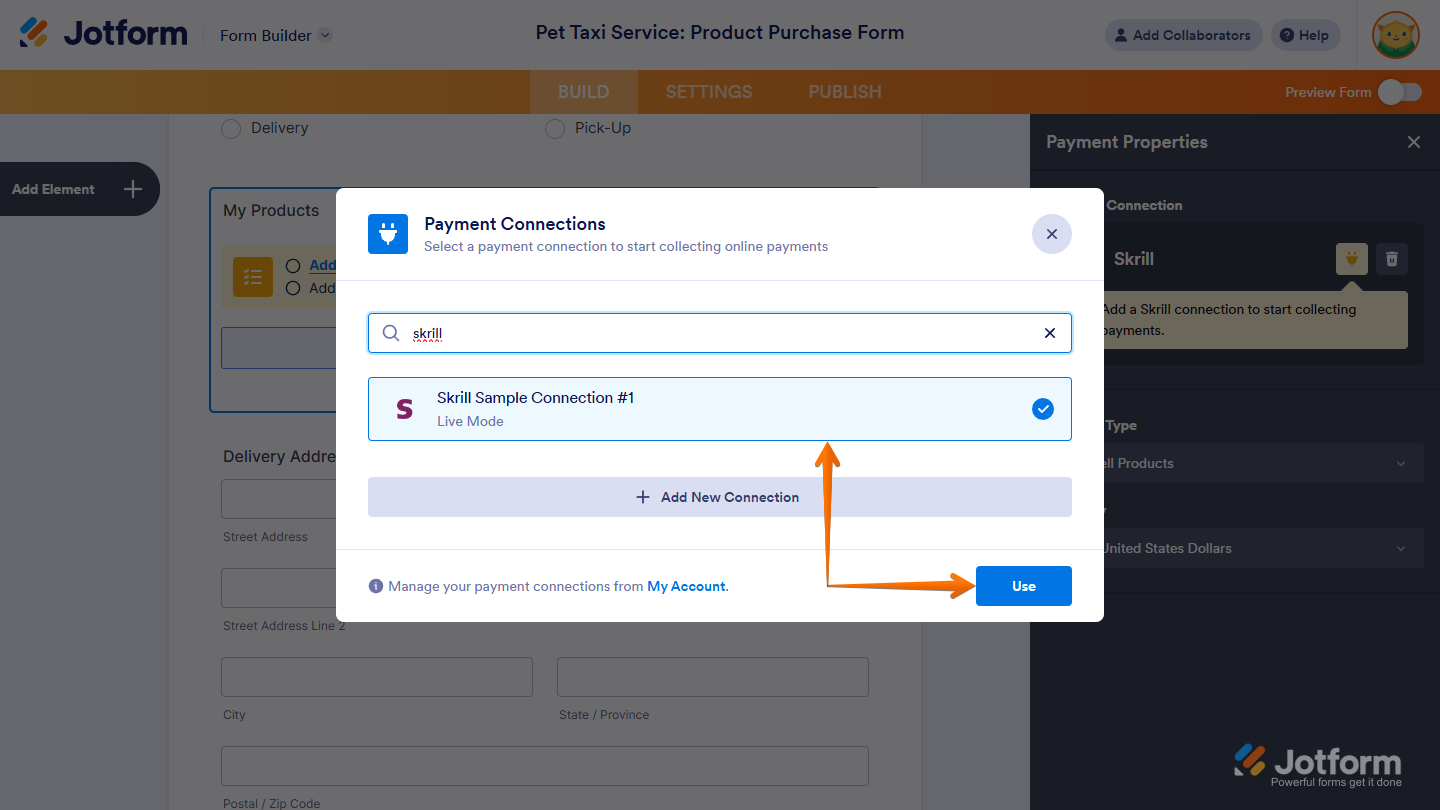
If you have other saved payment connections in your account, search for the Skrill connection you just added in the Payment Connections window. Click on it to select, then click on Use at the bottom to continue.
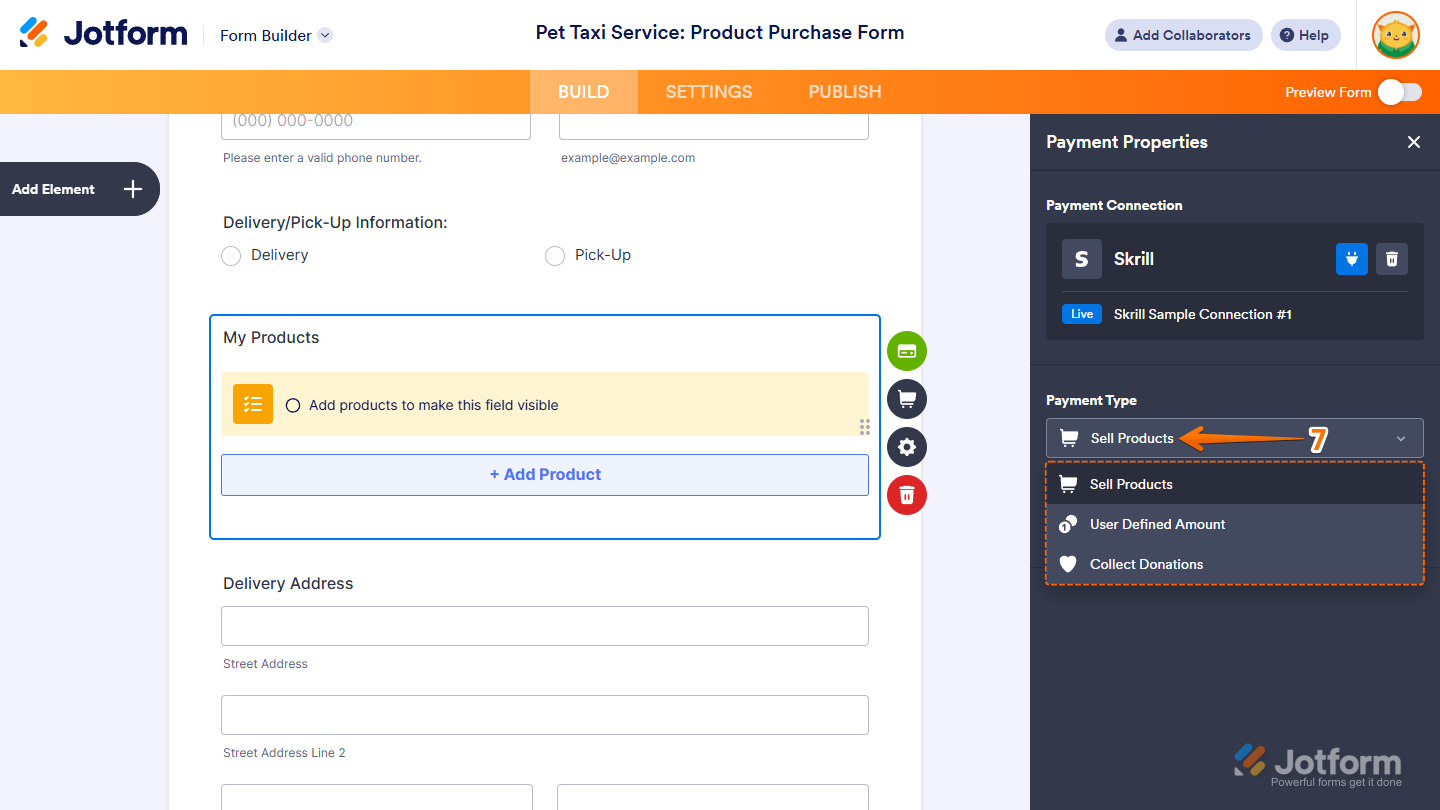
- In the Payment Properties window on the right side of the page, click on the Payment Type Dropdown menu and select the option you’d like the payment to be processed for:
- Sell Products — This is selected by default. Use this to sell physical or digital goods at a fixed price, allowing customers to make a one-time purchase.
- User-Defined Amount — This lets customers enter the amount they want to pay, useful for tipping, custom amount pricing, or flexible payments.
- Collect Donations — Select this to accept voluntary contributions. It’s commonly used for fundraising, nonprofit support, or charitable causes.
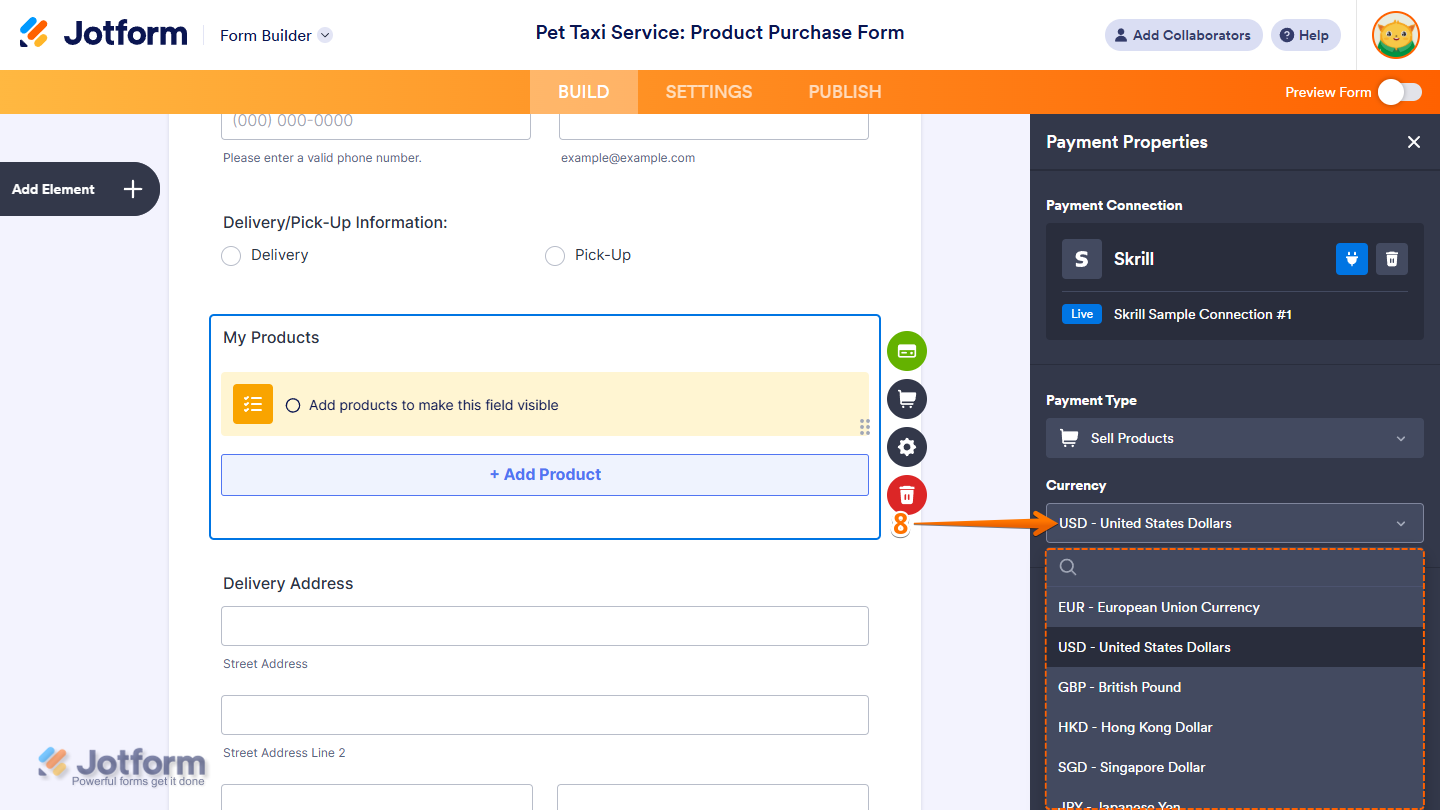
- Then, in the Currency Dropdown menu, select one of the currencies available with the integration:
- EUR — European Union Currency
- USD — United States Dollars
- GBP — British Pound
- HKD — Hong Kong Dollar
- SGD — Singapore Dollar
- JPY — Japanese Yen
- CAD — Canadian Dollar
- AUD — Australian Dollar
- CHF — Swiss Franc
- DKK — Danish Krone
- SEK — Swedish Krona
- NOK — Norwegian Krone
- ILS — Israeli New Sheqel
- MYR — Malaysian Ringgit
- NZD — New Zealand Dollar
- TRY — Turkish Lira
- AED — United Arab Emirates Dirham
- MAD — Moroccan Dirham
- QAR — Qatari Riyal
- SAR — Saudi Riyal
- TWD — New Taiwan Dollar
- THB — Thai Baht
- CZK — Czech Koruna
- HUF — Hungarian Forint
- BGN — Bulgarian Lev
- PLN — Polish Złoty
- ISK — Icelandic Króna
- INR — Indian Rupee
- KRW — South Korean Won
- ZAR — South African Rand
- RON — Romanian Leu
- JOD — Jordanian Dinar
- OMR — Omani Rial
- RSD — Serbian Dinar
- TND — Tunisian Dinar
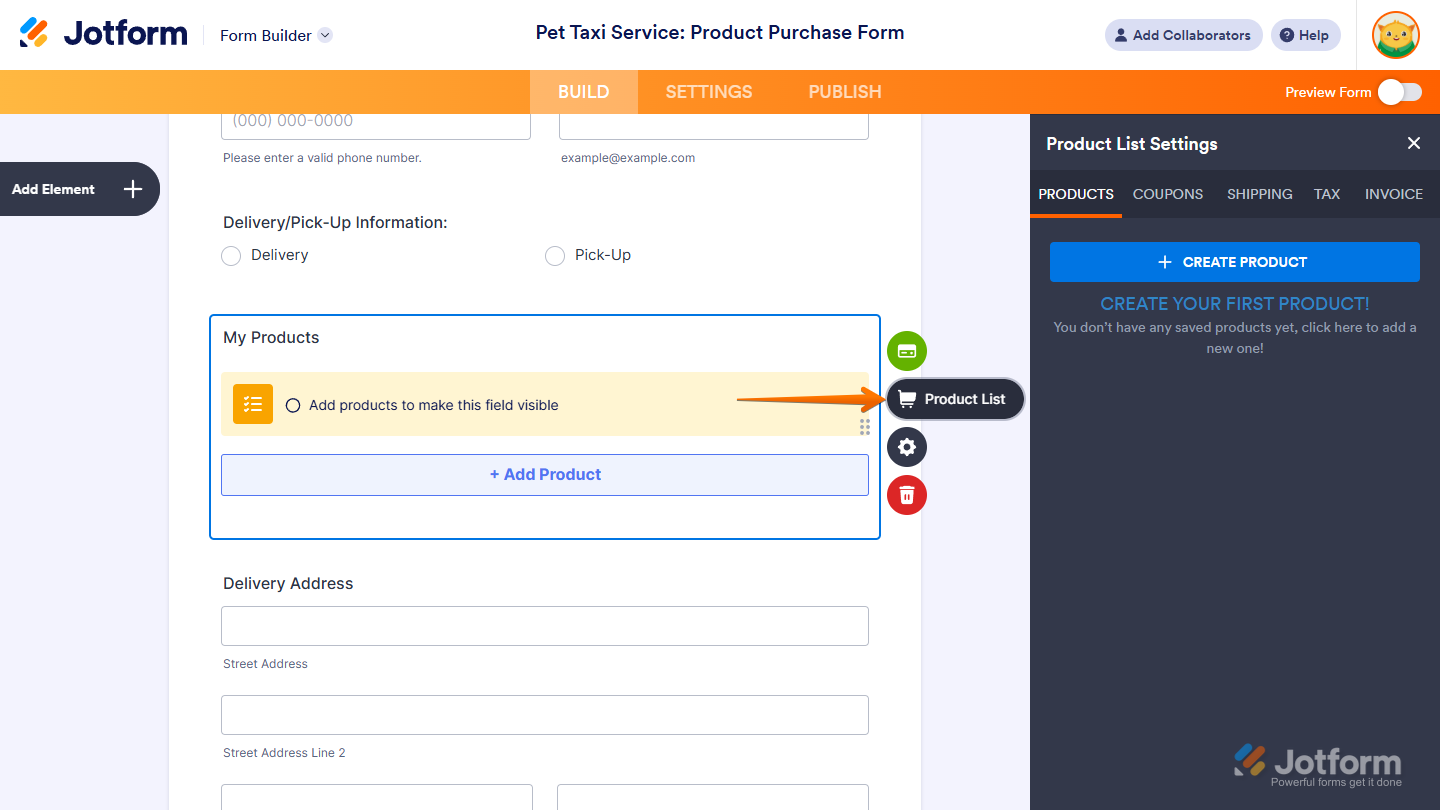
Once everything’s set, on the right side of the field, and depending on the type of payment you chose in the Payment Properties window above:
- Click on the Shopping Cart icon to set up your Products.
- Click on the Money Token icon to set up User-Defined Amounts.
- Click on the Heart icon to set up Donations.
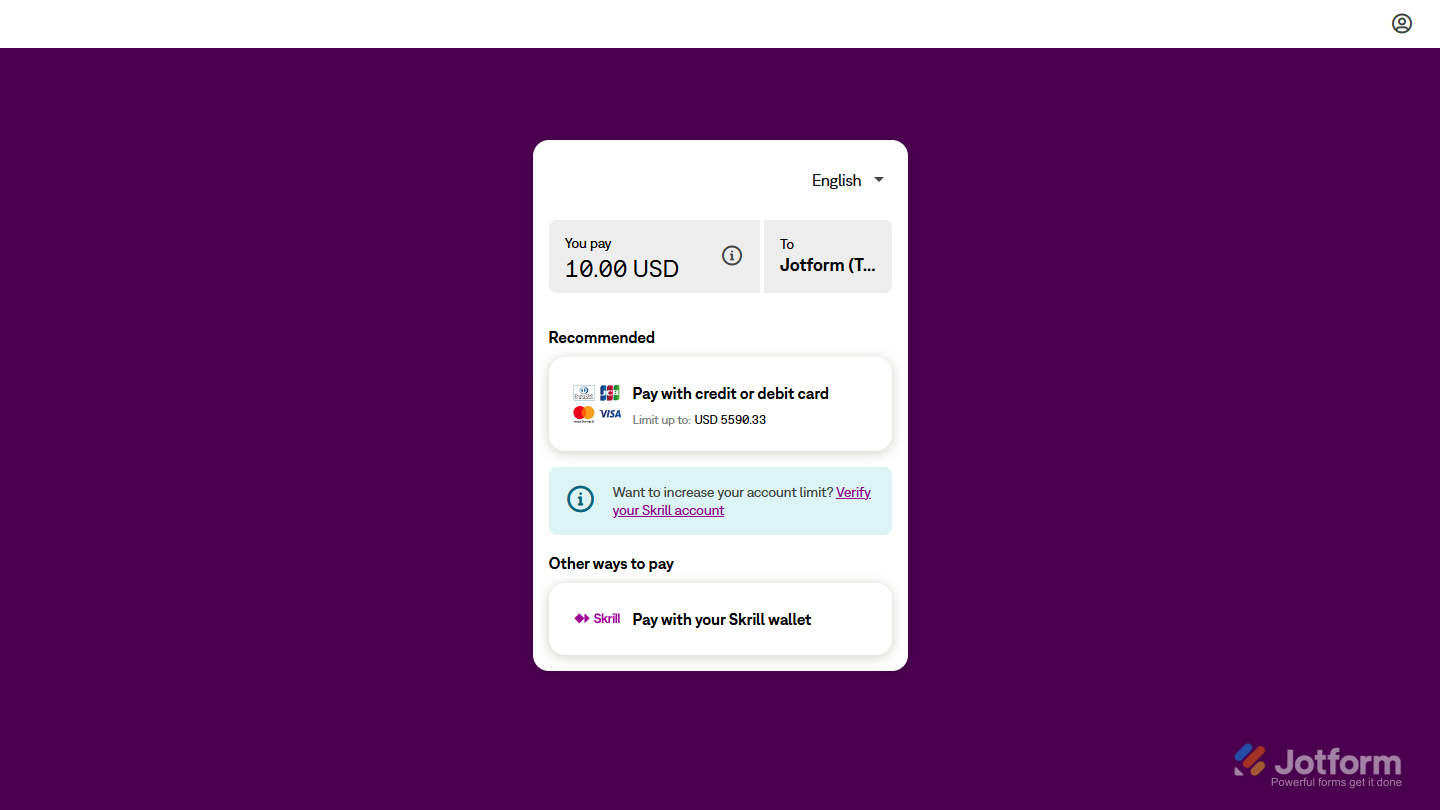
Making Payments with Skrill
Skrill integration works as an off-form payment method, which means users are redirected to the Skrill Payment page to complete their transaction. Here’s how it looks when paying for a product:

Send Comment:
6 Comments:
More than a year ago
هل سكريل يدعم الدفع بكروت الاءتمان داخل مصر
More than a year ago
I have registered with skrill account when I login it says my email address is invalid and I don't want to change my email address what should I do
More than a year ago
Click “Build”.
Click “Add Form Element”.
Click “Payments” tab.
Select “Skrill” in the Payments list. ...
Integration wizard will be opened automatically after you add it to form.
More than a year ago
I need the Skrill integration code that will link my form to Skrill when submit is been clicked. Can I get the code here or you help me with the form?
More than a year ago
Thank you for responding. I have another question. Can I have funds withdrawn from my Skrill account to my green dot or Netspend cards? I was also looking at the skrill card is it a visa or master card? Also, I have a patron account. Can I have the funds transfer from Patron to my skrill account?
More than a year ago
Can i accept donations with skrill merchant account? i have tried 2co but its not work.
thanks