The Purchase Order payment option lets you collect payments without connecting to a payment gateway, making it perfect for offline transactions like checks or wire transfers. You can use it to sell products, accept custom payment amounts, or manage purchase requests—no real-time processing required.
Just add the Purchase Order field to your payment form to start accepting offline payments. It supports any currency, automatically stores submission data, and helps you keep your purchase order records organized, all without needing a third-party provider.
Note
Submissions made on your forms with the Purchase Order payment field won’t count toward your account’s Payment Submissions Limit.
Whether you’re creating a new form or updating an existing one, setting it up to accept purchase orders and collect payments offline takes just a second. Here’s how to do it:
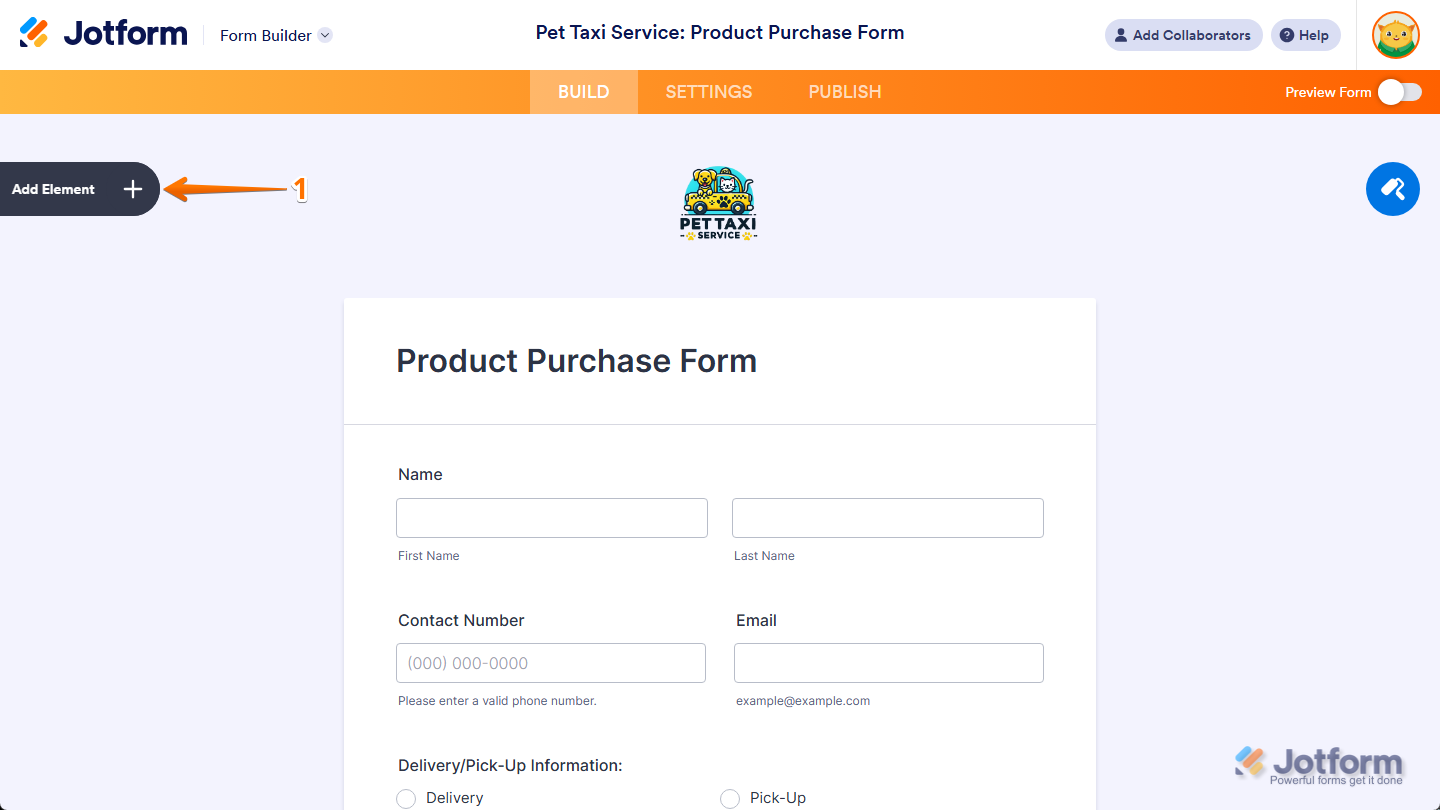
- In Form Builder, click on Add Element on the left side of the page.
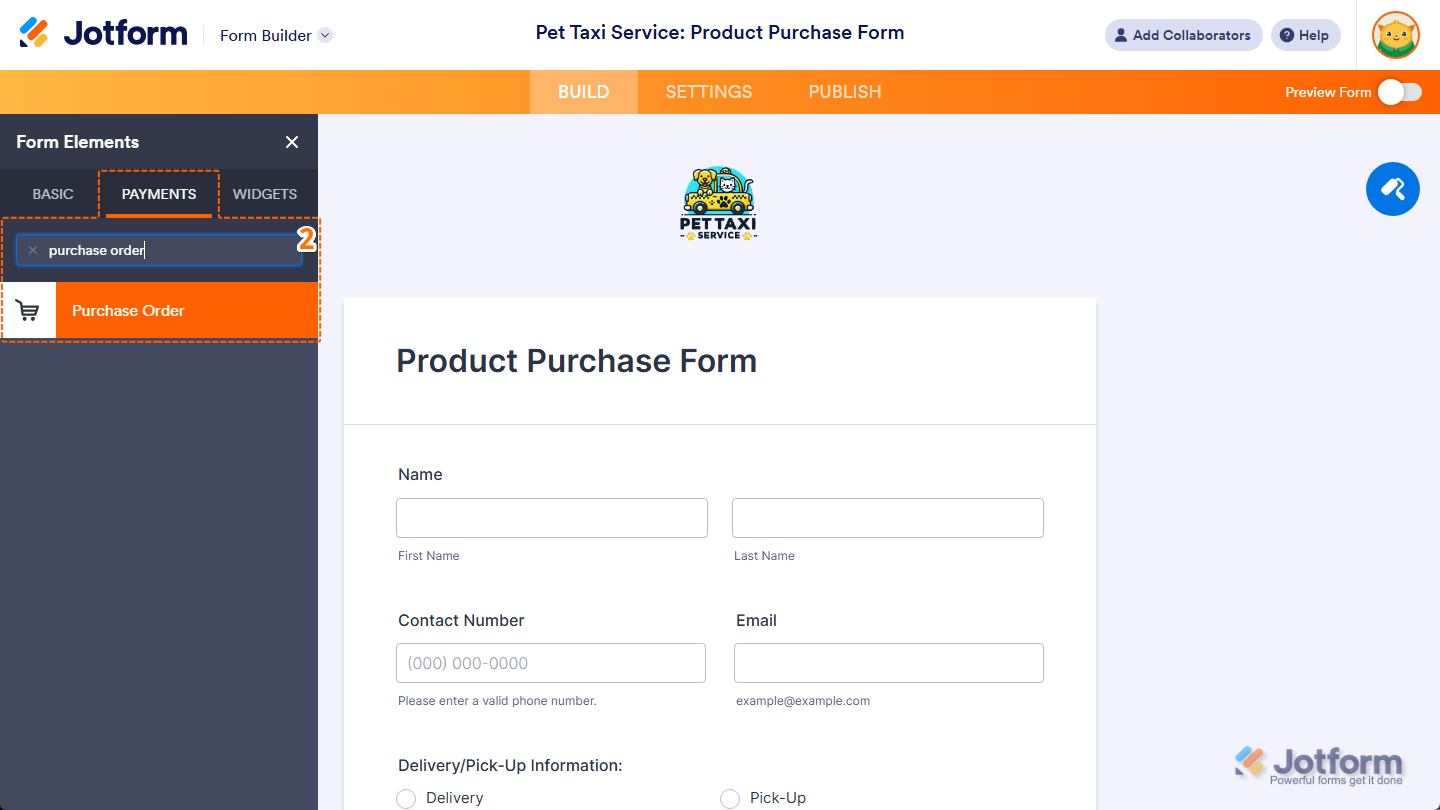
- Now, in the Form Elements menu, under the Payments tab, search for Purchase Order and then click on it. Or, just drag and then drop it to where you want it to be on your form.
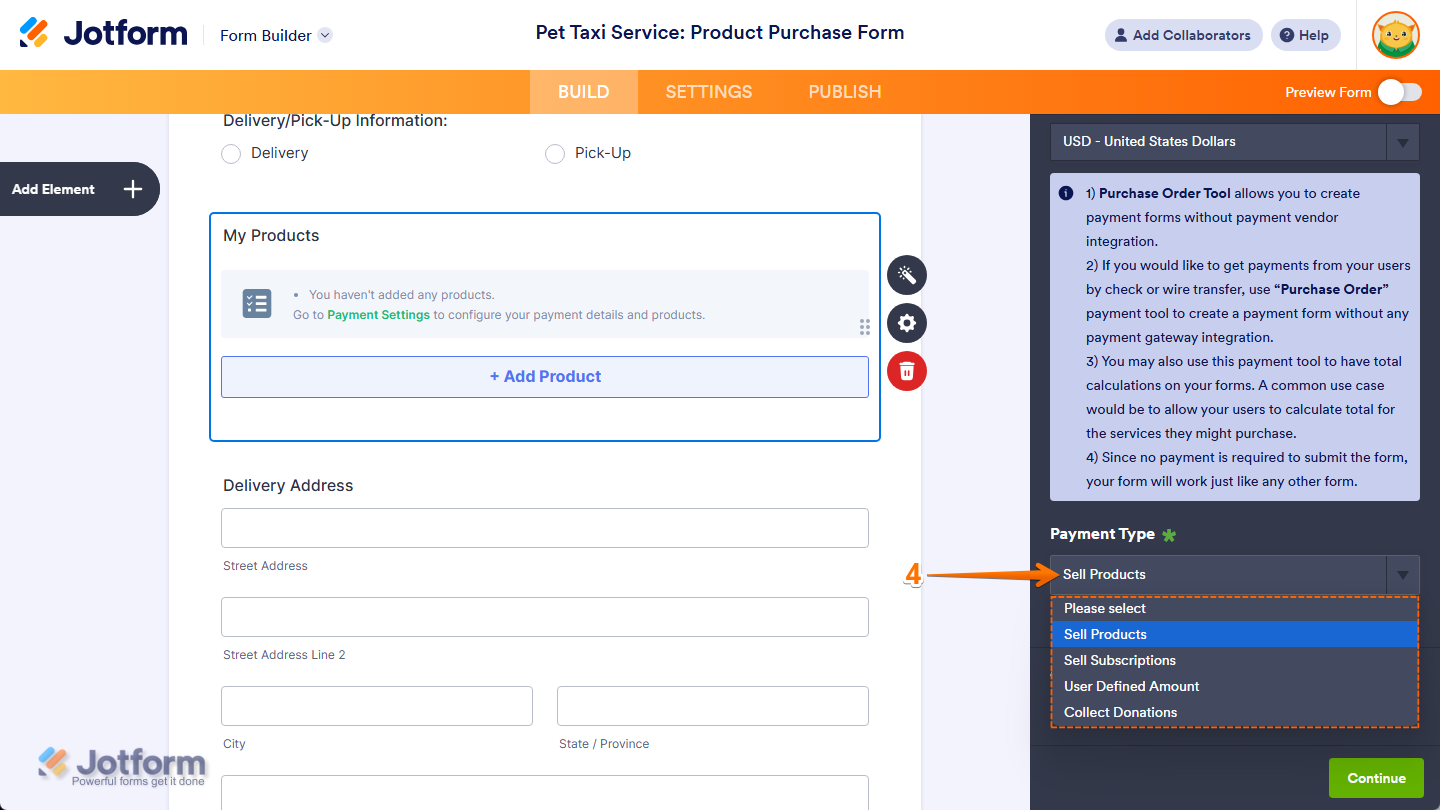
- Next, in the Purchase Order Integration window that opens on the right side of the page, select the currency you want to use in the Currency Dropdown menu.

- Then, in the Payment Type Dropdown menu, select what you’d like the payment to be processed for:
- Sell Products — This is selected by default. Use this to sell physical or digital goods at a fixed price, allowing customers to make a one-time purchase.
- Sell Subscriptions — Choose this to charge customers on a recurring basis for services, memberships, or other ongoing access.
- User-Defined Amount — This lets customers enter the amount they want to pay. It’s useful for tipping, custom amount pricing, or flexible payments.
- Collect Donations — Select this to accept voluntary contributions, commonly used for fundraising, nonprofit support, or charitable causes.
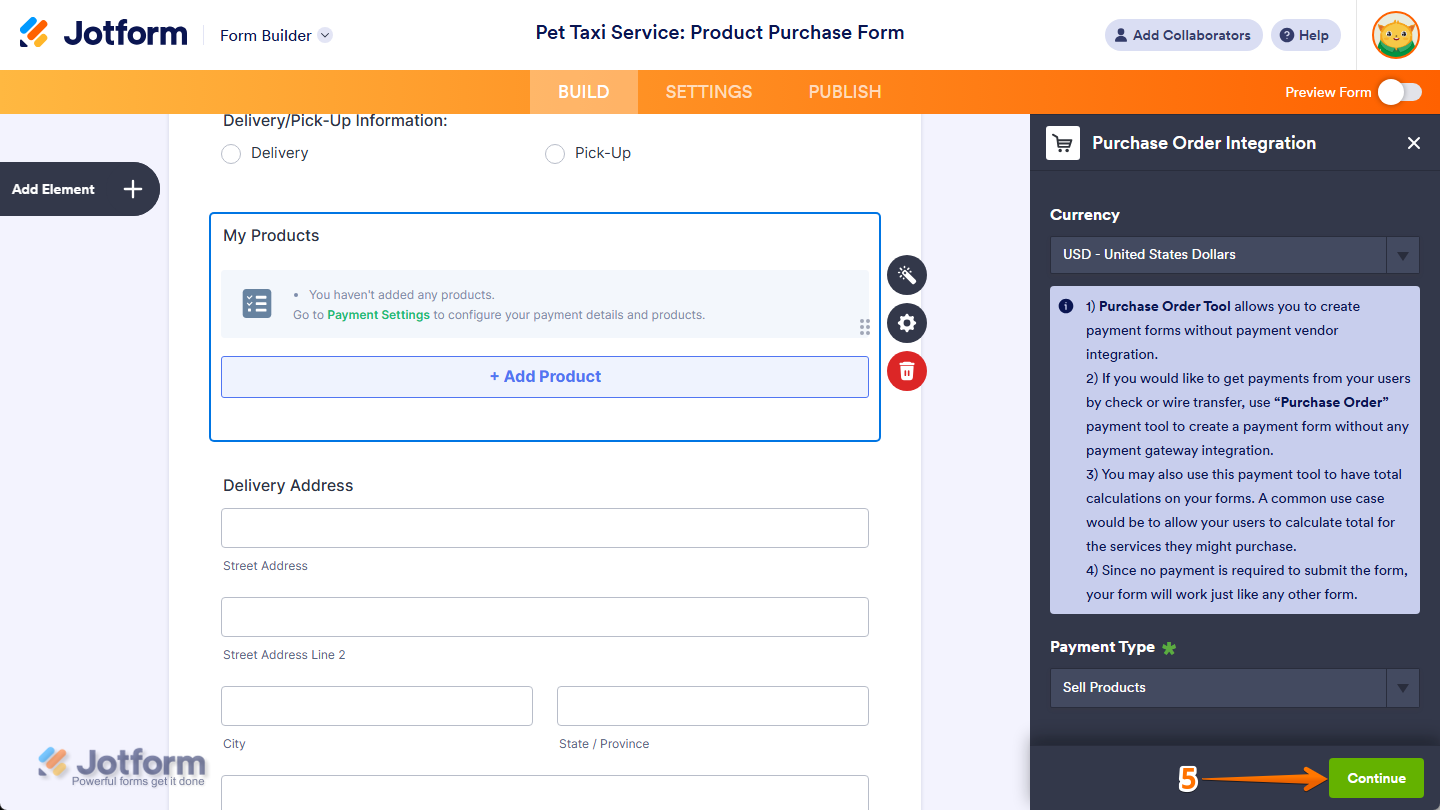
- Once everything is set for the Sell Products and Sell Subscriptions payment types, click on Continue to start creating products and subscriptions for your payment field. For the User Defined Amount and Collect Donations payment types, just click on Save at the bottom.
Want to learn more about setting up your products and subscriptions? These guides have you covered:
- Setting Up Your First Order Form
- How to Set Up a Recurring Payment Option
- How to Add Options to Payment Forms
- How to Add Coupon Code to Payment Forms
- How to Add Tax to Your Payment Form
- How to Add Shipping Cost to Payment Forms
- How to Generate an Invoice for Your Payment Form
- How to Enable and Manage Product Stocks in Payment Fields
For the User Defined Amount and Collect Donations payment types, you can enter a description that’ll be shown under the Payment box on your form. You can also provide a suggested amount and set it as minimum, or get the price from a Form Calculation widget, which is useful when you want to pass a calculated amount to your payment field instead of getting it from users. Need help getting started? See our guide on How to Pass a Calculation to a Payment Field.

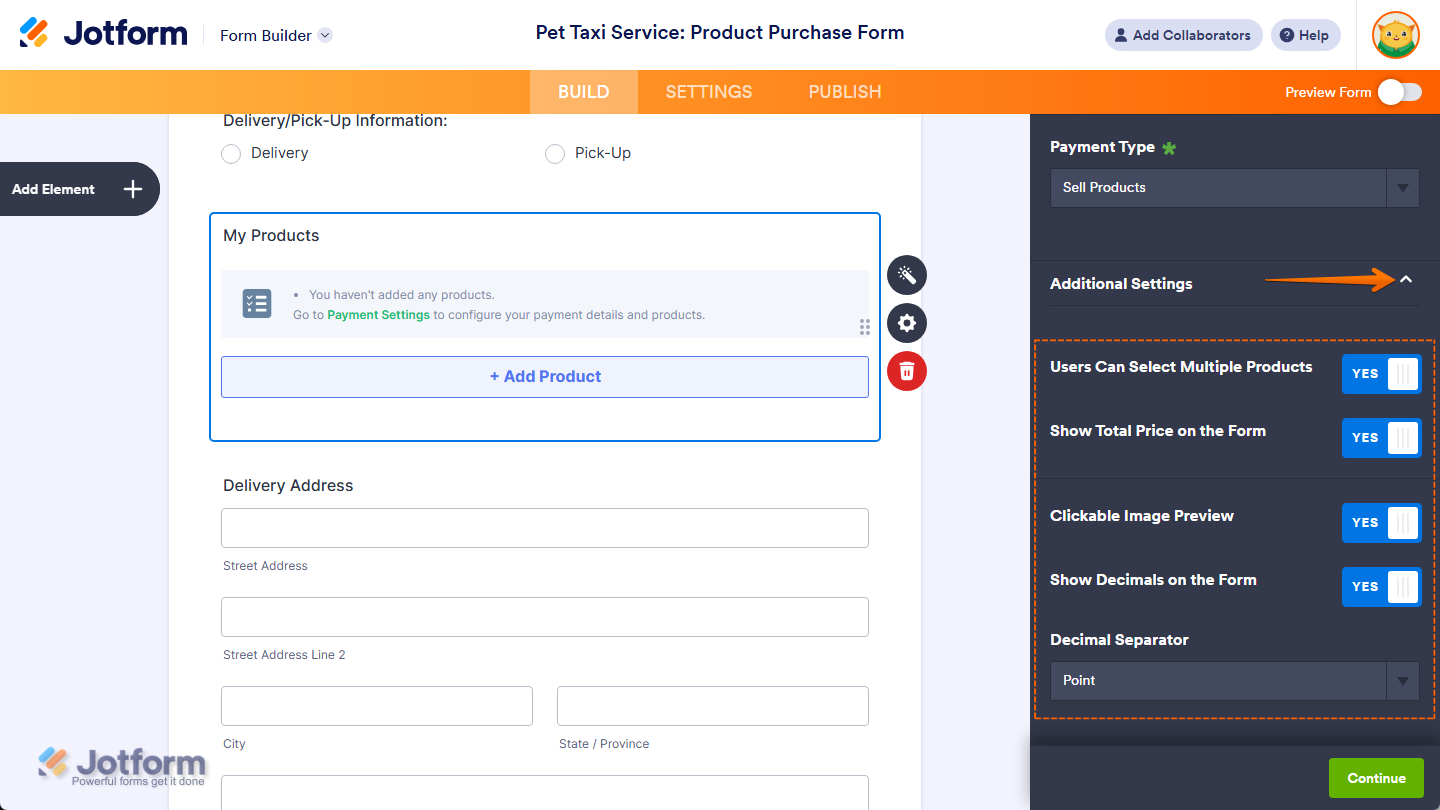
When you expand the Additional Settings section of the Purchase Order Integration window, you’ll see this list of options you can adjust based on the payment type you chose:
- Users Can Select Multiple Products — This is only available with the Sell Products payment type and is enabled by default. You can toggle this Off if you want customers to select only one (1) product per submission.
- Show Total Price on the Form — This is only available with the Sell Products payment type and is enabled by default. You can toggle this Off if you want to hide the total price of selected products on your form.
- Clickable Image Preview — This is enabled by default. You can toggle this Off to prevent customers from enlarging product or subscription images.
- Show Decimals on the Form — This is enabled by default. You can toggle this Off to hide decimals on both the item prices and total amount.
- Decimal Separator — When decimals are shown on your payment field, you can select between a period, which is used in English-speaking countries, or a comma, which is used in many European countries.

Send Comment:
12 Comments:
January 4, 2026
Hi! I was hoping that you would be able to include PayMongo as a payment gateway (I was hoping that GCash would be integrated, or have a way that QR Ph may work) for the Philippines.
May 9, 2025
Hello, payment services are not available in my country which is the Philippines.
I am just asking, is there a way of adding a downpayment option using the "Purchase Order Integration" thank you
October 16, 2024
I could not see that purchase order when building a jotform app. No payment section. Only Widgets and Elements. Please advise.
June 11, 2024
Here's the corresponding question in English:
"How can I add a Purchase Order payment element to a form using the Jotform Form Builder, following the instructions provided in the post?"
February 29, 2024
Hi, the option for "Purchase Order" is not available on the listing. What other options can I use?
January 7, 2024
The widget may have been there but is no longer there :(
January 19, 2023
Is this no longer valid? I do not see Purchase Order as a Payment option (or widget)
December 2, 2022
I created a form using the Purchase Order element. When If the user now clicks on "Submit", I want to let her choose the payment options (PayPal, Stripe) and pay. I am a bit puzzled - how do I achieve this?
November 16, 2022
can someone please explain, i dont understand how we are suppose to link this form to the payment. what is the purpose of this form?
January 26, 2022
Is there an option to add a discount based only on certain number of items orders without a coupon? For example a customer buys 1 for $5 or 2 for $8 3 would have no discount but they can buy 4 for $16 and so on.
January 20, 2022
The above form example link leads to an error
December 10, 2021
I dont see the Purchase Order option under Payments? Any reason why?