PayPal is a trusted and widely used online payment service that allows users to pay, send money, and accept payments quickly and securely. With support for both instant transactions and authorized payments for future use, it’s a versatile solution for businesses of all sizes.
Jotform offers seamless integration with PayPal Standard, enabling you to sell products or subscriptions, collect donations, and accept custom payments, all directly through your forms using the PayPal Standard gateway.
Integrating PayPal Standard with Your Form
Whether you’re creating a new form or updating an existing one, you can add and set up the Paypal Standard payment field on your form in a few easy steps. Here’s how to do it:
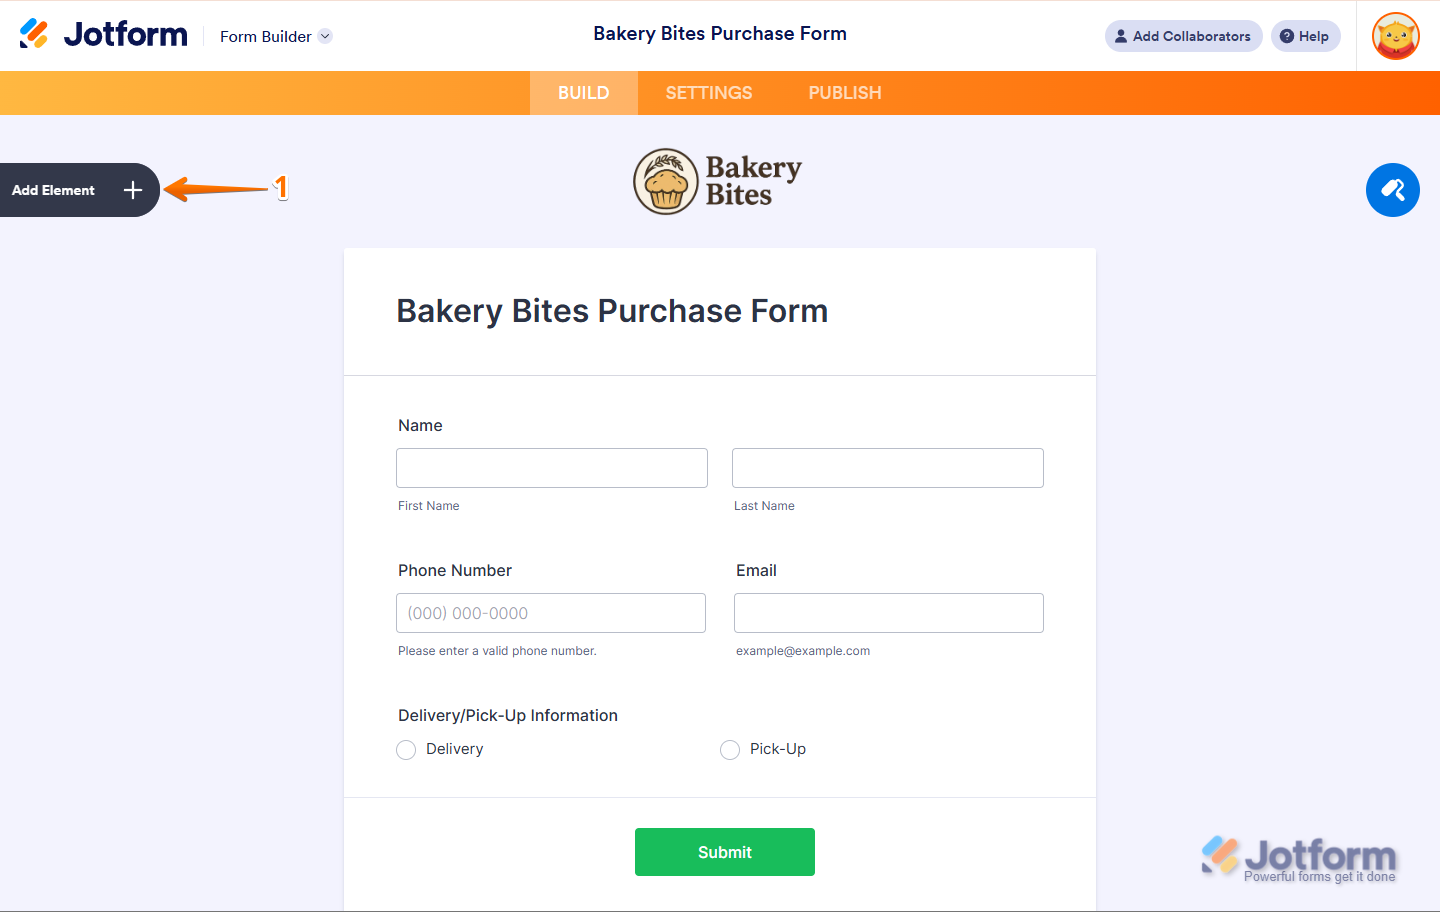
- In Form Builder, click on Add Element on the left side of the page.
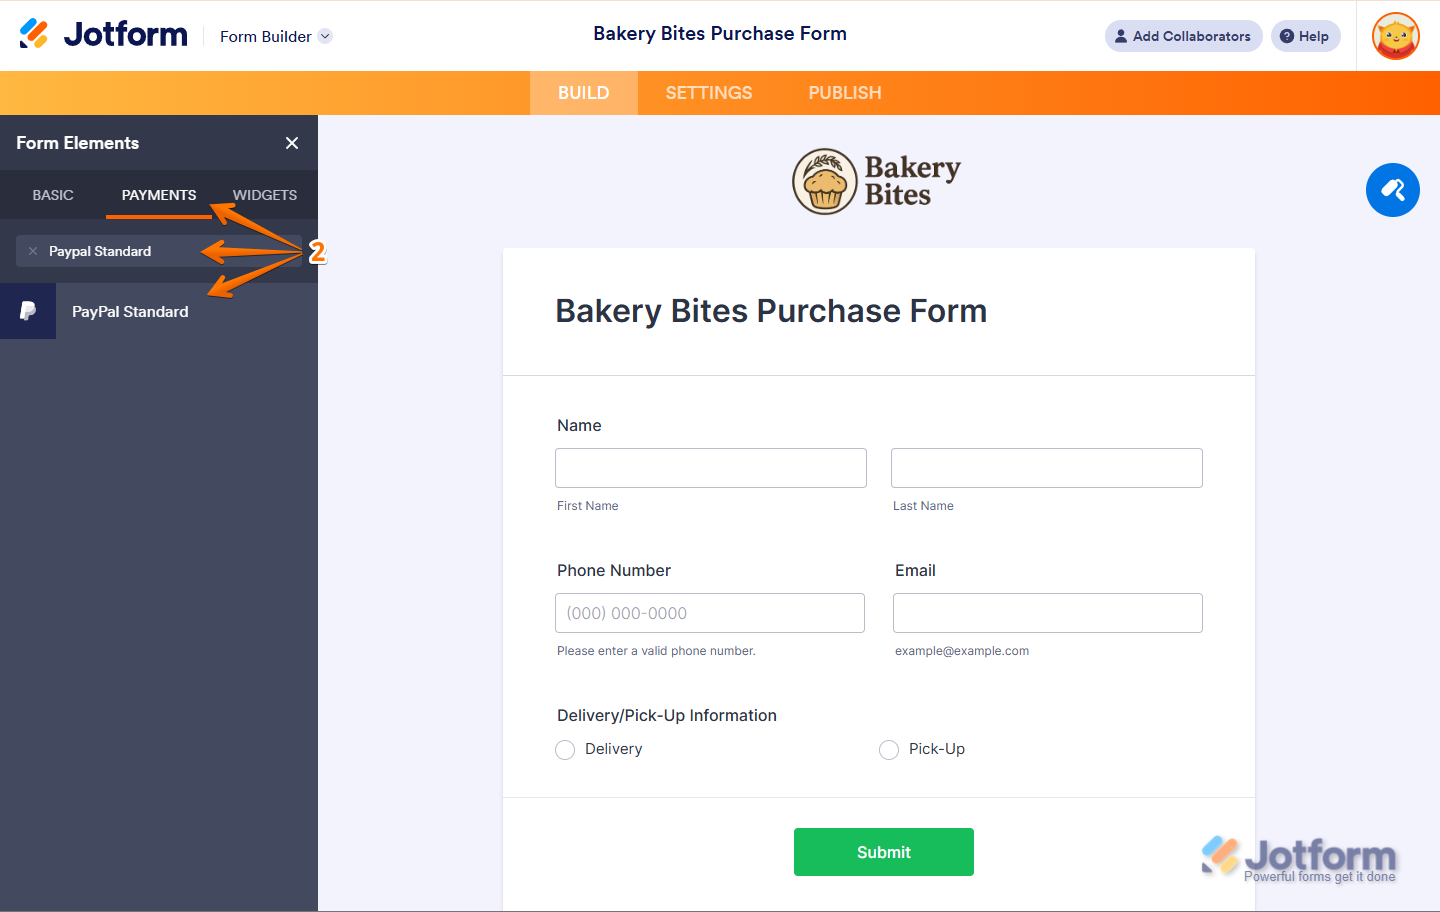
- Now, in the Form Elements menu, under the Payments tab, search PayPal Standard and click on it to add it to your form.
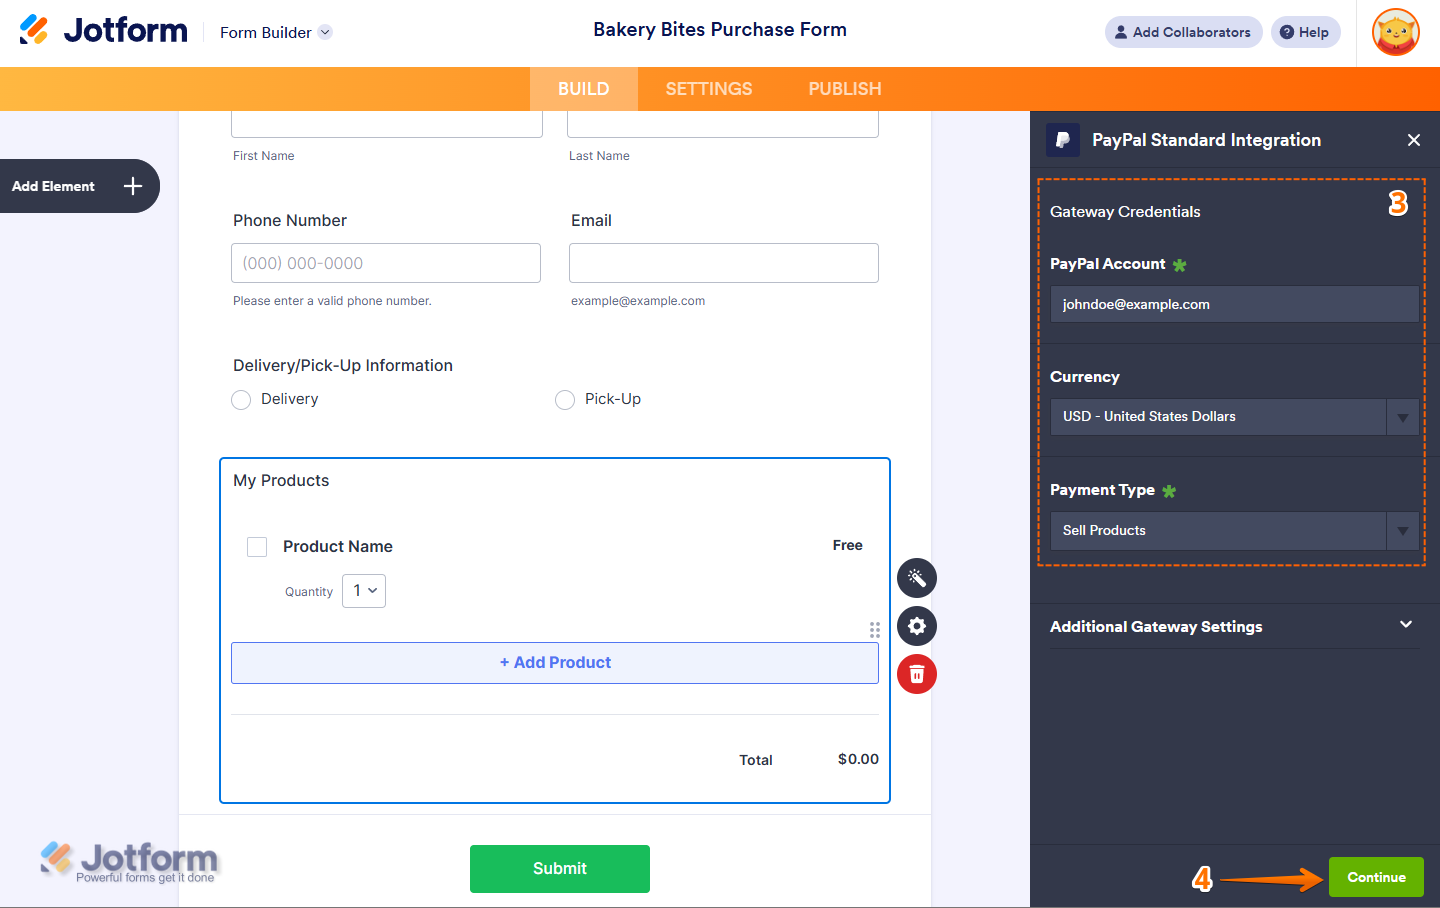
- Next, in the PayPal Standard Integration window that opens on the right side of the page, set up the following things:
- PayPal Account — Enter your registered PayPal email address to link your account and start accepting payments.
- Currency — Choose the currency you want to use. Check out PayPal’s Supported Currencies page for a complete list of those.
- Payment Type — Choose the type of payment you want to collect: Sell Products, Sell Subscriptions, User-Defined Amount, or Collect Donations.
- Once everything is set for the Sell Products and Sell Subscriptions payment types, click on Continue to continue with creating products and subscriptions for your payment field. For the User Defined Amount and Collect Donations payment types, just click on Save at the bottom.
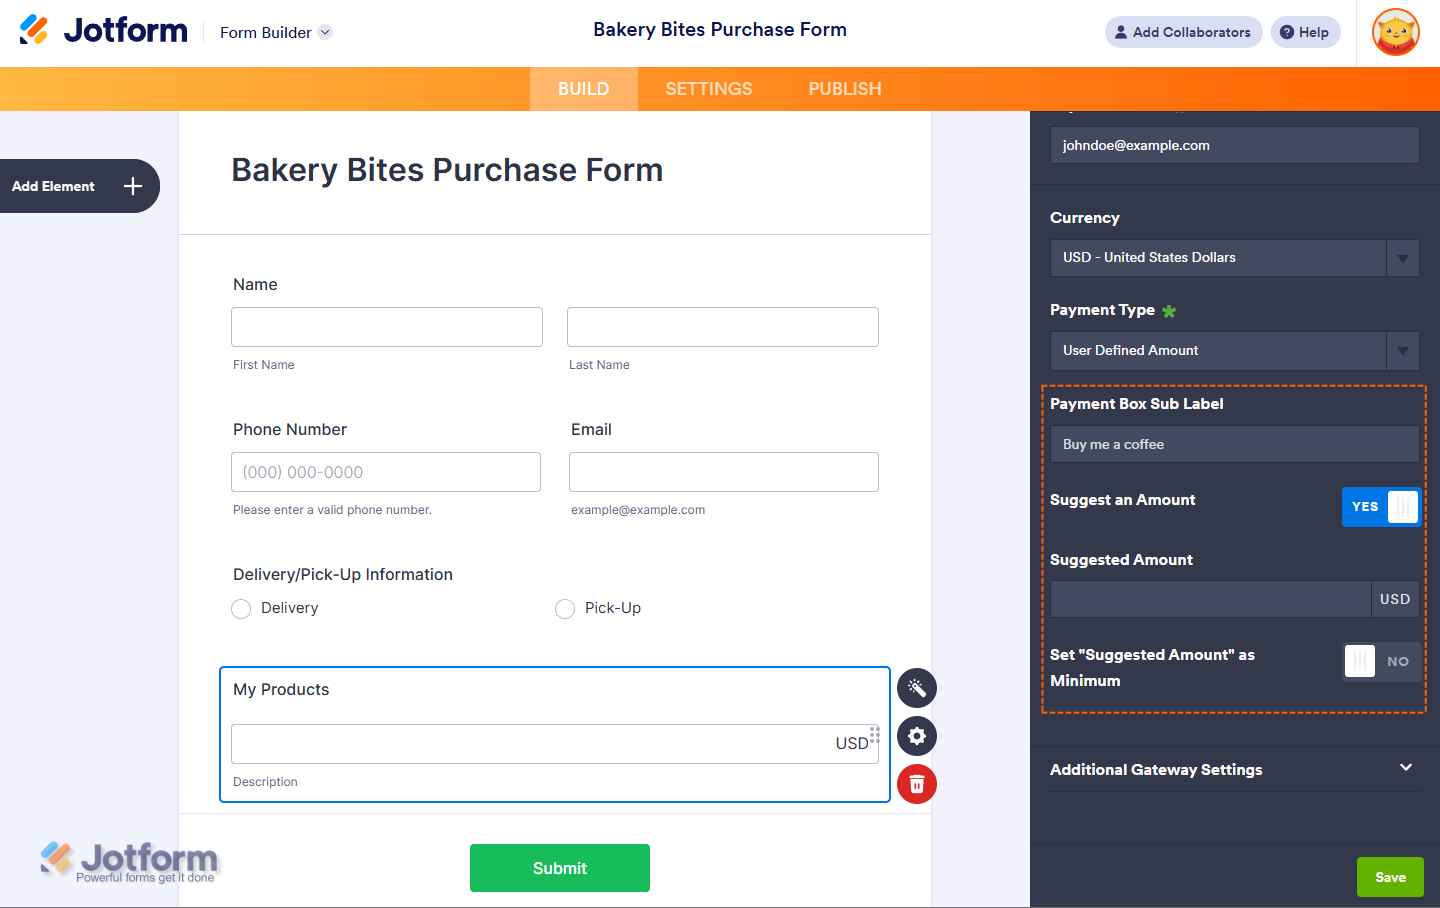
For the User-Defined Amount and Collect Donations payment types, you can enter a description that’ll be shown under the payment box on your form. You can also suggest an amount and set it as the minimum or get the price from a Form Calculation widget, which is useful when you want to pass a calculated amount to your payment field instead of getting it from users. Check out this guide on How to Pass a Calculation to a Payment Field to learn more about it.
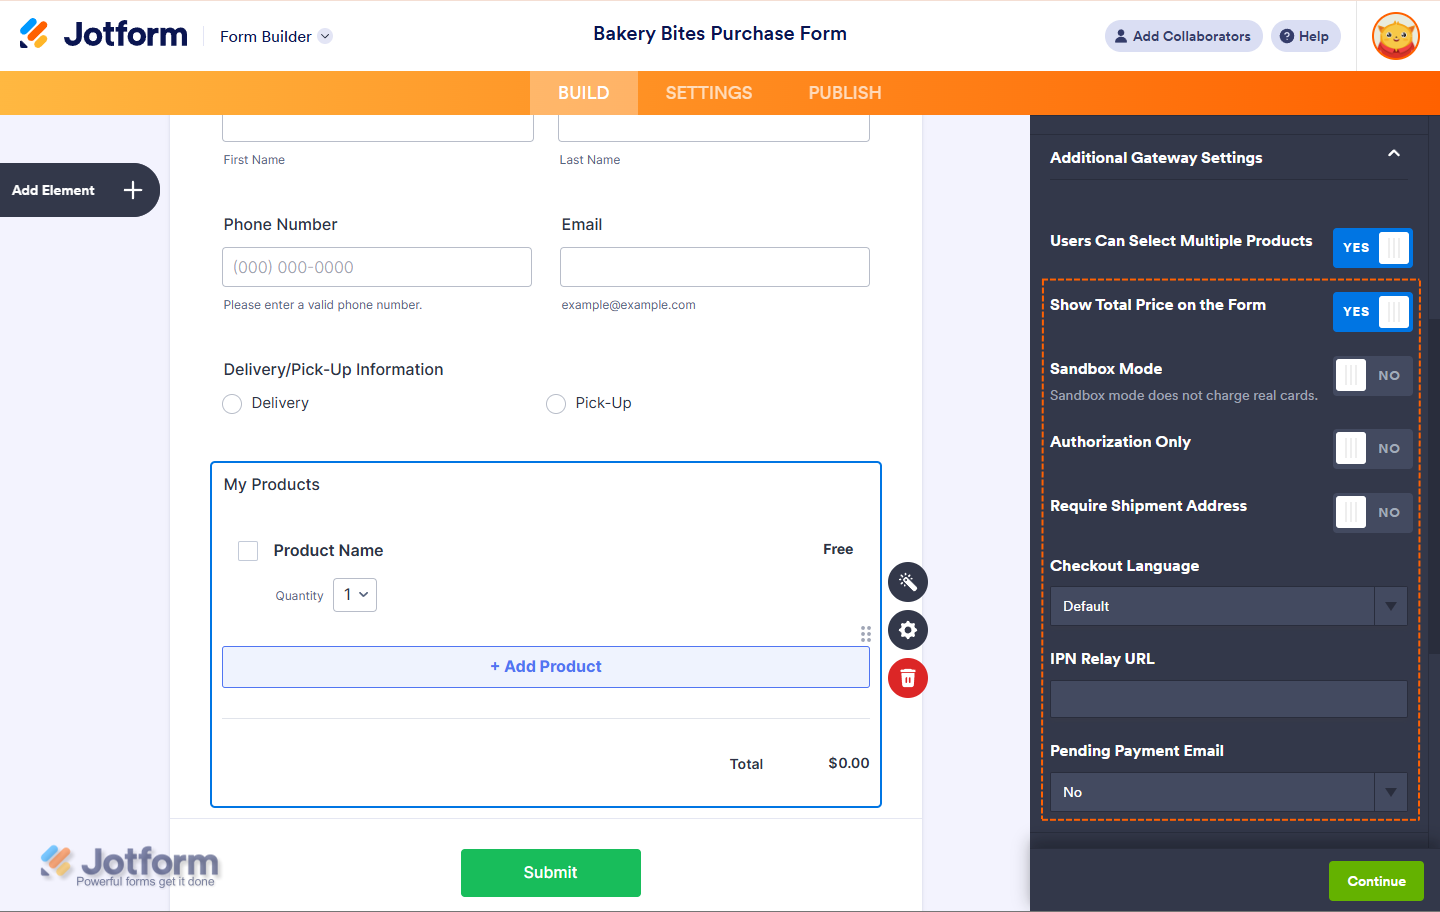
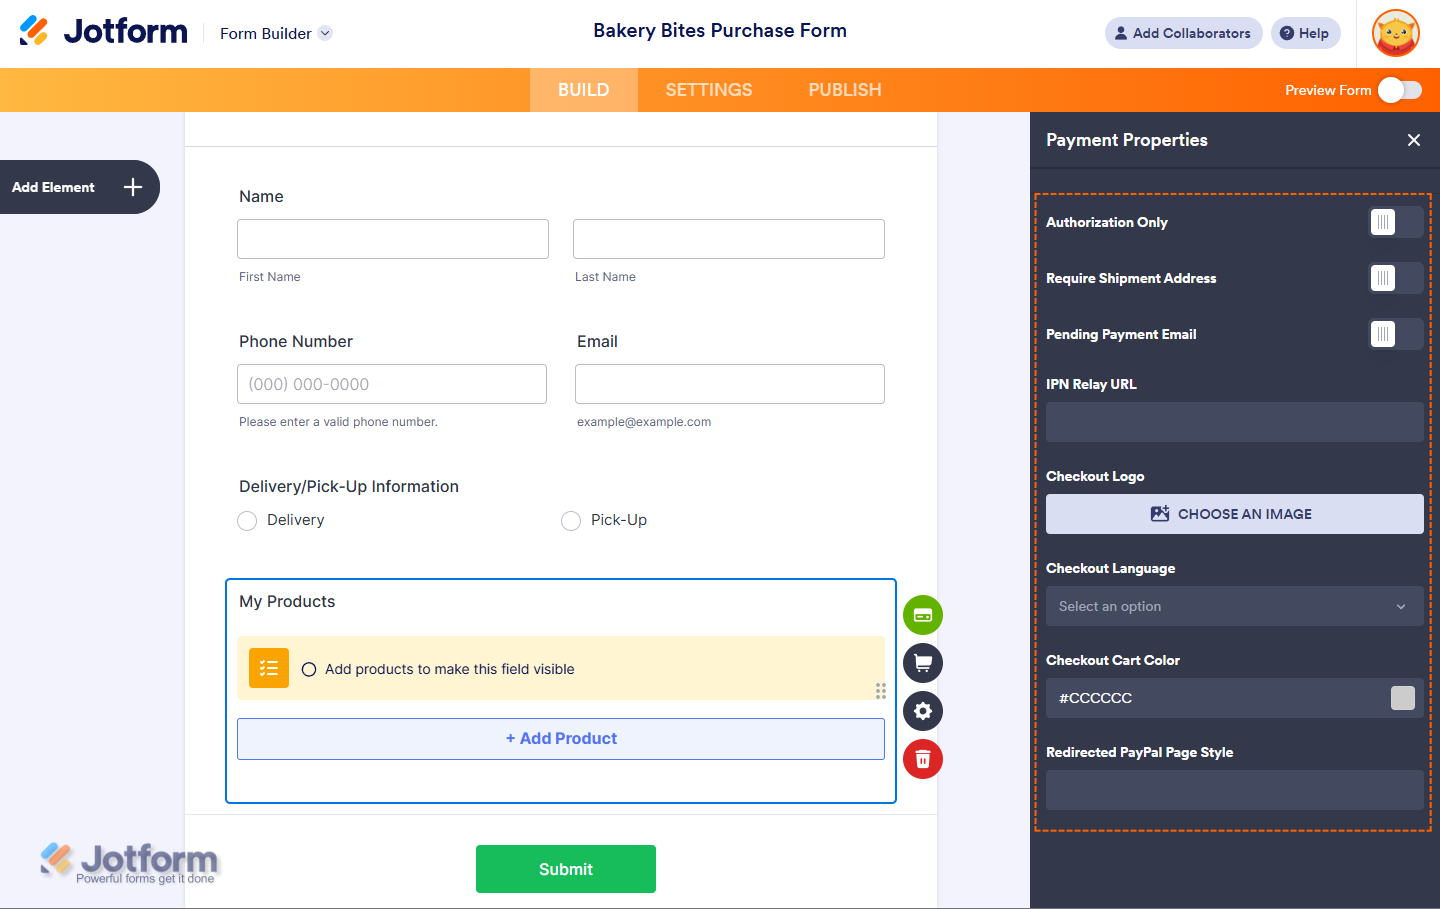
When you expand the Additional Gateway Settings of the PayPal Standard Integration section, you can configure the following based on the type of payment you selected, as needed:
- Show Total Price on the Form — Enable this to display the total amount directly on your form before users are redirected to PayPal.
- Sandbox Mode — Use this for testing purposes. When enabled, payments are processed using PayPal’s Sandbox environment instead of live transactions. Check out this guide on How to Test your PayPal to learn more about it.
- Authorization Only — PayPal Standard supports charging customers at a later date. Check out this guide about Enable Payment Authorization to learn more about it.
- Require Shipment Address — Enable this if you need to collect the customer’s shipping address during checkout.
- Checkout Language — Set the language for the PayPal Checkout page to match your audience’s locale.
- IPN Relay URL — Enter a custom Instant Payment Notification (IPN) URL if your workflow requires server-side communication for payment events.
- Pending Payment Email — Enable this to notify users via email when their payment is marked as Incomplete. Check out this guide about How to Set Up Incomplete Payment Notification to learn more about it.
- Clickable Image Preview — When enabled, product images on your form become clickable, allowing users to preview a larger version before checkout.
- Show Decimals on the Form — This displays decimal values (e.g., $9.99) on your form, which is useful for precision in pricing.
- Decimal Separator — Choose whether to use a period (.) or comma (,) as the decimal separator based on your regional formatting.
- Redirected PayPal Page Style — Enter the name of a custom PayPal page style to match the branding of your business during checkout. This’ll have to be configured within your PayPal account.
- Checkout Logo — Upload a logo image that’ll be shown on the PayPal Checkout page, helping to reinforce your brand.
- Checkout Cart Color — Set the background color of the PayPal Checkout cart to visually align with your form or brand theme.

Integrating and Setting Up PayPal Standard with Reusable Payment Connections
Jotform’s Reusable Payment Connections allow you to set up payment integrations like PayPal Standard and reuse the same configuration on other forms or apps you create, without needing to configure it again. Here’s how to set it up:
- In Form Builder, click on Add Element menu on the left side of the page.

- Now, in the Form Elements menu, under the Payments tab, search for PayPal Standard and click on it to add it to your form.
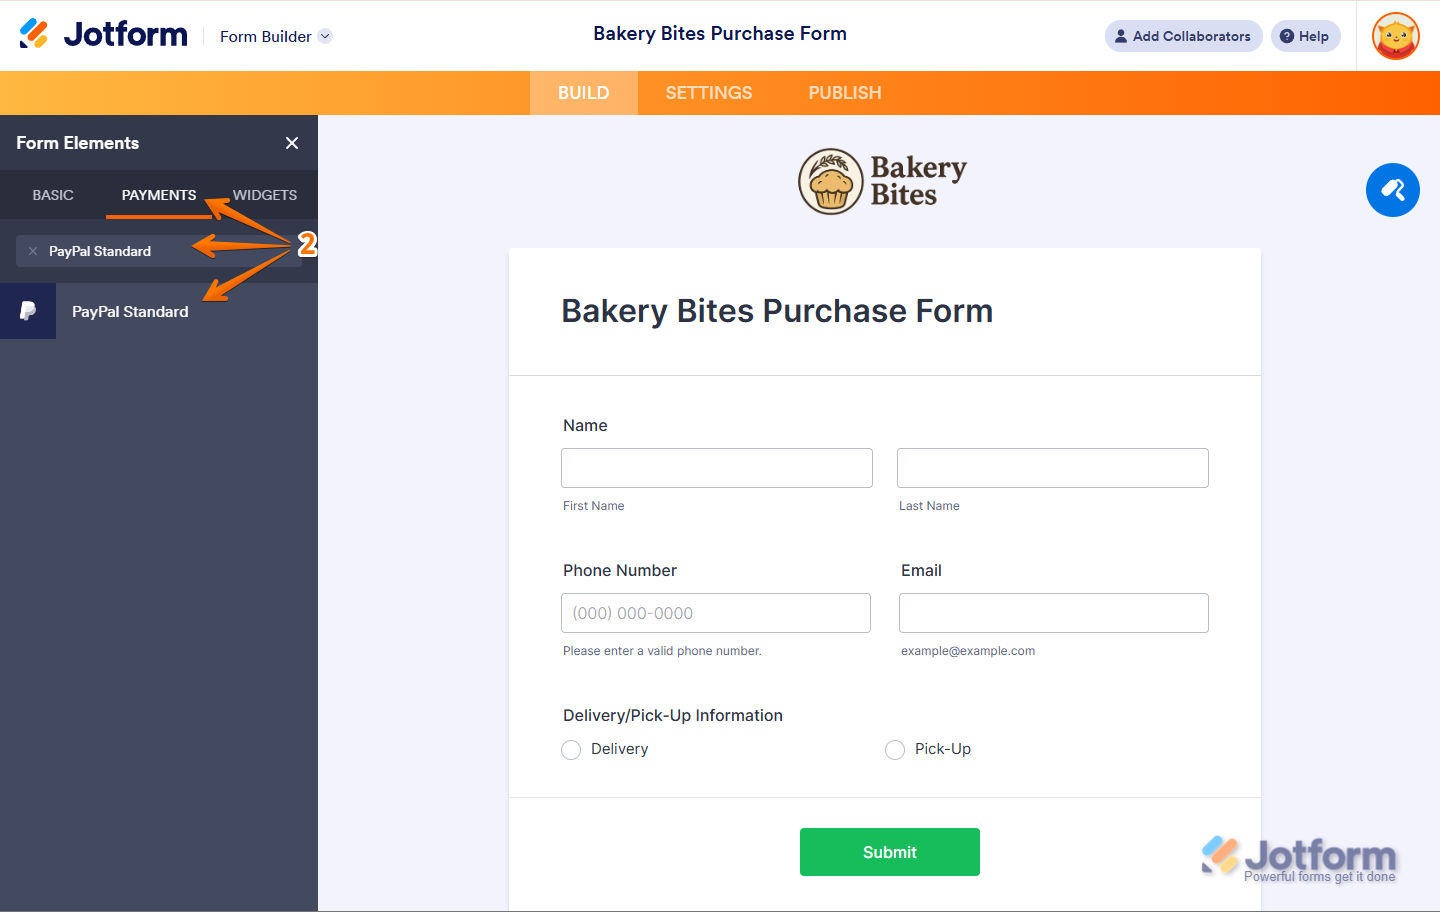
- Then, in the Payment Properties section that opens on the left side of the page, click on the Plug icon.
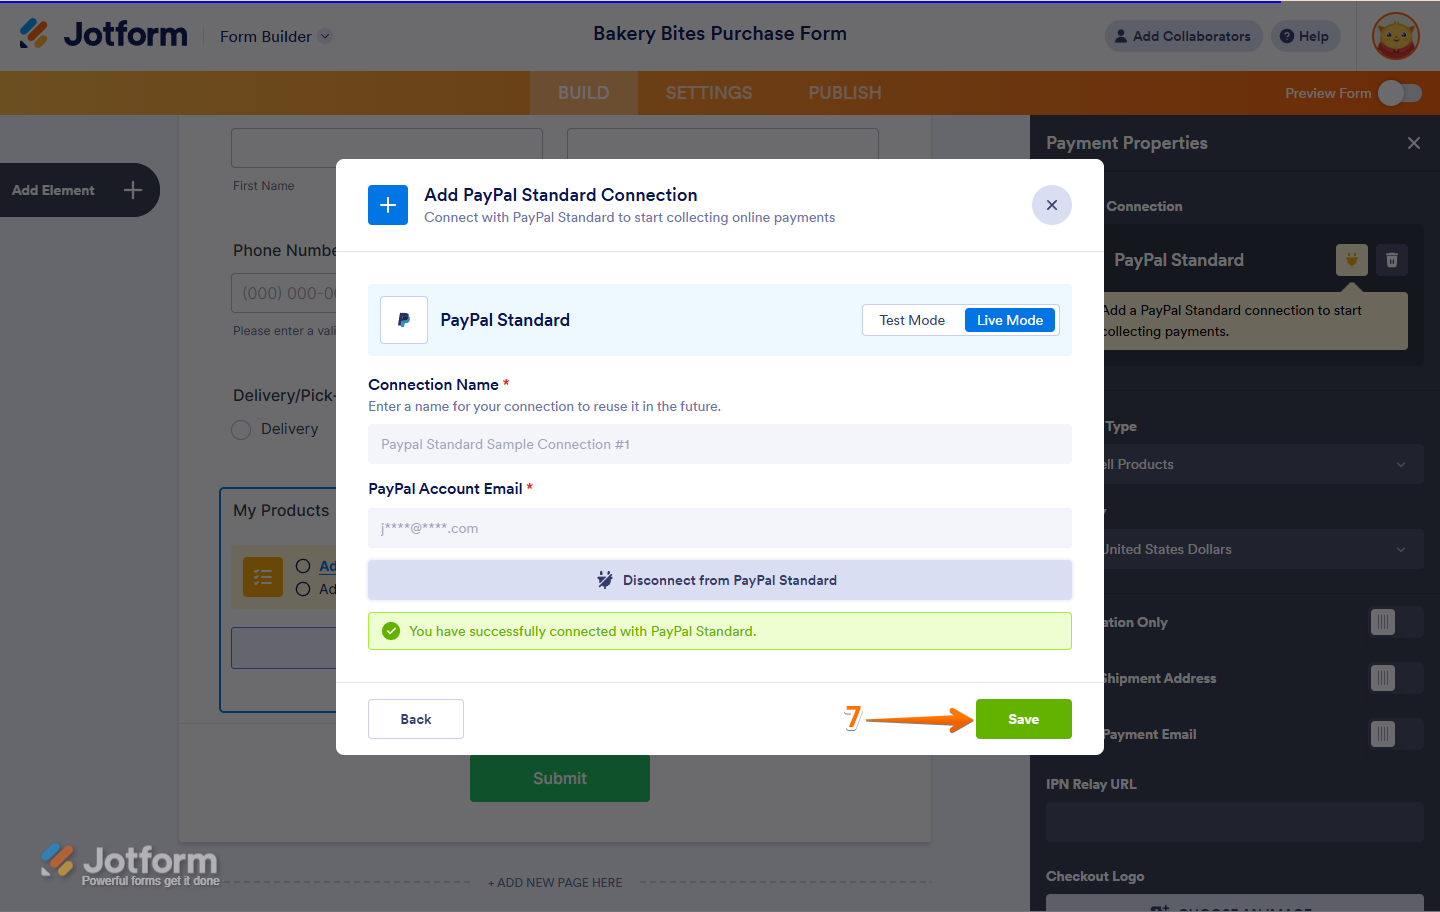
- Now, in the PayPal Standard Connection window, click on either Test Mode or Live Mode at the top to select the environment for your payment connection.
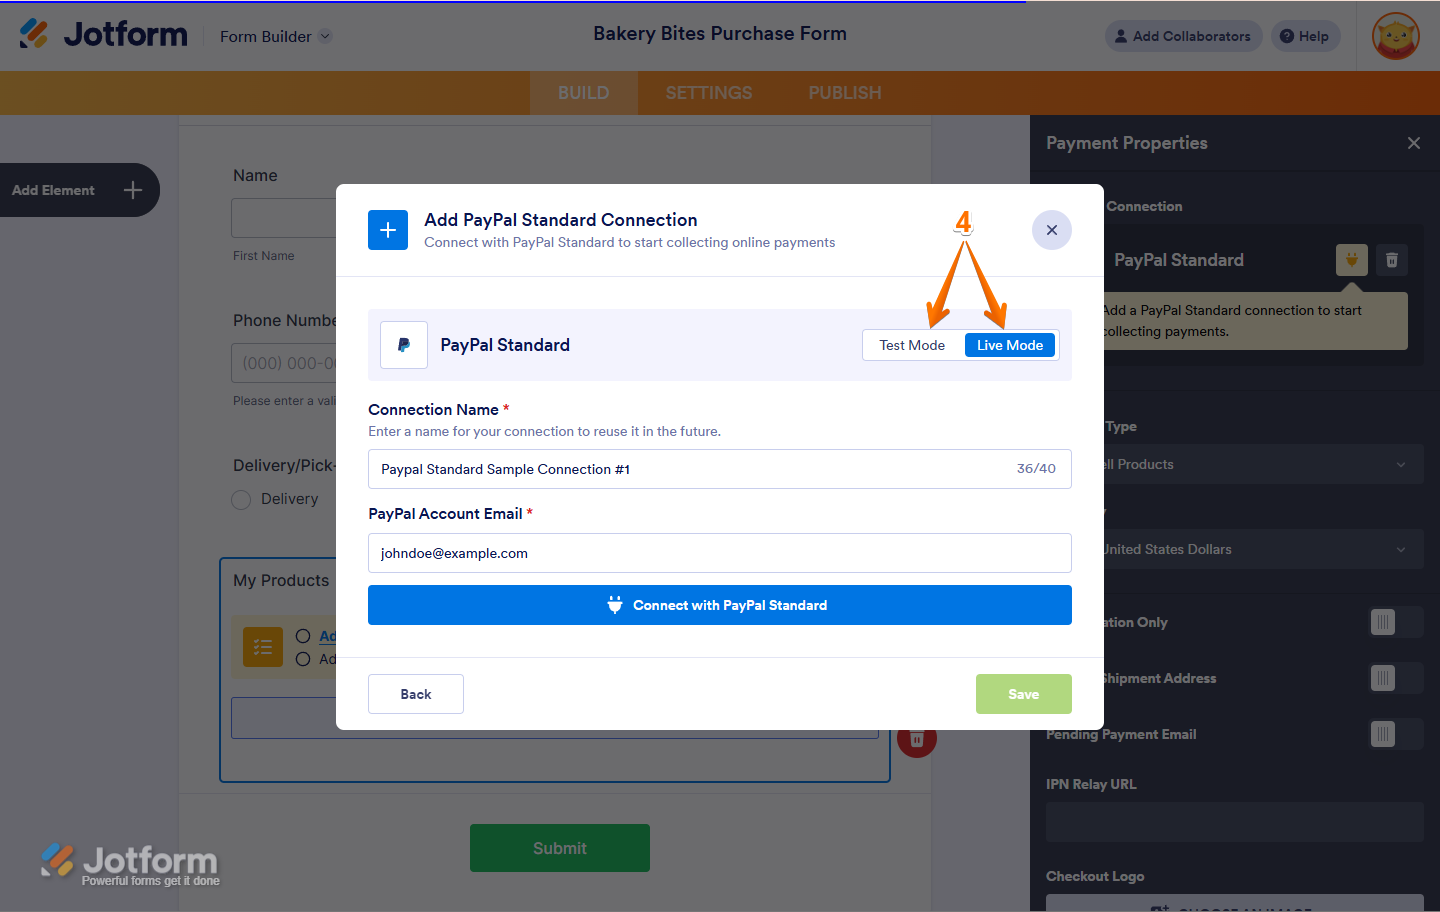
- Next, enter a name in the Connection Name field, and add your PayPal Account Email in the PayPal Account Email field.
- Then, click on Connect with PayPal Standard.
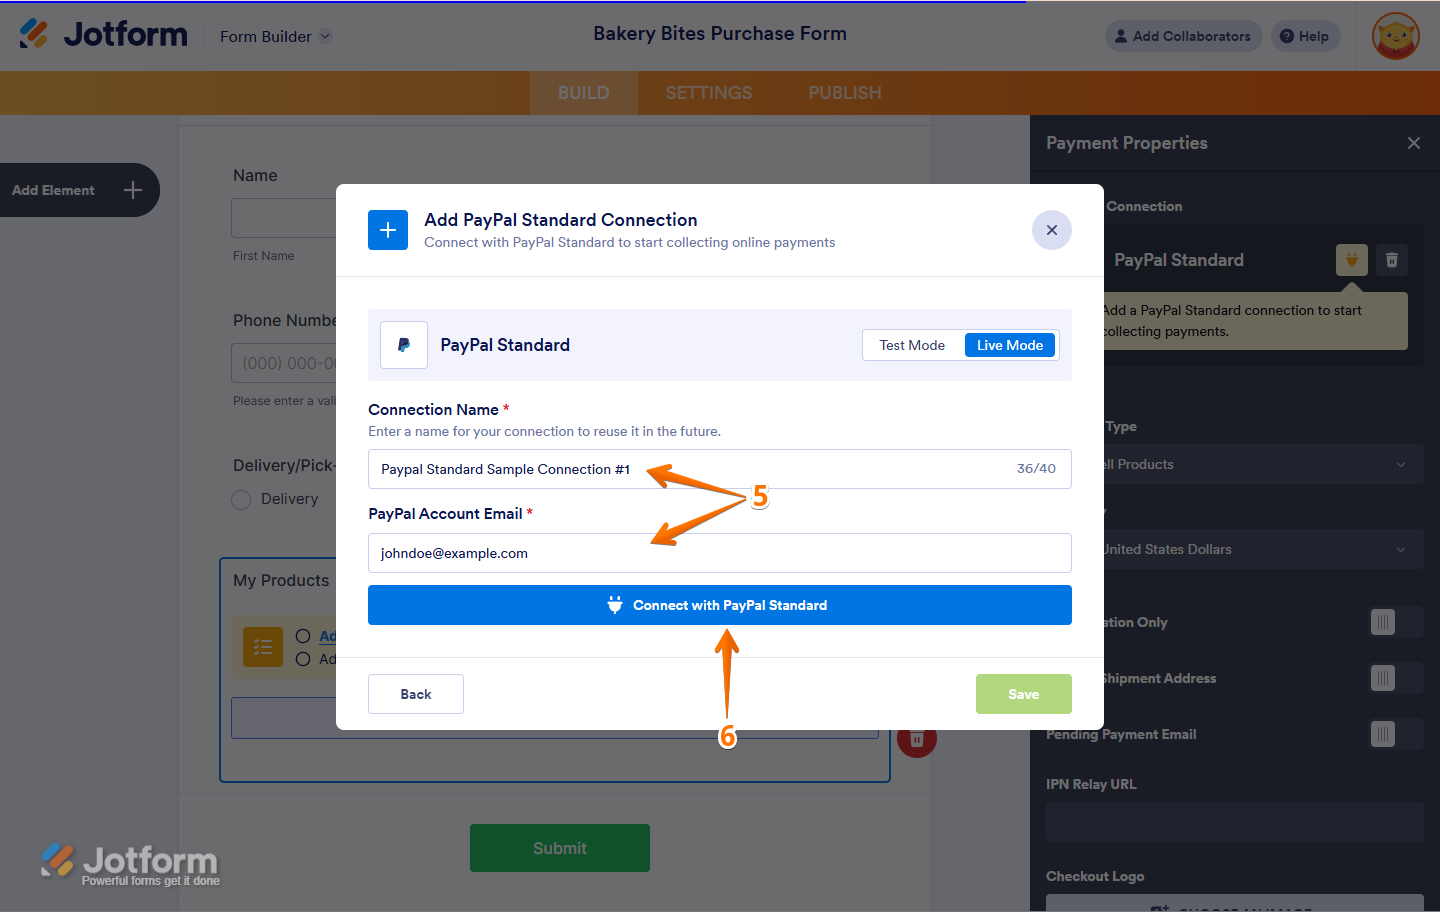
- Once your PayPal Standard Account is successfully connected, click on Save at the bottom of the window.
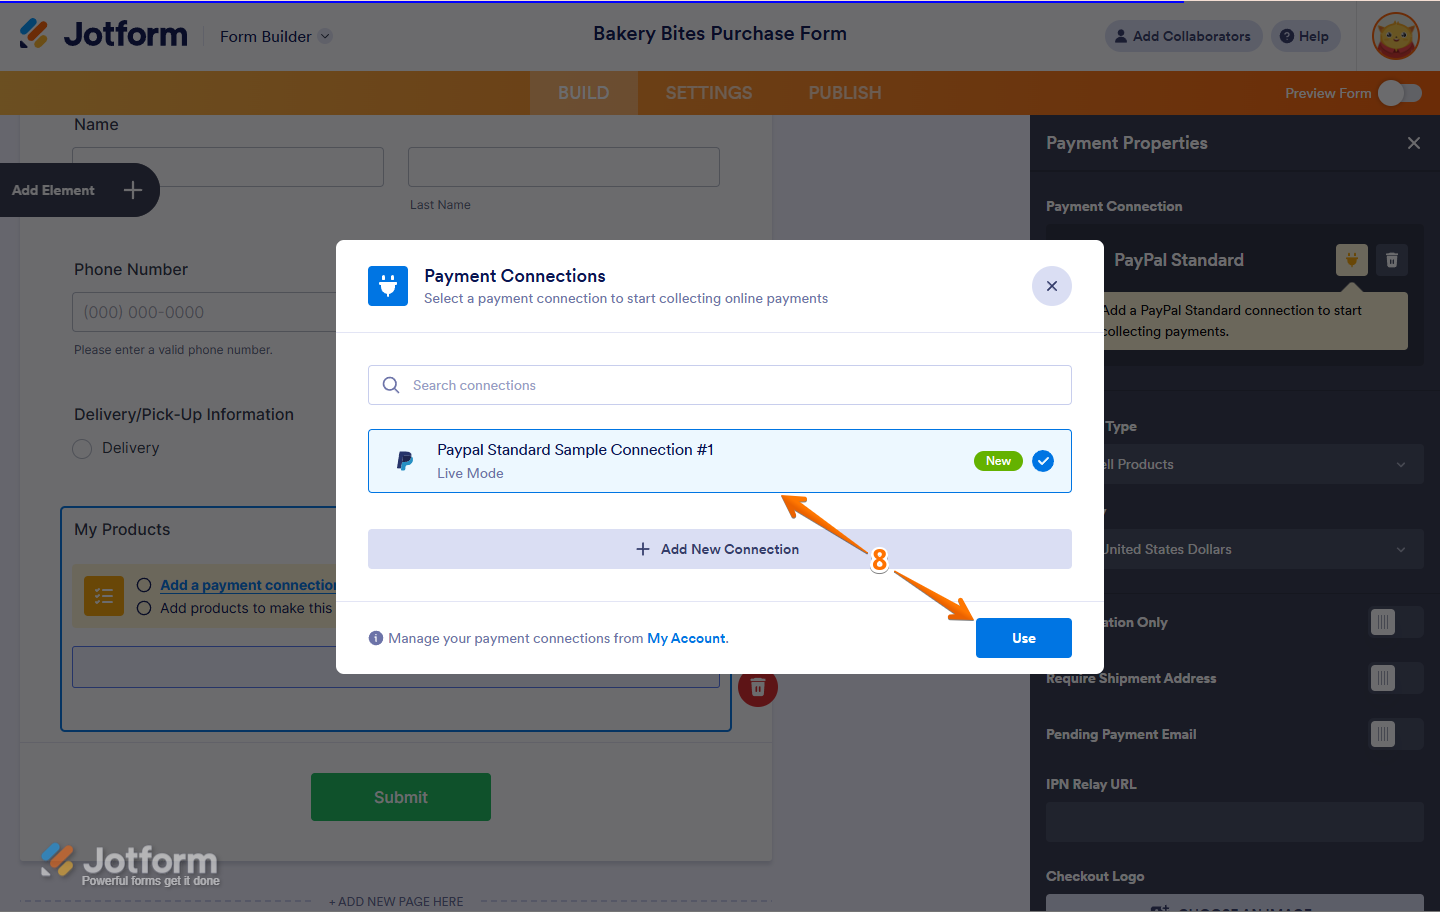
- Now, in the Payment Connections window, click on the PayPal Standard Connection you’ve just added, and then click on Use at the bottom.
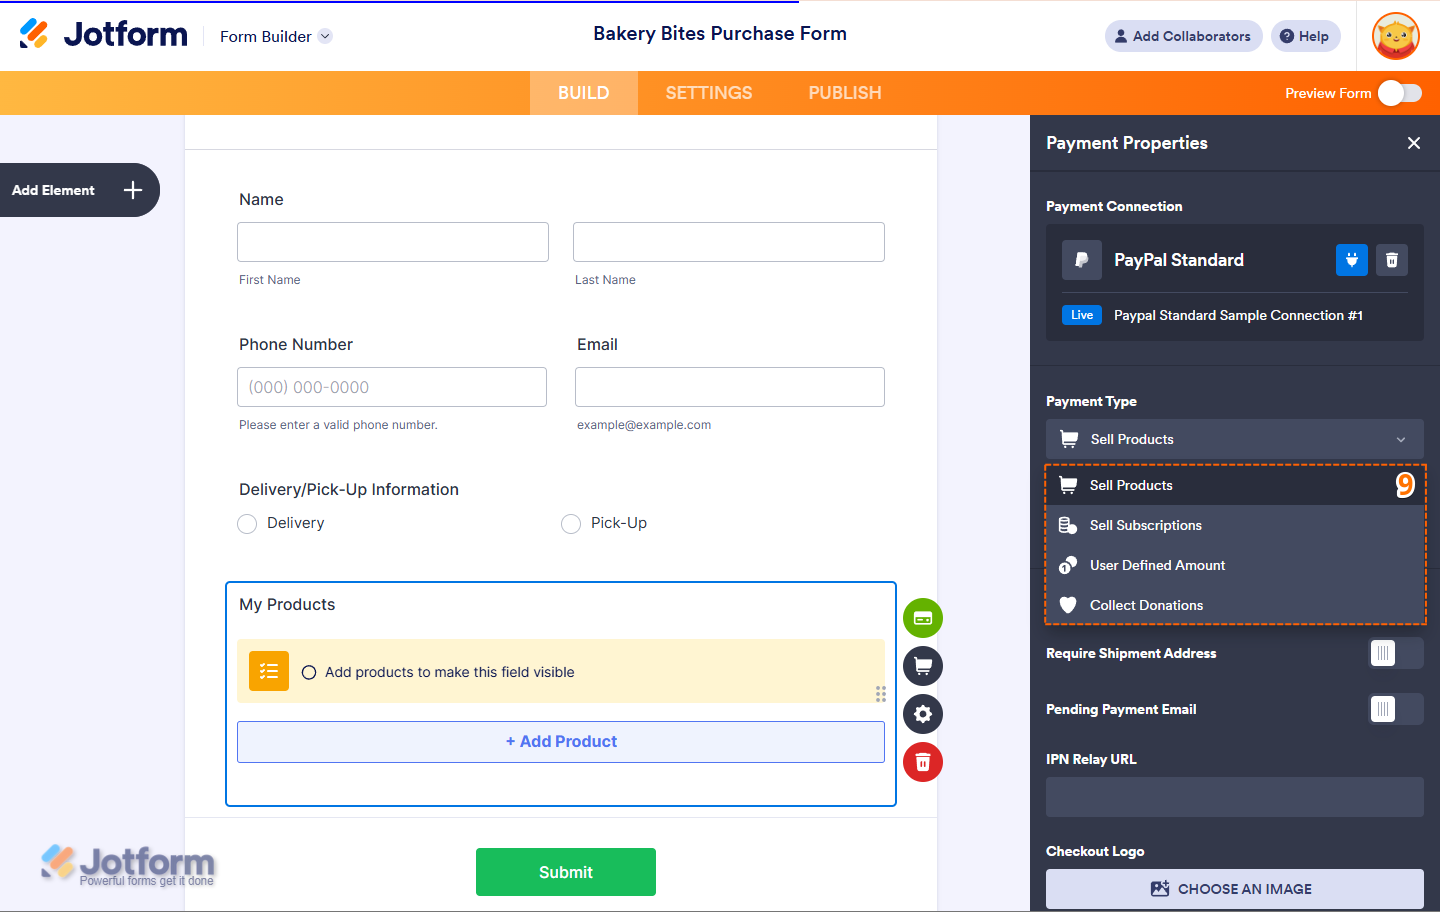
- After that, in the Payment Type Dropdown menu, select what you’d like the payment to be processed for:
- Sell Products — This is selected by default. Use this to sell physical or digital goods at a fixed price, allowing customers to make a one-time purchase.
- Sell Subscriptions — Choose this to charge customers on a recurring basis for services, memberships, or other ongoing access.
- User-Defined Amount — This lets customers enter the amount they want to pay. It’s useful for tipping, custom amount pricing, or flexible payments.
- Collect Donations — Select this to accept voluntary contributions, commonly used for fundraising, nonprofit support, or charitable causes.
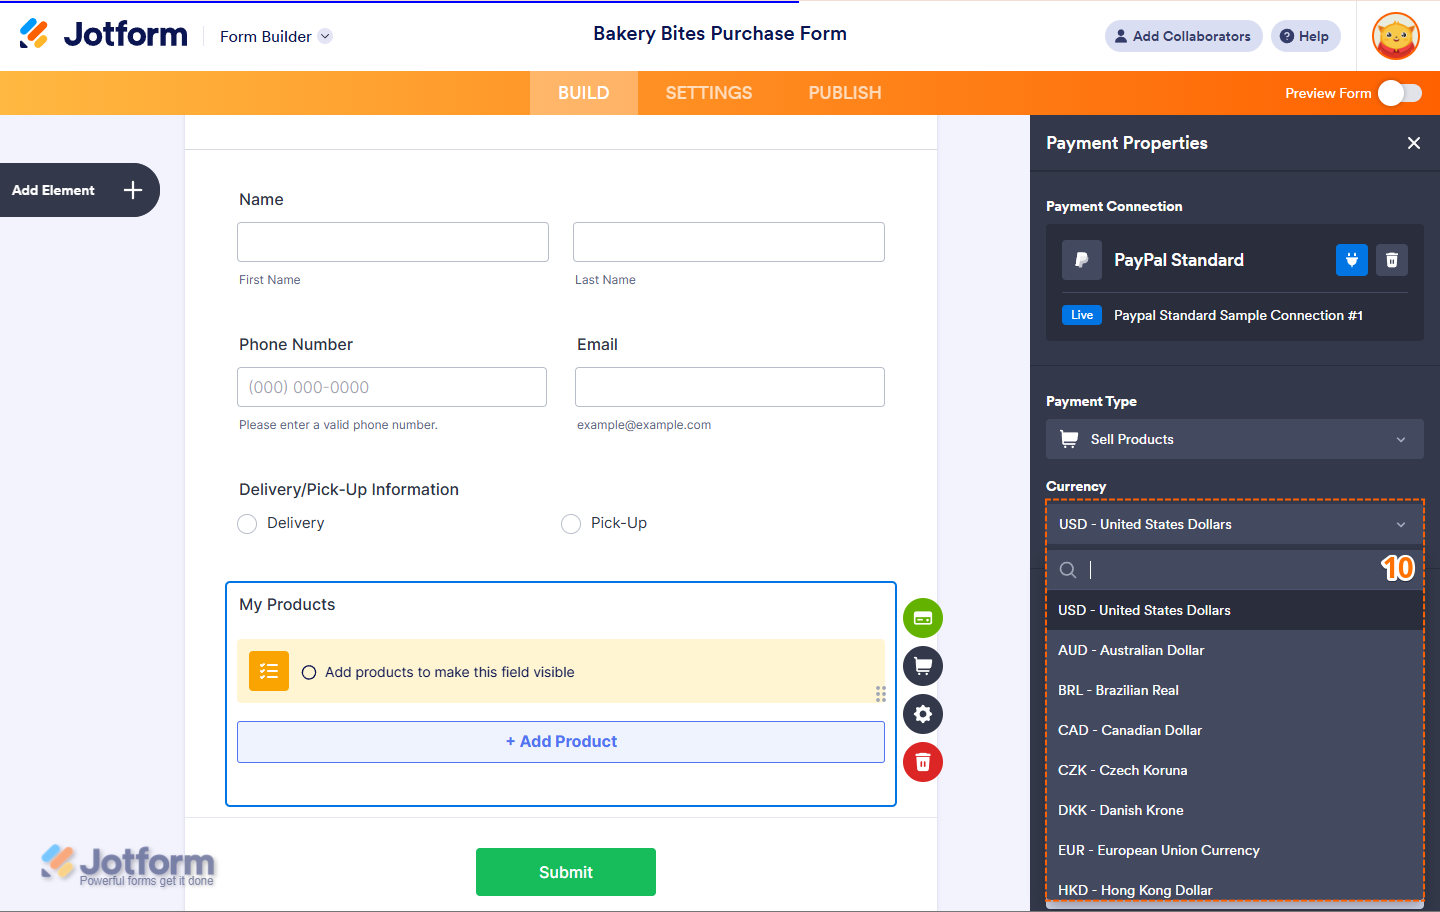
- Then, in the Currency Dropdown menu, select one of the currencies available with the integration. Check out PayPal’s Supported Currencies page for a complete list of those.
Here are other gateway settings you can configure as needed:
- Authorization Only — PayPal Standard supports charging customers at a later date. Check out this guide about Enable Payment Authorization to learn more about it.
- Require Shipment Address — Enable this if you need to collect the customer’s shipping address during checkout.
- Pending Payment Email — Enable this to notify users via email when their payment is marked as Incomplete. Check out this guide about How to Set Up Incomplete Payment Notification to learn more about it.
- IPN Relay URL — Enter a custom Instant Payment Notification (IPN) URL if your workflow requires server-side communication for payment events.
- Checkout Logo — Upload a logo image that will appear on the PayPal Checkout page, helping reinforce your brand.
- Checkout Language — Choose the language for the PayPal Checkout page to match your audience’s locale.
- Checkout Cart Color — Set the background color of the PayPal Checkout cart to visually align with your form or brand theme.
- Redirected PayPal Page Style — Enter the name of a custom PayPal page style to match the branding of your business during checkout. This must be configured within your PayPal account.
And you’re all set! You’ve successfully set up your PayPal Standard Reusable Payment Connection. You can now use this same configuration on any other forms or apps you create.
You may also want to check out these guides about:
- Setting Up Your First Order Form
- How to Set Up a Recurring Payment Option
- How to Add Options to Payment Forms
- How to Add Coupon Code to Payment Forms
- How to Add Tax to Your Payment Form
- How to Add Shipping Cost to Payment Forms
- How to Generate an Invoice for Your Payment Form
- How to Enable and Manage Product Stocks in Payment Fields
Payment Flow for PayPal Standard
The PayPal Standard process the payment through it’s dedicated checkout page. Here’s the overview flow of that:
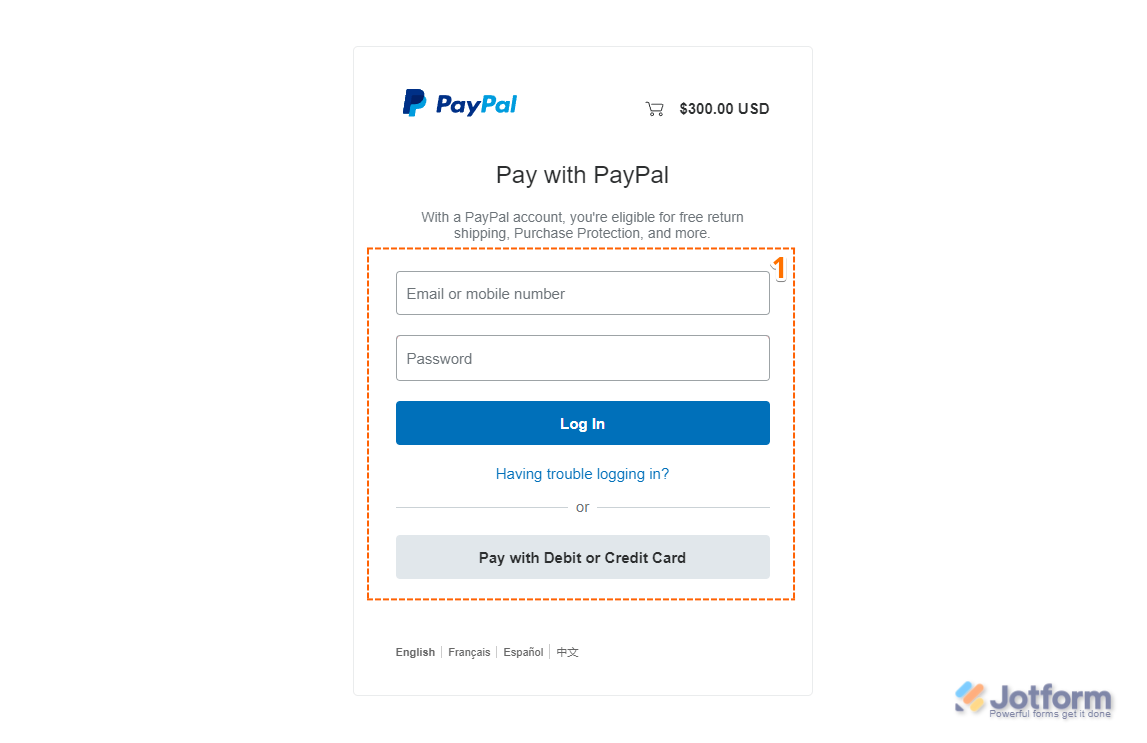
- After your customer click on submit on your form, they’ll be taken to the PayPal Payment Page where they can either log in to their PayPal account to pay or just use a debit or credit card, whichever works best for them.
Notes
- If you don’t enable Guest Checkout or your PayPal account was created in a country that doesn’t support it, your customers will see a Create Account button instead.
- The Pay with Debit or Credit Card option only shows up if Guest Checkout is enabled in your PayPal settings, and it’s only available in supported countries like the USA, UK, and Canada. Check out PayPal’s Guest Payments page for more details.
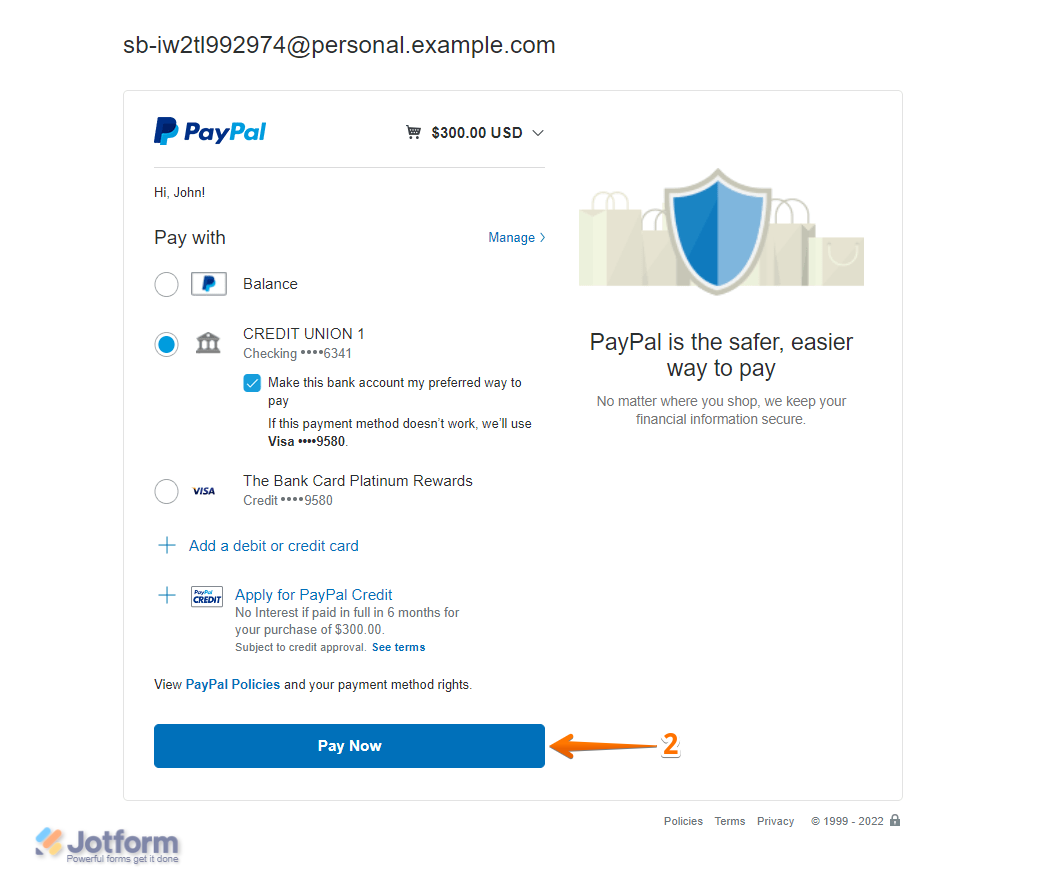
- Now, after they’ve chosen their payment option, your customers will be redirected to the PayPal page where they just need to click on Pay Now to complete the payment.
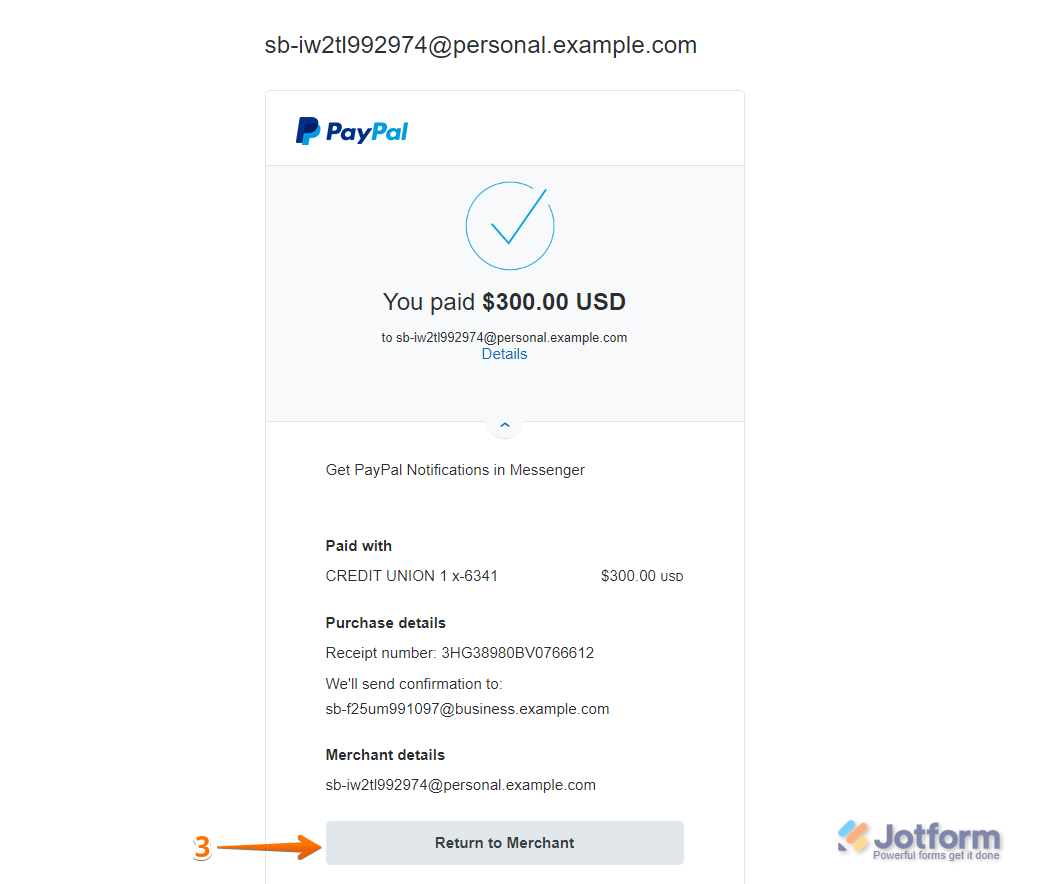
- Once the payment is successful, PayPal will show a confirmation screen. Your customers will just need to click on Return to Merchant to get your form’s Thank You Message, and that’s it!
Pro Tip
Remind your customers to click on Return to Merchant after completing their payment on PayPal. This final step ensures the transaction is properly recorded by both PayPal and Jotform, and helps prevent the submission from being marked as Incomplete.

Send Comment:
4 Comments:
More than a year ago
por favir conectar mi web con paypal
More than a year ago
Is there a minimum amount for using Paypal? My form is giving users an error saying minimum $25 required (the item is $20).
More than a year ago
it keeps showing the error msg after input all the debit /credit card info in publish page
""We're sorry, something seems to have gone wrong. Please try again.""
it works well in sandbox... may i know how to fix this issue ?
More than a year ago
" Here’s an example form that uses PayPal Personal: https://form.jotformpro.com/72442455966970.
Feel free to submit it to test the form. It is in Sandbox mode. "
This link is no good. do you have another to replace it?
constitutionpartyesr@gmail.com