Box is a powerful tool for storing files online, sharing content securely, managing projects, and collaborating with your team. If you’re looking to keep your form submissions organized and easily accessible, integrating your form with Box is a smart and seamless solution.

Integrating your form with Box makes your workflow more efficient, and it’s simple to set up. Here’s how:
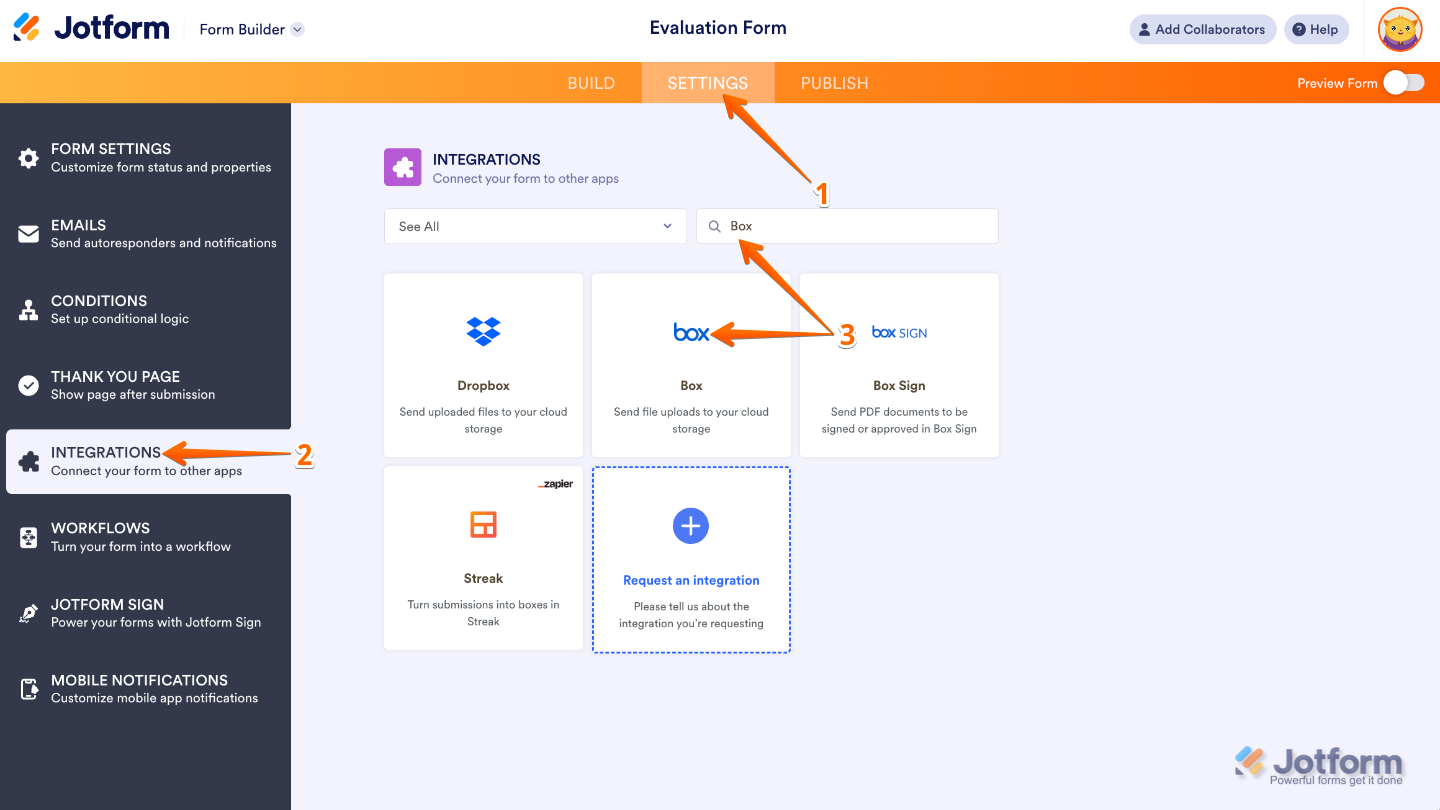
- In Form Builder, in the orange navigation bar at the top of the page, click on Settings.
- Click on Integrations in the menu on the left side of the page.
- Search for Box, and then click on it.
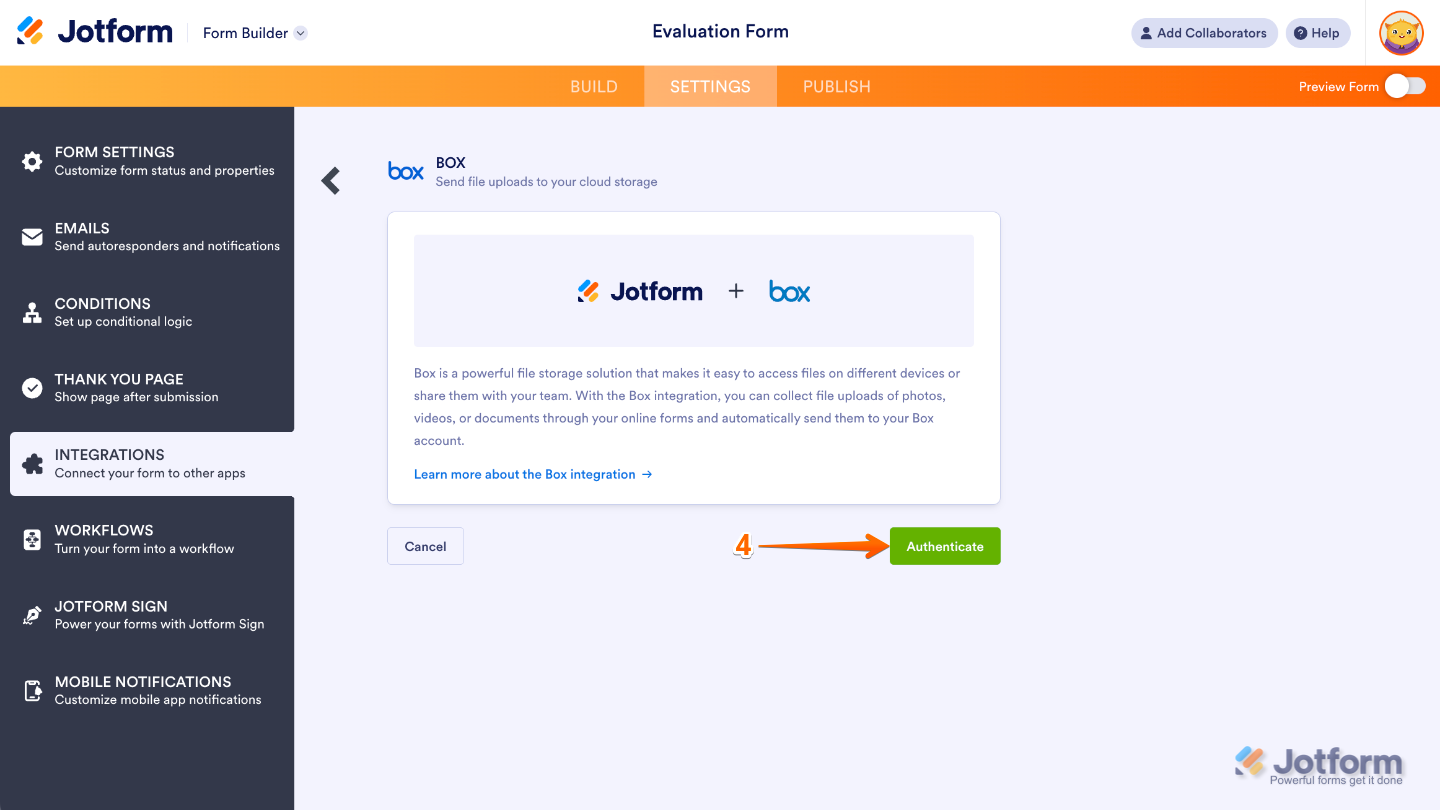
- Next, click on Authenticate.
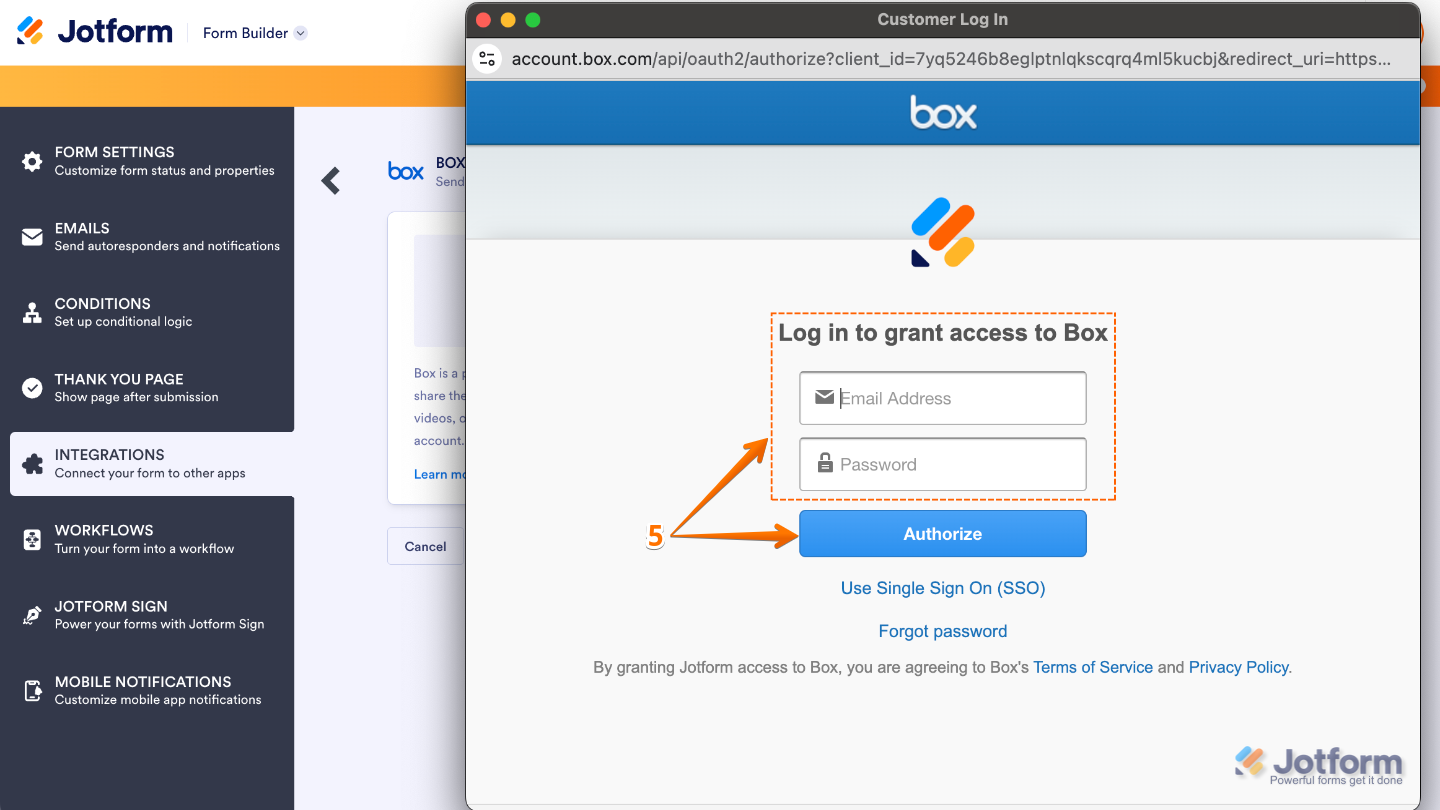
- In the window that pops up, log in to your Box account, and then click on Authorize.
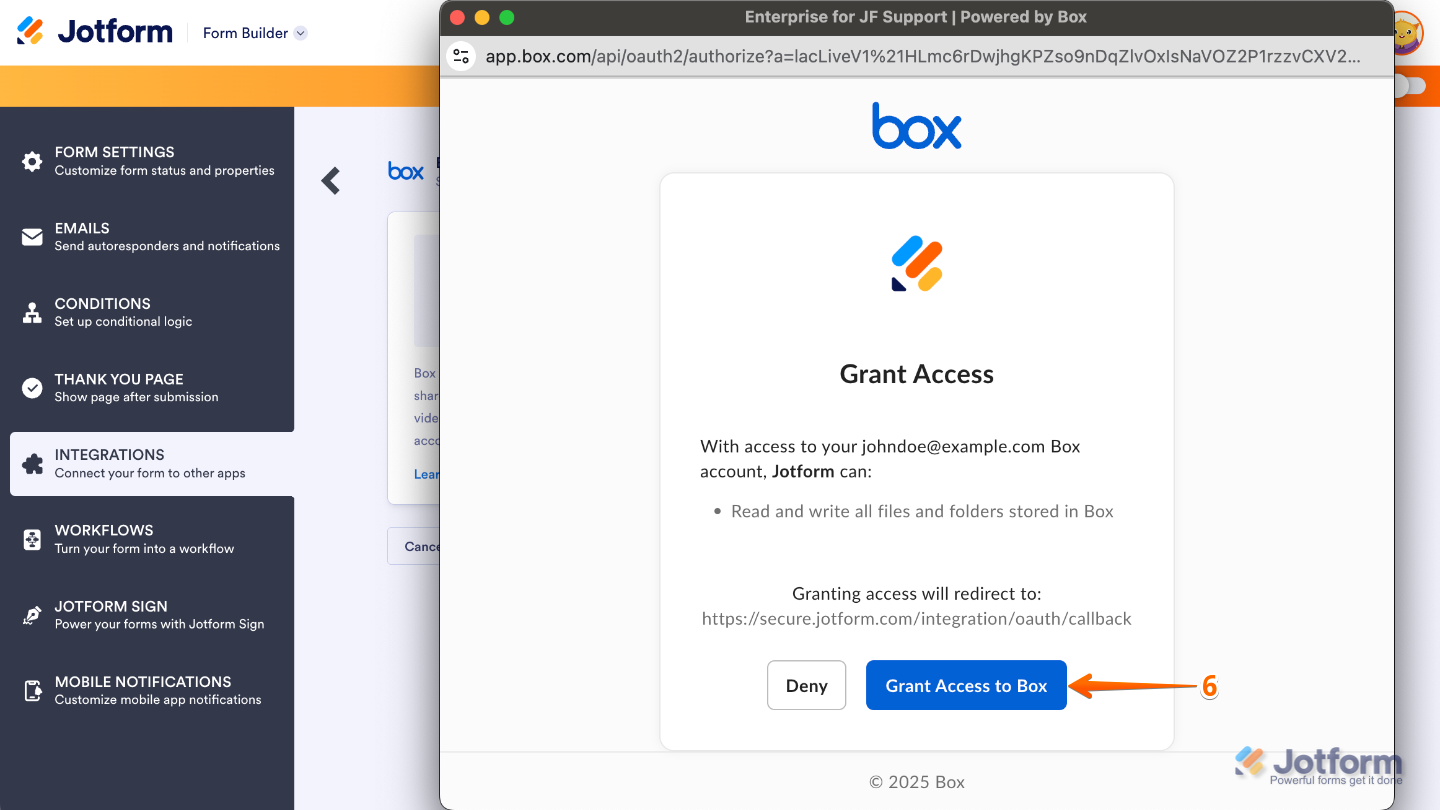
- Once logged in, click on Grant Access to Box.
- Then, edit these to finish the setup:
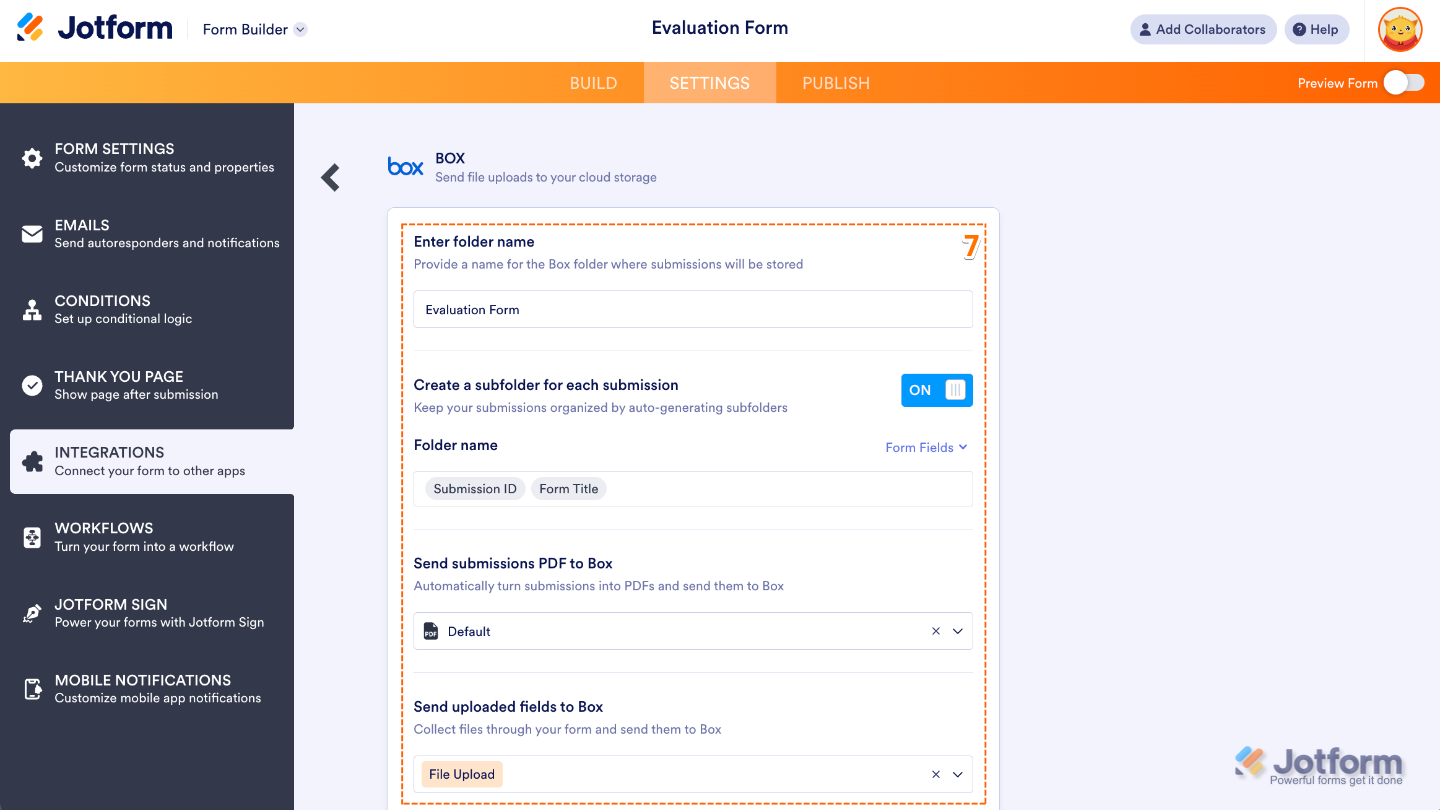
- Enter Folder Name — This will be your main Box folder.
- Create a Subfolder for Each Submission — Turn this On if you want to create a separate folder for each submission inside the main Box folder. You can type your custom folder name or dynamically create it based on Form Fields.
- Folder Name — This will show up when the Create a Subfolder for Each Submission feature is switched on. It will designate a subfolder name for your Box based on the form fields you selected.
- Send Submissions PDF to Box — Select which PDF document to send to Box. You’ll see Default if you haven’t created a PDF document yet. Want to rename your PDF? Our guide about How to Assign a Custom File Name to Your PDF Report shows you how.
- Send Uploaded Fields to Box — Select which file upload to send to Box. You can select multiple if you want to.
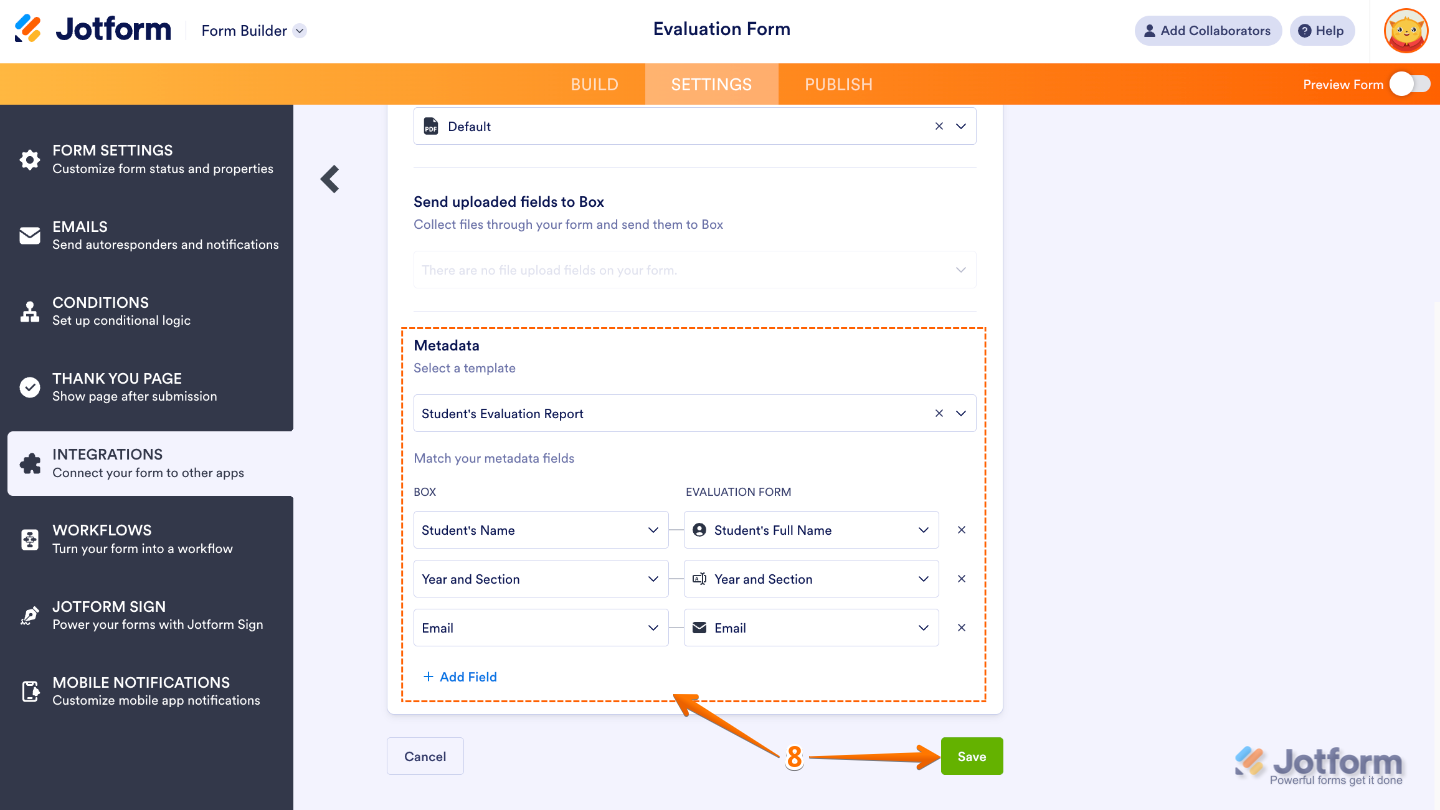
- Now, scroll down to the Metadata section and then Select a Template. Start mapping your form fields and click on Add Field if you want to map more. Once you’re done, click on Save.
That’s it. After saving the integration, you can see the created link going to your Google Drive Folder. If you hover your mouse over the created action, you’ll see the Edit icon, where you can edit the integration itself. And if you click on the Three Dots icon, you’ll see these other options:
- See Action Logs — This section will display your Box integration’s successful and failed runs. It’s useful when troubleshooting issues.
- Rename Action — Change this if you want to personalize the action’s title.
- Disable Action — This is useful to temporarily stop the integration from sending files.
- Delete Action — Select this if you want to completely remove the integration from your form.
If you want to edit the integration, click the Edit icon in the top-right corner of the Box integration window:
Note
If the subfolder is disabled, your file uploads and PDFs of your submissions are saved in the main folder. If the file names are the same, Box overwrites the older ones but automatically handles the revisions for you. You’ll find more info in this guide on Box: Accessing Version History.

Send Comment:
3 Comments:
143 days ago
I have got it to send my file to Box but not the form, how do you set that up
More than a year ago
We did all of these steps - twice - with no results. Please call me asap to fix this issue. Lori Kurth
More than a year ago
Why does my refresh token keep expiring and how do I prevent it from expiring?