Transferring forms and data to another account in Jotform is a straightforward process that ensures seamless collaboration or ownership changes. You can move your forms and associated submission data to a different account with just a few steps. This feature is handy for team transitions, account consolidations, or delegating responsibilities while keeping all information intact.
Before moving with the transfer, ensure you meet the following conditions:
- You must have the correct email address of the new owner.
- The form(s) you will transfer are not connected to Jotform products, such as Jotform Apps, Jotform Store Builder, and Jotform Workflows. If connected, you should remove the connections.
- It’s not possible to transfer forms to or from HIPAA-friendly accounts.
- If the target or source account is Enterprise, you should contact to Enterprise Support.
In addition to above, to be able to successfully transfer form(s), form(s) should not have any connection to the other products. The list below shows the complete list a form should not have for a successful transfer to another account:
- Form should not have connection to an AI Agent.
- Form should not have a Workflow, or it should not be in an Assign Form element in other Workflow.
- Form should not be included in an Jotform App.
- In the form’s Tables, there should not be any connection to other forms via Tab or Send Form Action Button, and form should not be included in any other forms’ Tables as Tab and/or Action Button.
- The form’s Tables should not be included in any Sentbox and/or Report element in a Jotform App.
- The form’s Boards should not have a connection to any other form, AI Agent, Workflow, and/or E-sign.
Processing the Form Transfer
To transfer forms:
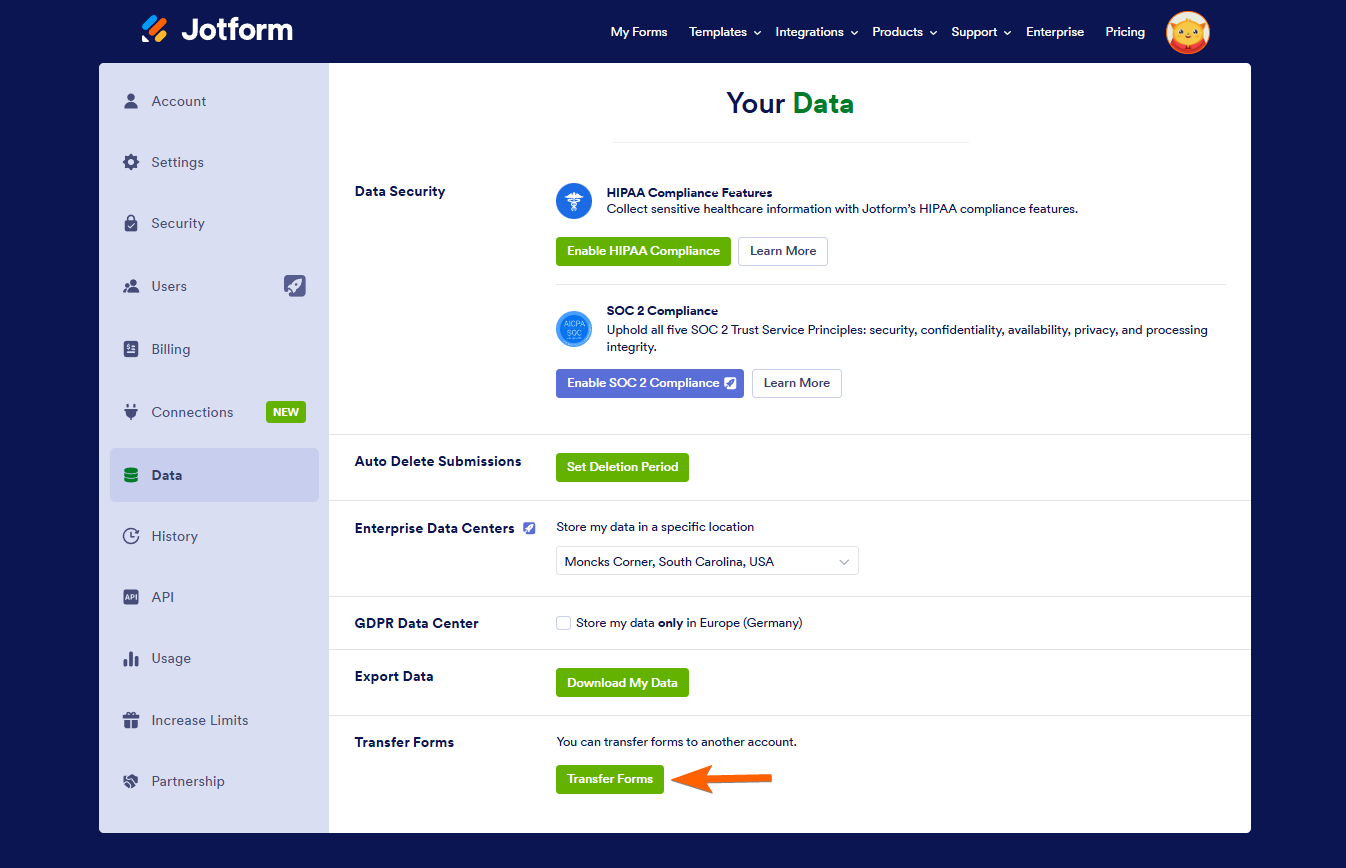
- Go to the Data page of your account.
- Start the transfer process by clicking the Transfer Forms button at the bottom part of the page.
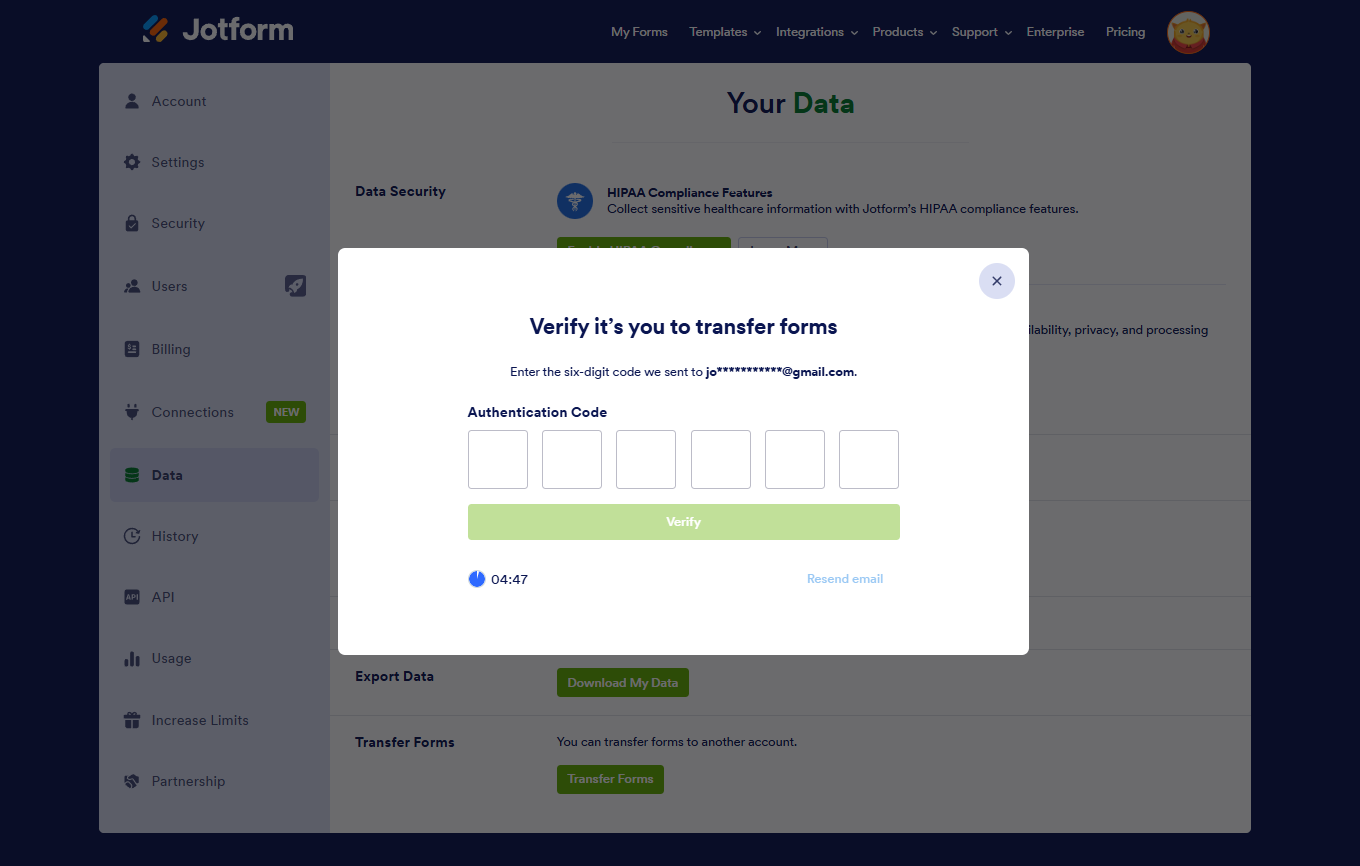
- Enter the verification code sent to the registered email address of your account.
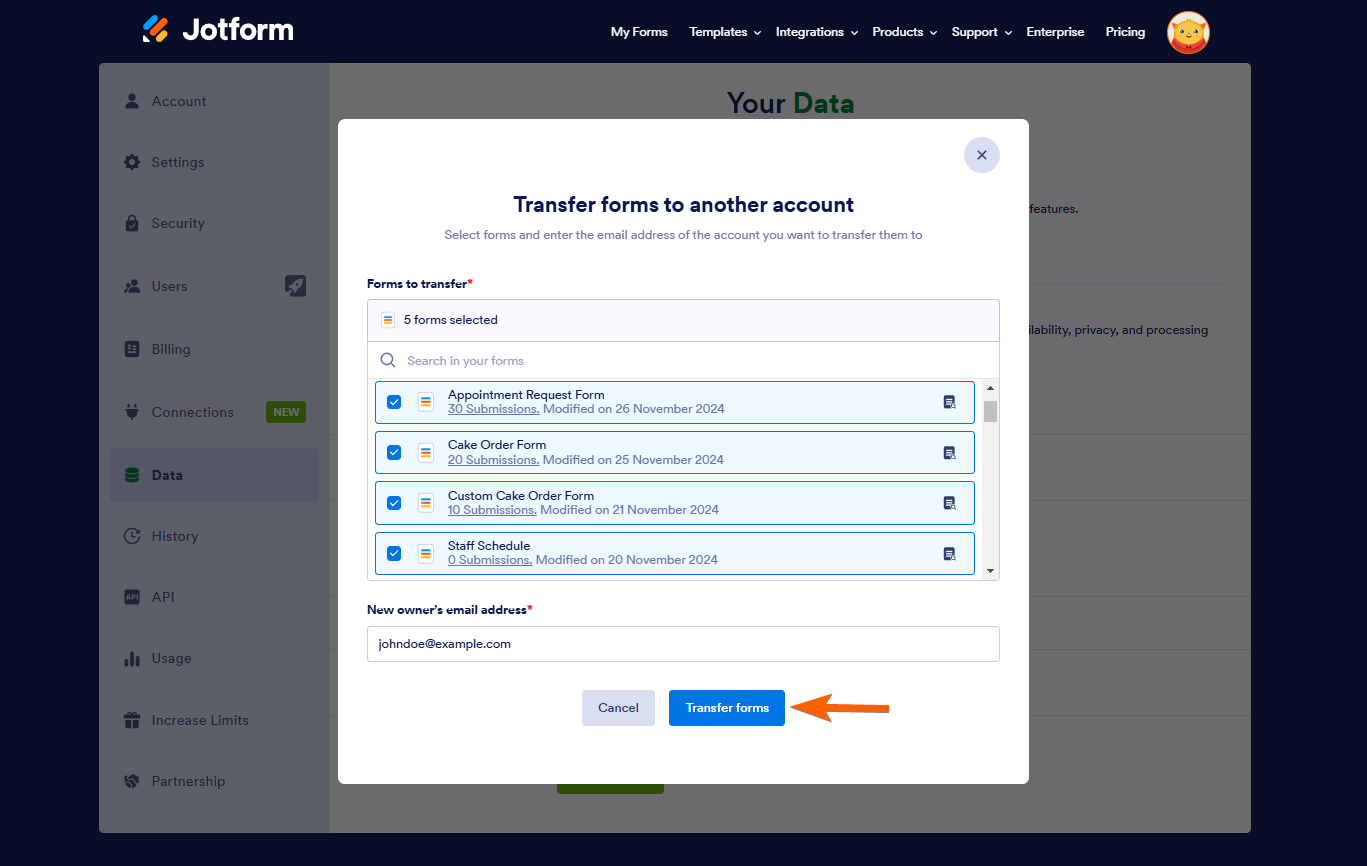
- Search and select the forms you wish to transfer.
- Click the Transfer Forms button.
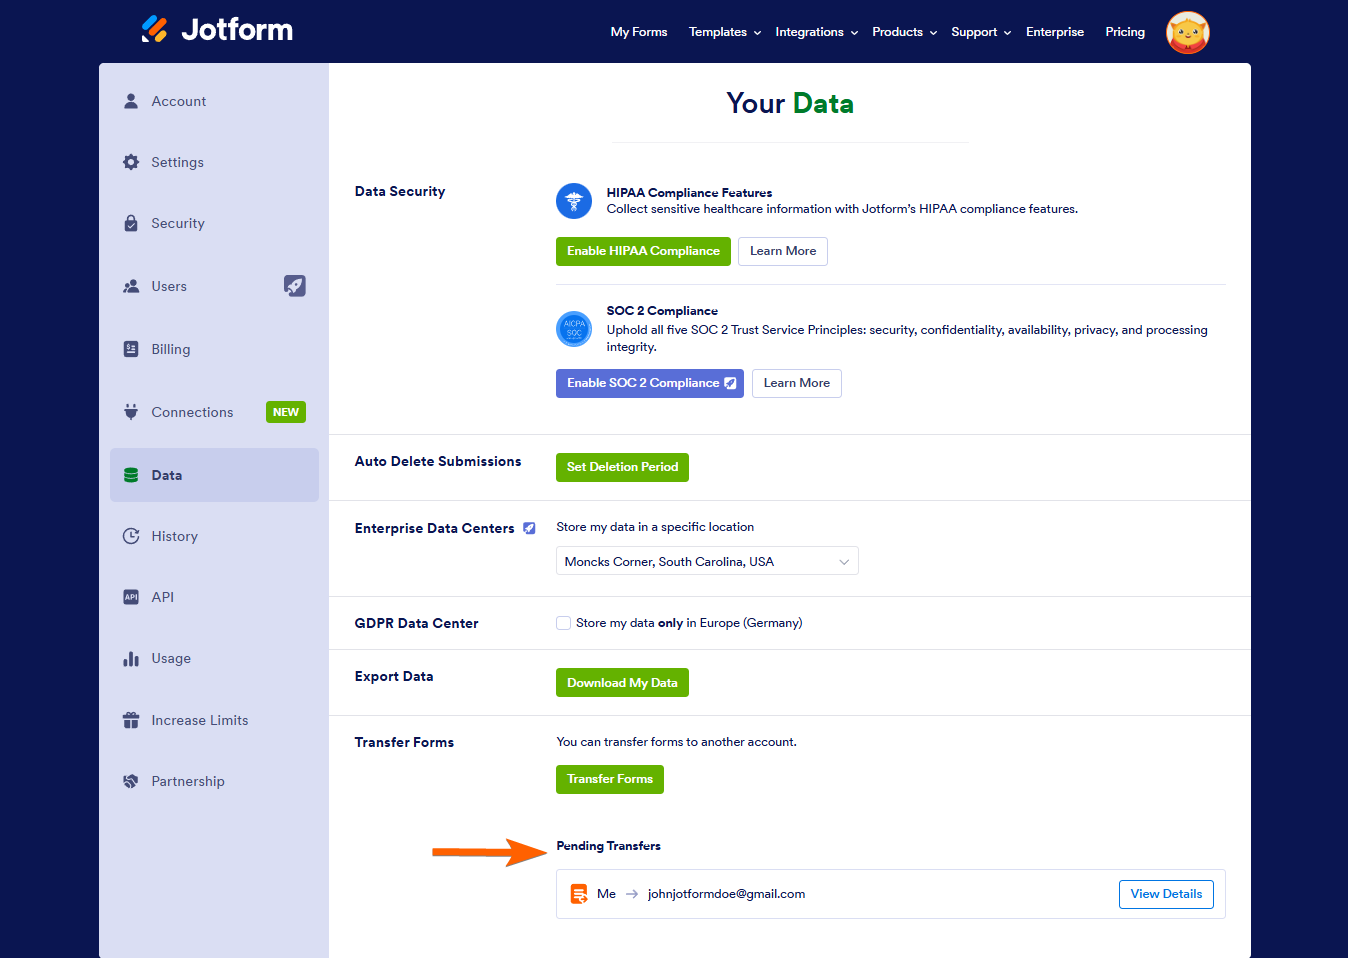
At this moment, the new owner will have to accept the transfer request. You will see all Pending Transfers in the same section of your account.
Note
A form transfer request can contain maximum 15 forms. Note that you can only create maximum 20 form transfer requests in 60 minutes.
Accepting Form Transfer Request
To accept a form transfer:
- Go to the Account – Data page and click the View Details button under the Pending Transfers.
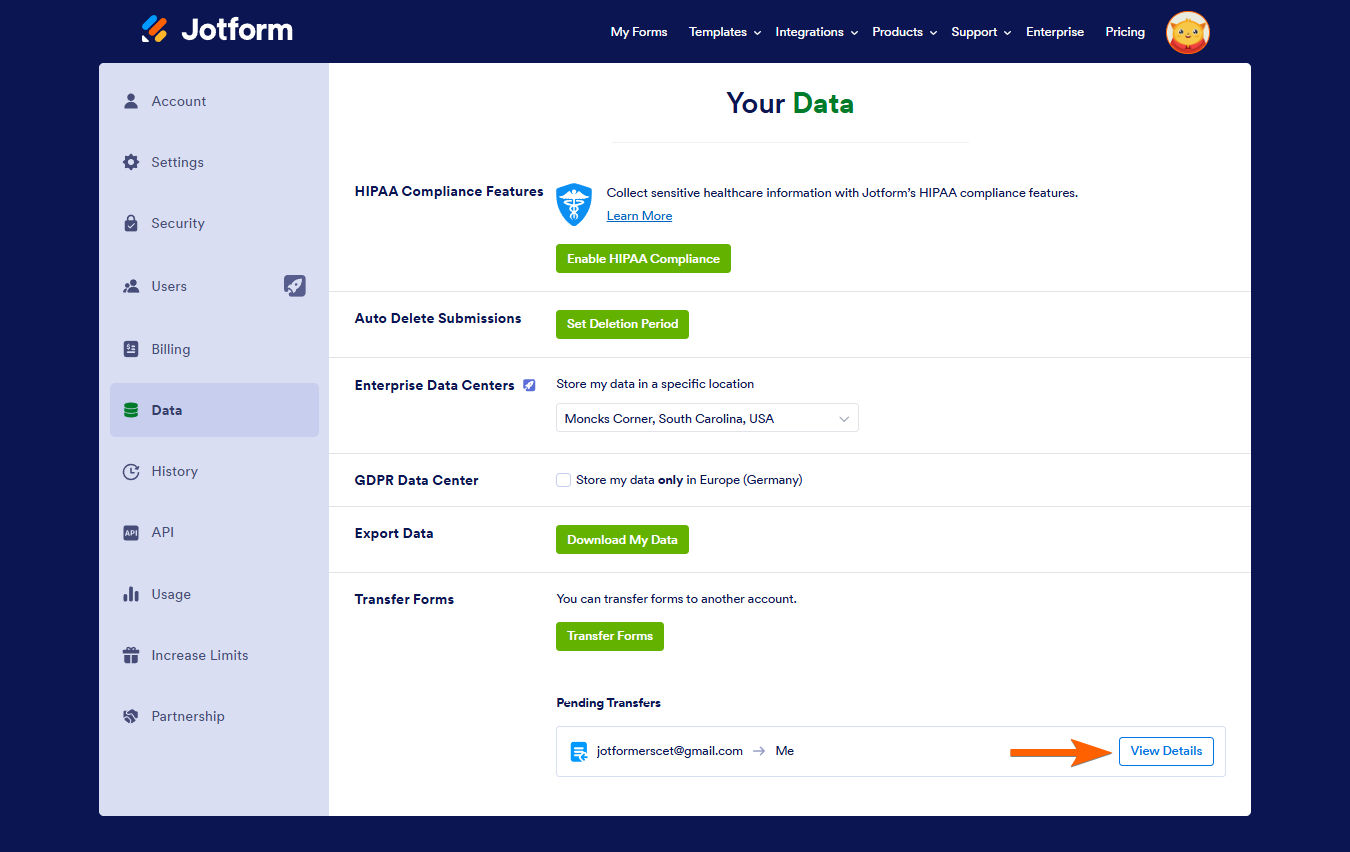
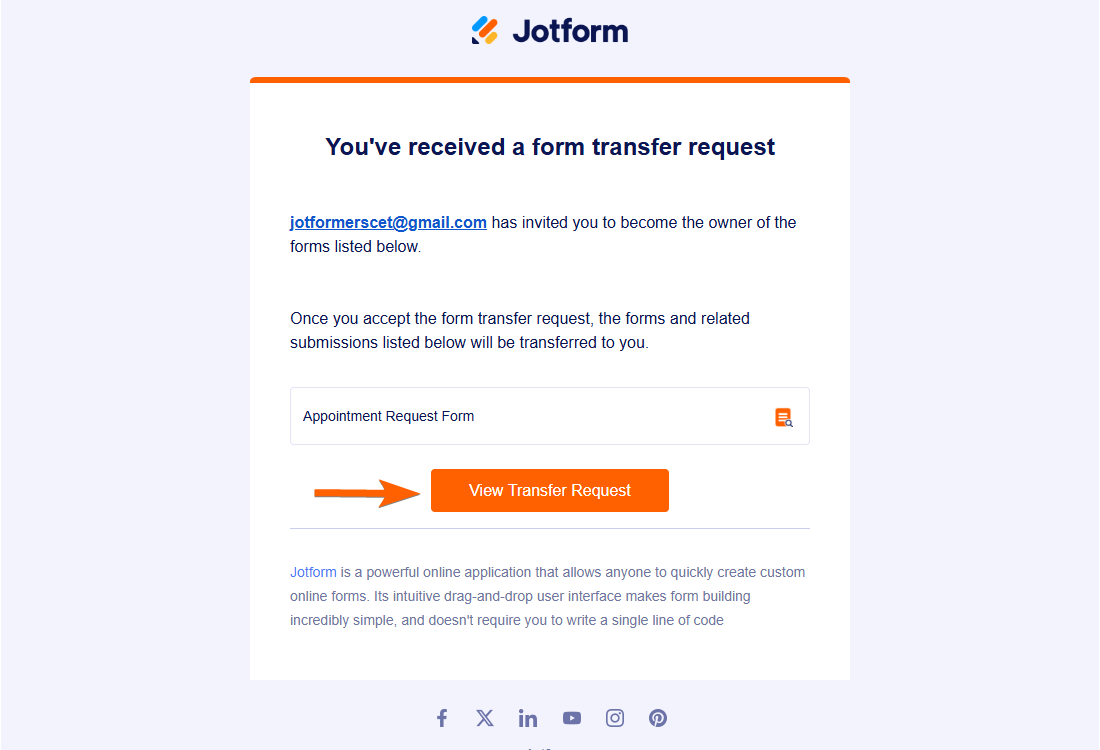
Alternatively, click the View Transfer Request button on the email sent to you upon the transfer request of the form owner.
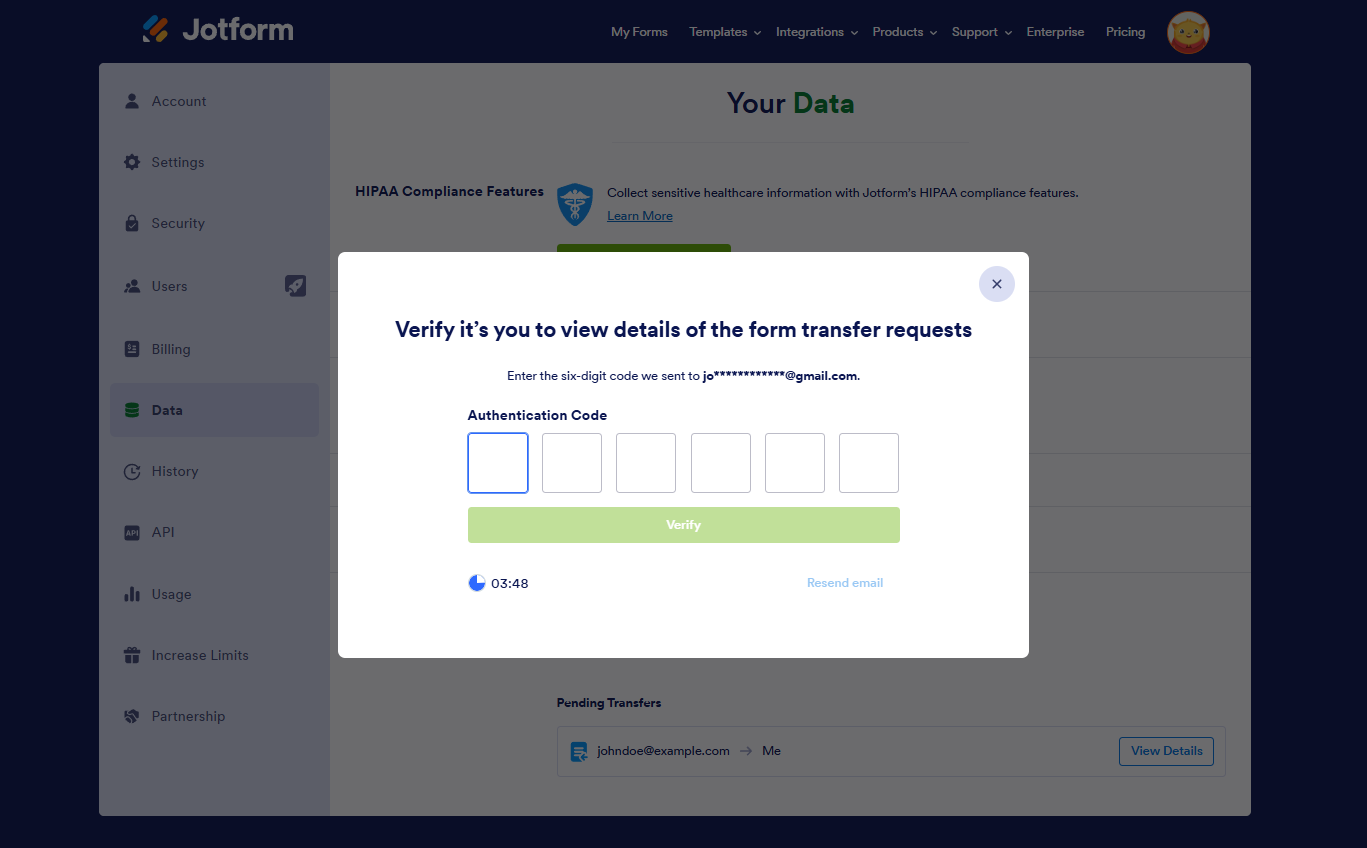
- Enter the verification code sent to your registered email address to view the details.
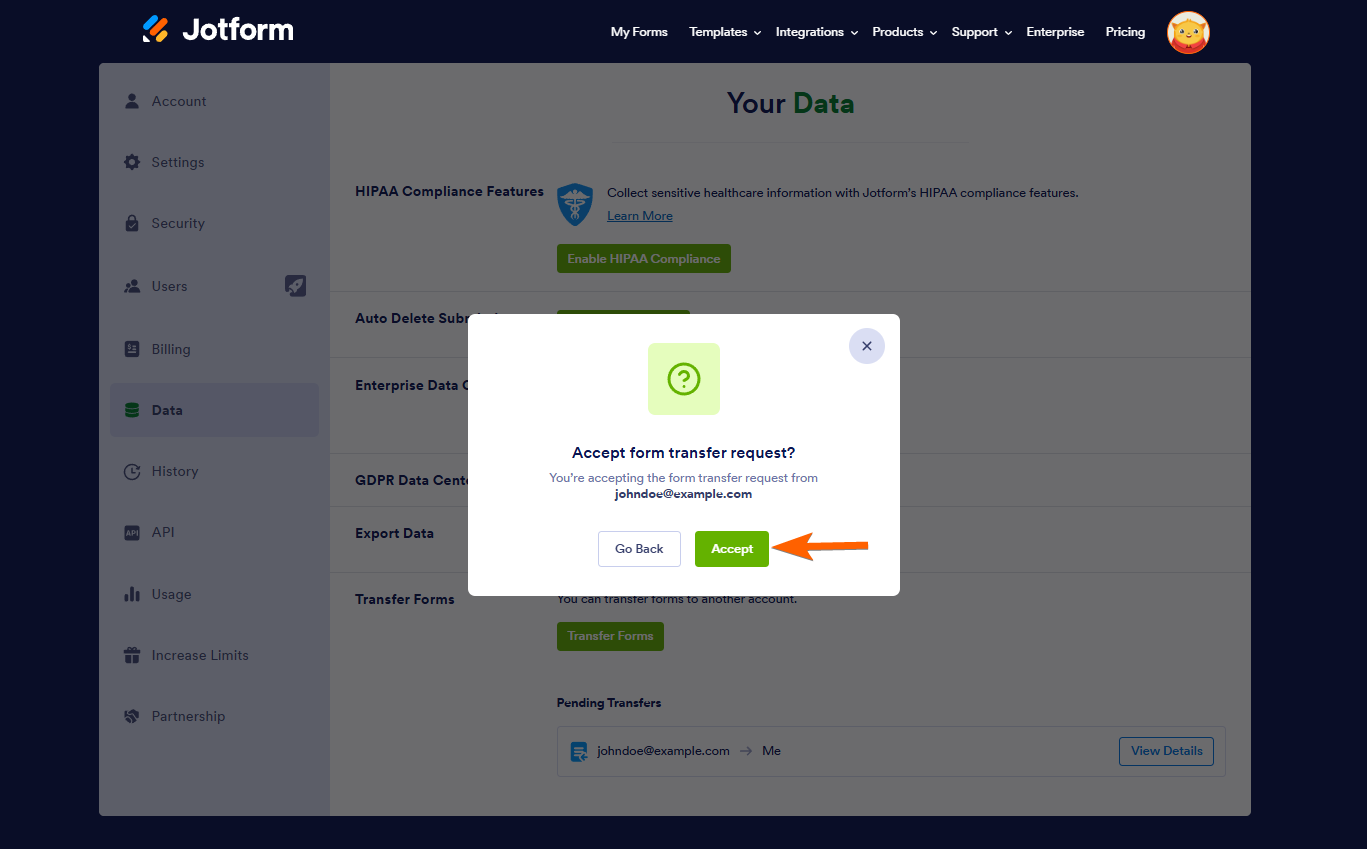
- Here, you’ll see the forms to transfer. Review the list and click the Accept button to proceed.
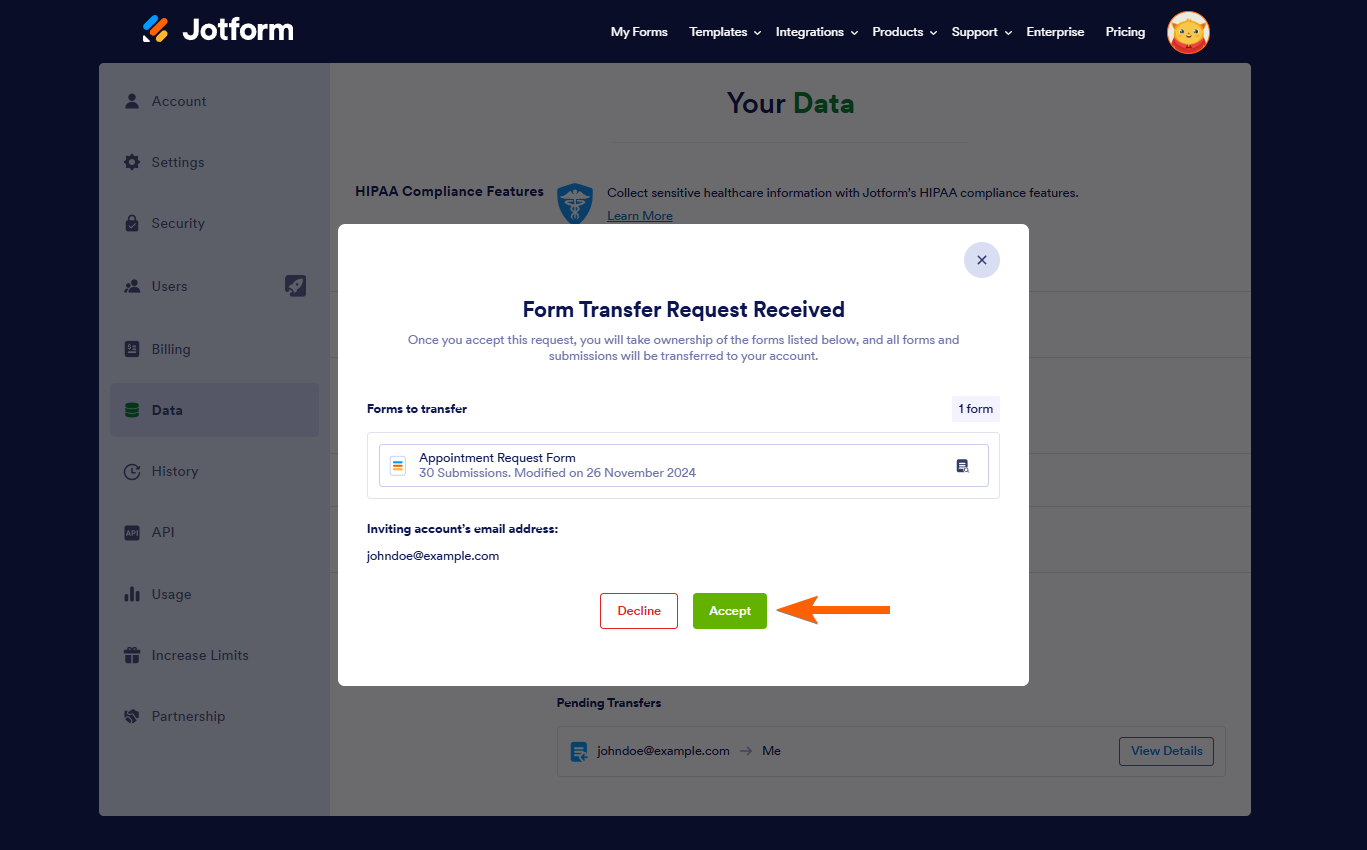
- Finally, click the Accept button to accept the transfer.
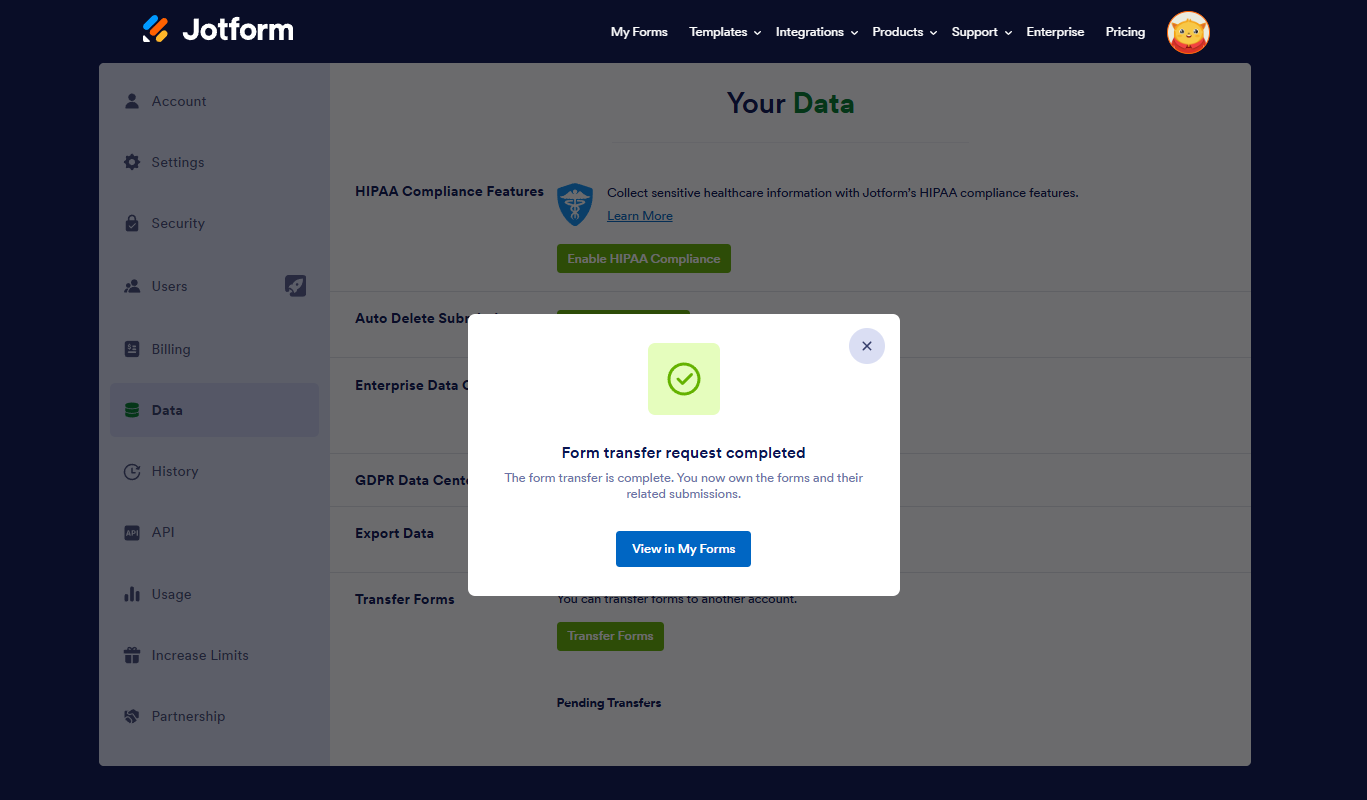
5. You will get a confirmation on-screen and in the email that the transfer is complete. It will also clear the Pending Transfers in your and the owner’s accounts.

Send Comment:
13 Comments:
99 days ago
So there's no way of transferring other products? For example, I had a form with workflows; there's no way for me to transfer the flows?
154 days ago
Is the click and drag to a folder under shared with me still going to still be an option?
212 days ago
Please transfer this form
261 days ago
Will the URL change when the account is transferred?
270 days ago
Juste to make sure, if I ask for a transfer from account#1 to account #2, will I still have the form in account #1 afterwards? And in account #2?
Can I clone a form from an account to another?
Thanks
More than a year ago
I would like to change email address but it shows "This email address is already associated with a Jotform account.". The problem is we have deleted the Jotform account 3 weeks ago but till now the issue is not solved. Can you assist me on this?
Its an urgent matter.
Thanks in advance for your time and consideration for this matter.
More than a year ago
can i also transfer apps
More than a year ago
How long will it take to transfer my forms to a different account?
More than a year ago
If a form gets moved, does it retain the same URL?
More than a year ago
I love Jotform, but we cannot afford the enterprise accounts . We are paying for two accounts but cannot share anything.... it's becoming a problem and we may have to close the accounts.
More than a year ago
I forgot the password of my Jotform account and the email i use to register has been disable kindly help me out
this is the form:
More than a year ago
Hello,
Can i move forms from another account to my account if i have reach the maximum capacity of forms on my account? (5 forms for my account)
Best regards
Rafaël
More than a year ago
Can this be done over the weekend?