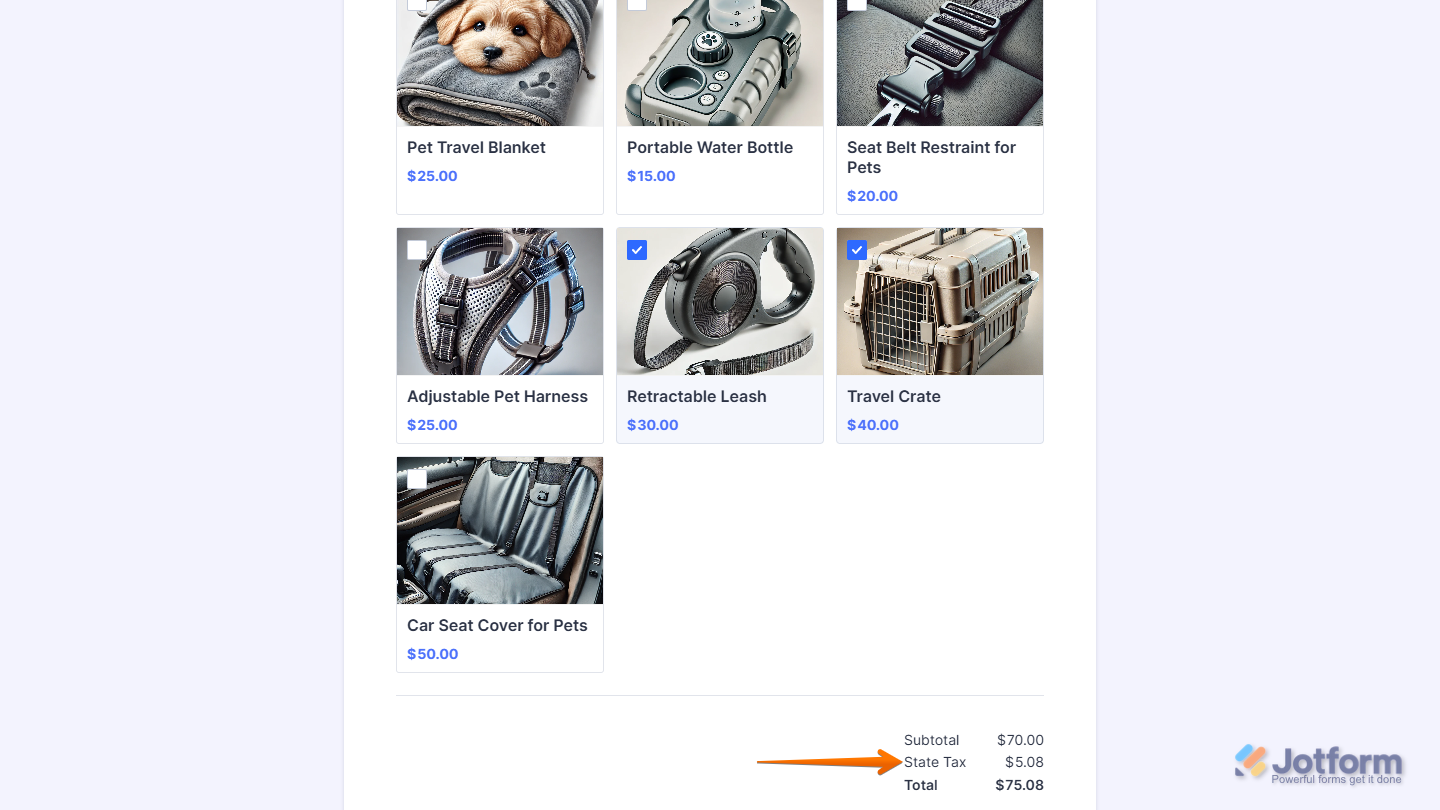
Applying tax to products on your payment forms keeps you compliant and makes pricing more transparent for your customers. You can apply sales tax as a percentage, either as a base rate or based on their location. Jotform handles the calculations automatically for each submission, ensuring accurate charges and a smooth checkout experience.
Setting Up the Base Tax Rate
Whether you’re creating a new payment form or updating an existing one, you can start by setting a base tax rate that applies to all taxable products on each submission. Here’s how to do it:
- Open your form in Form Builder, and click on the Payment field.
- Now, on the right side of it, and depending on the method you used to set it up:
- Click on the Wand icon to open the Payment Settings section.
- Click on the Shopping Cart icon to open the Product List section.
- Then, under the Tax tab, in the Menu on the right side of the page, enter a tax rate (as a percentage) into the Base Tax Rate section. Or, leave it empty if you only want to charge customers based on their location.
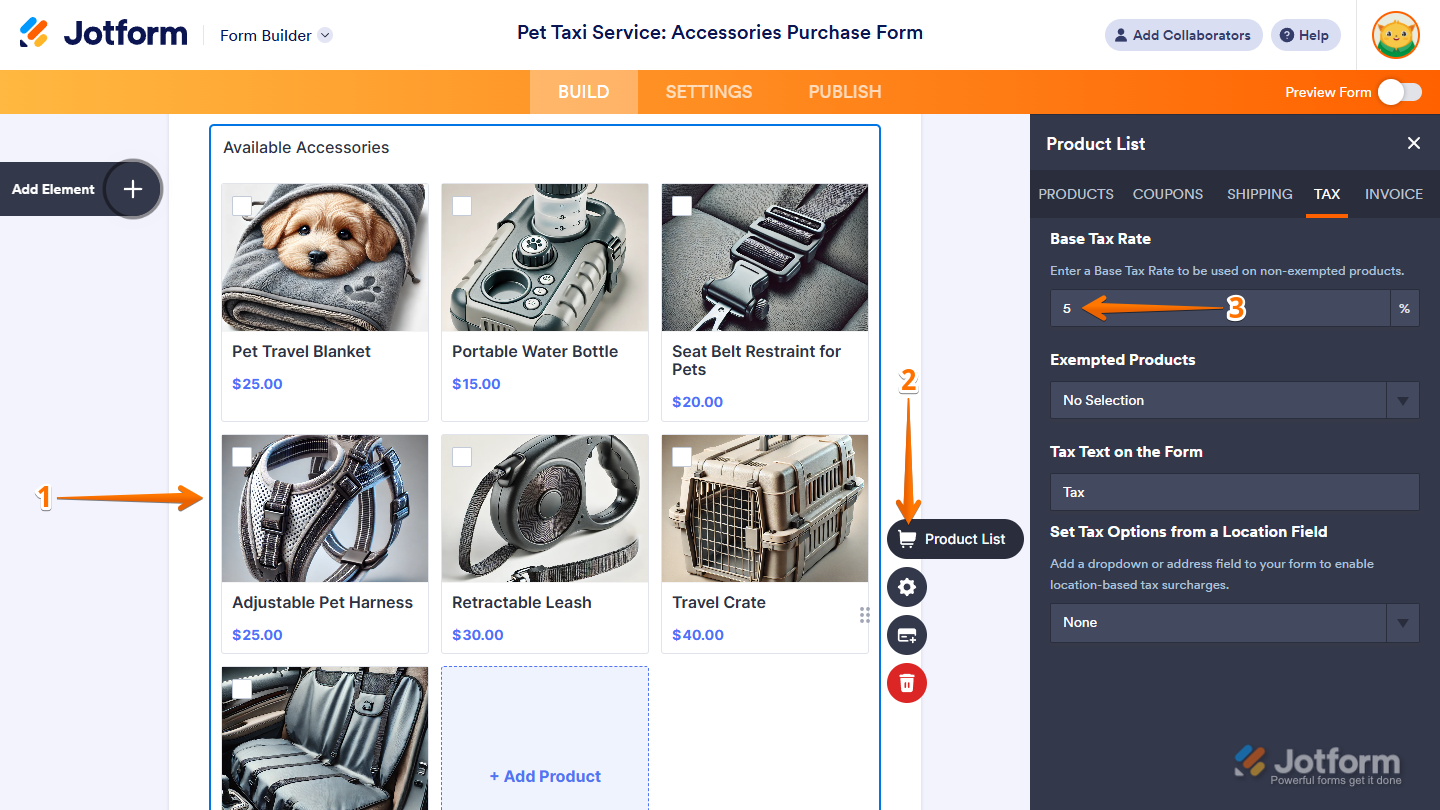
- Next, click on the Exempted Products dropdown and tick the boxes next to any products you don’t want to charge tax on.
- In the Tax Text on the Form section, enter the label you want to show on the form instead of the default one.

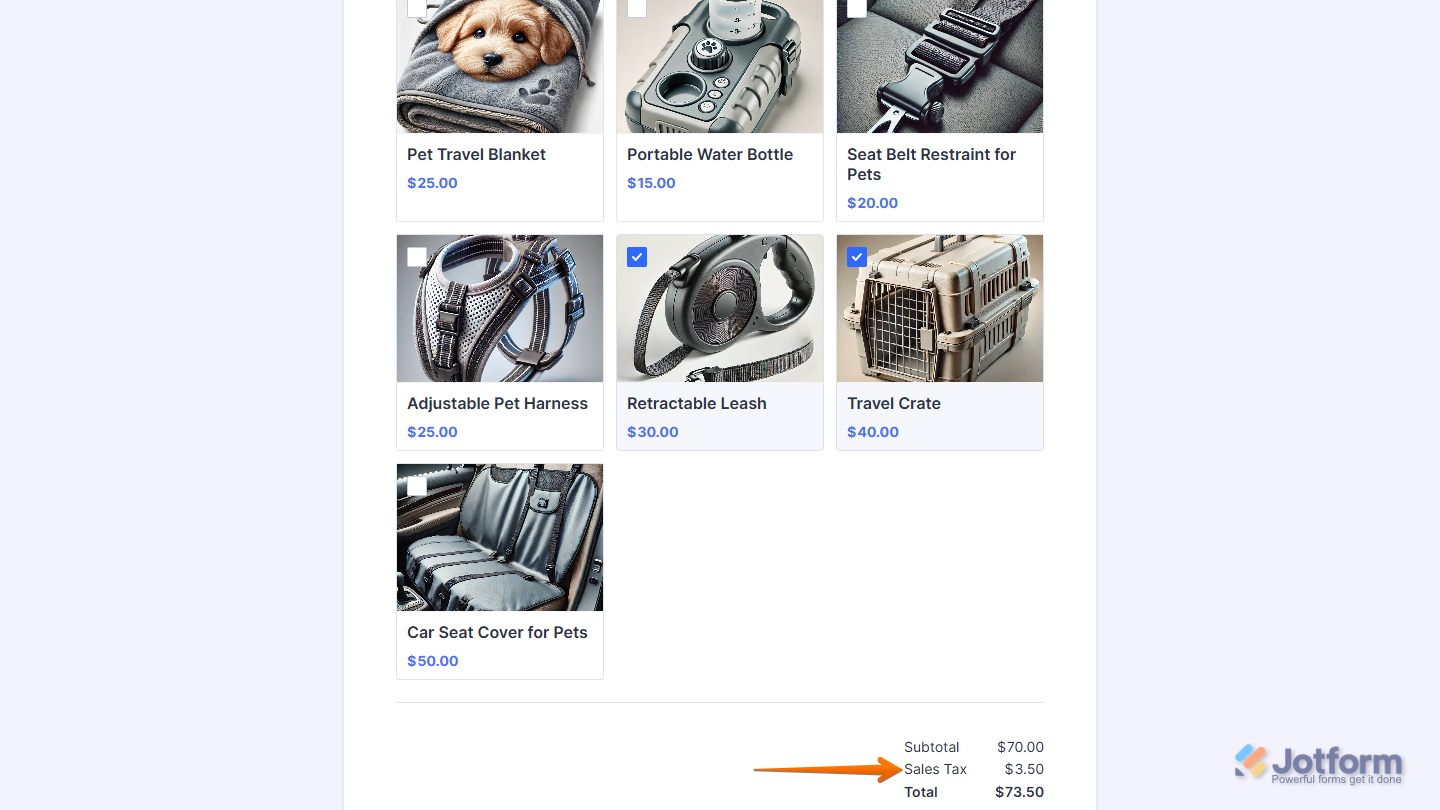
That’s it. The base tax rate will now be automatically applied to all taxable products on each submission.
Notes
- Any changes you make in the Tax tab of the Payment Settings section or the Product List section are saved automatically.
- To enable the Tax feature, your payment field must have at least one (1) product.
- The Tax feature is available on the Product List field and on Payment Processing Fields that support the Sell Products payment type—like Square, PayPal, Authorize.Net, Stripe, and others, except Braintree and Worldpay UK.
- The Total Price on the form is enabled by default when tax is turned on in your payment field.
Setting Up a Location-Based Tax Rate
You can add location-based tax on top of your base rate by Adding and Setting Up an Address Field on your form. This lets you apply different tax rates depending on where your customer is located. Here’s how to do it:
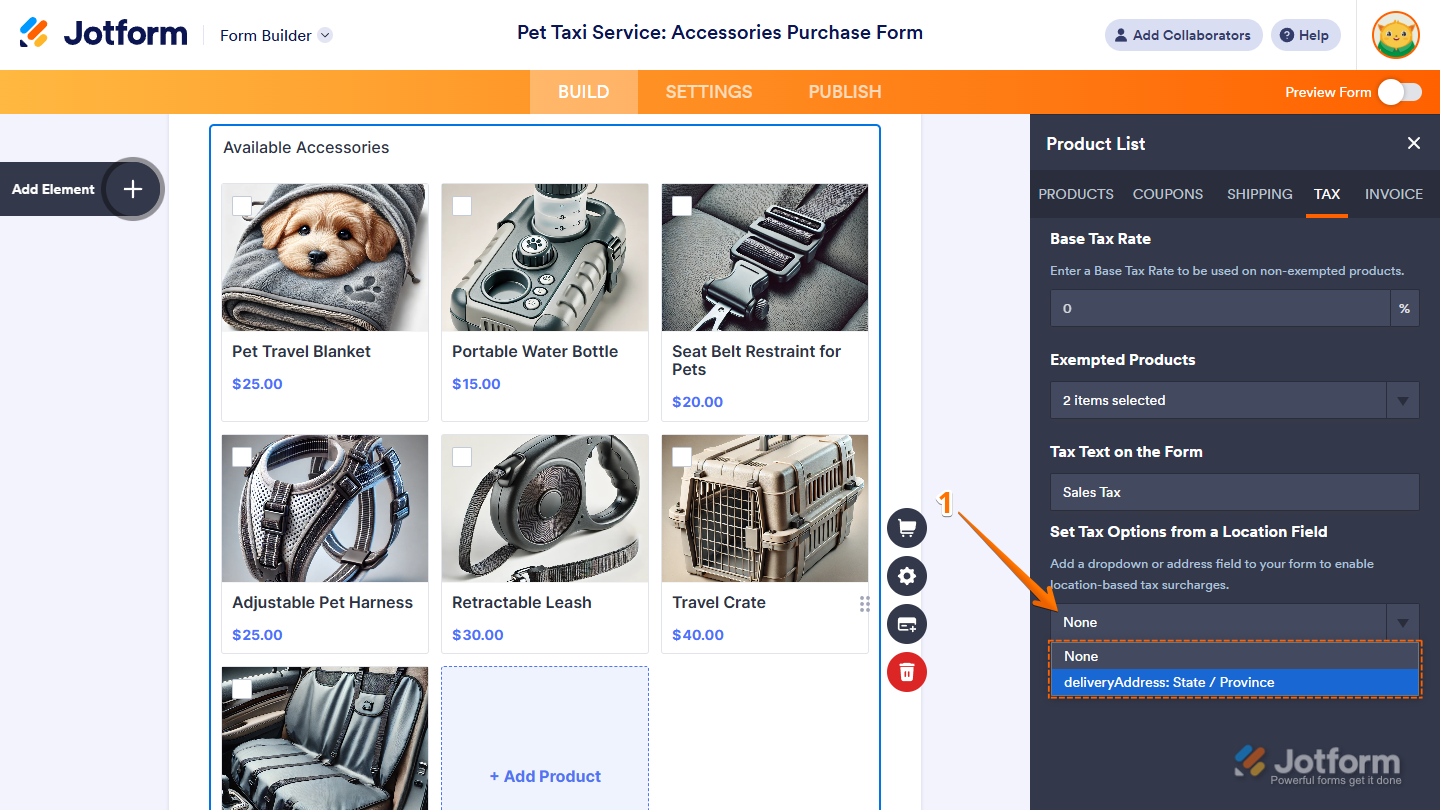
- In Form Builder, while under the Tax tab of the Payment Settings or Product List, click on the Set Tax Options From a Location Field Dropdown menu and select a Dropdown field, or a State or Country subfield for your form’s Address field.
- Then, in the table that comes up at the bottom, enter the tax surcharge (as a percentage) next to each location option. If the State Options property of your form’s Address field is set to Text Box instead of American States (a dropdown with predefined options), you’ll also need to enter the location names manually in the table.
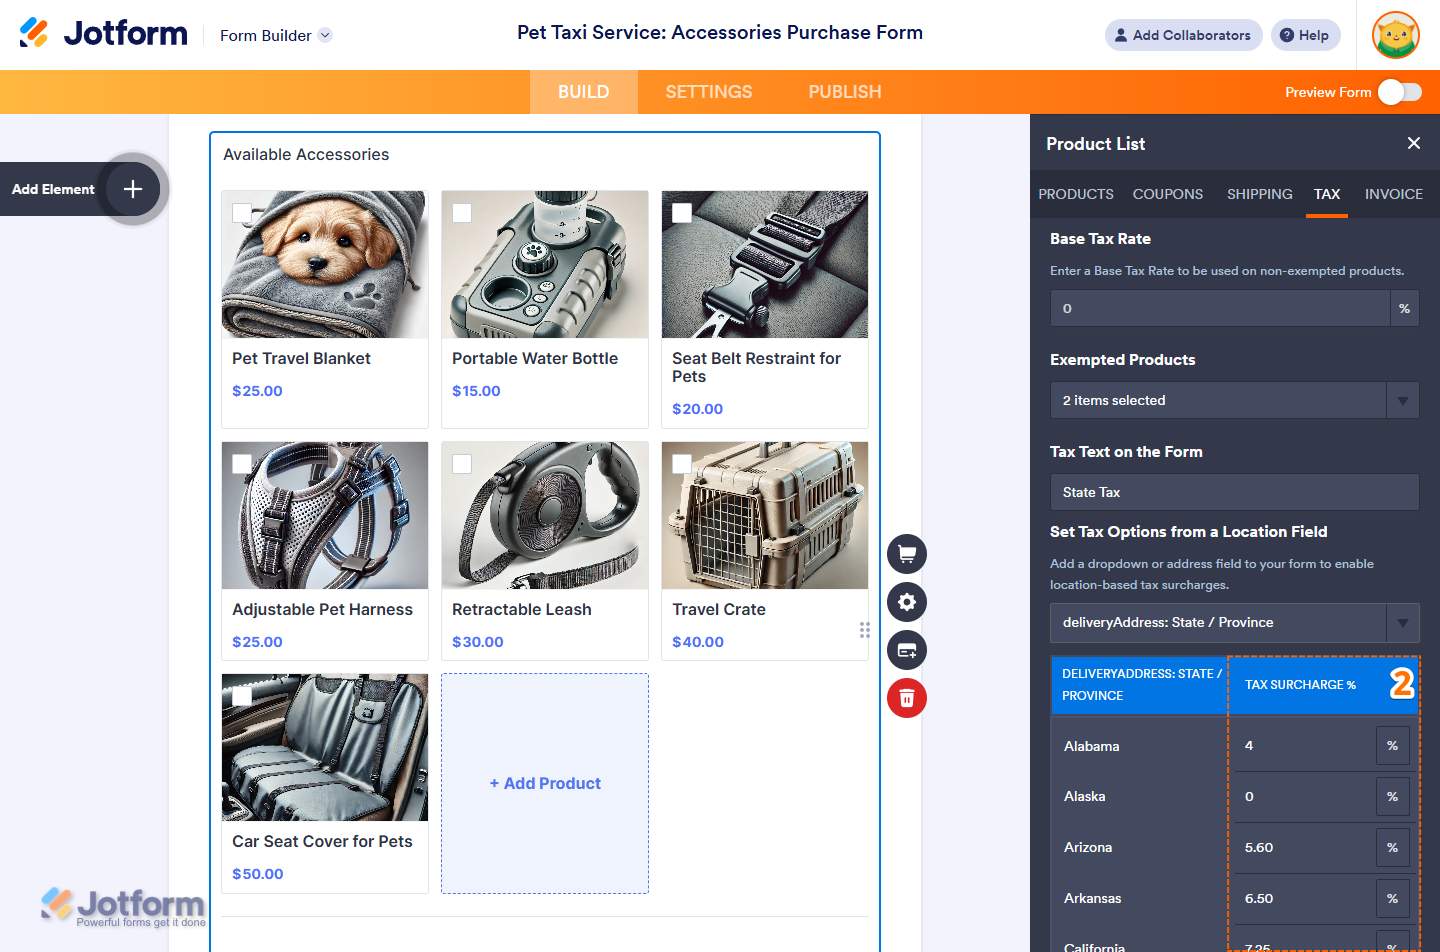
That’s it. The tax surcharge will now be applied automatically based on the customer’s selected location on each submission.
Notes
- If both Base Tax and Location-Based Tax are set in the Tax tab of the Payment Settings or Product List section, the location-based rate will be added on top of the base rate. For example, you can set a 5% Base Tax and add a 2.25% Location-Based Tax for customers in California, resulting in a total tax of 7.25%—matching the state’s standard rate.
- The Set Tax Options from a Location Field Dropdown menu shows the field names of your form’s Dropdown and Address fields—not their field labels. To learn more, check out our guide on How to Find Field IDs and Unique Names.
- Selecting a Dropdown field will automatically fill the table at the bottom of the Tax tab with location names based on its options. It also supports US States and Countries set as predefined options in the Dropdown Field Properties.
- If you type the location names yourself in the tax options table, your customers don’t need to match the exact letter-case when filling out the State field in the form. For example, “california,” “California,” or “CALIFORNIA” will all work.


Send Comment:
5 Comments:
321 days ago
Is there functionality that allows me to add different tax amounts on different payment options? E.g. AMEX, = 4%, but AfterPay = 7%.
More than a year ago
Some of my products are taxed, but many of my buyers have tax exempt status. How do we include a tax exempt option with certificate upload for verification? I am using Authorize.net
More than a year ago
Are you going to be adding functionality for different tax amounts on different product types. E.g. all products in British Columbia Canada have 5% GST, but only some products also have an additional 7% PST - right now it doesn’t seem like your settings allow for this??
More than a year ago
Hi, thank you for the tutorial.
How do I add different taxes for different products?
Because I tried using the option Set Tax Options but I am not sure how it works.
Can you please help me?, thank you!
More than a year ago
I see that the only possibility is to enter your product prices EXCLUDING tax (which added on the total).. is that correct? Because I would like to have my product prices including tax. Otherwise you have strange prices (not rounded off) which means the coupon price will be different too.