Over time, you may need to edit or delete sender emails used with your SMTP settings. You might need to edit an email address if it changes, update the password associated with your email account, or correct any outdated information. Editing ensures your emails are sent from the correct address with the right credentials while deleting removes old or inactive addresses to avoid confusion. Keeping your sender email list accurate helps ensure smooth email delivery and prevents errors.
Updating Sender Emails
You can edit the configuration of your sender email in a few easy steps. Here’s how to do it:
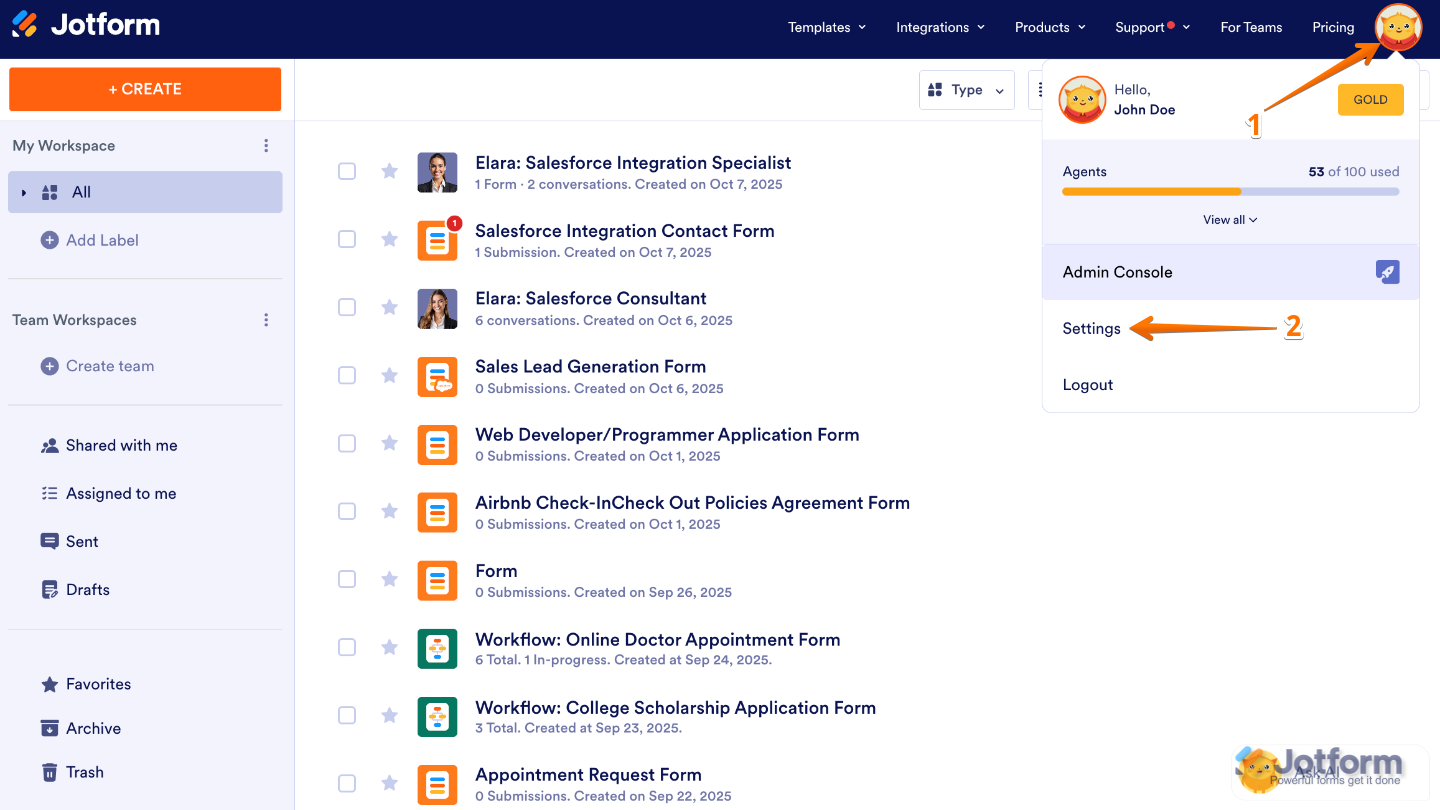
- On your My Workspace page, click on your Profile Picture/Avatar on the top-right side of the page.
- In the menu that opens, click on Settings to open your Account Settings page in a new browser tab.
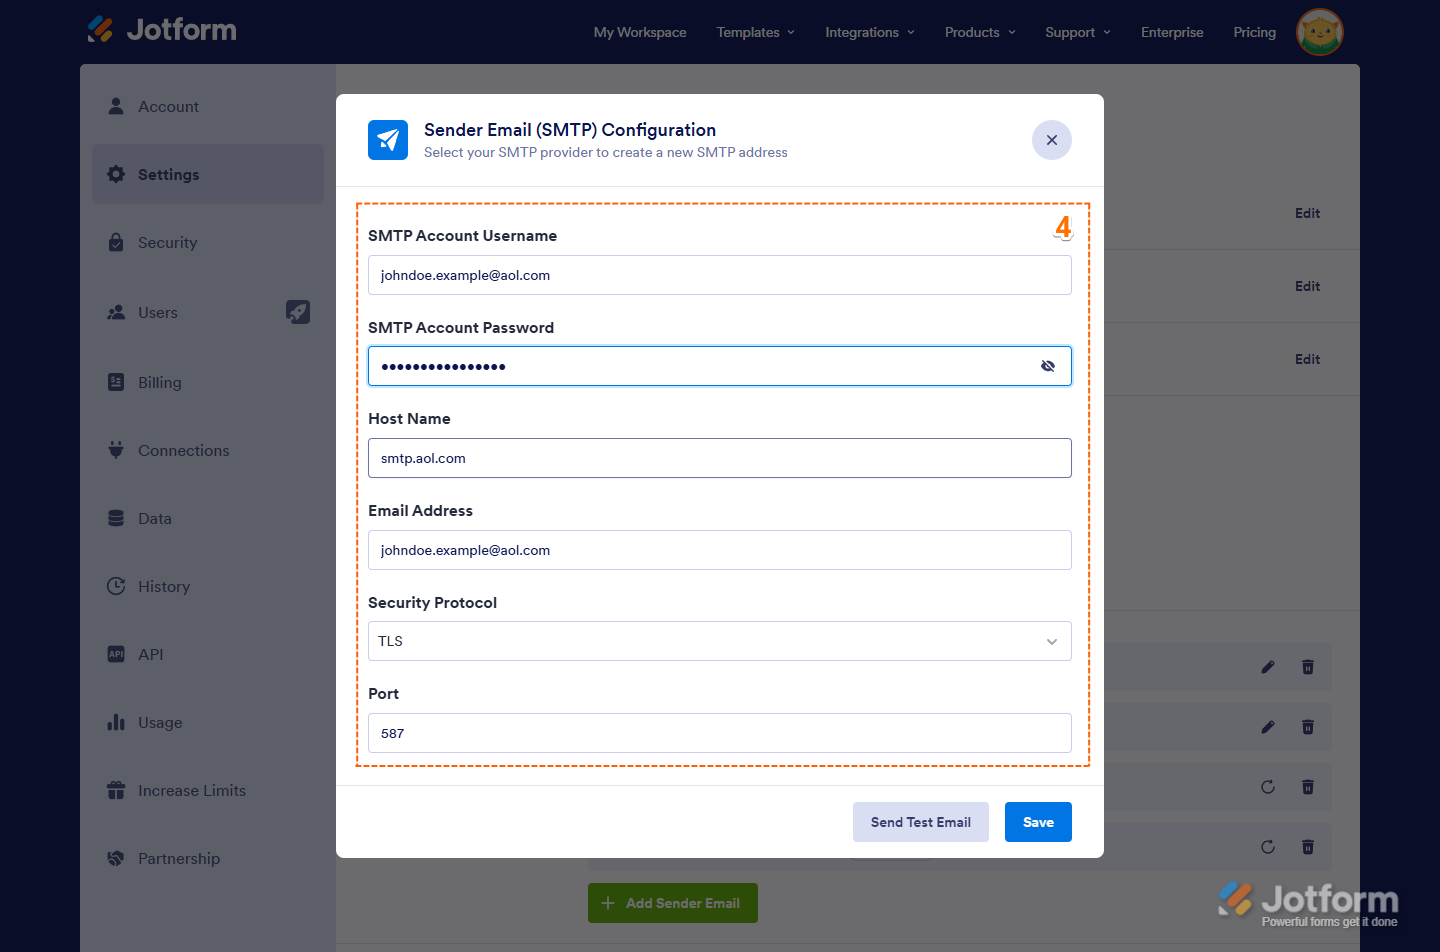
- Now, in the Sender Emails section, on the right side of your account’s custom sender email, click on the Pencil icon.

- Then, in the Sender Email (SMTP) Configuration window, update the SMTP settings to match any changes made to your email account or permissions.
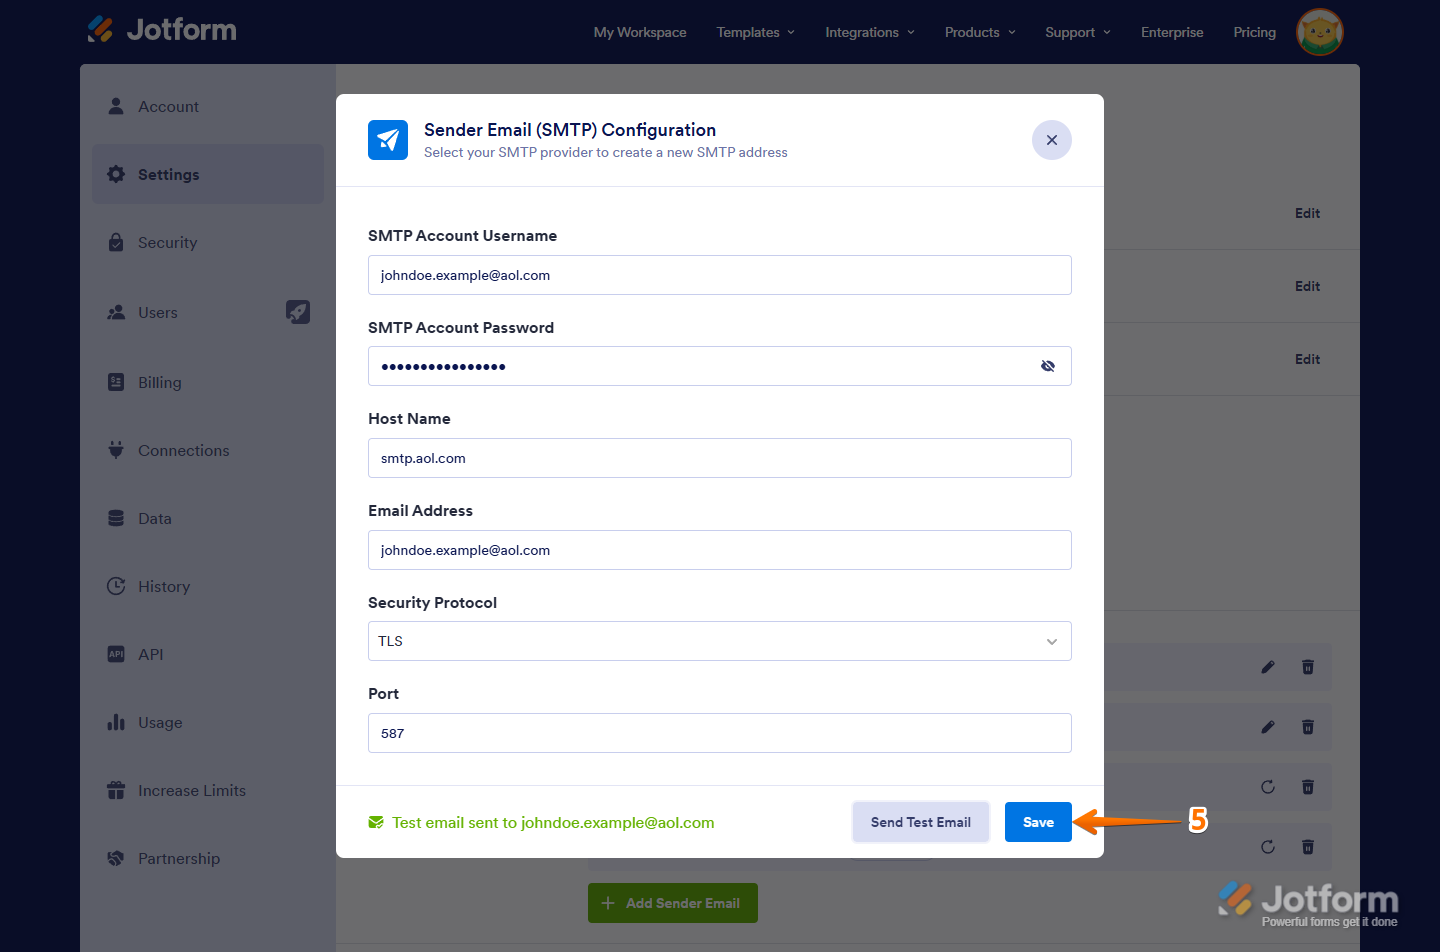
We recommend using the Send Test Email button to check if all the information you provided is correct. You should see a message at the bottom of the Sender Email (SMTP) Configuration window confirming that a test email has been sent to the address you’re setting up as the sender email for your account. If you get an error message during the test, you won’t be able to complete the setup.
- Once you’ve confirmed that everything is correct, click on Save to create the custom sender email with your email address.
Note
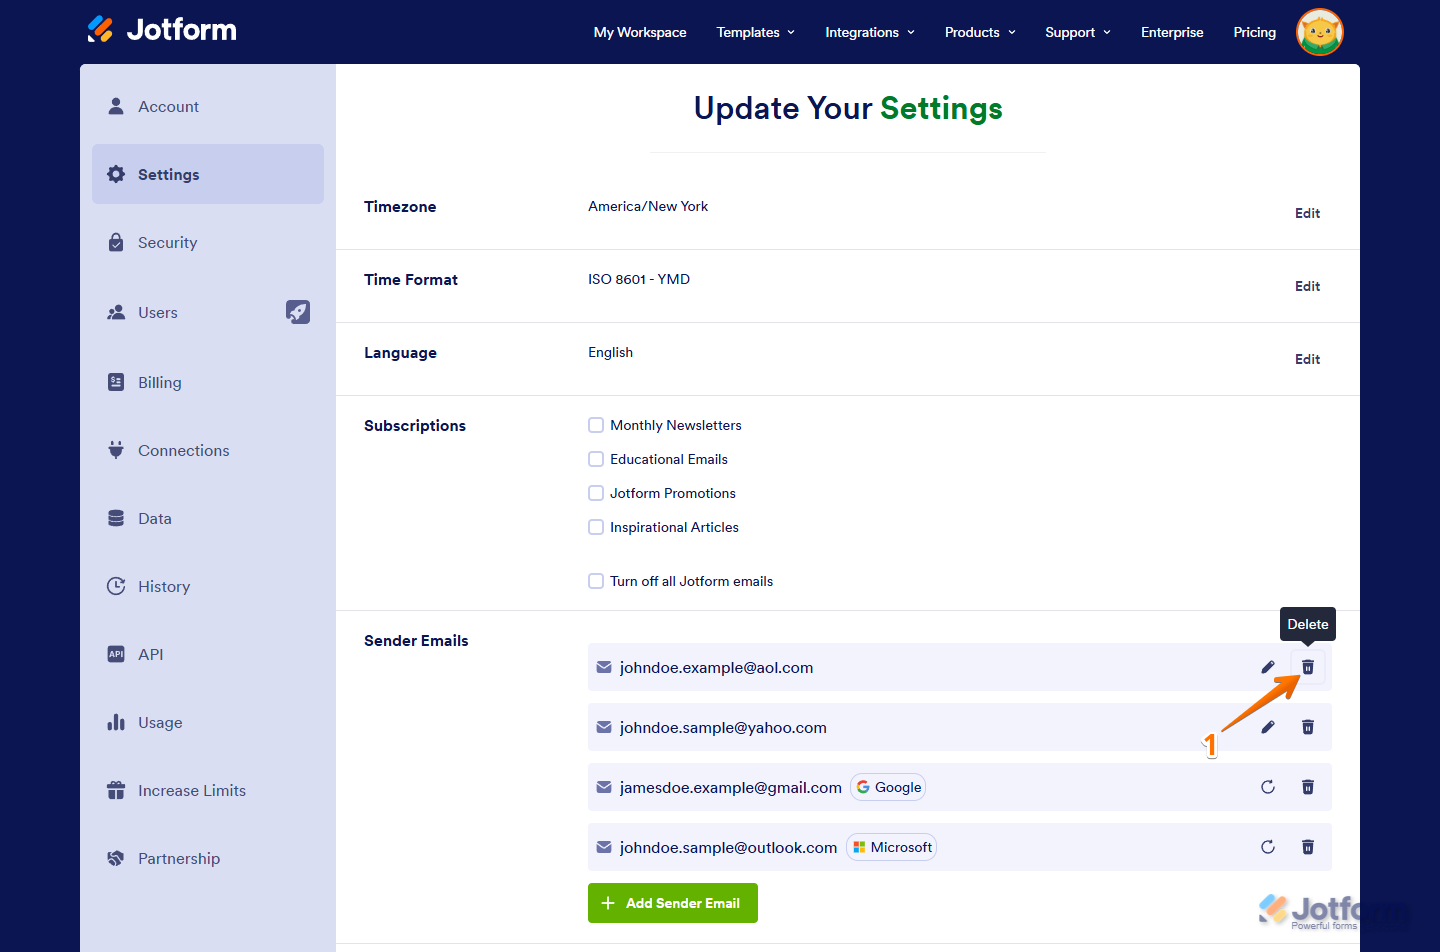
Sender emails added via Google or Microsoft’s OAuth 2.0 will display a Refresh icon instead. Clicking on this icon allows you to re-authenticate your Gmail or Outlook account. This is useful if you’ve changed your password or updated the permissions in Google’s or Microsoft’s App Manager after initially setting up your sender email.
Deleting Sender Emails
You can delete sender emails you’re no longer using in a few easy steps. Here’s how to do it:
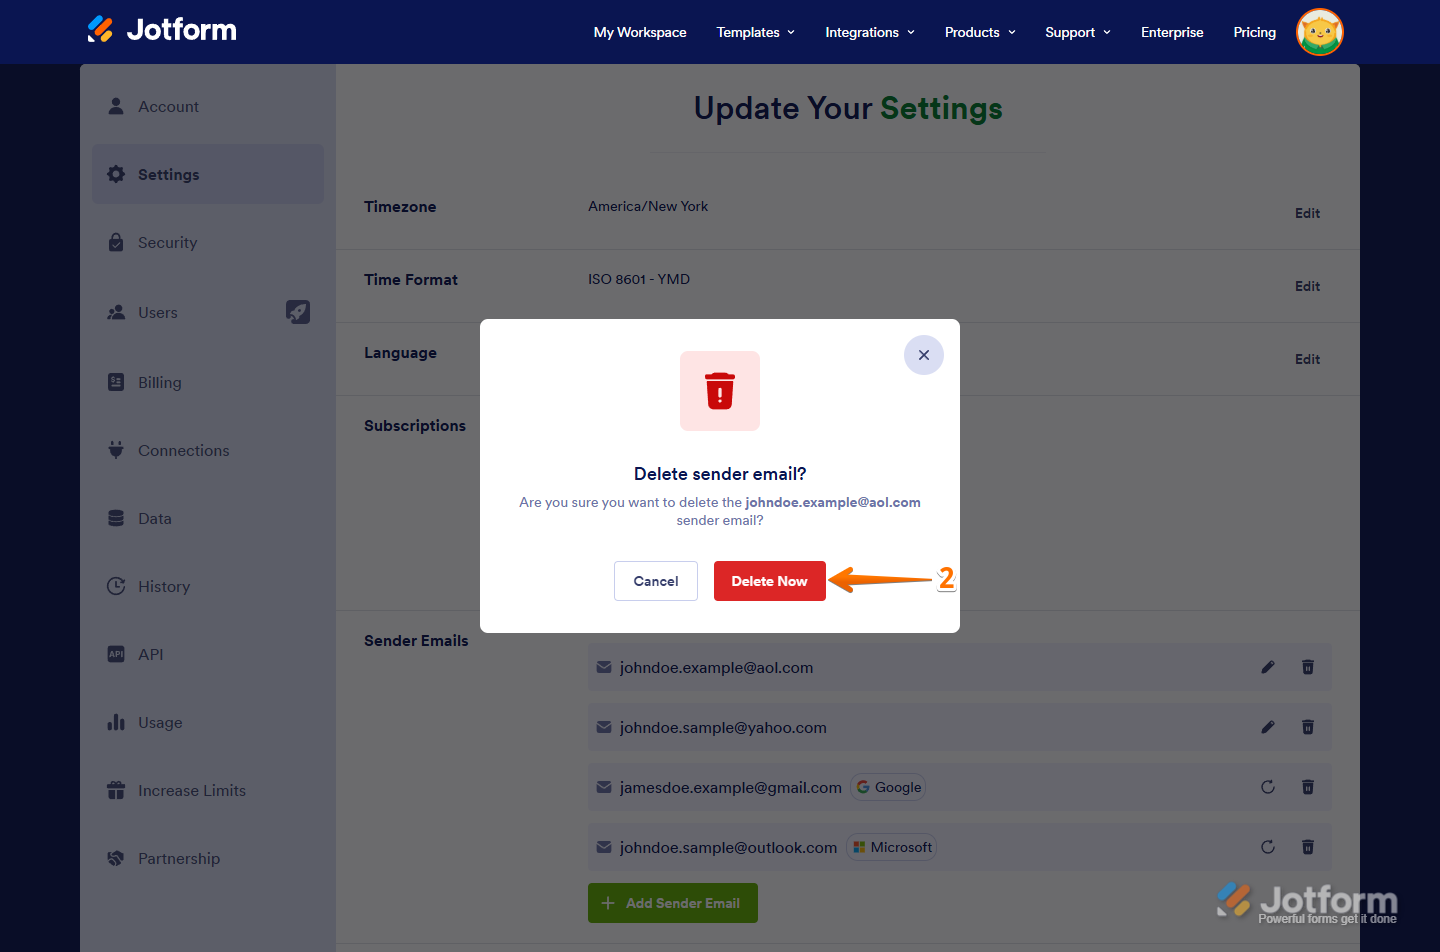
- While in your Account Settings page, on the right side of your account’s custom sender email in the Sender Emails section, click on the Trash Can icon.
- Now, in the Delete Sender Email Confirmation window, click on Delete Now to continue.


Send Comment:
1 Comments:
More than a year ago
It was almost helpful, but as I was trying to figure out the errors ... I reached my daily test email limit. You have to be kidding me — no emails were sent, why is there a limit?