Jotform’s Take Photo widget makes it easy for users to snap and upload photos right from your form, no extra steps needed. Whether you’re doing inspections, gathering event photos, or just adding a visual touch to your submissions, this handy tool gets the job done. It works smoothly with a computer’s webcam or a phone’s camera, so capturing the moment is quick and easy.
Note
The widget needs access to the user’s camera. They’ll be prompted to allow permission through their browser or device—if they deny it, they won’t be able to take a photo.
With just a few simple steps, you can let users take and upload pictures straight from your form, no extra tools or tech skills needed. Here’s how to do it:
- In Form Builder, click on Add Element on the left side of the page.

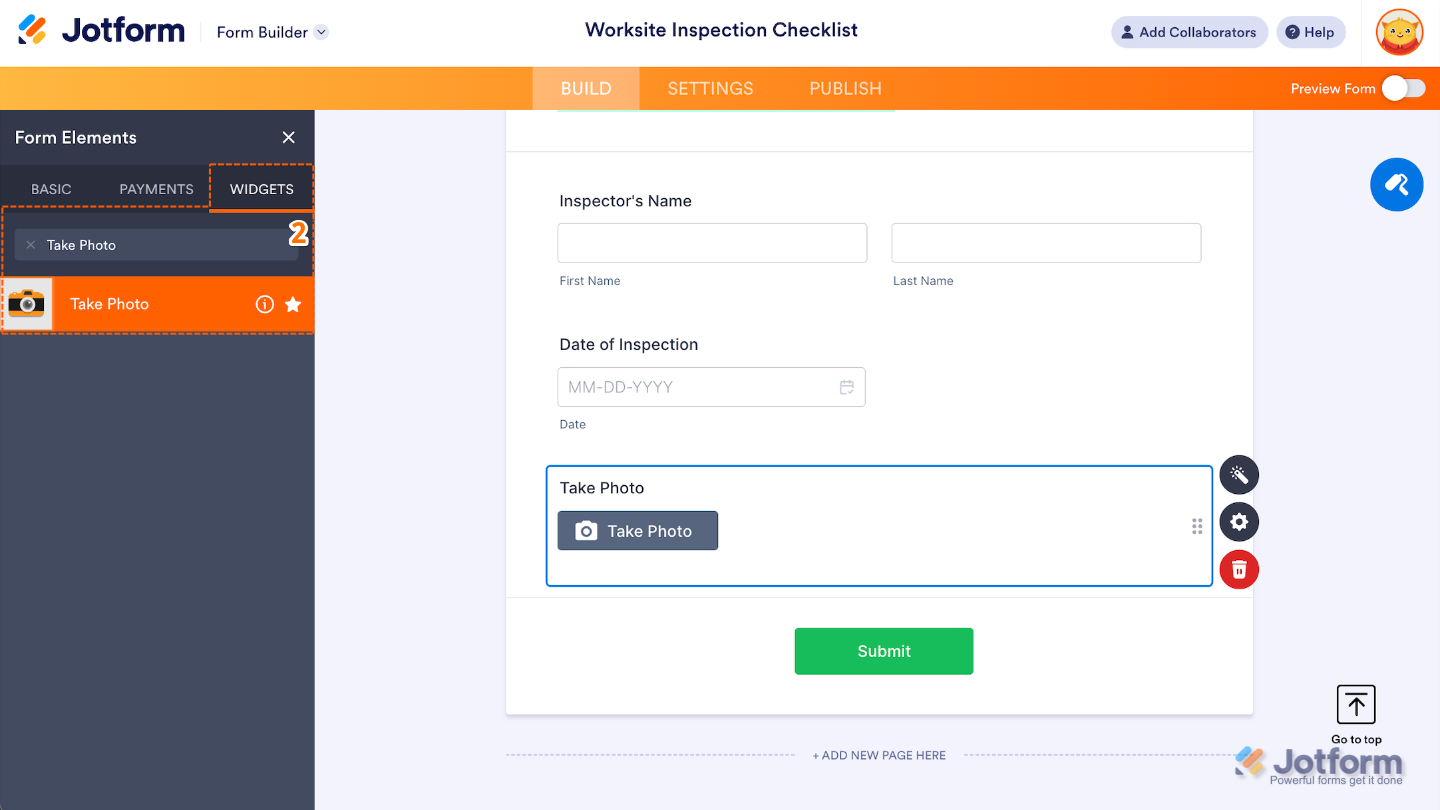
- Now, in the Form Elements menu, under the Widgets tab, search for Take Photo and then click on it. Or, just drag and drop it to where you want it to be on your form.
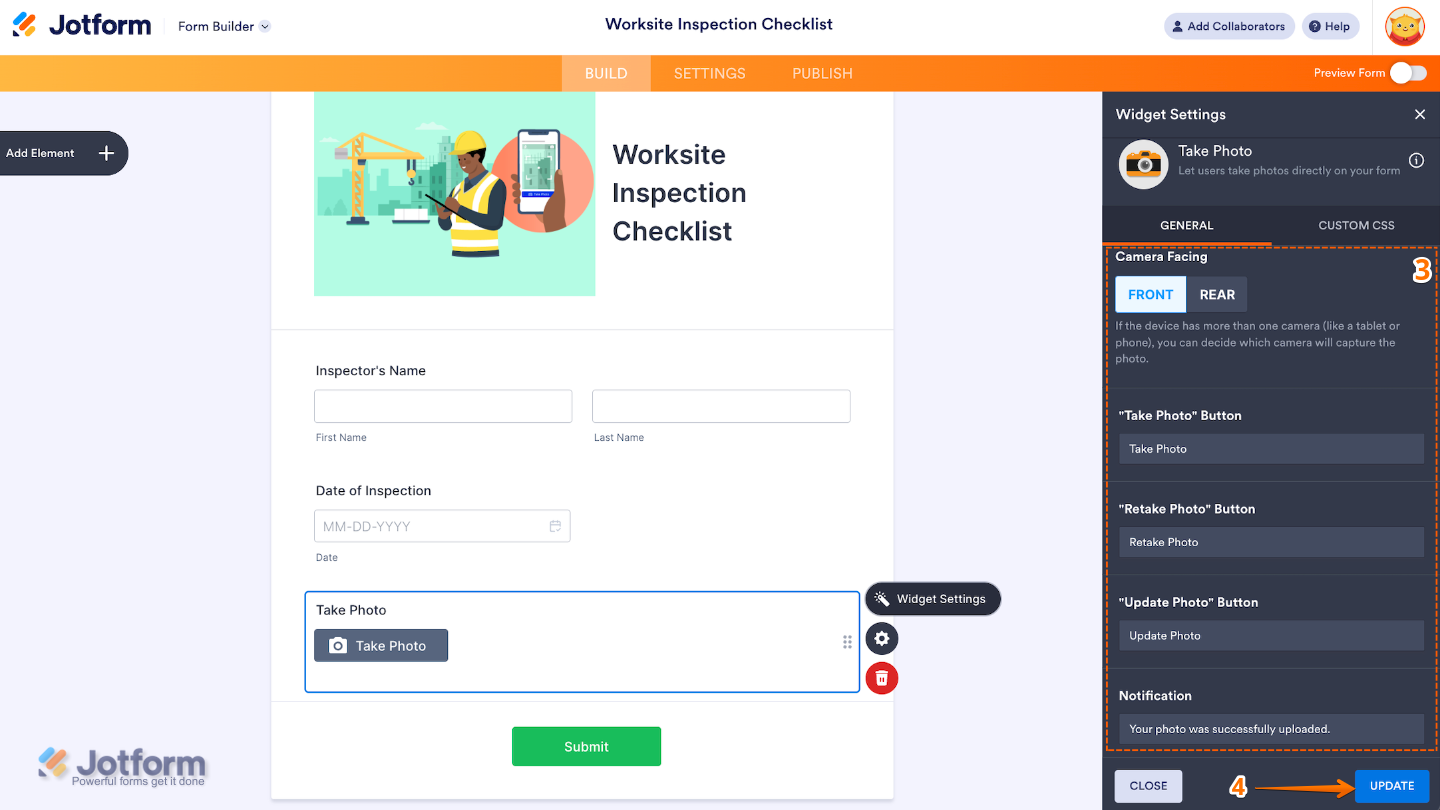
- Next, in the Widget Settings window that opens on the right side of the page, under the General tab, set up the following things:
- Camera Facing — Choose whether to use the front or rear camera.
- Take Photo Button — Customize the text for the Take Photo button.
- Retake Photo Button — Change the text for the Retake Photo button.
- Update Photo Button — Edit the text for the Update Photo button.
- Notification — Set up the text that’ll show up when the user successfully adds the photo.
- Once you’re done, click on Update.
That’s it! You’ve successfully added and set up the Take Photo widget on your form. Now, users can snap a photo right in the form and send it along with their submission. Want to see how it looks in action? Check out this Demo Form.
To further customize your Take Photo field appearance, just click on the Gear icon to open its properties. For a full breakdown of how to do it, head over to our guide on [Ongoing Redirect Link].
Notes
- For advanced styling, you can add your own custom CSS under the Custom CSS tab in the widget settings and style the Take Photo field. For a full breakdown of how to do it, head over to our guide on How to Inject CSS Codes to Widgets.
- Photos are automatically attached to submissions—no extra upload steps needed. Once a photo is taken, it’s saved with the form response.
Pro Tips
- Use the Required option if you want to make sure users include a photo before submitting. It’s perfect for inspections, reports, or verifications.
- Adjust the widget’s height in the Advanced tab to give users a better view of their photo before submitting it.
- Add a clear, friendly label to guide users through the process.
- Test the form on different devices before publishing to make sure the widget works smoothly on both desktop and mobile.

Send Comment:
5 Comments:
190 days ago
I have the same questions as Luigi. I need an option to take/upload multiple photos for one question.
Doesn't seem to be an option for the "Image" field from the Basic list, nor for the "Take Photo" field from the widget list.
190 days ago
how to take multiple photos and not only one
More than a year ago
I am testing this. Unfortunately the Photo that is sent is really reduced in size and not really of any use. Is there any way to send the photo in it's original size?
More than a year ago
Similarly, can pictures be included in the email confirmation using the Take Photo widget, rather than through a file upload.
More than a year ago
Hi there - when my report is sent to the email recipients, the pictures uploaded show only as a link, that link essentially doesnt work. I want to get the pictures to actually display in the email sent out to recipients of it, how do i do this?