Removing old or unused forms helps keep your account organized. It declutters your workspace and ensures that you’re only working with relevant forms. If a form contains sensitive information or personal data, purging it ensures that the data are no longer accessible.
Deleting Individual Forms
You can delete a form in a few easy steps. Here’s how to do it:
- On your My Workspace page, click on Type at the top and in the Dropdown menu that opens, uncheck the boxes next to all the assets except Forms, so only they’ll be shown on the page.

- Now, hover your mouse over the form you want to delete, and click on More on the right side of the page.
- Then, in the Dropdown menu, under the Form column, click on Move to Trash.

- Next, click on Delete Form in the Confirmation window.

That’s it! Your form has now been deleted.
Deleting Multiple Forms
You can also delete multiple forms at the same time. Here’s how to do it:
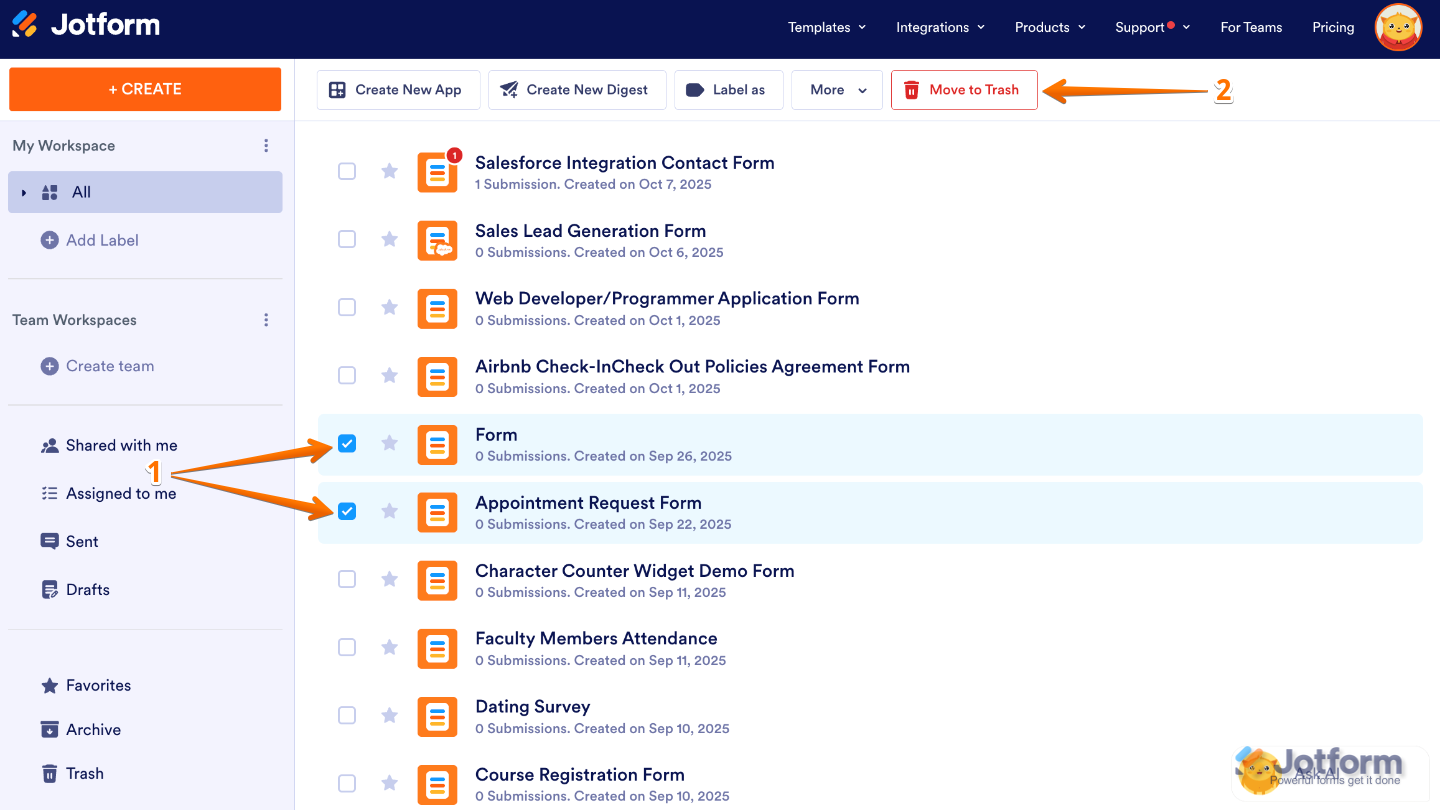
- While your assets are filtered by the Form type on your My Workspace page, put checks in the boxes next to the forms you want to delete.
- Now, in the menu at the top of the page, click on Move to Trash.
- Then, click on Delete Forms in the Confirmation window.
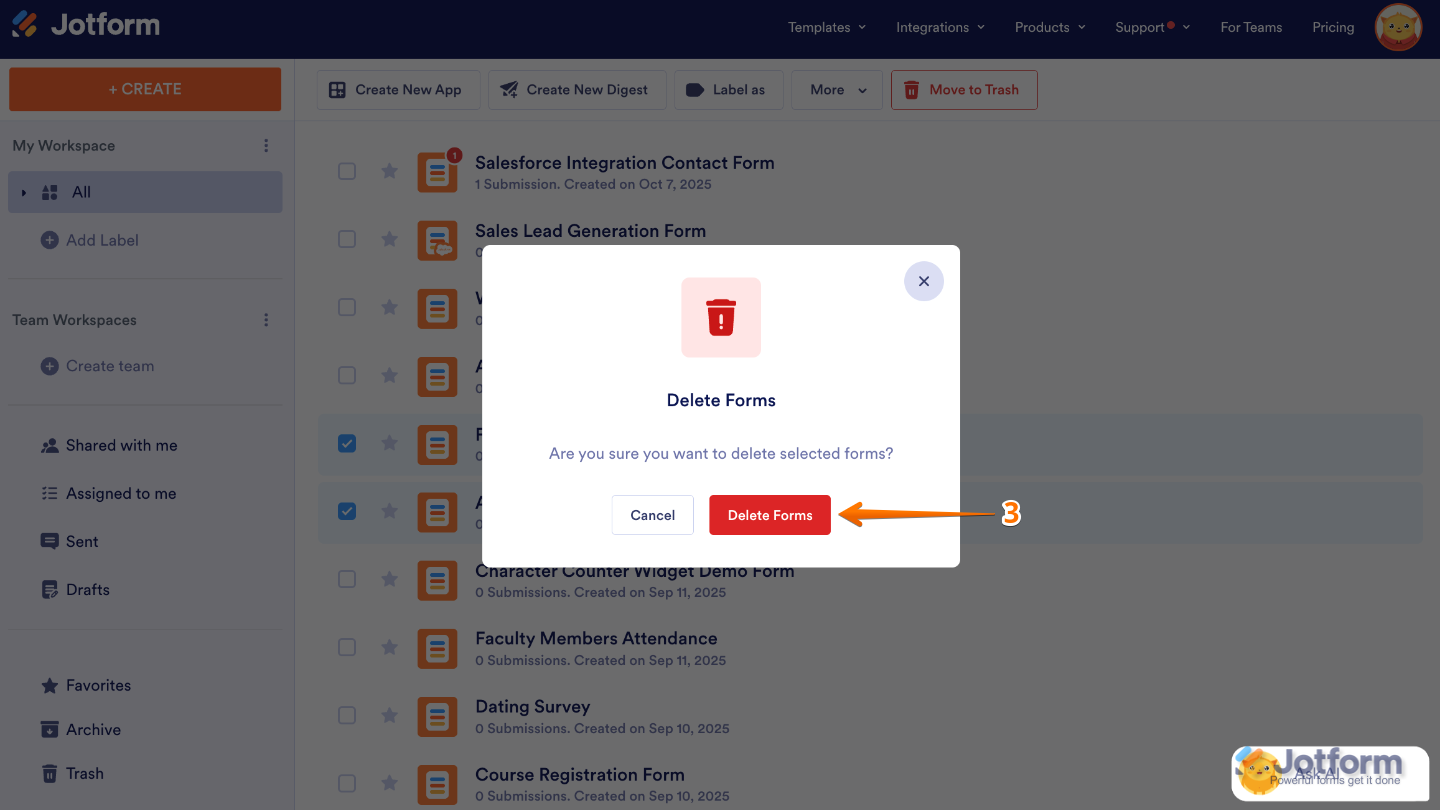
That’s it! Your forms have now been deleted.
Purging Deleted Forms
Deleted forms are automatically disabled by default and moved to the Trash folder of the My Workspace page. You can purge forms just as easily as you can delete them. Here’s how to do it:
- On your My Workspace page, click on the Trash tab on the bottom-left side of the screen.
- Now, click on Type at the top of the page, and in the Dropdown menu that opens, uncheck the boxes next to all the assets except Forms, so only they’ll be shown on the page.

- Then, hover your mouse over the form you want to purge, and click on Purge on the right side of the page.

- Next, click on Confirm in the Confirmation window.

You can also purge multiple forms at the same time. Here’s how to do it:
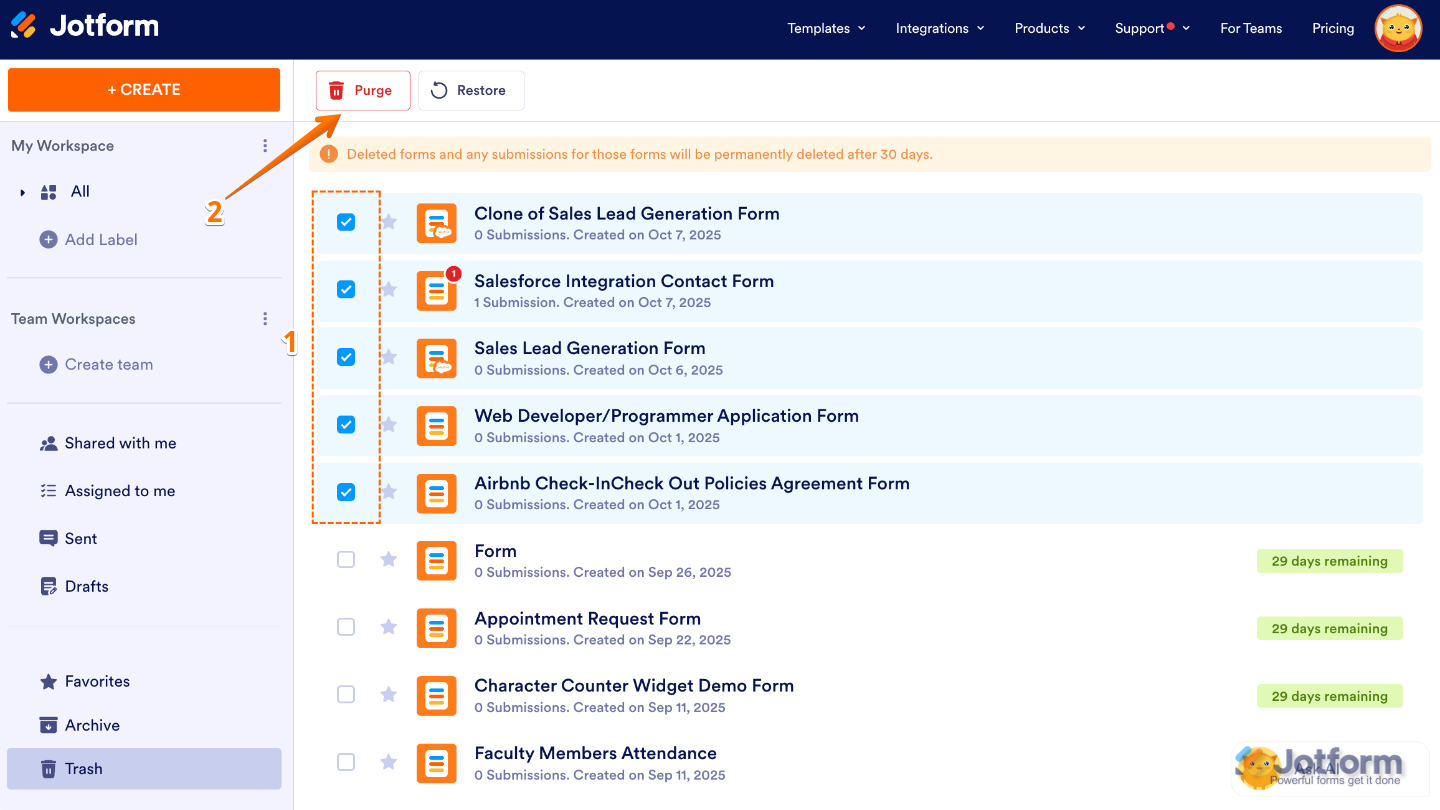
- While your assets are filtered by the Form type in the Trash folder on your My Workspace page, put checks in the boxes next to the forms you want to purge.
- Now, in the menu at the top of the page, click on Purge.
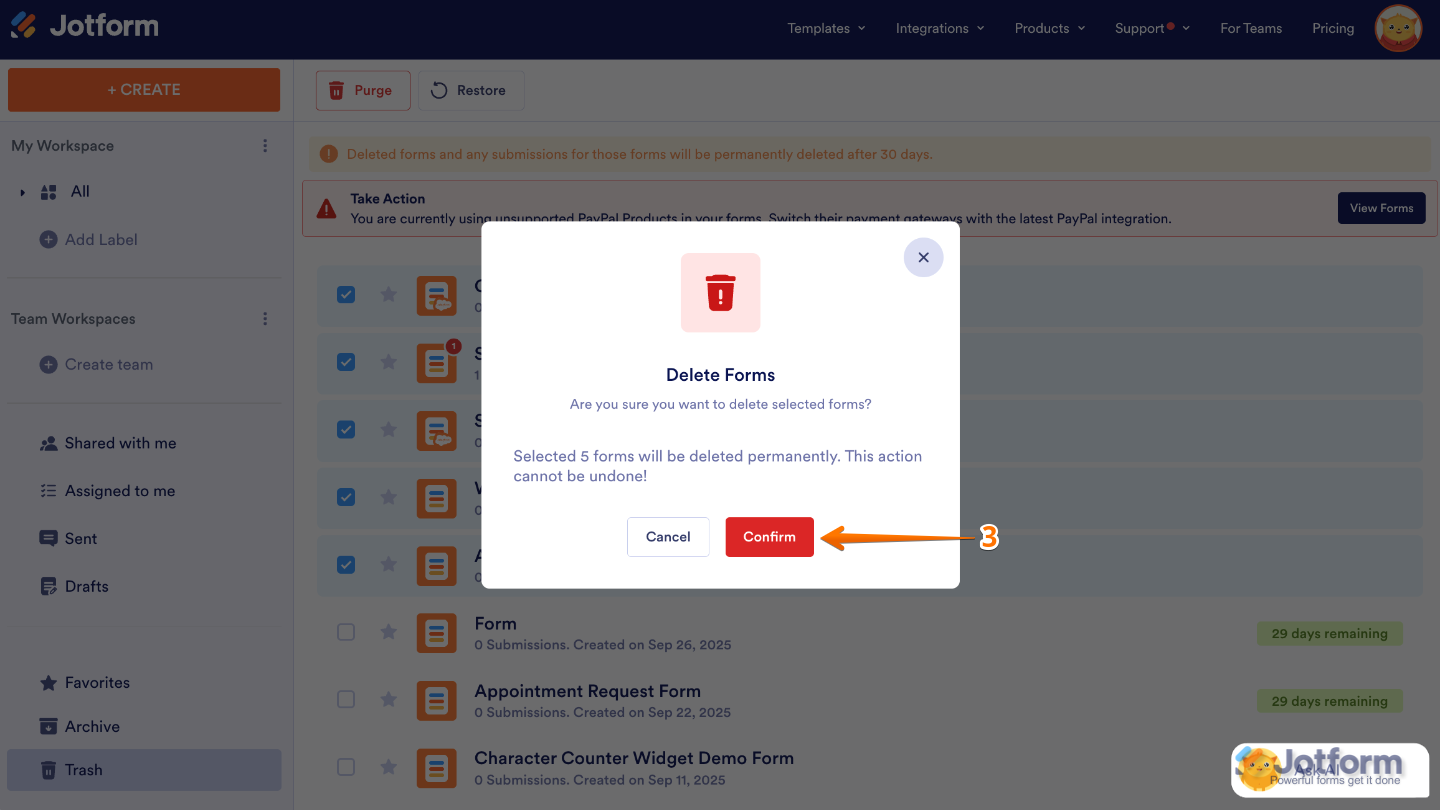
- Then, click on Confirm in the Confirmation window.
Note
Forms in the Trash folder of your My Workspace page stay there for 30 days before being permanently deleted unless you purge them manually. Forms deleted or purged from the Trash can’t be restored. Check out our guide to learn more about How to Restore Deleted Forms.

Send Comment:
3 Comments:
More than a year ago
I am using the free version
When I click PURGE, it placed the forms back into All Tables
So it does not lower the number of Active forms
More than a year ago
EDIT: The TRASH icon is not visible on small screens. It is somehow hidden behind other menu items. I had to go full screen with my browser on my desktop, and only then was the TRASH icon visible. You might want to remedy that.
More than a year ago
Form link below coming up as unavailable. Can you please advise?