Jotform Workflows enables you to create workflows tailored to your personal and business needs. One of its key features is its ability to create individual or team approval, request payments, and even collect signatures with Jotform Sign. With Logic Elements, you can also design and run a workflow based on specific user actions from the chosen form.
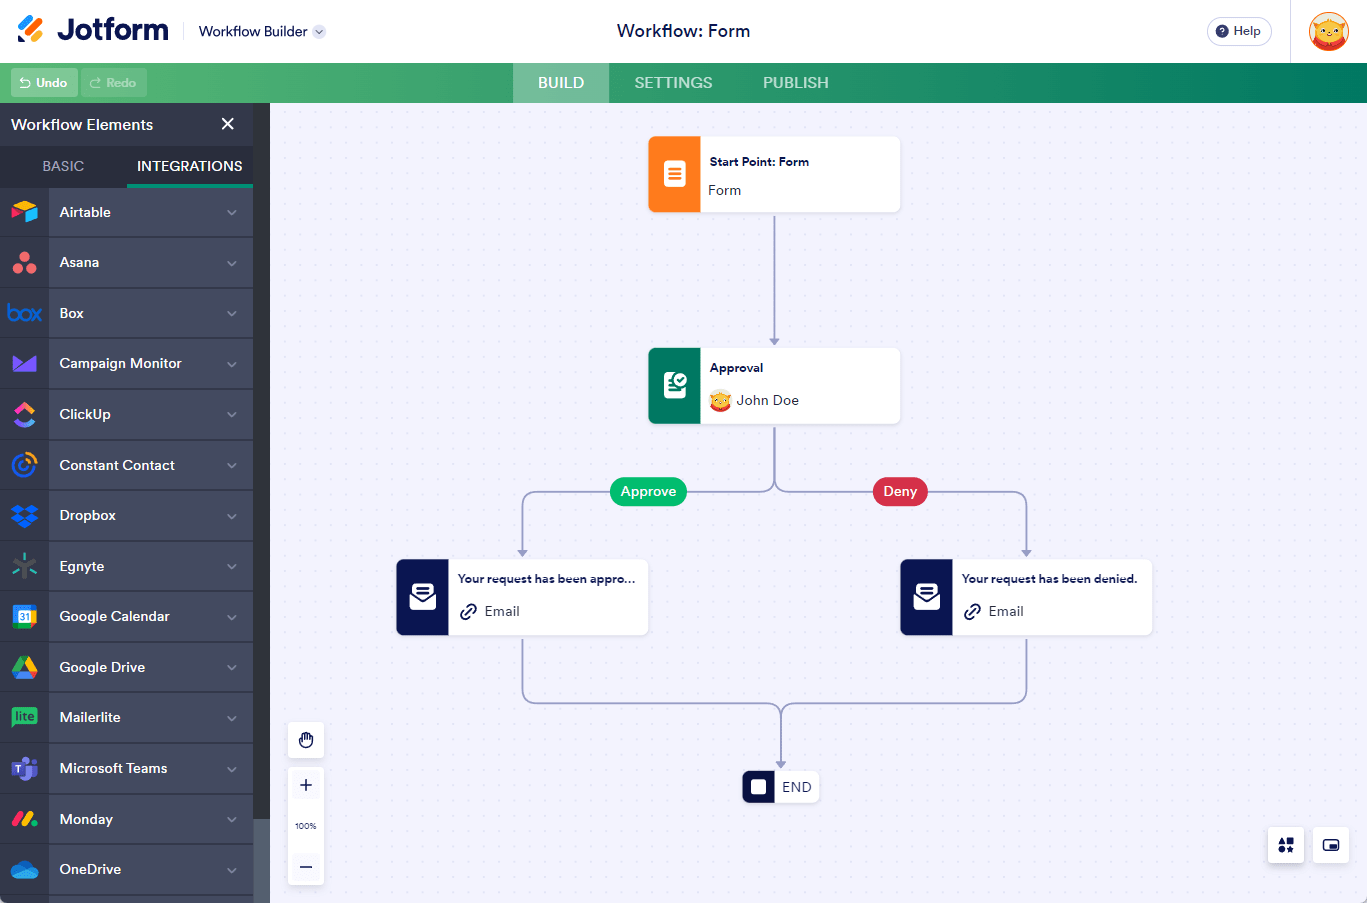
Powered by integrations, Jotform Workflows also allows you to integrate with select 3rd party apps so you can send your data when the workflow runs.
Using Jotform Workflows can save time, reduce operational costs, and eliminate the need for manual paperwork. It makes your approval process faster, more efficient, and easier to manage.
If you’re building a form, you can create a workflow by following these steps:
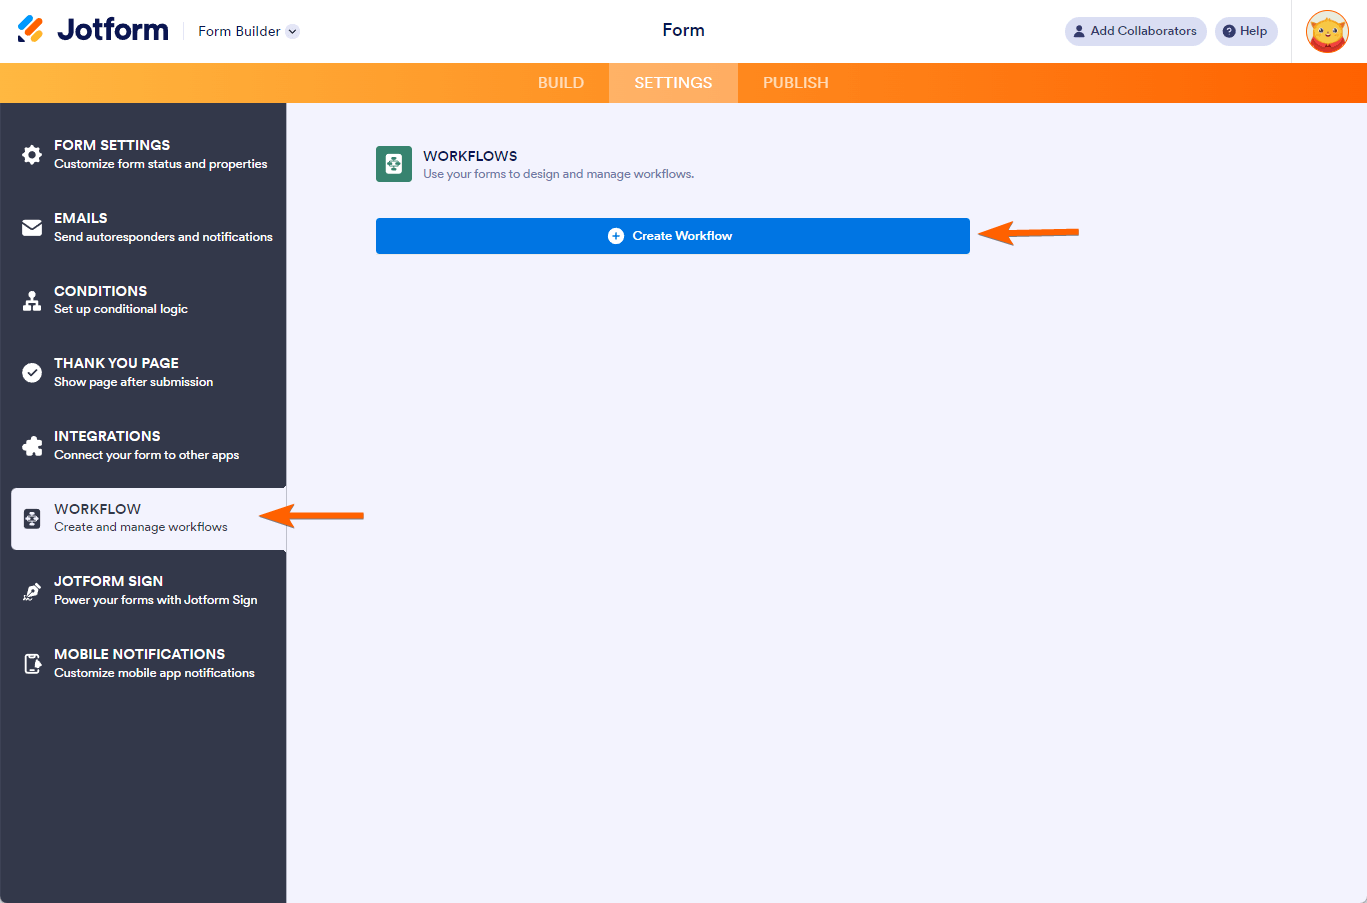
- In the Form Builder, go to the Settings tab.
- Select Workflows in the left panel.
- Click the Create Workflow button. This will open the Workflow Builder in a new tab.
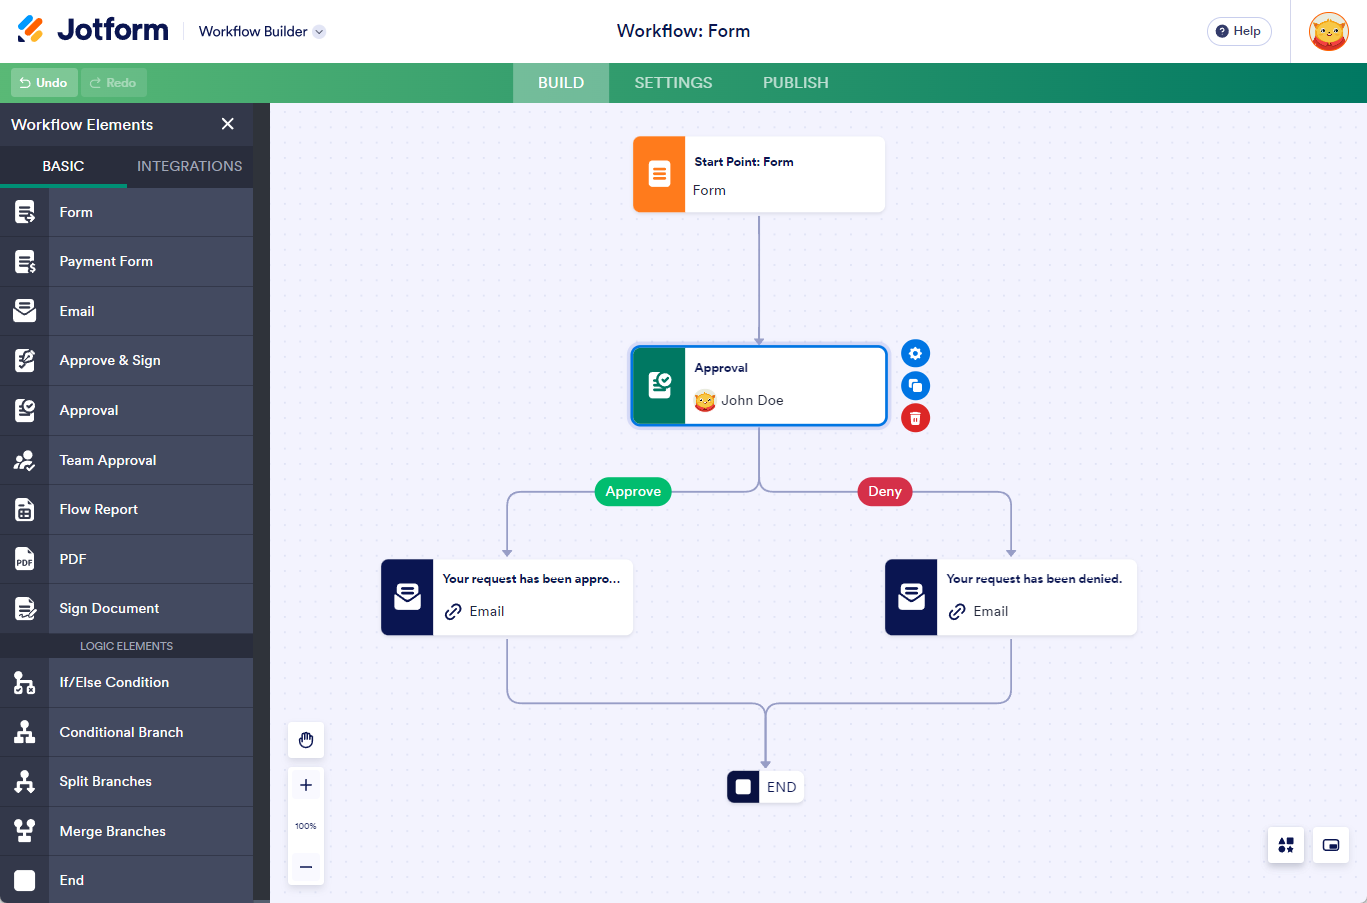
In Jotform Workflows builder, you’ll find the Basic and Logic elements as well as the Integrations.
Basic Elements
Under the Basic tab, you’ll find the following components of Jotform Workflows:
- Form — The Form element allows you to add follow-up forms to your flow.
- Payment Form — With payment elements, you can seamlessly integrate payment forms into your Workflows.
- Email — Send an email to keep everyone informed of the progress of your workflow.
- Task — The Task element allows you to assign specific tasks to a specific assignee within a workflow process.
- Approve & Sign — With Approve & Sign, you can require approvers to affix their signature when processing the approval request.
- Approval — Adding Approval allows you to configure and define outcomes for your approval flow.
- Team Approval — Use this element to request approval from specific teams within your organization.
- Flow Report — Add this element to generate detailed reports of an ongoing or completed approval process.
- PDF — Use the PDF element to send a PDF copy of the data from the Forms and Tasks added to your workflow.
- Sign Document — Use this element to request and collect signatures from your workflow users.
Logic Elements
With the Logic tab, you will find the following elements:
- If/Else Condition — The If/Else Condition element automates workflow decisions based on form responses.
- Conditional Branch — The Conditional Branch element lets you direct workflows through defined branches, tailoring processes based on criteria for greater flexibility and efficiency.
- Split Branches — The Split Branches element adds parallel paths to Jotform Workflows, enabling simultaneous task execution.
- Merge Branches — The Merge Branches element combines multiple paths in Jotform Workflows, uniting parallel processes for simpler management and progression.
- End — The End element sets a visual signal to indicate branch completion. You can also change its behavior to Terminate specific flow.
Integrations
Jotform Workflows supports integrations. In the Integrations tab, you’ll find the following apps that Jotform Workflows supports:


Send Comment:
1 Comments:
More than a year ago
Pueden los aprobadores no tener cuenta en jotform?