
Fixing a bad value for a restricted picklist field
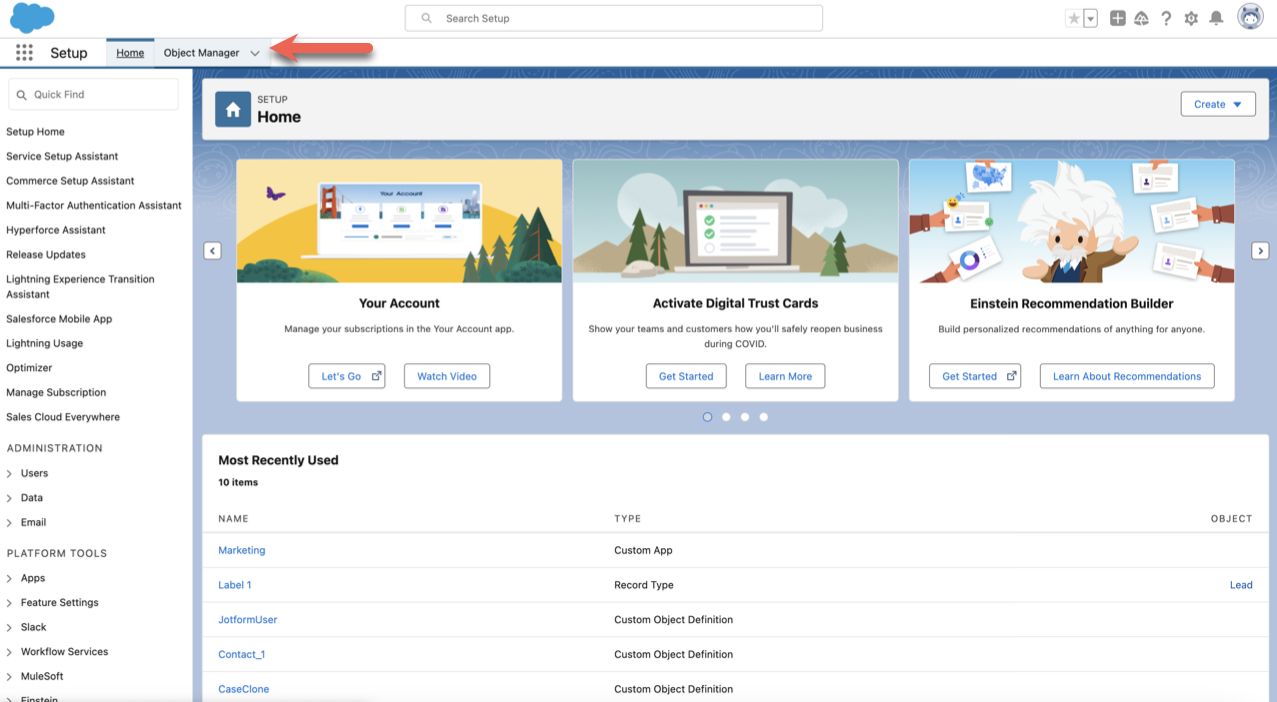
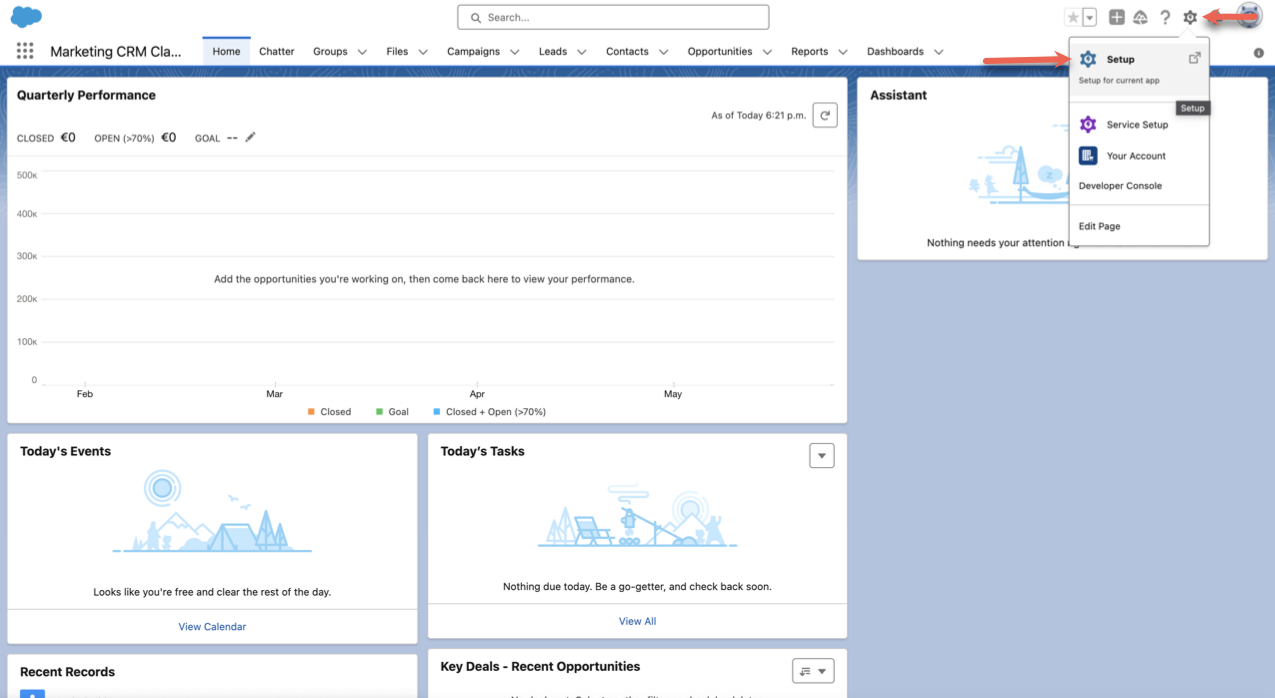
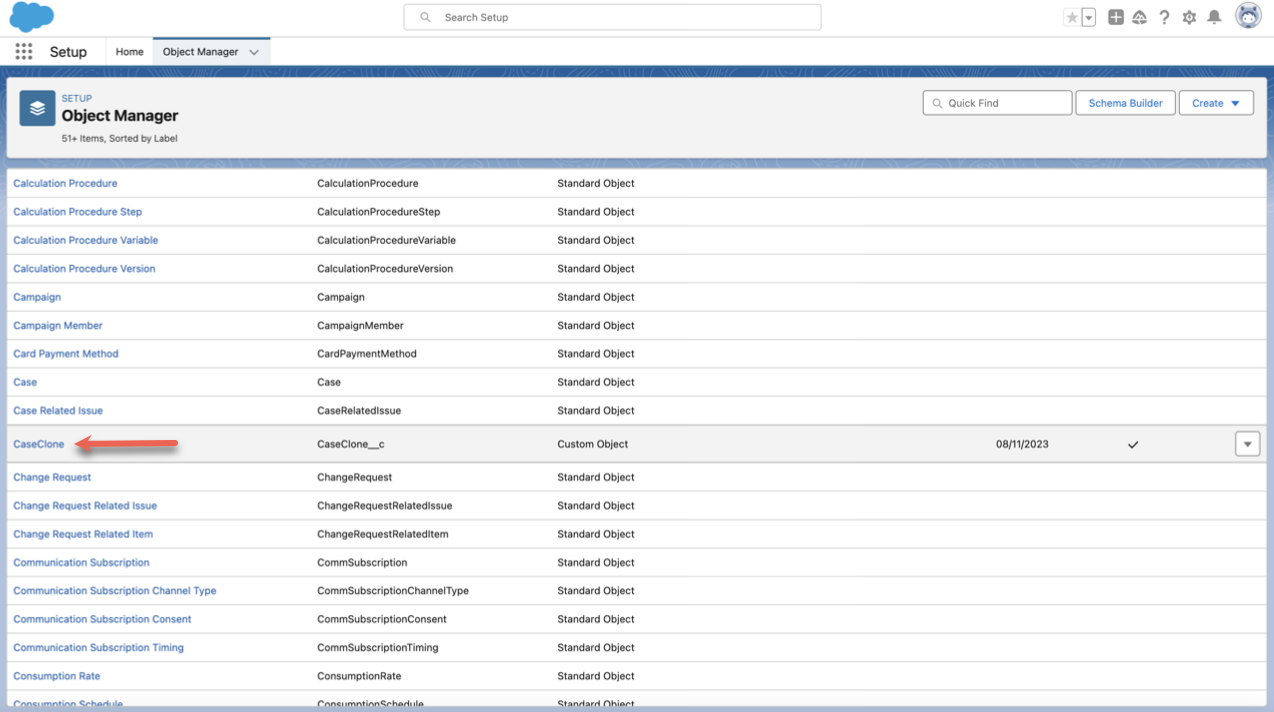
- Click the gear icon, then click Setup.
- Click Object Manager.
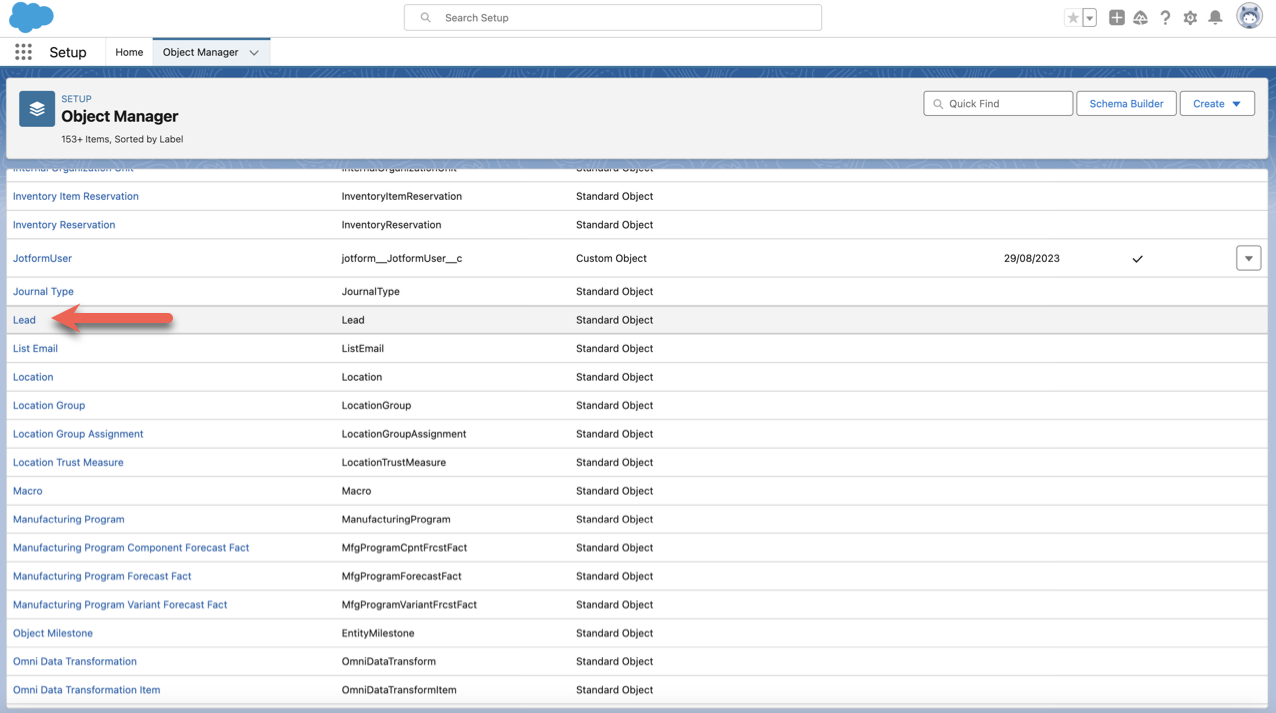
- Select the object for the record type.
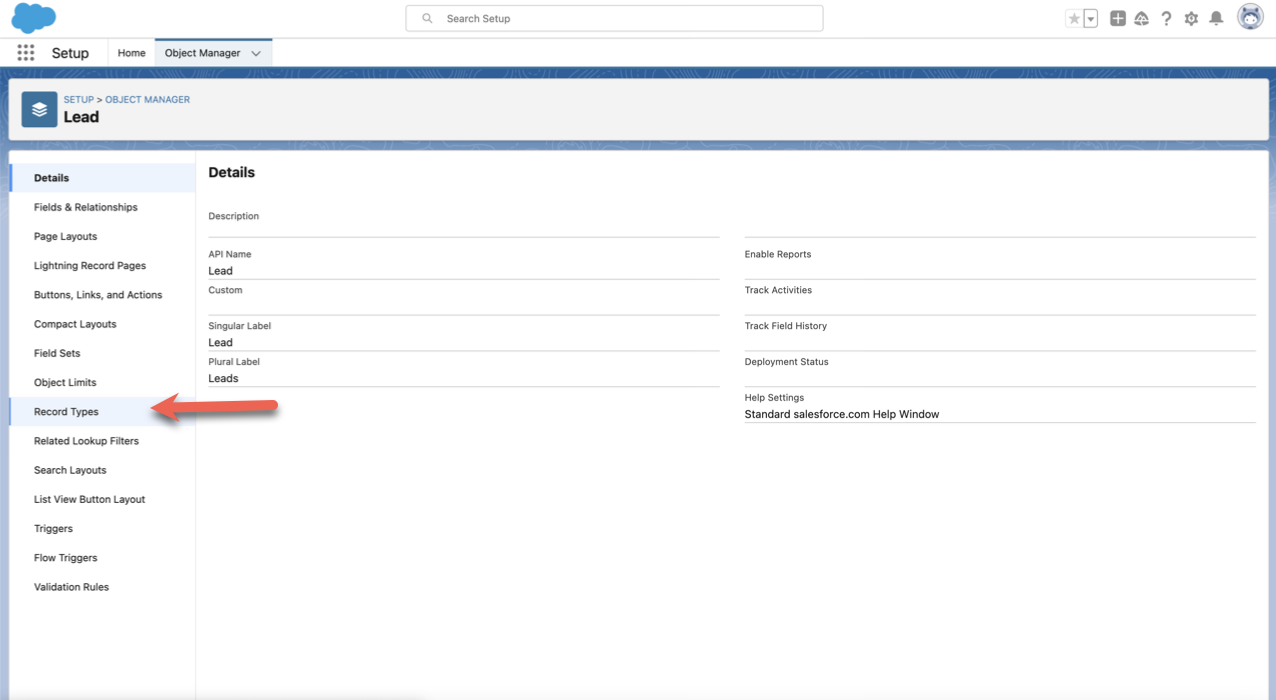
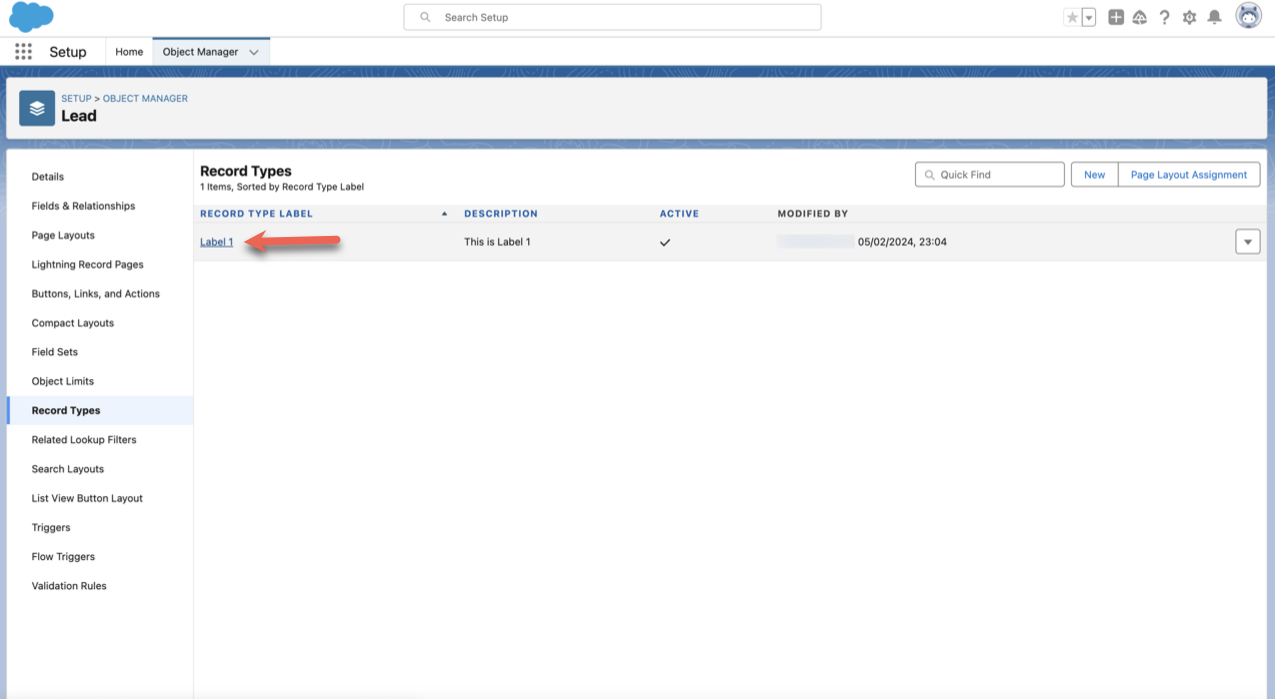
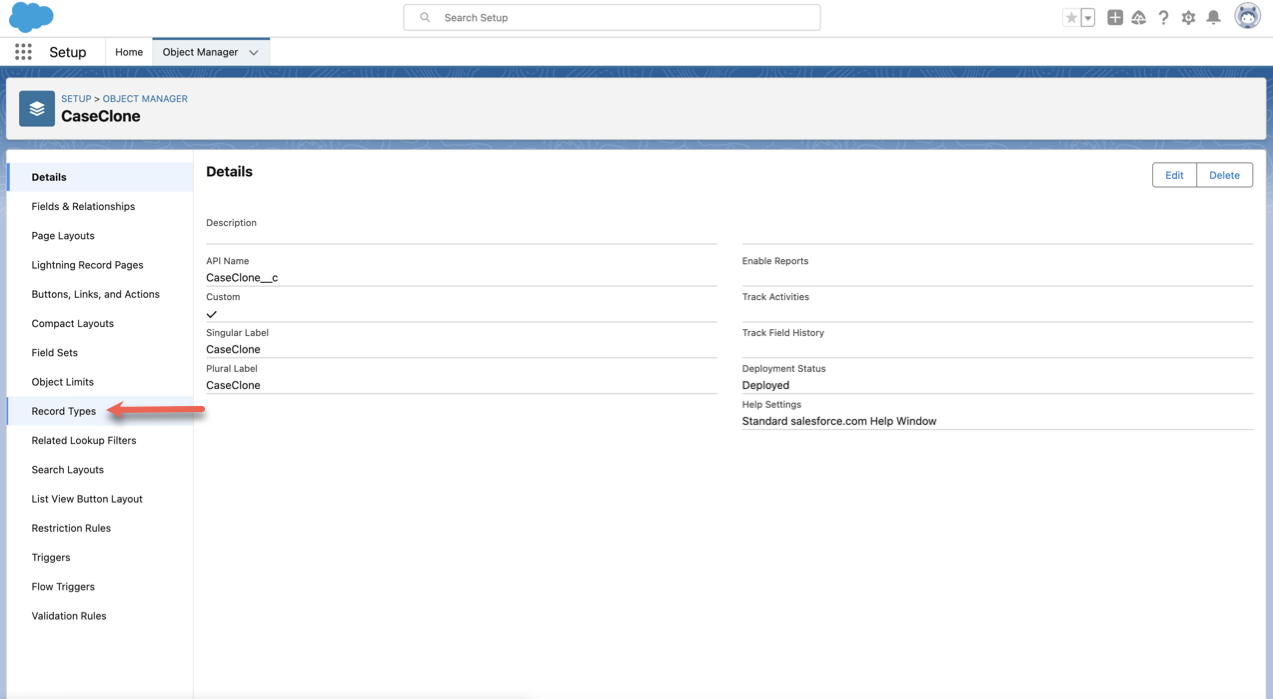
- Click Record Types.
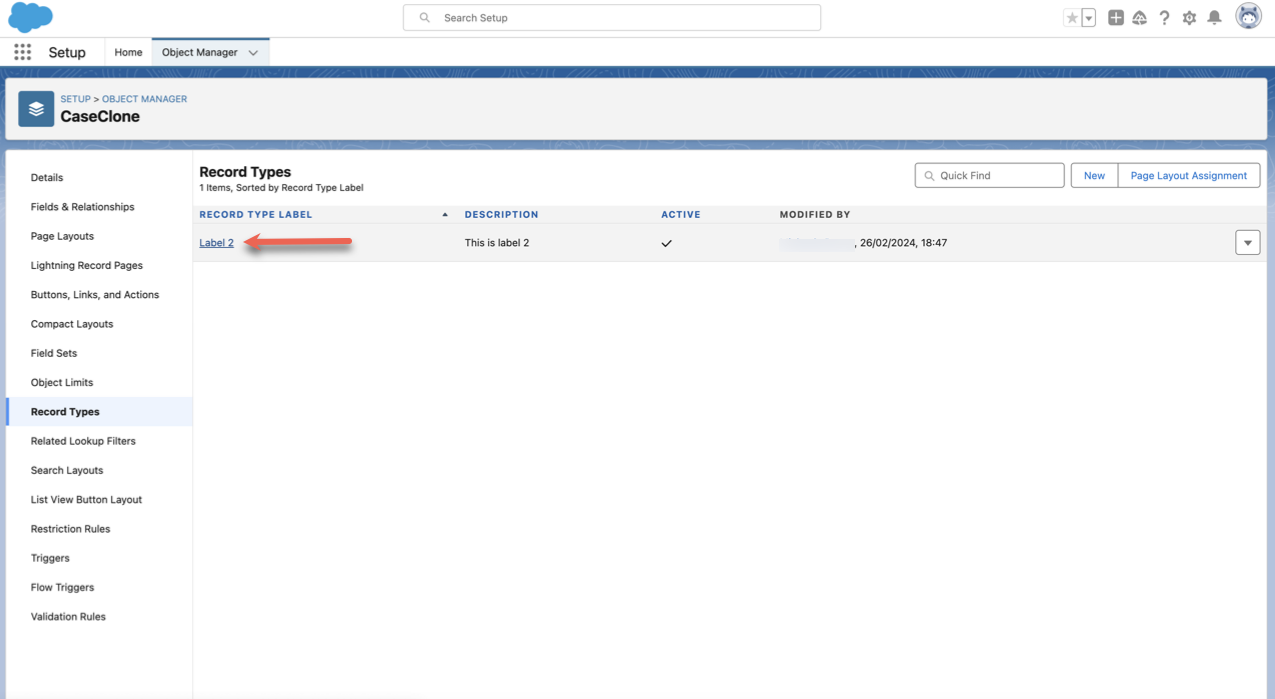
- Select the record type that contains the picklist.
- Click the Edit link.
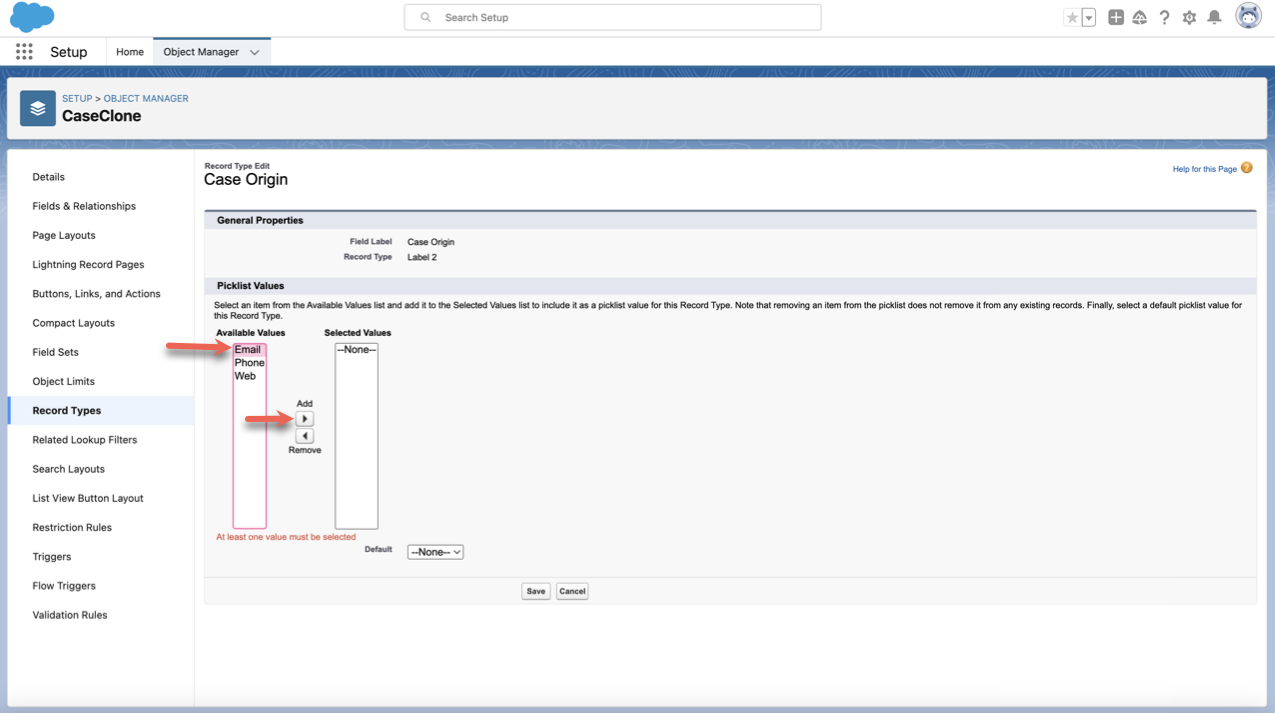
- In the Default field, select None. Then click Save.
Getting an error message is never good, especially when you’re trying to import data into Salesforce. Fortunately, Salesforce has methods to ensure your data stays clean and consistent across all departments in your organization.
One of those methods is using error messages when the data is a bit off. But error messages are only helpful if you understand why you’re getting them and if you know how to fix them. Once you understand what an error message is for, you can figure out how to fix it. One of the more common errors that may occur is a bad value for a restricted picklist field. It will look like this:
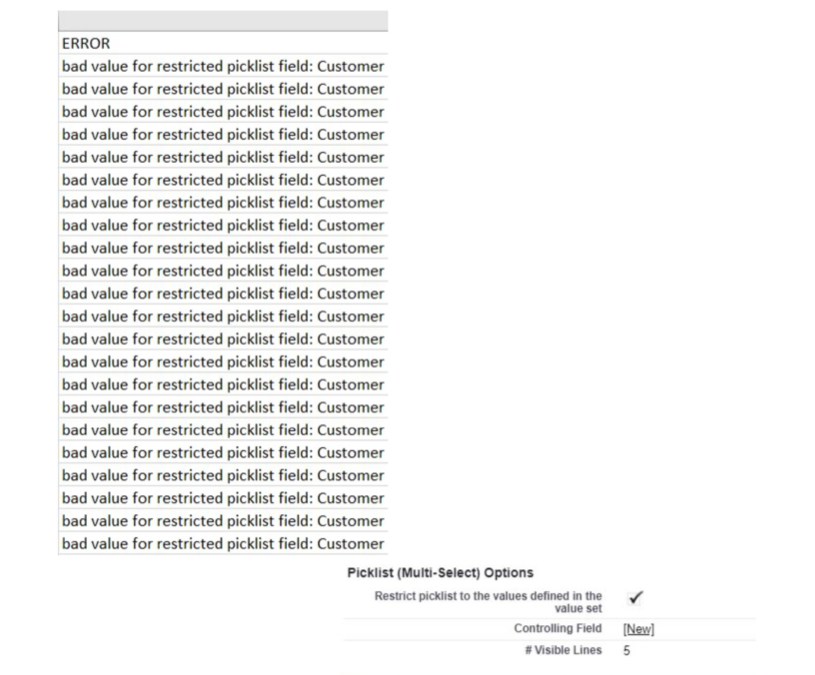
You’ll usually receive this error message when you work with restricted picklists. Even though getting an error message can be annoying, it’s better to use a restricted picklist than an unrestricted one because restricted picklists help you notice discrepancies or errors in your data.
The error message can happen for a few different reasons, but first let’s check out what this error is.
What is this error?
If you try to enter data with a value that doesn’t match the predefined value in your restricted picklist, you’ll receive an error message. It’s similar to trying to enter email addresses into a spreadsheet when the column you’re working with is set up to accept only phone numbers.
Why do you see this error message?
Overall, picklists are great because they give you more control over your data, but most picklists can accept only certain types of data. These types of picklists are most likely dependent or restricted picklists.
Restricted picklists are restricted in terms of who can and can’t alter them. Non-admin users can’t alter restricted picklists, even through the API, automation, or other apps. (They can do these things with unrestricted picklists.) This helps keep data clean because users can select only from the list provided by the admin, rather than uploading new items that may contain typos.
A dependent picklist is a specific type of restricted picklist. Its values are determined by another picklist. For example, if you work at a bakery and you want your customers to narrow down their choices to only gluten free cookies, you could create a dependent picklist that presents users with only gluten free options if they select gluten free from the first picklist
There are a few different ways to change your picklist settings so you don’t get that pesky error message.
Pro Tip
Reduce bad updates by guiding users with Jotform Salesforce Agent, which uses AI to capture intent, update the right object fields, and log successes or failures for review.
How do you fix this error?
The first course of action is to try expanding your value options to match the ones you’re trying to import. Here’s how to do that:
- Click the gear icon, then click Setup.

- Click Object Manager.
- Select the object for the record type that contains the picklist.
- After selecting the object, click Record Types.
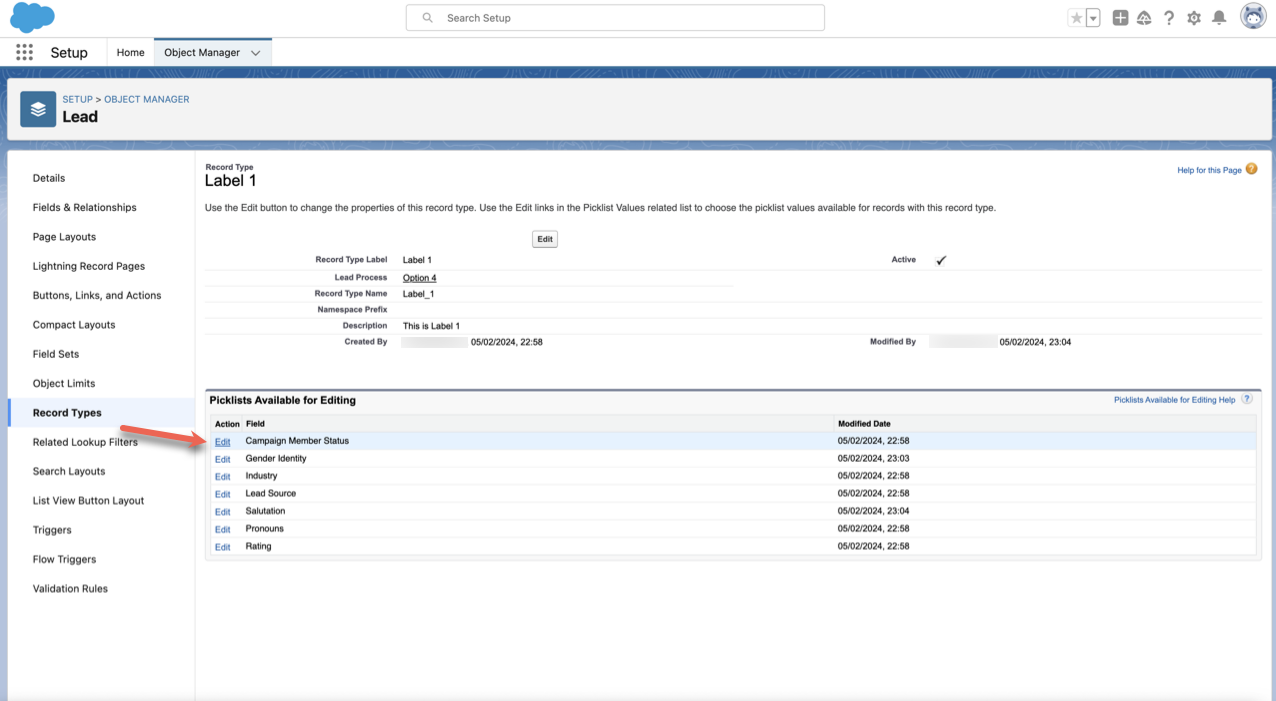
- Select the record type that contains the picklist.
- Click the Edit link for the picklist you wish to change.
- In the Default field, select None. Then click Save.
If that doesn’t work, try expanding your selected values rules so you don’t have to worry as much about matching values. See how to do it below:
- Click the gear icon, then click Setup.
- Click Object Manager.

- Select the object containing the picklist you’re having trouble with.
- Click Record Types.
- Select the record type you want to edit.
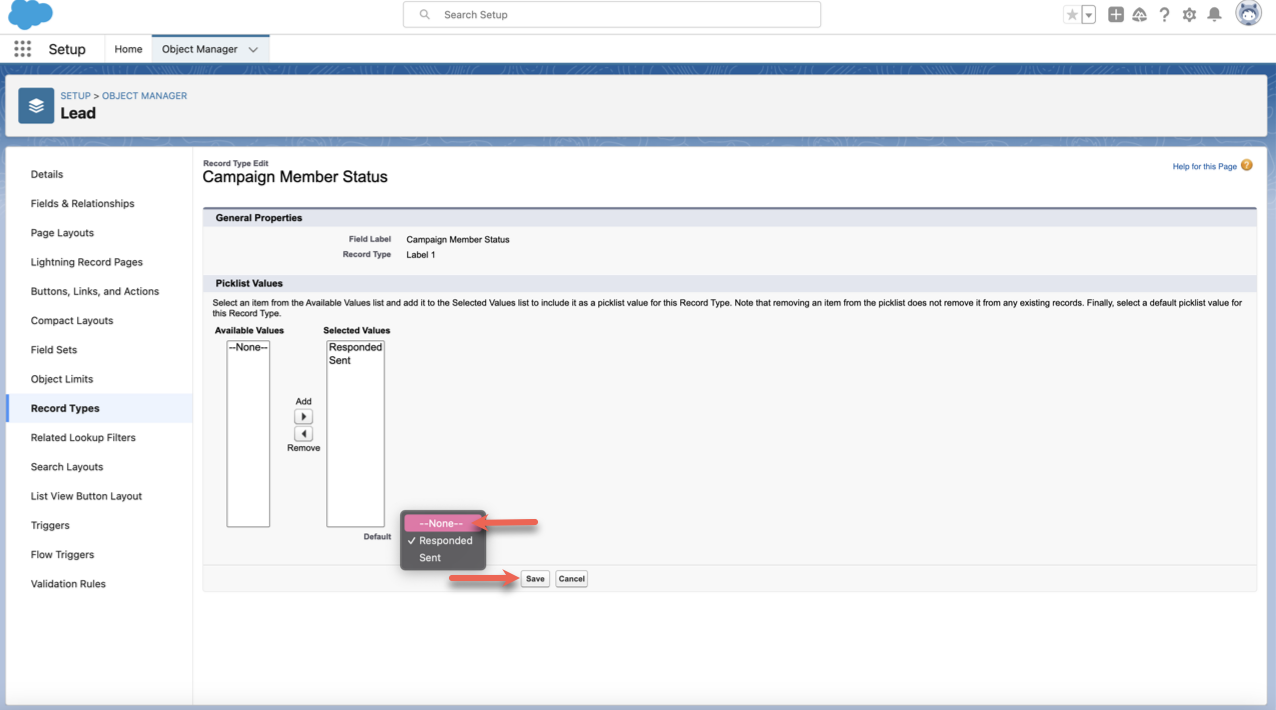
- Select the Picklist you need to edit and click Edit.

- Find the values you want to edit from the Available Values column, and use the arrow buttons in between the two columns to move them to Selected Values.
- Your Selected Values column should look like this when you’re done.
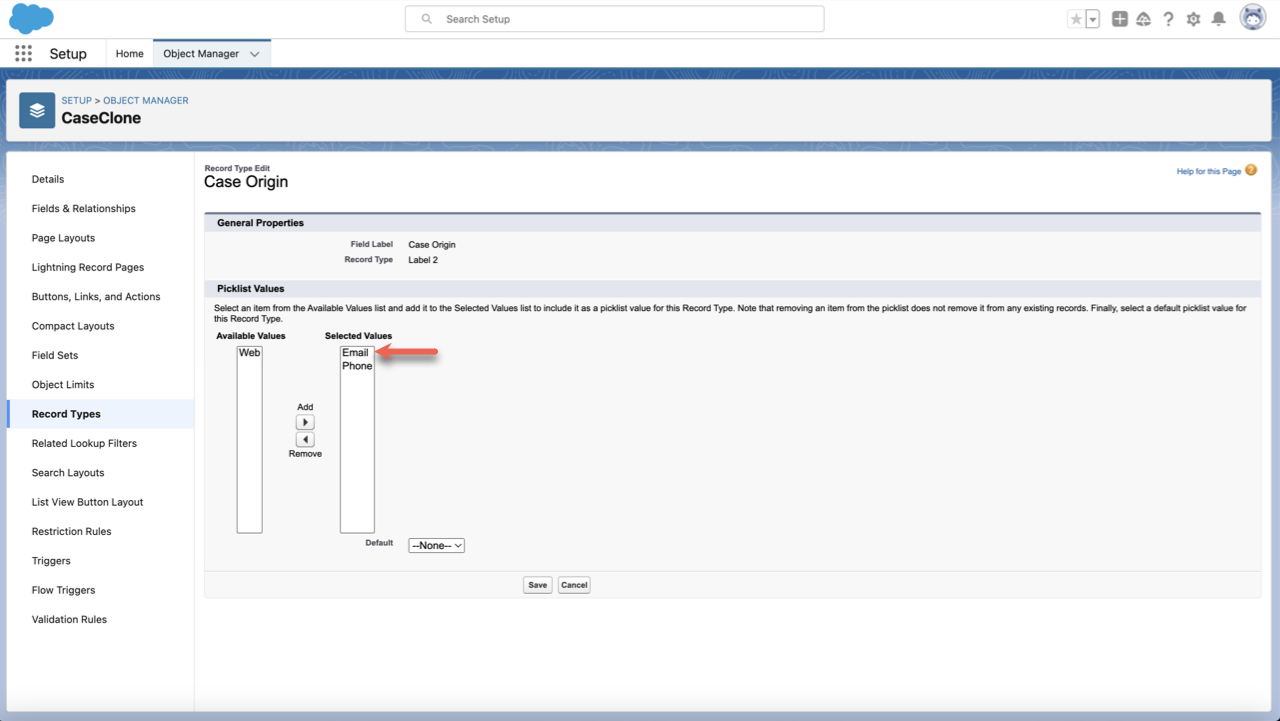
Photo by MART PRODUCTION


Send Comment: