
Steps to create a form in Microsoft Excel
- Make an Excel table.
- Add the data entry form option to the Excel sheet ribbon.
- Enter some data into your newly created form.
Though the popular spreadsheet software Microsoft Excel touts many features, one of the most useful is the ability to create fillable forms.
Primarily used to easily enter and edit data, fillable forms help users know exactly where to enter their information without scrolling through an entire worksheet — resulting in greater efficiency and fewer chances for human error. It also provides a convenient way to both enter and display data, especially if that data is added to multiple columns.
Fillable forms are also useful in helping you stay organized. For example, if you’re in human resources and you want to track each job candidate’s application, interview stage, and contact information, fillable forms can make the process easier. Or, if you’re building a form to improve your asset and inventory management (especially if your company struggles with overstock or shortages), fillable forms can help.
Fortunately, if you want to learn how to create a form in Excel, the process is pretty easy.
How to create a form in Microsoft Excel
Imagine you’re collecting customer feedback on a recently launched product. Here’s how to create a feedback form in Excel in just a few simple steps.
- First, make an Excel table.
- Open an Excel spreadsheet.

- Create column headers for your feedback form (like Name, Email, City, and Feedback/Comments).

- To convert your column names into a table, select the column headers, then select Insert from the top menu, then Table.
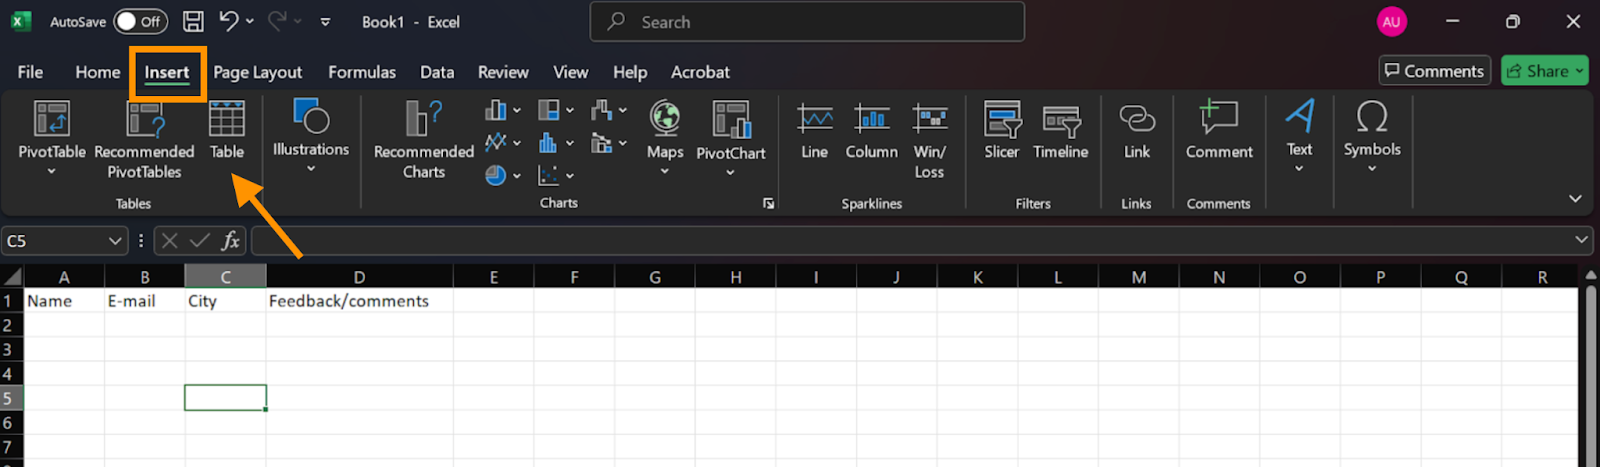
- Within the dialog box, tick the My table has headers checkbox.

- Click OK to create your Excel table.
- Next, add the data entry form option to the Excel sheet ribbon (that’s the top of your Excel window full of icons and menus).
- Click on File > Options > Customize Ribbon.

- Under Choose commands from, select Commands Not in the Ribbon.
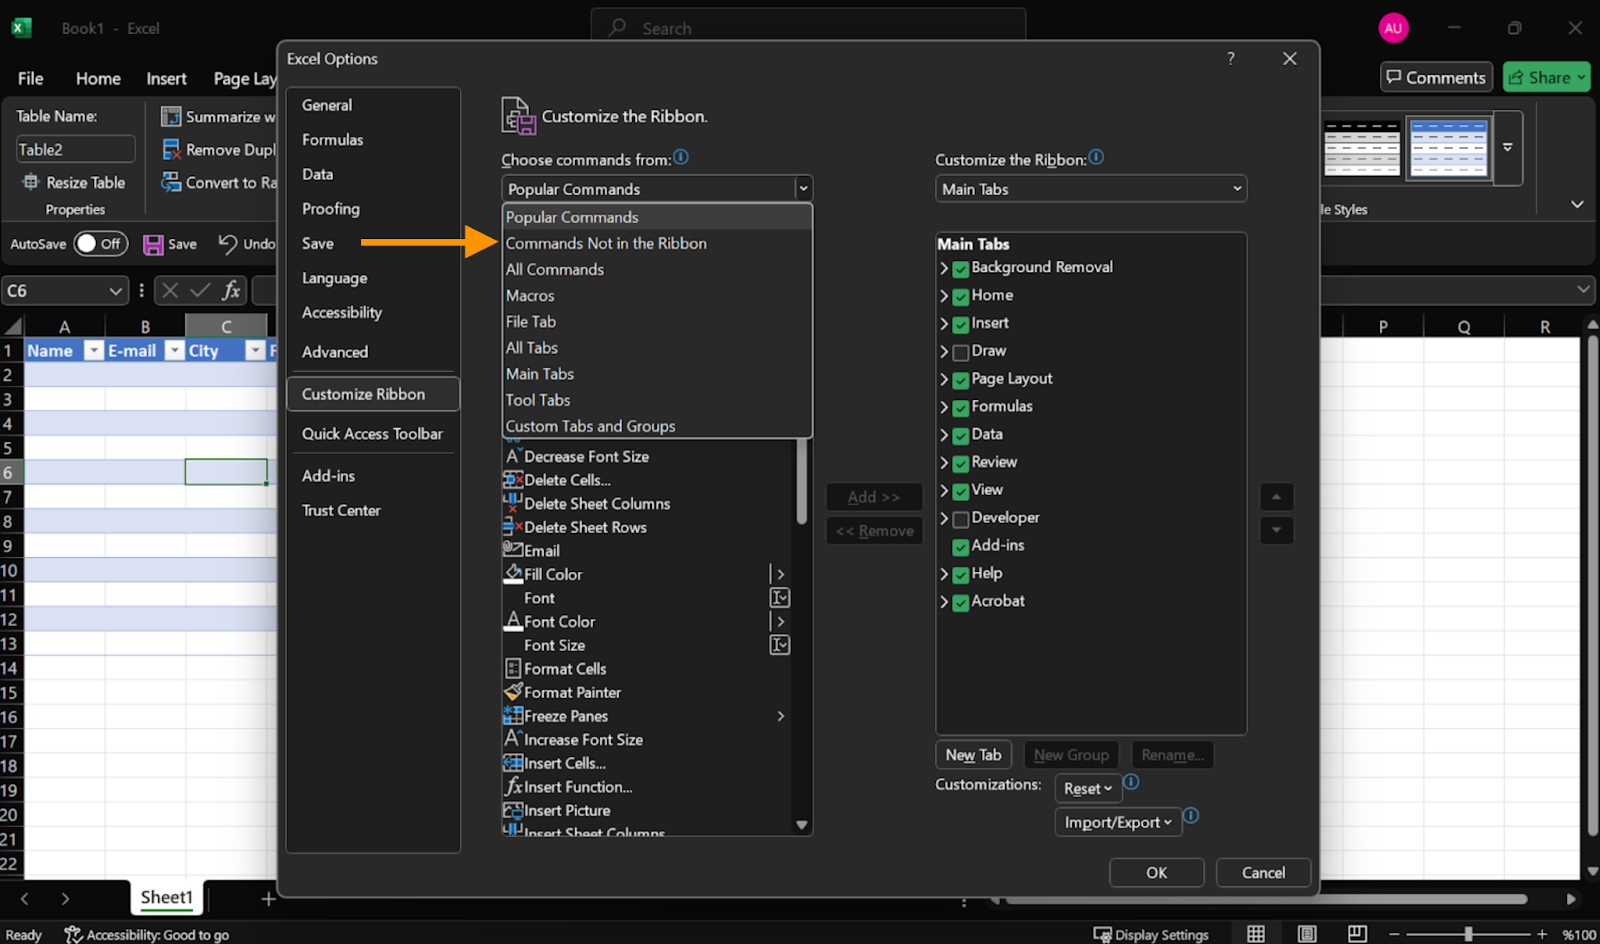
- Select Form, then Add, and then hit the OK button. You’ll now notice the Form button near the green area at the top of the Excel workbook.

- Finally, it’s time to enter some data into your newly created form.
- To input data, click on any cell in your table and then on the Form button.
- A dialog box should appear with your original column headers (Name, Email, City, and Feedback/Comments) and a few button options: New, Delete, Criteria, and Close.
- Enter your collected data in the form fields.
- Select New, prompting the data to appear in your Excel table.
- Select Close to leave the dialog box and view your data or repeat the process until you have entered all your data.
Level up your forms with Jotform’s Excel integration via Zapier
Now that you know how to create a form in Excel, consider another method: using the online form builder Jotform.
Fillable forms are supposed to make data entry easier, so you don’t want them to become a hassle. Unfortunately, Microsoft Excel does have some limitations. It’s not the most user-friendly program on the market (especially for Mac users), and it has formula restrictions and field limits that can prevent you from completing a project correctly.
Plus, it doesn’t integrate with other programs, making it an isolated system if you need to do more than just organize numbers and data.
Instead, you can host your forms online with form builder Jotform. Using Jotform, you can not only create fillable forms to collect data, but you can also send them to Excel automatically (using a Zapier integration).
This way, you can manage your data in easy-to-view and easy-to-use rows — eliminating the tedium of manual data entry from your work life. Jotform is also a code-free tool, so you can access its wide array of features even if you don’t have any coding expertise.
And the best part is you don’t even need to exit Jotform to set it all up and get started. All you have to do is select the integration in the Jotform Form Builder, log in to your Zapier account to connect Jotform and Excel, and sync them together to share information.
How to use Jotform Tables as an Excel alternative
What’s more, if you really want to keep everything centralized in one digital workspace, you can use Jotform Tables and Jotform together as a great Microsoft Excel alternative.
Here’s what you can do with Jotform Tables:
- Collect accurate data quickly and easily through customizable online forms, ensuring better organization, quality assurance, and decision-making
- Auto-populate tables with your collected form data to reduce the chance of human error
- Search and filter your data to provide a quicker, easier user experience
- Add formulas and calculations to save time
- Import CSV or Excel files directly into Jotform Tables, allowing you to access shared documents with ease to complete various tasks
- Share your tables with your colleagues for open communication and collaboration
- Organize your data in columns that correspond to form fields, making it easy to search and manage for everyone on your team
And with access to 300-plus free table templates for your next project (including templates for equipment inventories, marketing plans, and budgets), the possibilities are truly endless.
There are various spreadsheet software options on the market ready and willing to help you collect, filter, and sort data as well as design charts like bar and line graphs. So, be sure to select the tool that’s best for your specific spreadsheet needs, and you’ll be equipped to design exactly what you’re envisioning.
Photo by Antoni Shkraba Studio


")


Send Comment: