The Form element lets you easily add follow-up forms to your approval workflow. You can assign these forms to specific people or respondents and keep track of their progress right from your workspace. Invitations are automatically sent via email, and you can personalize the message to match your tone or style.
Assigning a Follow-Up Form
Assigning a follow-up form is a great way to keep your workflow moving smoothly. It helps you gather additional details, confirm actions, or collect next steps from the right people—all without losing track of progress. You can set it up like this:
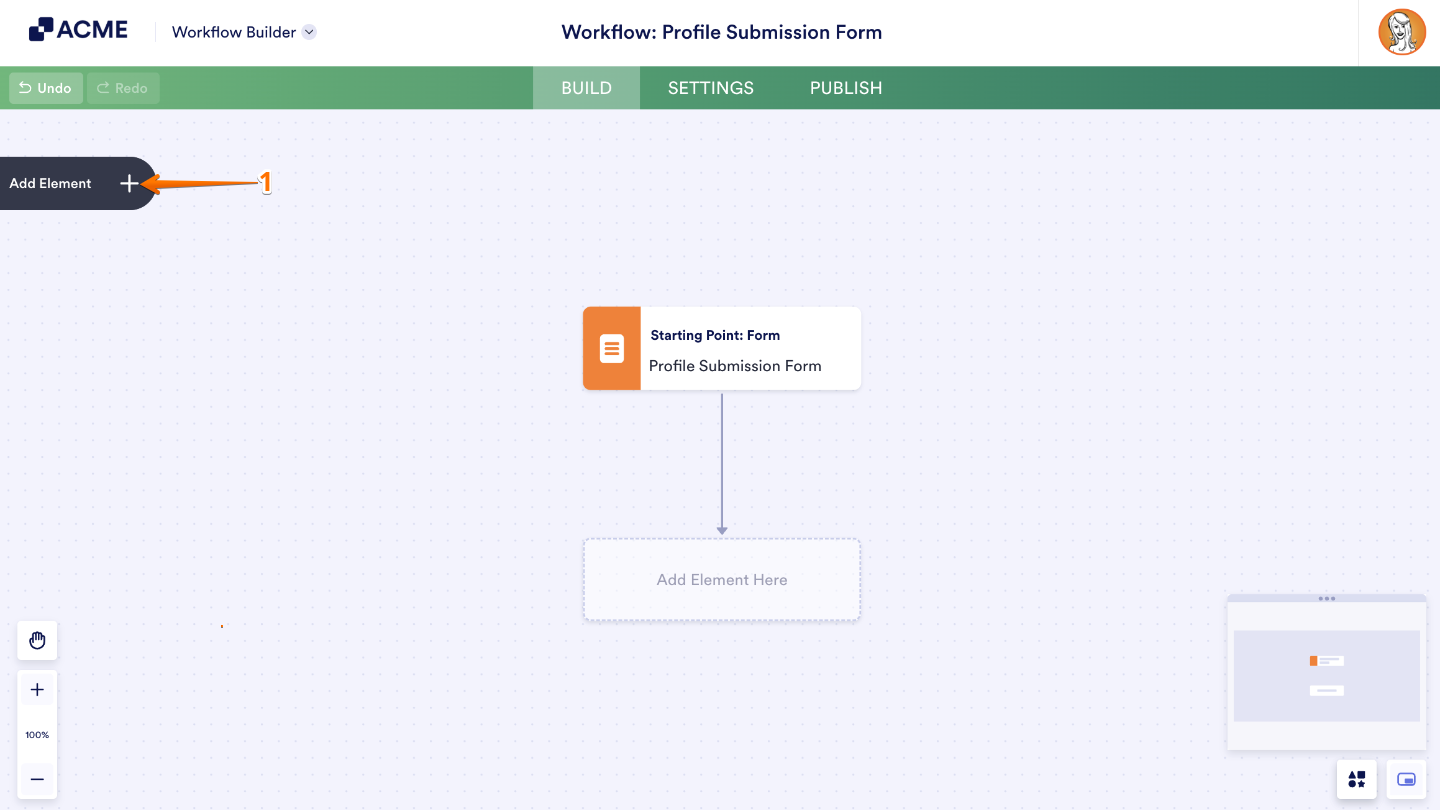
- In Workflow Builder, click on Add Element on the left side of the page.
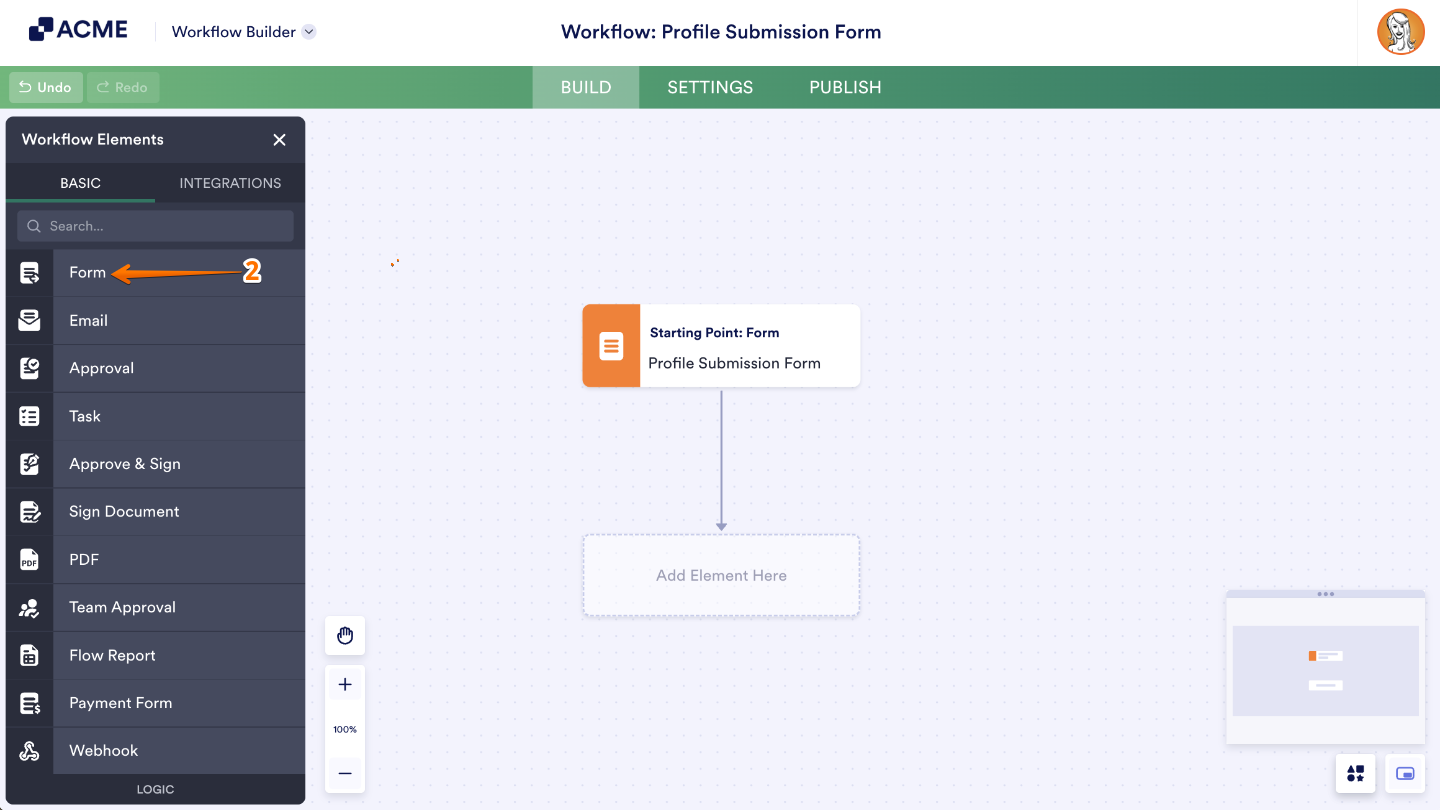
- Then, in the Workflow Elements menu, click on Form element, or drag and drop it to add it to your workflow.
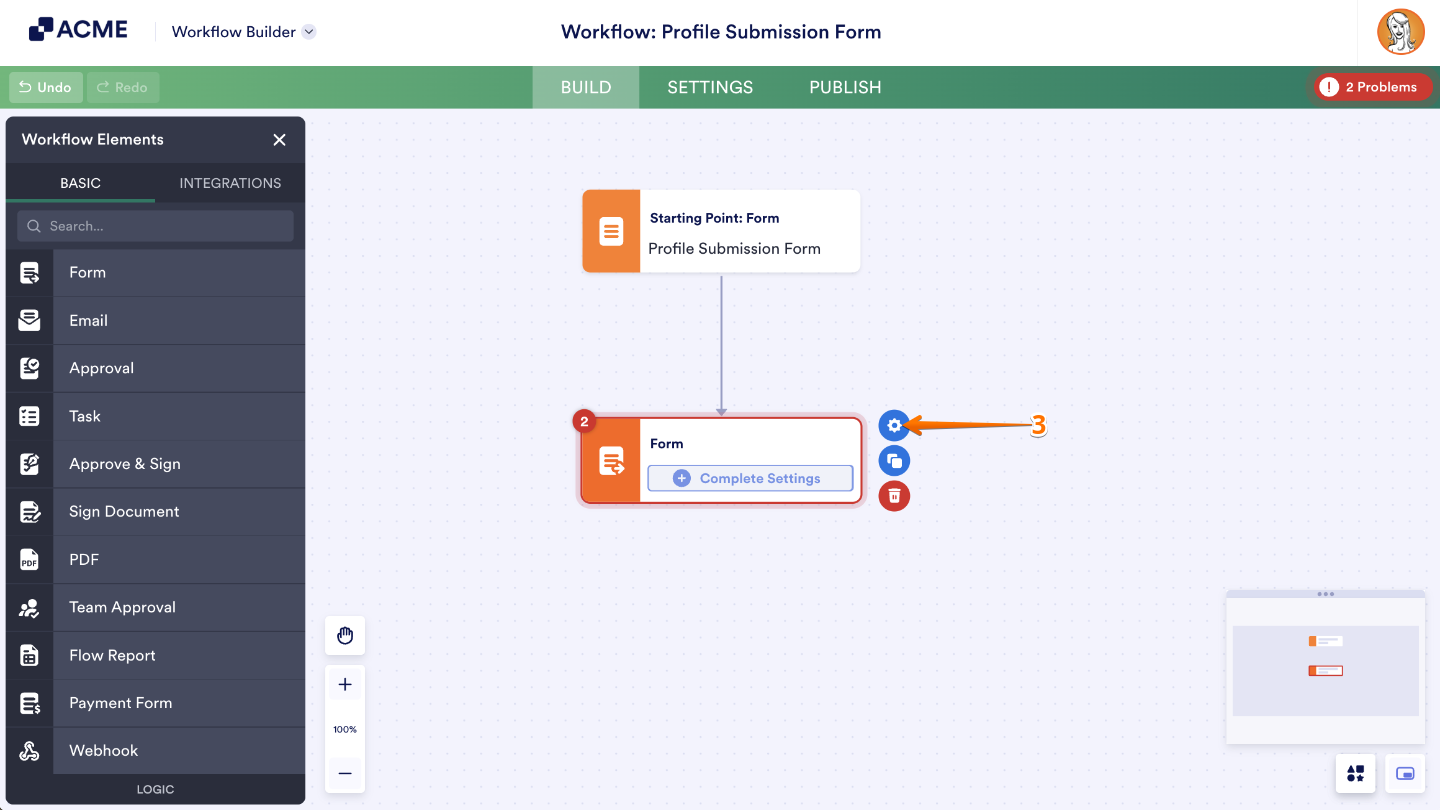
- Next, click on the added Form field, and then click on the Gear icon.
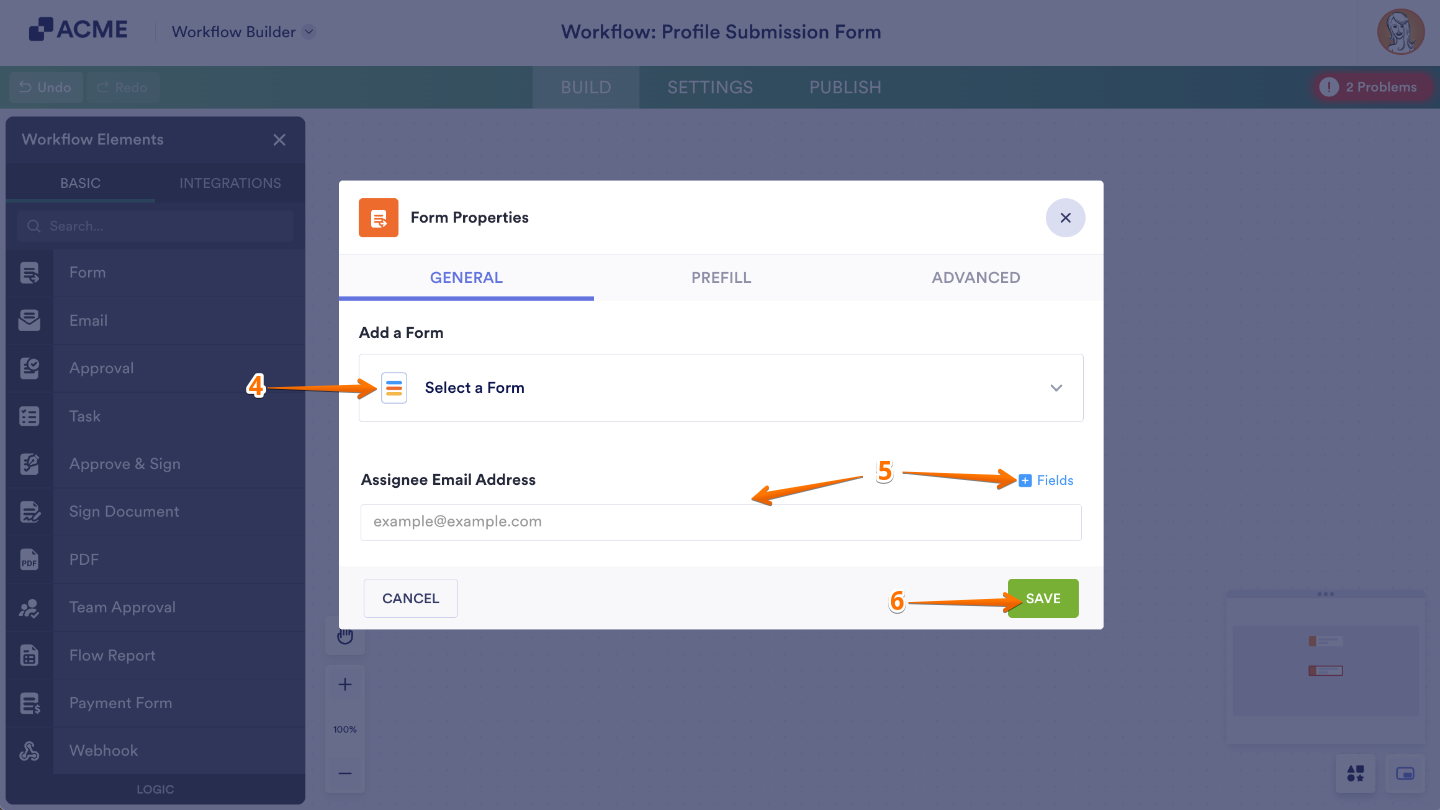
- Now, in the Form Settings dialog that comes up, click on Select a Form to choose your follow-up form.
- After that, enter the recipient’s email address in the Assignee Email Address field or click on Form Fields to select an email field from the menu.
- Once you’re done, click on Save.
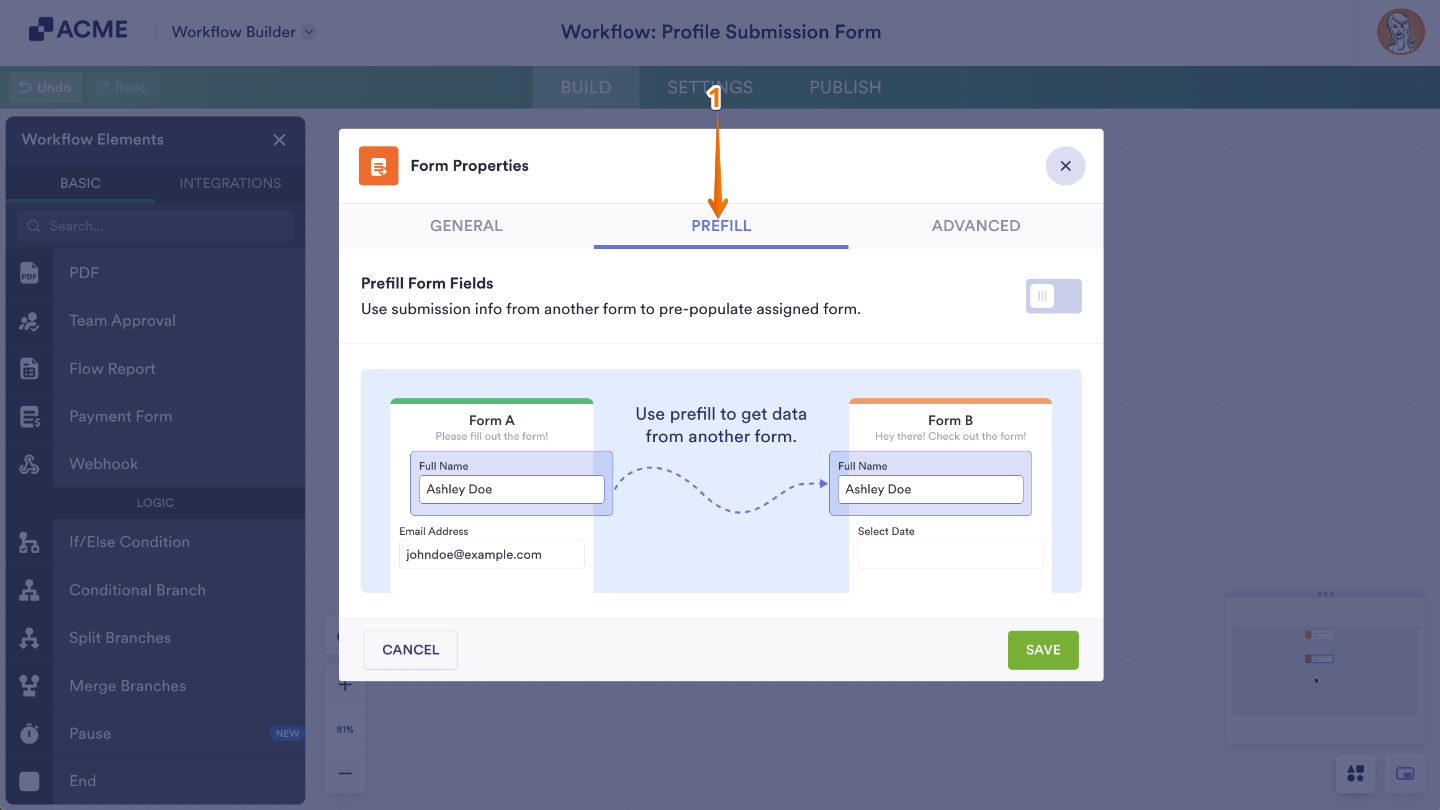
Enabling Prefill
You can make things easier for your respondents by automatically carrying over their answers from the main form to the follow-up form using Prefill. This saves them time and keeps your workflow seamless. Here’s the quick way to do it:
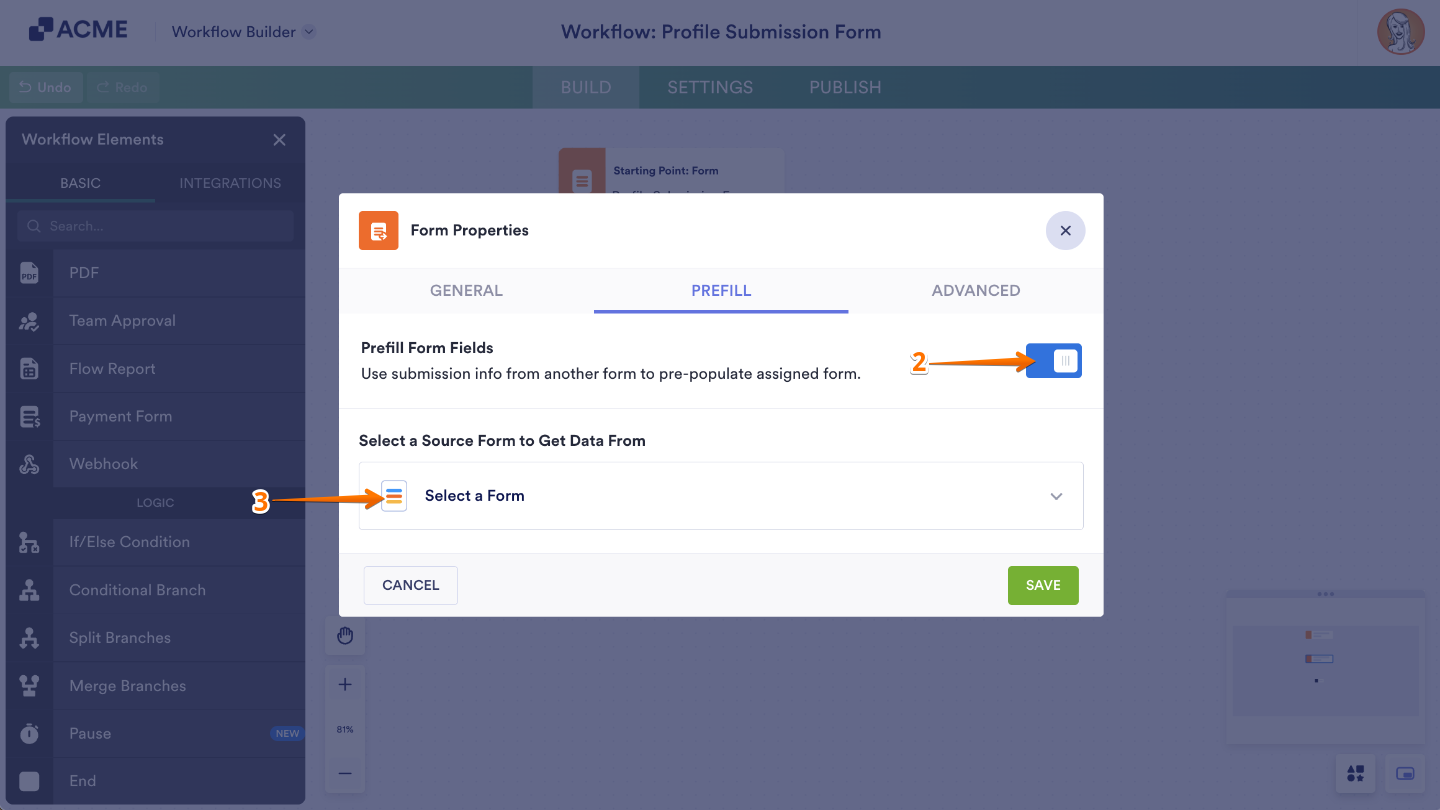
- In the Form Settings dialog, click on the Prefill tab.
- Next, toggle on Prefill From Fields.
- Then, in the Select a Source Form to Get Data From field that shows up, click on Select a Form to choose your source form.
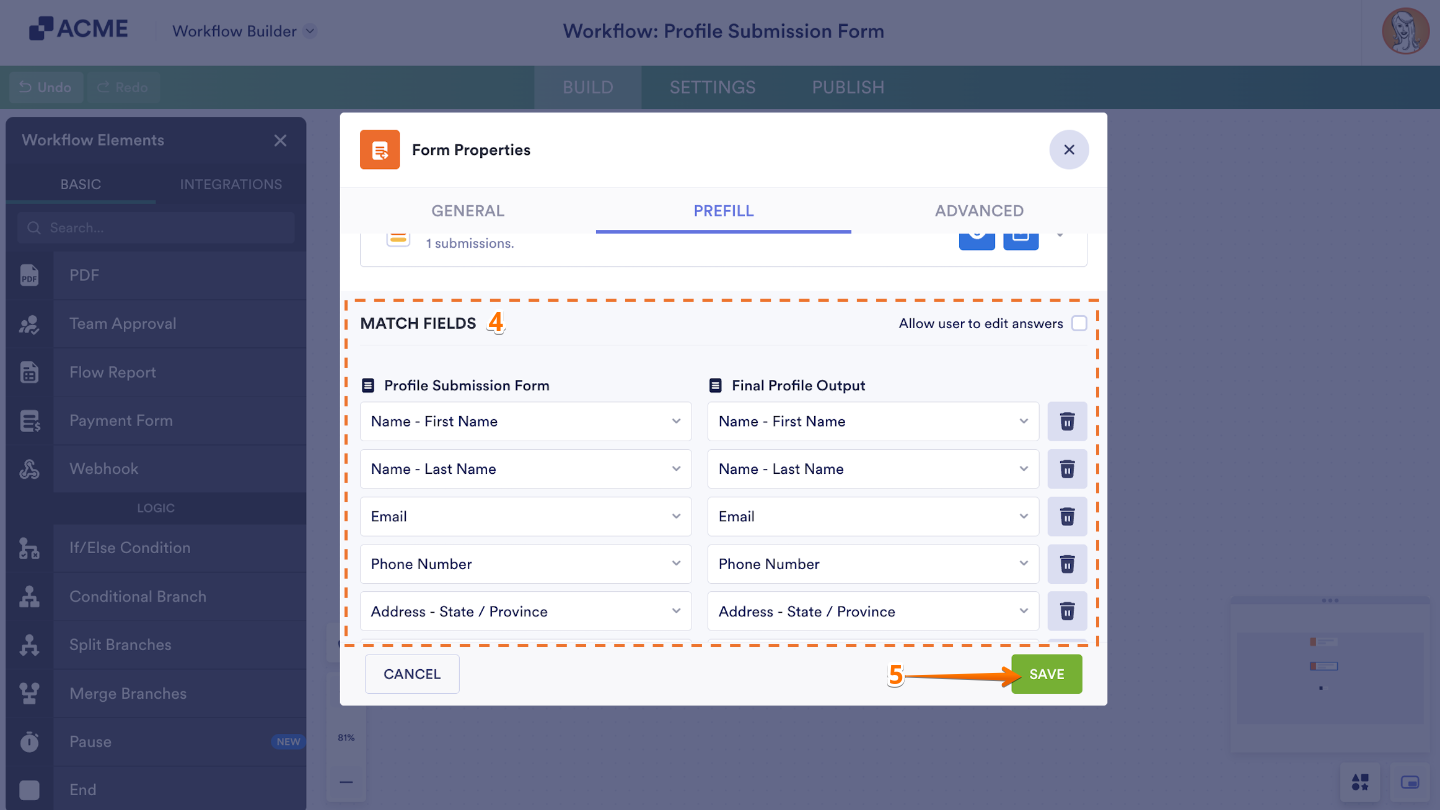
- Now, in the Match Fields section, map the form fields to copy the field data. You can also check the box under the Allow User to Edit Answer option to let the user edit the follow-up form.
- Once you’re done, click on Save.
Customizing the Invitation Email
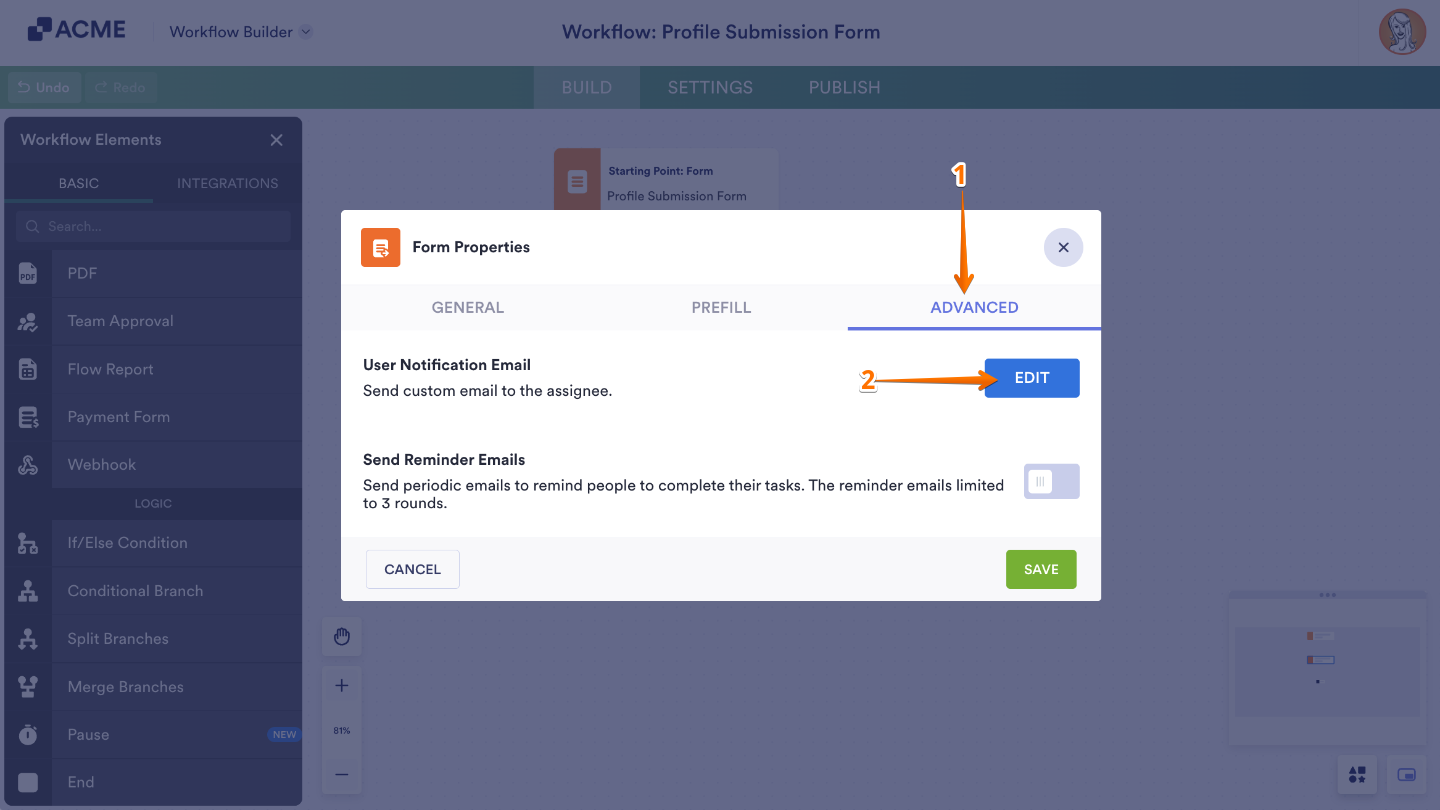
Under the Advanced tab, you can make the invitation email truly your own—edit the message template, update the sender name and address, attach files, and even set reminders to follow up automatically. Here’s how you can customize your invitation email:
- In the Form Settings dialog, click on the Advanced tab.
- Next, click on Edit.
Note: To send follow-up reminders automatically, simply turn on the Send Reminder Emails option and adjust the settings to fit your needs. This feature has its own email template and customization options, so you can tailor the reminders just the way you like.
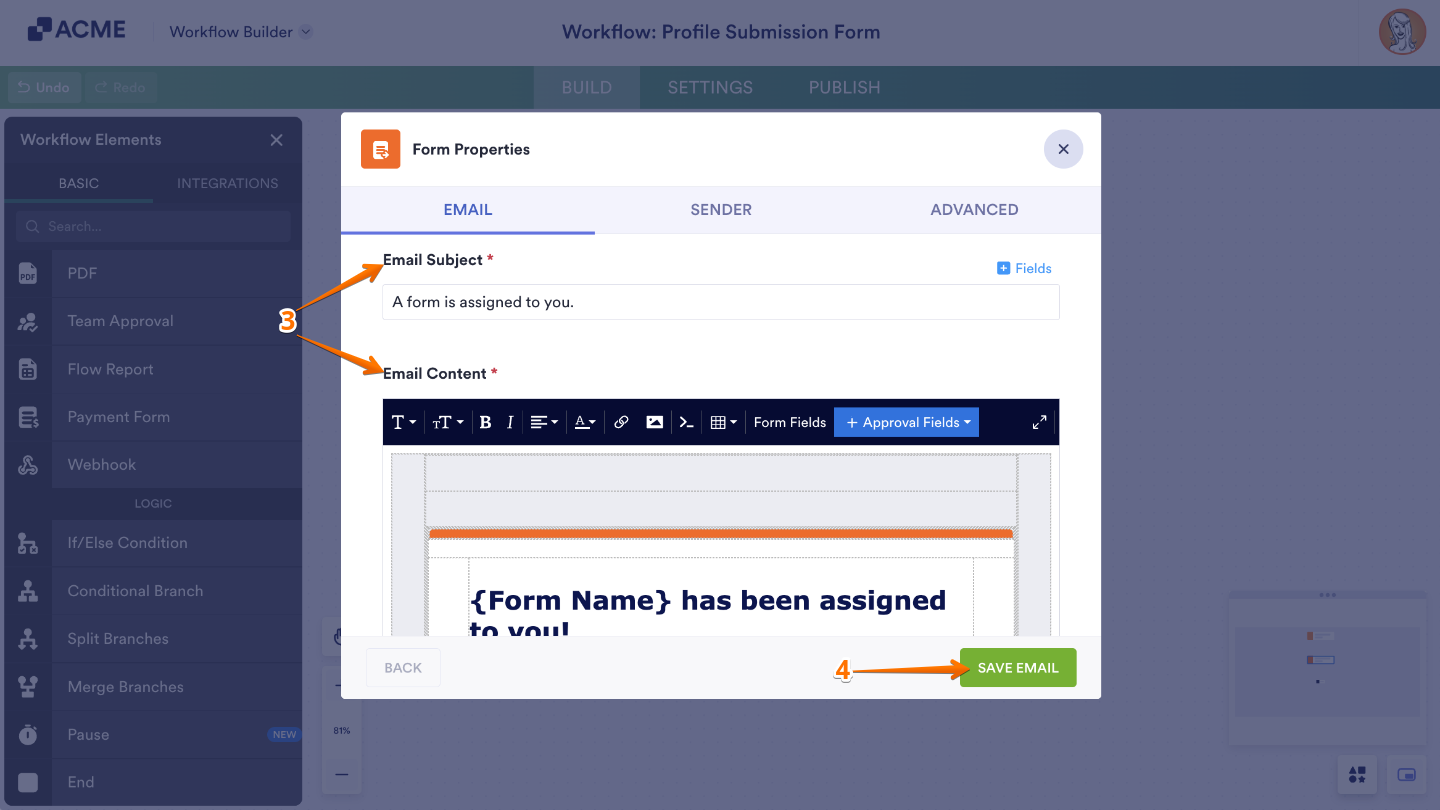
- Then, under the Email tab, customize the Email Subject and Email Content fields to your liking.
- Once you’re done, click on Save Email.
Note: The View Form button in your email includes a dynamic link that takes recipients straight to your form. It’s best to keep this button as it makes accessing the form quick and easy for your users.
Here are more options available for your email:
- Sender Name — Found under the Sender tab, this is the “from” name that appears on the email.
- Reply-to Email — Also found under the Sender tab, this is the destination address when your recipients reply to your email.
- Attach File — Found under the Advanced tab, this allows you to add attachments to your email.
- Sender Email — Also under the Advanced tab, here you can change the email address to show as the sender.
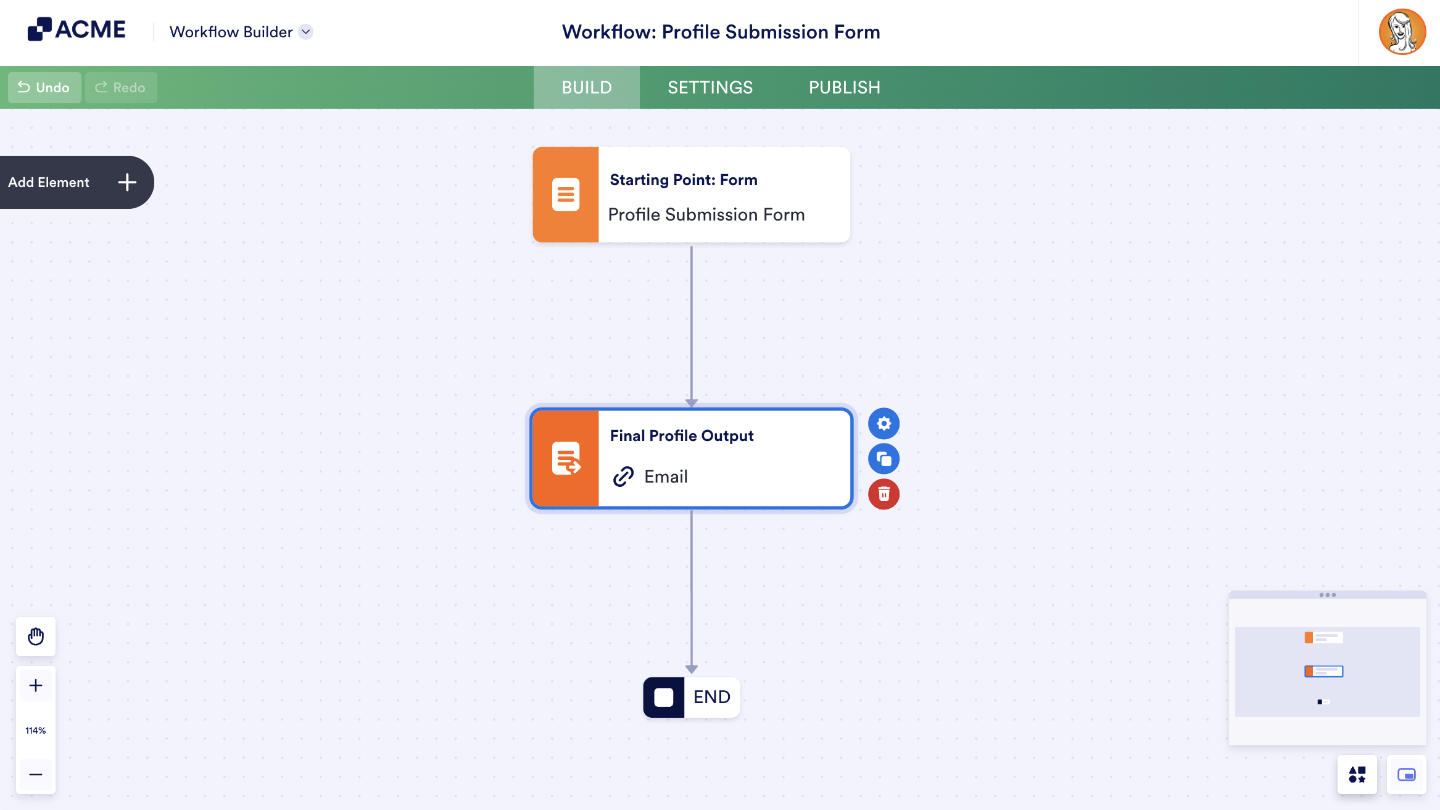
That’s it. The last step is to add an End element to wrap up your workflow. Here’s an example of how the complete workflow looks—it automatically sends a follow-up form to a user’s email based on their answer in the main form:


Send Comment: