-
 eric_eric304
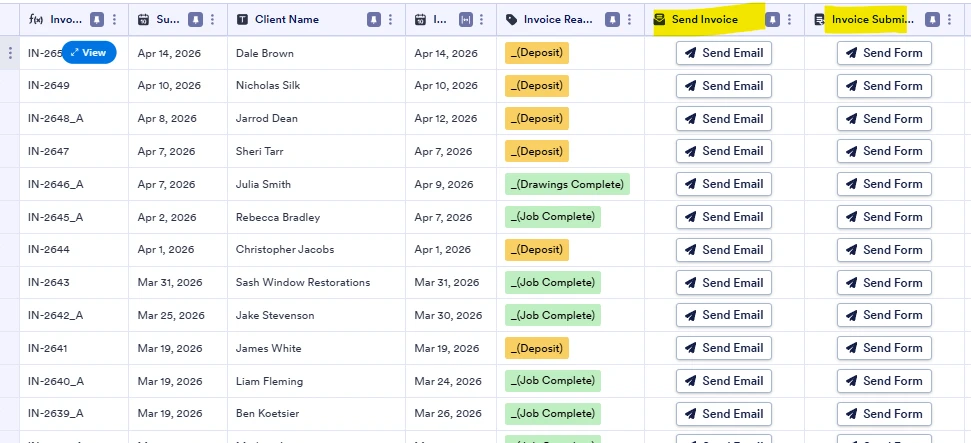
Just then the send columns on my submission tables timestamps got reset and the buttons are no longer functional. although when I click on it the emails do send, jut doesn't get updated on the tables. is this a bug or a known issue.

-
 Podo: Support Specialist
Hi Eric,
Thanks for reaching out to Jotform Support. I'm an AI assistant here to assist you.
Based on the information available, after an email is sent from a Send Email Action Button in Jotform Tables, the button should change to show a timestamp. The same source also notes that if the button settings are modified, the email is resent using the new configuration, but it does not automatically reset the button state for entries that were already sent.
Relevant points from the knowledge base:
- After sending an email, the Send Email button changes to show a timestamp for that entry.
- You can click the downward arrow next to the timestamp and select Resend if needed.
- Reconfiguring the button settings does not automatically reset the buttons for entries where the email has already been sent.
If the emails are sending but the table is not updating the timestamp or the button is not behaving as expected, I don't know this information and our support team will handle your request.
Give it a try and let us know how it goes.
-
 Rose Enterprise Support
Hi Eric,
Thanks for reaching out to Jotform Support. I cloned your form and tested it to see if I could replicate the behavior, but everything was working properly. Check out the screencast below to see my results:
To dig deeper, a screen recording would help us see exactly what’s happening. You can use Loom or upload to Google Drive or Dropbox, then send us the link. Can you also allow us to log in to your account to view your table? Let me show you how to do it:
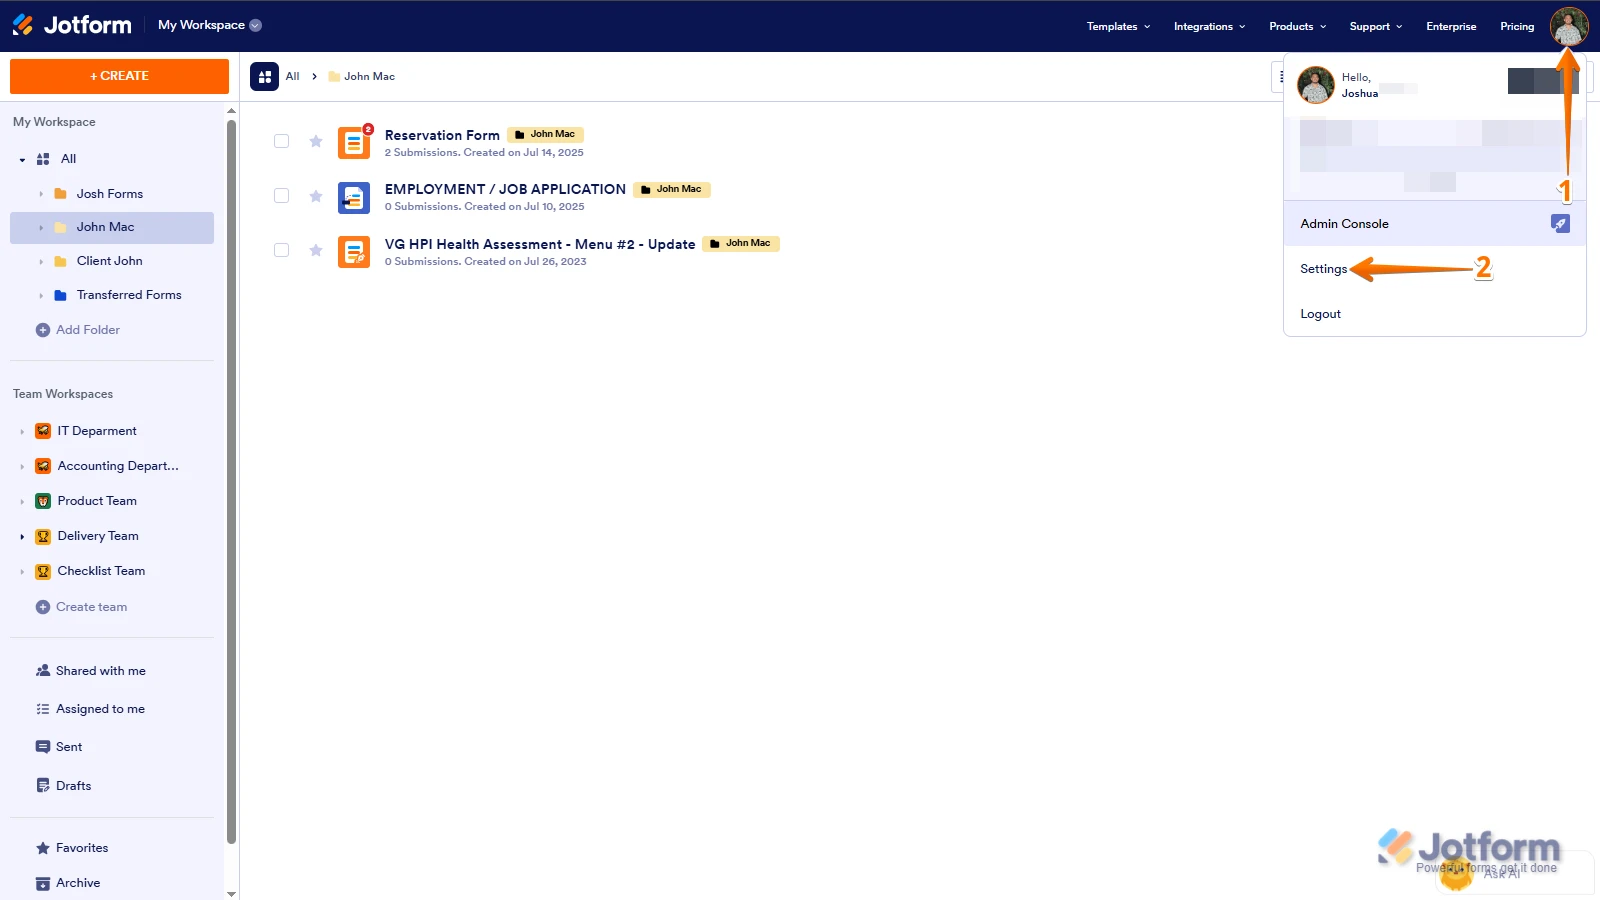
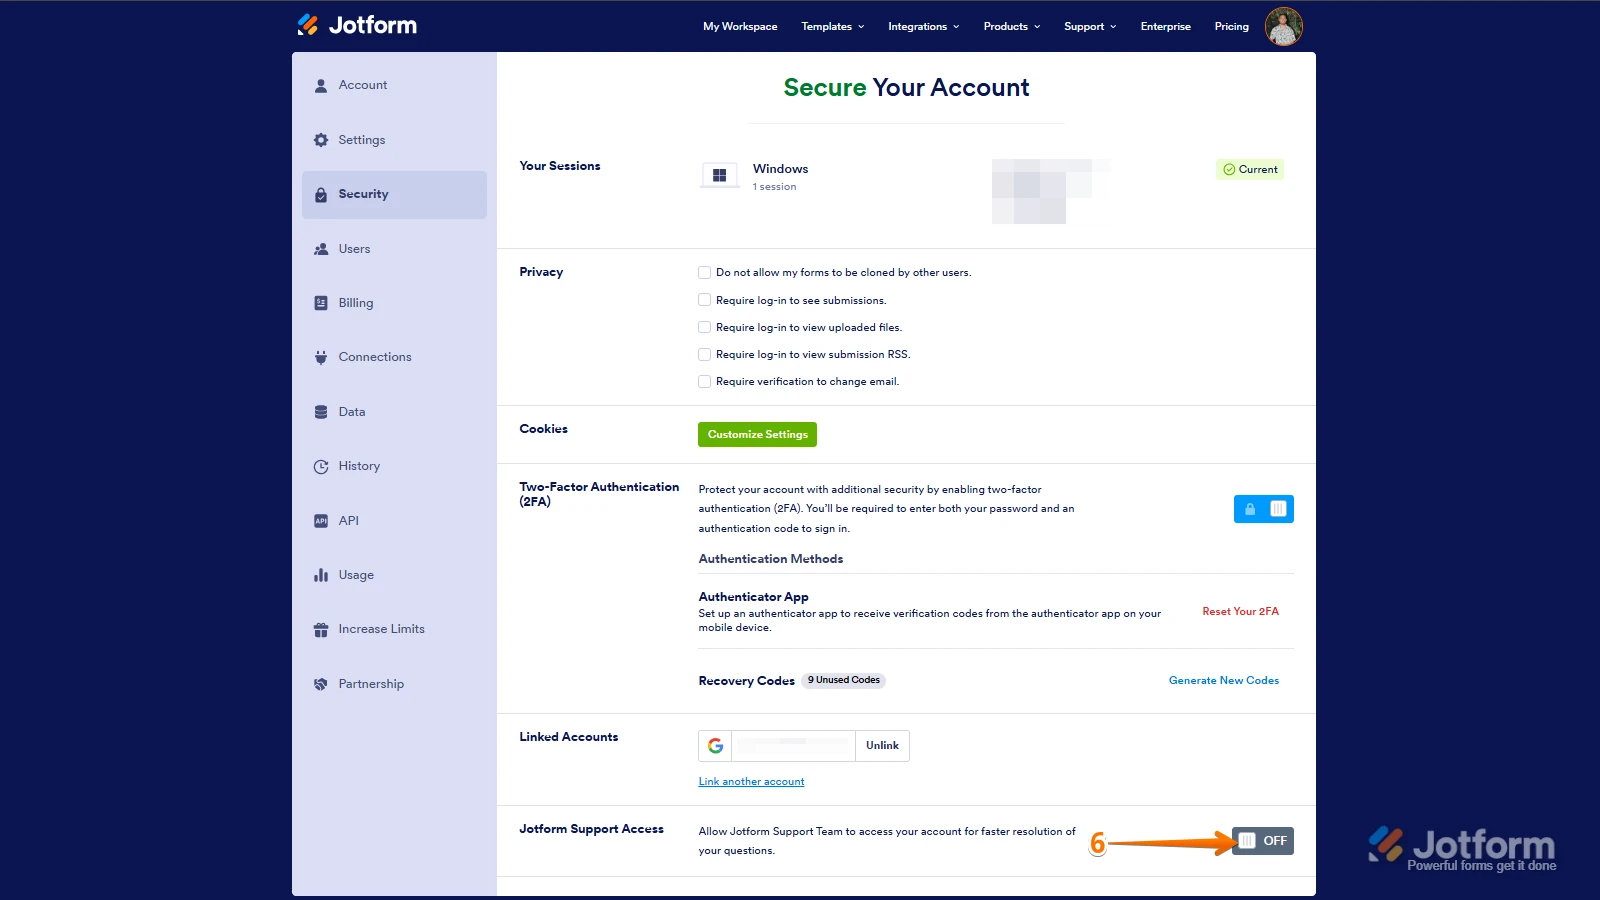
1. In the top-right corner of your Workspace page, click on your Avatar/Profile Image icon.
2. Then, in the Dropdown menu that opens, click on Settings.
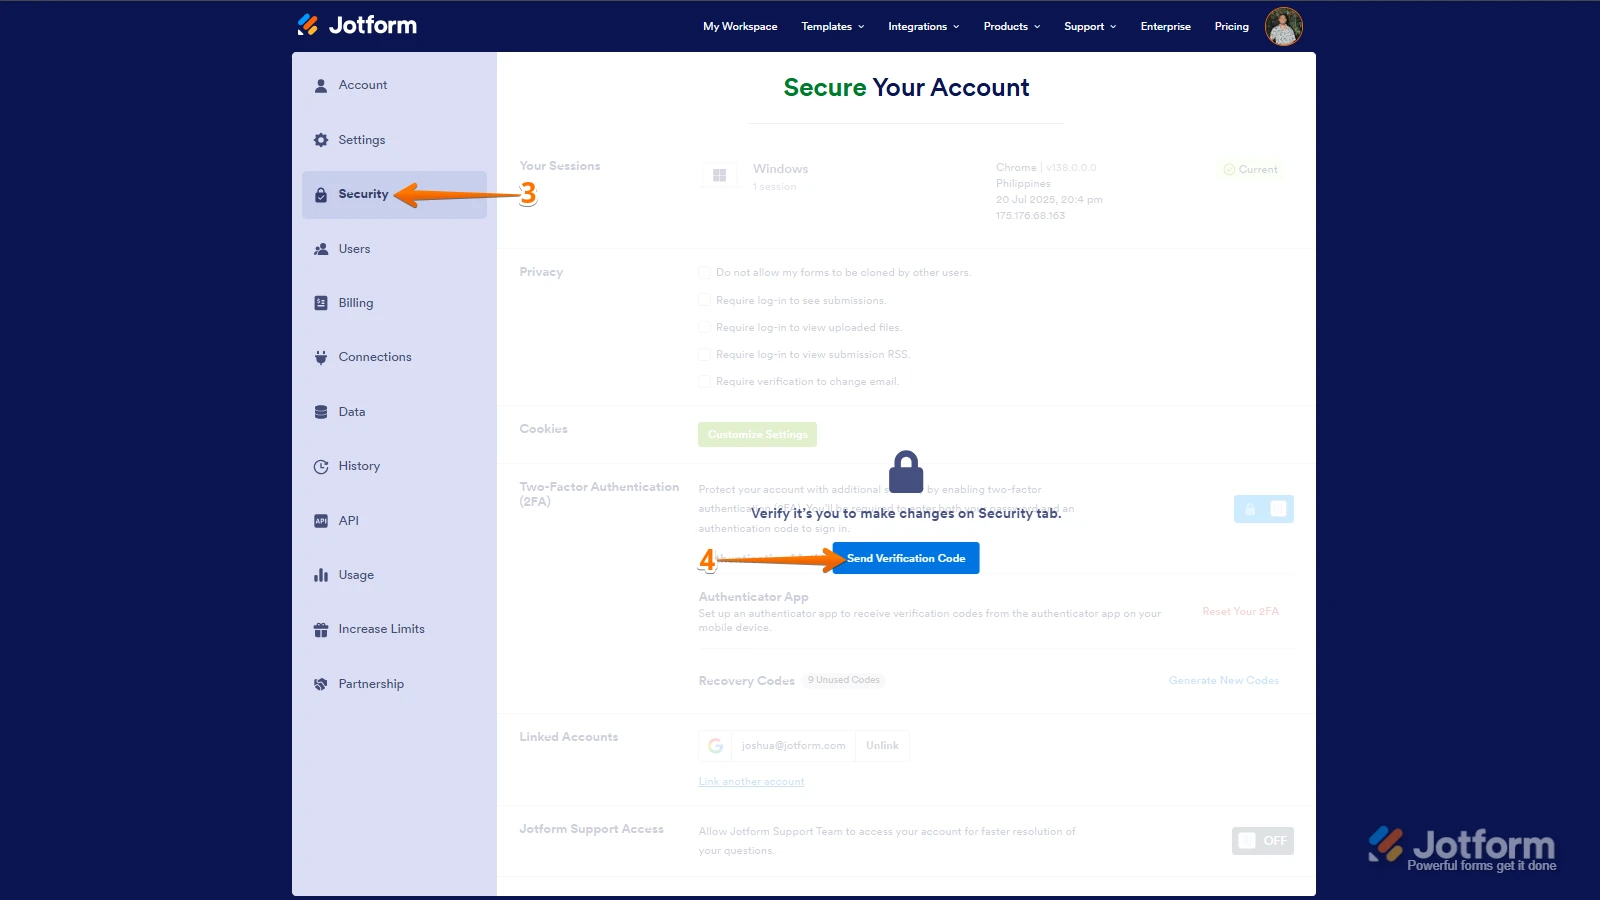
3. Next, in the panel on the left, click on the Security tab.
4. If you haven’t opened your Security page in a while, it’ll ask you to verify. To do that, click on Send Verification Code.
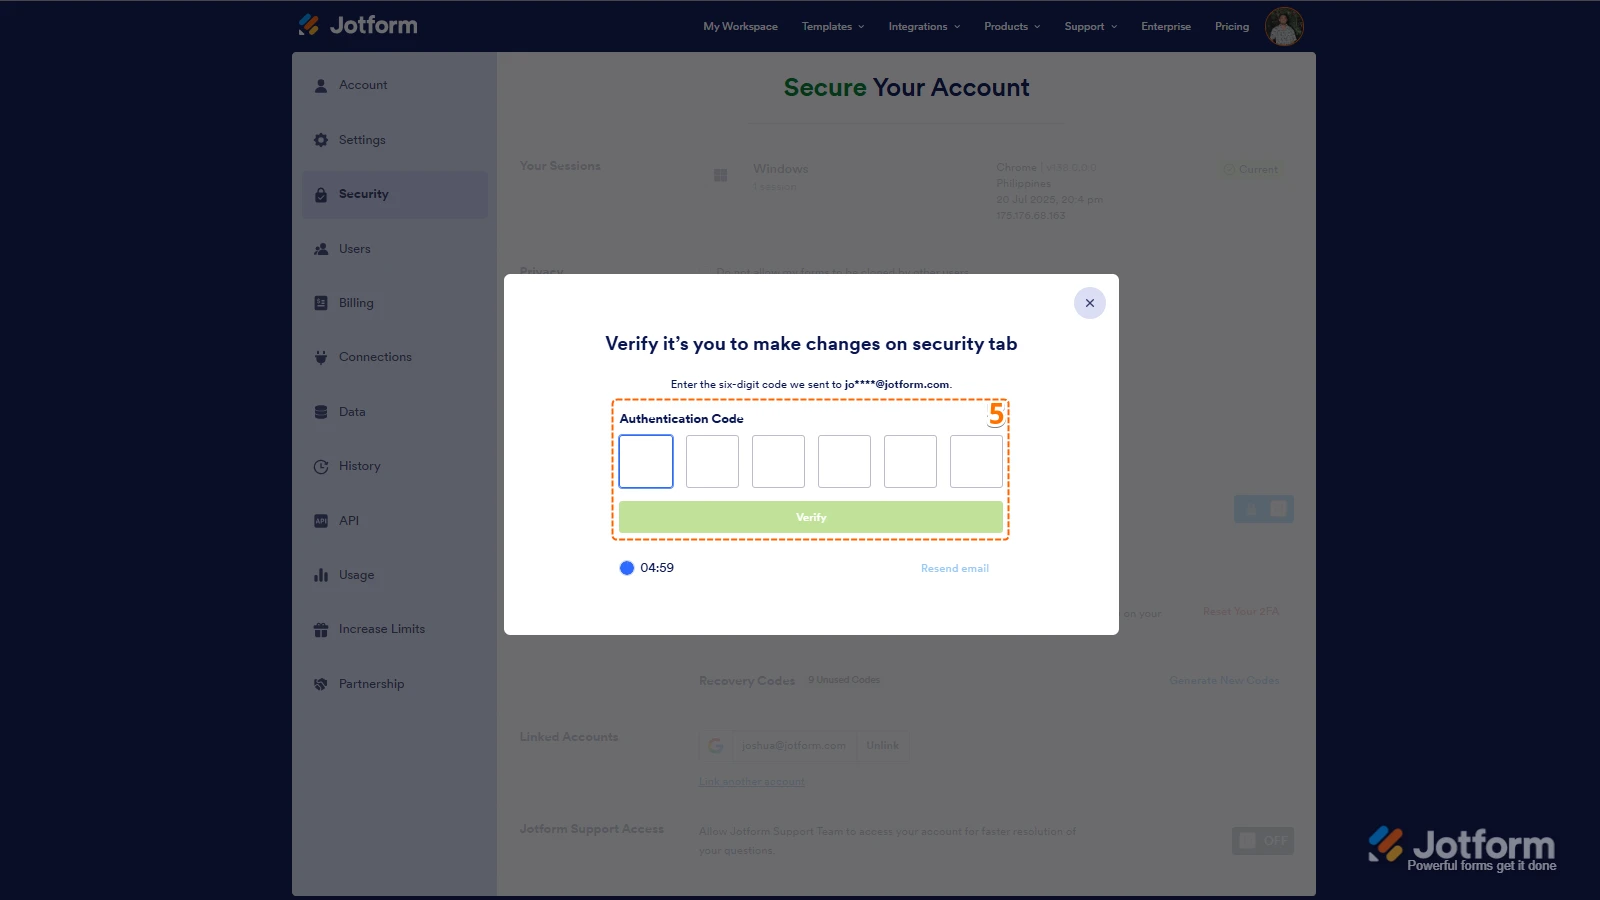
5. Then, enter the Verification Code you receive in your email.
6. Finally, at the bottom of the page, toggle on Jotform Support Access.
After we hear back from you, we’ll have a better idea of what’s going on and how to help.
 After we hear back from you, we’ll have a better idea of what’s going on and how to help.
Your Reply
Something Went Wrong
An error occurred while generating the AI response. Please try again!