-
Gunter_JeancarlosFecha de consulta 9 de julio de 2025, 14:08
Hola buenos días, quisiera saber como muevo formularios de mi cuenta personal a carpetas de mi empresa que si tienen el plan pago, antes podia pero hace unas semanas ya no puedo simplemente arrastrarlos a esas carpetas compartidas, ya no me deja. y la distribucion de carpetas tampoco me aparece, solo aparece un listado de formularios todo revueltos. adjunto captura. en compartidos conmigo antes habian mas carpetas y podia mover directamente los formualarios de mi espacio personal solo arrastrandolos y ya no me deja hacer eso

-
Abdul Jotform SupportFecha de respuesta 9 de julio de 2025, 16:22
Hi Jeancarlos,
Thanks for reaching out to Jotform Support. Our Spanish Support agents are busy helping other Jotform users right now, so I'll try to help you in English using Google Translate, but you can reply in whichever language you feel comfortable using. Or, if you'd rather have support in Spanish, let us know and we can have them do that. But, it might take a while until they're available again.
Now, coming back to your question. Based on the current Jotform functionality, it is not possible to move or transfer forms directly from your personal workspace (My Workspace) to the Shared with Me folder by drag and drop or any other means.
Moving your forms to another Jotform account is easy. When you transfer a form, all its submission data moves with it, and the receiving account becomes the new owner. If you're using a custom URL, it’ll automatically update from https://form.jotform.com/{yourUsername}/{your-custom-url-slug} to https://form.jotform.com/{New_Owner_Username}/{your-custom-url-slug}. The transfer can’t be undone unless the new owner agrees to send the forms back. Now, let me show you how to do it:
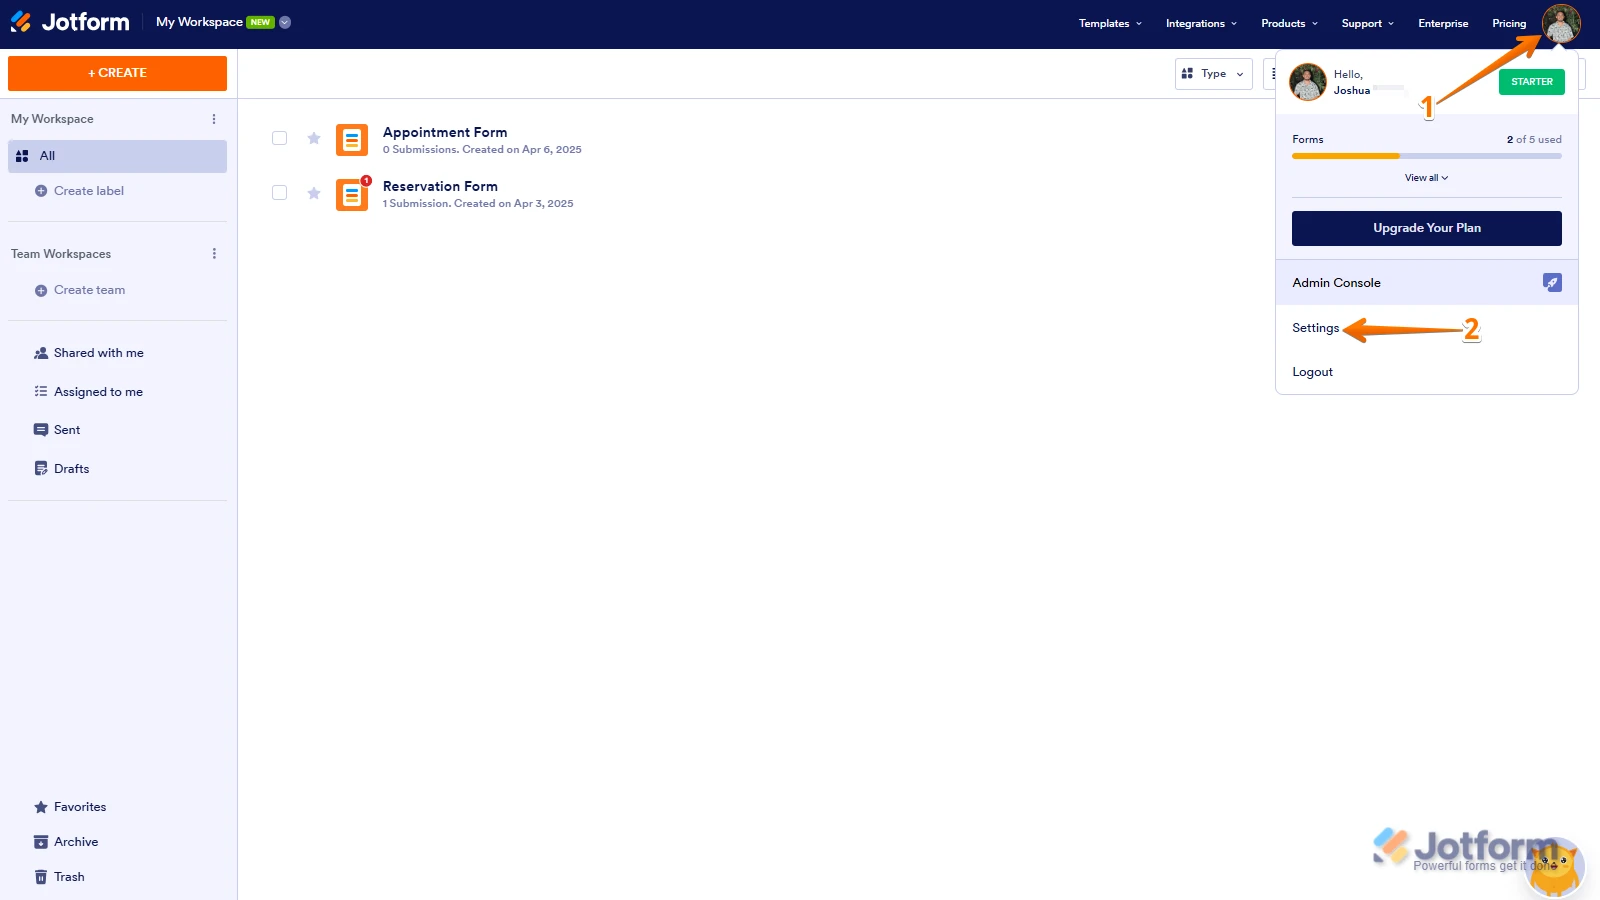
1. On your My Workspace page, click on your Avatar/Profile Image in the top-right corner of the screen.
2. In the window that opens, click on Settings.
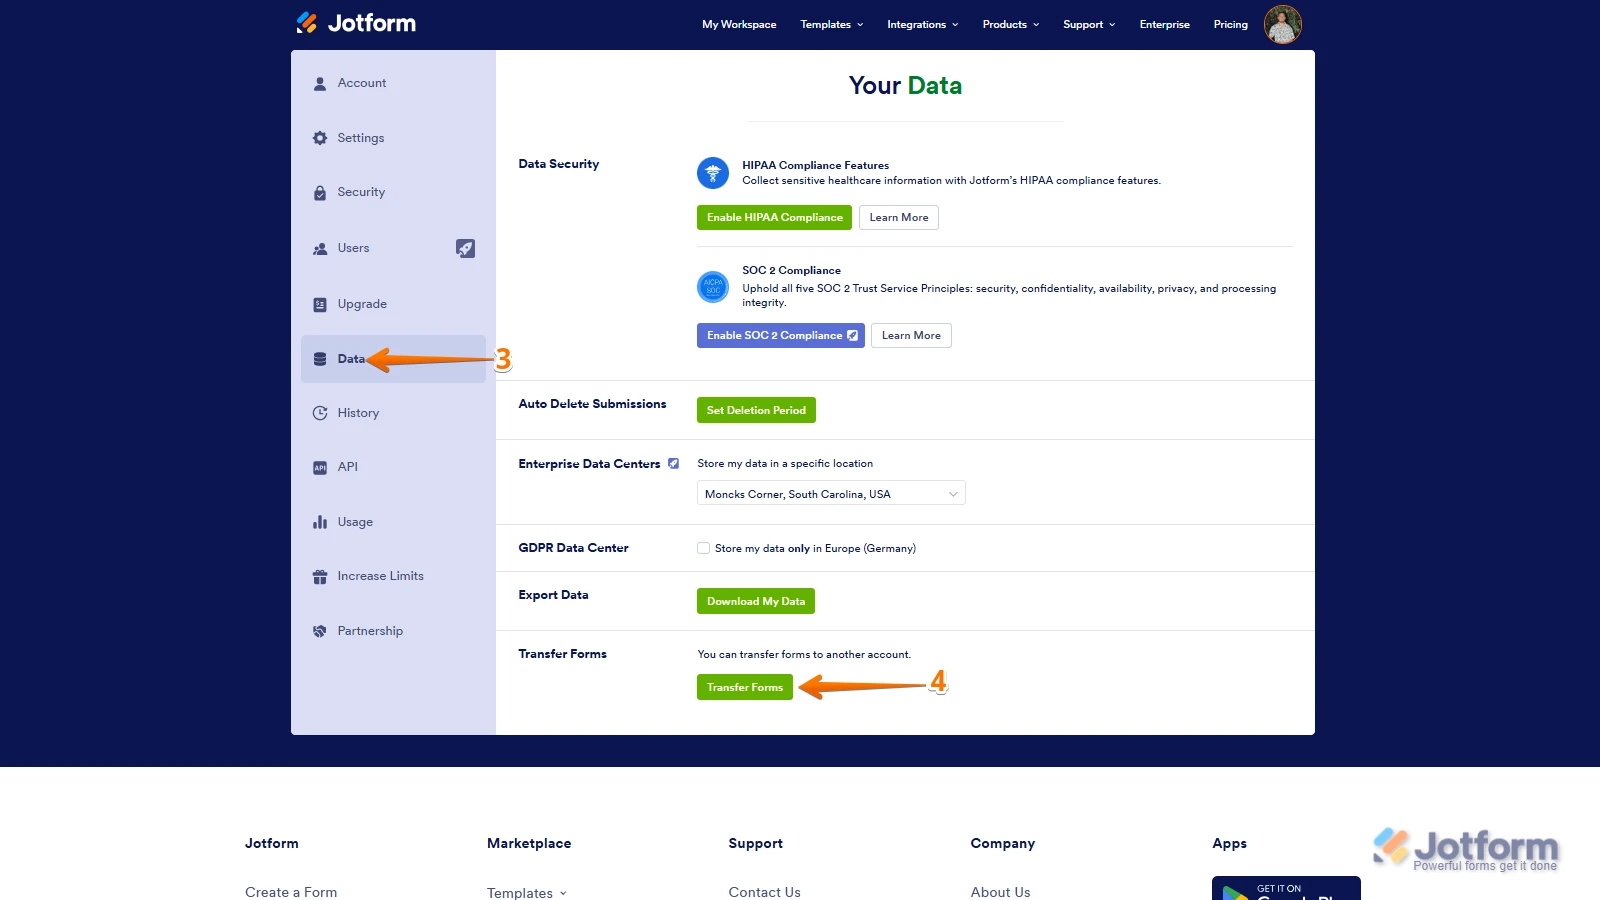
3. Then, click on the Data tab on the left.
4. In the Transfer Form section, click on Transfer Form.
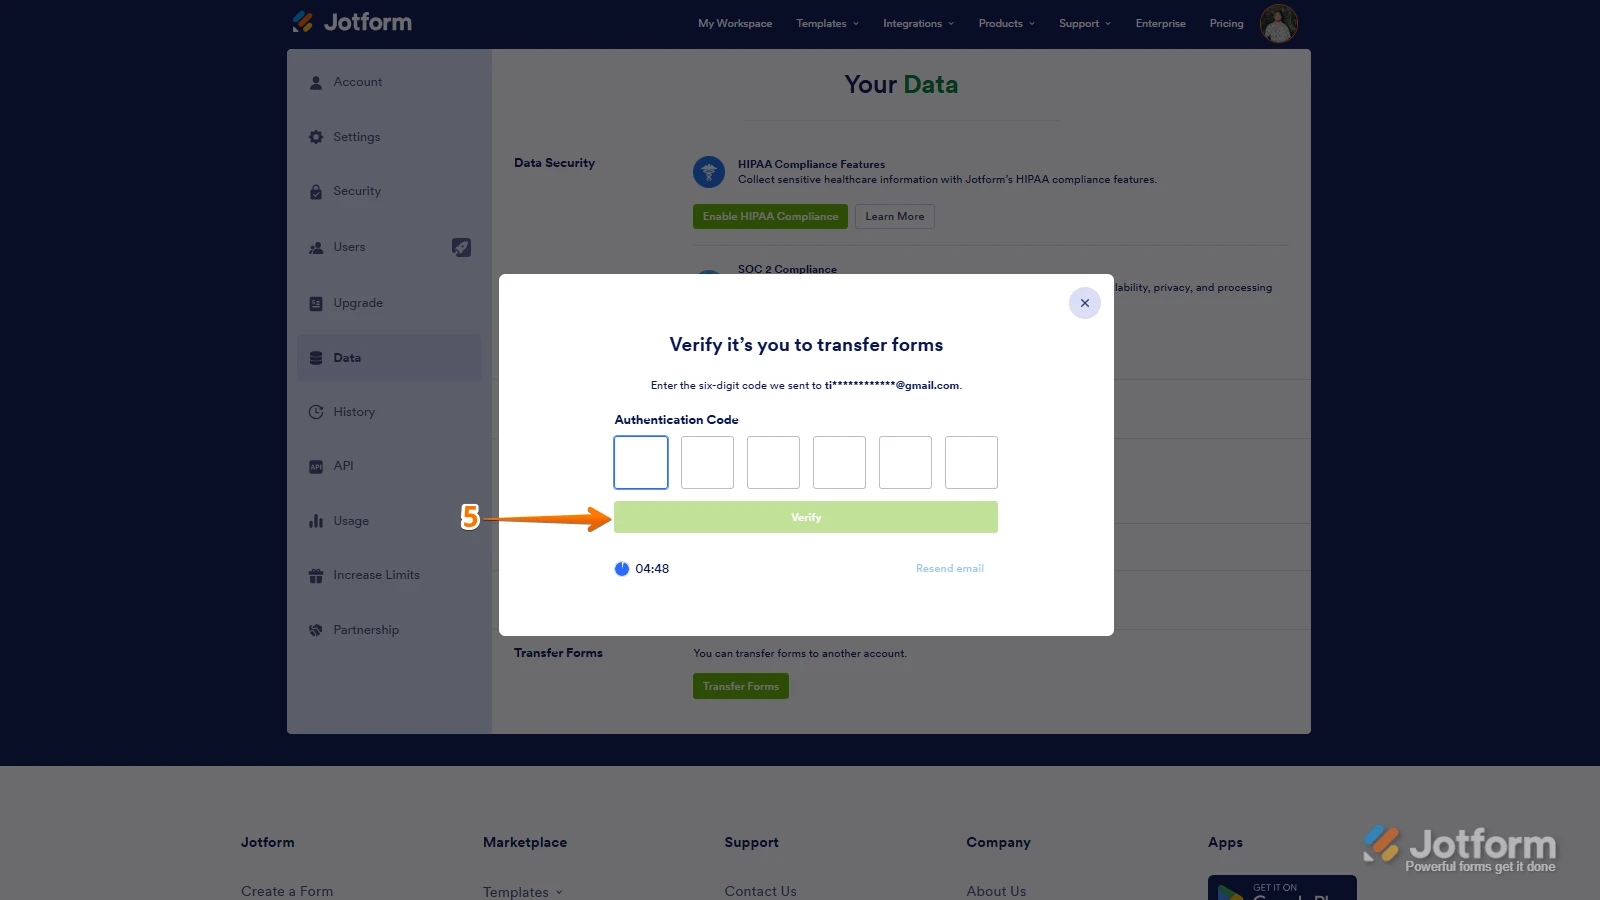
5. Next, enter the Authentication Code that is sent to your email address, and click on Verify.
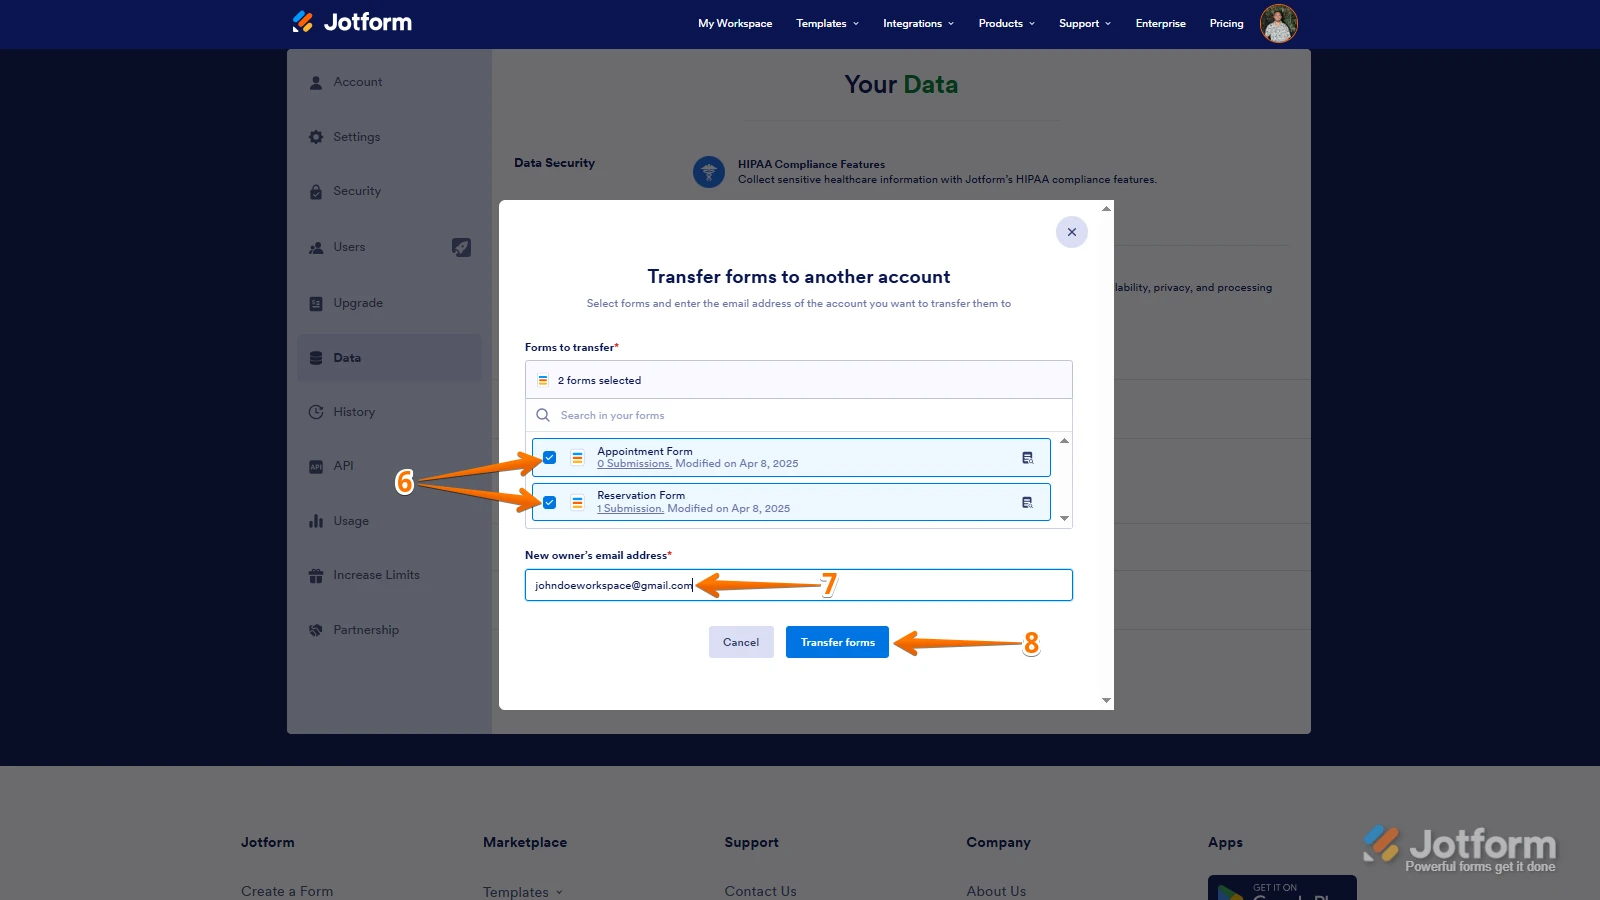
6. In the window that opens, tick the box next to the name of the form you want to transfer.
7. In the New Email Owner’s Email Address field, enter the email address of the account that you want the forms to be transferred to.
8. Now, click on Transfer Form.
Keep in mind that you can only send one form transfer at a time. You can also cancel the current transfer request. Let me show you how:1. While you are still on the Data page, click on the View Details button in the Pending Transfer section.
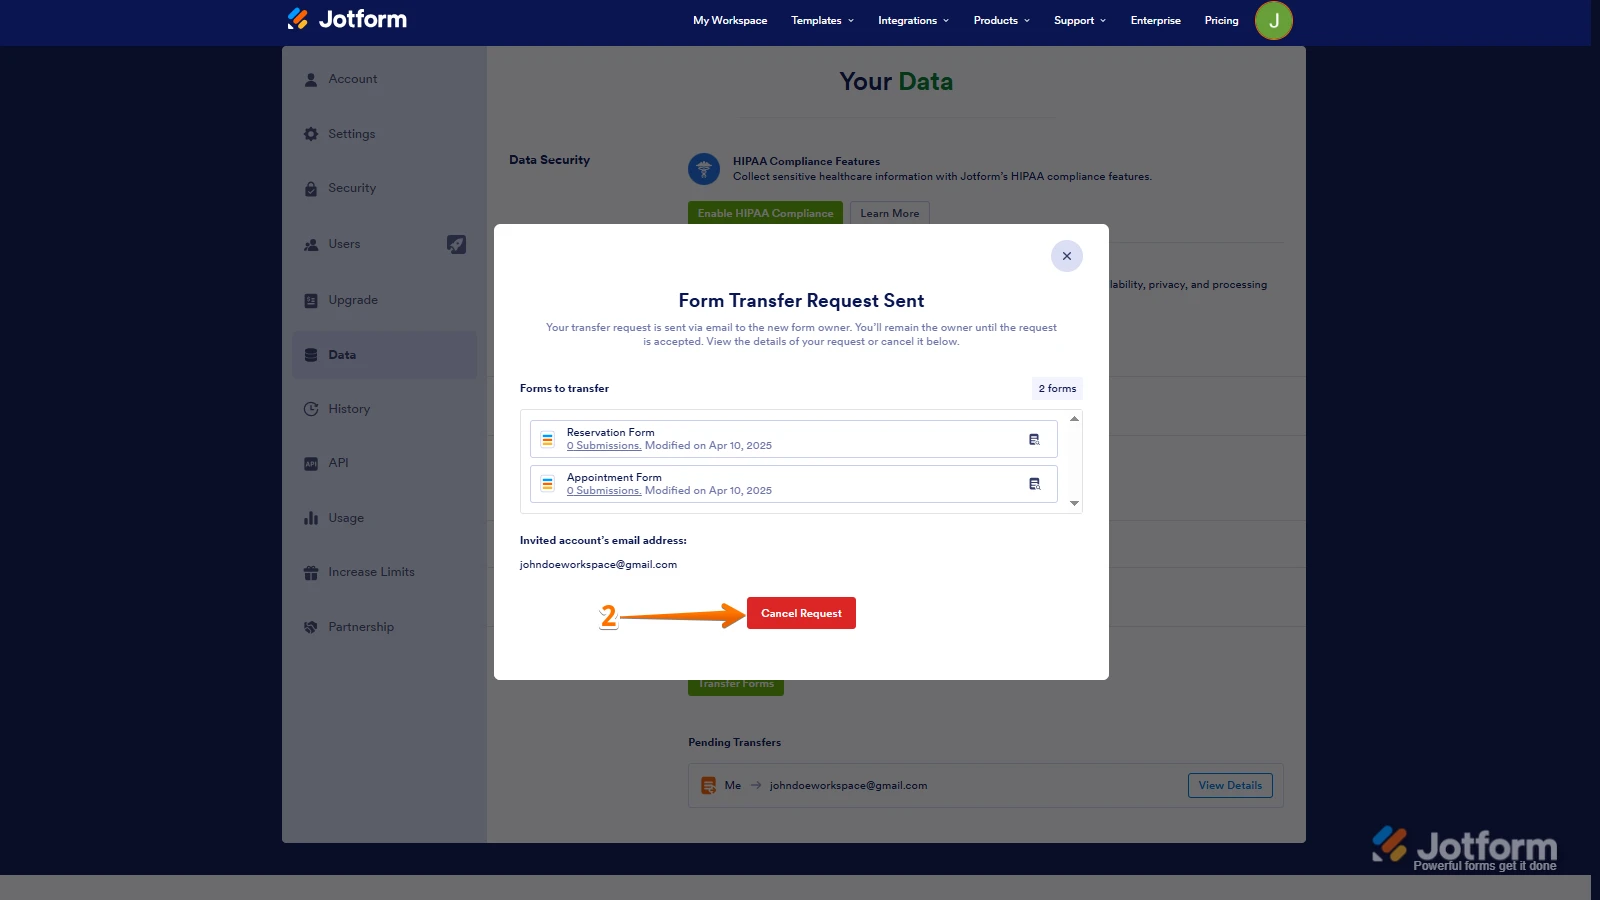
2. Then, click on Cancel Request.
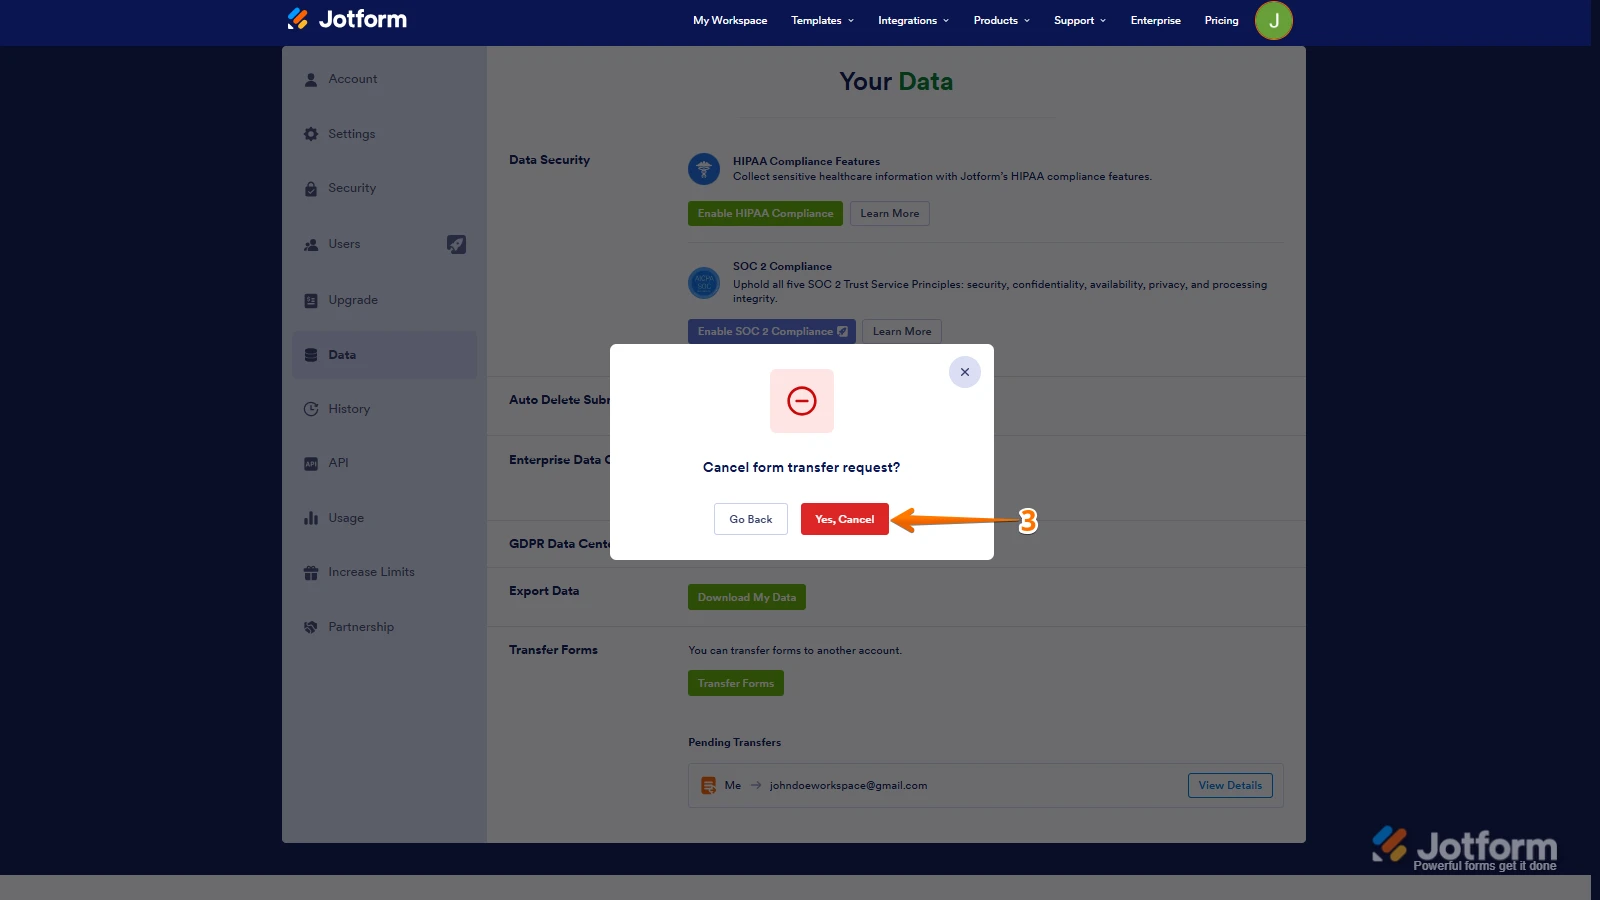
3. Finally, click on Yes, Cancel.
Once the forms are transferred, the owner of the account receiving the forms will get an email notification. From that email, they can click on the View Transfer button, then click on Accept to complete the transfer. Check out the screencast below:


 Keep in mind that you can only send one form transfer at a time. You can also cancel the current transfer request. Let me show you how:
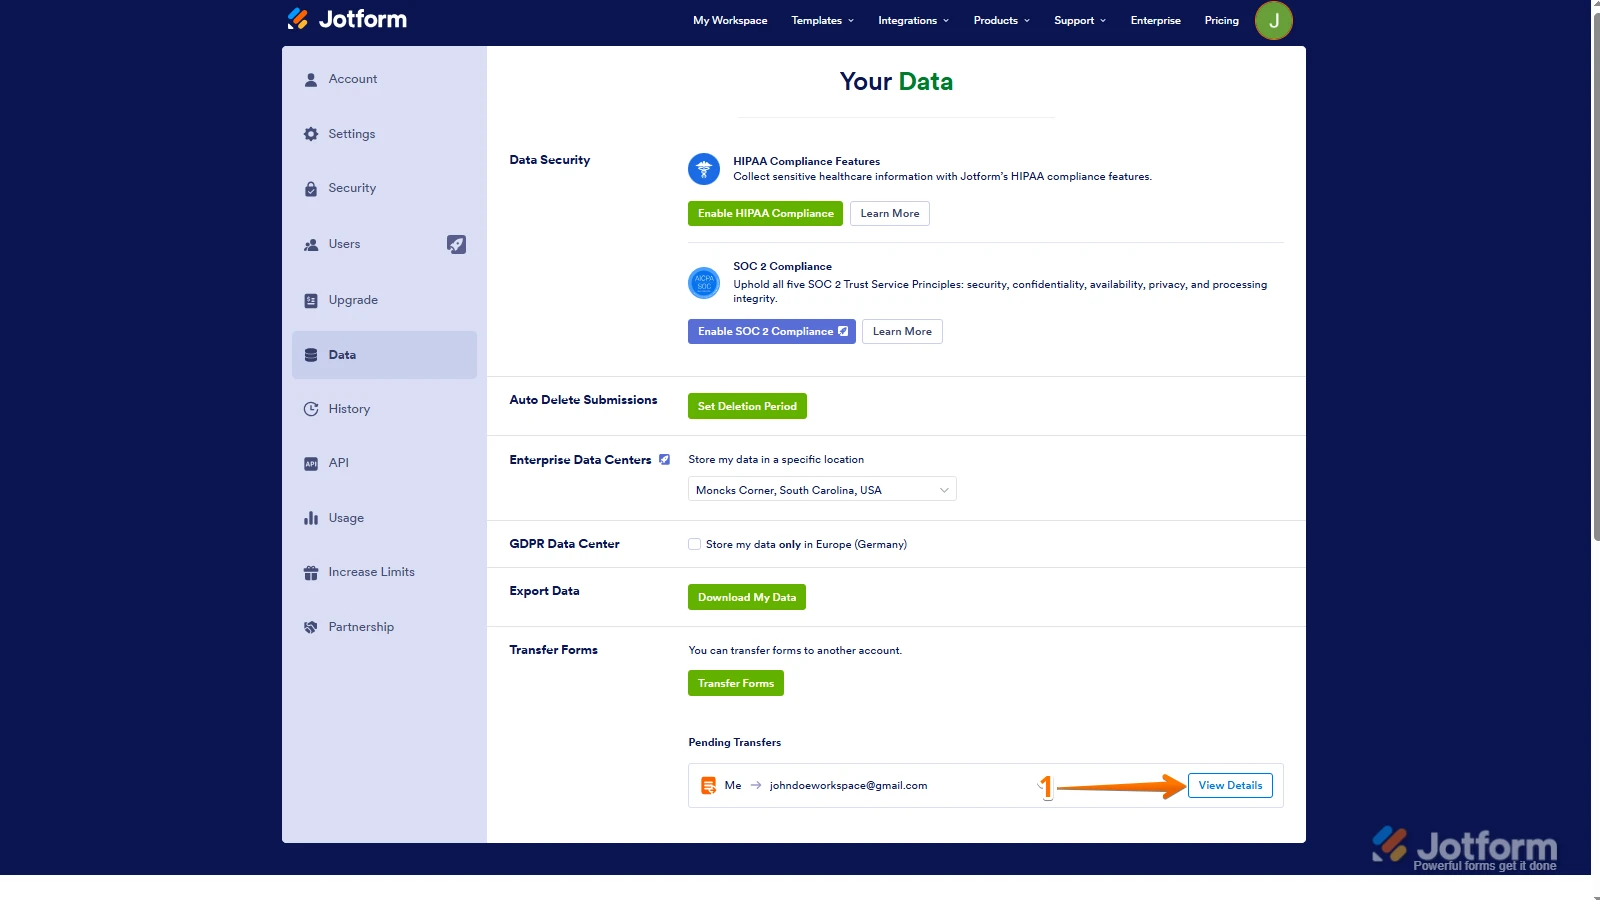
 Once the forms are transferred, the owner of the account receiving the forms will get an email notification. From that email, they can click on the View Transfer button, then click on Accept to complete the transfer. Check out the screencast below:
Your Reply
Something Went Wrong
An error occurred while generating the AI response. Please try again!