-
 nnnjoe7
I am creating an app for our non-profit retirement home, which serves around 100 residents. I need to capture basic data such as Apartment Number, Names, Telephone Numbers, and Email IDs. To start, I created a sample Jotform Table with 12 rows. My plan is to use this data to automatically fill fields in various forms, such as those for Breakfast, Lunch, Dinner, Absence, and Guests. These forms will be used daily, weekly, or monthly to record food choices and other details.
For example, when a form is opened in the app, the user should be able to enter or select their Apartment Number, and then the other fields like Names and Telephone Numbers should auto-populate. After that, the user can make their selections for the day, week, or month.
I am currently stuck on how to populate the form fields with specific data from the table. How can I solve this issue?
-
 Sonnyfer JotForm Support
Hi Ninan,
Thanks for reaching out to Jotform Support. Unfortunately, it's not possible for your residents to just enter the apartment number and get their information from another table to populate your form. However, you can use Spreadsheet to Form widget wherein you'll be using an Excel file for your residents' records and use that to populate your form. Let me walk you through it:
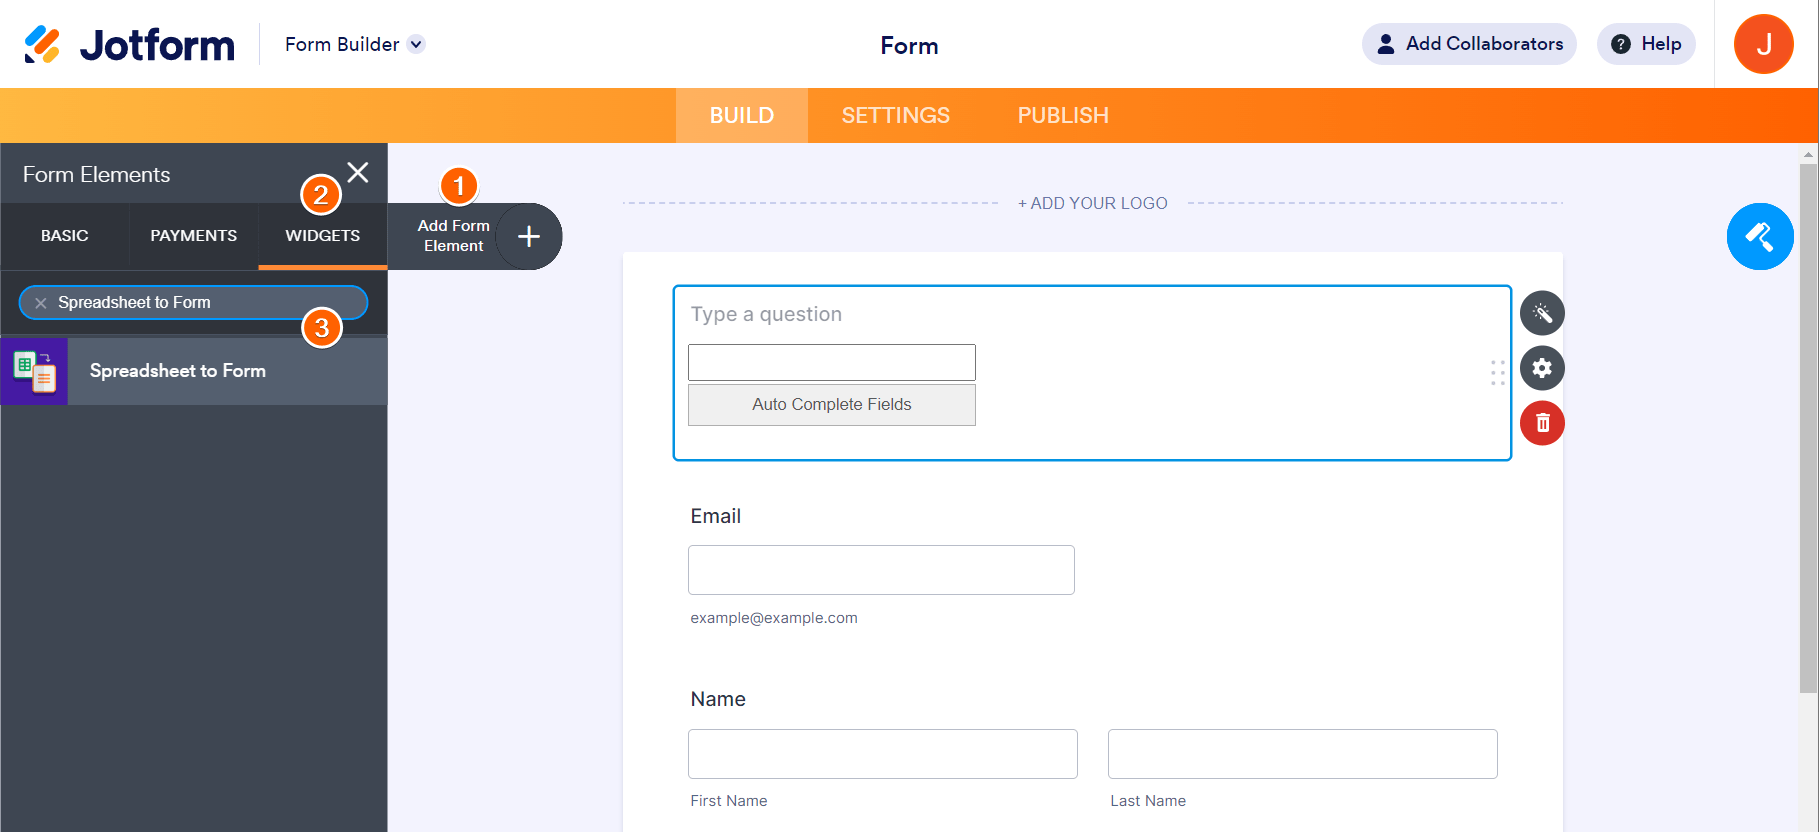
- Click the Add Form Element button in the Form Builder.
- Go to the Widgets tab.
- Search and select the Spreadsheet to Form widget.

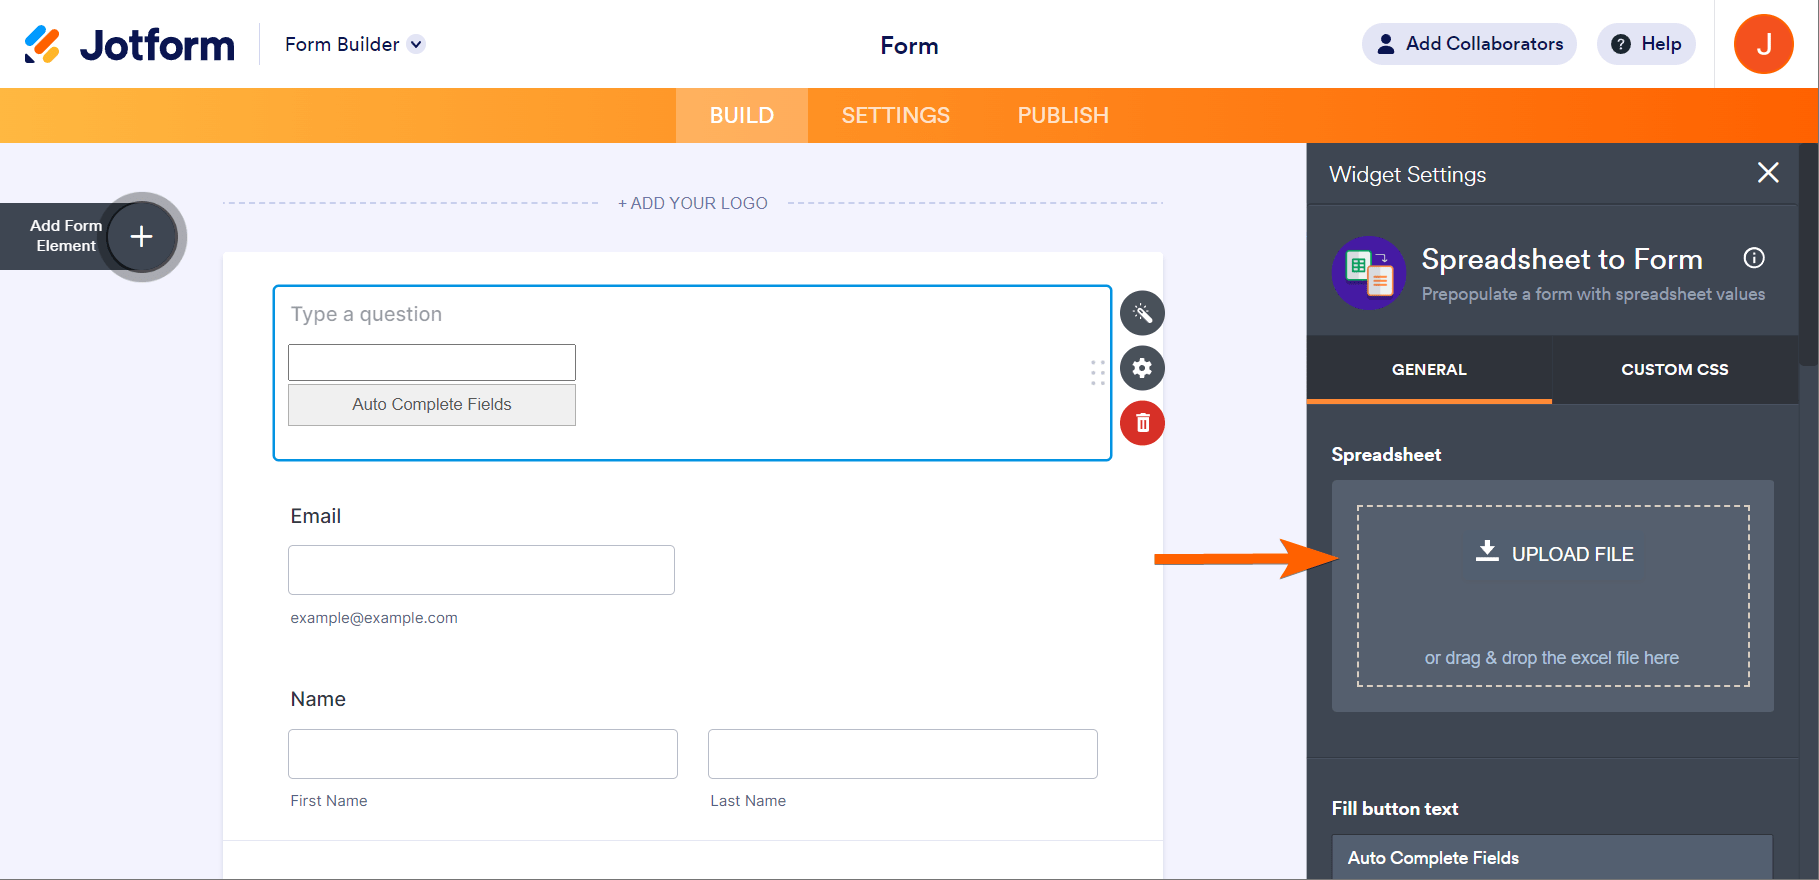
- Click the Upload File canvass in the widget’s settings panel.
- Upload the spreadsheet file.

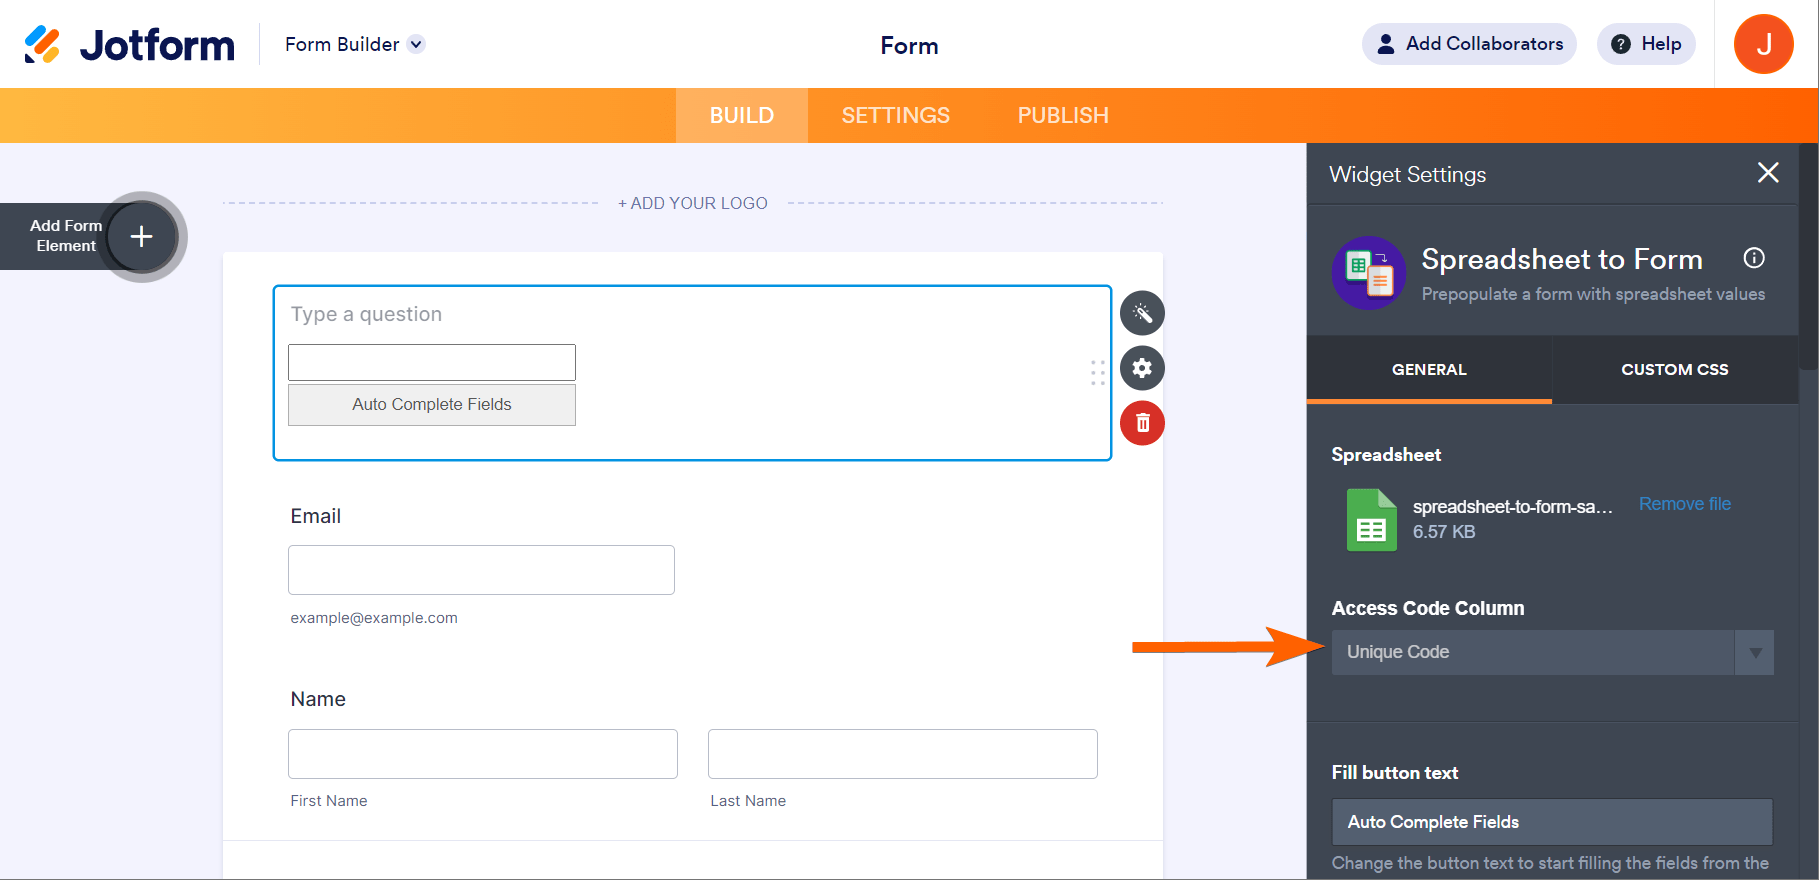
- Select the Access Code Column from a dropdown. The widget will also ask you to select the Sheet Name if you have multiple sheets in the spreadsheet file.

- Set up the other options. Some of the options, such as the texts, are relatively straightforward, so let’s skip to the following:
- Submit Input Field value — This option allows you to include the Unique Code as part of the submission, so it’s visible in both the emails and submissions page.
- Autofill By Condition — Enabling this option allows the widget to autofill the fields without clicking the autofill button if the widget’s input field gets a value through the conditions. Here’s a demo form to see it in action.
- Reset fields when Invalid — Choose whether to automatically clear the entered unique code value if it’s not present in the uploaded spreadsheet file.
- Run in the background — Instead of hiding the widget when it’s configured to be filled by condition, enable this option to run it in the background.
8. Finally, click the Update Widget button at the bottom, and that’s it!
That's it. You can also check out this guide to learn more about using the Spreadsheet to Form widget.
Let us know if you need any more help.
-
 nnnjoe7
Thank You Very Much! I just got over the stumbling block


