
Steps to set the print area in Google Sheets
- Open Google Sheets
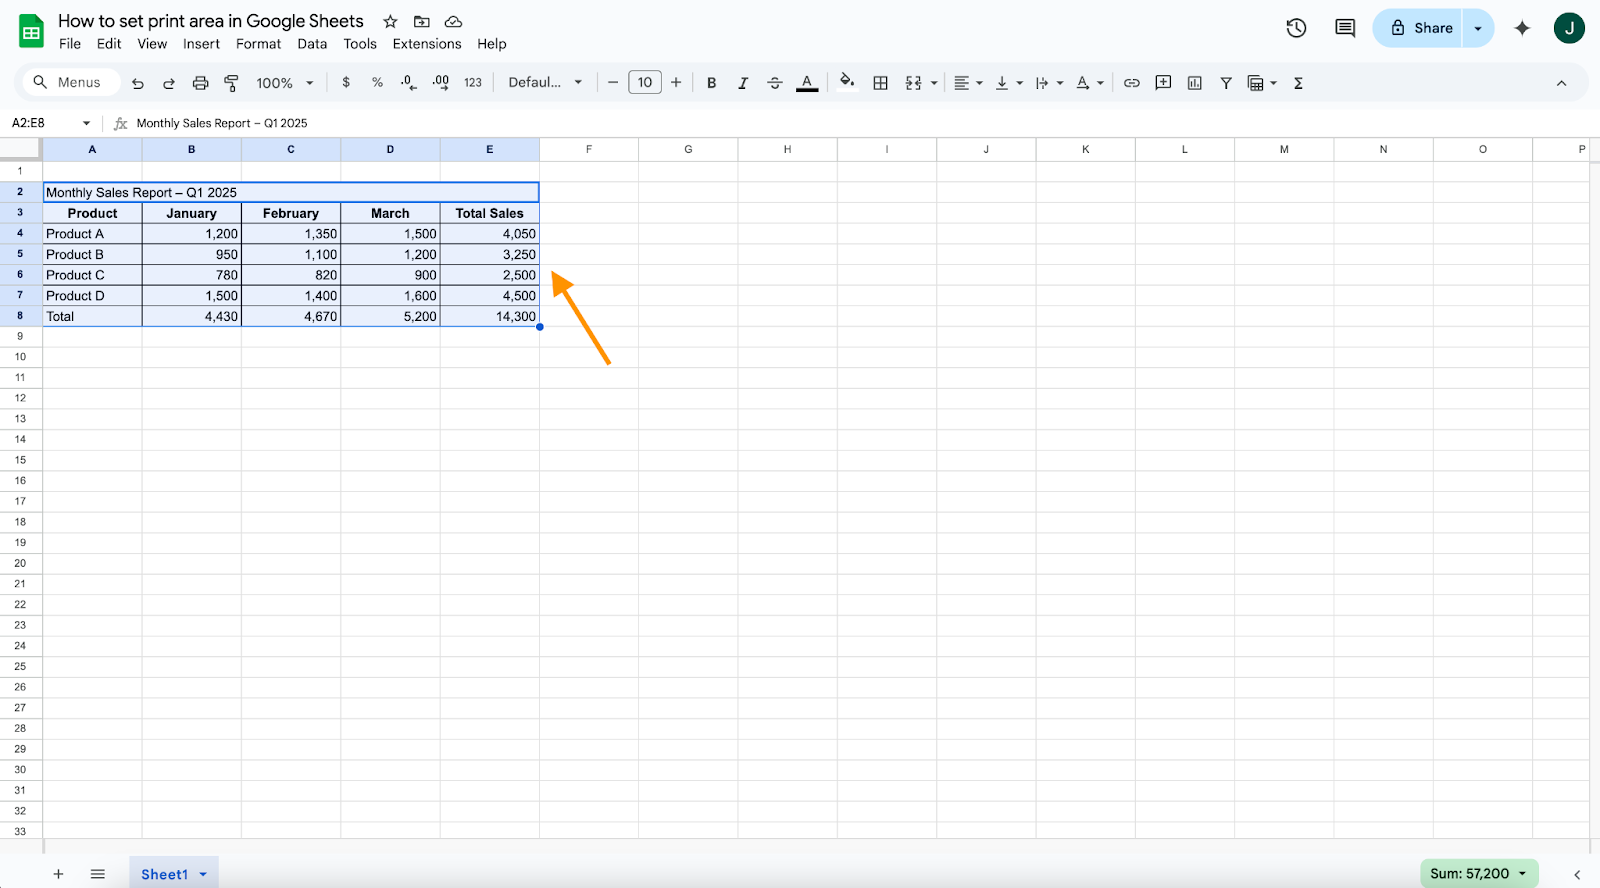
- Select the cells you want to print
- Click and drag over the range you want to include.
- Open the Print menu
- Go to File → Print, or press Ctrl + P (Cmd + P on Mac).
- Set the print area
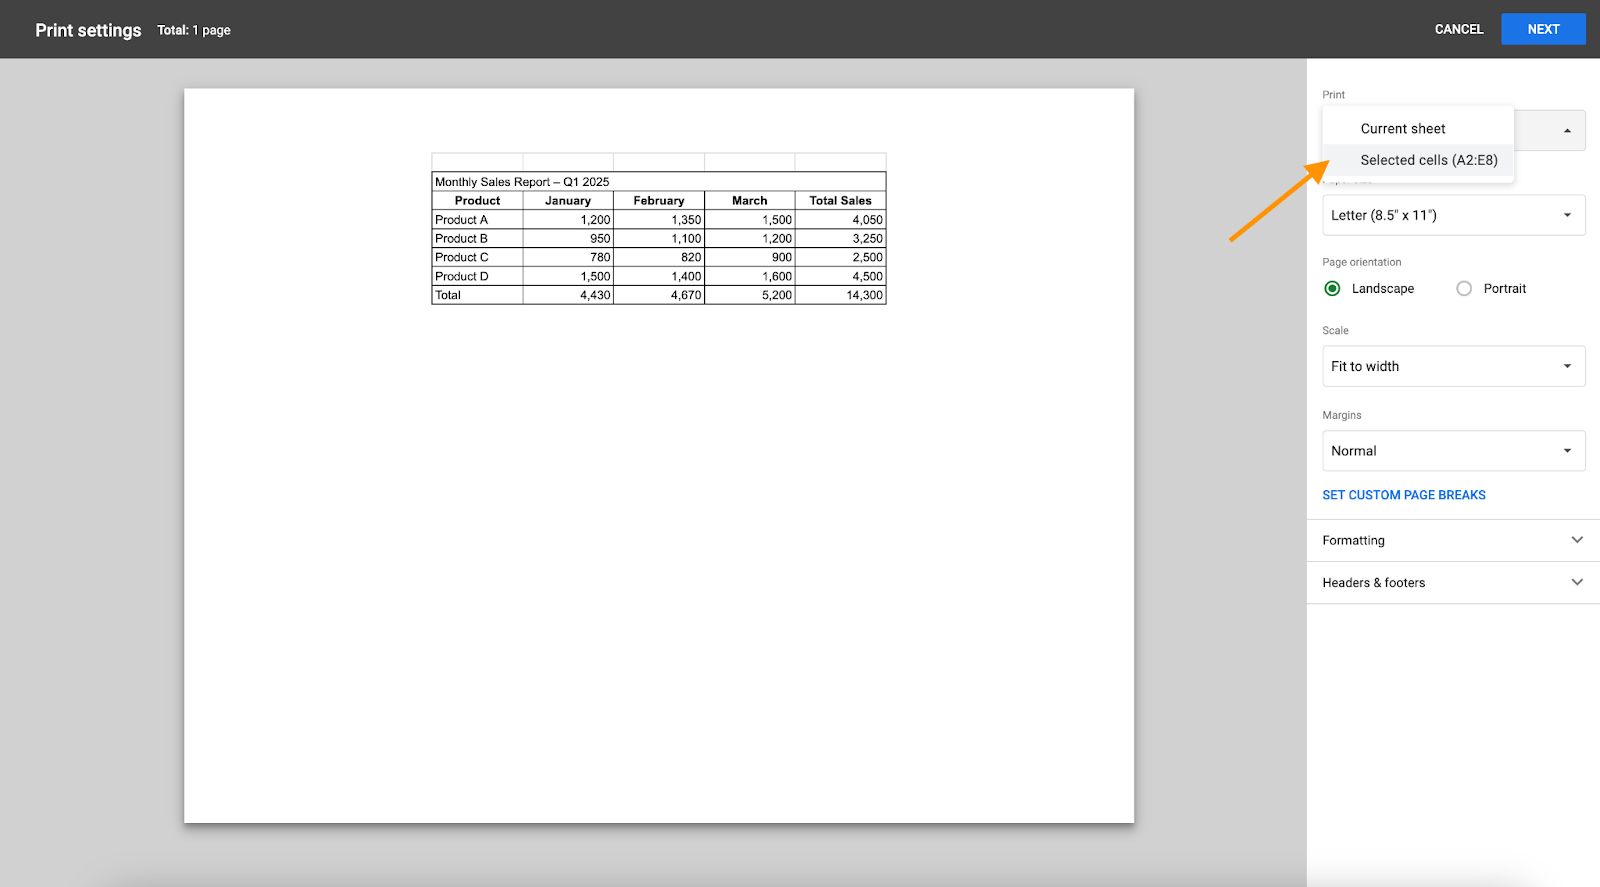
- In the Print sidebar, open Print → Selected cells.
- This ensures only your selection prints, not the entire sheet.
- Adjust layout & scale
- Under Layout, you can set:
- Orientation: Portrait or Landscape
- Scale: Fit to width / Fit to page
- Margins: Normal / Narrow / Custom
- Under Layout, you can set:
- Preview & Print
- Check the preview on the right.
- Click Next → Choose your printer or “Save as PDF”.
Going into a crucial meeting without properly organized data is like stepping into a new restaurant without knowing what’s on the menu. You might feel uncertain and overwhelmed, unsure whether you’ll pick the right option. Similarly, when preparing your Google Sheets document for printing, choosing precisely what data to include is essential. It ensures clarity, precision, and effectiveness during your presentations or data analyses.
Mastering how to set the print area in Google Sheets allows you to highlight critical information, facilitating better discussions and smarter decision-making.
Here’s how to confidently set the print area in Google Sheets.
Set Google Sheets print area in 3 steps
Setting your print area in Google Sheets is straightforward:
- Highlight the cells you wish to print.
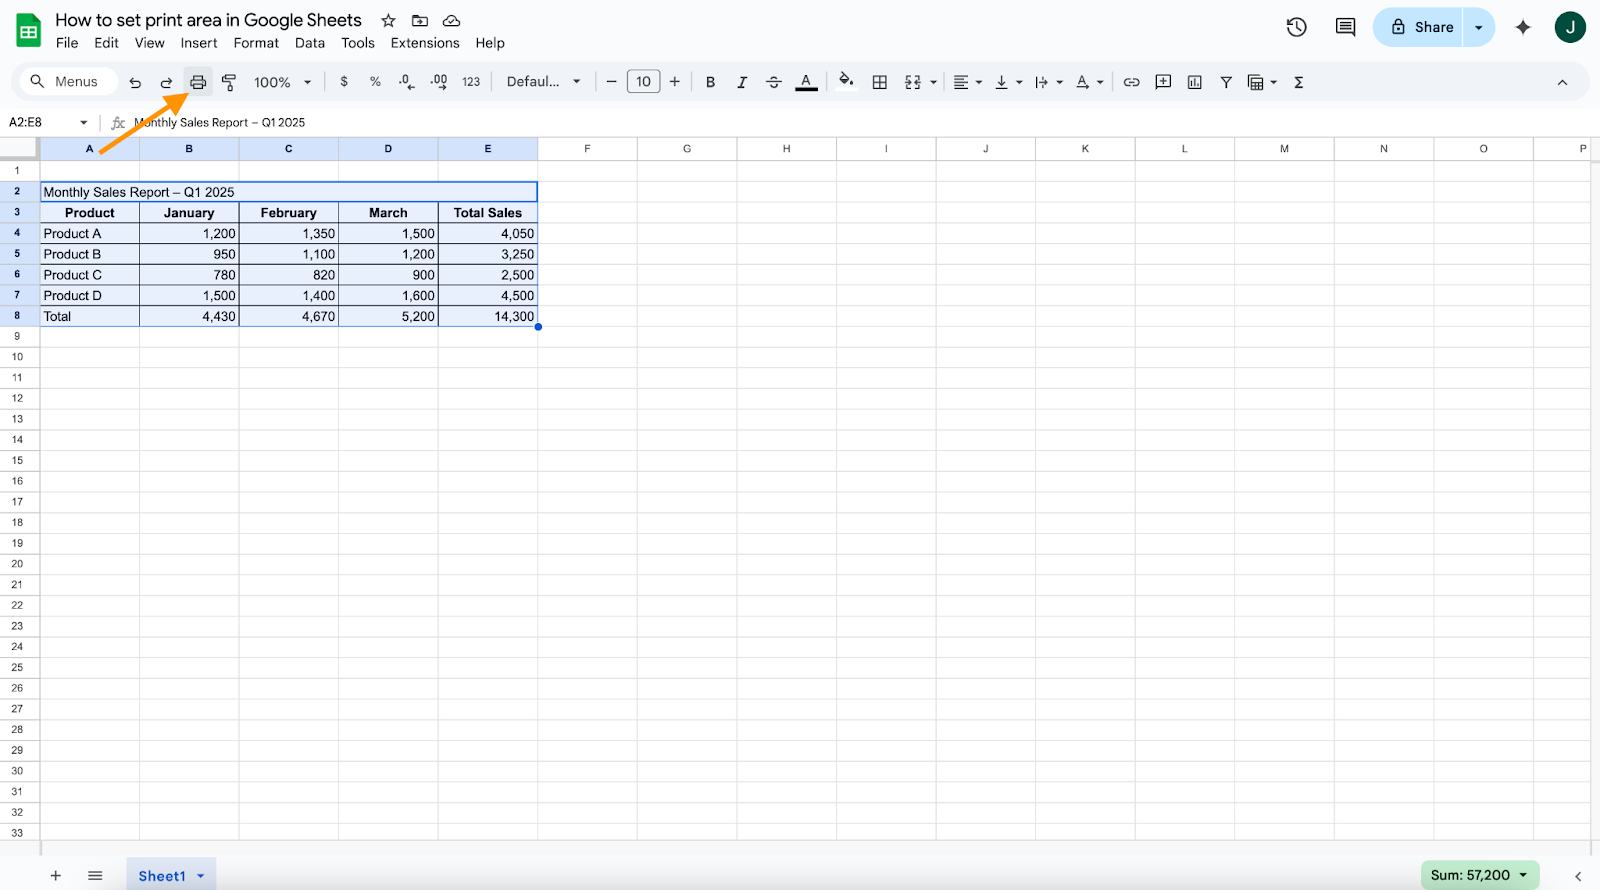
- Click the printer icon on the toolbar.
- In the print menu, set the print field to Selected cells.
You can make formatting changes in the print preview window. From there, you can select the printer you want to use — or you can save the sheet as a PDF. Select the option you want, and you’re good to go.
How to print multiple sheets in Google Sheets
Occasionally, you’ll need to print multiple sections or tabs of your workbook—for instance, customer details in one tab and financial data in another. To achieve this:
- Go to the print menu.

- Under the print options, choose between:
- Current sheet: Prints only the current sheet.
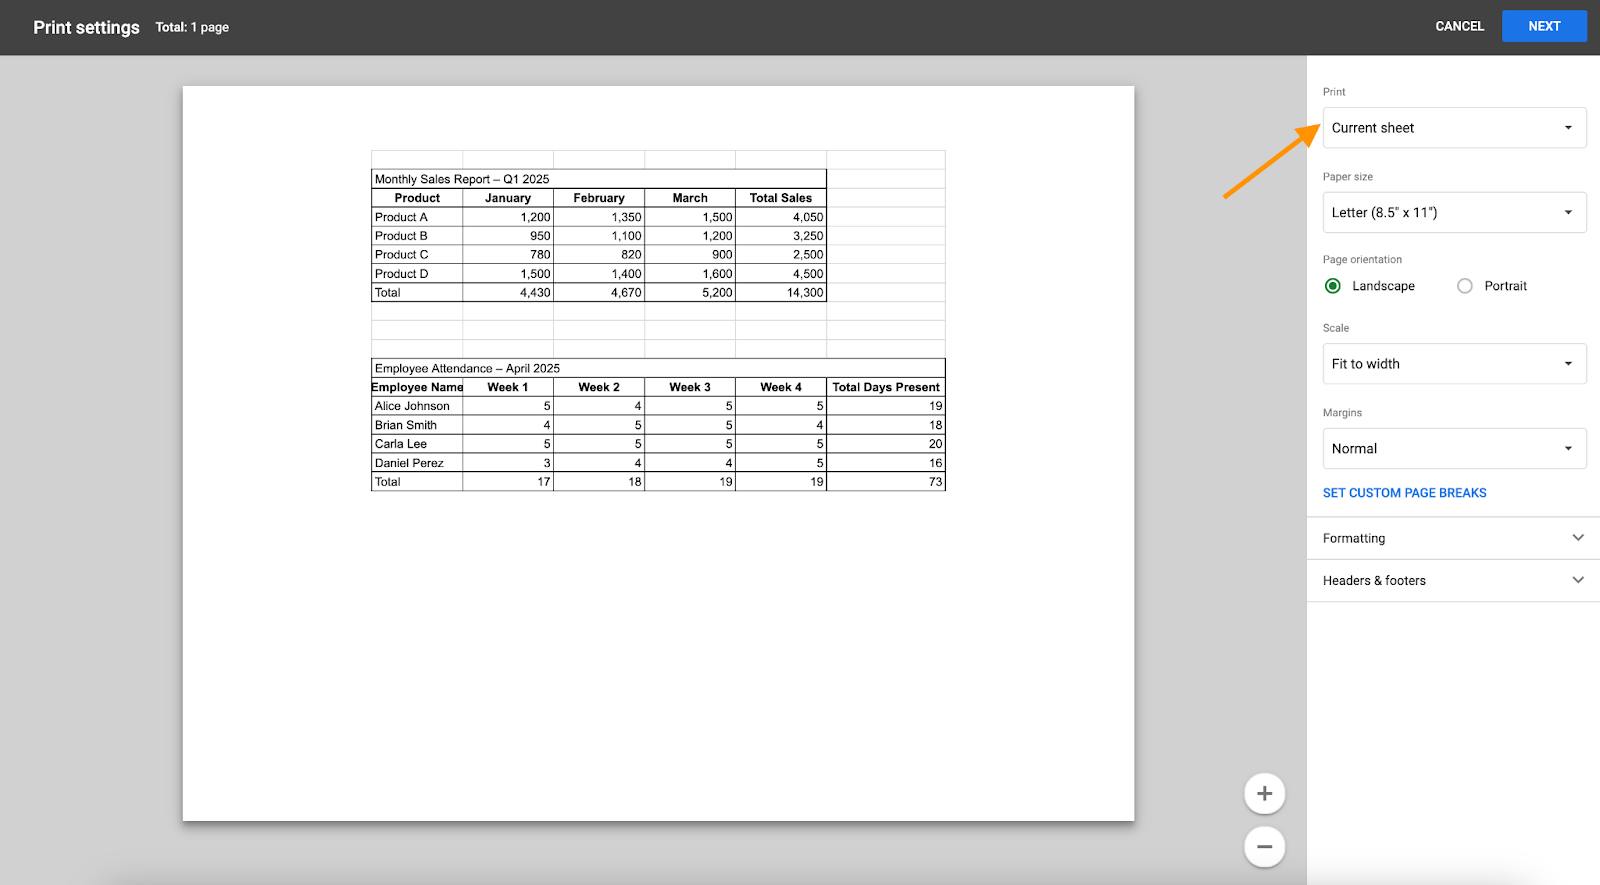
- Workbook: Prints all sheets within the workbook.

Google Sheets makes this process easy and intuitive, ensuring that you get hard copies of the documents you need quickly.
4 advance Google Sheets printing tips
Try these quick tweaks to print cleaner, more consistent sheets, starting with headers on every page.
How to print header rows for each Google Sheets page?
Keep your data context intact by repeating header rows on each printed page:
- Open the print menu.
- Go to Headers & Footers.
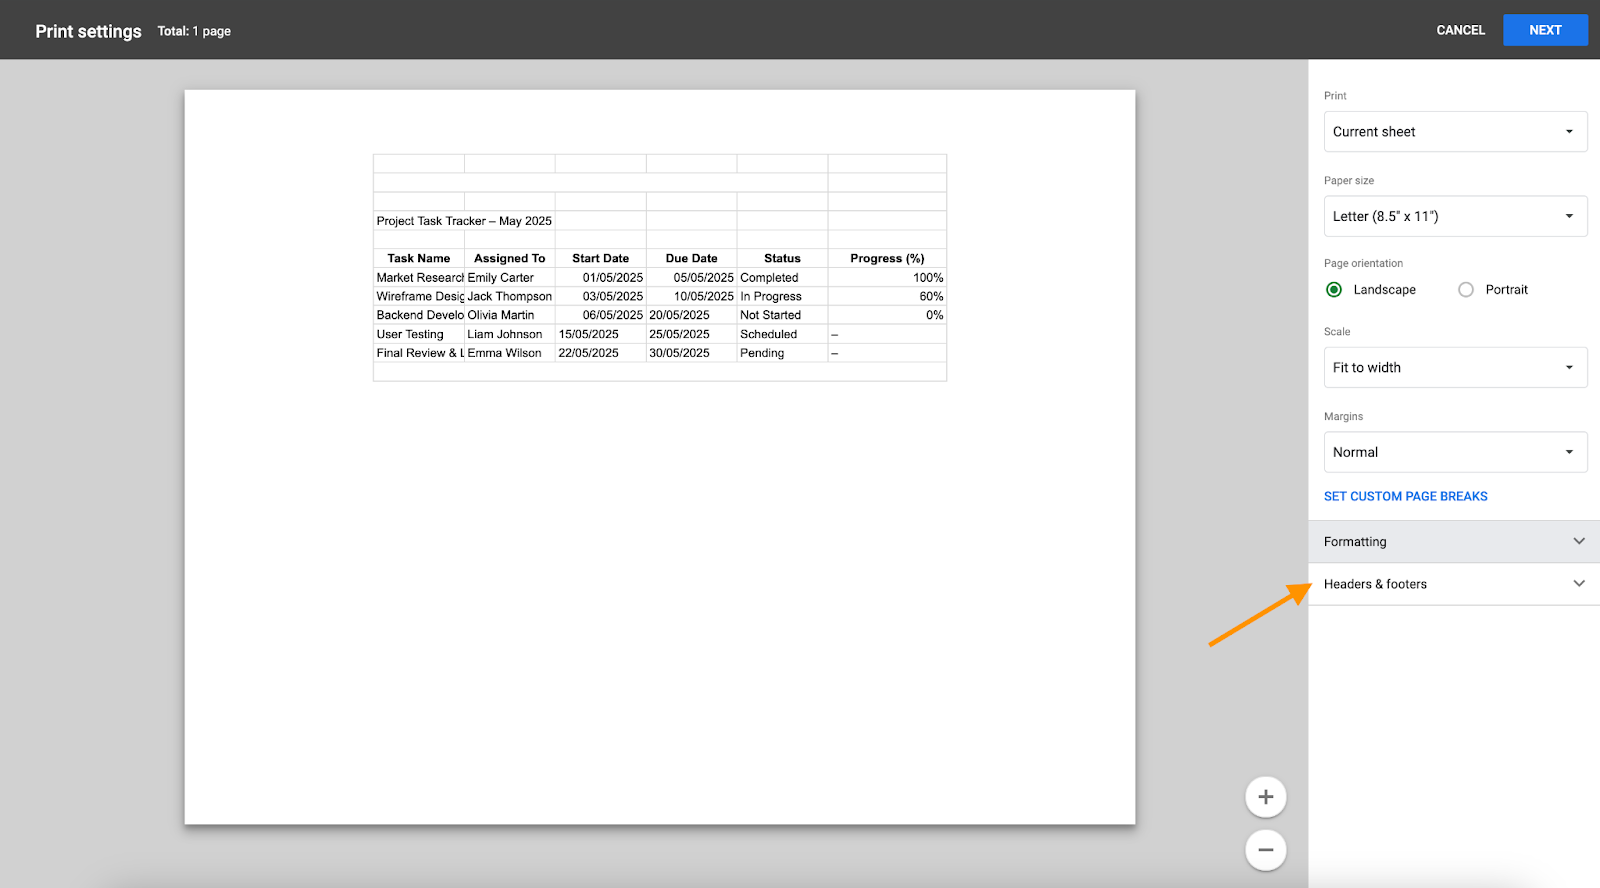
- Select Repeat frozen rows to print headers on each page.

How to change print margins in Google Sheets?
Adjust margins easily:
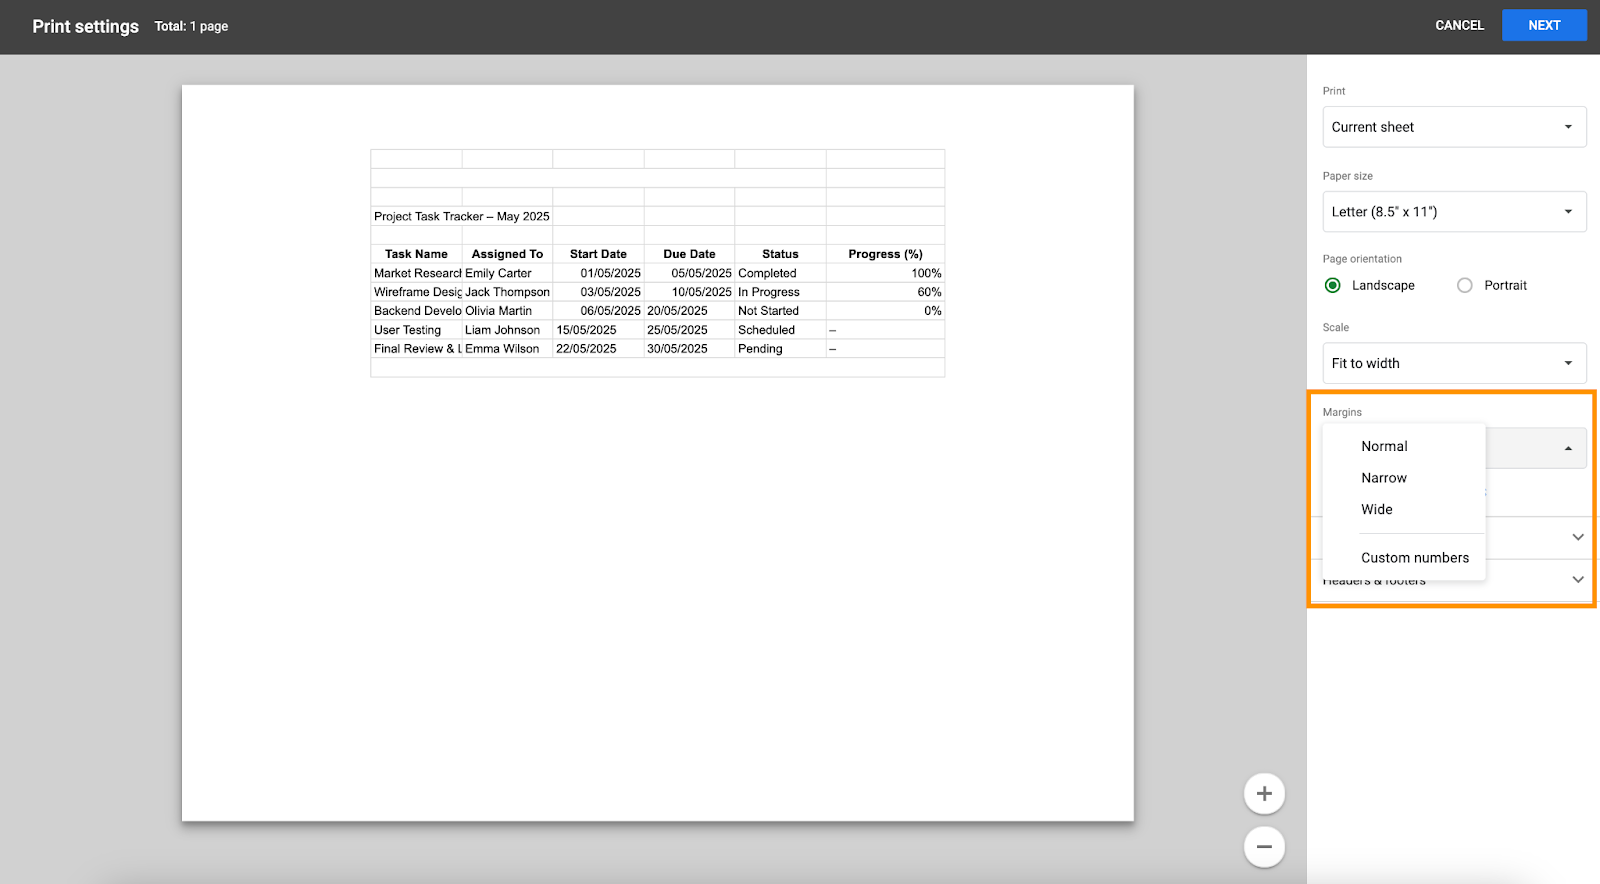
- In the print menu, select Margins.
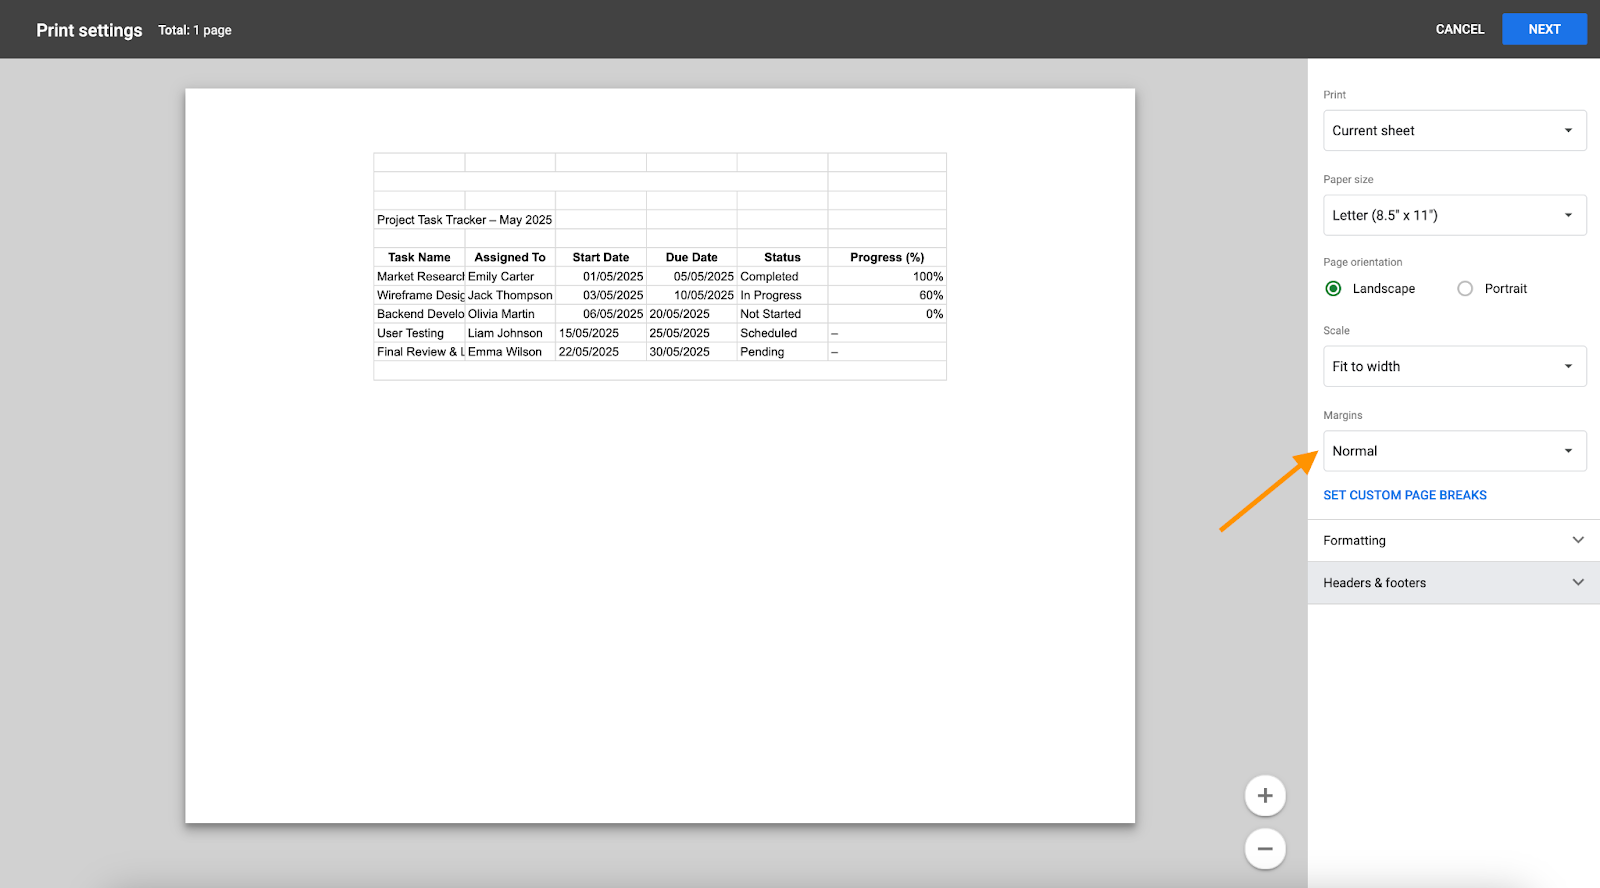
- Choose between Normal, Narrow, Wide, or Custom to suit your needs.
How to repeat headers when printing pages in Google Sheets?
Repeat headers easily:
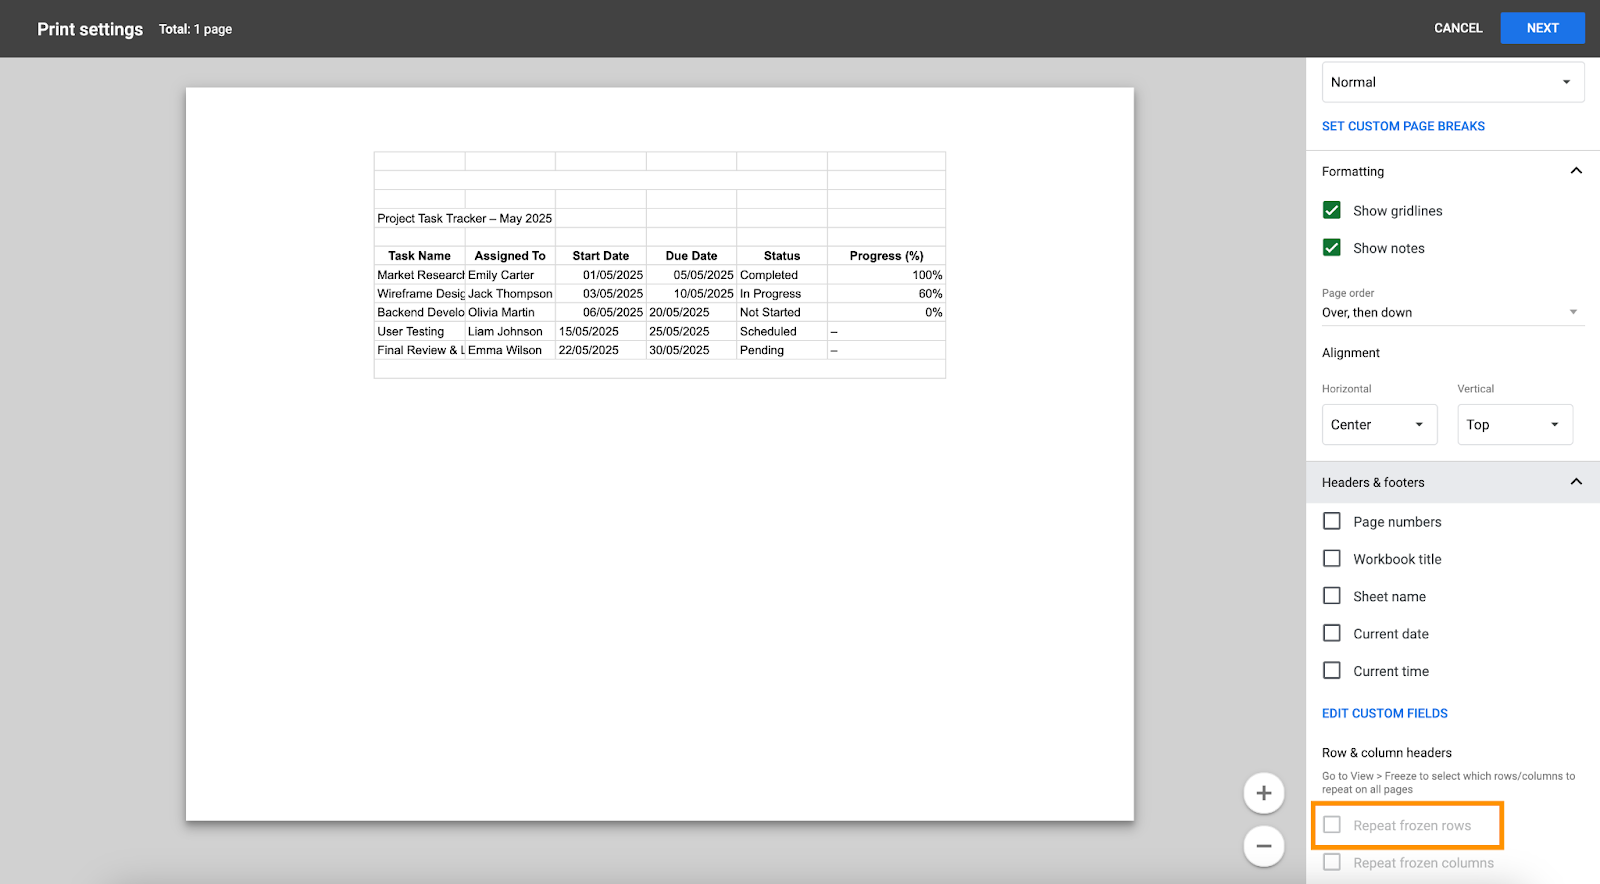
- Freeze your header row first by selecting View > Freeze.

- In the print menu, select Repeat frozen rows.
How to use named ranges as print areas?
Named ranges enhance printing efficiency:
- Select cells and go to Data > Named ranges.

- Assign a name to the range.

- When printing, select your named range from the print menu.
Valuing ease of use? Try Jotform Tables
If you’ve gone through the process of learning how to set print area in Google Sheets and find you need more functionality than what Google Sheets can provide, consider using Jotform. It combines the simplicity of a spreadsheet with the power of a database, letting you collect, organize, and print data without extra setup or formulas.
Key features of Jotform Tables
- Form-connected data: Submissions flow directly into a table, with no exports or syncing needed.
- Custom layouts: Design branded PDFs in the built-in PDF Editor for polished printouts.
- Flexible views: Switch between Table, Card, Calendar, and Report views for clearer insights.
- Simple imports and collaboration: Bring in Excel data, filter easily, and share securely with your team.
- Smart printing: Print individual entries, filtered sets, or full reports right from your workspace.
With Jotform Tables, all form submissions automatically populate a table view, so you can print data directly from your forms without exporting anything. Simply open the related table, select the entries you want, and click Print to generate clean, ready-to-share outputs. You can also print individual submissions or entire filtered sets — ideal for meetings, reports, or client records.
Beyond standard printouts, Jotform Tables lets you customize your layouts in the built-in PDF Editor, where you can decide which fields appear, adjust design and branding, and create polished templates for recurring reports. Need visuals instead of grids? Add a Report view to turn your data into charts and summaries, then print those directly for quick insights.
If your workflow involves Excel or other data sources, you can import existing spreadsheets or CSV files into Tables to keep everything centralized. Smart tools like lookup fields, filters, and summary charts make it easy to analyze your data before printing. And because everything is connected within the Jotform platform, you can automate updates, share tables securely, and even add Print buttons to your forms so respondents can print filled or blank forms themselves.
In short, Jotform Tables goes beyond static print areas — it gives you dynamic, customizable, and connected printing that scales with your data.
Photo by Burst


Send Comment: