
Steps to creating a learning app
- Start with a template
- Explore the app and the forms
- Customize the quiz form
- Edit and use conditions
- Navigate the app layout
- Enhance the app with other elements
- Use your app for more than quizzes
- Test and publish
If you’re preparing for a test or running a trivia night, using quizzing software can make the task a lot easier. You could always use Jotform to create quizzes for others, and you could shuffle your questions to quiz yourself.
But Jotform’s Apps tool is a lot more powerful than that. With it, you can build an app that does much more than run quizzes. For example, you can use Apps to track curriculum, keep links to reference materials, and easily access analytics data for your students.
On top of that, the apps you make with Jotform Apps are easy to share, and they look and feel like a native app on any device. Sound good? Here’s how to create a learning app with Jotform Apps.
A super quick start
You can get started with Apps in minutes. In fact, you don’t even need to create your own. We have several templates to help you get started right away.
A few good templates to look at first are the tutoring app, the assignment tracking app, and the quiz app. For this introduction, let’s take a look at the quiz app by clicking Use Template to see how it works.
A first look at the quiz app
The quiz app contains two trivia quizzes and two personality quizzes (like the kind your aunt keeps posting on Facebook). Let’s look at the Friends trivia quiz (or the Rick and Morty one, if you prefer.) Click on the photo for the quiz and then the Edit Form button.
That will open the form in a new tab. Try out the quiz yourself by clicking Preview Form in the upper right-hand corner.
You’ll notice that each question tells you the answer if you get it wrong, and at the end of the quiz, it gives you a score.
Those two features are great for more than just trivia night, though. They can also help you stay on track and evaluate your progress when you’re studying.
A look under the hood
Let’s take a closer look at what makes the quiz smart enough to evaluate your questions and grade them when you’re done.
Checking for the right answer and grading
Start by clicking on any of the questions and then clicking the Properties gear icon button.

If you go to the Options tab of the menu that popped up, you’ll see a couple of the options that help make this form respond to your answers.
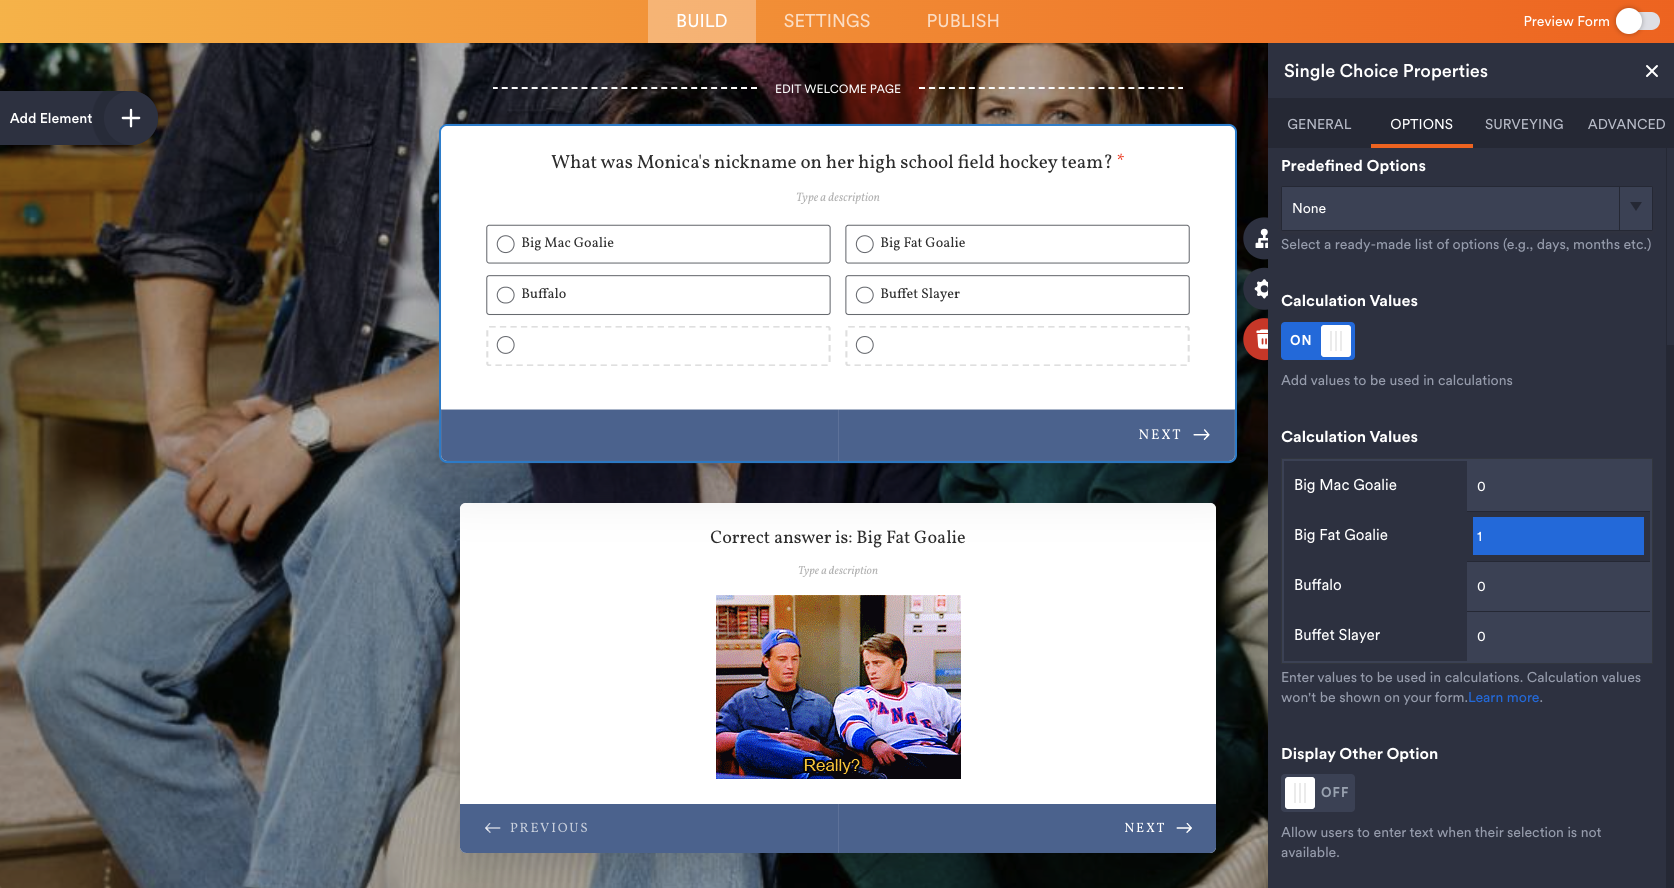
First off, the Use Calculation Values toggle button is how the form knows to grade the quiz after someone has finished it. And the Calculation Values option gives us the numbers to score the quiz at the end.
You can set the calculation values to different numbers so you can assign more weight to important questions. You can also have multiple correct answers in a question. You can even make one answer partially correct and give it only half points, for example.
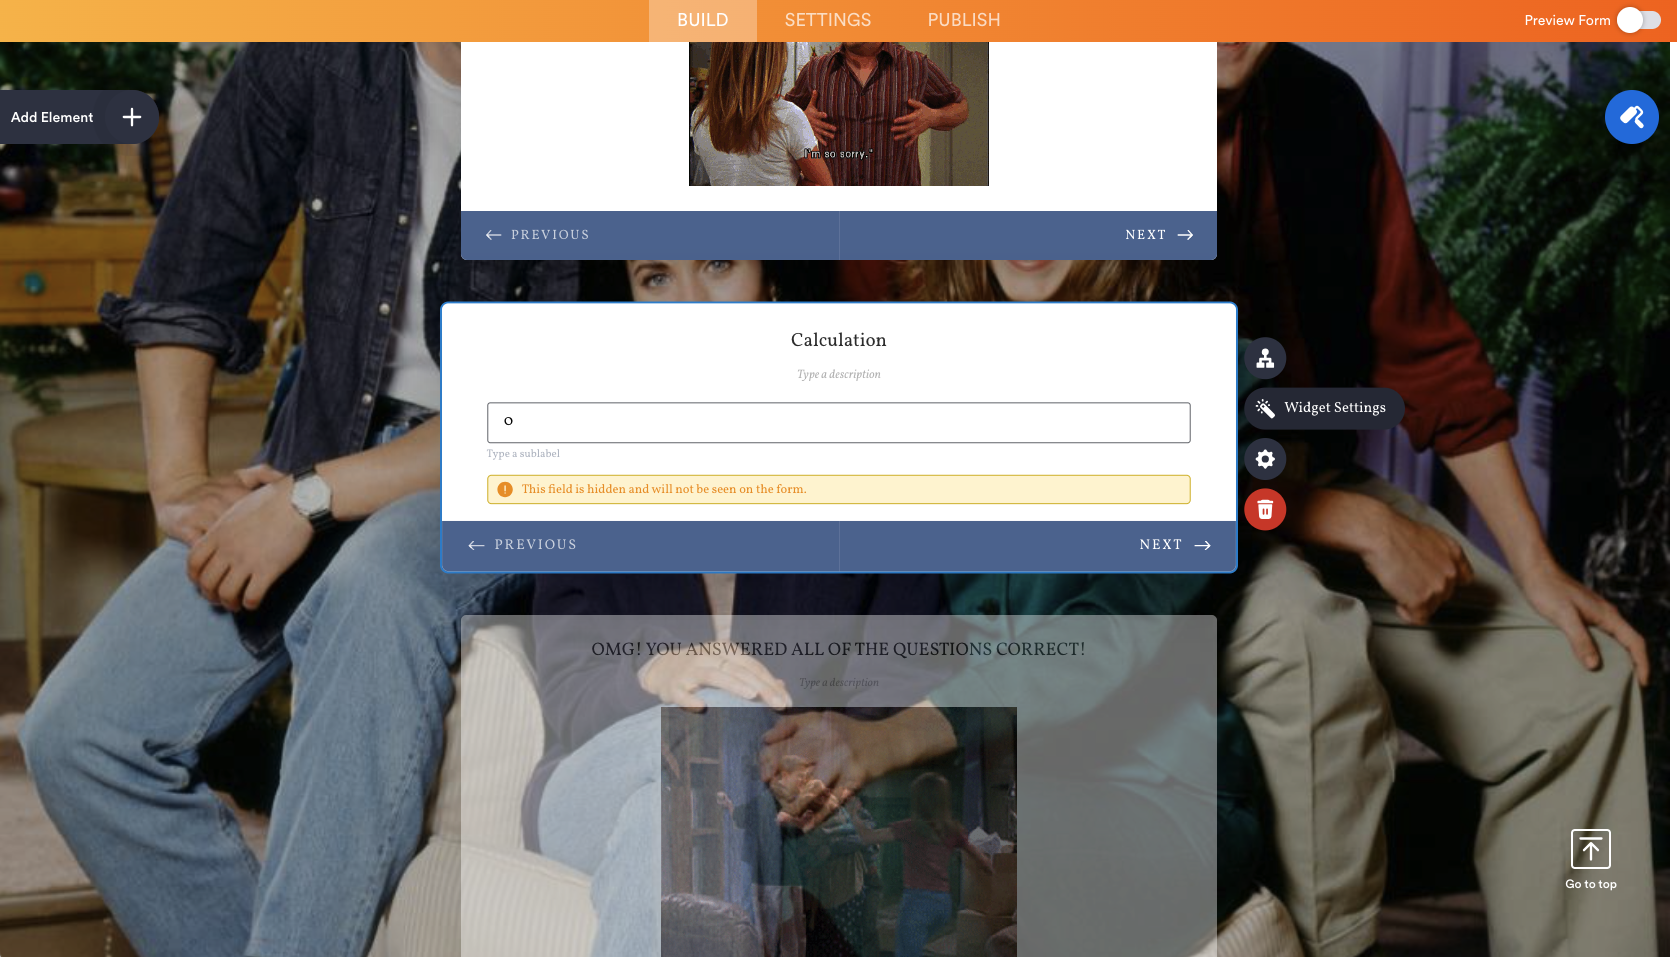
If you scroll down to the bottom of the quiz, there are a number of semi-transparent form slides. Those are all hidden by default. The calculation slide is hidden because nobody needs to see it.
The rest of the slides are hidden because the person taking the quiz should only see their score. The appropriate slide will be unhidden when the score is calculated.
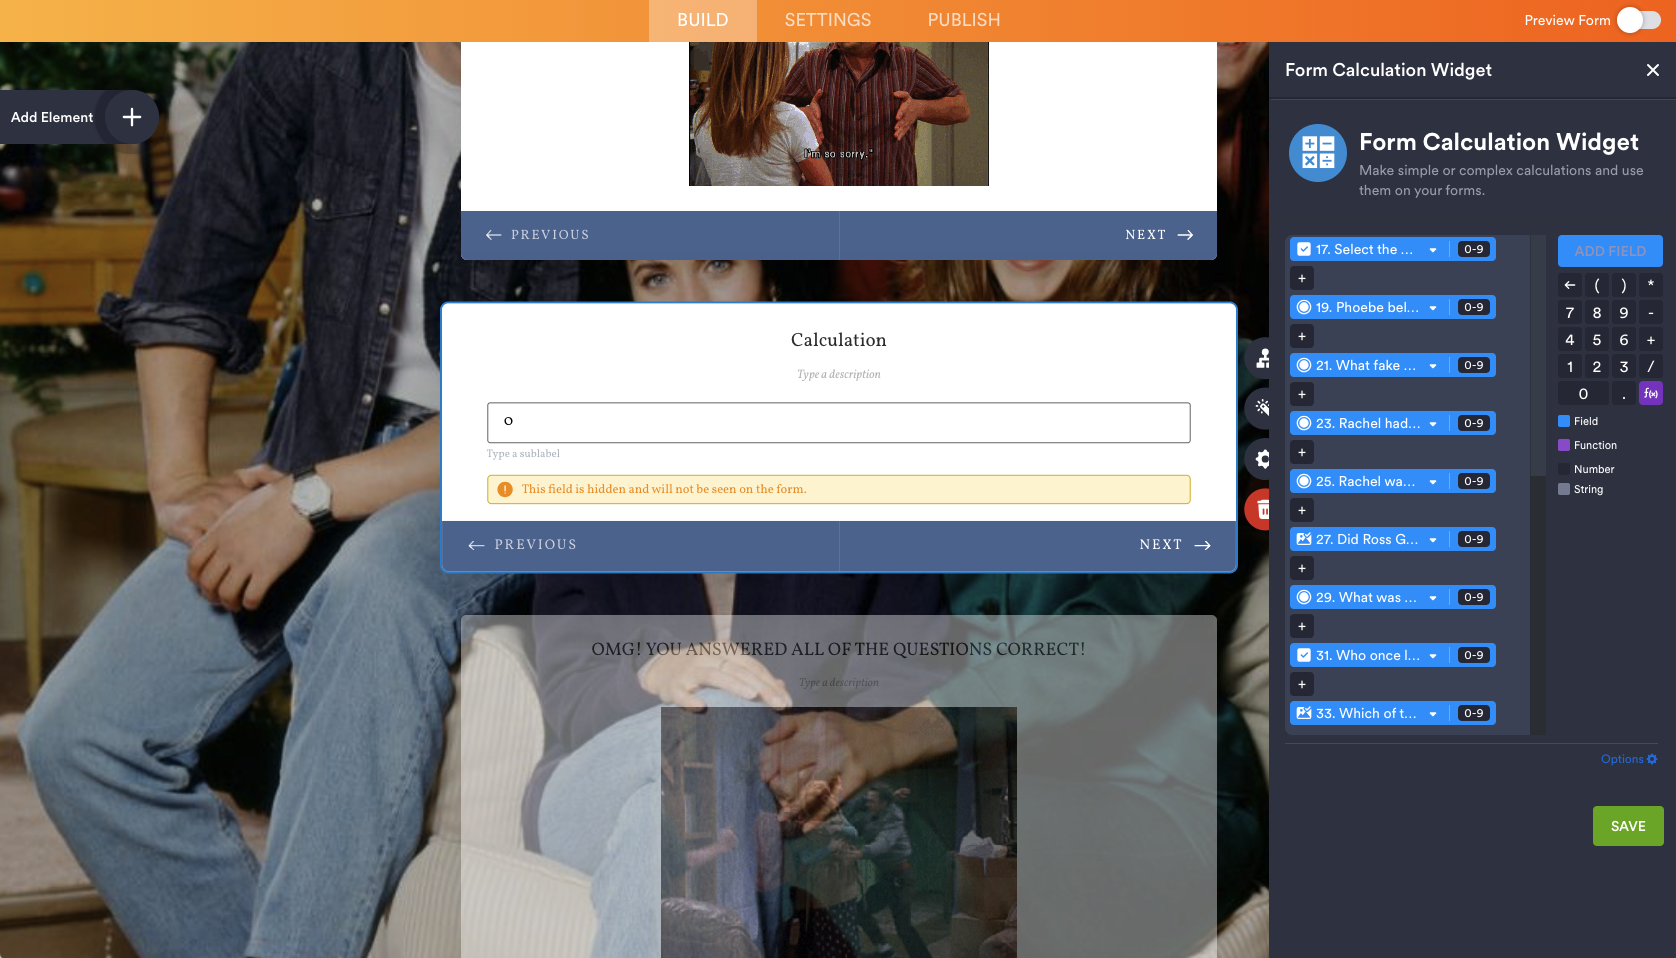
If you click the calculation slide, you can see that this question is actually a widget. A widget is a special form element that gives your form different abilities. In this case, it figures out your score for the test.
If you click the Widget Settings icon button, you can see how the quiz is graded. Each question’s score is added up based on its calculation values.
Navigating the form
Jotform lets you assign conditions to questions that assist in flow control. In most cases, you’d use conditions to show the correct answer for incorrect guesses. You can look at conditions individually by clicking the Conditions icon button next to the question.
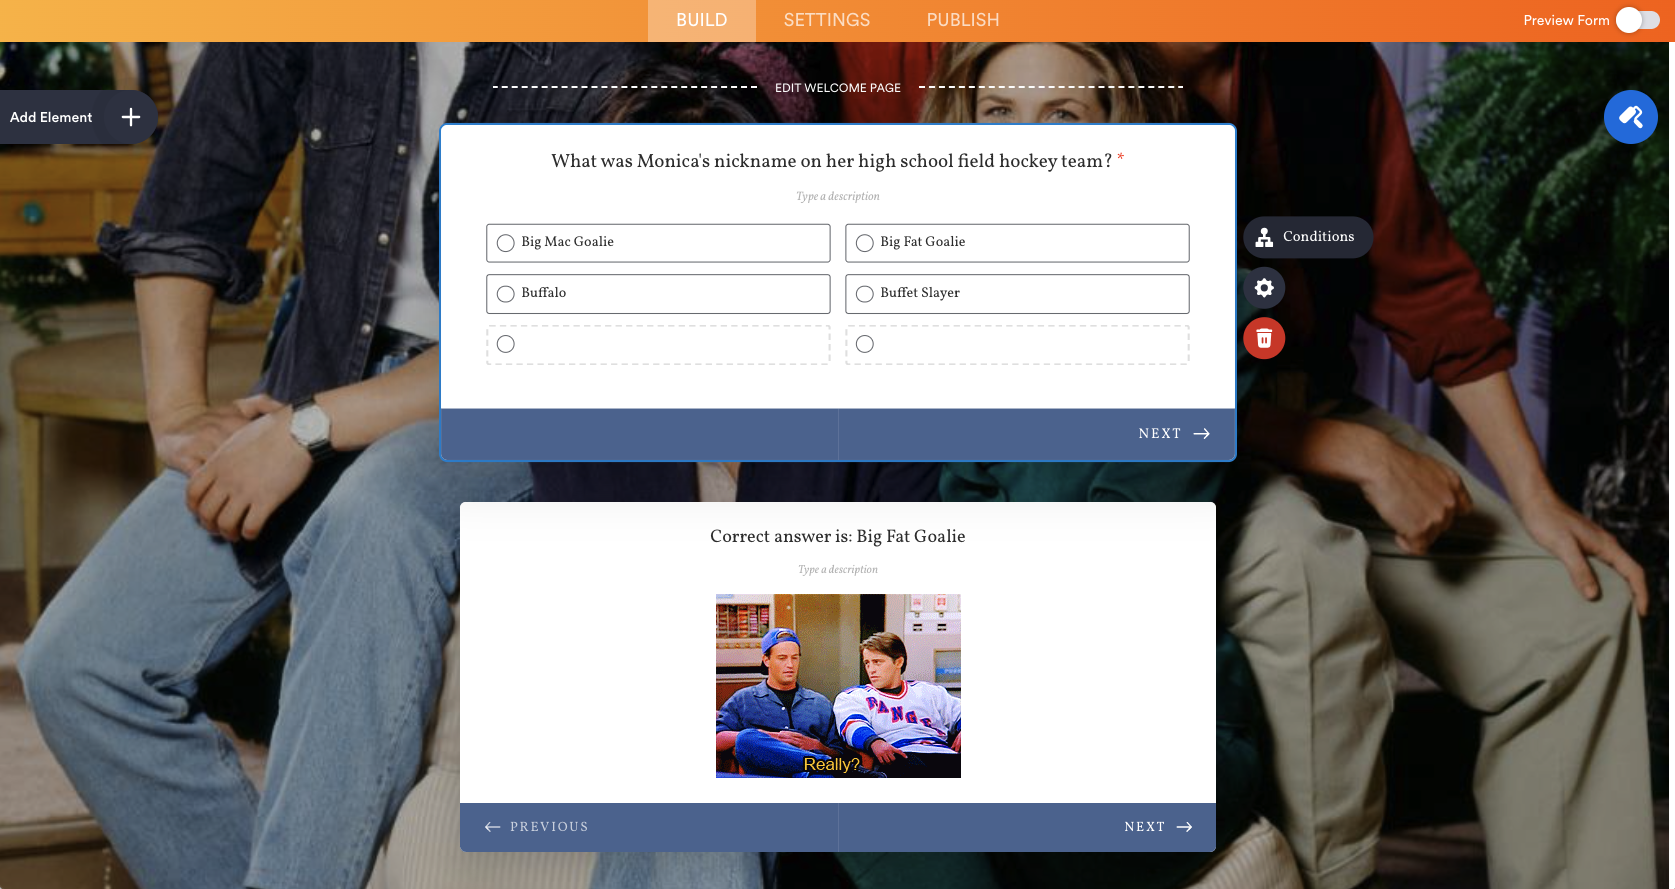
That will navigate you to the Conditions tab under the Settings page. You can see that the conditions use plain English to make it easier to understand what’s happening. Hover over the condition and click the Pencil (edit) icon to take a closer look.

There are two rules that this condition is looking for. It wants to know if the answer is empty or if it’s correct. If any of those rules are true, it will hide the correct answer page.

The question is required, and quiz takers must fill it out to continue. Adding an extra safety rail, like making sure it’s filled out, can’t hurt. If you click the Back button, you can see that there’s a dropdown above and to the right of the condition.
That dropdown will show you every condition used in the form. There are other types of questions besides multiple choice with different types of conditions. For example, the questions that allow users to select more than one option are handled differently than the others. It would be a good idea to explore the other conditions to familiarize yourself with how they work.
Condition 35 is especially important because that’s the one that handles navigation based on your final score.
The way to manage and navigate the app itself
We mentioned the quiz app has four quizzes, but we didn’t touch on how the app itself works. Navigate back to your quiz app. Let’s take a closer look at it.
The top section has four buttons for each of the quizzes. Those are navigation buttons. Below that is an Add a Page button. You can find one of those between each page.
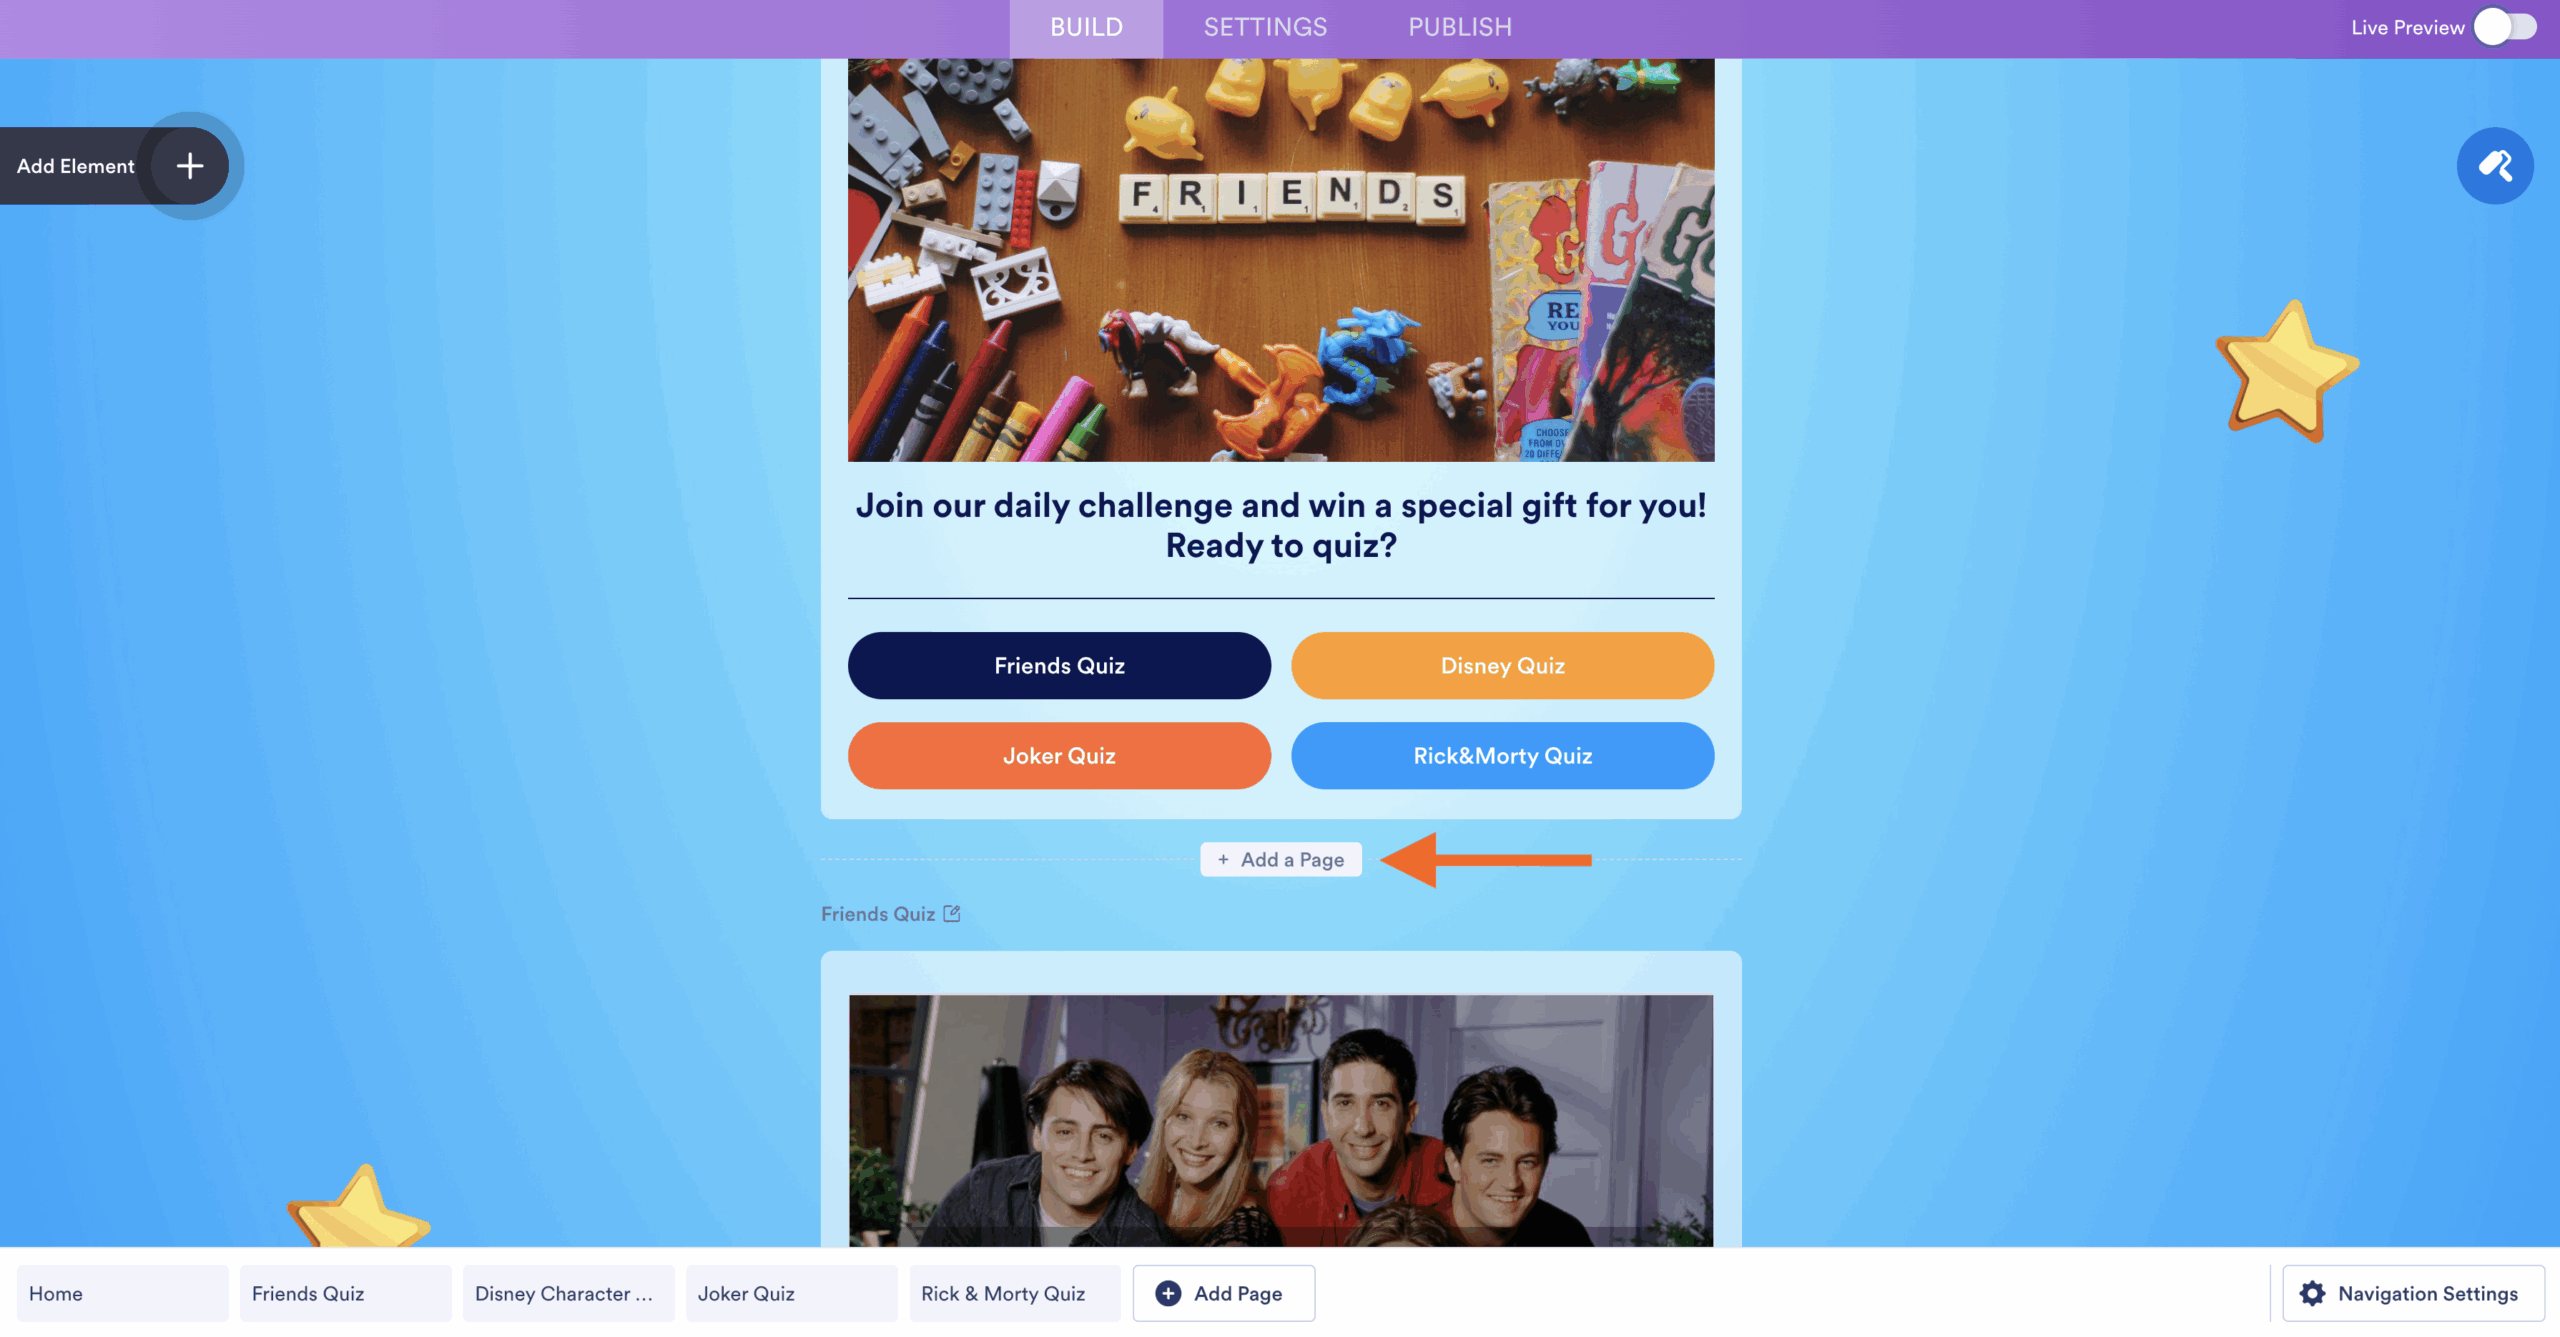
If you scroll down, you’ll notice that each quiz has a new page divider as well. That’s because each of those buttons navigates to their respective page.
Since it’s easier to show you, click the Preview App button in the upper right-hand corner. Now you can play with the app and navigate around.
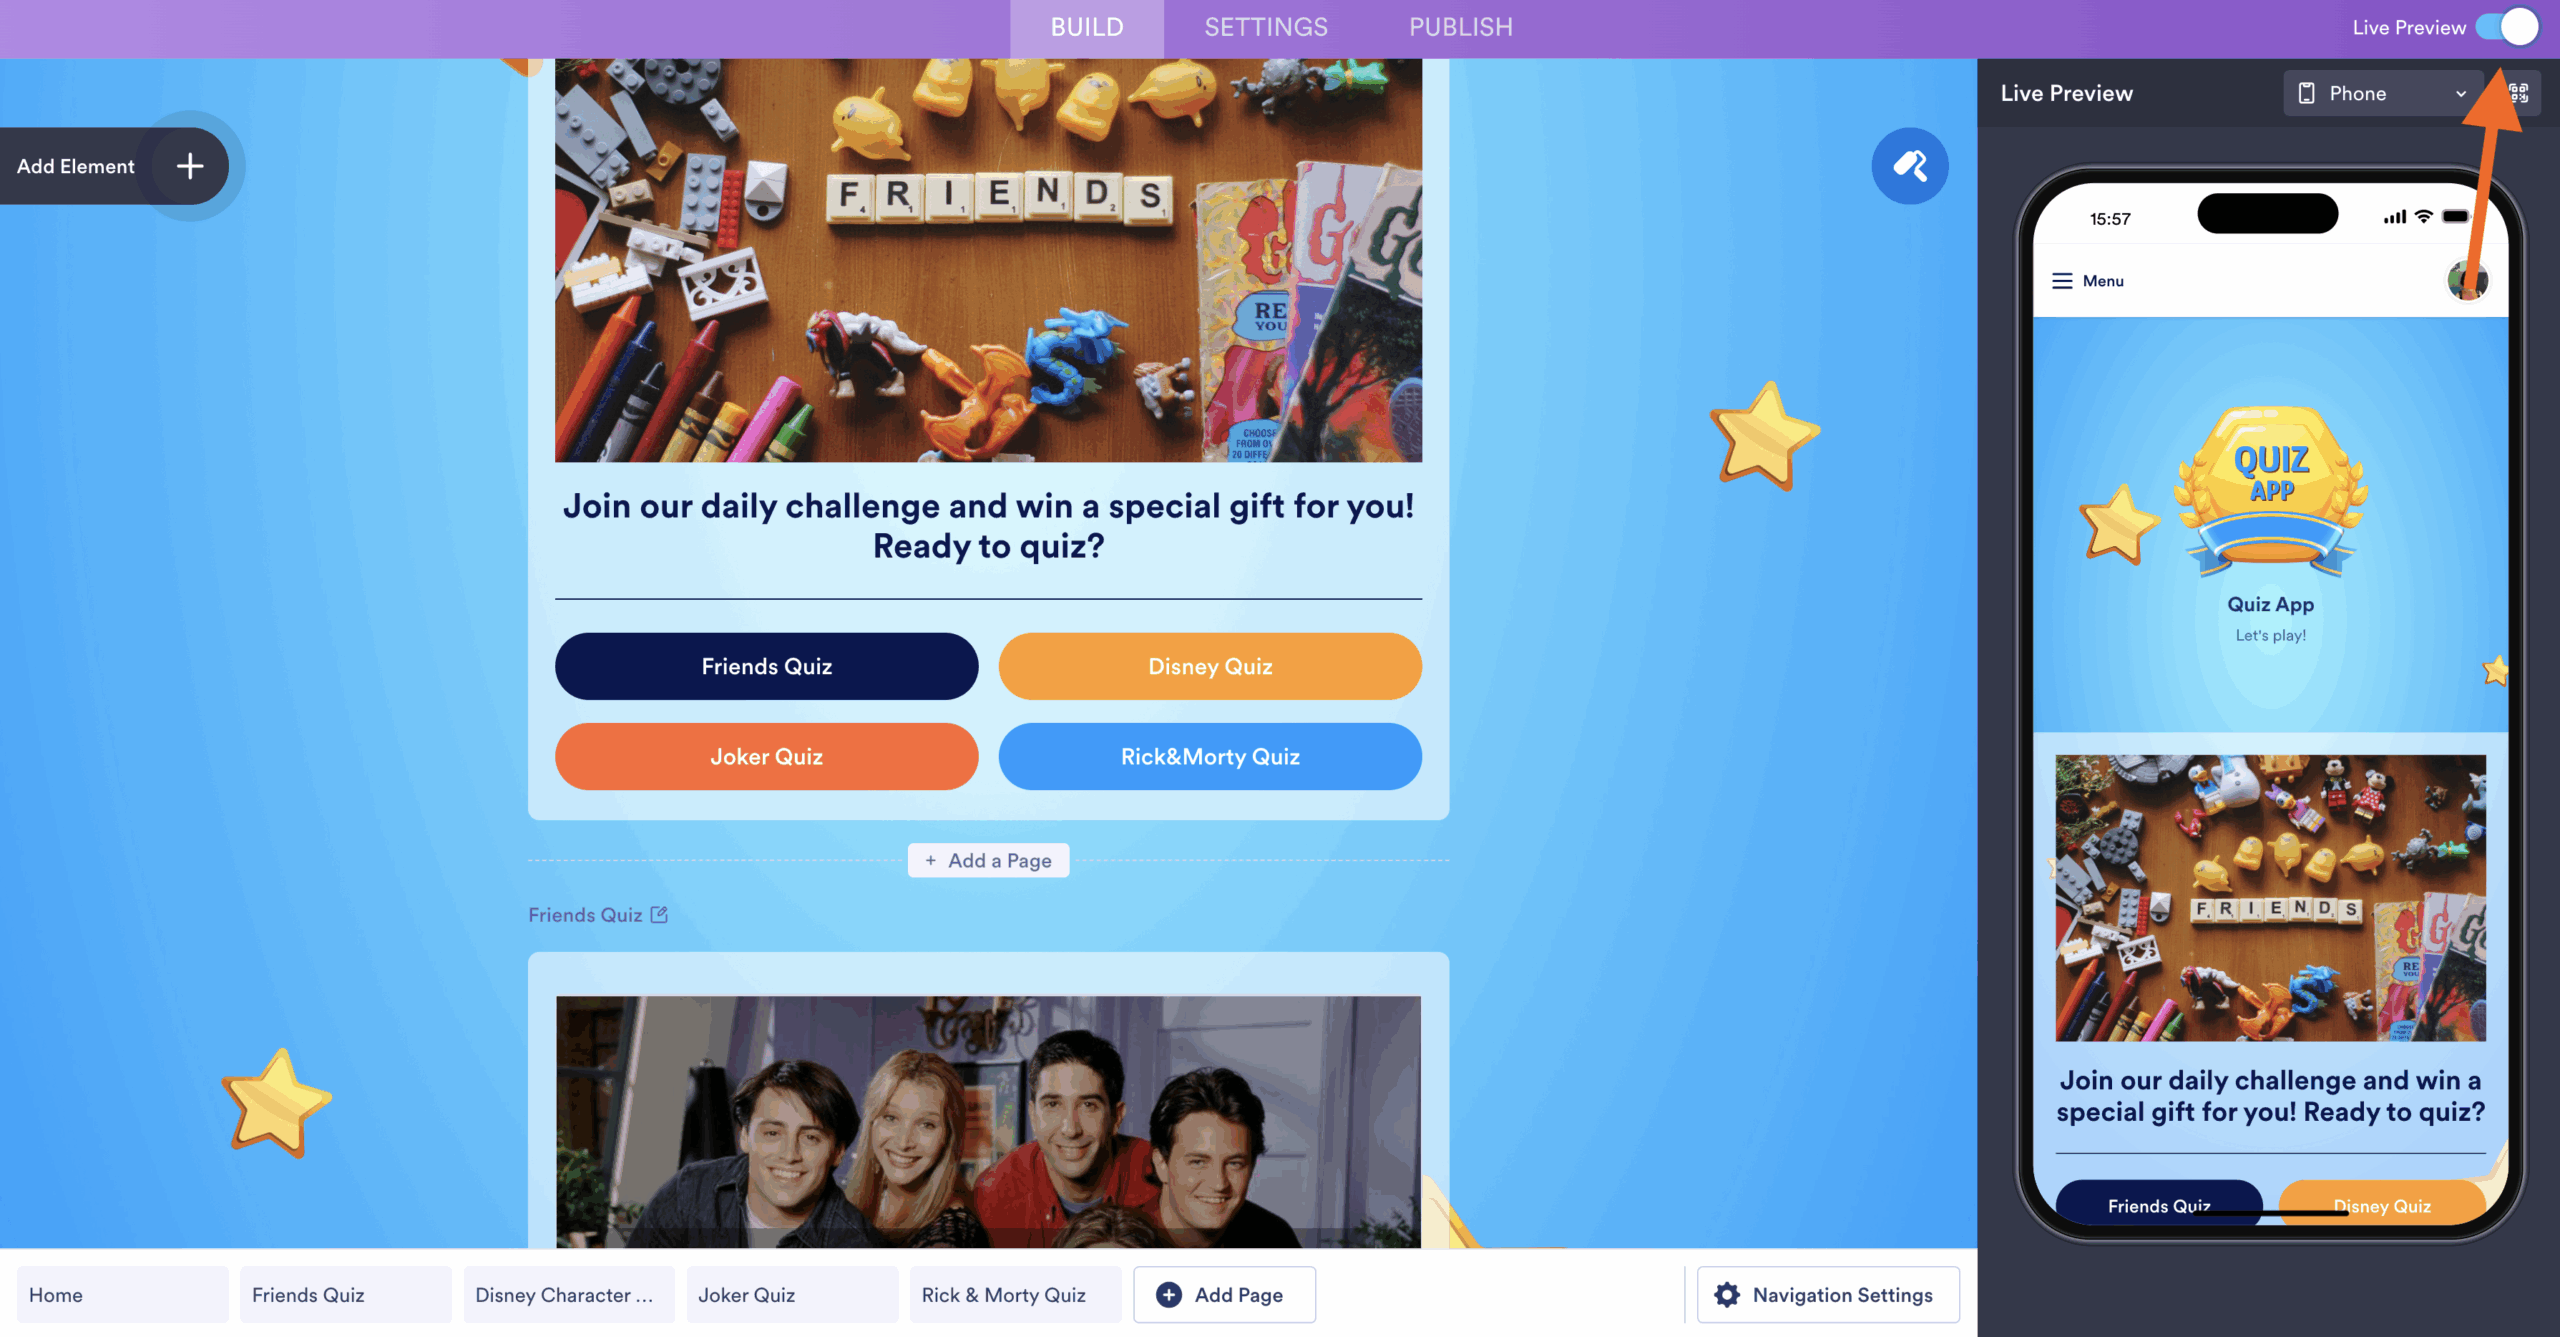
Each button lets you go to a page with a quiz. And each page has a button to go to the home page, just like a website’s navigation. You can control each button’s navigation from its properties menu.
Here are some other useful elements you can add to your app:
- Stylized text like headers and paragraphs
- Web and social links
- Images, videos, slideshows, and galleries
- Forms, tables, and reports
- A whole bunch of custom widgets for things like QR codes, RSS feeds, embedded social media, and much more
It’s all in the App Elements menu to the left.

The possibilities beyond quizzes
This article is about how to build a learning app, not just a quiz app. It’s a useful tool whether you’re an educator or a student.
If you’re a student, you can use it to
- Track class schedules
- Manage study groups
- Keep track of reference materials and websites
- Manage expenses and budgets for books, school lunches, dorm fees, etc.
If you’re a teacher or tutor, you can
- Manage your curriculum
- Get feedback on your courses
- Automatically grade your students
- Track your classes and student information
Jotform Forms and Tables can help you do each of the tasks above, but Apps brings them all together as a solid, cohesive unit. Give it a try.
Photo by Anete Lusina


")


Send Comment: