To keep up with the pace of business these days, staying organized isn’t just helpful — it’s essential. Whether you’re balancing meetings with clients, focusing on paperwork, or fitting in personal commitments, you need a calendar tool that helps you manage your day and boosts your productivity.
That’s where Google Calendar comes in. As part of the massive Google ecosystem of products, this tool is one of the most widely used scheduling and time management solutions out there. Google Calendar has a sleek, easy-to-use interface that’s highly intuitive for beginners and pros alike. Plus, it has plenty of integration options with third-party apps, so you can extend its functionality to meet any organization and productivity needs.
When you’re juggling conflicting deadlines, coordinating with colleagues and clients, and trying to find some semblance of work-life balance in your day, knowing how to make the most of Google Calendar is a game changer. In this article, we’ll walk through 13 productivity tips for Google Calendar so you can get more done in less time.
13 Google Calendar productivity tips
Google Calendar can do so much more than help you schedule your meetings. You can use it to set up reminders for important events, share calendars with key people, and even shave time off recurring tasks by using keyboard shortcuts. For more ways to boost your productivity with Google Calendar, follow the 13 tips below.
1. Set up recurring events for repeat meetings, tasks, and processes
No matter your job, you likely have things happening on a recurring basis, such as weekly meetings or filling out time sheets every two weeks. Instead of trying to remember the recurring events yourself or manually inputting them into your calendar every week, let Google Calendar do the hard work for you.
- Click +Create.
- Select Event or Task.
- Select how often you want your event or task to repeat.
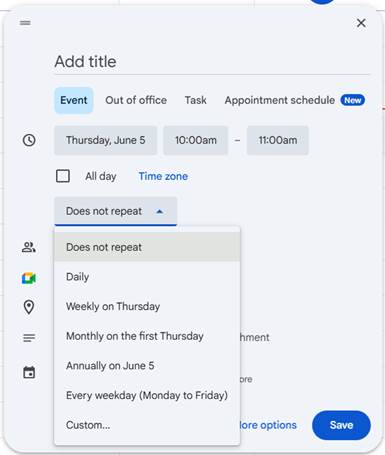
- Set up the event or task details.
- Click Save.
2. Color-code your events and priorities
If you’re a visual learner, it’s helpful to be able to see what tasks and events you have coming up at a glance without having to read every little detail. Google Calendar has the ability to color-code your events so that each one shows up as a specific color in your calendar. You can assign colors to specific types of events based on your work and personal commitments.
For example, if you work with multiple clients, you can assign a different color to each client. Or if you find yourself regularly completing a wide variety of tasks, you can assign a different color to each type of task.
- Click +Create.
- Select Event or Task.
- Click on the color circle to expand the dropdown menu.
- Select the appropriate color for your event or task.
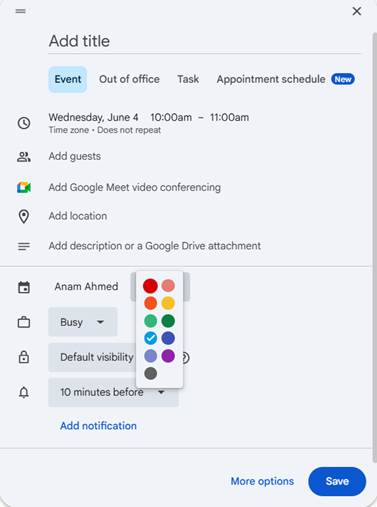
- Set up the event or task details.
- Click Save.
3. Create default reminders and notifications for important deadlines
Do you sometimes find yourself unaware of an upcoming event or task until the very last minute? You can set up default reminders and notifications for events and tasks in Google Calendar based on your work habits. For example, if you don’t need a long window of notification before an event, you can set the reminder to arrive just 10 or 15 minutes before the event starts. If you need more time to prepare, consider setting up a reminder 30 minutes to an hour before the event.
- Click the gear icon.
- Click Settings.
- Scroll down to Settings for my calendars.
- Select the calendar on which you want to set default reminders and notifications.
- Scroll to Event notifications.
- Click +Add notification.
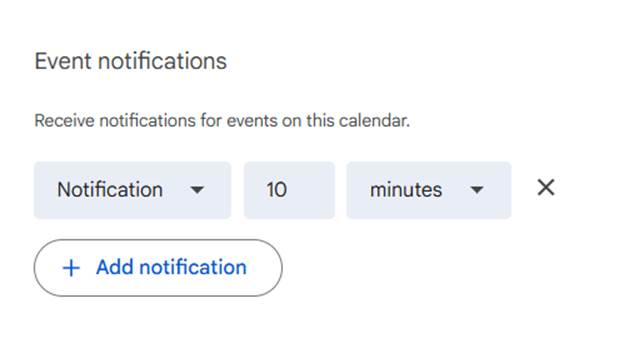
- Configure the settings for events based on your needs. Your new settings will be saved automatically.
4. Share your calendar with colleagues, clients, family, and other stakeholders
If you need to coordinate with others, such as colleagues, clients, family, or friends, you can easily share your Google Calendar. This way, stakeholders can see what you have going on in your day to help schedule meetings and tasks accordingly.
- Click the gear icon.
- Click Settings.
- Scroll down to Settings for my calendars.
- Click the calendar you wish to share.
- Scroll down to Shared with.
- Click Add people and groups.
- Type in the email addresses for the people or groups you want to share your calendar with.
- Click Send.
5. Use the Find a Time feature to schedule meetings more effectively
Have you ever tried to schedule a meeting with someone by sending multiple emails back and forth to find a time that works for both of you? It can be an incredibly frustrating process that zaps your productivity. Google Calendar has a great Find a Time feature that solves this problem. (Note that this feature only works if someone has shared their calendar with you or is part of your work, school, or other organization.)
- Click the Search for people box on the left-hand side of Google Calendar.
- Type in the name of the person you want to meet with.
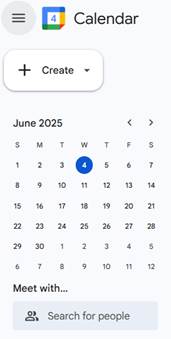
- Click +Create. Select Event.
- Click Suggested times. You will be able to see what their availability is and book a meeting accordingly.
6. Create separate calendars for work, personal commitments, and other projects
Though some people like to see all of their events and tasks for different parts of their lives in one place, others like to have everything separated. If you’re the latter, you can create multiple calendars in Google Calendar for even more clarity.
- Scroll down to Other calendars on the left-hand side of Google Calendar. Click +.
- Select Create new calendar.
- Name your calendar and add in relevant details. Click Create calendar.
Once you’ve created your new calendar, it will show up under My calendars on the left-hand side menu.
Pro Tip
Want to change your calendar’s color? Click the three vertical dots next to the calendar name and select the color you want to associate with that calendar.
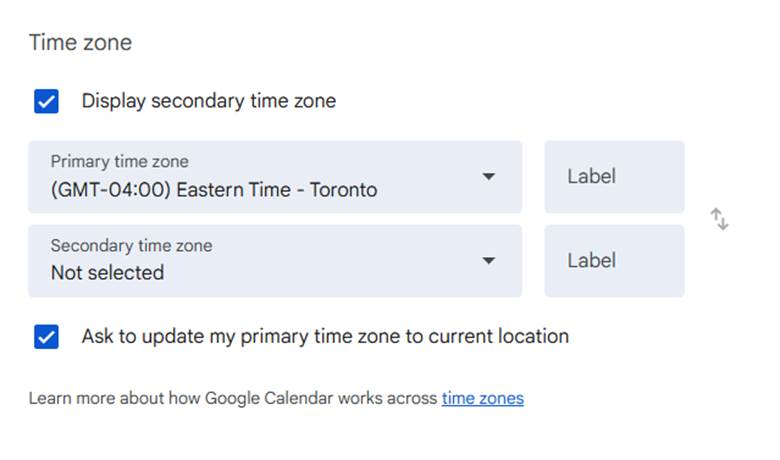
7. Add a secondary time zone to your calendar
If you frequently travel for work or pleasure, work with international colleagues, or have friends and family overseas, you may need to deal with time zones other than your own. In Google Calendar, you can add a secondary time zone to your events and tasks, making it easier to manage your time.
- Click the gear icon.
- Click Settings.
- Scroll down to Time zone.
- Click the Display secondary time zone box.
- Specify the secondary time zone. Your new settings will be saved automatically.
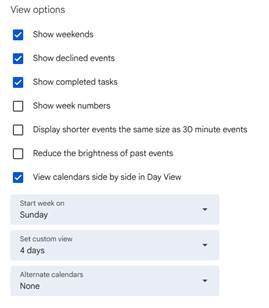
8. Change your calendar view
Do you like to see weekends in your calendar, or do you prefer to see only working days? Do you want shorter appointment slots to be the same size as longer ones? Do you want to see declined events in your calendar or keep it only to events you’re attending? Google Calendar lets you customize your calendar view so you can configure it based on your preferences.
- Click the gear icon.
- Click Settings.
- Scroll down to View options.
- Customize your calendar view based on your preferences. Your changes will be saved automatically.
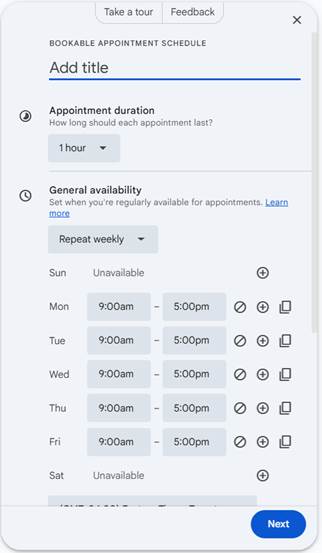
9. Create appointment slots for easier booking
If you frequently need to book appointments and meetings with clients, coworkers, and other stakeholders, you can use one of the best productivity enhancing Google Calendar tricks to do so. The Appointment schedule feature in Google Calendar enables you to create rules for how people can book time with you. Here’show to create appointment slots in Google Calendar.
- Click +Create.
- Select Appointment schedule.
- Fill out the appointment booking details based on your schedule.
- Click Next.
- Fill out the remaining details regarding what information to include on your booking page.
- Click Save.
10. Use keyboard shortcuts to save time
Keyboard shortcuts are a great way to shave seconds off your tasks. It may not seem like a lot of time, but when you’re saving seconds on hundreds of tasks a day, they add up. Here are some popular Google Calendar shortcuts you can use.
- Next date range: Ctrl + J
- Previous date range: Ctrl + K
- Refresh: Ctrl + R
- Jump to today: Ctrl + T
- Search: Ctrl + F
- Go to settings: Ctrl + ,
- Go to date: Ctrl + G
- Scroll timeline up: Alt + Up arrow
- Scroll timeline down: Alt + Down arrow
- Previous time frame: Alt + Left arrow
- Next time frame: Alt + Right arrow
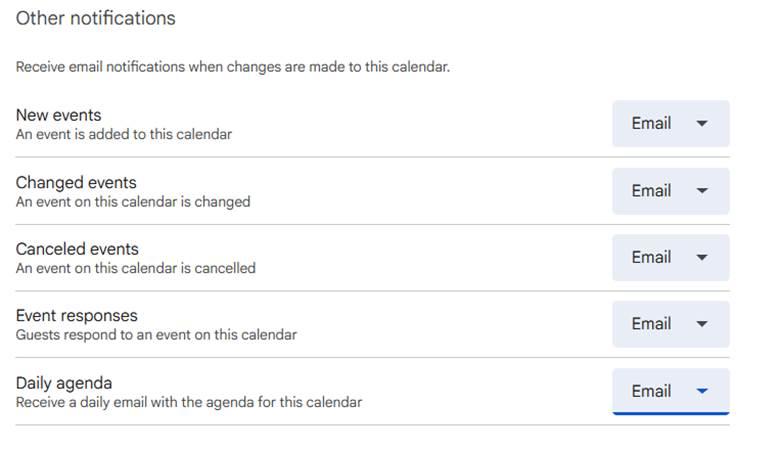
11. Get your daily agenda delivered to your inbox
If your calendar is full, it’s nice to see a summary of your agenda every morning. Google Calendar can send you an email with all of the important details so you can be sure you don’t miss anything important.
- Click the gear icon.
- Click Settings.
- Scroll down to Settings for my calendars.
- Click on your calendar name.
- Click Other notifications.
- For the Daily agenda field, select Email in the dropdown. Your settings will be saved automatically.
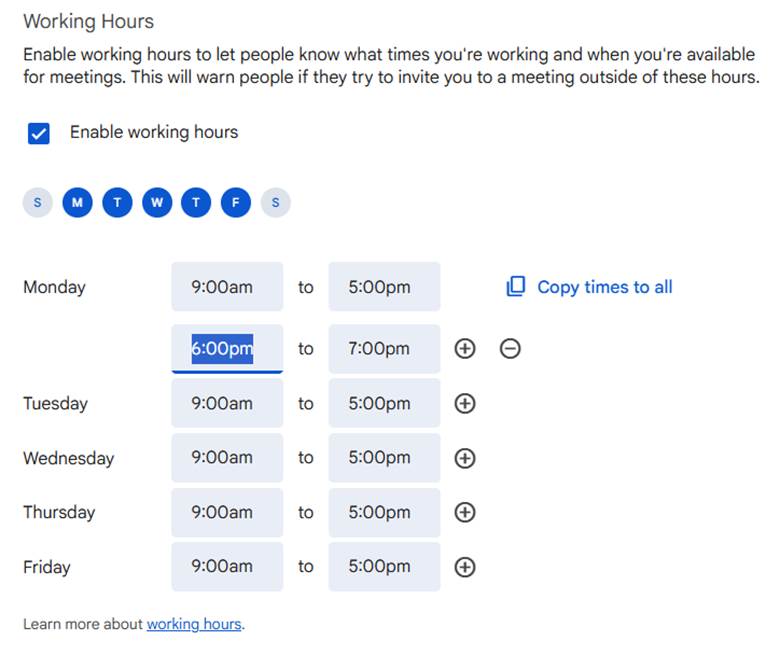
12. Set your working hours
If you find yourself being invited to events and meetings outside of your working hours which you cannot attend, you can specify your working hours in Google Calendar. This makes it easy for others to see when you’re available.
- Click the gear icon.
- Click Settings.
- Scroll down to Working hours.
- Tick the Enable working hours checkbox.
- Select the days you wish to be available for work, and select the times accordingly. You can also split times during the day. Your settings will be saved automatically.
13. Sync Google Calendar events with form submissions using Jotform
If you receive appointment, event, and task bookings via forms, you can integrate Google Calendar with Jotform to automatically create and sync calendar events based on form submissions. With Jotform, you don’t have to manually enter each event into your calendar, which helps to streamline workflows, reduce errors, and save time.
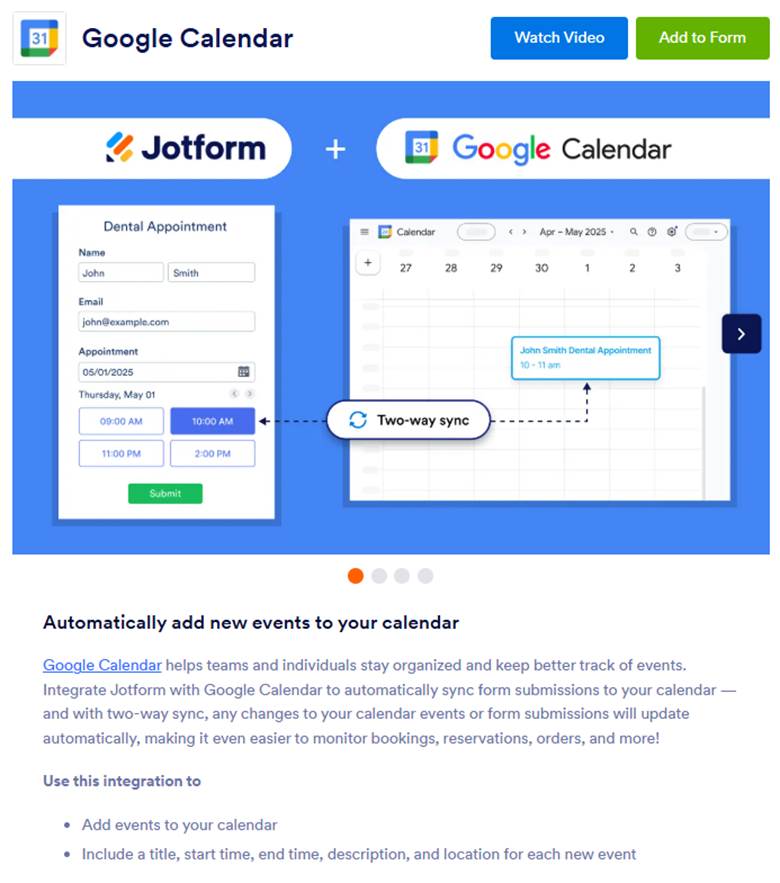
Jotform’s Google Calendar integration comes in handy for plenty of use cases:
- Appointment bookings(e.g., doctor’s appointments, salon appointments)
- Event registrations (e.g., workshops, webinars, conferences)
- Reservations (e.g., restaurants, bars)
- Order tracking (e.g., online stores)
Here’s how it works: Whenever a form is submitted in Jotform, the integration instantly adds the event to the Google Calendar you’ve specified. The integration also maps event details, such as the title, date, time, and description, directly from the form fields to the calendar event.
Sound complex? It’s not! Setup is easy and takes only a few minutes. Here’s what you need to do:
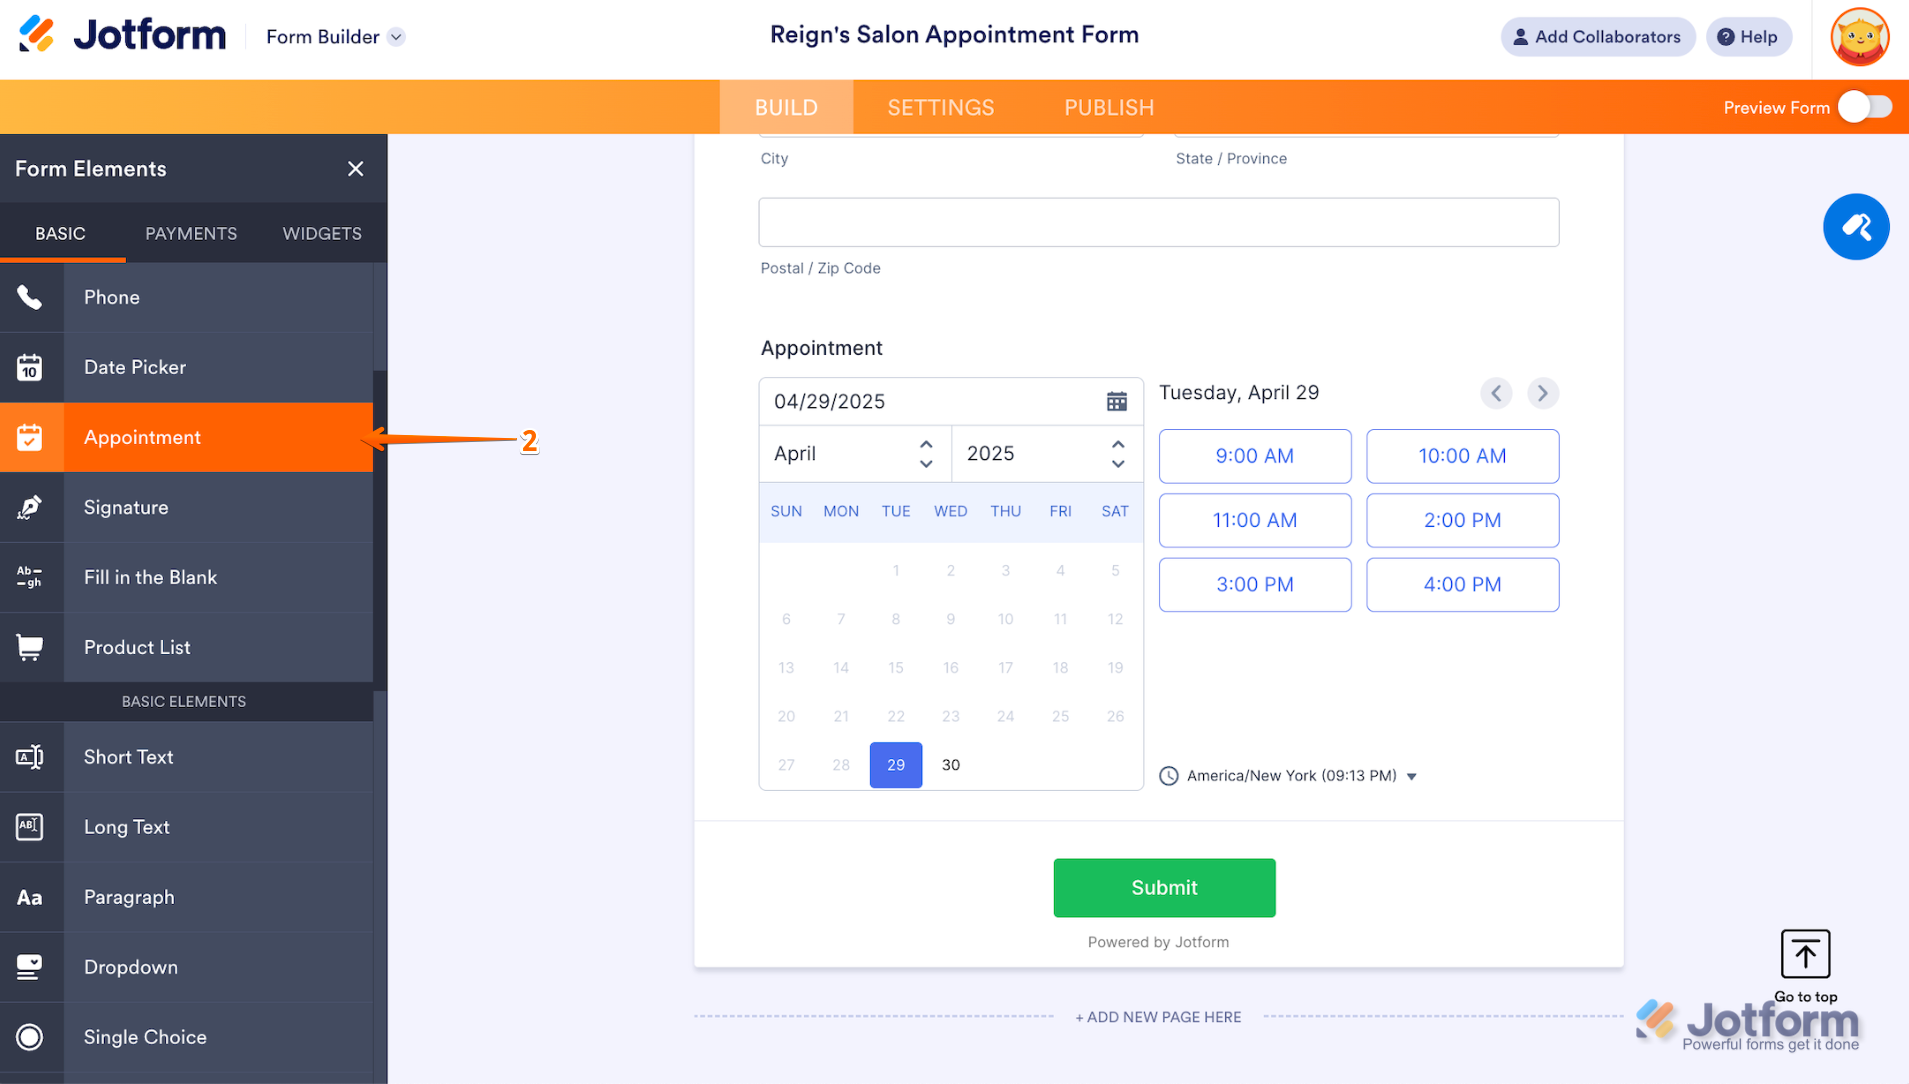
- In Jotform Form Builder, go to the Add Elements section on the left-hand side.
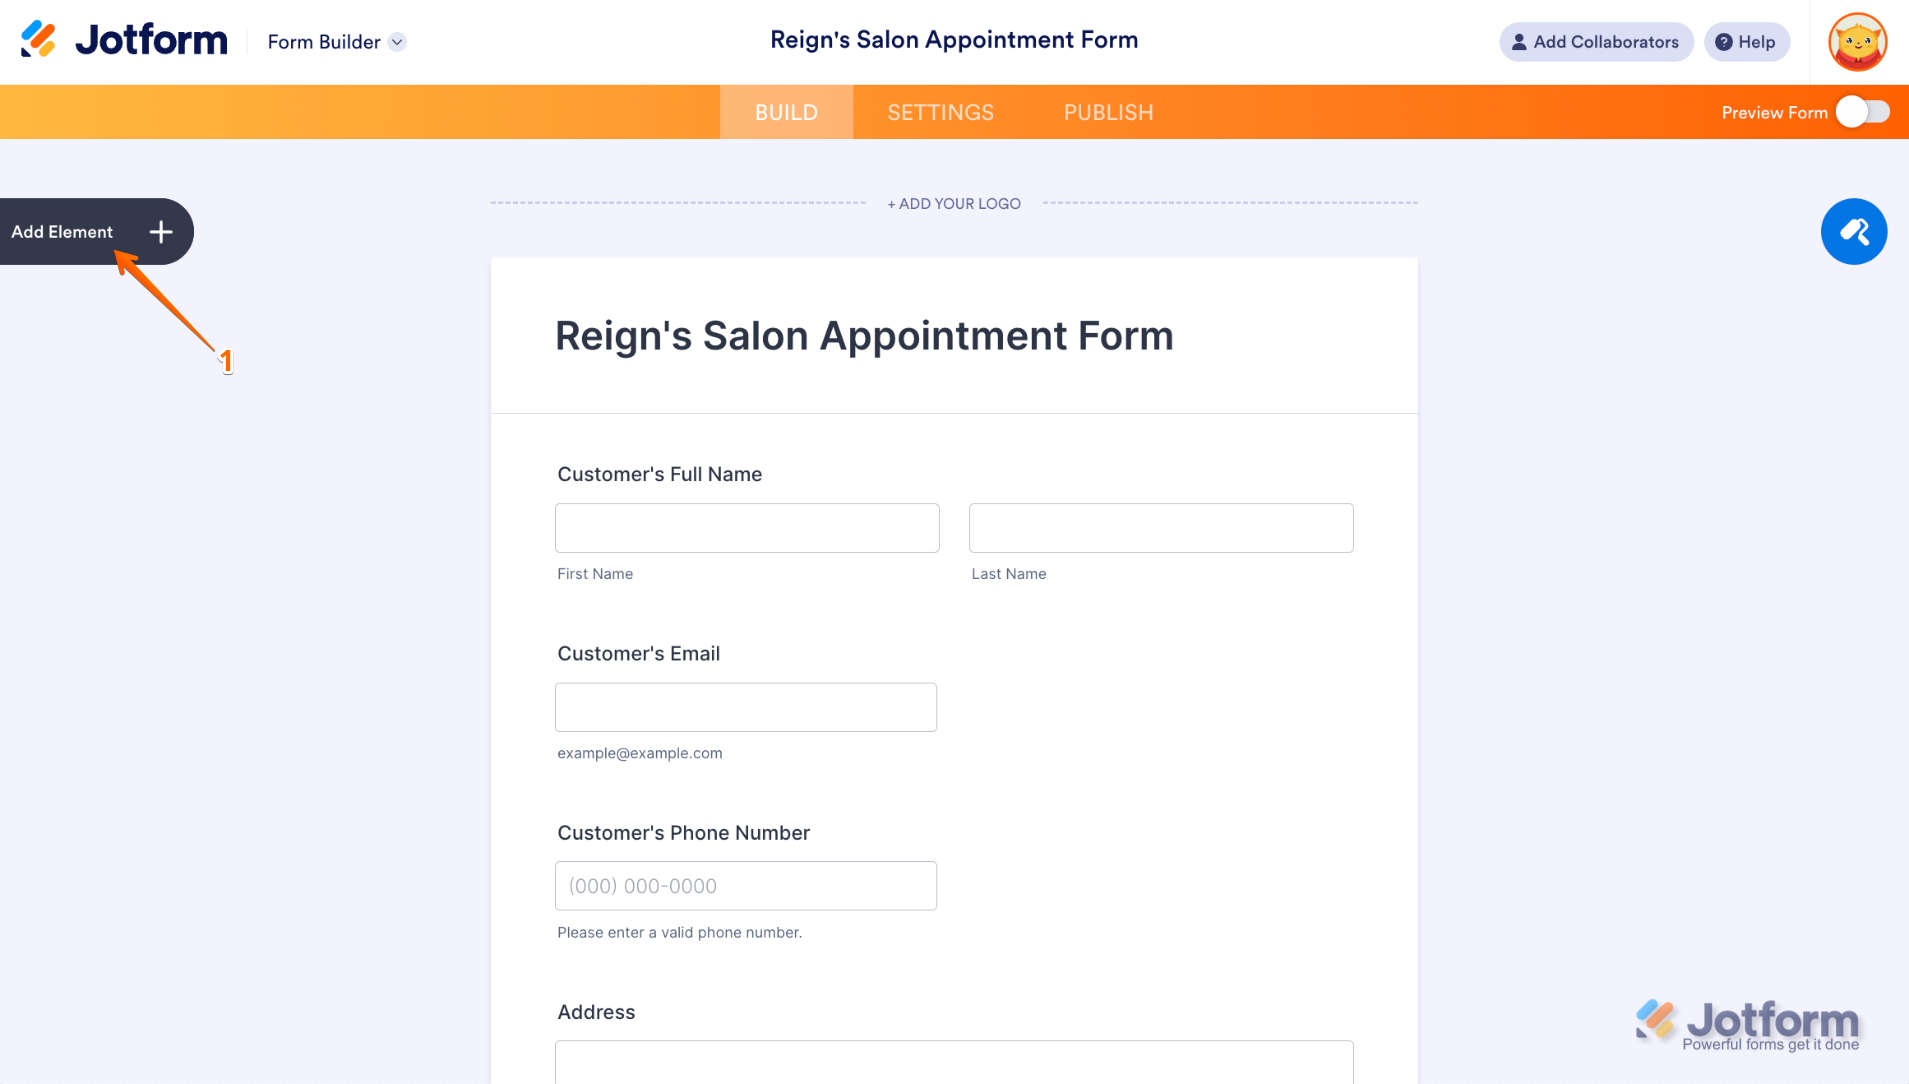
- Choose the Appointment field.
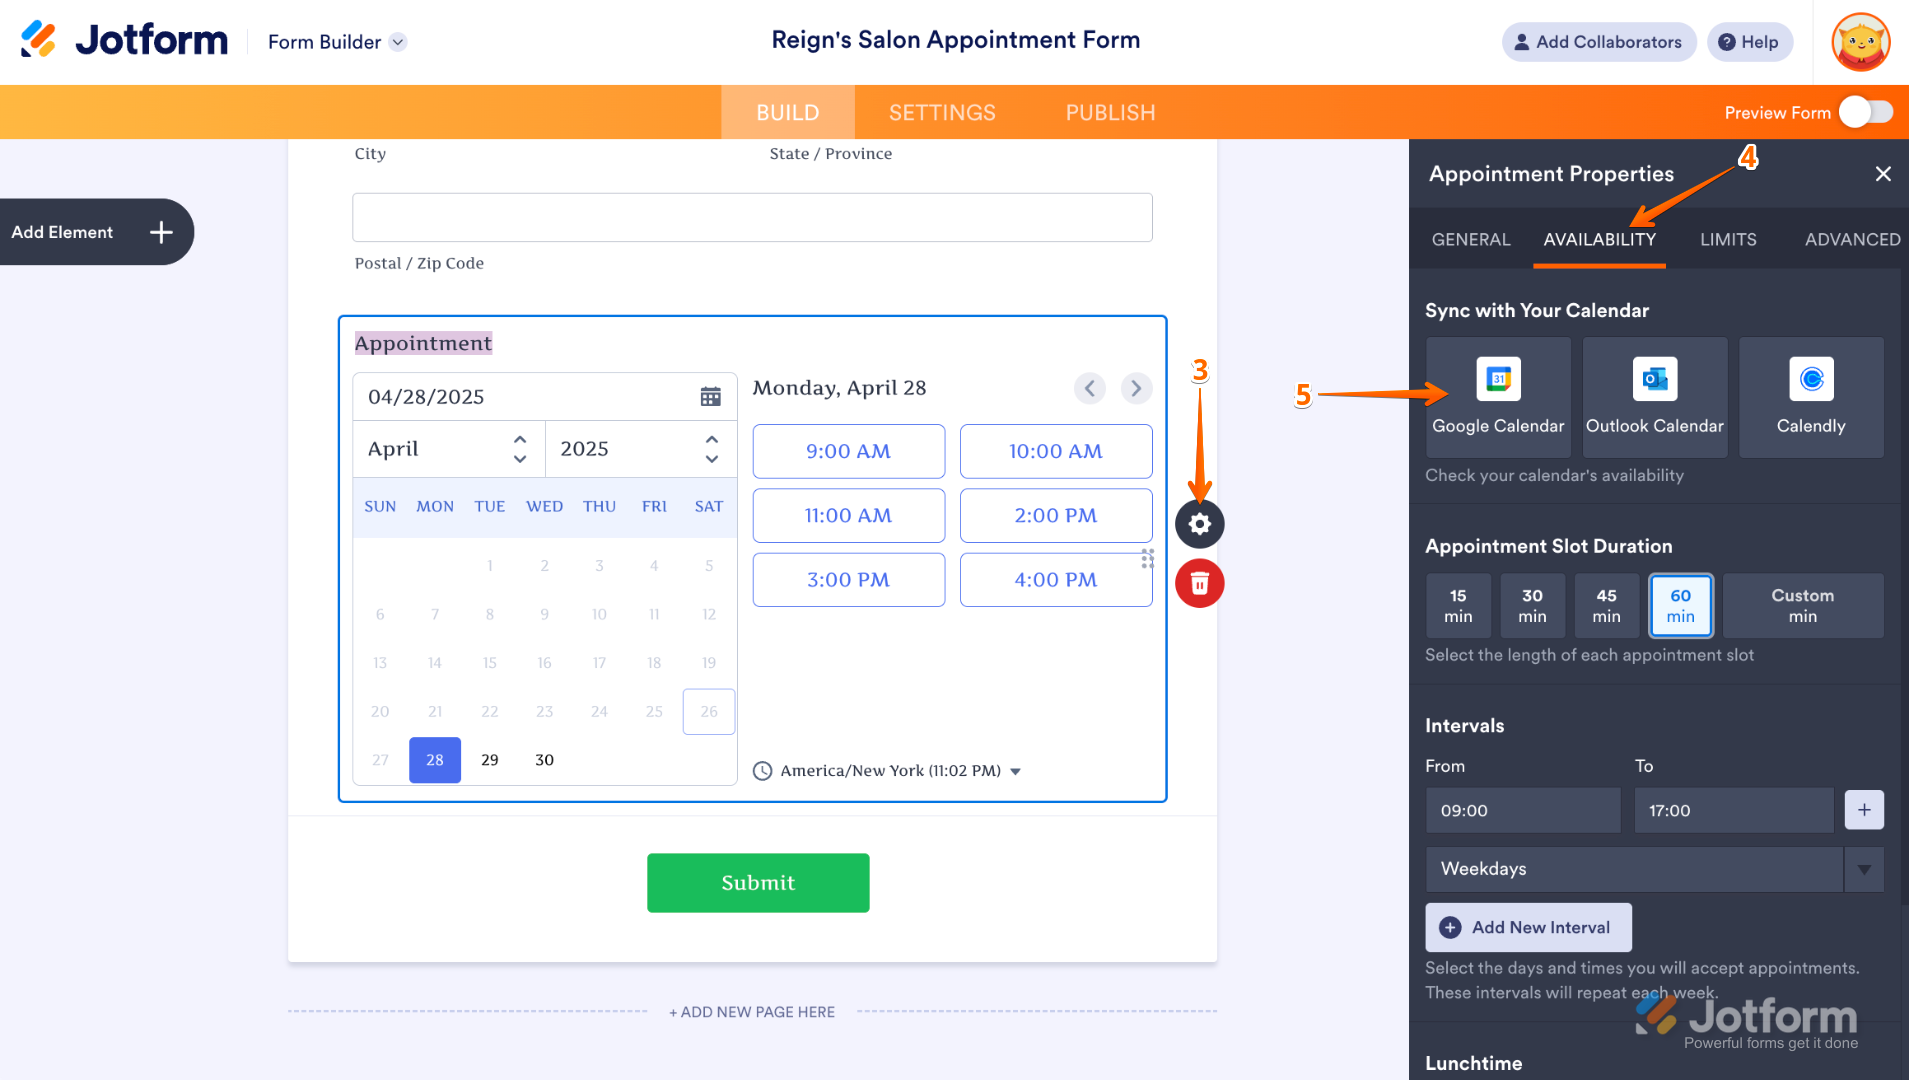
- Click the gear icon next to the Appointment field.
- Click on the Availability tab.
- In the Sync with Your Calendar section, select Google Calendar.
- Authenticate your Google account.
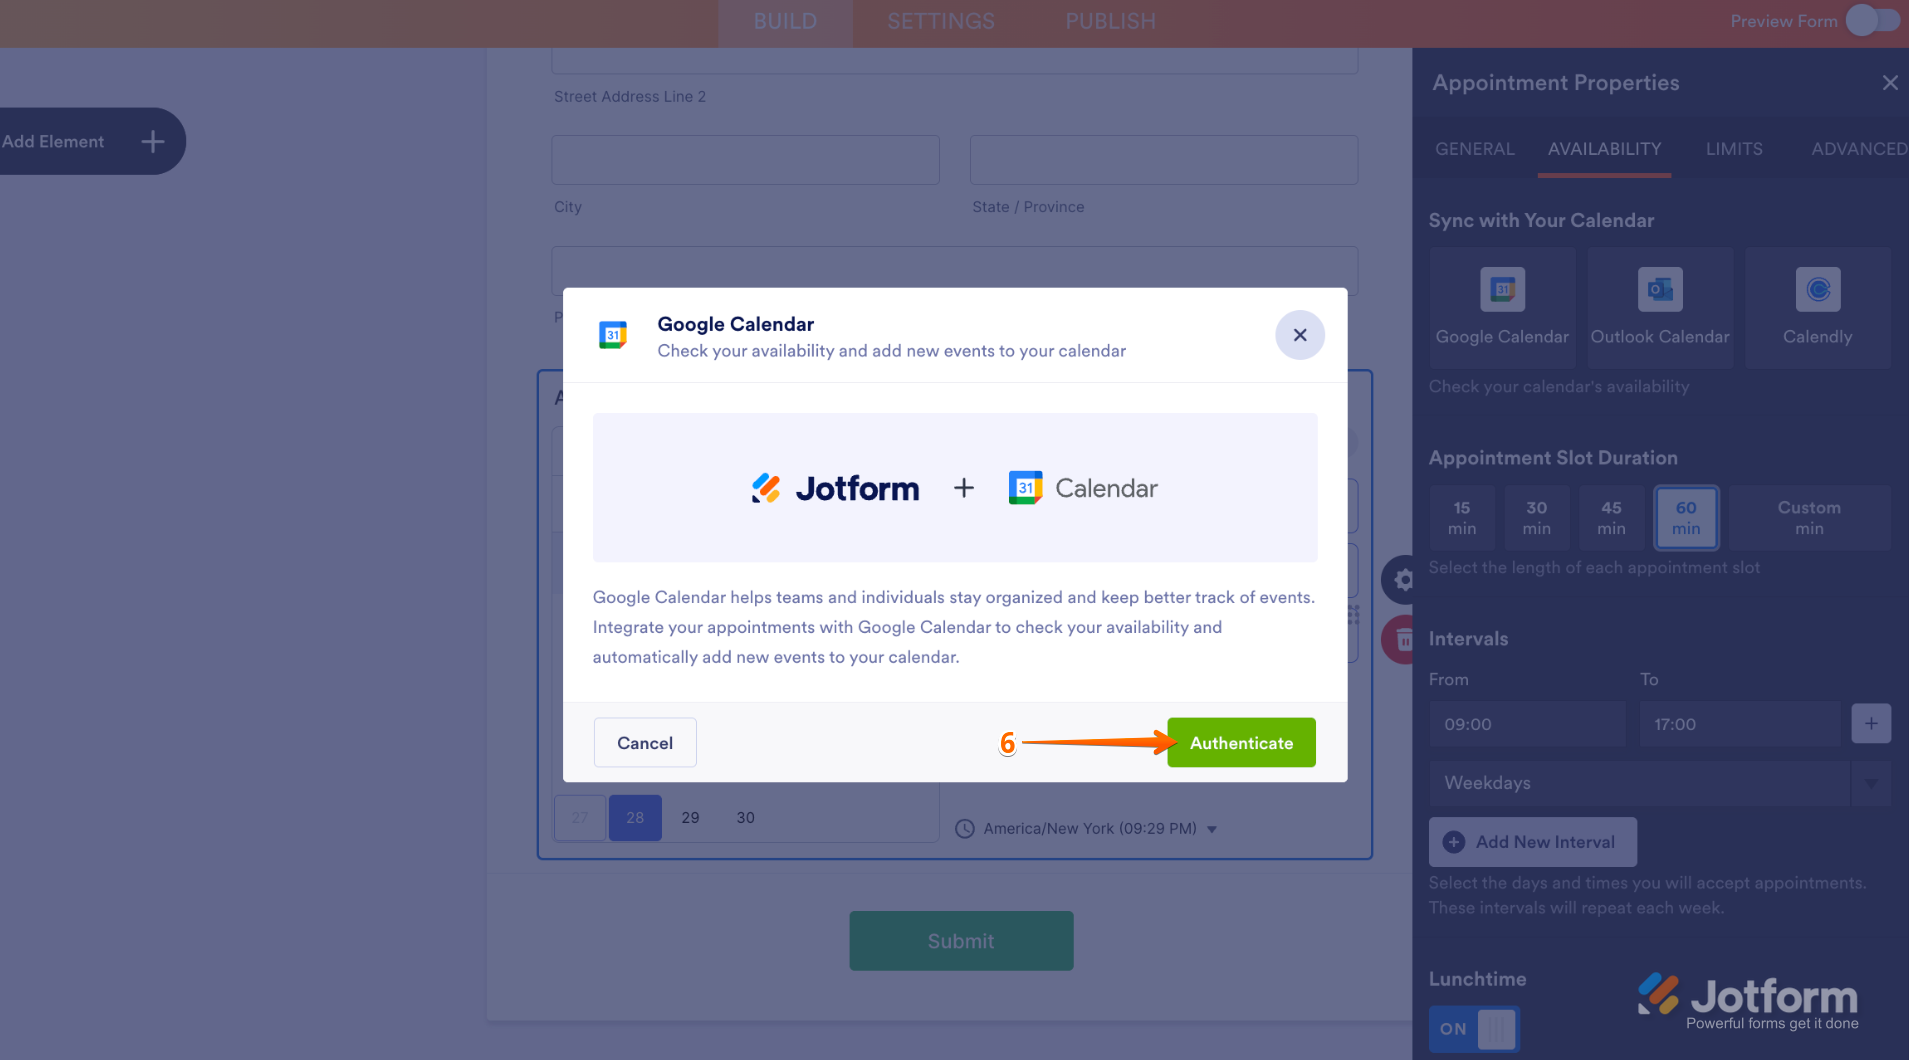
- Enter the email address for your Google account. Click Next.
- Tick the checkbox next to Select All.
- Click Continue.
- Select the calendar you wish to integrate with Jotform.
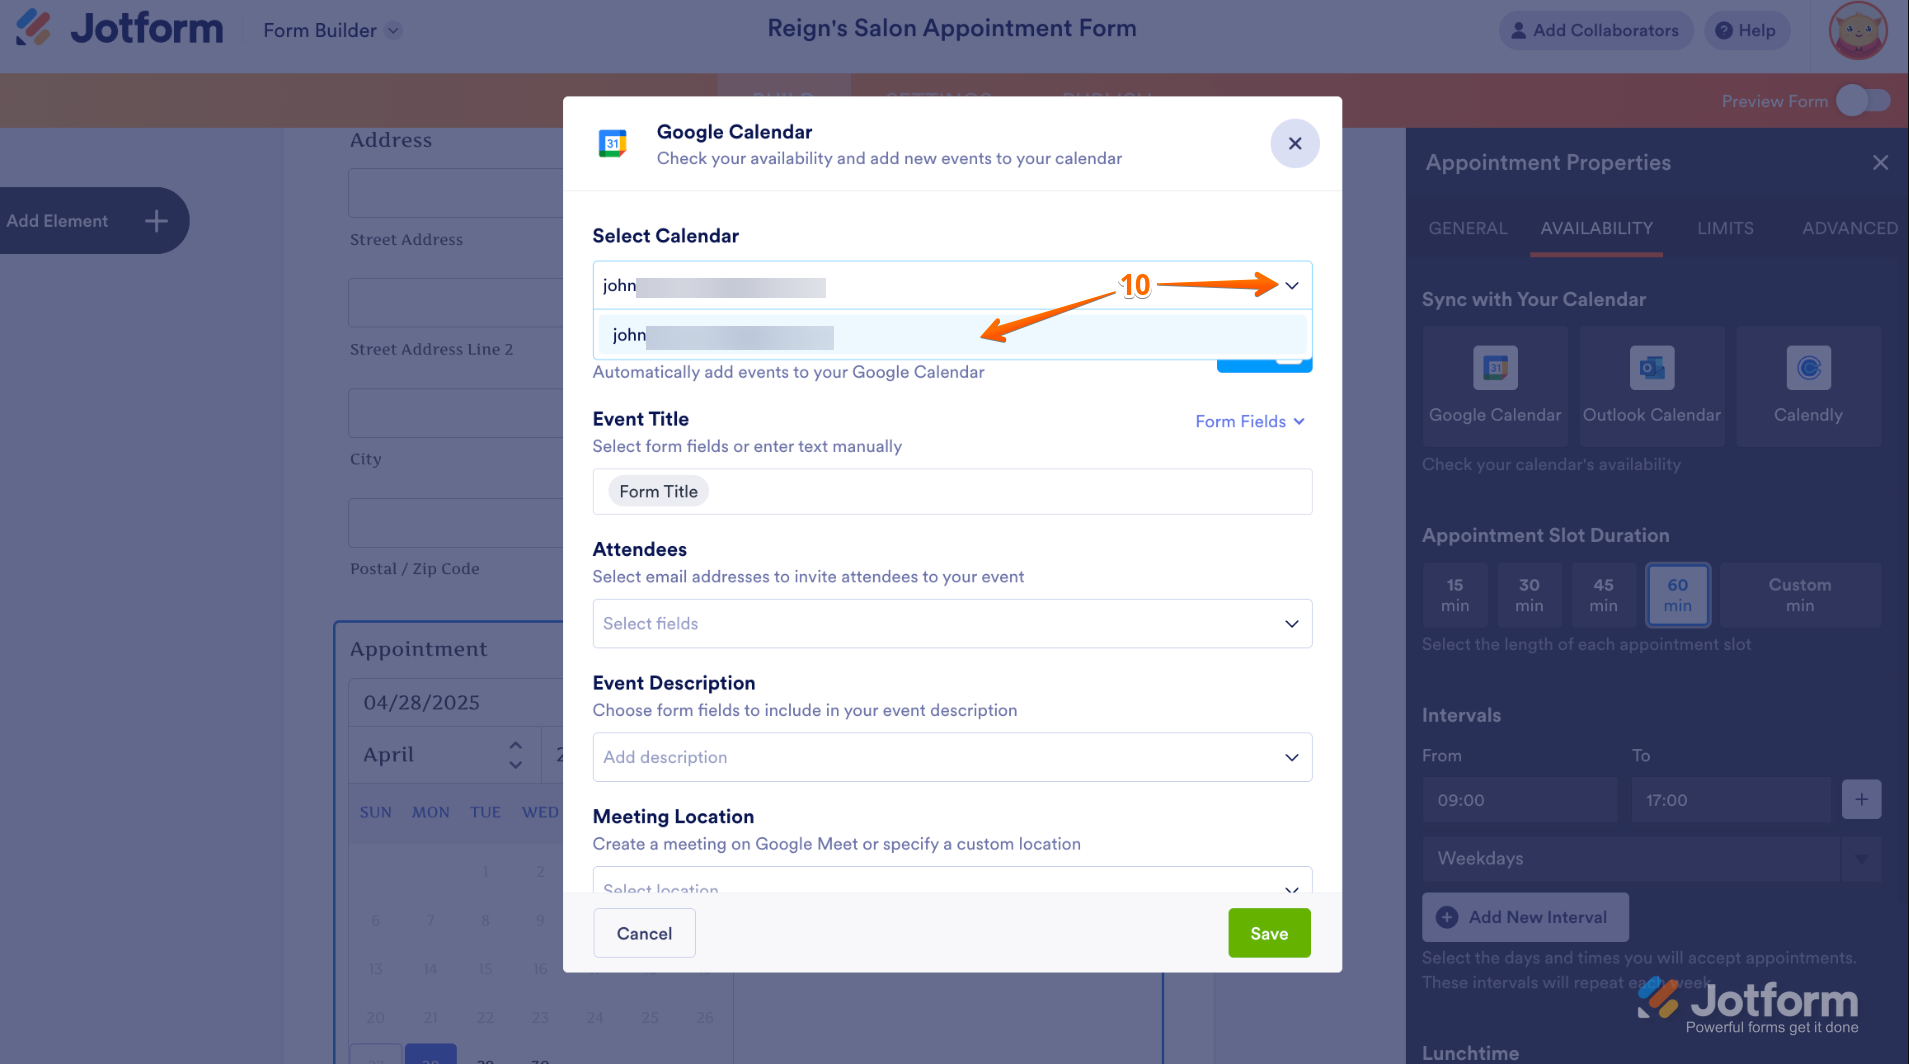
- Set your preferences for the event: Event Title, Attendees, Event Description, and Meeting Location.
- Click Save.
It’s that easy! Now, Jotform is connected to your Google Calendar. Whenever someone submits a form, an event will be automatically created in your Google Calendar for you. This way, you can keep all your events organized in one place, reduce your manual work, and increase your efficiency.
Ready to boost your productivity with Google Calendar?
Scheduling appointments in Google Calendar is easy — that’s why so many people flock to this time management and scheduling tool. But if you want to go beyond the basics and maximize time, take advantage of the Google Calendar tips in this article to improve your productivity.
For those who use forms to schedule events, the Jotform Google Calendar integration is essential. With this tool, you can simplify scheduling and never miss an important event again. Don’t waste your time on manual work when Jotform’s integration can take care of it for you.
This article is tailored for busy professionals, business owners, and teams who rely on Google Calendar to manage meetings, tasks, and deadlines — and want to unlock its advanced features to boost productivity and streamline scheduling.
Photo by Towfiqu barbhuiya on Unsplash


 wasting time at work increases productivity")


Send Comment: