With Jotform, you can easily create more interactive and visually engaging Card Forms using the Image Choice element. Instead of asking users to choose from plain text options, you can let them respond by selecting images, making forms feel faster, more intuitive, and easier to complete. It’s especially useful for surveys, quizzes, product selections, booking forms, event registrations, and other forms where visual choices help users decide more confidently.
Here are a few ways to use it:
- Let customers choose products, services, or packages visually.
- Create quizzes, polls, and surveys that feel more interactive.
- Help event attendees select seating, meal options, or activities more easily.
- Build forms that are more engaging for students, clients, customers, or participants.
- Simplify decision-making by showing visual options instead of text-only choices.
Note
The Image Choice element is only available in Card Forms. Need help changing your form layout? See our guide on How to Change Your Form Layout.
Adding the Image Choice Element
Whether you’re creating a new form or updating an existing one, you can add the Image Choice element in a few easy steps. Here’s how to do it:
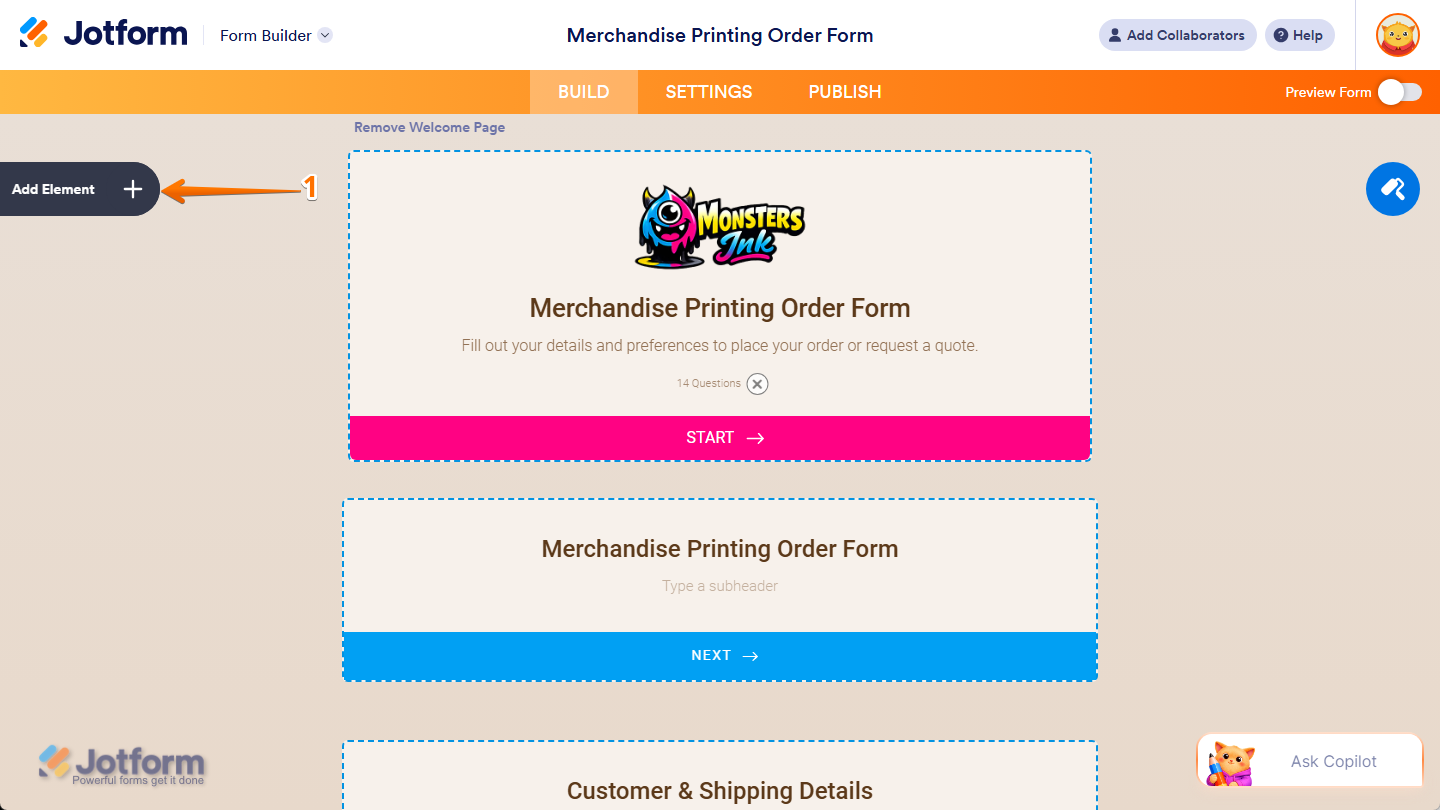
- In Form Builder, click on Add Element on the left side of the page.
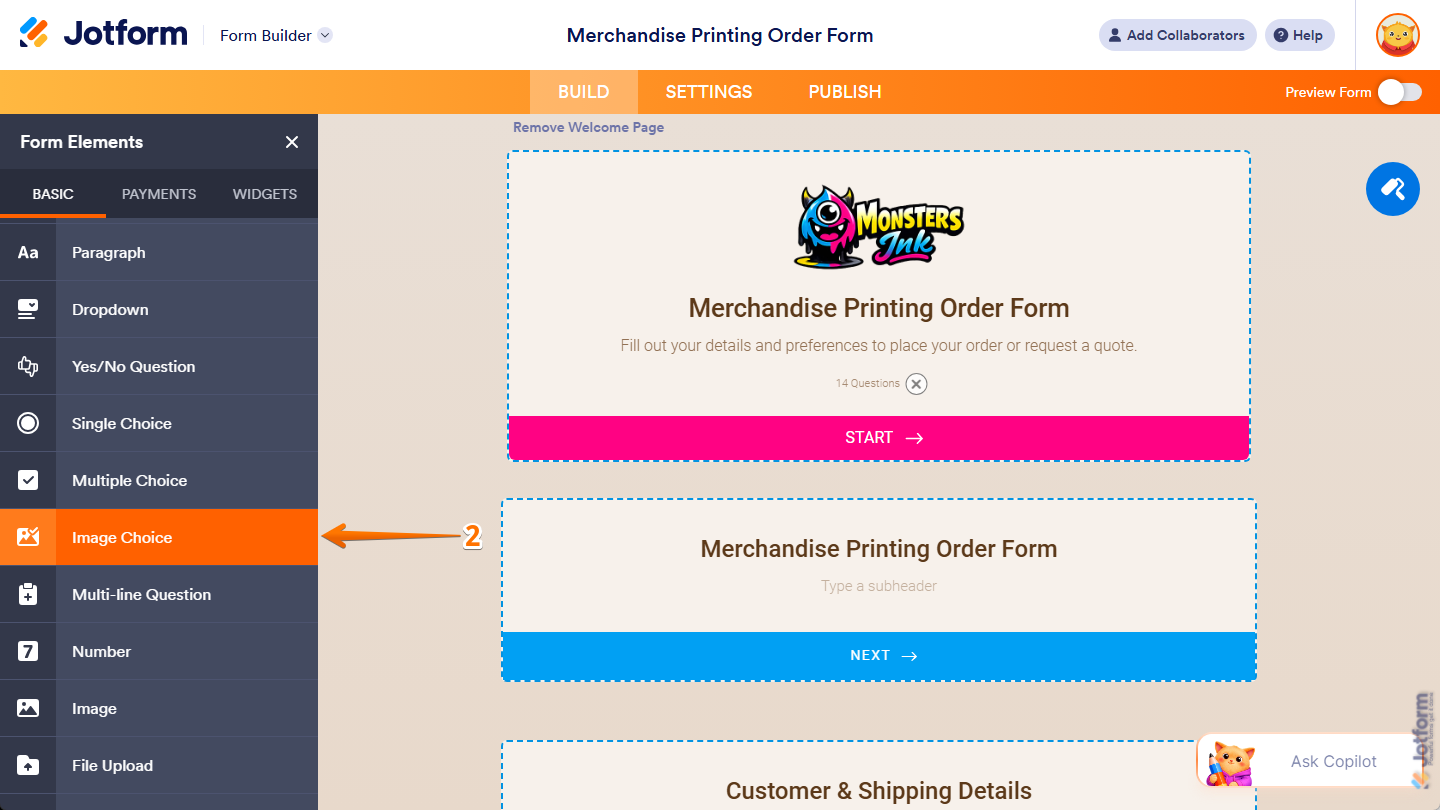
- Then, in the Form Elements menu, under the Basic tab, scroll down and then click on Image Choice. Or, just drag and then drop it to where you want it to be on your form.
Once you’ve added the Image Choice element to your form, you can adjust how it appears and works through the following tabs:
Changing General Tab Properties
After adding the Image Choice element, you can change its basic settings to control how it looks and behaves on your form. Follow these quick steps to get started:
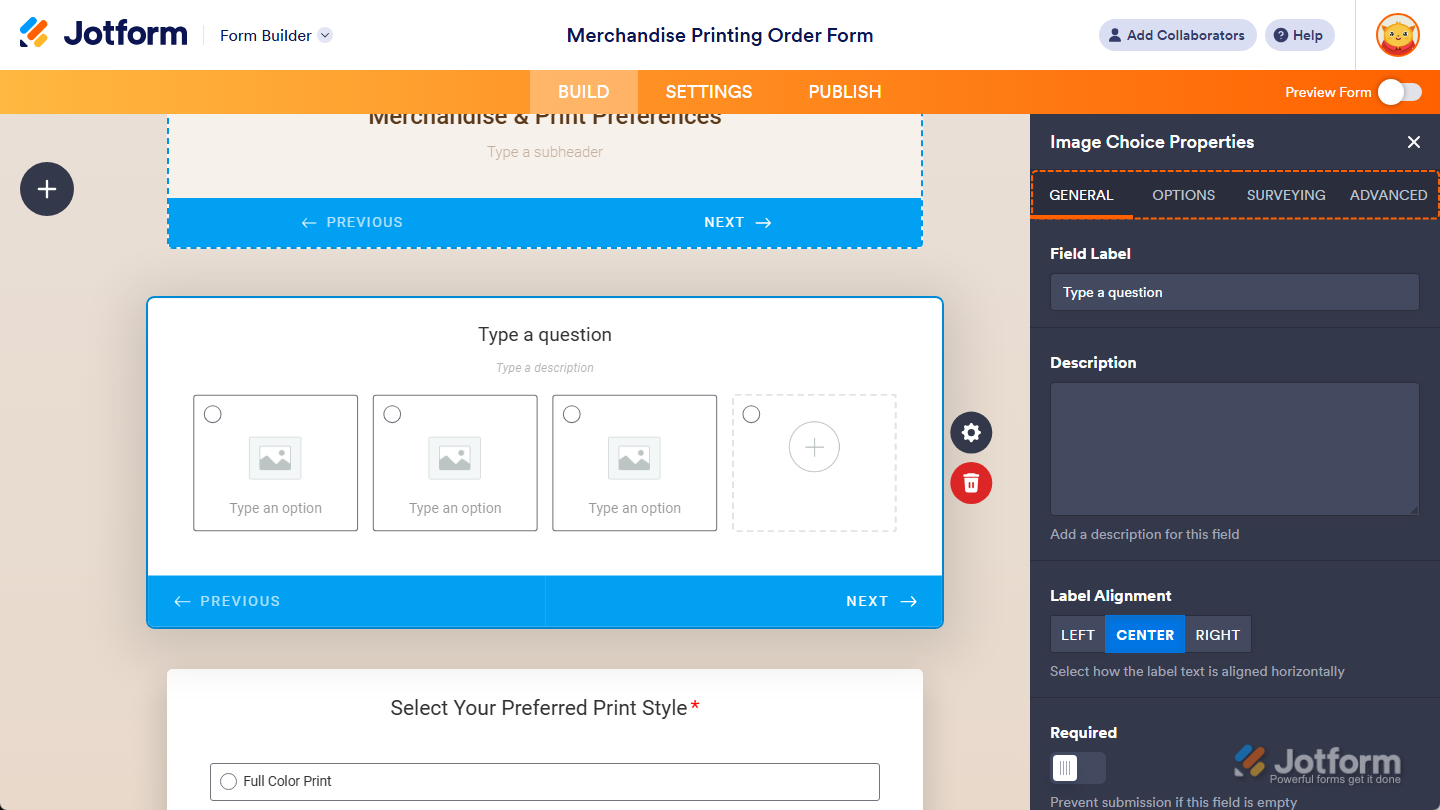
- In Form Builder, while your Image Choice element is selected on your form, click on the Gear icon on the right side of it.
- Then, in the Image Choice Properties menu that opens on the right side of the page, under the General tab, you’ll see the properties you can edit:
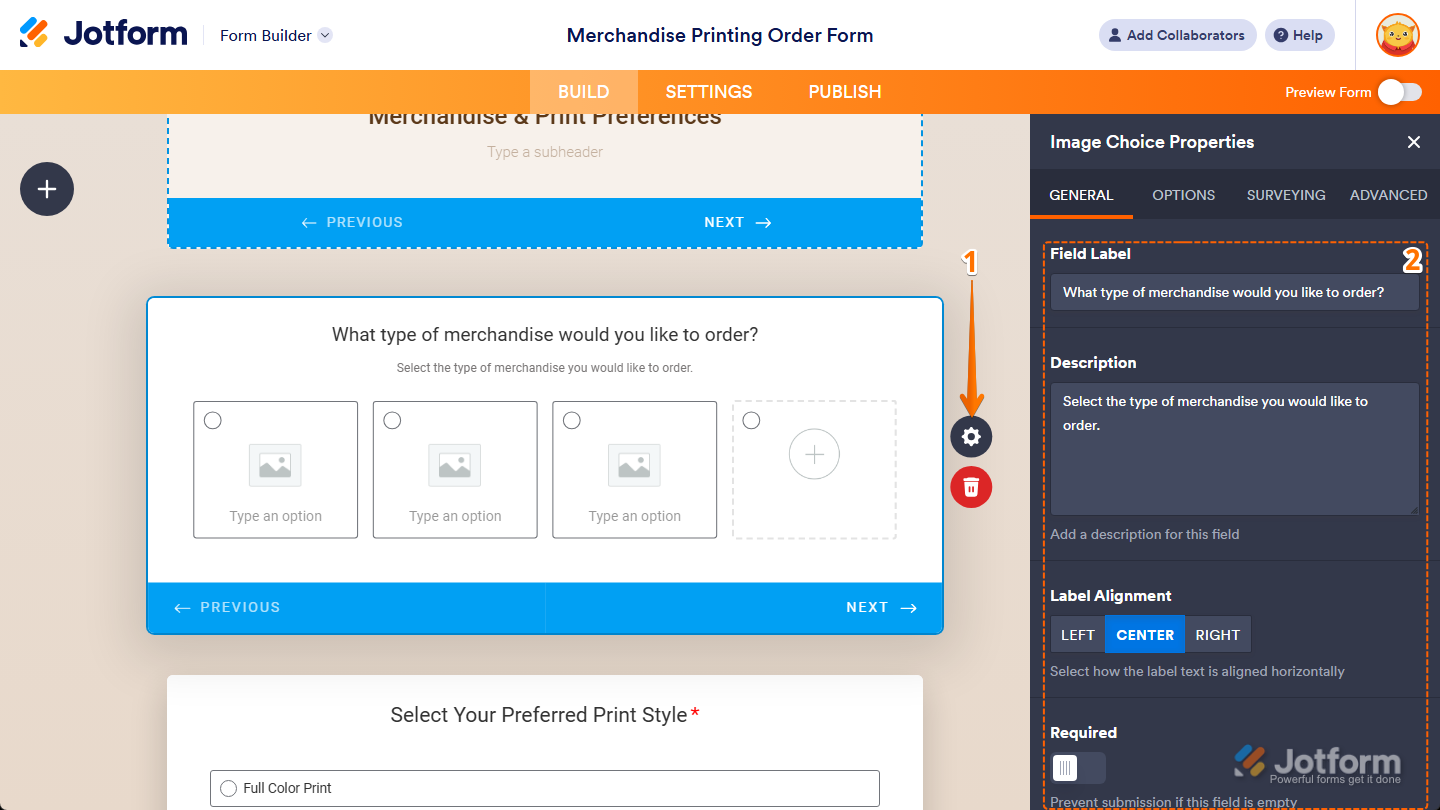
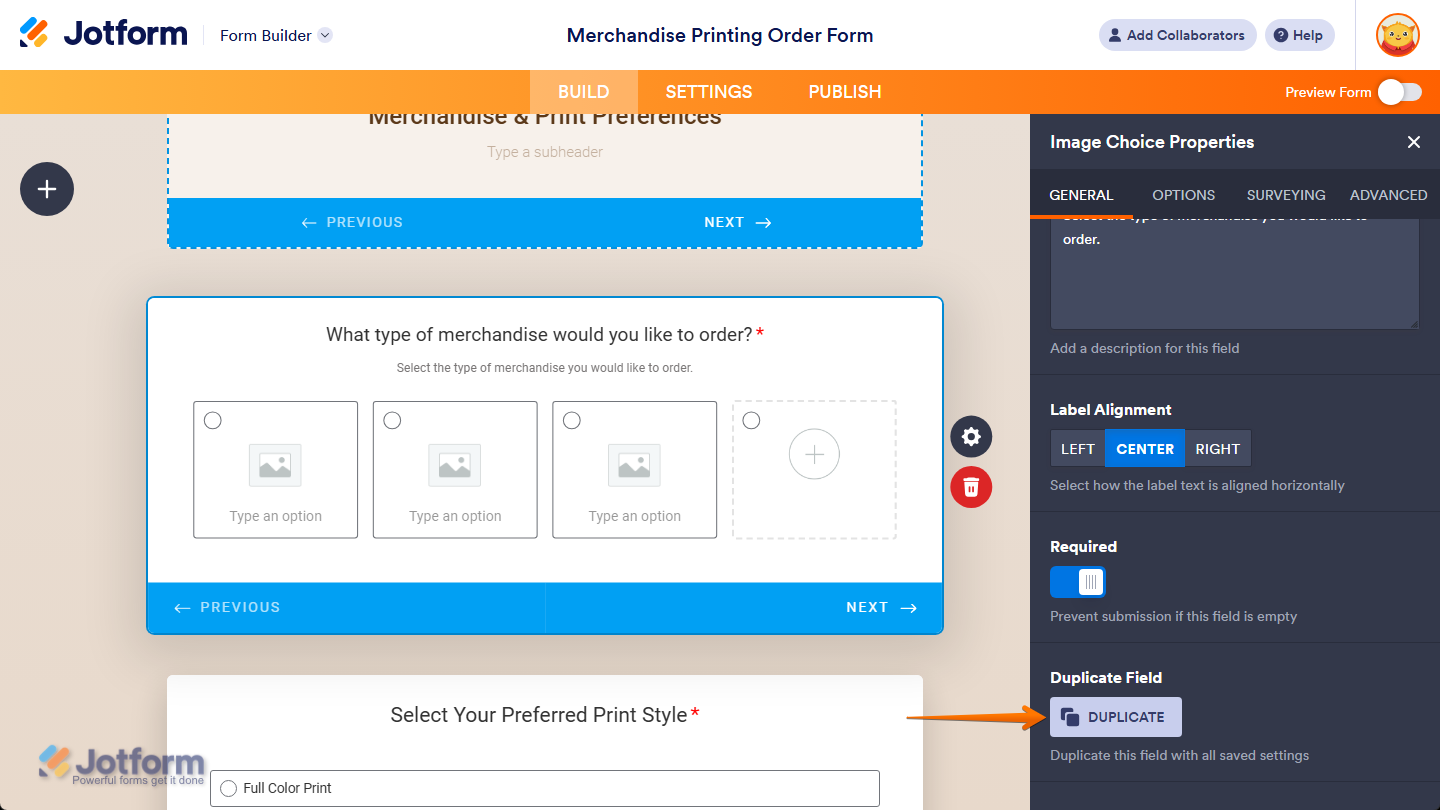
- Field Label — Delete the default text and enter a label in the input box if you want to customize your Image Choice field’s question.
- Description — Enter the text you want in the input box to add context or instructions below your Image Choice field label.
- Label Alignment — Keep this set to Center to position your Image Choice field’s label in the middle of the card’s width, or select Left or Right to position it on either side.
- Required — Toggle this on if you want respondents to complete your Image Choice field before they can submit the form.
That’s it. You’ve customized the General tab properties of the Image Choice element on your form. If you want to create a copy of your field with the same setup, scroll down to the bottom of this tab and then click on Duplicate.
Managing Options Tab Properties
With the Image Choice element already added to your form, you can manage how users interact with it and organize the selectable choices under the Options tab. Setting it up is quick—here’s how:
- In Form Builder, while your Image Choice element is selected on your form, click on the Gear icon on the right side of it.
- Then, in the Image Choice Properties menu that opens on the right side of the page, under the Options tab, you’ll see the properties you can manage:
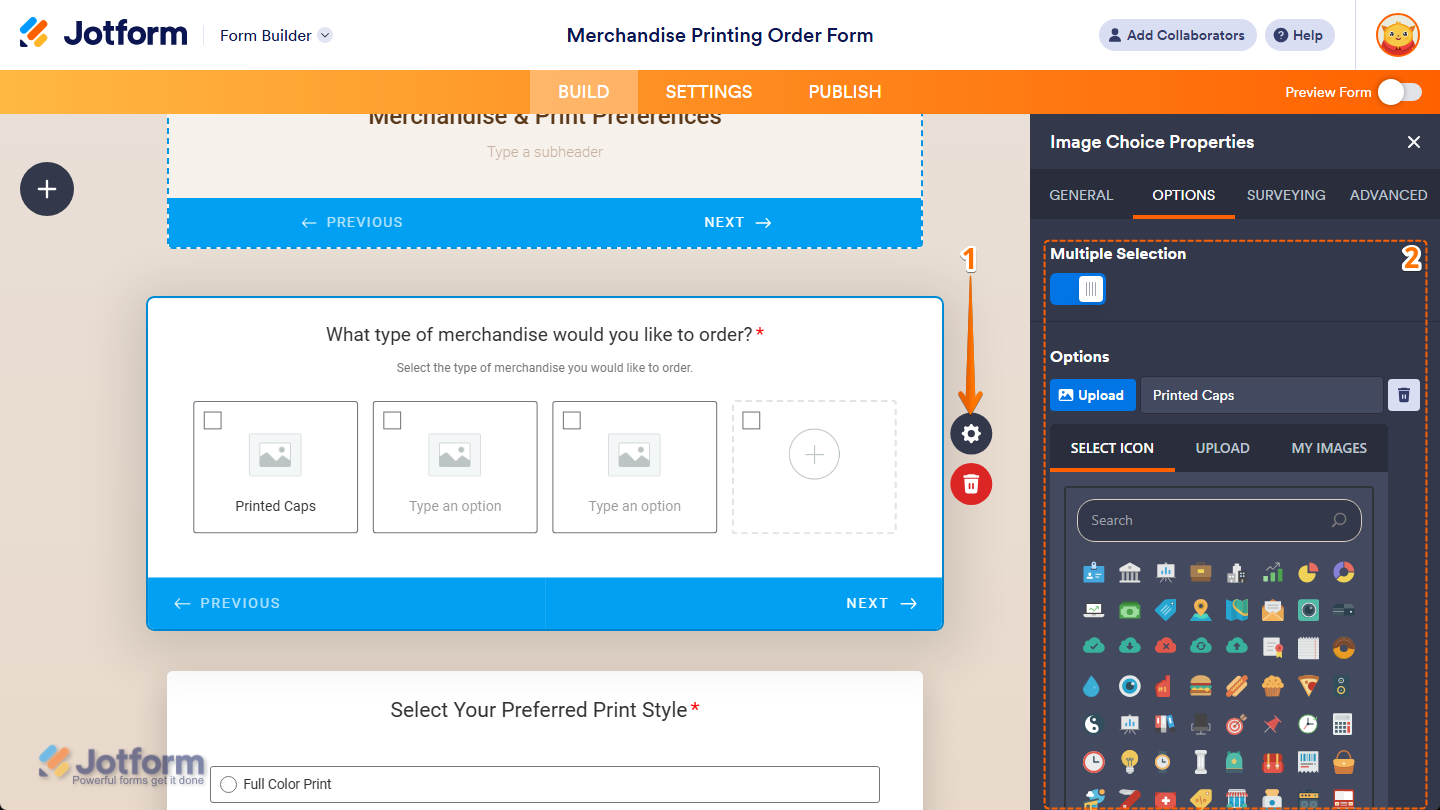
- Multiple Selection — Toggle this on if you want to allow respondents to select more than one option in your Image Choice field.
- Options — Enter text in an input box to set a label for an image option. Then, on the left side of each option, click on Upload, and in the menu that opens, go to one of the following tabs to add an image:
- Select Icon — Select the icon you want to use as an option image.
- Upload — Select an image directly from your device.
- My Images — Choose from images you’ve previously used and saved in your account.
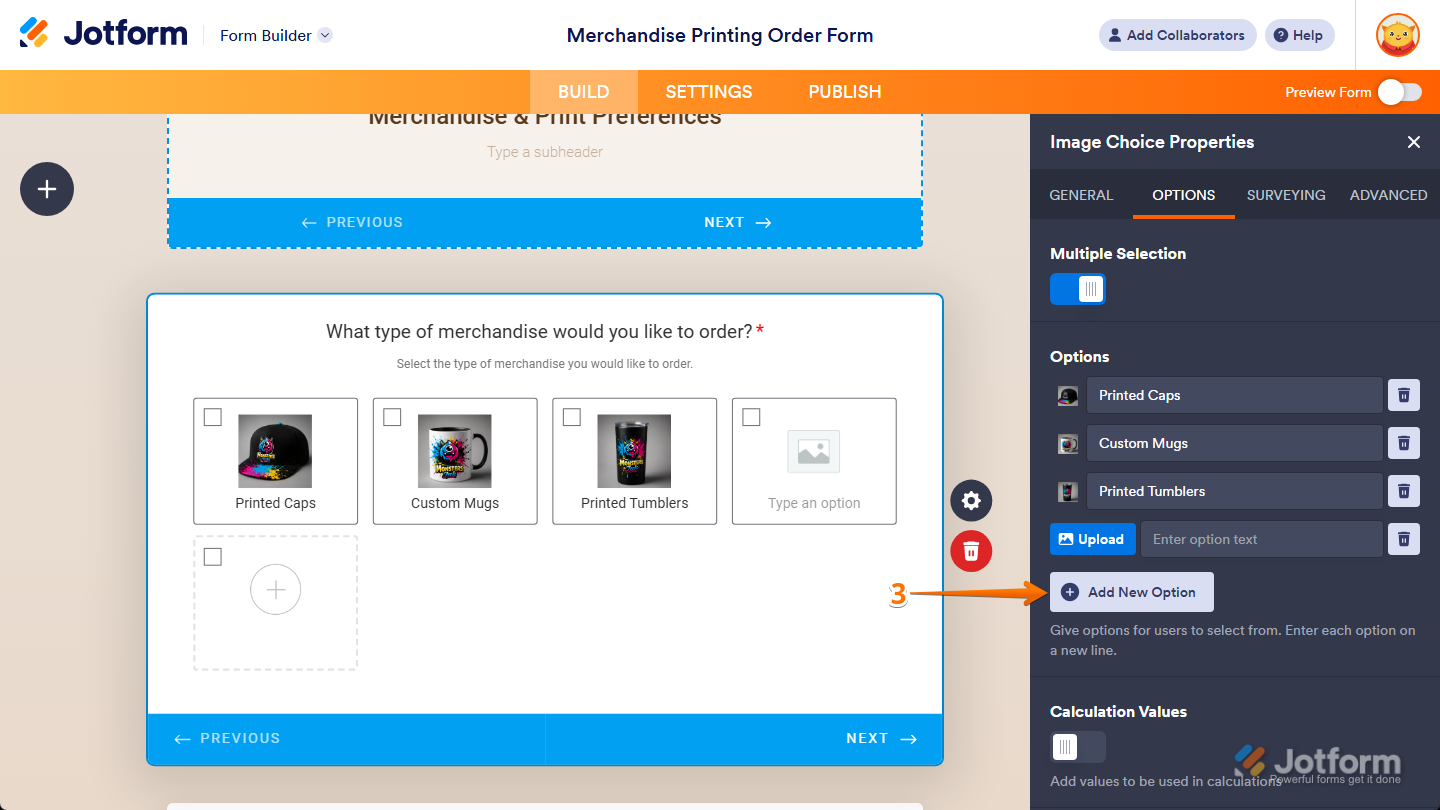
- To add an input box for another option, click on Add New Option at the bottom of the Options property.
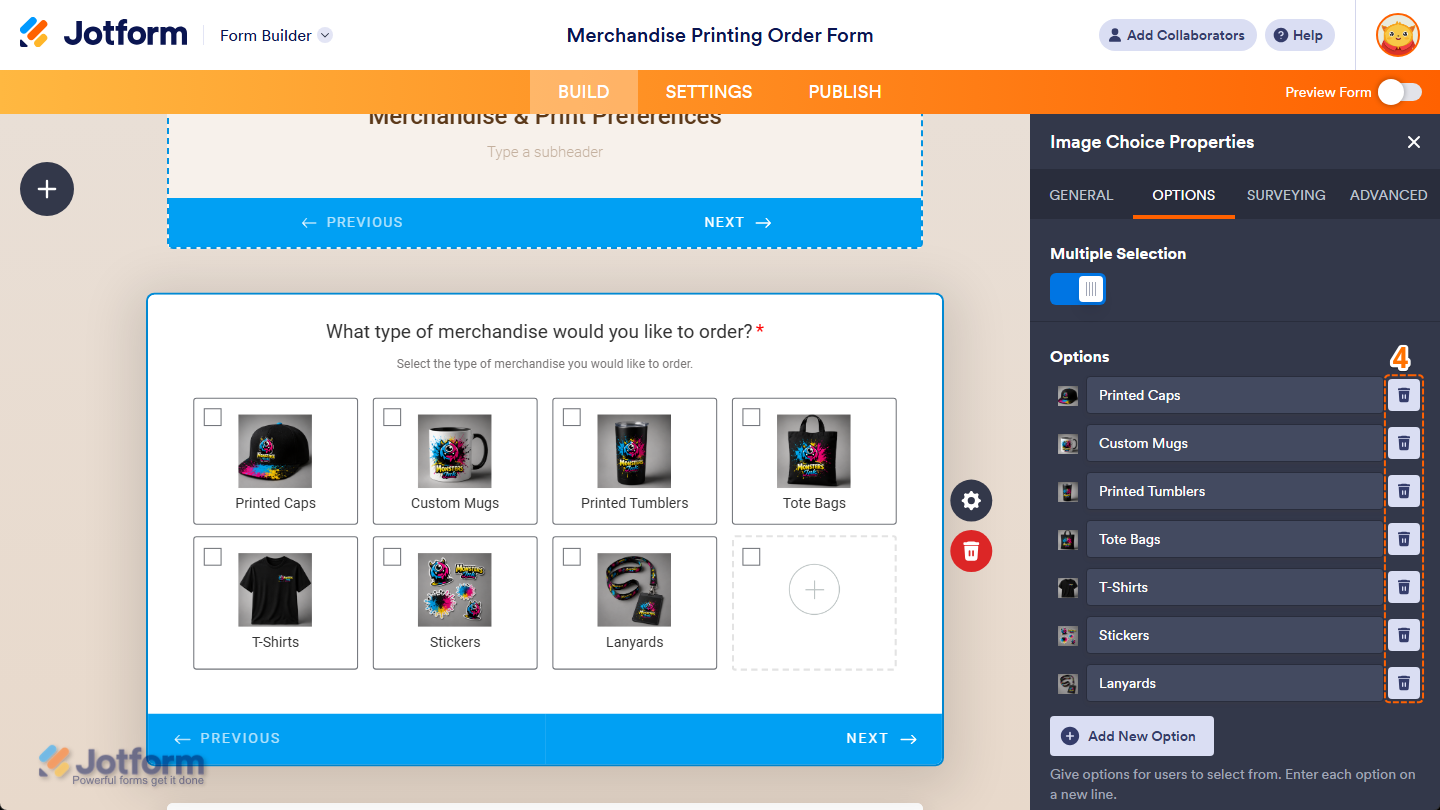
- To delete an option, click on the Trash Can icon on the right side of it.
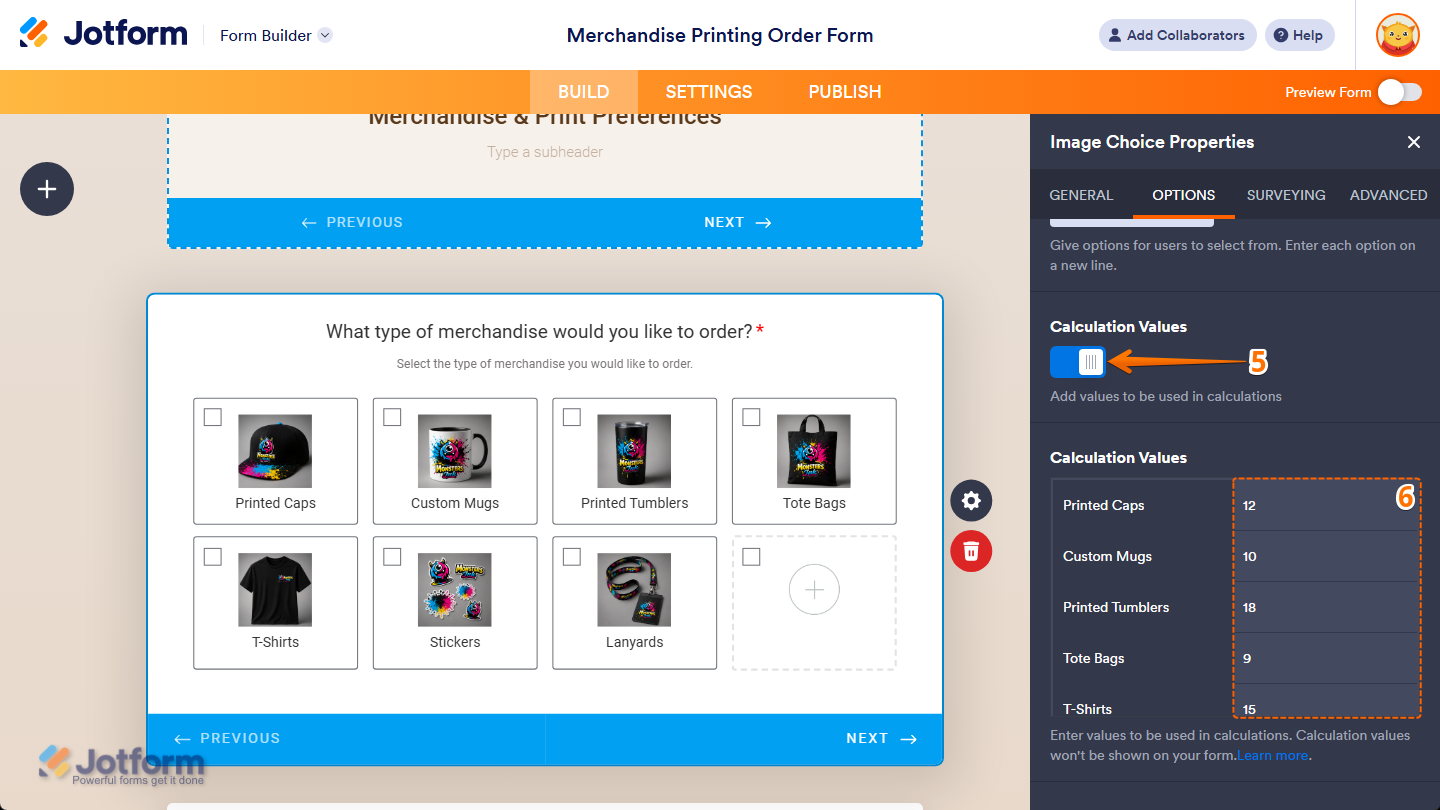
- Next, scroll down and toggle on Calculation Values if you want to assign values to your image options that will be used to calculate totals or results in your form.
- Now, in the table that comes up, enter the calculation value in the input box next to each option label. These values won’t appear on your form.
That’s it. You’ve managed the Options tab properties of the Image Choice element on your form.
Adjusting Surveying Tab Properties
After placing the Image Choice element on your form, you can adjust response-related settings under the Surveying tab to control how users interact with it. Here’s how to set it up:
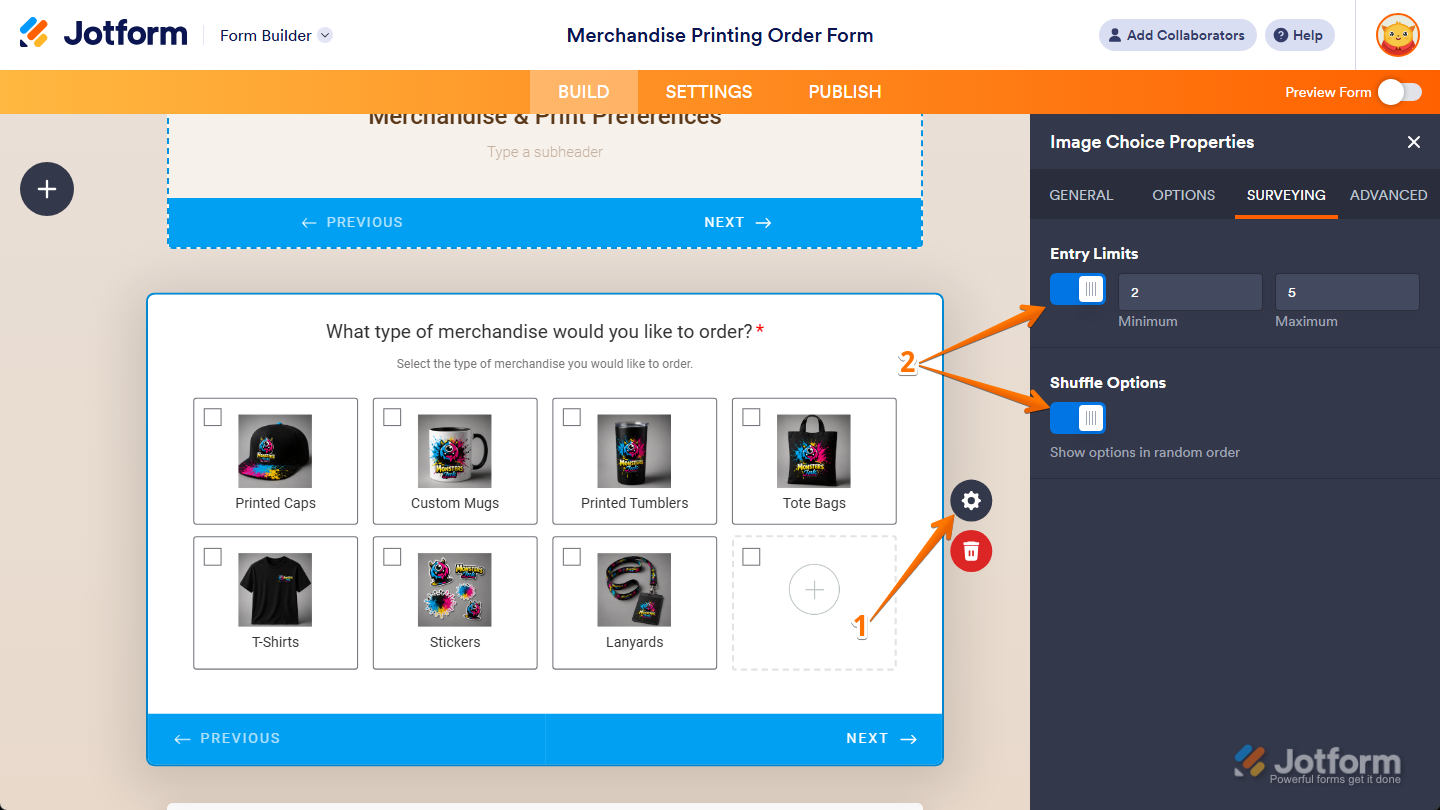
- In Form Builder, while your Image Choice element is selected on your form, click on the Gear icon on the right side of it.
- Then, in the Image Choice Properties menu that opens on the right side of the page, under the Surveying tab, you’ll see the properties you can adjust:
- Entry Limits — Toggle this on, and in the input boxes that come up next to it, enter a minimum and maximum number of entries that can be selected in your Image Choice field.
- Shuffle Options — Toggle this on if you want to display options in random order.
That’s it. You’ve adjusted the Surveying tab properties of the Image Choice element on your form.
Updating Advanced Tab Properties
With the Image Choice element on your form, you can update additional settings under the Advanced tab to control how it works with different form features. You can do it in a few simple steps:
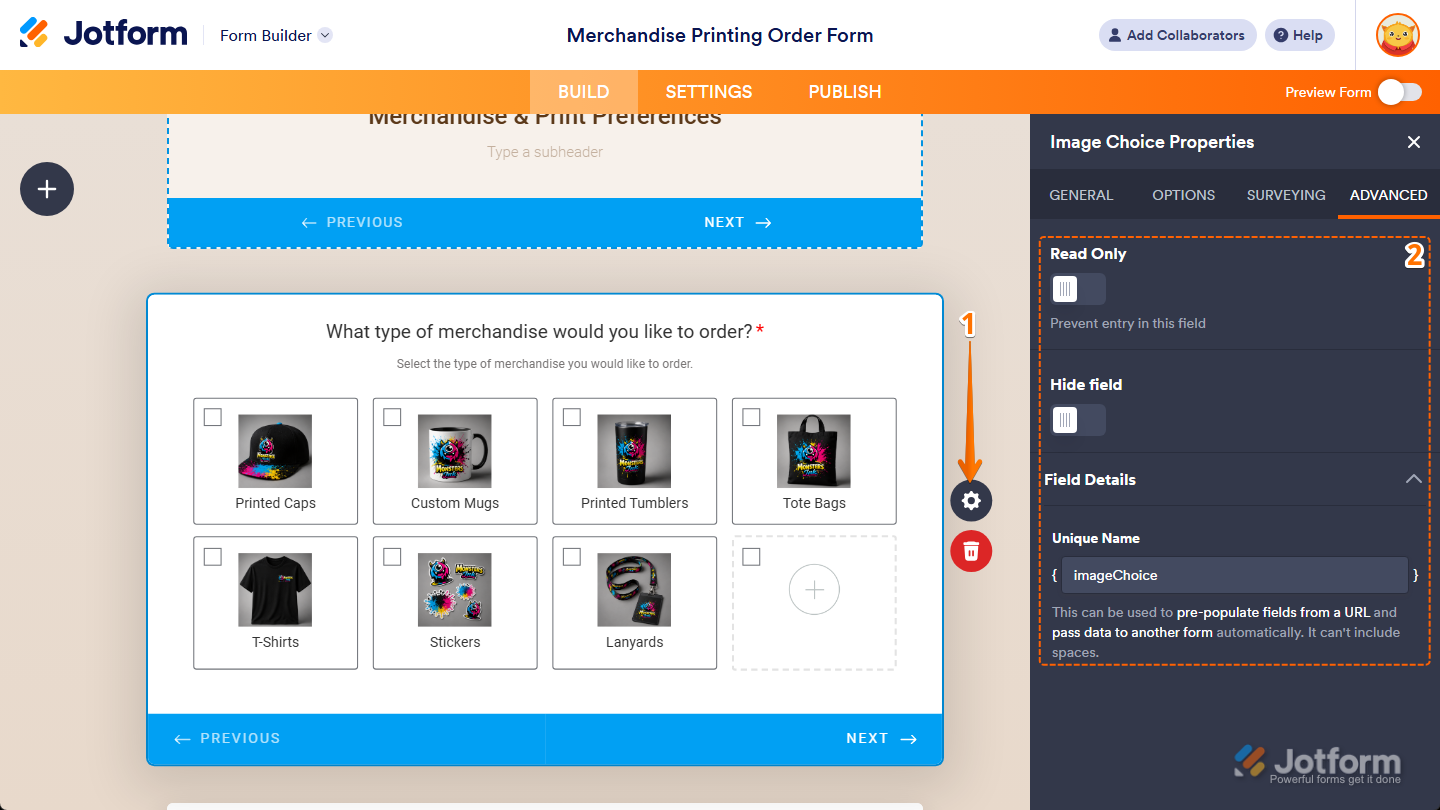
- In Form Builder, while your Image Choice element is selected on your form, click on the Gear icon on the right side of it.
- Then, in the Image Choice Properties menu that opens on the right side of the page, under the Advanced tab, you’ll see the properties you can update:
- Read Only — Toggle this on to prevent users from selecting an option in your Image Choice field.
- Hide Field — Toggle this on if you want to hide the Image Choice field on your form. Take a look at our guide on How to Hide Form Elements for more details.
- Field Details — Click on this section to expand it and view, copy, or update your Image Choice field’s Unique Name, which is used to reference it in integrations, calculations, and other advanced form features. Check out our guide on How to Find Field IDs and Unique Names to learn more.
That’s it. You’ve updated the Advanced tab properties of the Image Choice element on your form.
Note
If your form uses the Classic layout, you can use the Image Choices, Image Radio Buttons, or Image Picker widgets as alternatives. If you’re looking to dive deeper into their features, these guides can help:

Send Comment: